You can create a board in Jotform Tables to manage tasks alongside your form submissions. This allows you to track progress, update information, and organize everything in one place without switching between different assets in your account.
Creating Boards with Custom Groups
You can create a board with custom groups within Jotform Tables in a few easy steps. Here’s how to do it:
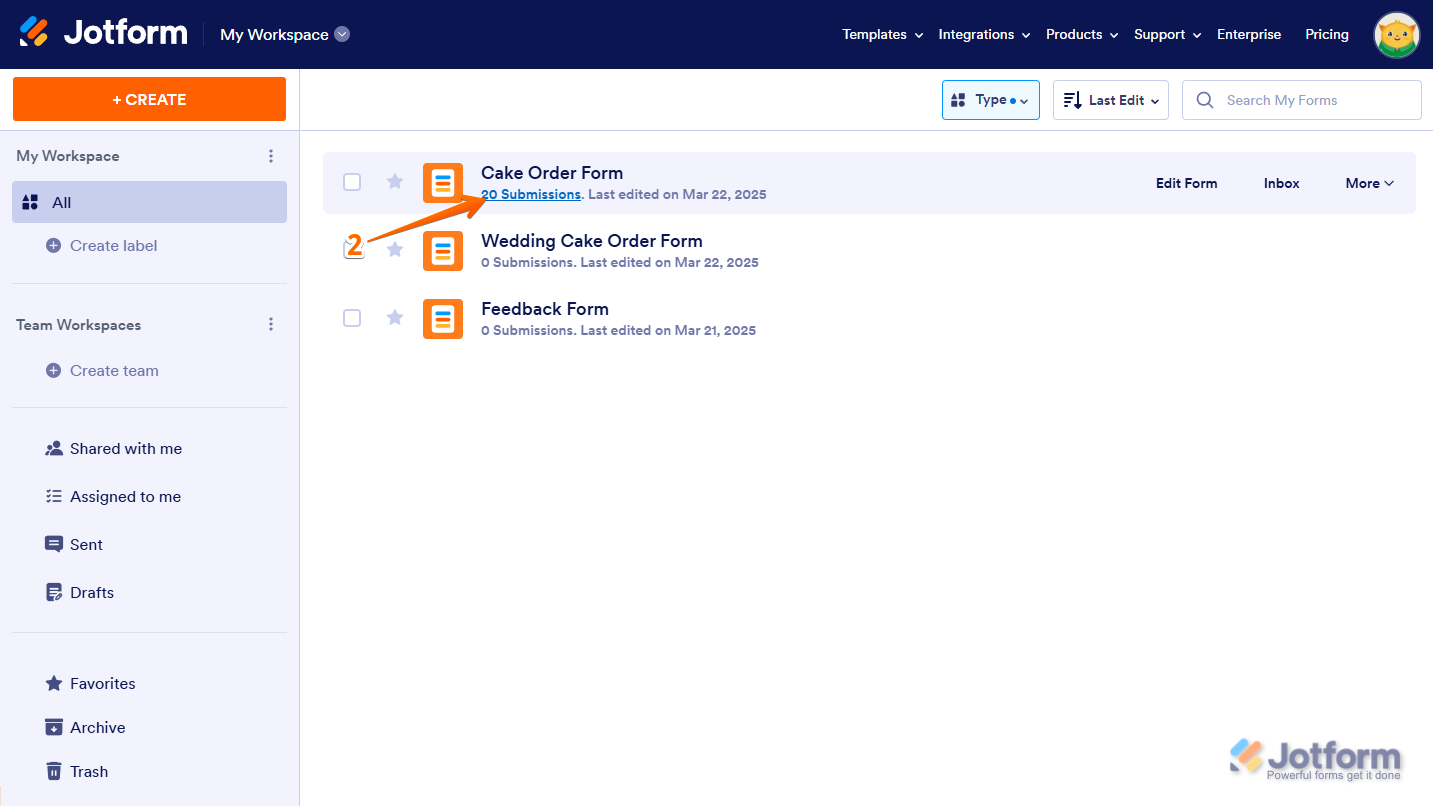
- On your My Workspace page, click on Type at the top and in the Dropdown menu that opens, uncheck the boxes next to all the assets except Forms, so only they’ll be shown on the page.
- Now, click on the Submissions Link directly below the form you want to view the submissions for.
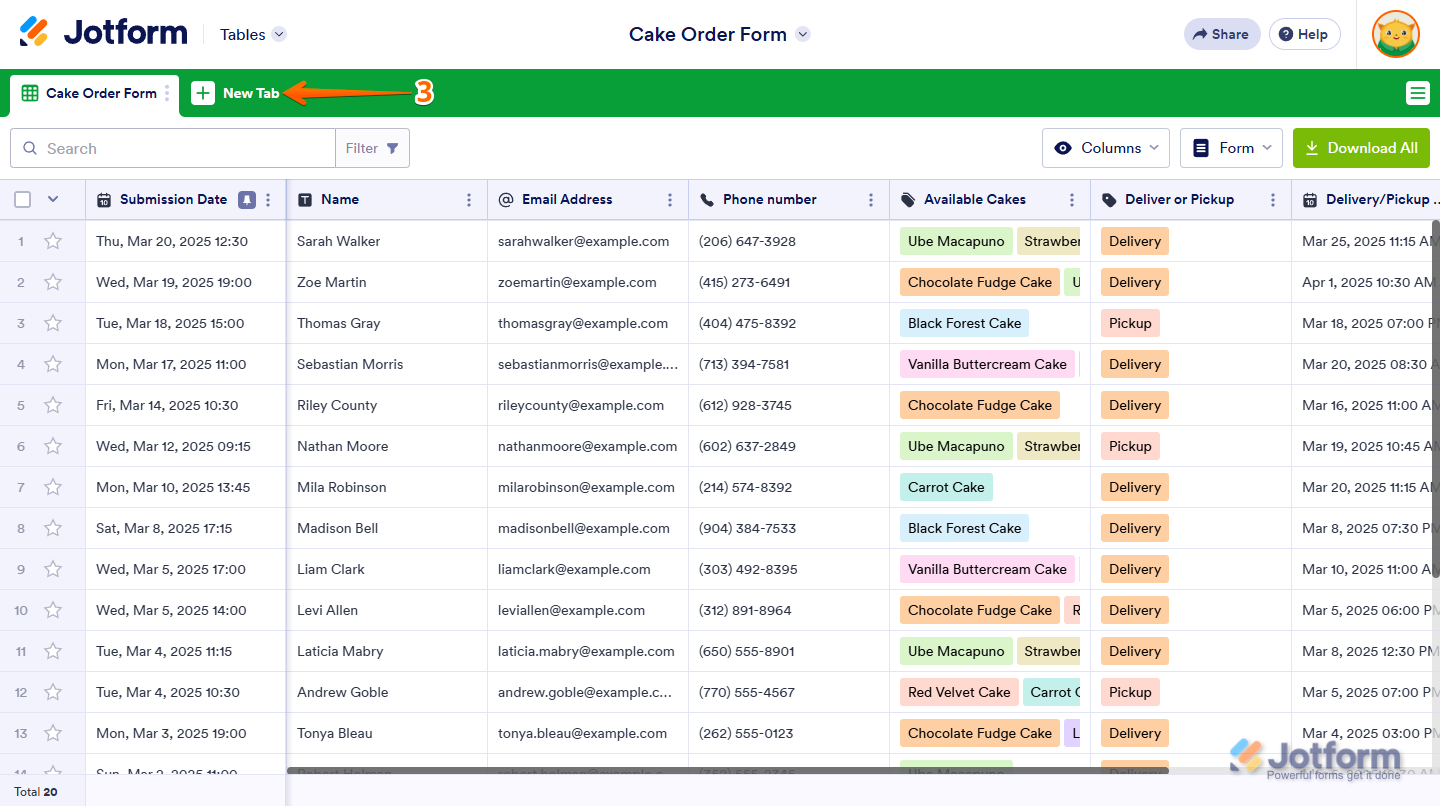
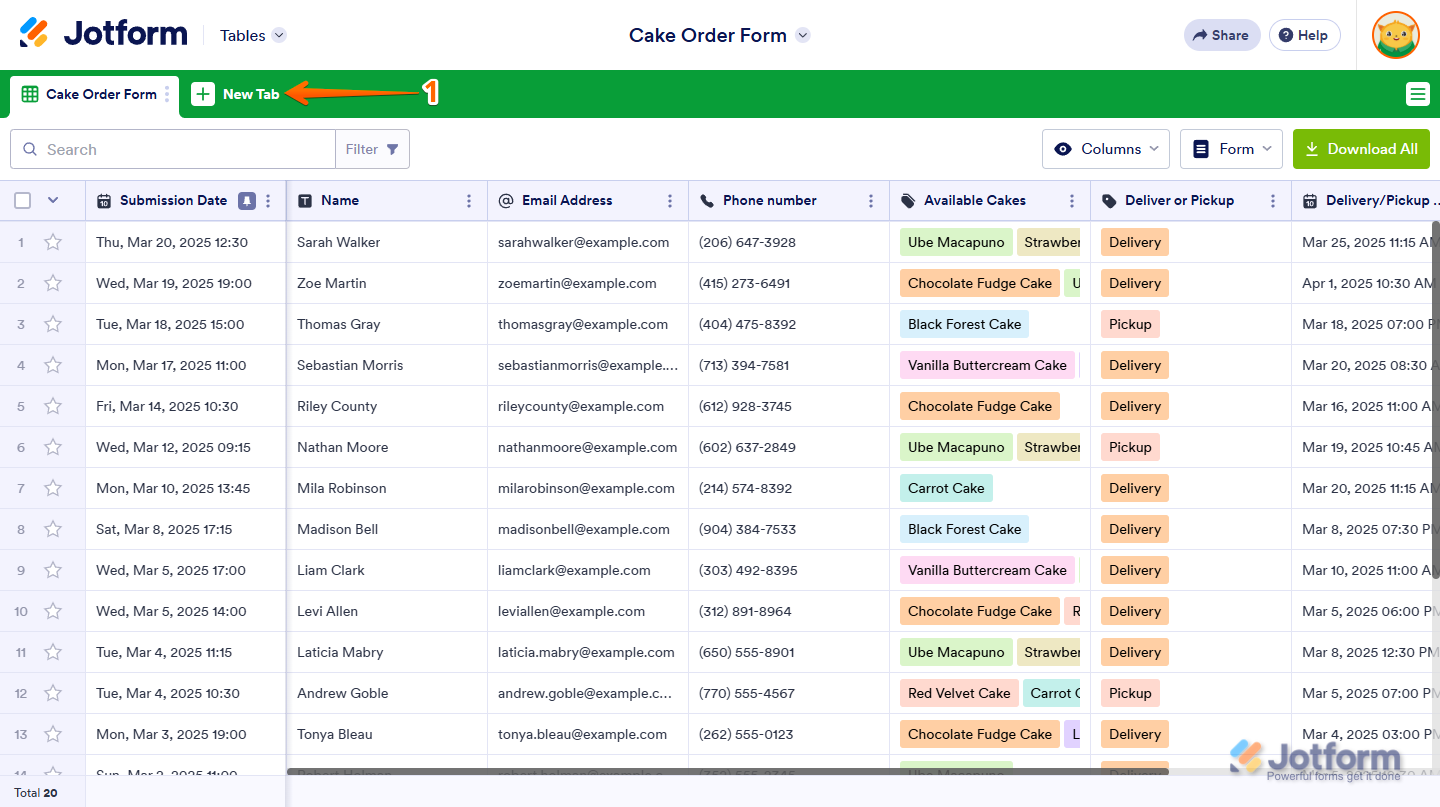
- In Jotform Tables, click on New Tab in the green navigation bar at the top of the page.
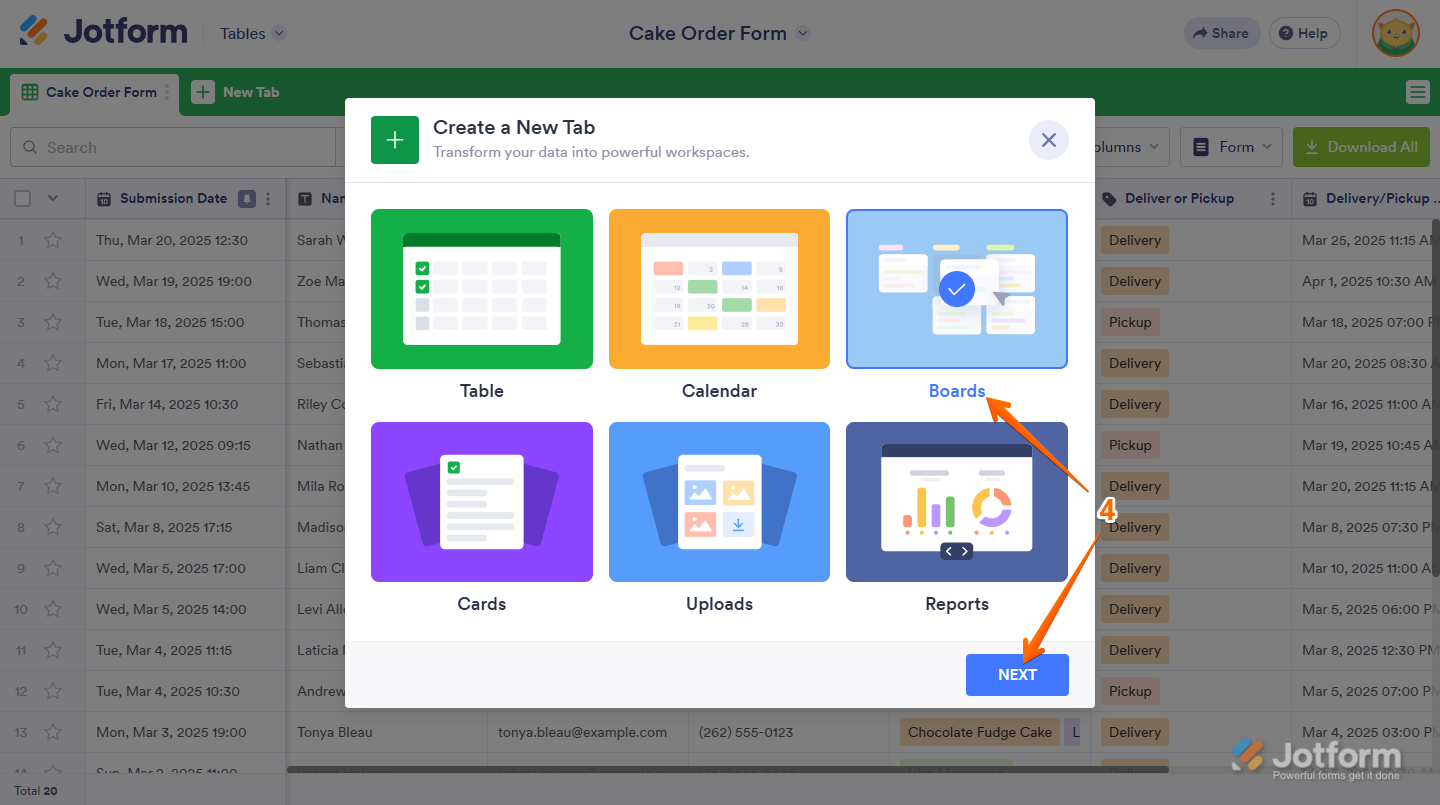
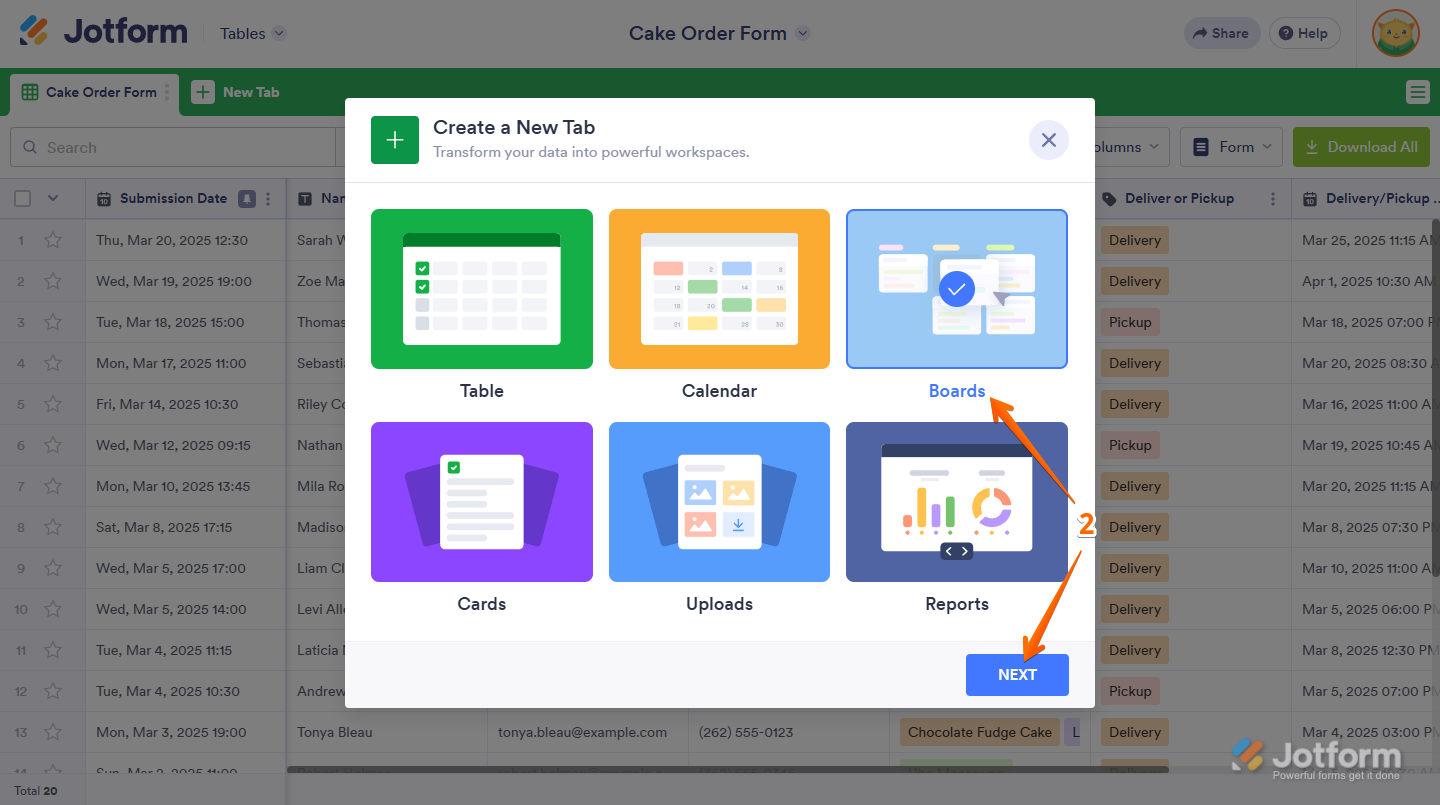
- Now, in the Create a New Tab window, click on Boards to select it, and then click on Next.
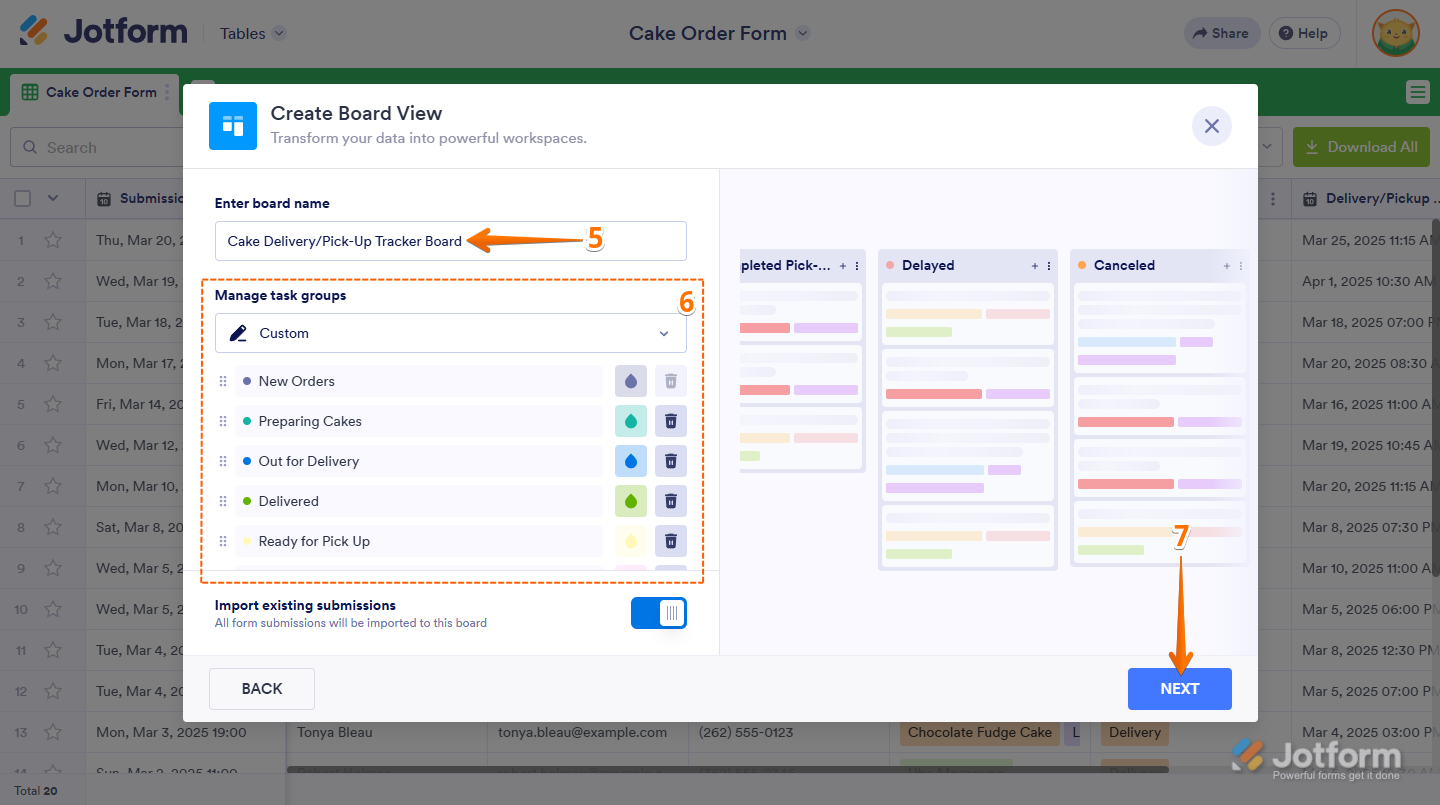
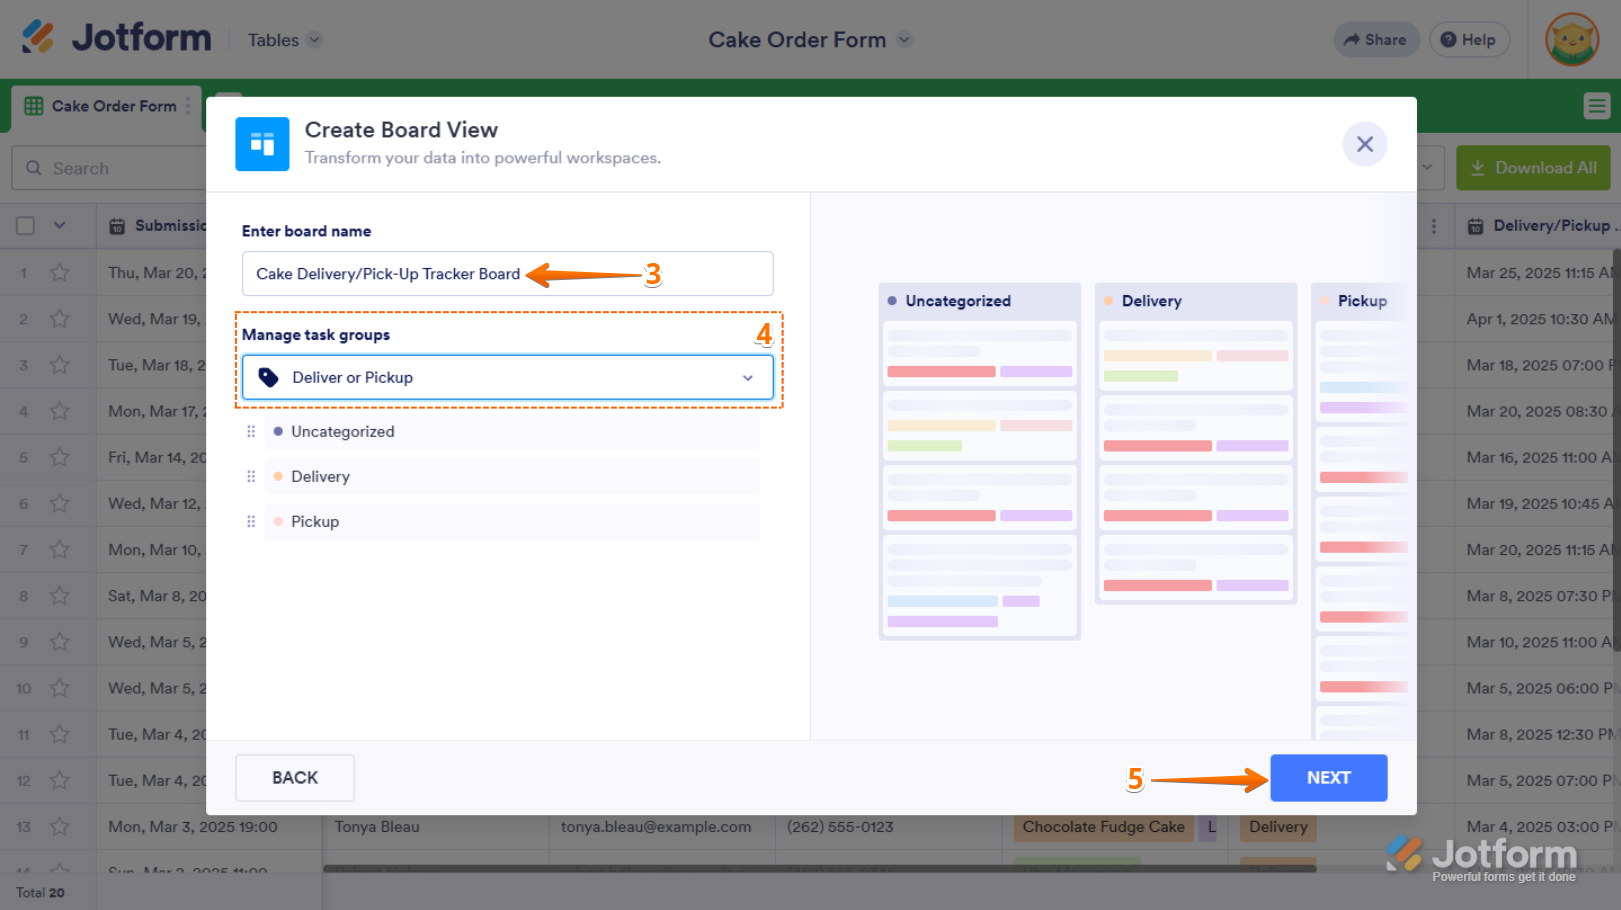
- In the Create Board View window, enter a Board Name, which will also be the name of the tab that’ll be created in your table.
- Now, in the Manage Task Groups section, keep Custom selected in the Dropdown menu and do the following actions to organize how the groups on your new board should be set up:
- Arranging Group Order — Click on and hold the Six Dots icon on the left of a group to grab it, and then move it to where you want to drop it.
- Updating Group Name — Double-click on a group name to start updating it. Click anywhere outside it to save your changes.
- Changing Group Color — Click on the Ink Drop icon on the right side of a group, and then select from the predefined colors in the menu.
- Adding a Group — Click on Add New Group at the bottom of the list to create a new group for your board. After entering a name, click anywhere outside it to save it.
- Deleting a Group — Click on the Trash Can icon on the right side of a group to delete it. This immediately deletes the group, and it can’t be undone.
- Next, toggle Import Existing Submissions to the Off position if you don’t want to add the submissions in your table as tasks right now, and then click on Next.
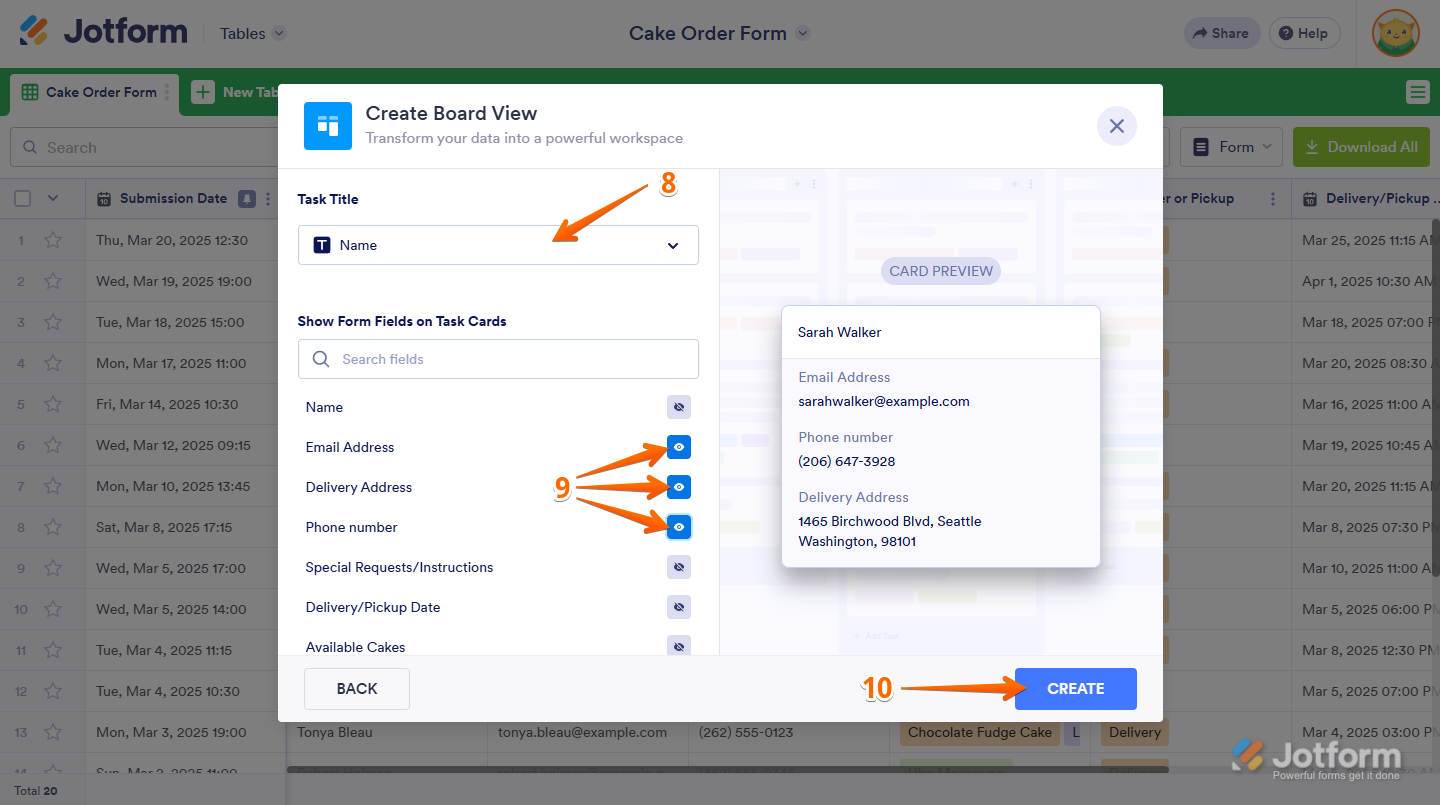
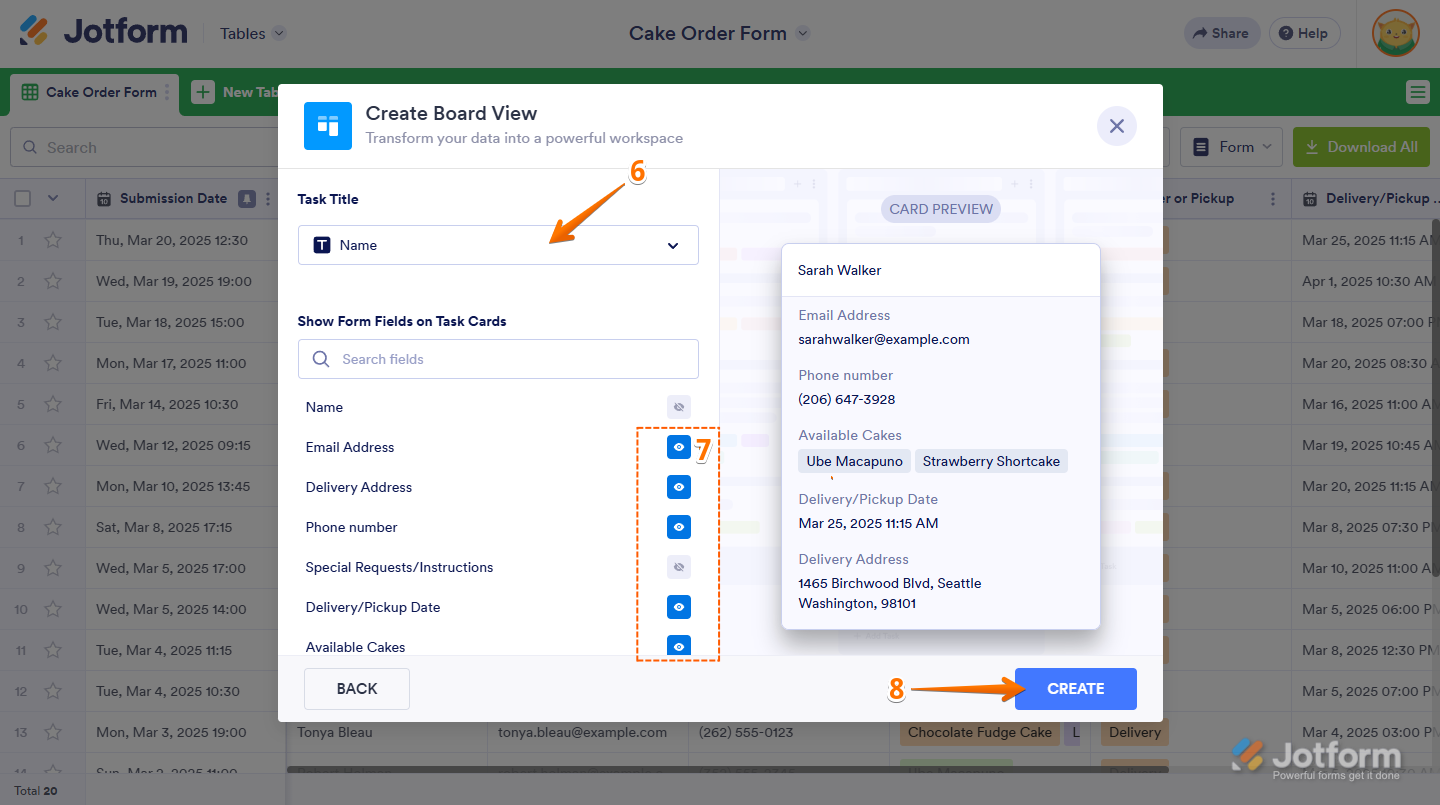
- In the next screen, click on the Task Title Dropdown menu to select a form field that the title of each task on your board will get its value from.
- Now, in the Show Form Fields on Task Cards section, click on the Eye icon on the right side of a form field to display its real-time value on the task cards. Or, use the Search bar at the top of the Form Fields List menu to find one easily. You can display up to five (5) form fields on your task cards.
- Then, click on Create on the bottom-right side of the window.
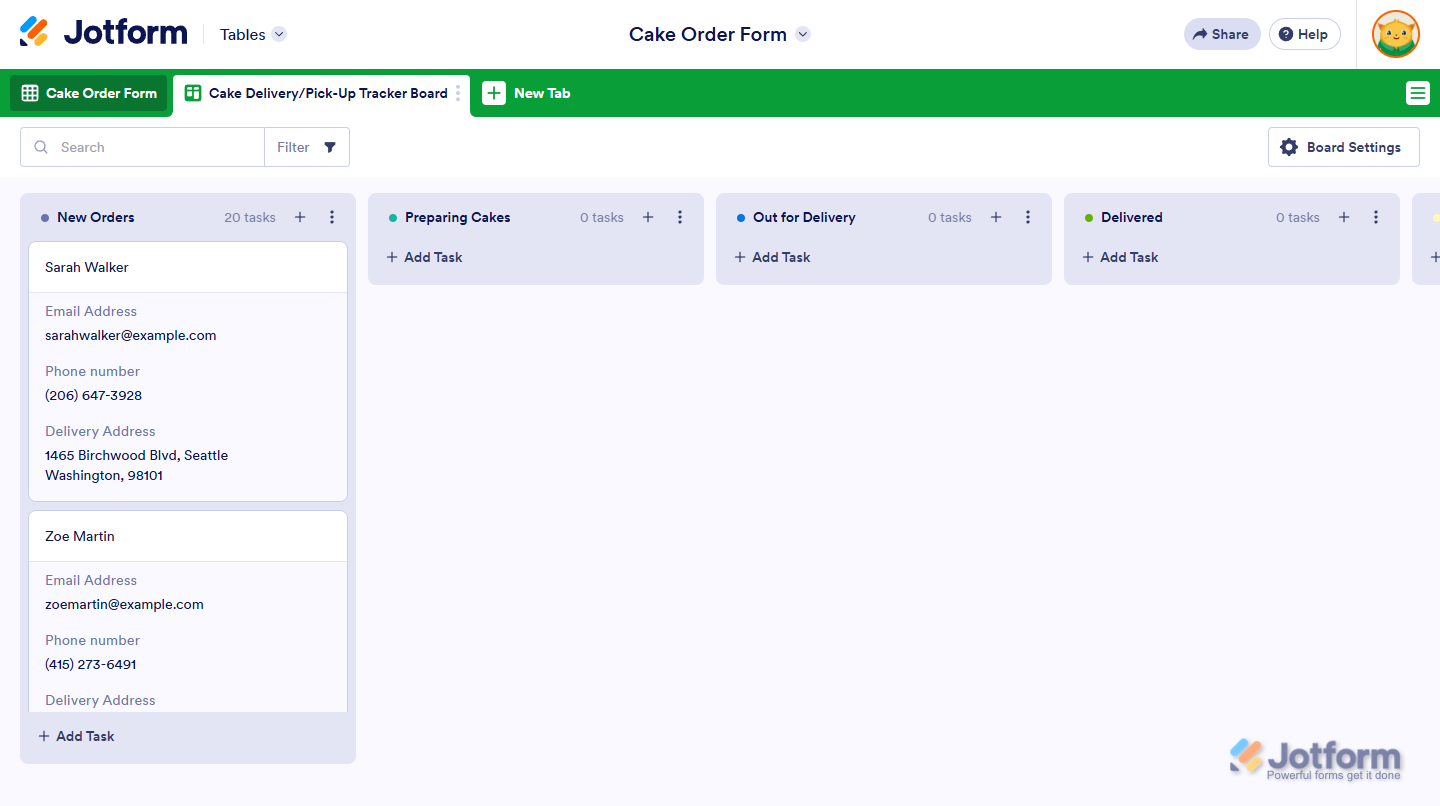
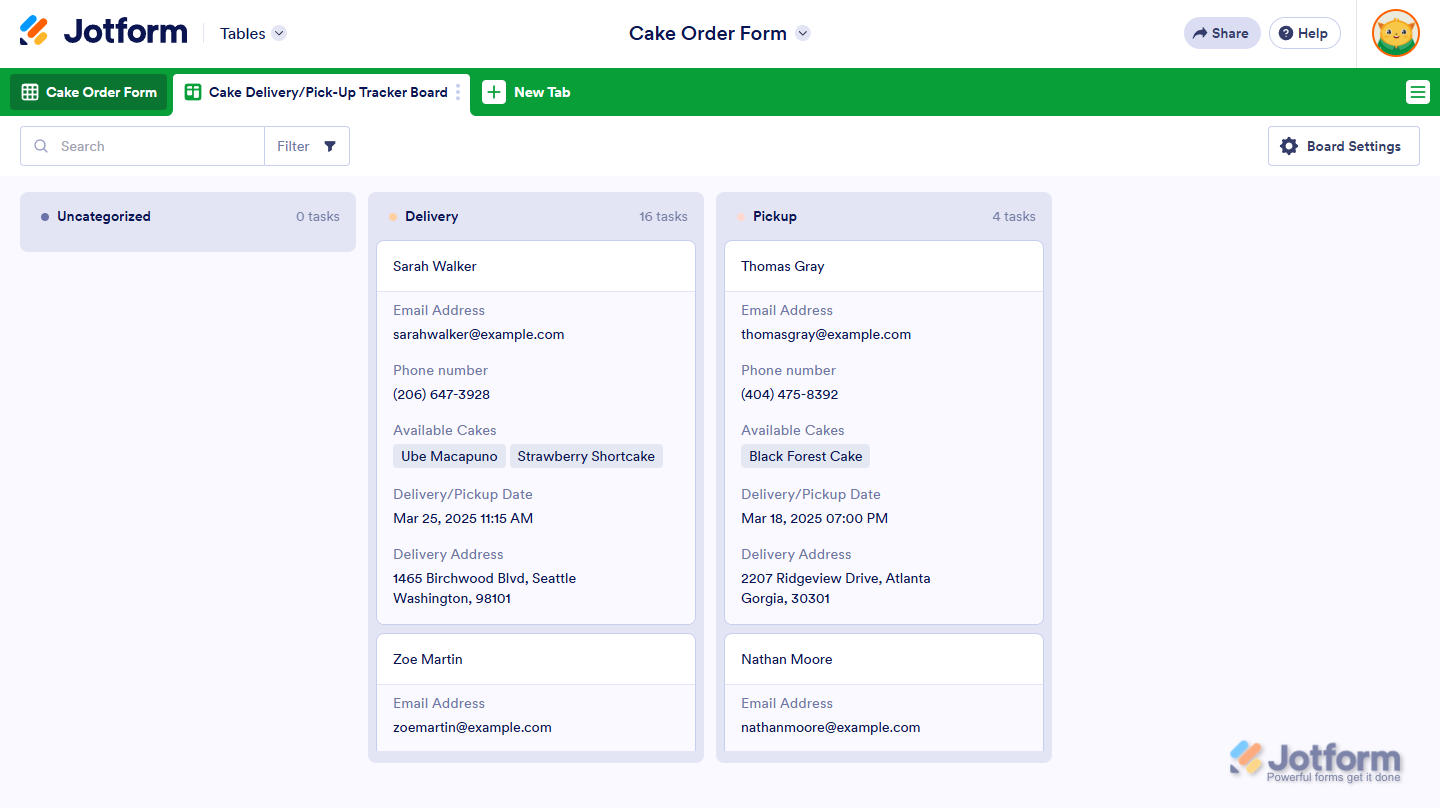
That’s it! You’ve successfully created a board with custom groups in Jotform Tables. At this point, you can manage your tasks the same as on a standalone board.
Notes
- Unlike standalone boards, those created in Jotform Tables can only be connected to the form associated with the table it’s created from.
- Boards created in Jotform Tables aren’t visible separately on your My Workspace page or My Boards page.
Creating Boards with Groups Based on Form Field Options
You also can create a board with groups based on the options in a field on your form within Jotform Tables in a few easy steps. Here’s how to do it:
- While you’re in Jotform Tables, click on New Tab in the green navigation bar at the top of the page.
- Now, in the Create a New Tab window, click on Boards to select it, and then click on Next.
- In the Create Board View window, enter a Board Name, which will also be the name of the tab that’ll be created in your table.
- Now, in the Manage Task Groups section, click on the Dropdown menu to select a single choice or dropdown field from your form.
- Then, click on Next.
- In the next screen, click on the Task Title Dropdown menu to select a form field that the title of each task on your board will get its value from.
- Now, in the Show Form Fields on Task Cards section, click on the Eye icon on the right side of a form field to display its real-time value on the task cards. Or, use the Search bar at the top of the Form Fields List menu to find one easily. You can display up to five (5) form fields on your task cards.
- Then, click on Create on the bottom-right side of the window.
That’s it! You’ve now created a board with groups based on the options of the form field you selected in Jotform Tables.
Notes
- You won’t be able to edit the groups that are based on form field options. You also can’t add tasks to them manually.
- When you move a task in a group created from one form field option to another, the selection in that form field will also be updated in the submission.


Send Comment:
1 Comments:
157 days ago
Jotform Technical Support,
Thank you for giving examples how to make some "Boards for workflow cycle".
Will it be possible to make another example specifically relate to WorkFlow cycle for Customer feedback survey form?
For example to follow up a workflow customer clicks the submission button, until final statistical computation made of the submission content received from us?
The example of my customer feedback survey form can be seen from:
I will repeat this request in Contact Jotform Support, if it is needed to do this way.
Let me know at my email.
Thank you.