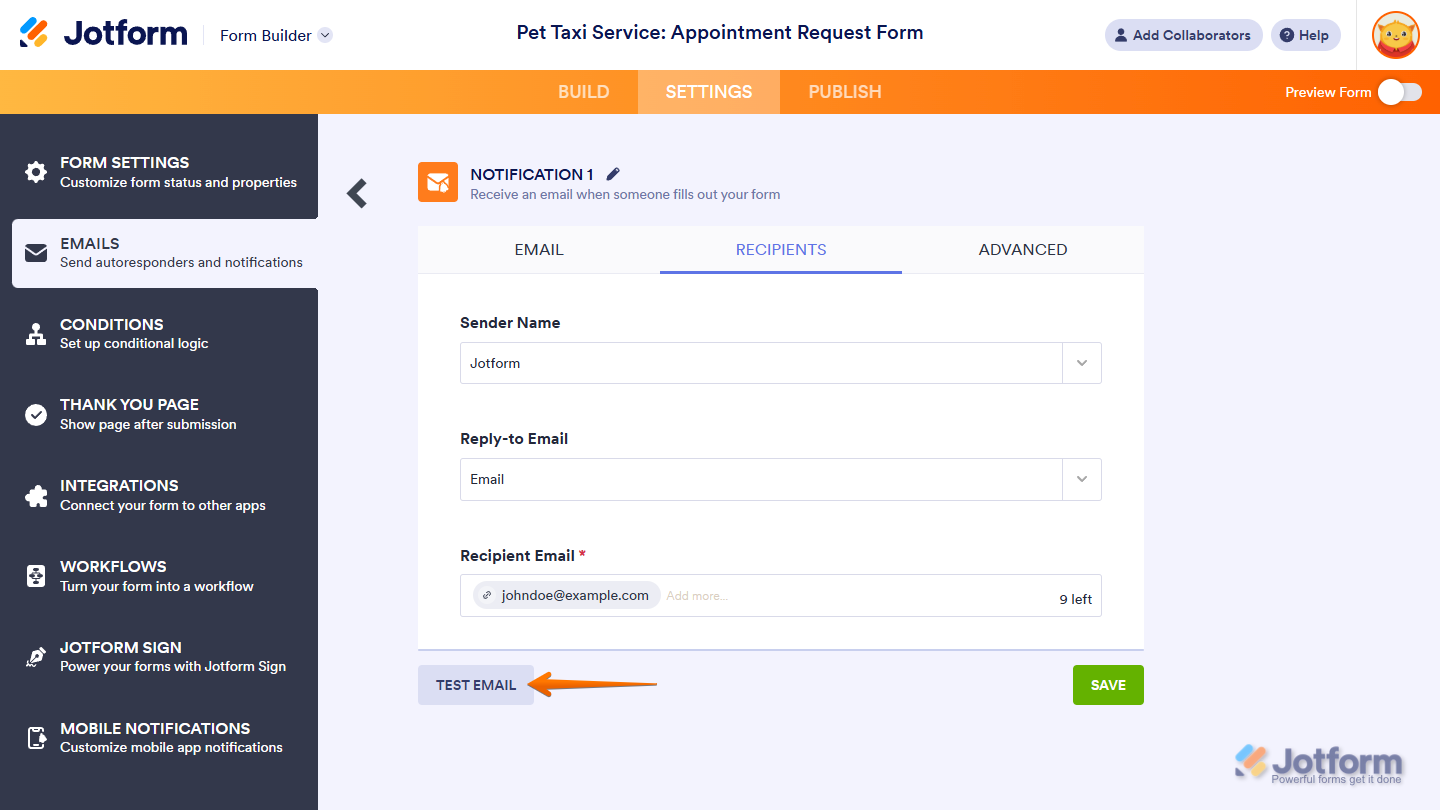
A common problem you may have faced is that you changed the recipient of your form’s Notification Email to have it sent to a different email address, only to find it’s gone to the old email address when you tested it out. This happens when you’re using the Test Email button in the Form Builder’s Emails Settings, which always sends the test email to the email address associated with your account.
Note
Your account email address, which you can check on your Account page, is always set as the default recipient email of the Notification Email for your forms. If you need to change it, check out our guide on How to Change Your Account Email Address.
Adding and Changing a Notification Email Recipient Address
You can add a new recipient or change the existing one for your form’s Notification Email in a few easy steps. Here’s how to do it:
- On your My Workspace page, click on Type at the top and in the Dropdown menu that opens, uncheck the boxes next to all the assets except Forms, so only they’ll be shown on the page.
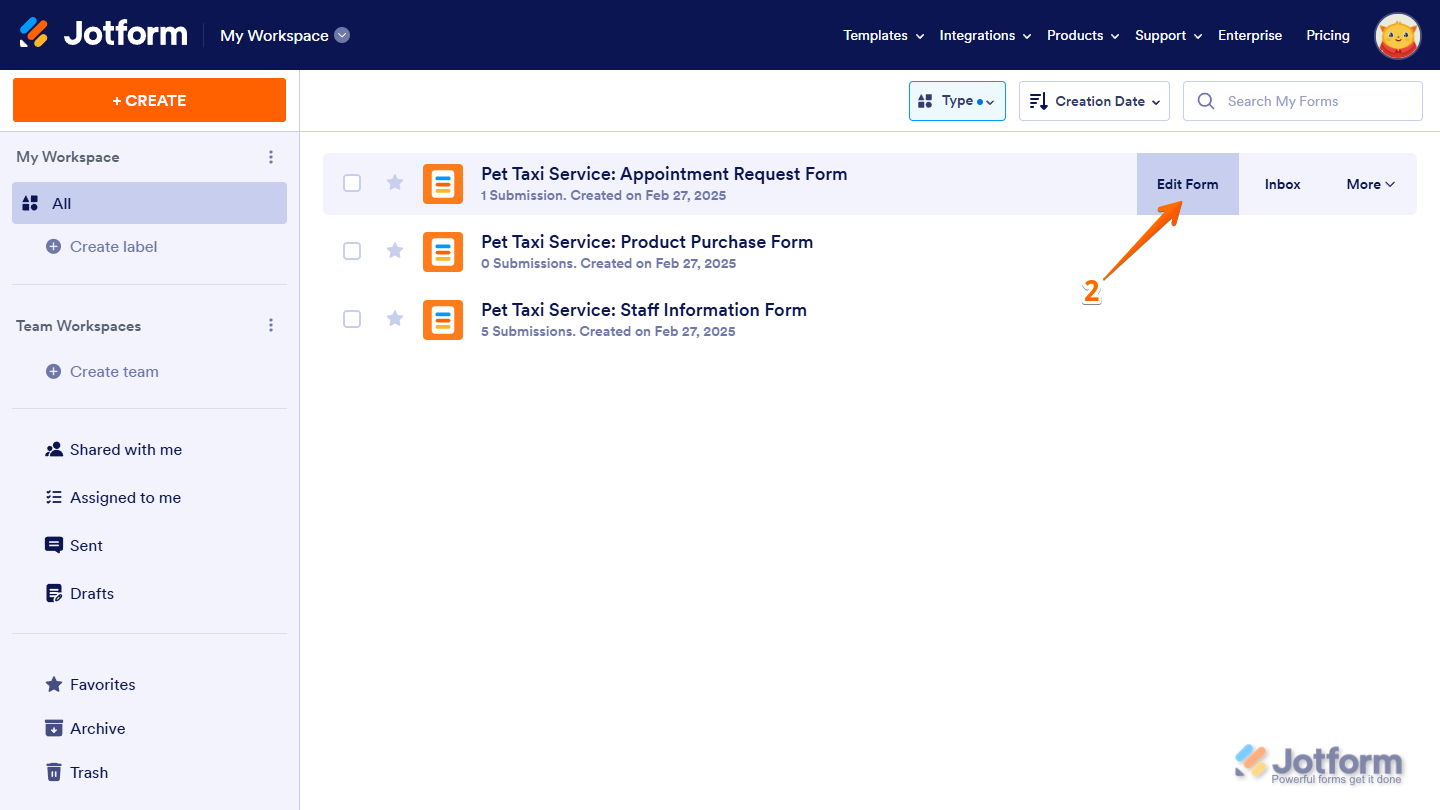
- Now, hover your mouse over the form you want to edit, and click on Edit Form on the right side of the page.
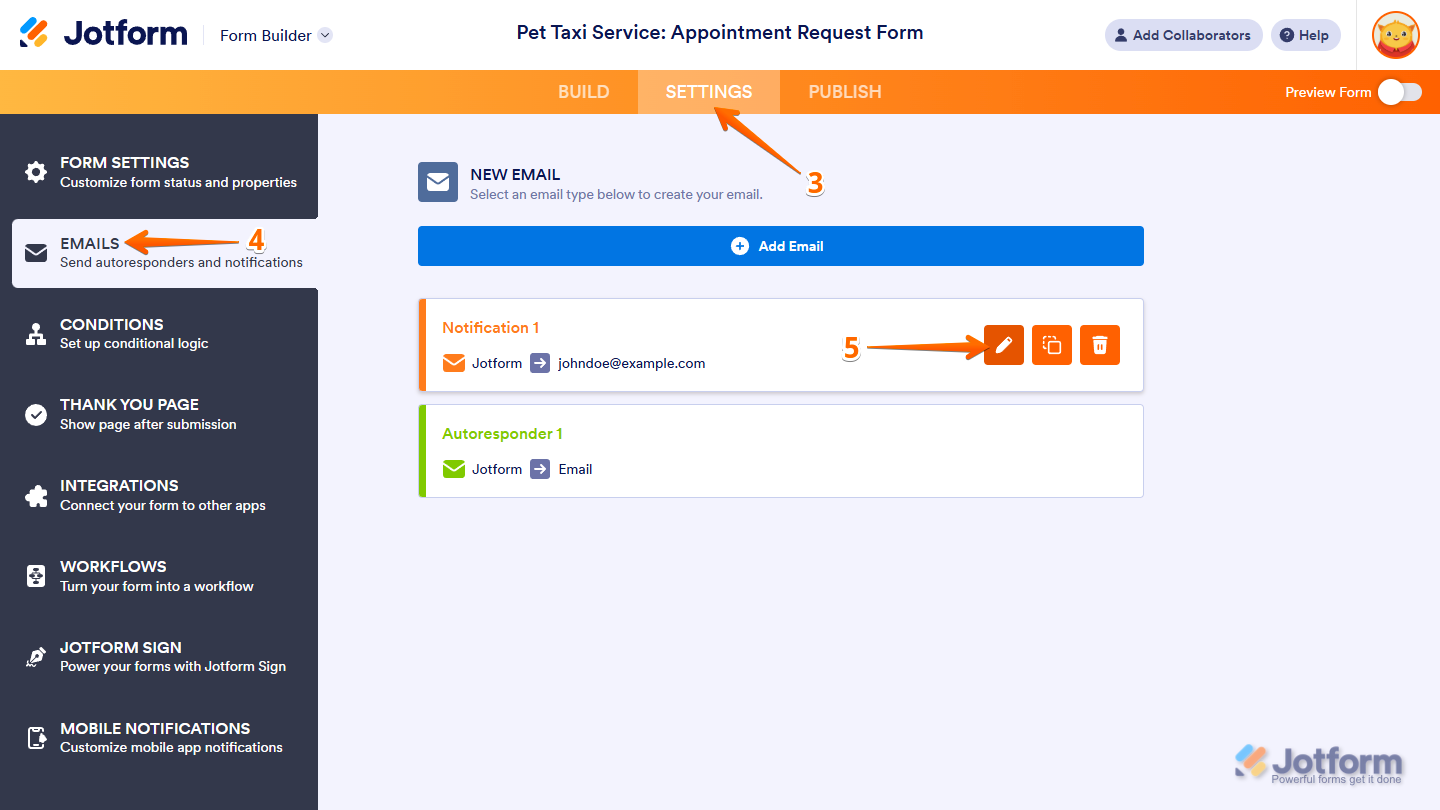
- In Form Builder, in the orange navigation bar at the top of the page, click on Settings.
- Then, click on Emails in the menu on the left.
- Hover your mouse over the Notification Email and click on the Pencil icon to edit it.
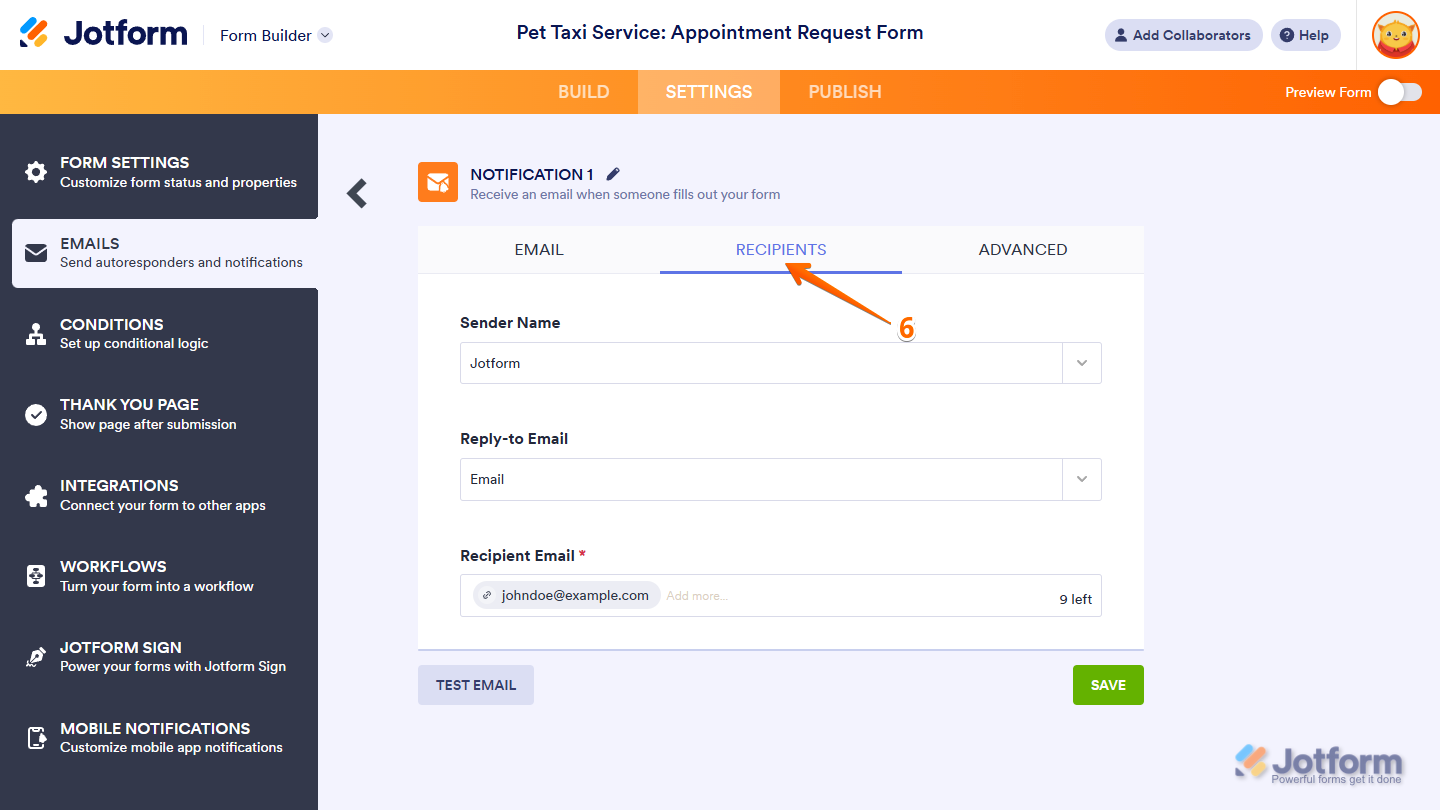
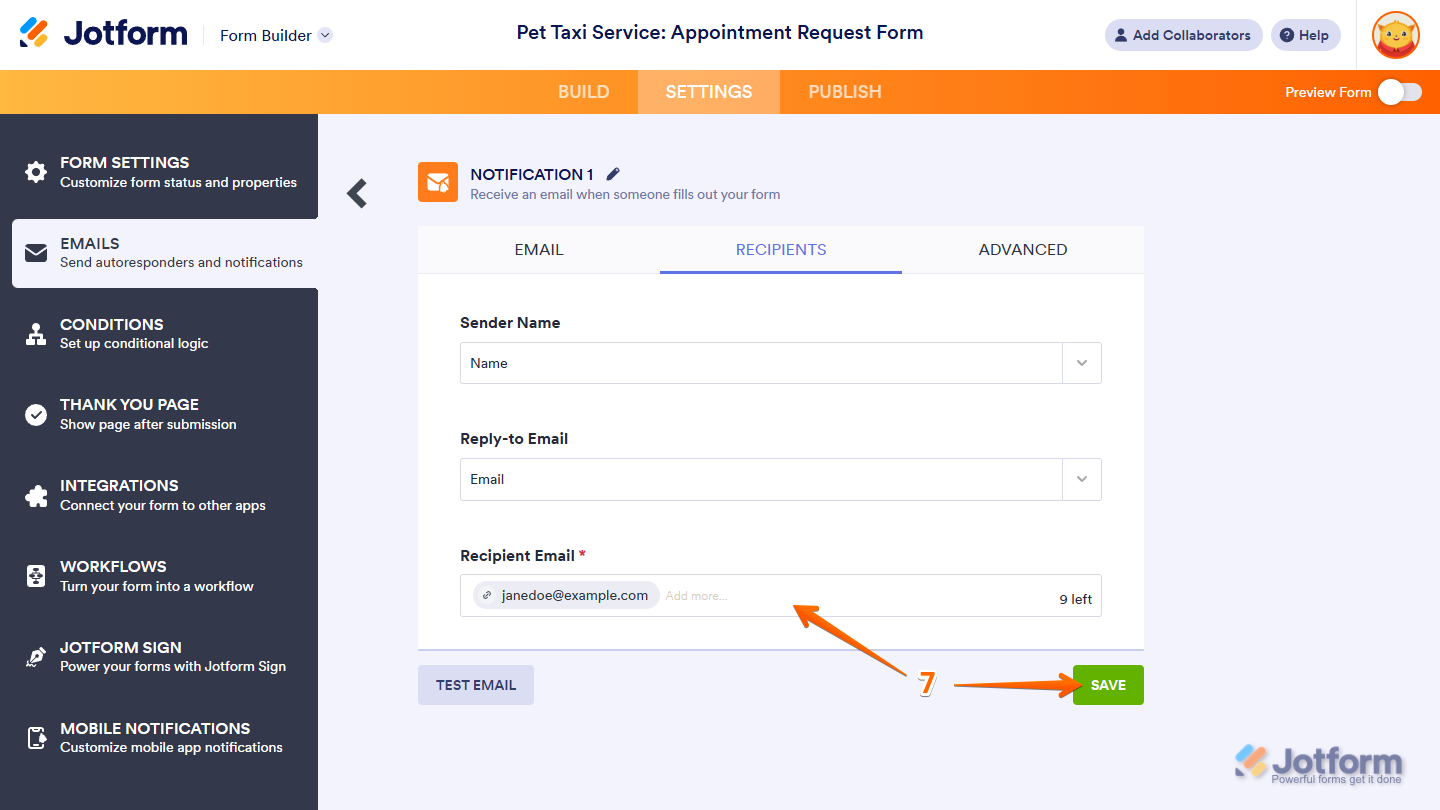
- Now, go to the Recipients tab.
- Finally, delete the existing email address, add a new one in the Recipient Email field, and then click on Save.
Note
Users with Starter (Free) accounts can only add one Notification Email template with one recipient for a form. Those with Bronze, Silver, or Gold accounts can add multiple email templates with multiple recipients, but we recommend only adding up to 10 recipients per template. If you want to upgrade your account, check out our guide about How to Upgrade Your Account to see how to do that.
Testing a New Notification Email Recipient Address
You can immediately test your Notification Email after saving the new email recipient address on the Preview Form page instead of using the Test Email button in the Notification Email settings. Here’s how to do it:
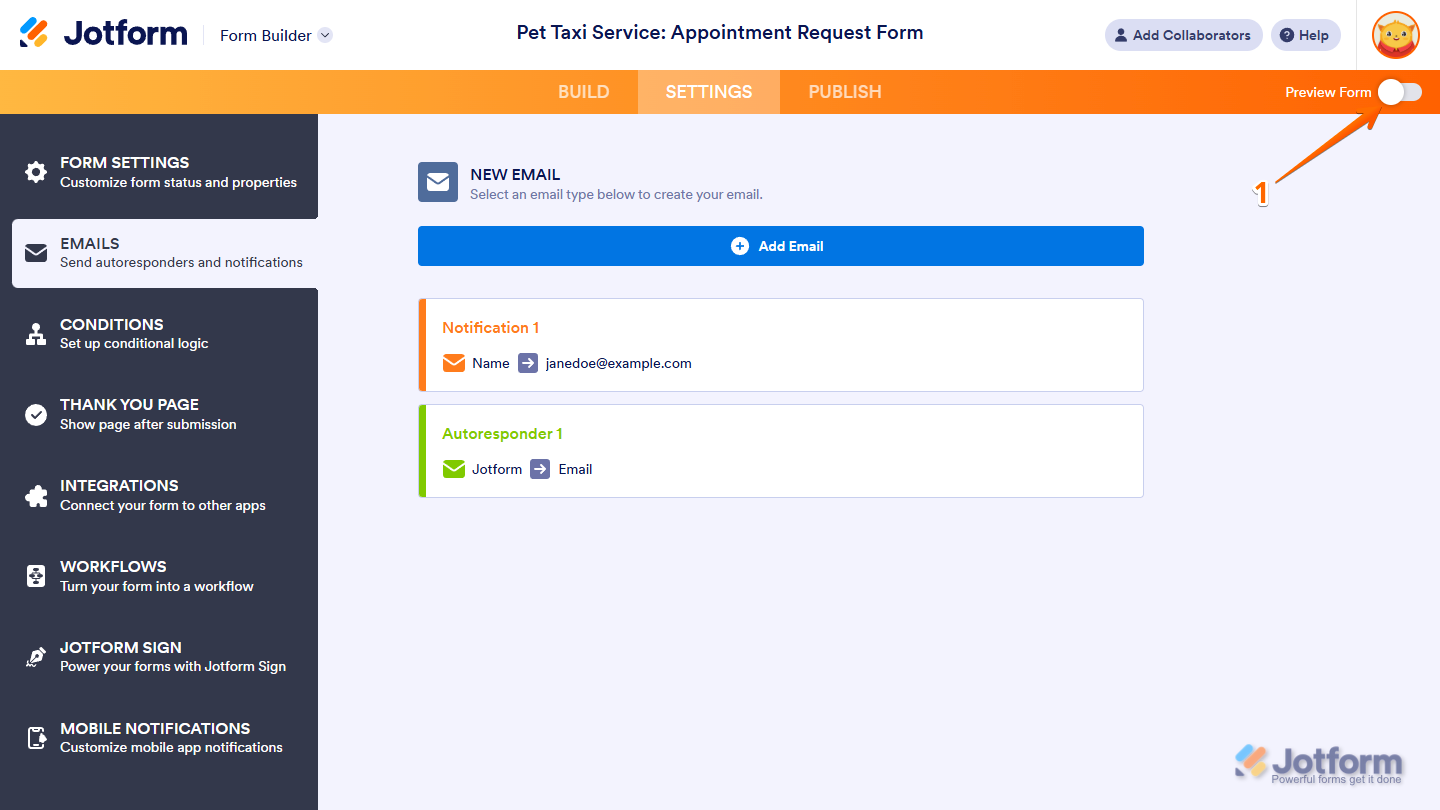
- While in Form Builder, toggle Preview Form to the On position in the top-right corner of the page to open your form in Preview Mode.
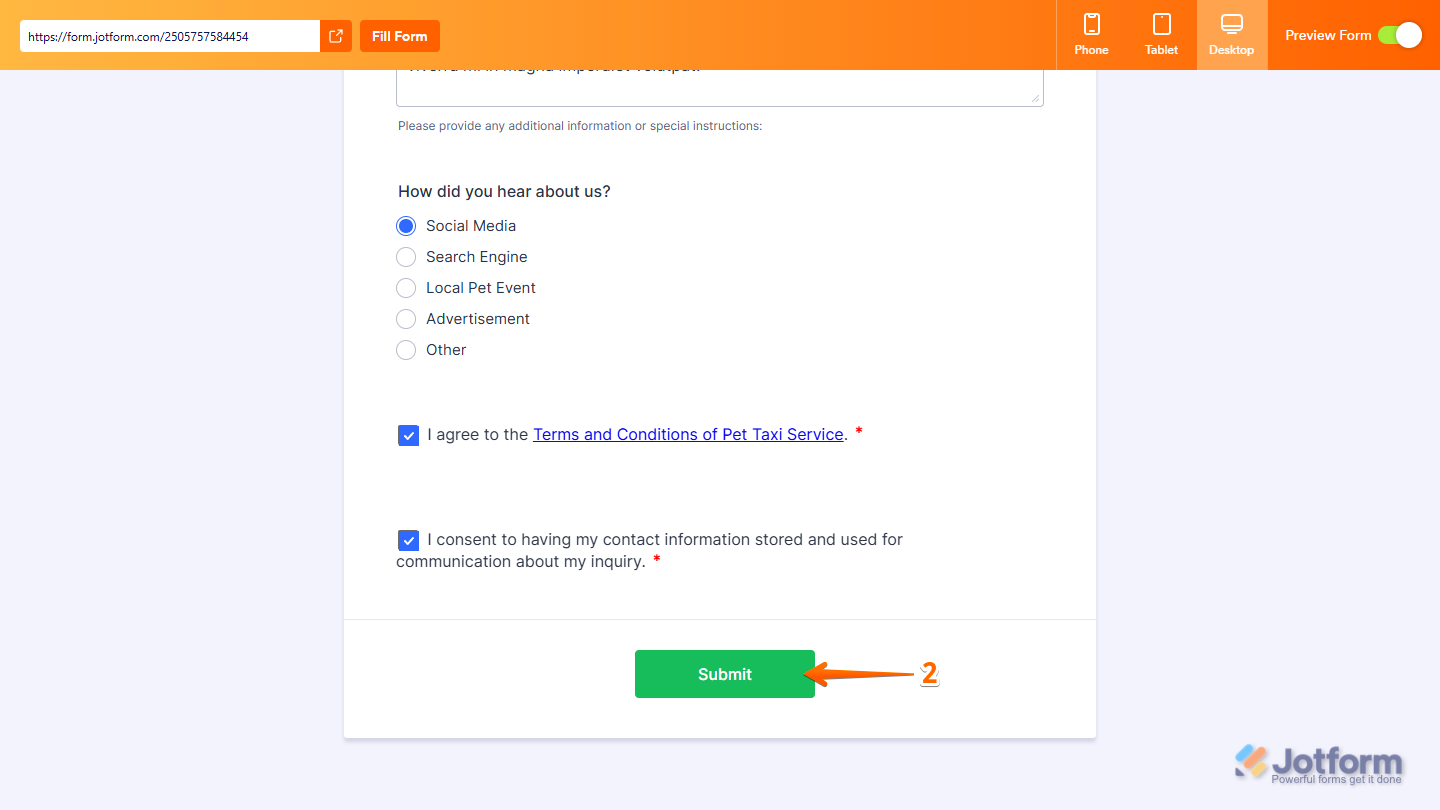
- Then, fill out and submit your form manually. You can also use the Fill Form button at the top of the page to fill out the fields on your form with test data.
That’s it. Check the inbox of the Notification Email recipient address to confirm it was sent correctly.
Note
While submitting your form on the Form Builder Preview Form page will count as a submission, it won’t count toward your account’s Monthly Form Views Limit. For more details, check our guide on Form View Limits: What is it All About.


Send Comment:
83 Comments:
360 days ago
I created a form and it is no longer available. Any idea where it is?
More than a year ago
Great comprehensive guide on answering everything but the damn question I had! Are you serious?? My God you long winded round about too much time having someone needs canned, after being slapped
More than a year ago
Como puedo recibir el formulario rellenado por mi cliente?
More than a year ago
I am still having problems setting this up. When I see the page it shows the reply email section that has to be filled in along with the recipient. What I am wanting is this form to be sent to a specific email address that people have visibility to. But it is always coming back to my email address when the form is submitted.
More than a year ago
I have tried to remove some email recipients and the save button is disabled. How can I save my changes?
More than a year ago
I never really used yahoo mail that much because Gmail took over pretty soon. so don't really have but to say about it but Gmail is just one of those apps that everybody is using I have been using it since day one and I must say it's the best email service out there, I tried yahoo and others they didn't work out well like I have hope so yeah, since I am a fan of Andriod devices i have never seen my self switching from Gmail ever since.
More than a year ago
Hello , I followed all the steps and still test email is being sent to the account email on file and not the assigned recipients email.Can you please help?
More than a year ago
Hi There,
I have updated email as per above instructions, but we still have an old email address j@afif.asn.au and I cannot find where this email is listed so that I can delete it.
Please advise`?
Many thanks
Taras
More than a year ago
Hello...I have read through the forum for answers to my issue. I've also tried to watch the videos too. I still cannot figure out why I am not getting any of the emails or form notifications. I tried to test it a couple of times but still nothing. Thanks for your help!
More than a year ago
Quiero que cada notificación le llegue a un correo diferente de acuerdo a las respuestas dadas en el formulario.
EJemplo:
Pregunta del cuestionario:
Que región es?
-sur
-Norte
-Centro
Y necesito que solo le lleguen las respuesta de SUR, al correo XXX, y las del norte al ZZZZ
así cada persona tendra conocimiento solo de sus respuestas regionales, no la de todo el equipo.
Es posible configurar los envios de formularios para cada correo de acuerdo a una respuesta?
Gracias! estoy muy pendiente!
More than a year ago
We are not receiving any notifications to our email address which is contact@thecakery.design This form says it is not a valid email address?? Sometimes the .design has caused trouble. The email on the form now is my personal one. I've tried doing what is suggested in the help file but nothing is working.
More than a year ago
I Have 3 AutoResponders set up but the AutoResponder3 does not action. It reverts to sending one of the of the first 2? Can you Help
More than a year ago
My emails aren't being sent to the recipients.
More than a year ago
Hi,
None of my email recipients are getting email notifications when a form is submitted and my sender email is set to noreply@jotform.com.
More than a year ago
Hi
My emails are not going to the email I tried to change. I would like all forms to be emailed to info@artworksclasses.com
More than a year ago
Hello,
I have tried editing my profile email address. I was finally able to remove the old email, but it now has my personal email address (iminhawaii28@gmail.com) on file. I need to change all emails on the Jotform account to reflect the organization that I am representing - Beckman PTO (beckmanpto10@gmail.com). All test emails have been sent to my personal email address. I am not sure how and when I had used my personal email address. Please advise.
Thanks!
Sandy
More than a year ago
hi,
I did have a problem getting the recipient correct - sadly it still remains after reading this article and doing the thing slowly and as said.
I created the website that the form is at, my own email is kevbro201@gmail.com ..
the recipient (my good friend Peter) is on peterhoward1@btconnect.com
currently he has a contact form online (named contact us.htm) - but most of my testing had been done on a page I uploaded named LATEST Test.htm
as I say, I followed the instruction, then did a form preview and sent a test meassage.
I then published my form (having chosen the embed option of 'sourec code') copied this into my test form using Dreamweaver MX, saved it and uploaded it - BOTH forms came to my PC in-box!
the completed and live form (fsom contact form in my online account) can be found at:
Test.htm
no doubt I have done something quite stupid - for that I apologise,
but I am a self taught amateur of 75 years old.
any help at all would be very much appreciated.
Kevin
More than a year ago
Emails are not getting sent to my new email, I have changed it to rmkolodzie@gmail.com and its not working. Thank you.
More than a year ago
My jot form submissions are coming into the mail box in Jotform instead of coming into my mail box which is parkingpermit@parkguardservices.com
Also users uploading the completed Jot form are NOT getting a confirmation of the email. They just get a pop up of thank you page.
Please assist asap.
thanks
Bhaskar
More than a year ago
Hello,
I am having issues with this form not sending the Autoresponder 1 email to the person that submitted the form and not sending the Clone Of Autoresponder 1 to the email address indicated. We created a form, tested it, it worked and sent out all the email notifications so we cloned it many times with slight changes. The link to this form is a clone so i wonder if in this process we changed something to cause the issue. I tried to fix the issue by adding some conditions but it does not seem to be working either. They only email notification that is being sent correctly is the Notification 1. Can you please take a look and let me know what needs to be corrected?
Thank you,
More than a year ago
hi
i am not receicing notification emails anymore
More than a year ago
Hi there,
I am currently having issues with one of our forms, particularly with the notification emails. I have double check the notification email settings and compare them against other working forms and also against Jotform support articles. Submissions are working fine as they can be found in the submissions section but notifications are not being sent to either of the two addresses I have setup. I would greatly appreciate if there´s any advice you can provide me on how to fix this issue.
Cheers
More than a year ago
I have one of our forms going directly to a 3rd party service desk program we use for work orders. Once the form is received in our service desk the requester's email is always the administrators email address for JotForm. Is there a way we can have the requester's email address sow up instead of the administrators?
Thanks,
More than a year ago
I just want to say I love your website and it has made it very easy for our school registrations. I am wondering however, Is it necessary that I have this notification of emails on? Sometimes I am receiving 13 notifications in my inbox and I don't know if I need to do this now. I can change the email address to our group one but I am waiting on confirmation from our IT guys. Or can I simply delete my email and not have them sent to my emails but rather check my submissions in the Submissions link.
More than a year ago
I have went through this and I'm not getting a notification when someone click the submit button. The infor is being saved which is good but I need to respond to the new submissions right away so I need to know when they come in. How do I fix this?