
Electronic signatures have transformed how we close deals and manage all types of business agreements. Gone are the days of printing, signing, and scanning. Electronic signatures allow us to sign paperwork securely from anywhere.
One of the leaders in this space is Docusign, a platform that helps users send, sign, and manage documents electronically with ease. Whether you’re finalizing a sales contract, onboarding a new employee, or securing a partnership agreement, digital signature software like Docusign can streamline the process.
This guide will walk you through how to send a Docusign document to multiple signers, ensuring every party can sign without hassle.
Sending a document to multiple signers with Docusign
Docusign gives you two ways to send a document to be signed: using the bulk send feature or sending individual envelopes to each signer.
The bulk send feature allows you to distribute a single document to multiple recipients at once. Each recipient receives a copy to review, sign, and return. Without bulk send, you would need to prepare and send individual documents for each signer.
Another way to speed up the signature process is with templates. Docusign’s templates allow you to predefine fields, roles, and content for your documents — saving time and ensuring consistency.
How does it work?
Let’s walk through the process step by step:
- Upload your document.
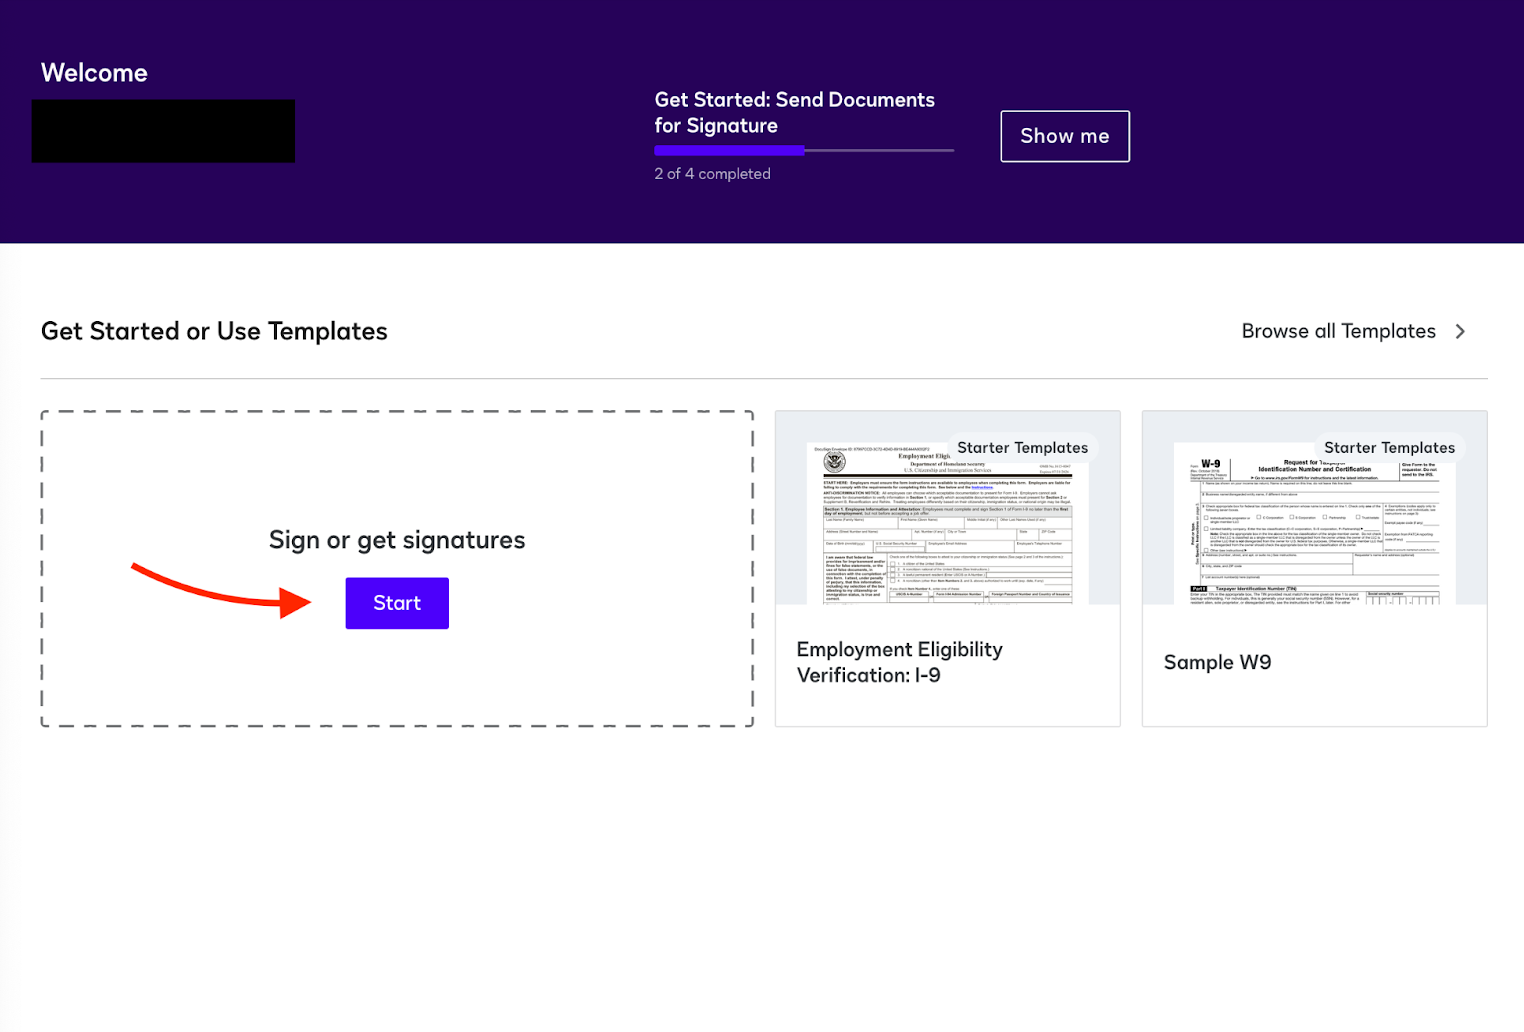
- Log in to Docusign and upload the document you wish to send by clicking Start.
- Use tags to specify where each signer needs to provide information, such as their signature, date, or initials.
- Prepare a recipient list.
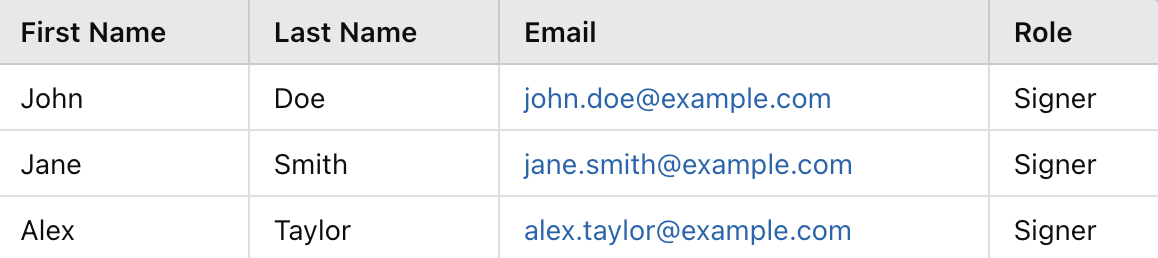
- Create a .CSV file with the names and email addresses of all your recipients.
- Ensure the data is accurately formatted and aligned with Docusign’s requirements for bulk uploads.
- Upload the recipient list.
- Navigate to the bulk send tool and upload your .CSV file.
- Send the document.
- Once all recipients have been listed and the document is ready, send the document for signing. Each signer will receive an individualized email with a link to the document.
Benefits of the bulk send feature
- Saves time. Instead of manually creating and sending individual envelopes for each recipient, bulk send allows you to handle the signing process with a single action.
- Cuts costs. By reducing the time spent on manual tasks, you save on labor costs and eliminate the need for printing, shipping, or mailing physical documents.
- Ensures consistency. When sending a document with bulk send, each recipient gets the same form with predefined fields — reducing errors and confusion.
Note: The bulk send feature is only available with Docusign’s premium plans, such as its Business Pro and Enhanced plans.
How to send a document to multiple signers as individual envelopes
Users without access to the bulk send feature can still send documents individually. While this approach is more time-consuming, it also allows for more personalization. Follow these steps:
- Upload the document.
- Click on Upload under the Add Documents field to upload the file you want recipients to sign.
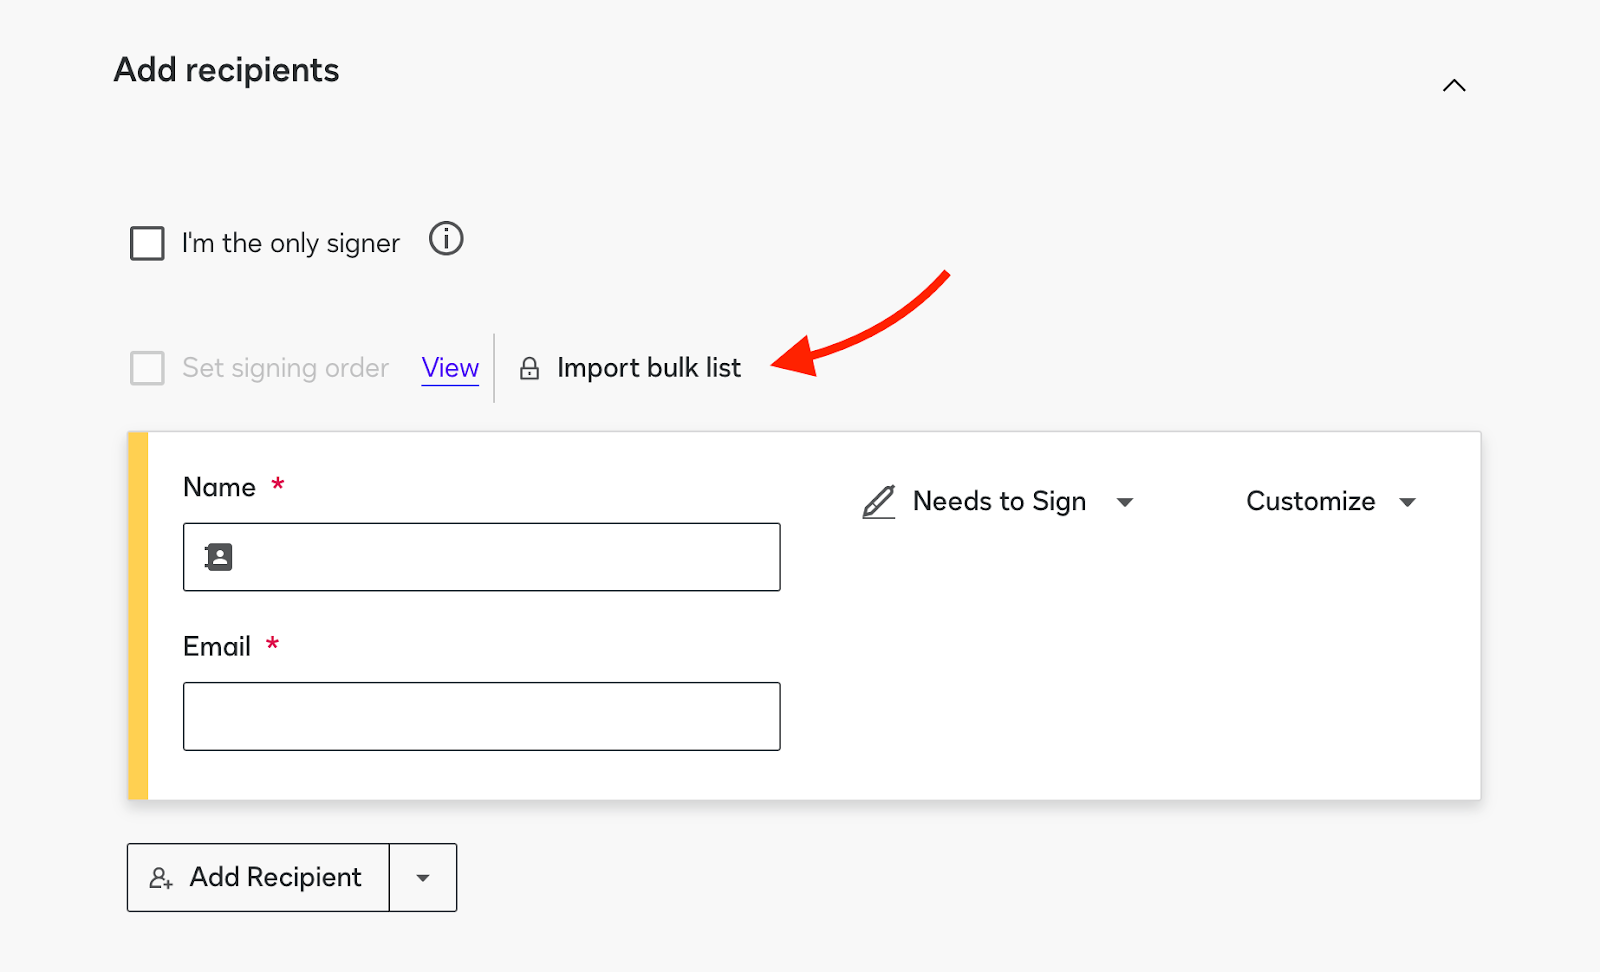
- Add recipients.
- Use the dropdown menu to add a recipient manually or select Add From Contacts if the recipient has already been saved.
- Define recipient roles.
- Select the recipients’ roles as signers, reviewers, or approvers.
- Click on Apply Selected once all recipients are added.
- Customize document fields for each recipient.
- Click Next to navigate to the document.
- Use the dropdown menu at the top to switch between recipients. Drag and drop fields (e.g., signature, date) onto the document and place in the appropriate locations for each recipient.
- Ensure all required fields are correctly placed to avoid missed signatures or incomplete forms.
- Preview and verify.
- After customizing fields, preview the document for accuracy.
- Send the envelope.
- Click on Send at the bottom right of the screen to distribute the document to all recipients.
Use Jotform Sign as an alternative
Sending individual documents to multiple signers without Docusign’s premium plan takes more time that could be spent on high priority tasks. Jotform Sign offers a free and efficient alternative for seamlessly distributing documents to numerous recipients. Consider some of its standout features:
- Integrations: Seamlessly connect with popular apps like Google Drive, Dropbox, Salesforce, and 240 more native integrations.
- Templates: Save time with thousands of customizable templates for frequently used forms and agreements. Templates allow you to predefine roles, fields, and layouts, ensuring consistency across documents while reducing setup time.
- Intuitive drag and drop: Jotform Sign’s user-friendly interface makes designing and customizing documents a breeze. Simply drag and drop the signature, date, or text fields onto your document to prepare it for signing.
Whether you’re managing contracts, collecting acknowledgments, or finalizing agreements, Jotform Sign is a powerful, easy-to-use alternative for businesses of all sizes. Best of all, a majority of its most helpful features are available on all pricing plans, including the free tier.
How to send a document to multiple signers with Jotform Sign
Sending a document to multiple signers with Jotform Sign is straightforward, regardless of whether your signers have similar or distinct roles in the signing process. Follow these steps to get started:
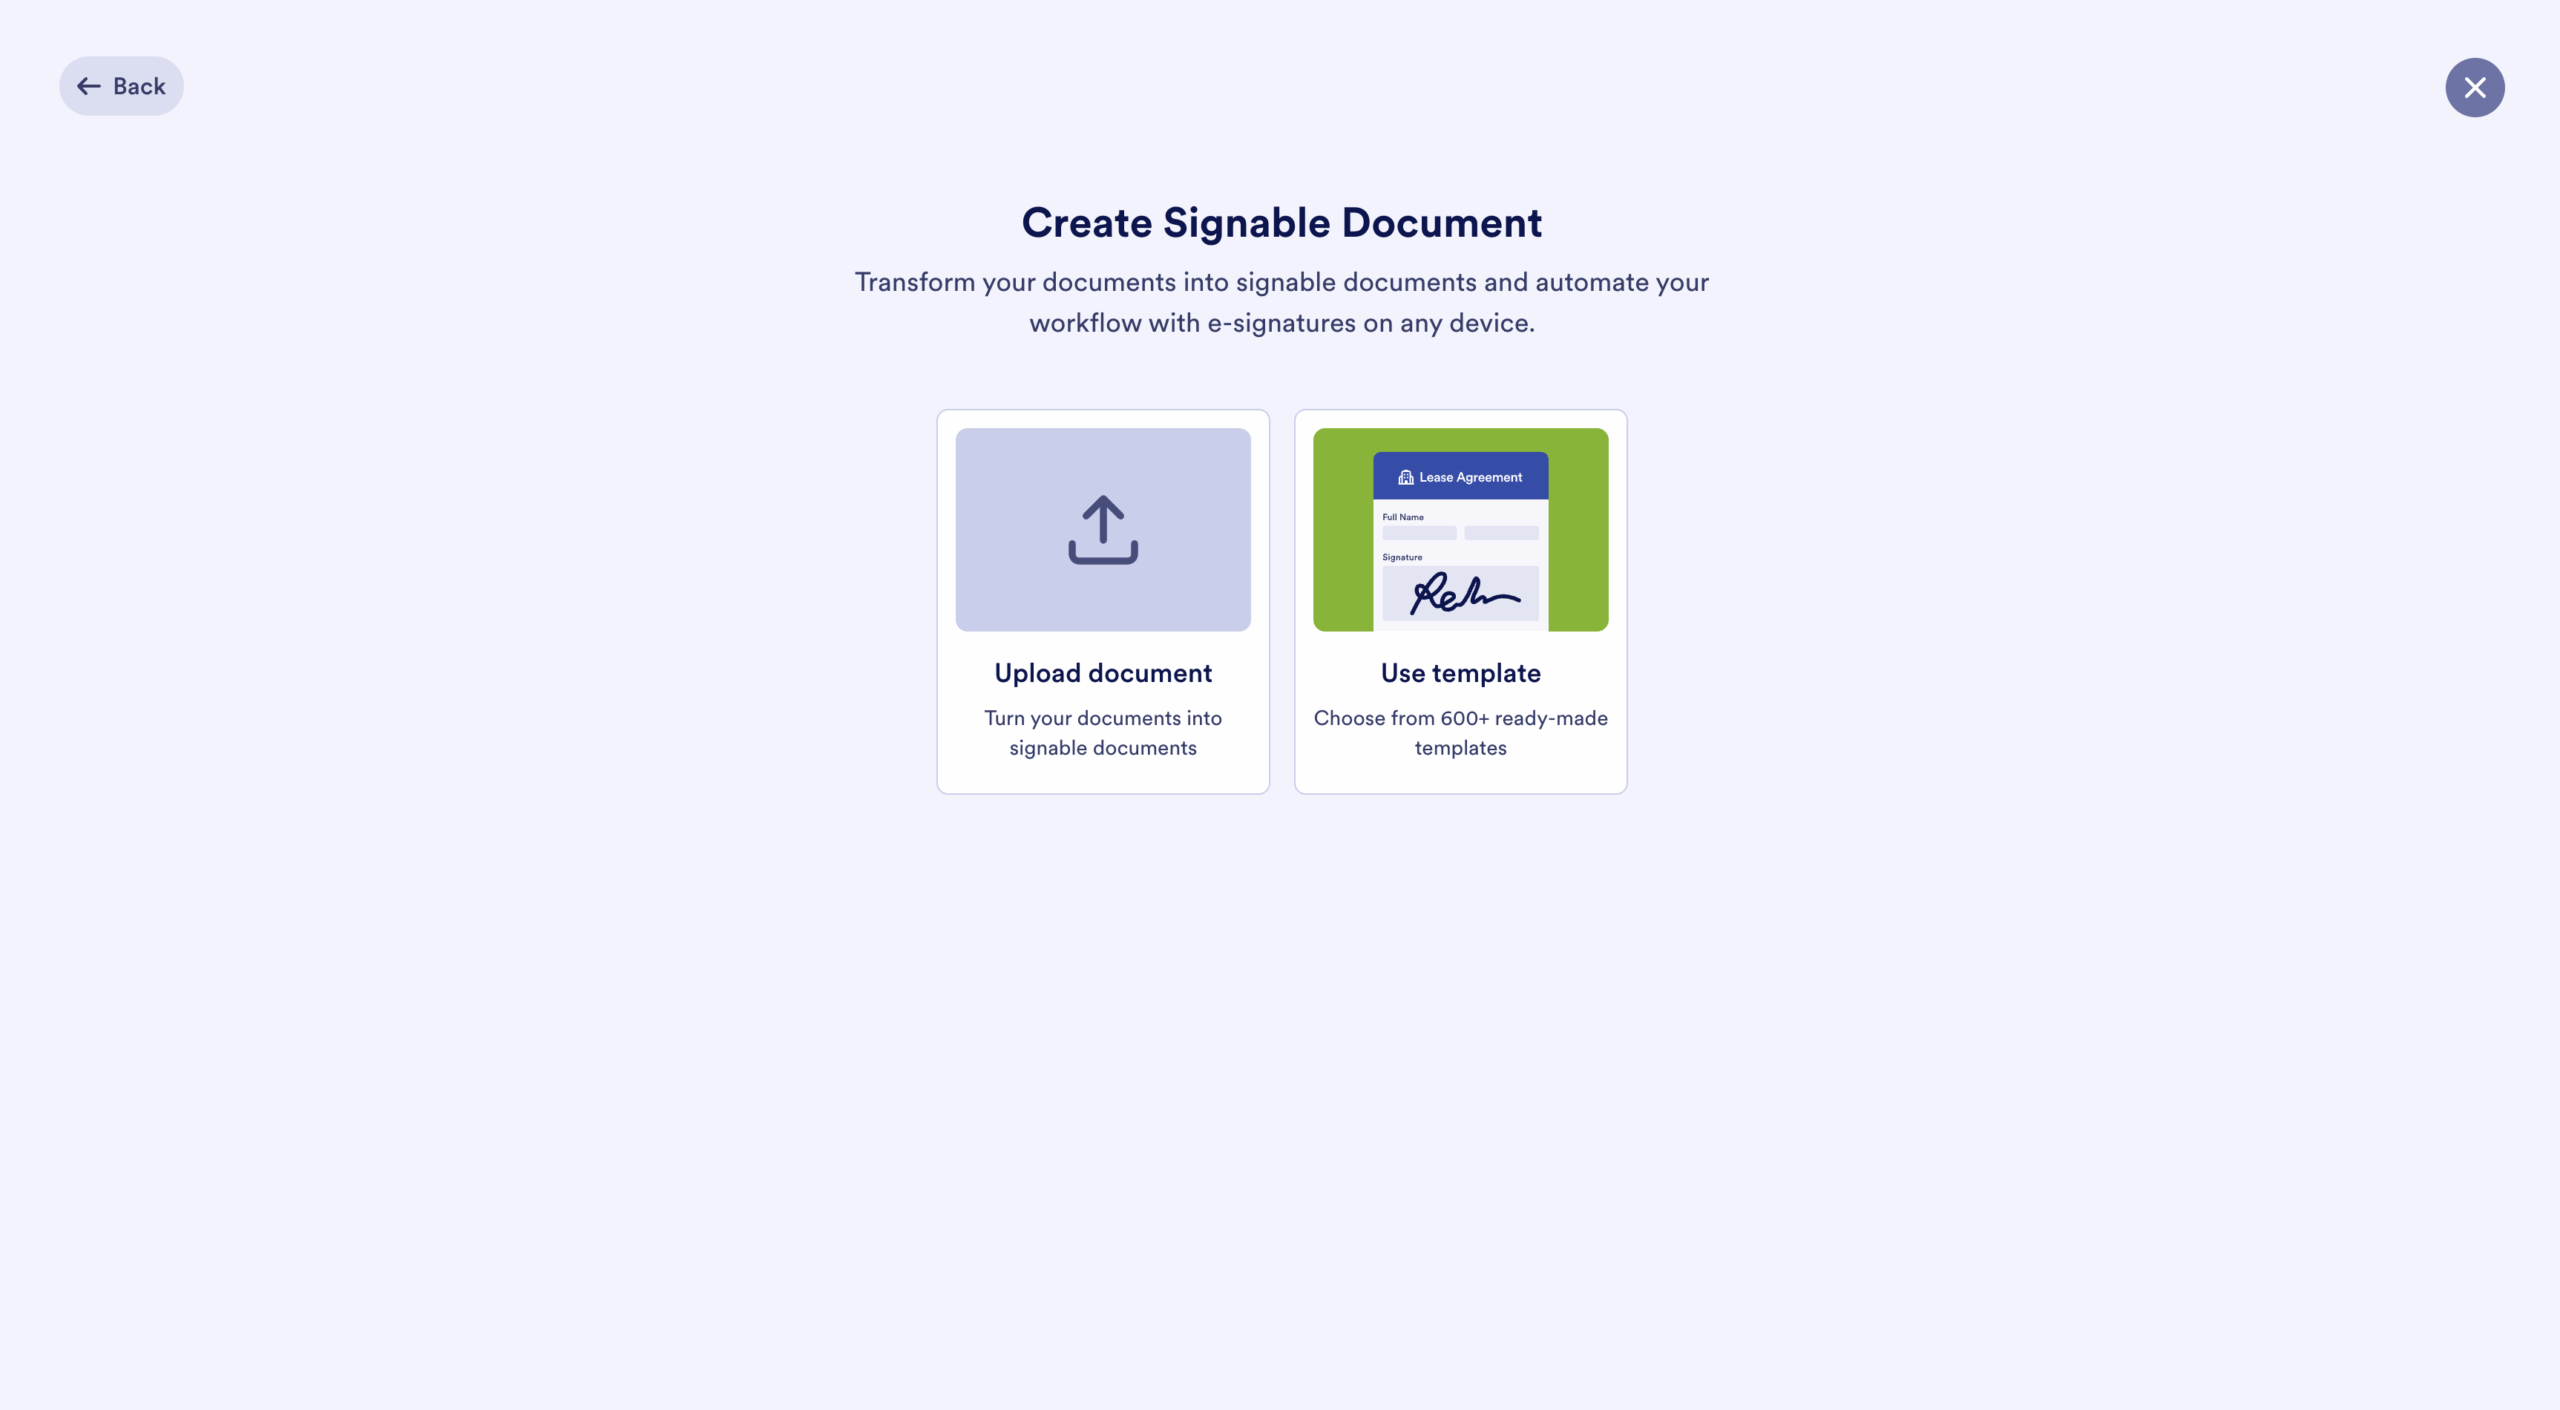
- Upload your document.
- Log in to Jotform and click on the +Create button on the My Workspace page.
- Select the E-Sign option and upload your form. Or, start with a template.
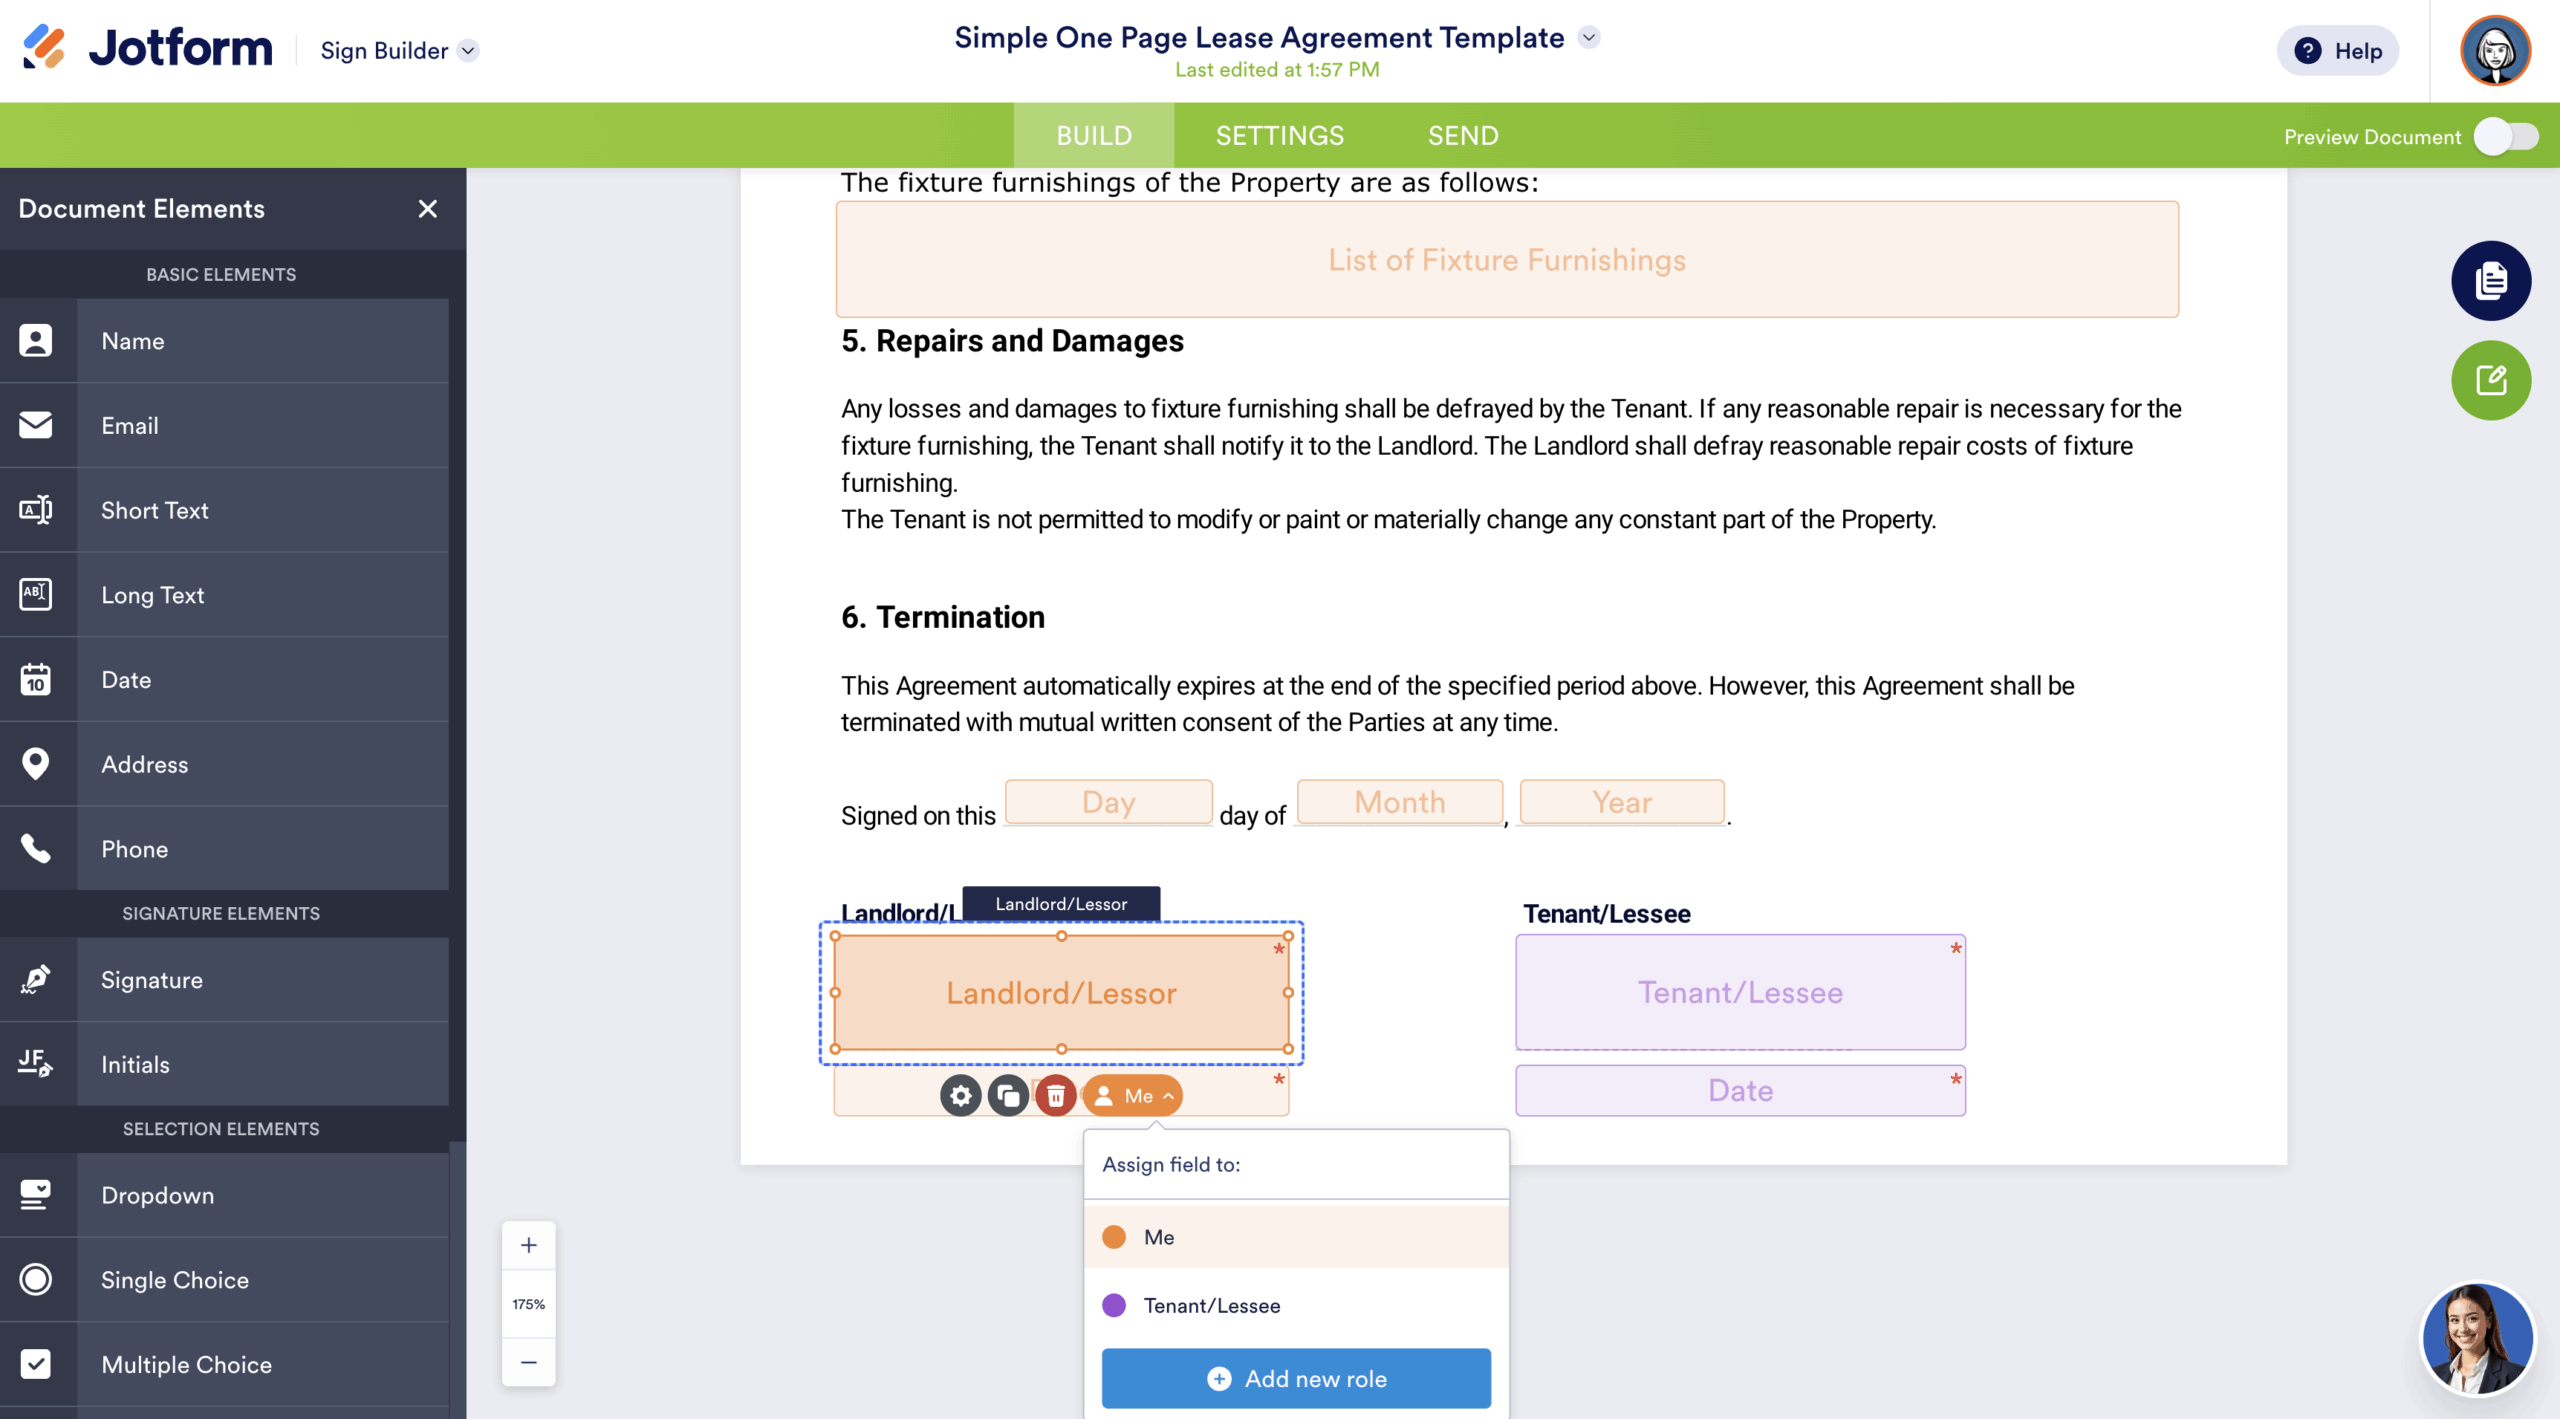
- Set up the fields for digital signatures.
- Click Detect Fields Automatically or use the drag-and-drop editor to place the signature, date, or other necessary fields into the document.
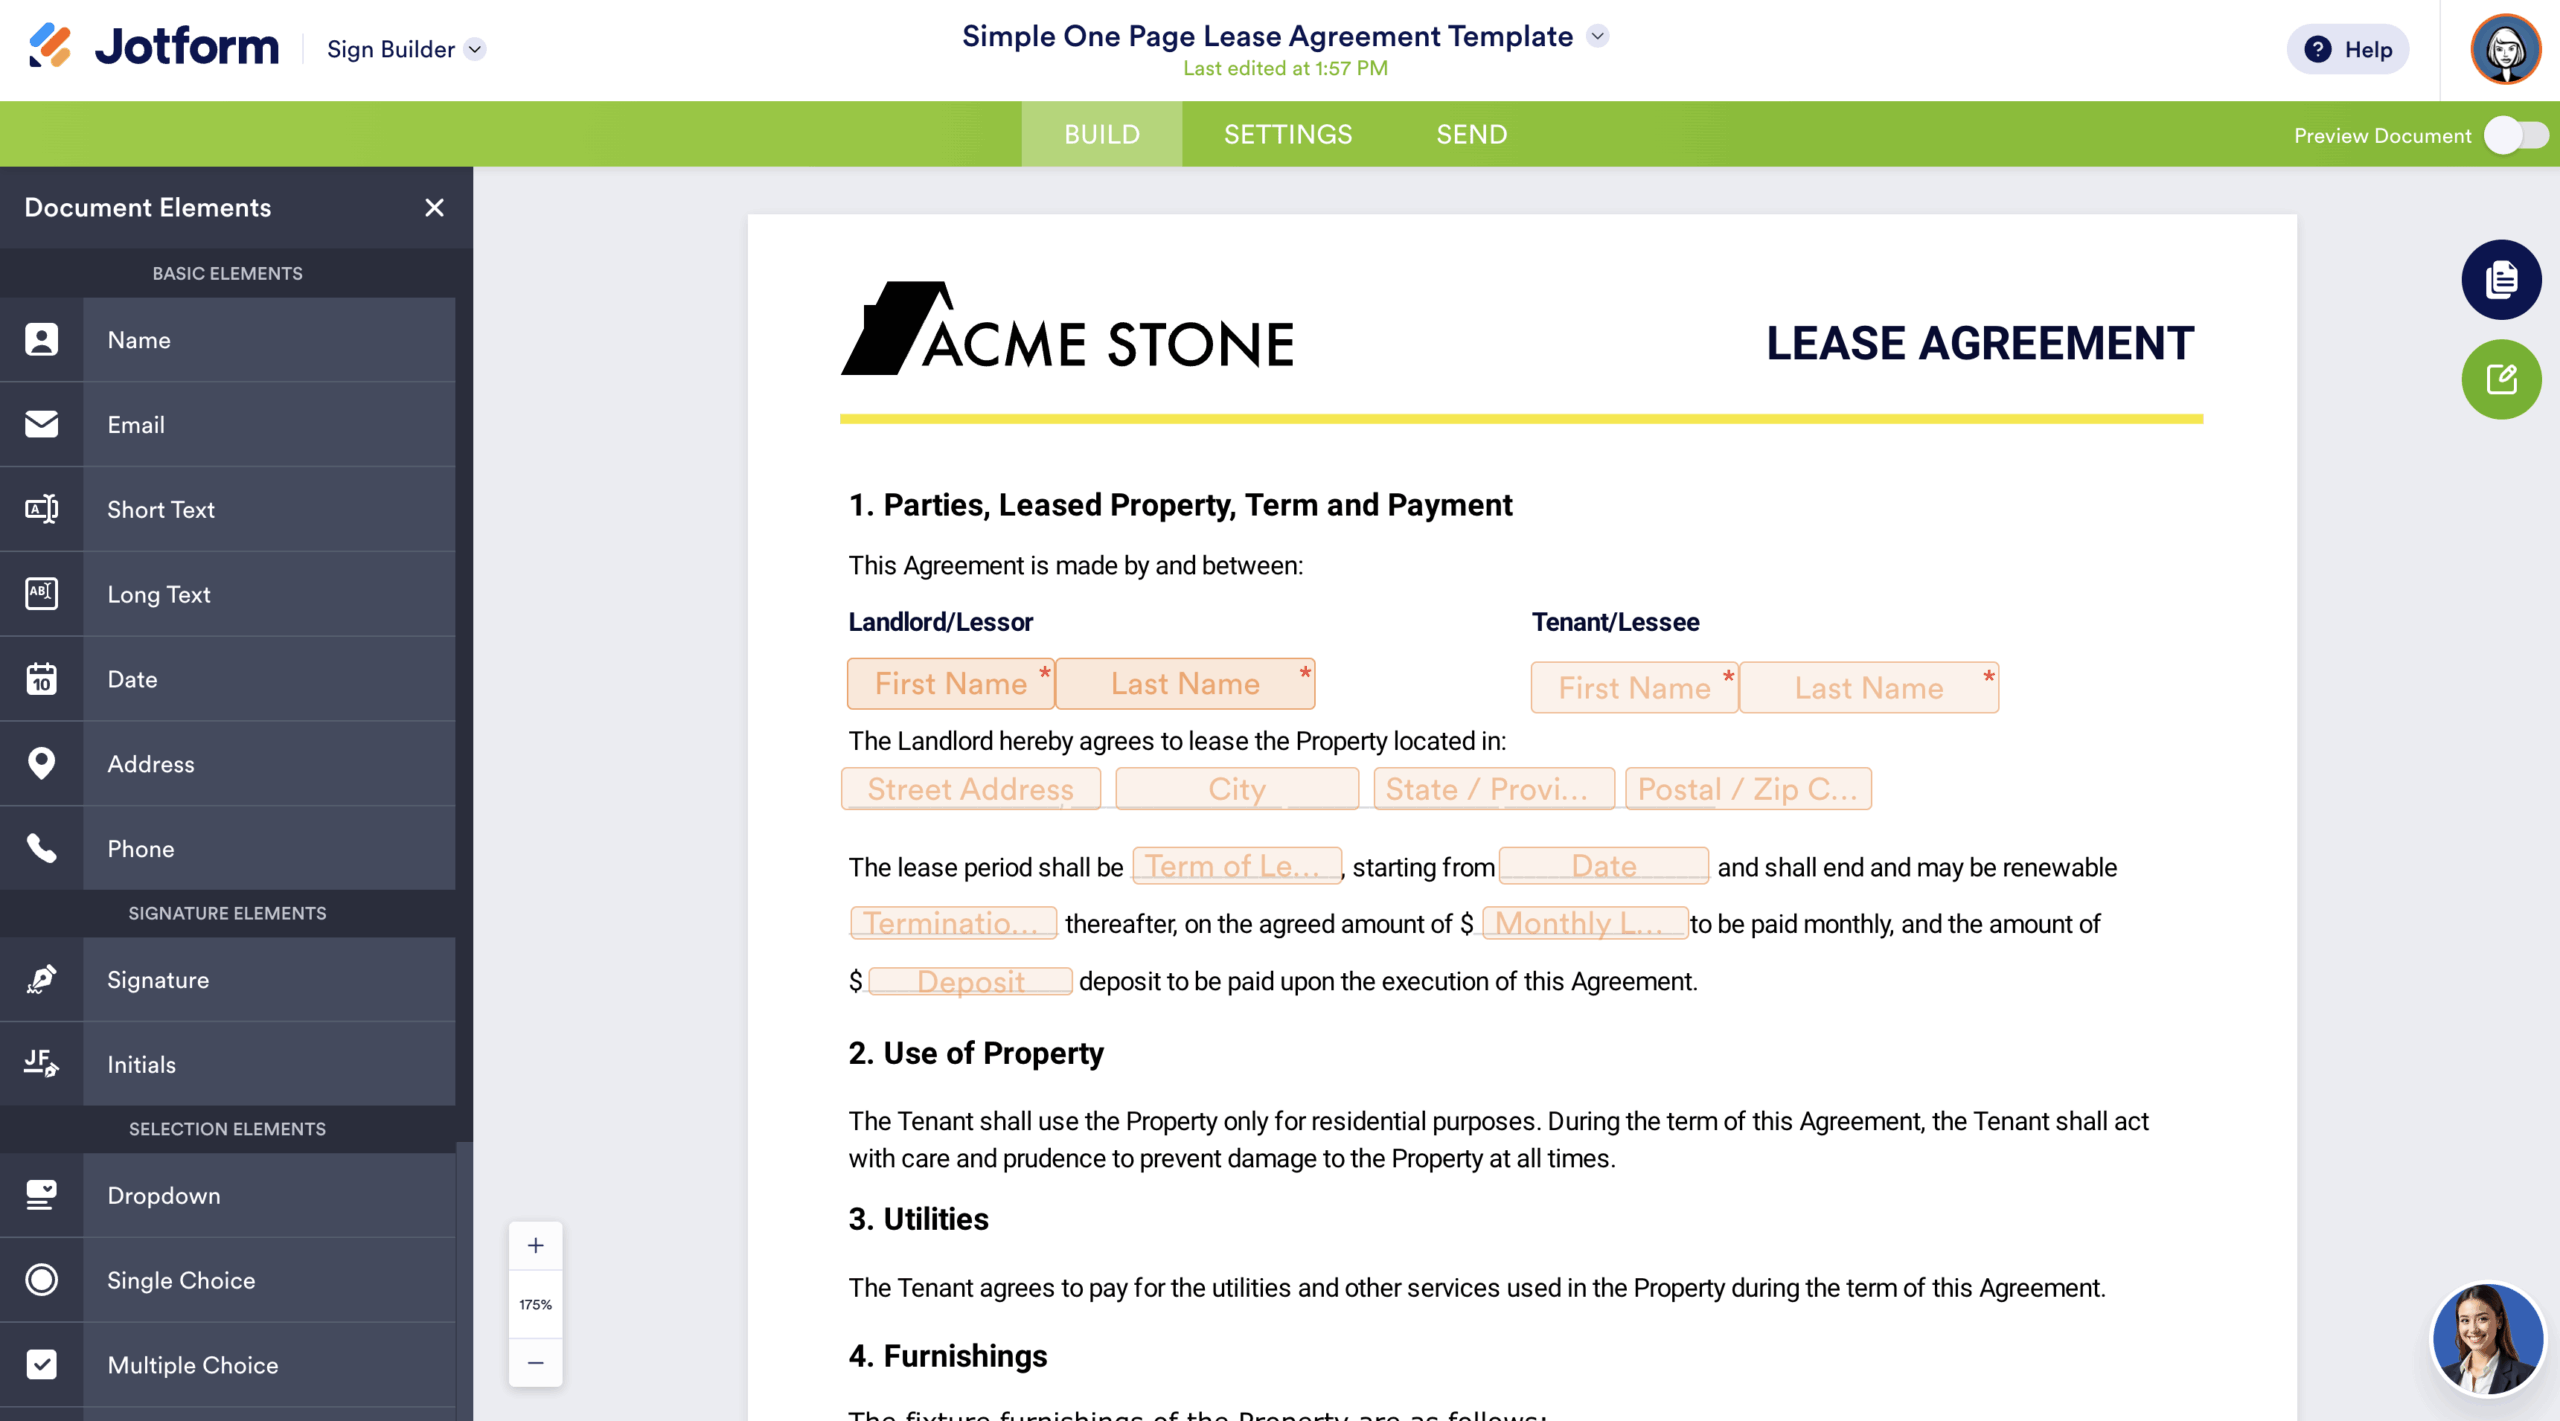
- Set up the signing flow.
- Assign roles to each signer (e.g., Signer 1 and Signer 2) to ensure they sign in the correct area. This is helpful when you need to set a specific signing order.
- Send for signature.
- Click on the Send tab and select Send to Sign.
- Add each signer’s email and name and click Send to Sign. Alternatively, you can generate a link that can be sent manually.
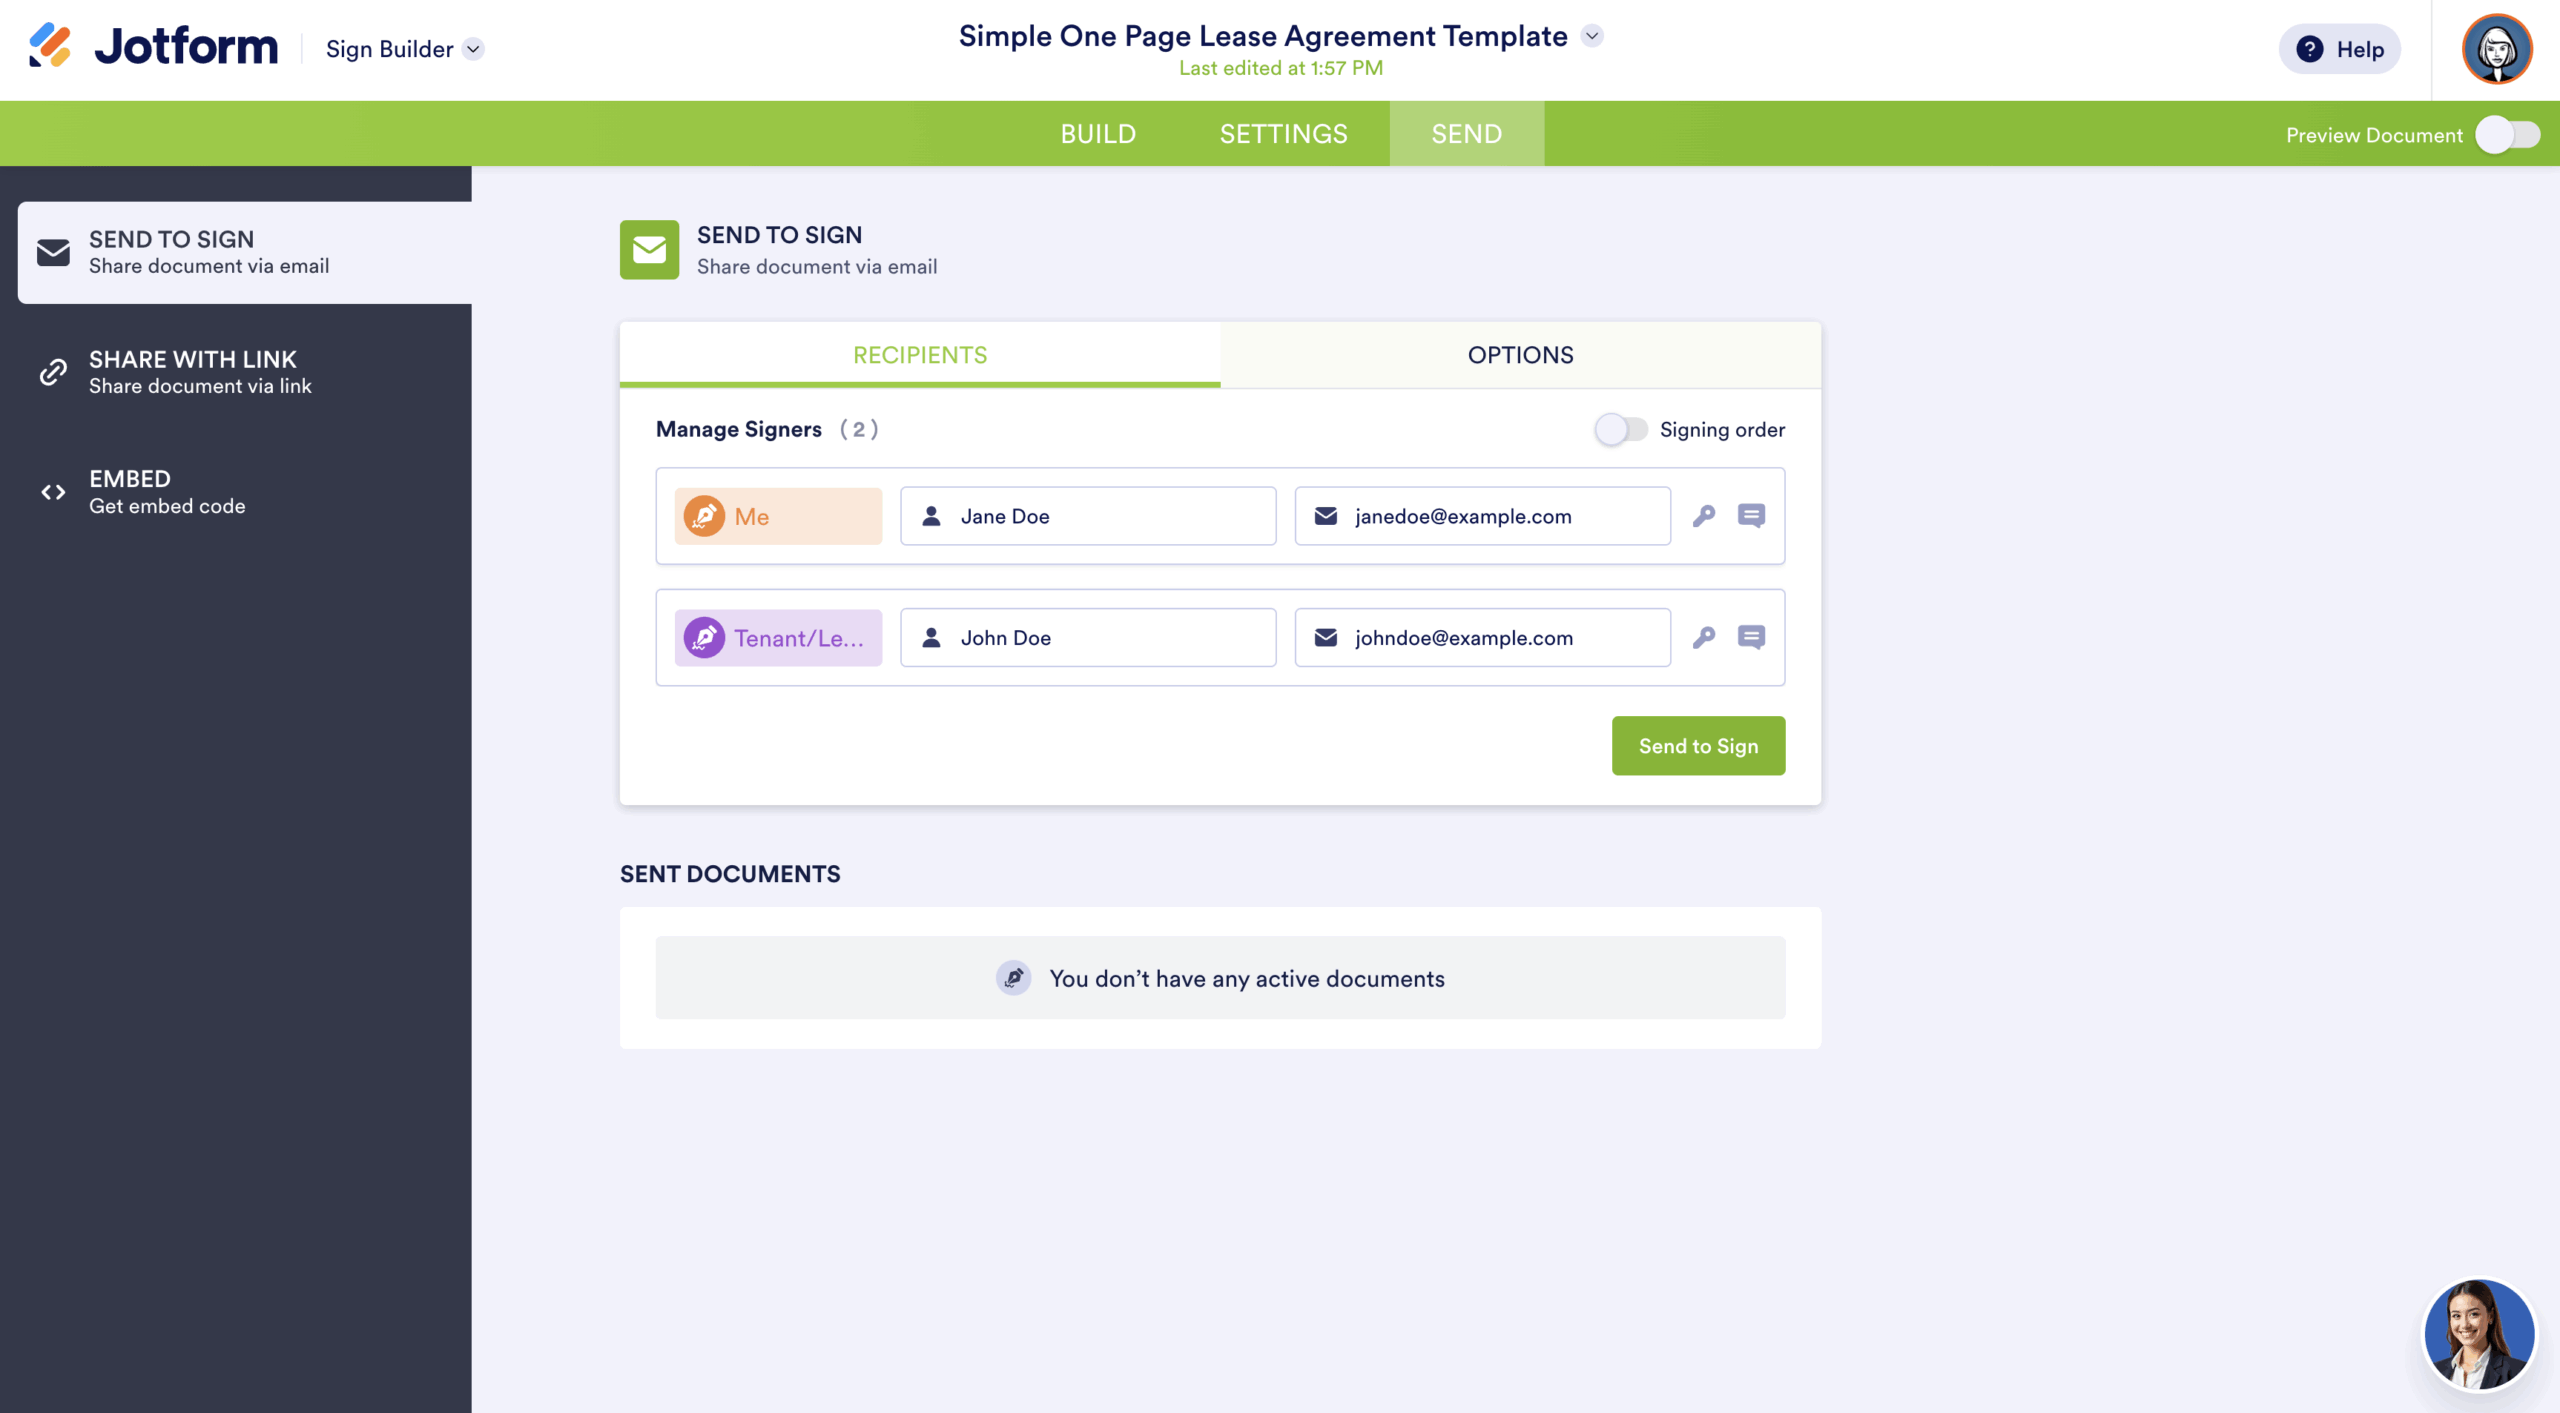
- Track progress.
- Monitor the signing process in real time, confirming each recipient completes their assigned task.
Note: Unlike many platforms, Jotform Sign’s multisigner functionality is available on all plans, including Free, Bronze, Silver, Gold, and Enterprise.
Electronic signature tools like Docusign and Jotform Sign have revolutionized how businesses manage agreements, making it faster and easier to send documents to multiple signers. Try Jotform to simplify your document signing process and stay focused on what matters most — growing your business.
FAQ
Whether using Docusign or Jotform Sign, the process is simple. Upload a document, define the recipients and their roles, and assign signature fields to each signer. For platforms like Docusign, you can set signing sequences, while Jotform Sign allows you to define roles and create a signing flow with public links.
To send a document to multiple signers in a specific order with Docusign, you can assign roles and set a signing sequence. During the recipient setup, you can define the order in which signers receive and sign the document. Simply drag and arrange recipients in the desired order.
Using the bulk send feature (available in Docusign’s premium plans) or Jotform Sign’s role-based flows can save time and effort. These tools allow you to distribute a document to many recipients efficiently while maintaining accuracy and tracking progress.
This post is tailored for business professionals, team managers, HR specialists, and sales leaders who regularly manage contracts, agreements, or approvals that require multiple signatures.


Send Comment: