Salesforce Integration Logs allow you to quickly identify and resolve integration issues, reducing system downtime and preventing data discrepancies. With error notifications, you can take immediate action when an error occurs, eliminating the need to check the logs manually. These logs provide detailed records of all data transfers between Jotform and Salesforce.
Common errors often arise from mismatched configurations between Jotform integration and Salesforce settings.

Viewing the Salesforce Action Logs
You can view the Salesforce Action Logs by going through the Salesforce option again through the Integration tab. Here are the steps:
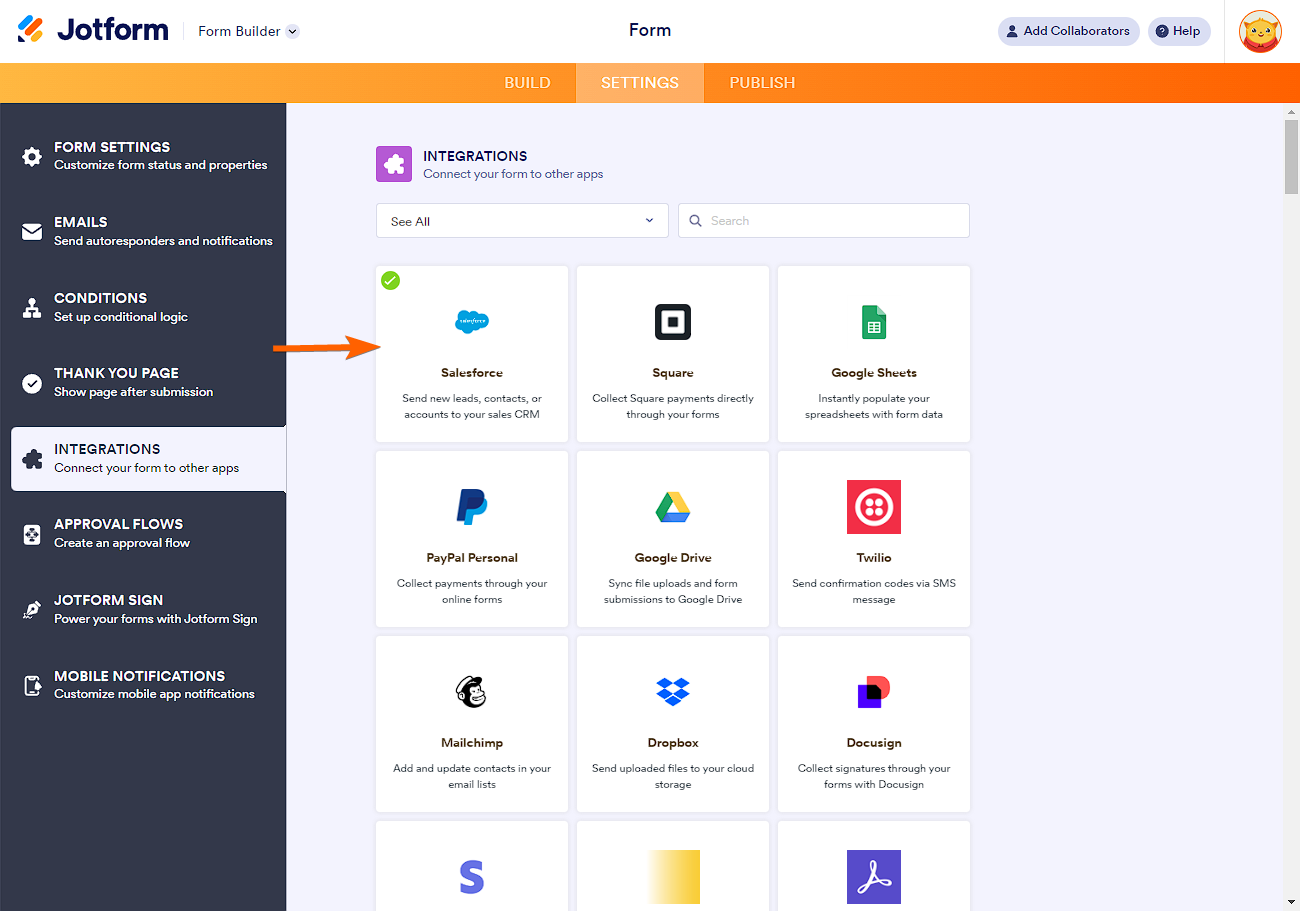
- In the Form Builder, go to the Settings tab.
- Click Integrations on the left panel.
- Choose Salesforce from the list. All apps that you integrate with Jotform are displayed at the top.
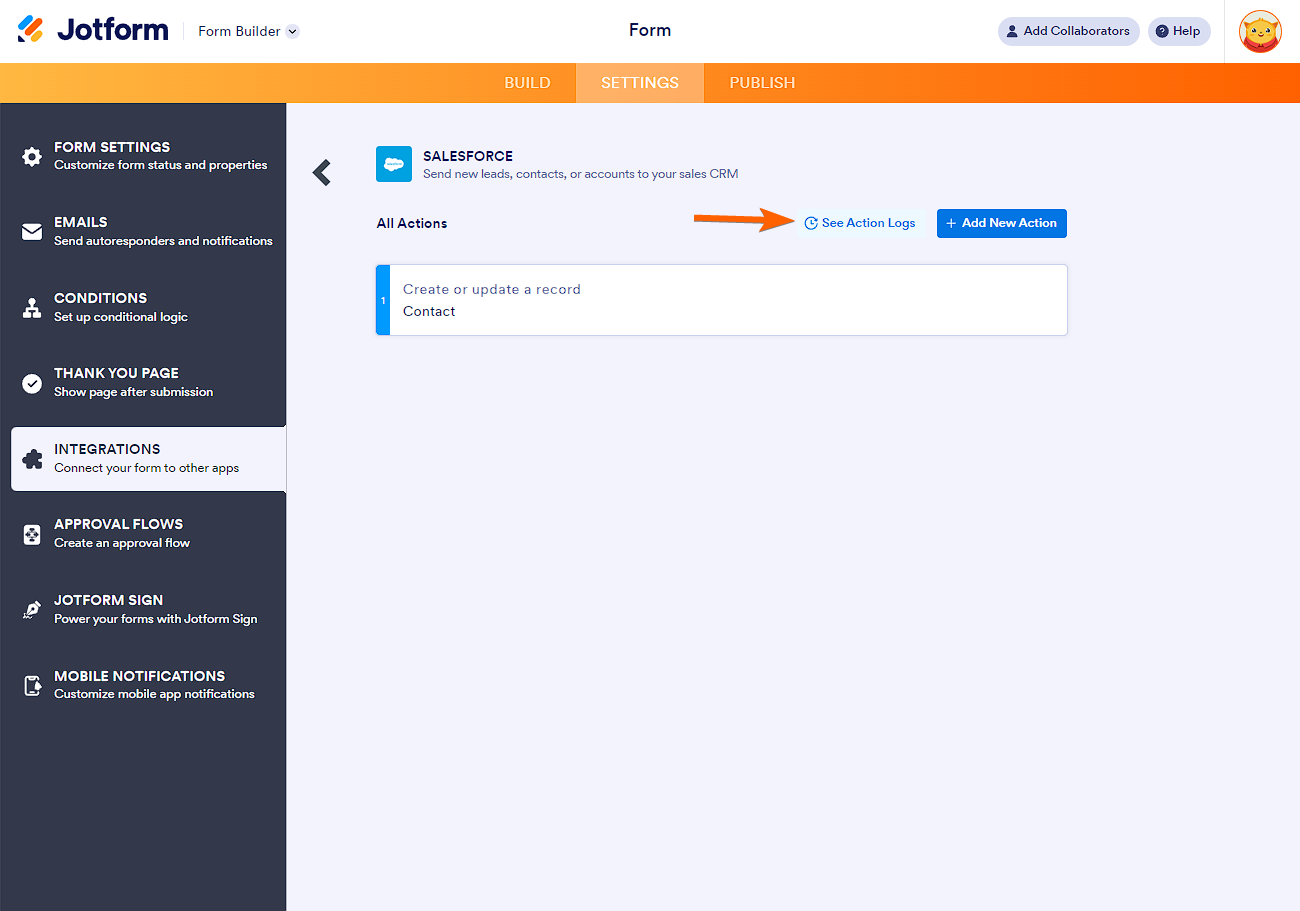
- Click the See Action Logs button to view your Salesforce integration log details.
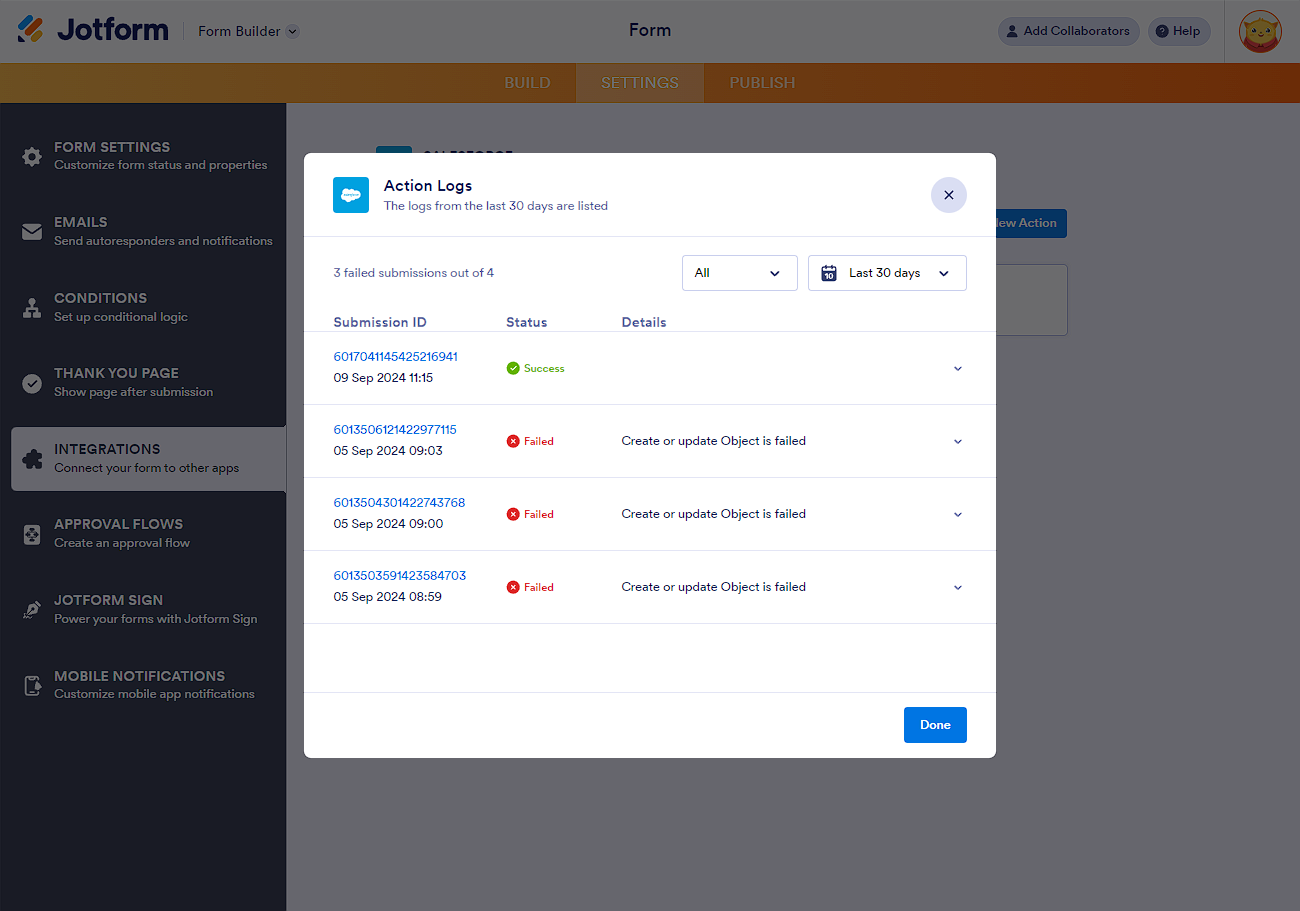
You’re now viewing the Salesforce Log Details. On this window, you’ll see the action log dropdown filters. One is to filter the Success and Errors, and the other is to filter the range (Today, Last 7 Days, Last 15 Days, and Last 30 Days).
Now, to view the details, simply click the small arrow on the right side of the error to view the log details.
Note
Jotform keeps the error logs for 30 days. That’s a lot of time for you to backtrack the errors. However, we still recommend monitoring your integration to see if it’s still sending realtime data.
Error Notifications
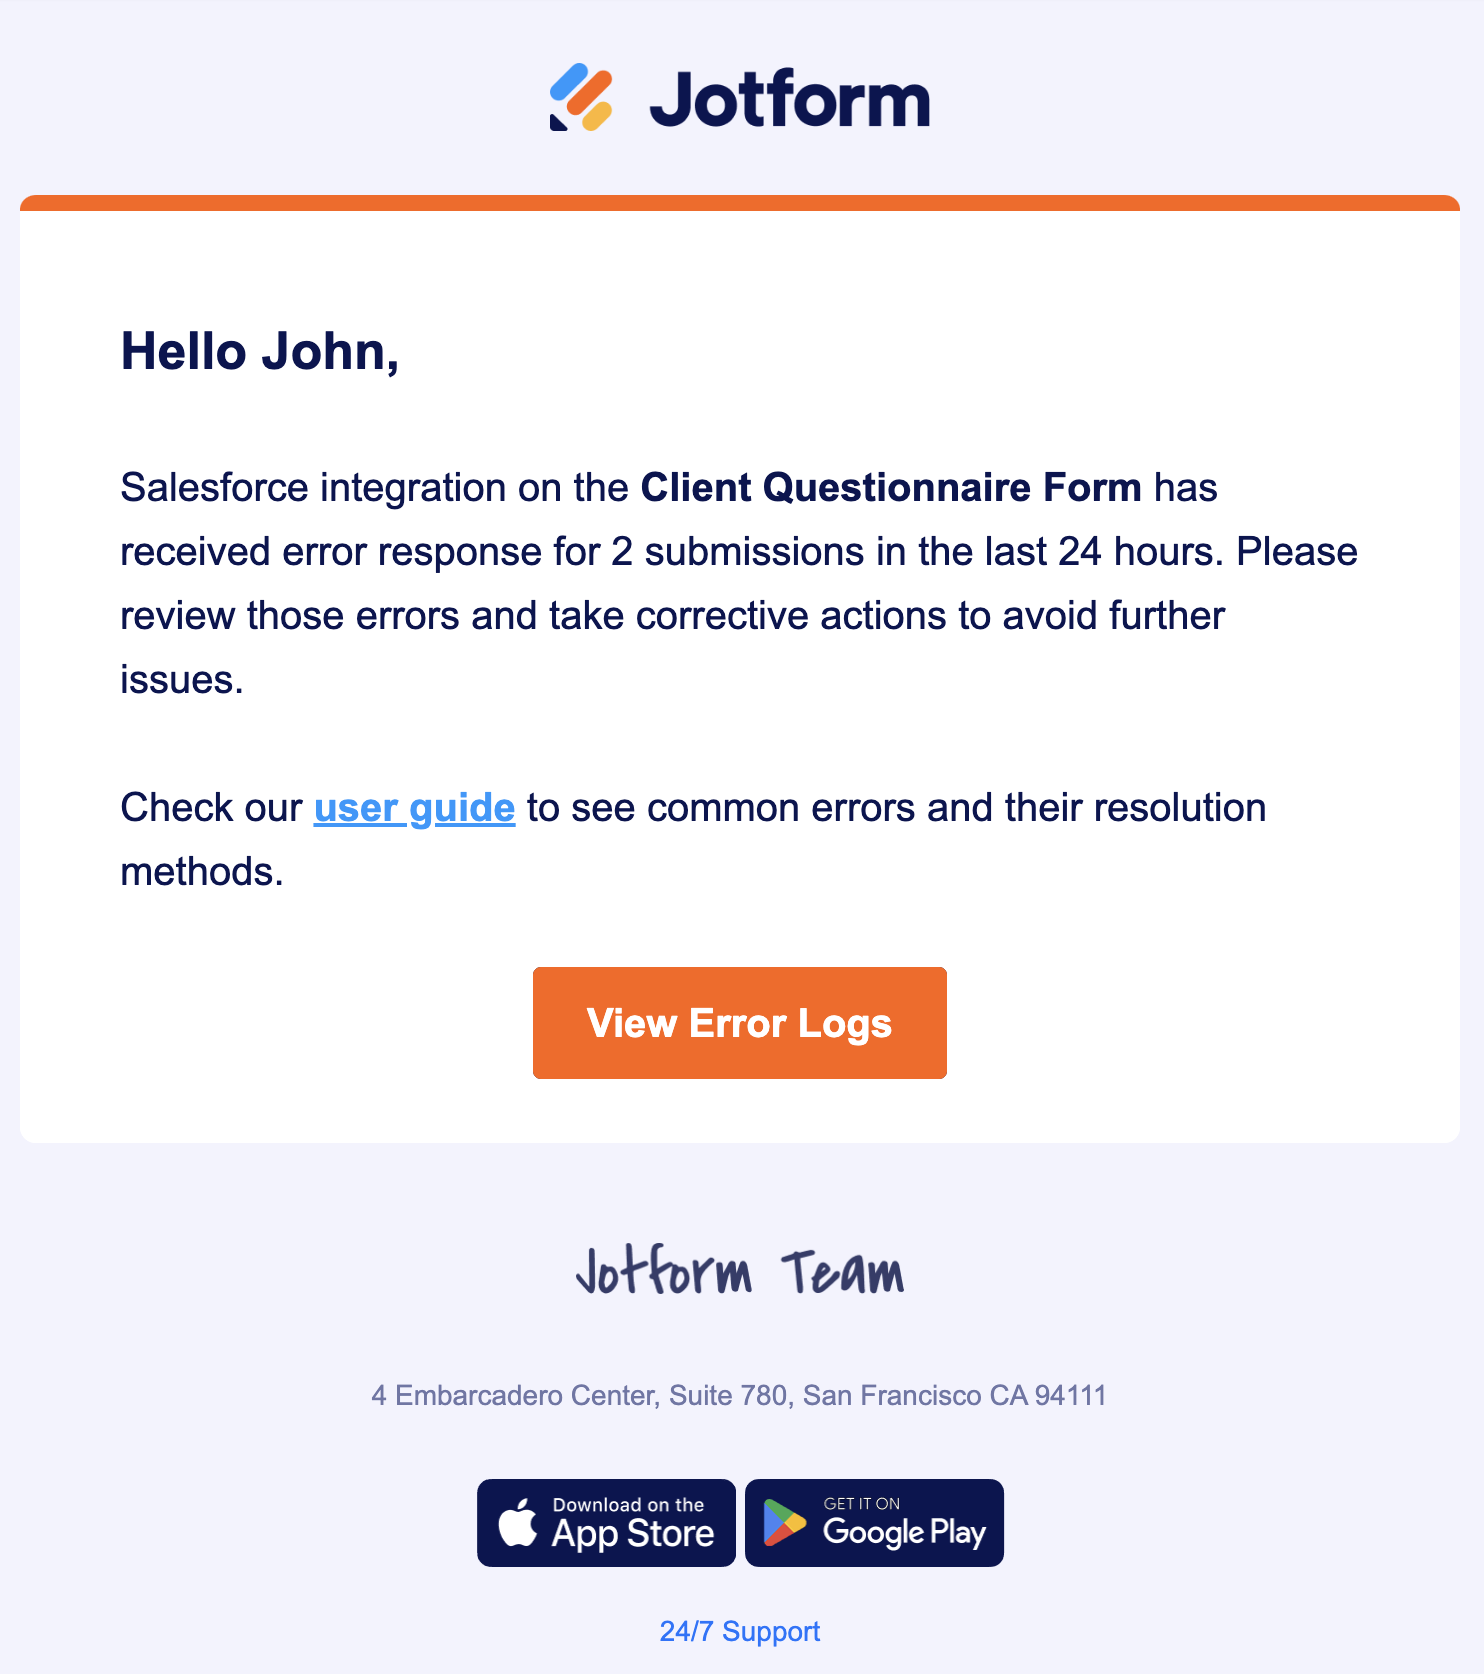
To prevent potential disruptions to the data flow, Jotform also sends an email when a problem occurs with your Salesforce integration. This process runs automatically and sends you an email notification if it detects a failed action in the last 24-hour logs.
Here is what the error summary email will look like:
Common Errors and Resolutions
To overcome the errors, general solutions are to correct the Jotform Form Field’s options, make form fields required, or add permissions on Salesforce. Below are the most common errors you’ll find and the corresponding solutions:
| Error | Solution |
|---|---|
| Bad value for restricted picklist field | #1: Match the form field options to Picklist API names. #2: Allow the picklist to accept values that are not defined in the picklist value set. |
| Duplicate records detected | #1: Adding an updated record matching the rule. #2: Disabling the duplicate rule. |
| Missing required field | #1: Make the field required. |
| Data value too large | #1: Set a character limit. #2: Change your custom field type in Salesforce. |
Bad Value for Restricted Picklist Field
Error code: INVALID_OR_NULL_FOR_RESTRICTED_PICKLISTThe mismatching options between the Jotform form field and the Salesforce picklist API Names cause this error.
The possible solutions to this case are:
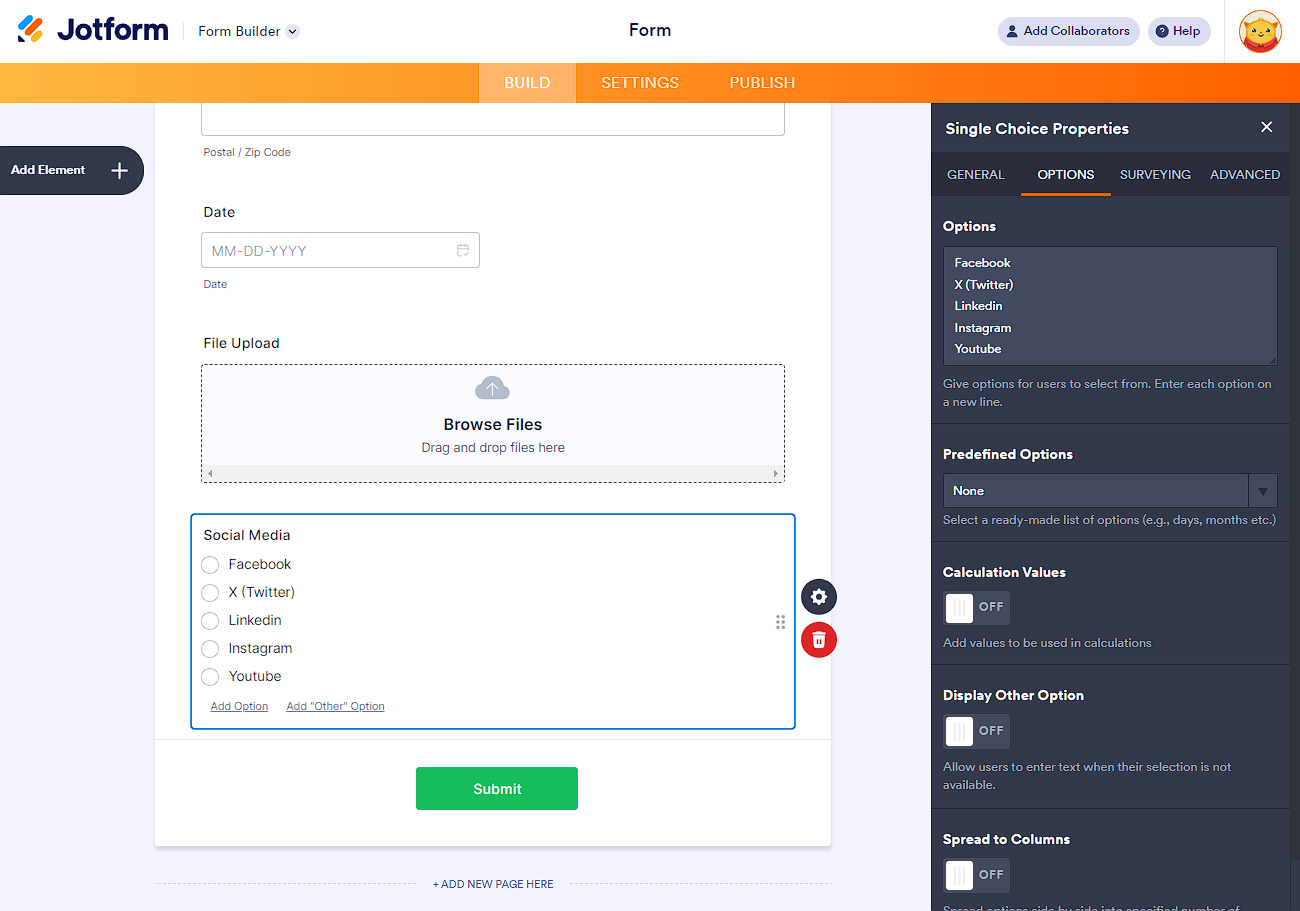
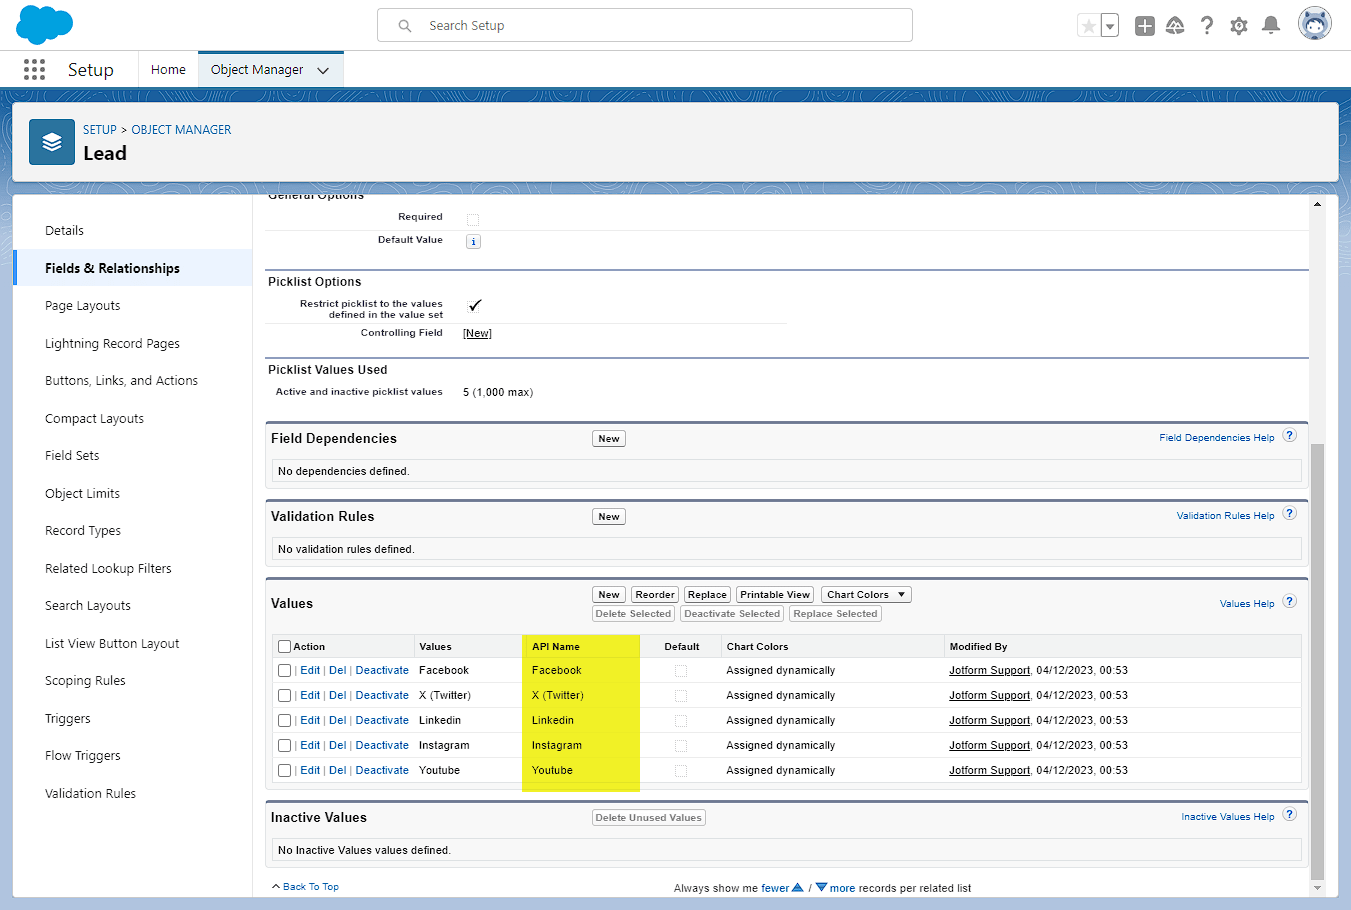
Method #1: Match the form field options to Picklist API names
Assume a Single Choice field is mapped to a Picklist. The options of the Single Choice field and the Picklist API names should perfectly match, as shown in the images below:
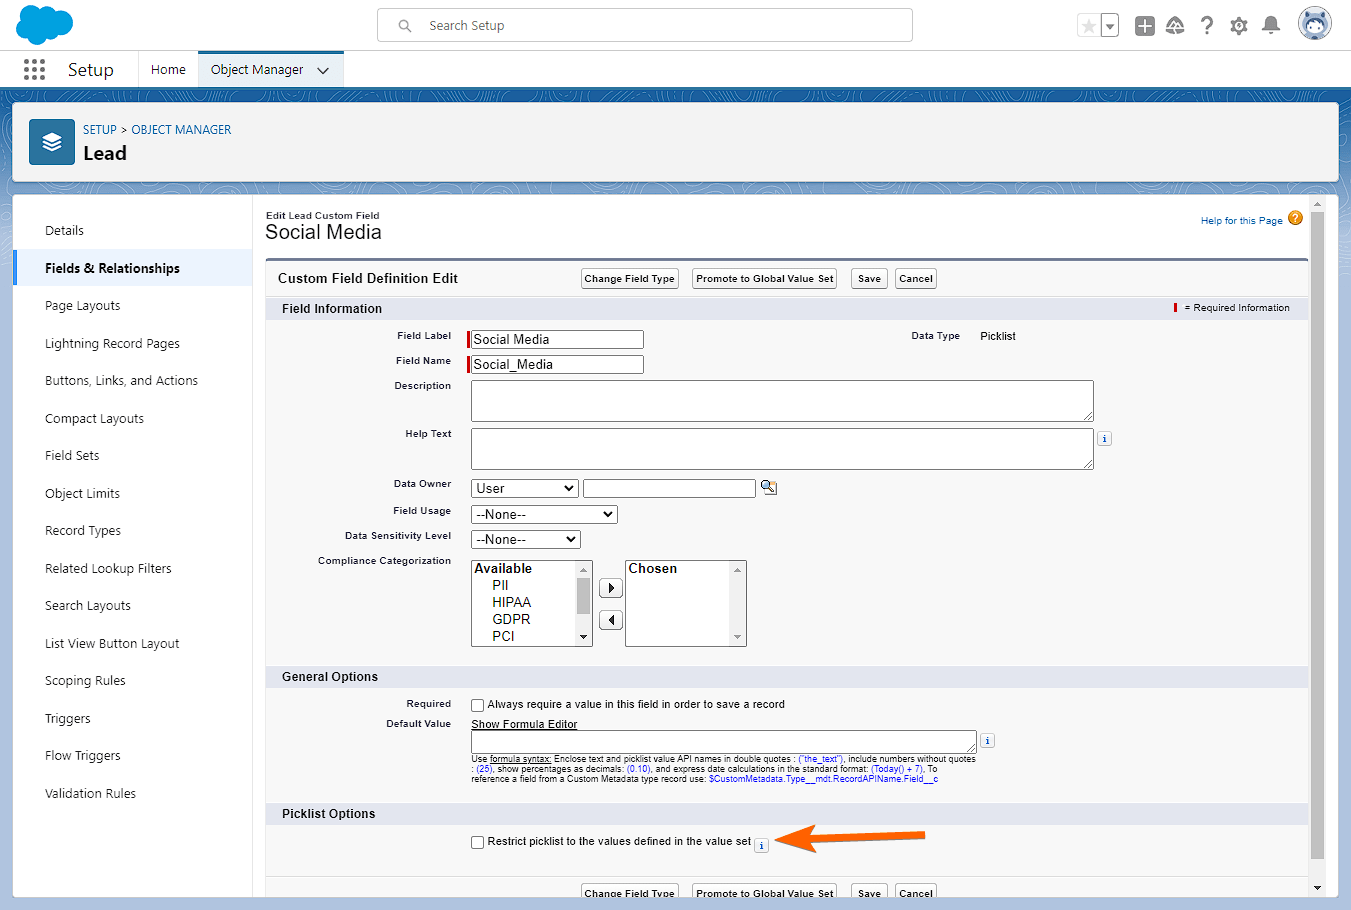
Method #2: Allow the picklist to accept values that are not defined in the picklist value set
To do this, you must edit your Picklist field in Salesforce and uncheck the “Restrict picklist to the values defined in the value set” option. See the below image for the option:
See also: Salesforce – INVALID_OR_NULL_FOR_RESTRICTED_PICKLIST.
Duplicate Records Detected
Error code: DUPLICATES_DETECTEDWhile creating a record at Salesforce from Jotform submission data, Salesforce can reject the request due to Salesforce’s duplicate rules.
The possible solutions to this case are:
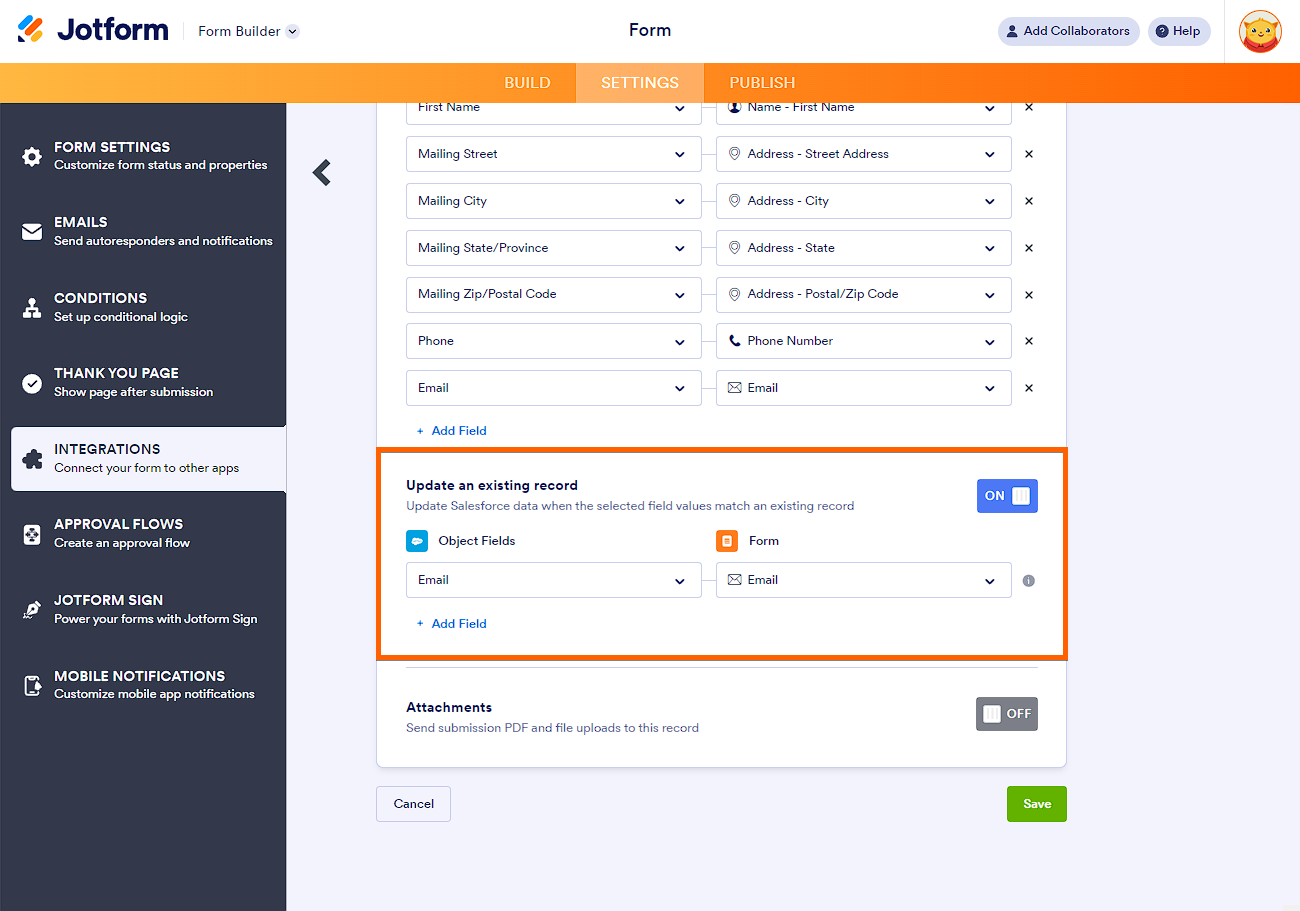
Method #1: Adding an updated record matching the rule
If you’ve chosen to Create a record when you first did the Salesforce integration, edit it and ensure that the “Update an existing record” option is enabled and a matching rule is set. You can add as many rules as you want, but matching with the Email Address field is recommended. The rule checks the records and will automatically determine the action for you – to update the record instead of throwing an error.
Method #2: Disabling the duplicate rule
Turning off the duplicate rule in the chosen object will also work, but it is not recommended if you wish to keep your data free of duplicate information from the same user. If you wish to do it this way, here are the steps:
- In your Salesforce dashboard, go to the Setup page.
- In the Quick Find box, search for Duplicate Rules.
- Click Duplicate Rules from the result. It is under the Duplicate Management section.
- Click the Standard Lead Duplicate Rule of the chosen object from the list of duplicate rules. In the below example, we have the Lead as the object.
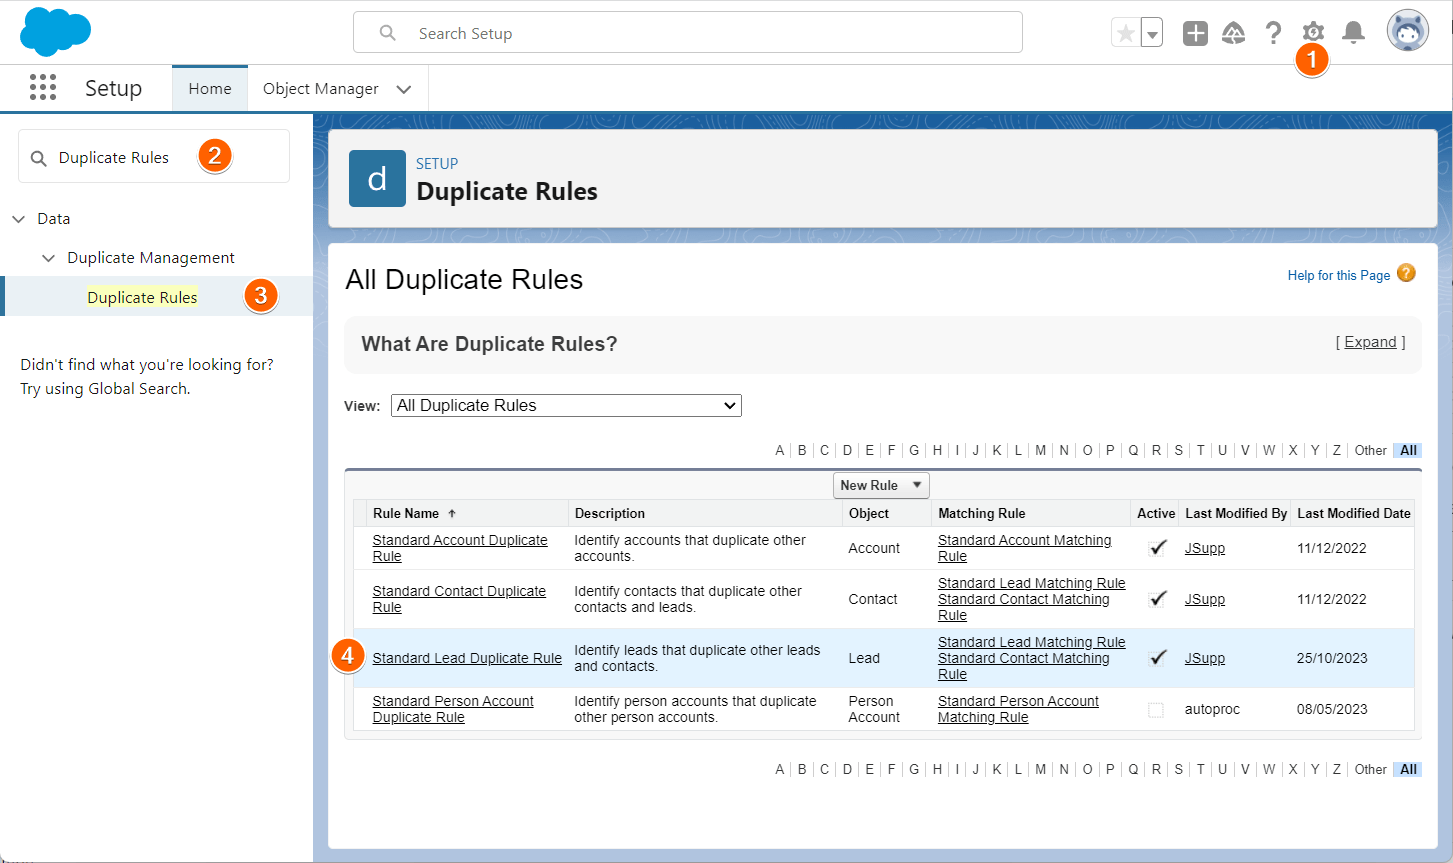
- Click the Deactivate button, and that’s it!

See also:
Missing Required Field
Error code: REQUIRED_FIELD_MISSINGYou’ll get this error when your Salesforce object has required fields mapped to an optional Jotform field, and your users skip it upon submitting their data. To fix this error, you must set the Jotform field as required.

See also: How to Set a Required Field.
Data Value Too Large
Error code: CANNOT_EXECUTE_FLOW_TRIGGERWhen you find an error code with a “STRING_TOO_LONG” message, it means that a question answer has more characters than the Salesforce record’s field limit. Below are the solutions to this error:
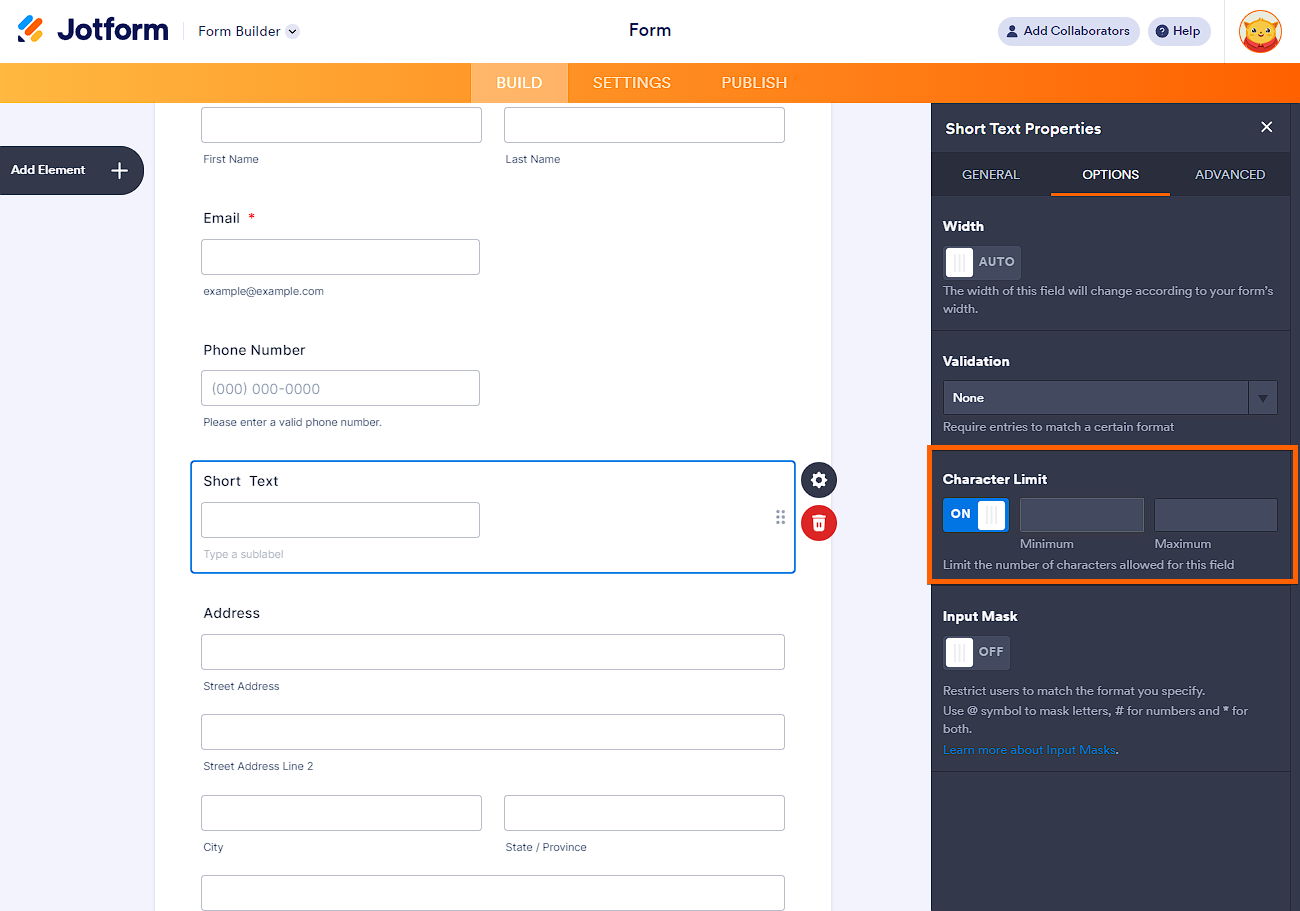
Method #1: Set a character limit to the Jotform field
The Character Limit is found in the Short Text Entry field. It’s called the Entry Limit on the Long Text Entry field.
See also: How to Set Entry Limits on Short and Long Text Fields.
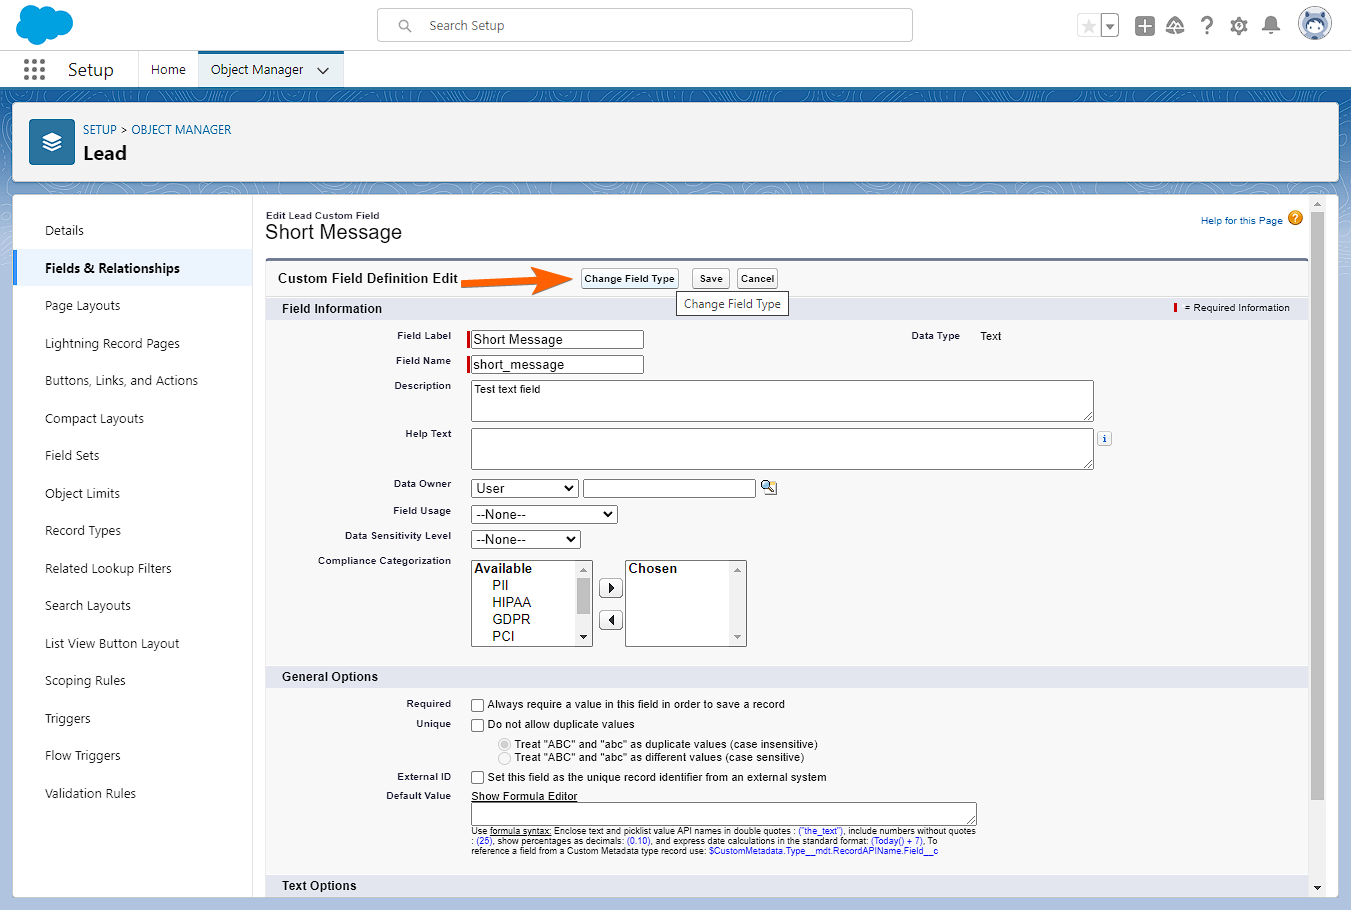
Method #2: Change the custom field type on Salesforce
You can change your custom field type according to the length of your answer to your form question. You can find the custom field type character lengths in this document.
See also: Salesforce – Change the Custom Field Type.

Send Comment: