Overview
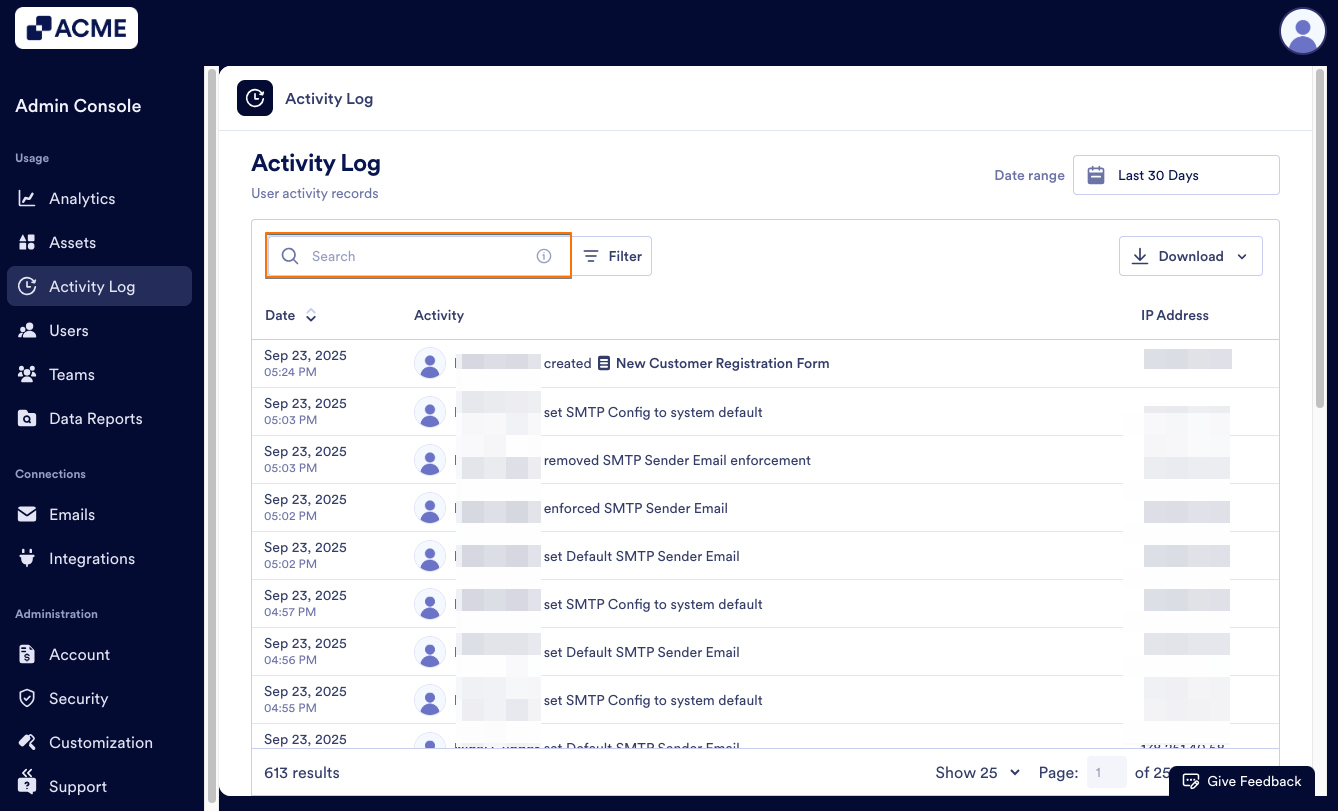
All non-email activity on your server is recorded and can be accessed in the Activity Log in the Admin Console.
Here, as an admin, you can see who logged in and when, who updated a form, or who purged a submission, along with the time, date, and IP address.
Accessing the Activity Log
By default, the Activity Log will show all actions within the last 30 days. Let’s walk through finding this together:
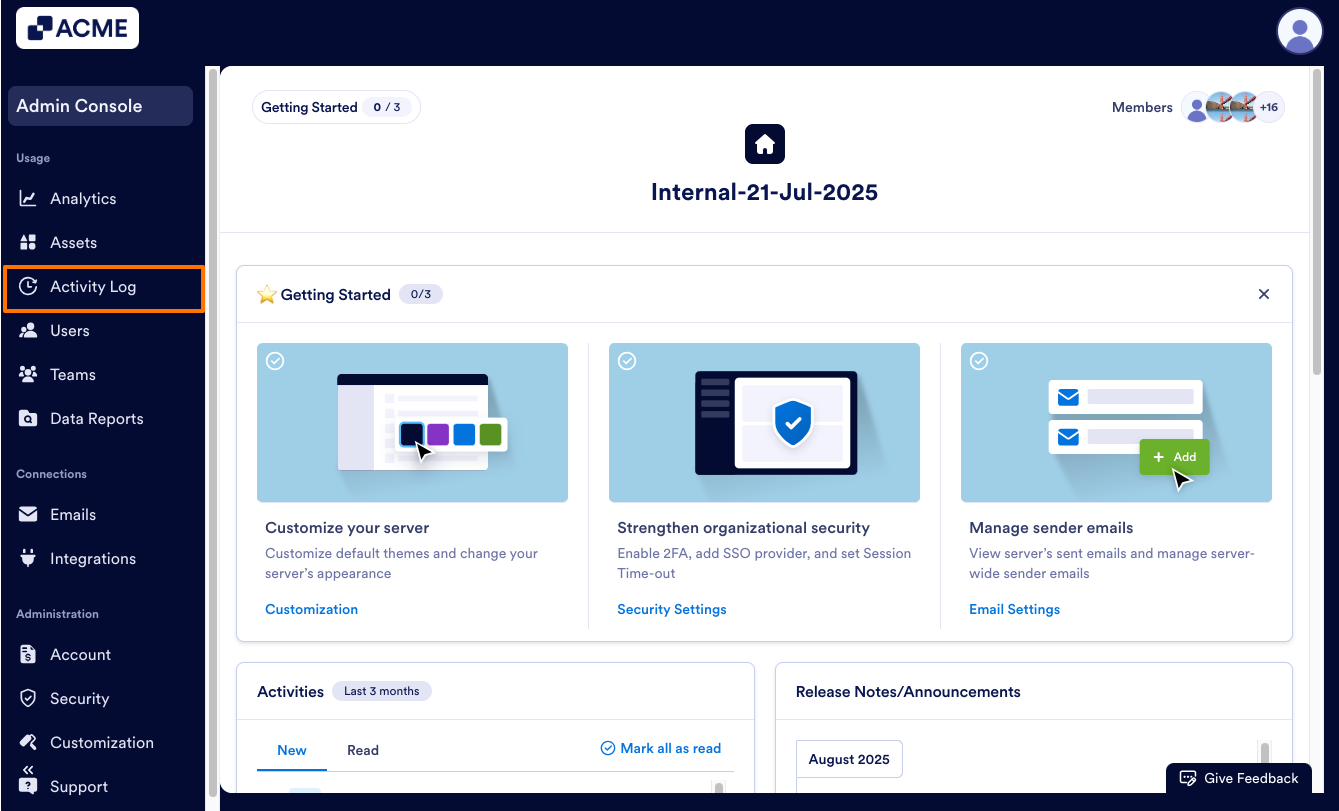
- Click on Activity Log on the left-hand side of the page.
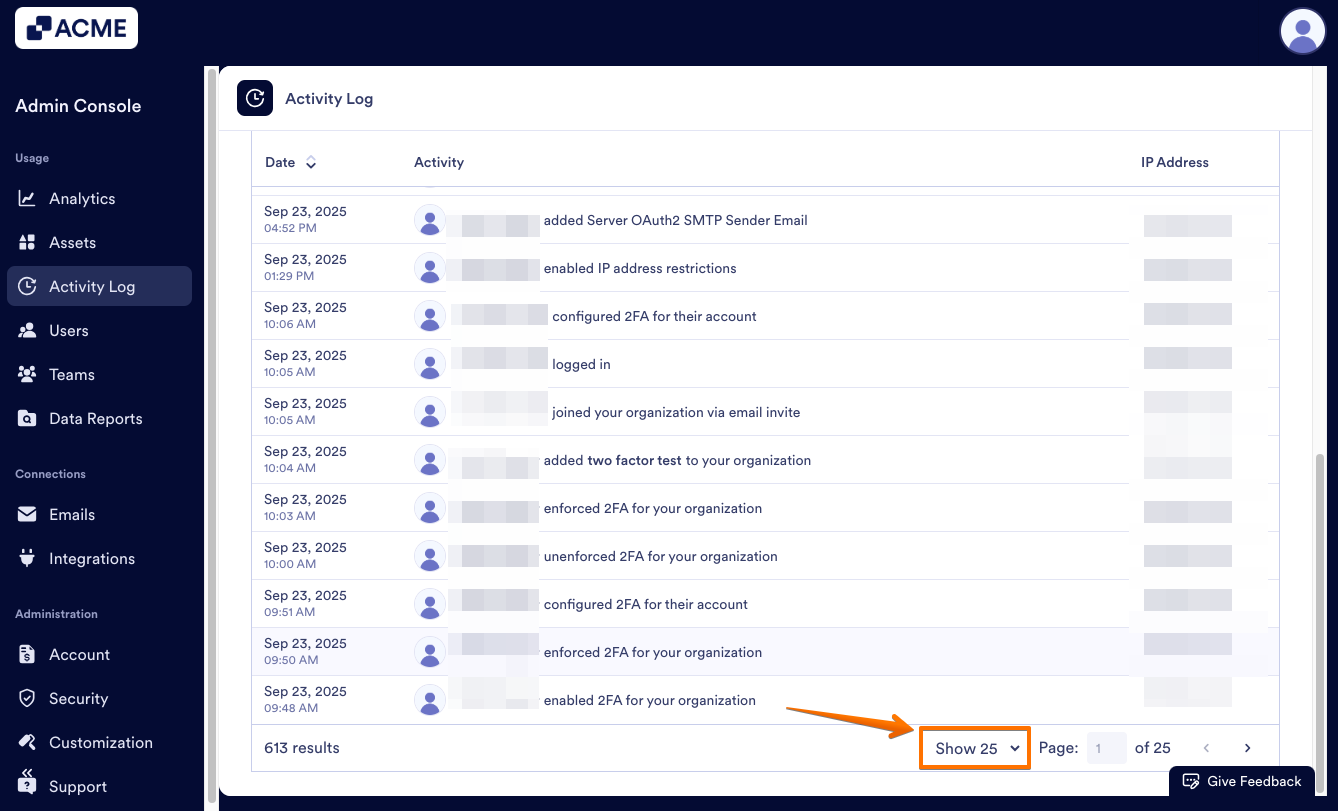
- To view additional logs, scroll to the bottom of the page and click on the Next arrow.
- To change the number of entries per page, click on the dropdown menu next to Show _ and select which option you’d like.
Finding Specific Activity Logs
If you need to find specific activity logs, you can search or filter the logs. As a reminder, the only activities that will show up are those that took place during the date in the Date Range. If you’re missing activities, make sure to update the Date Range as needed.
Updating the Date Range
Let’s walk through updating the Date Range together:
- In Activity Log, click on Date Range in the upper right-hand corner of the page.
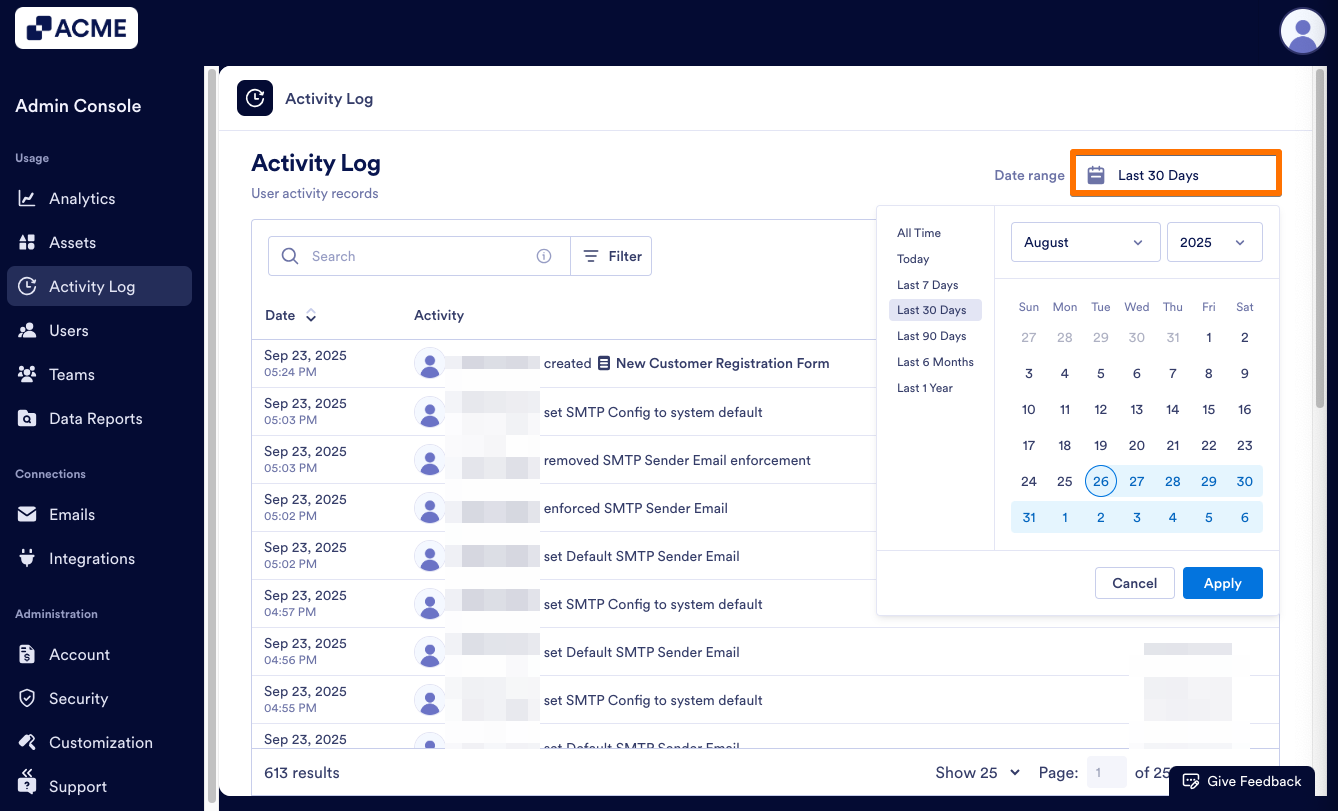
- Then, select either a quick option from the left or the range of dates you’d like to search for.
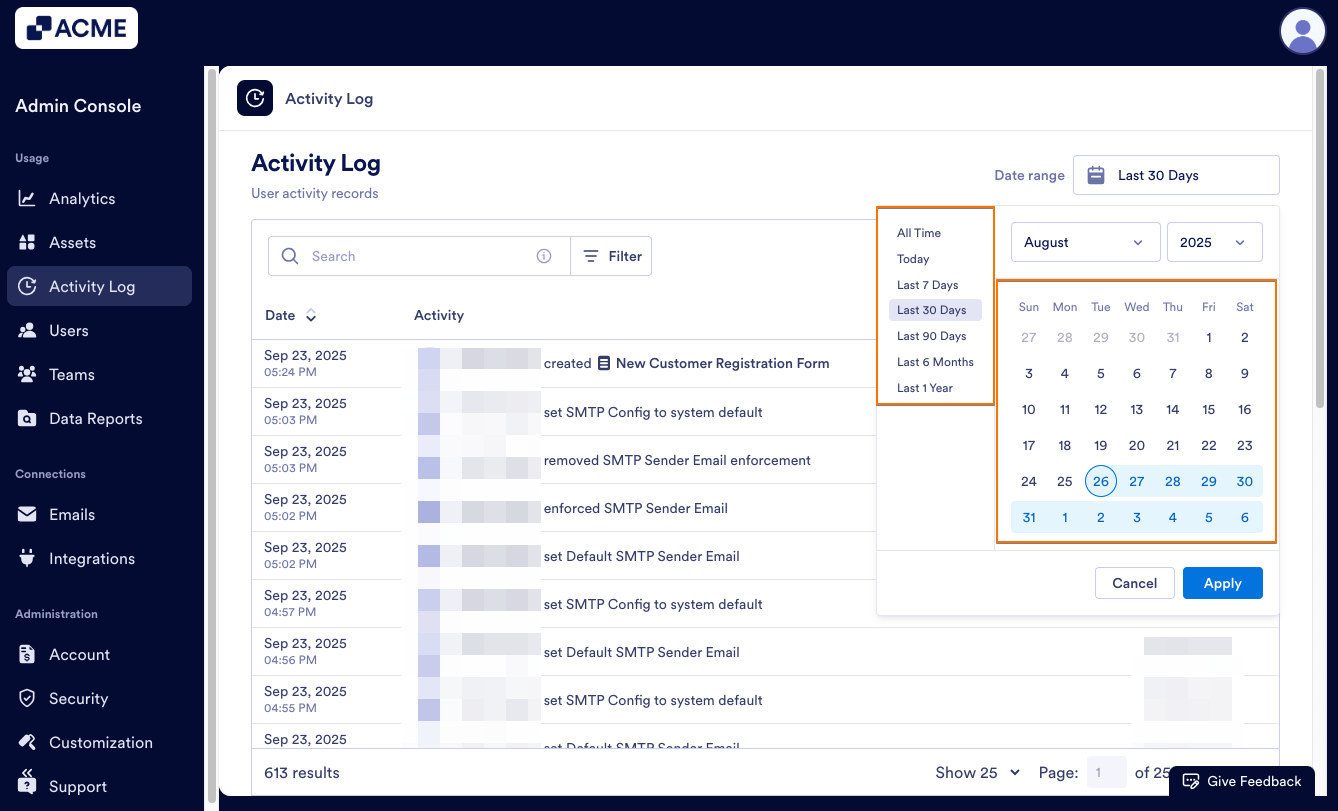
- Finally, click Apply.

Now, all activities matching the date range, and any filter or search keywords applied, will show up on the log.
Searching for Specific Activity Logs
You can also search the Activity Logs based on keywords, like IP Address, Asset ID, User Name, or Asset Name and the date range currently applied to the Activity Logs. Let’s walk through this together:
- In Activity Log, make sure the Date Range includes the dates for the actions you’re searching for.
- Next, click on the Search bar and enter your keyword(s).
Filtering the Activity Logs
If you’d like to view specific actions taken by a user, or all actions related to an Asset Type, you can filter the logs. Let’s walk through the process of filtering the activity logs:
- In Activity Log, review the Date Range to make sure it includes the correct date range for your search.
- Next, click on Filter next to the Search bar.
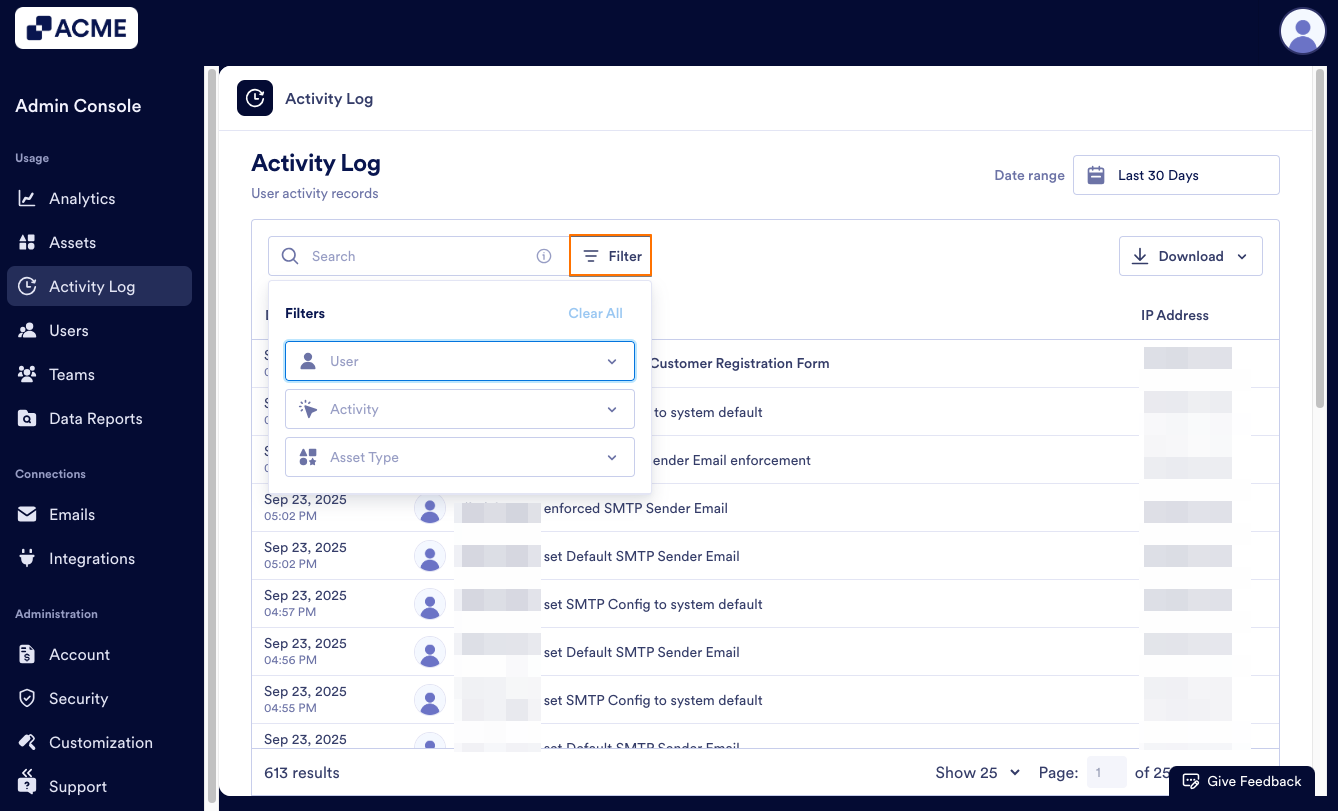
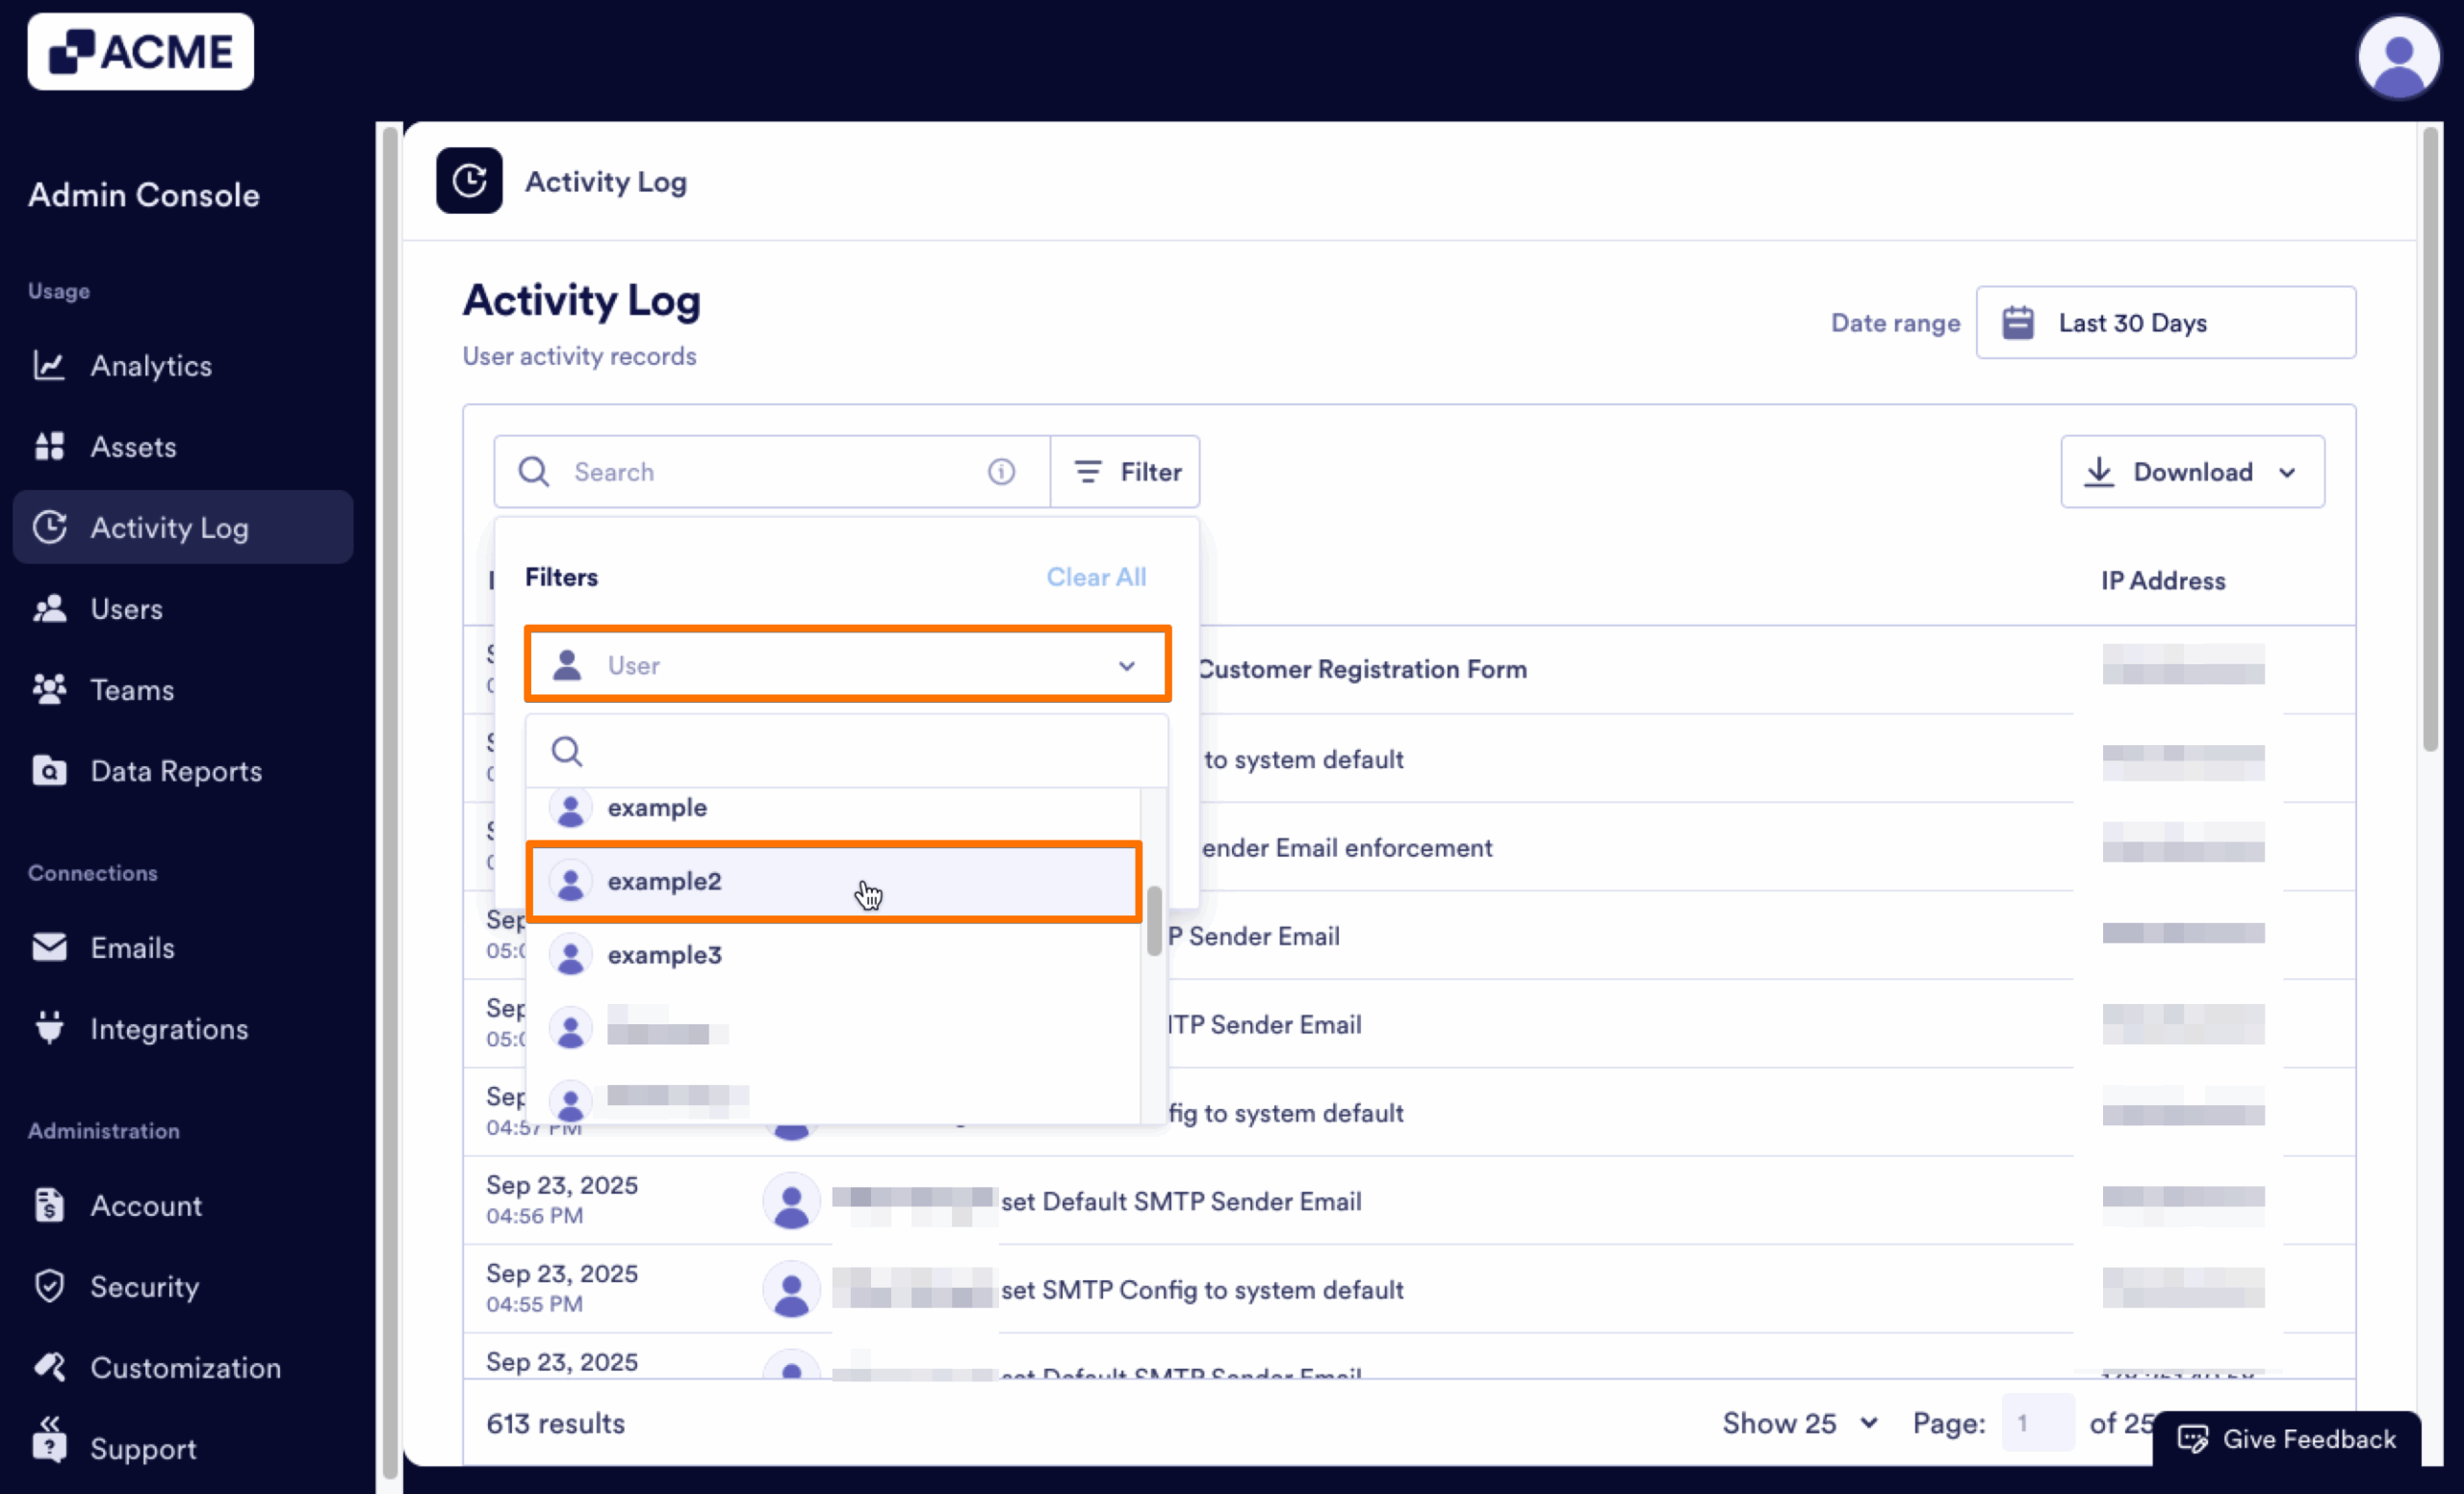
- Then, click on the drop-down menu next to the information you’d like to filter (User, Activity, Asset).
- Finally, click on the checkbox next to the activity you’d like to filter.
- Repeat steps 3 and 4 for as many filters as you’d like to apply.

- User: Select the user(s) you’d like to include in your search.
- Activity: Select the Activity type(s) you’d like to include in your search. If you’d like to search for a group of activities, such as all actions related to Server Settings, select the parent activity.
- Asset Type: Select the Asset Type(s) you’d like to include in your search, such as Forms, Tables, AI Agents, or Workflows.
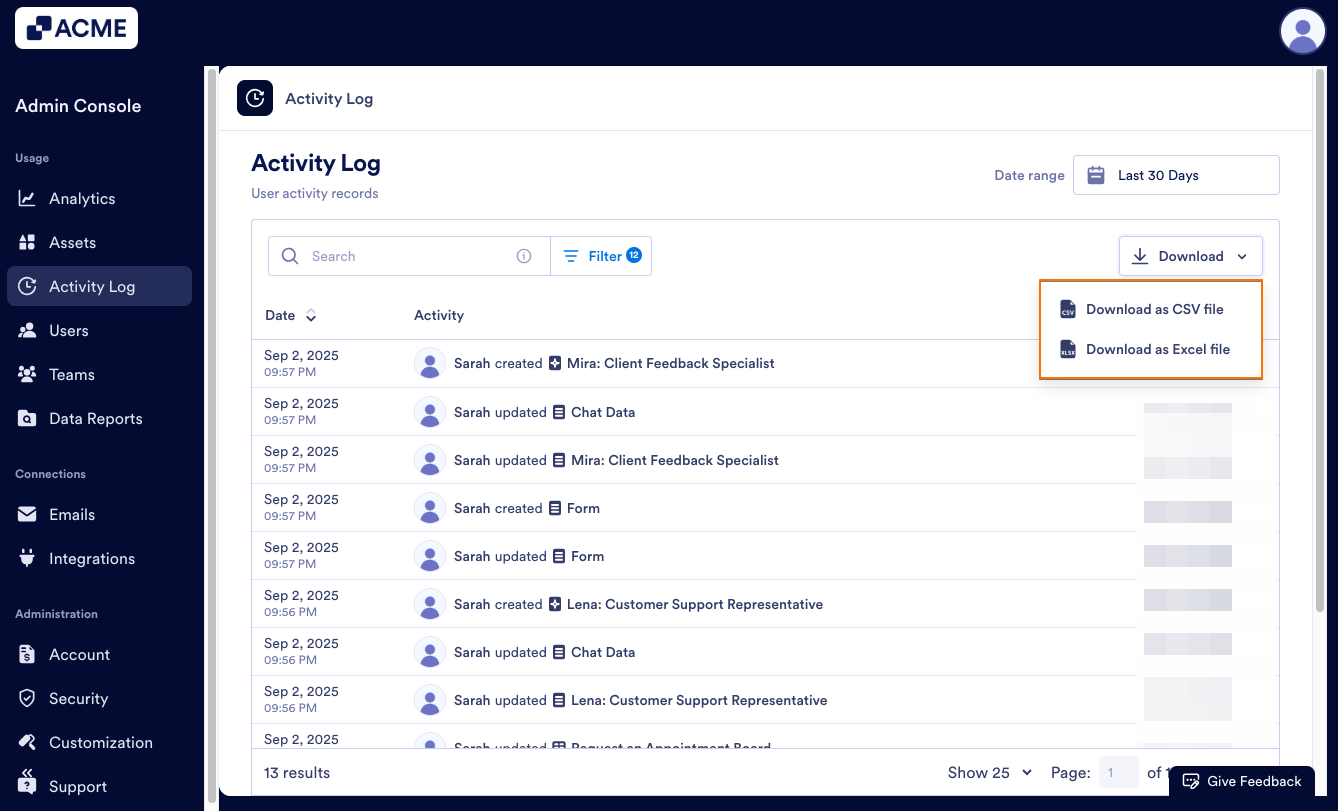
Downloading Activity Logs
You can download the logs that you’ve filtered for, searched for, or all that are live within the listed Date Range as a CSV file or an Excel File. Let’s walk through the process of downloading this together:
- In Activity Log, review the Date Range, Search, and Filters to make sure they’re displaying the data you’d like to download.
- Next, click on Download.
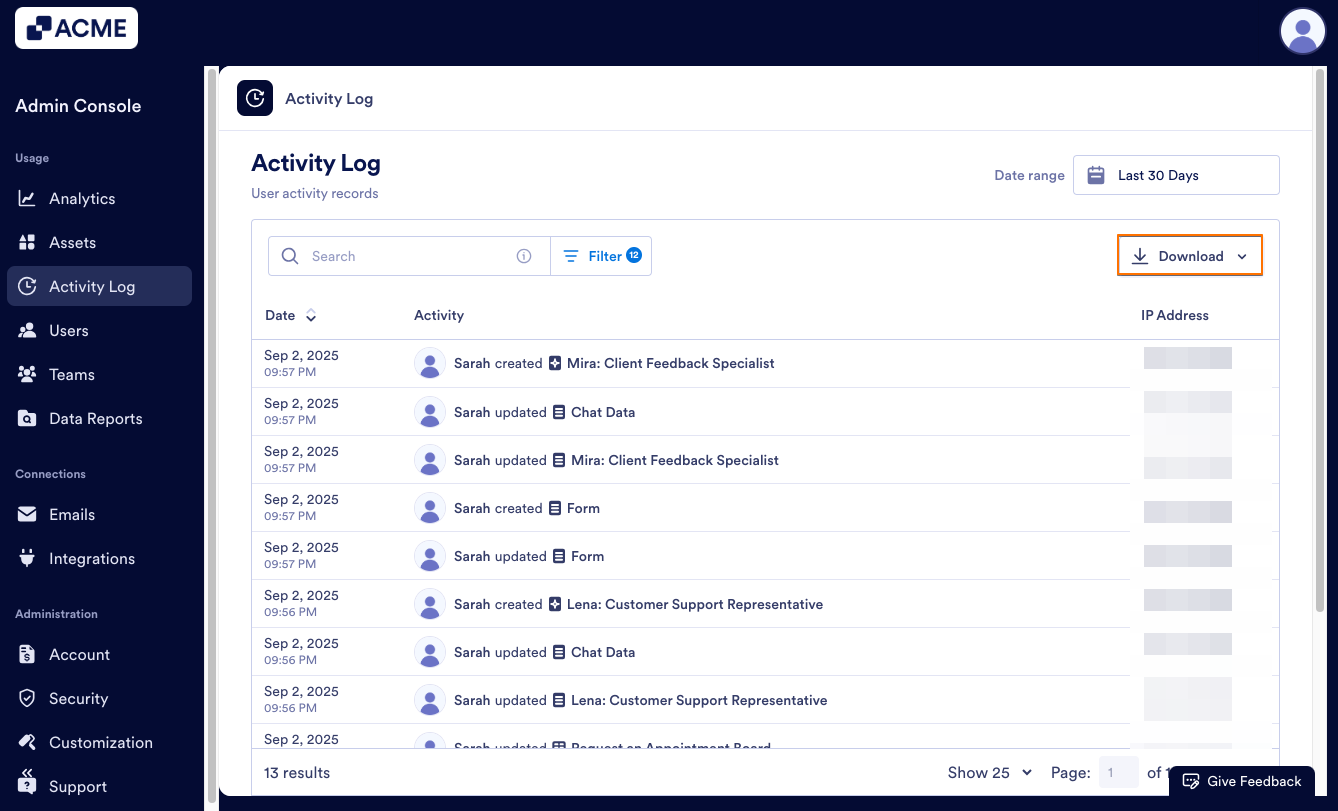
- Then, select either Download as CSV or Download as Excel.

Send Comment: