Staying in touch with your customers quickly and easily is key. The Messenger Button widget lets you chat with users instantly through Messenger—right from your form. It’s easy to set up and lets you offer real-time support without users having to leave the form. To use it, you’ll just need a connected Meta Business Suite account.
Adding the Messenger Button to Your Form
Whether you’re creating a new form or updating an existing one, you can add and set up your Messenger Button to your form in a few easy steps. Here’s how to do it:
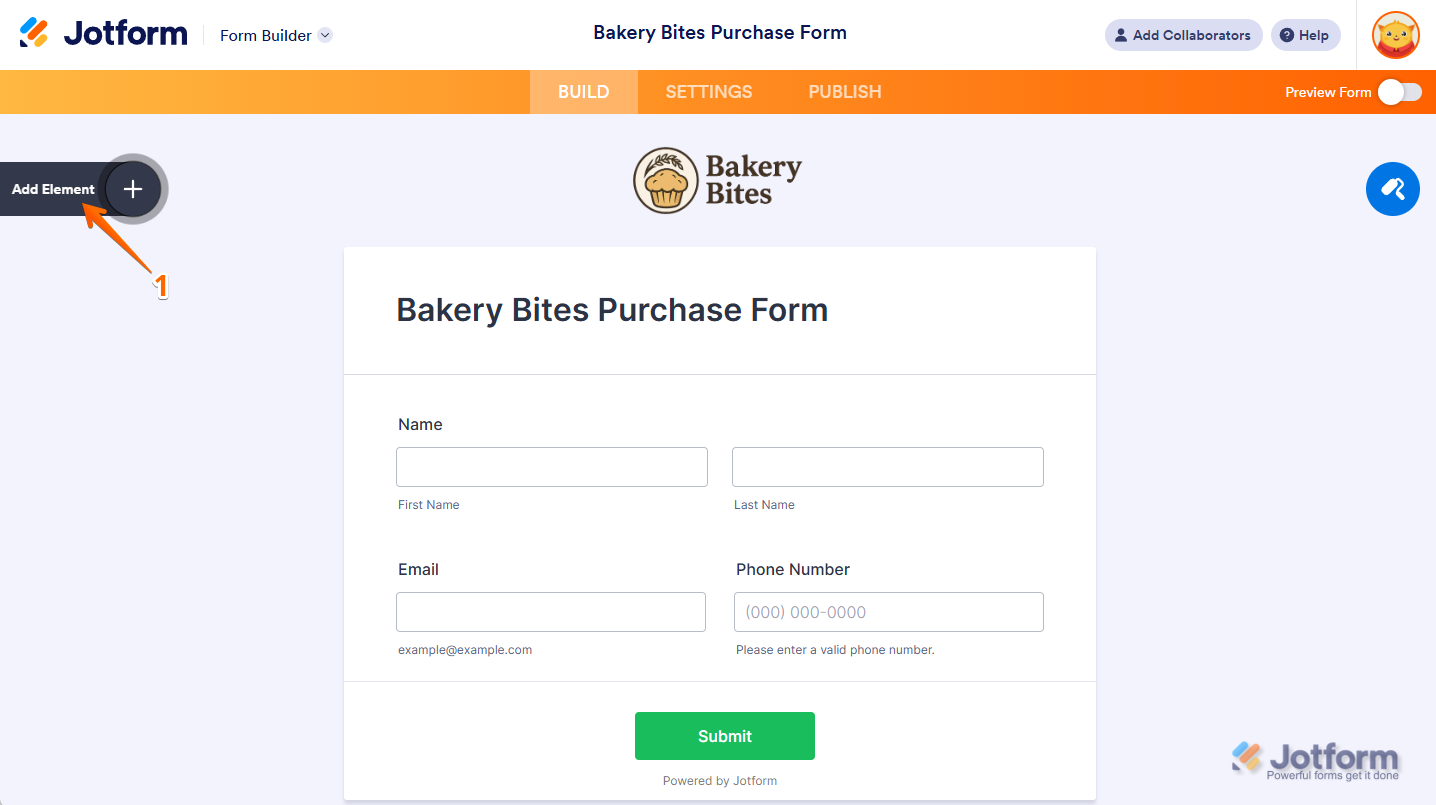
- In Form Builder, click on Add Element on the left side of the page.
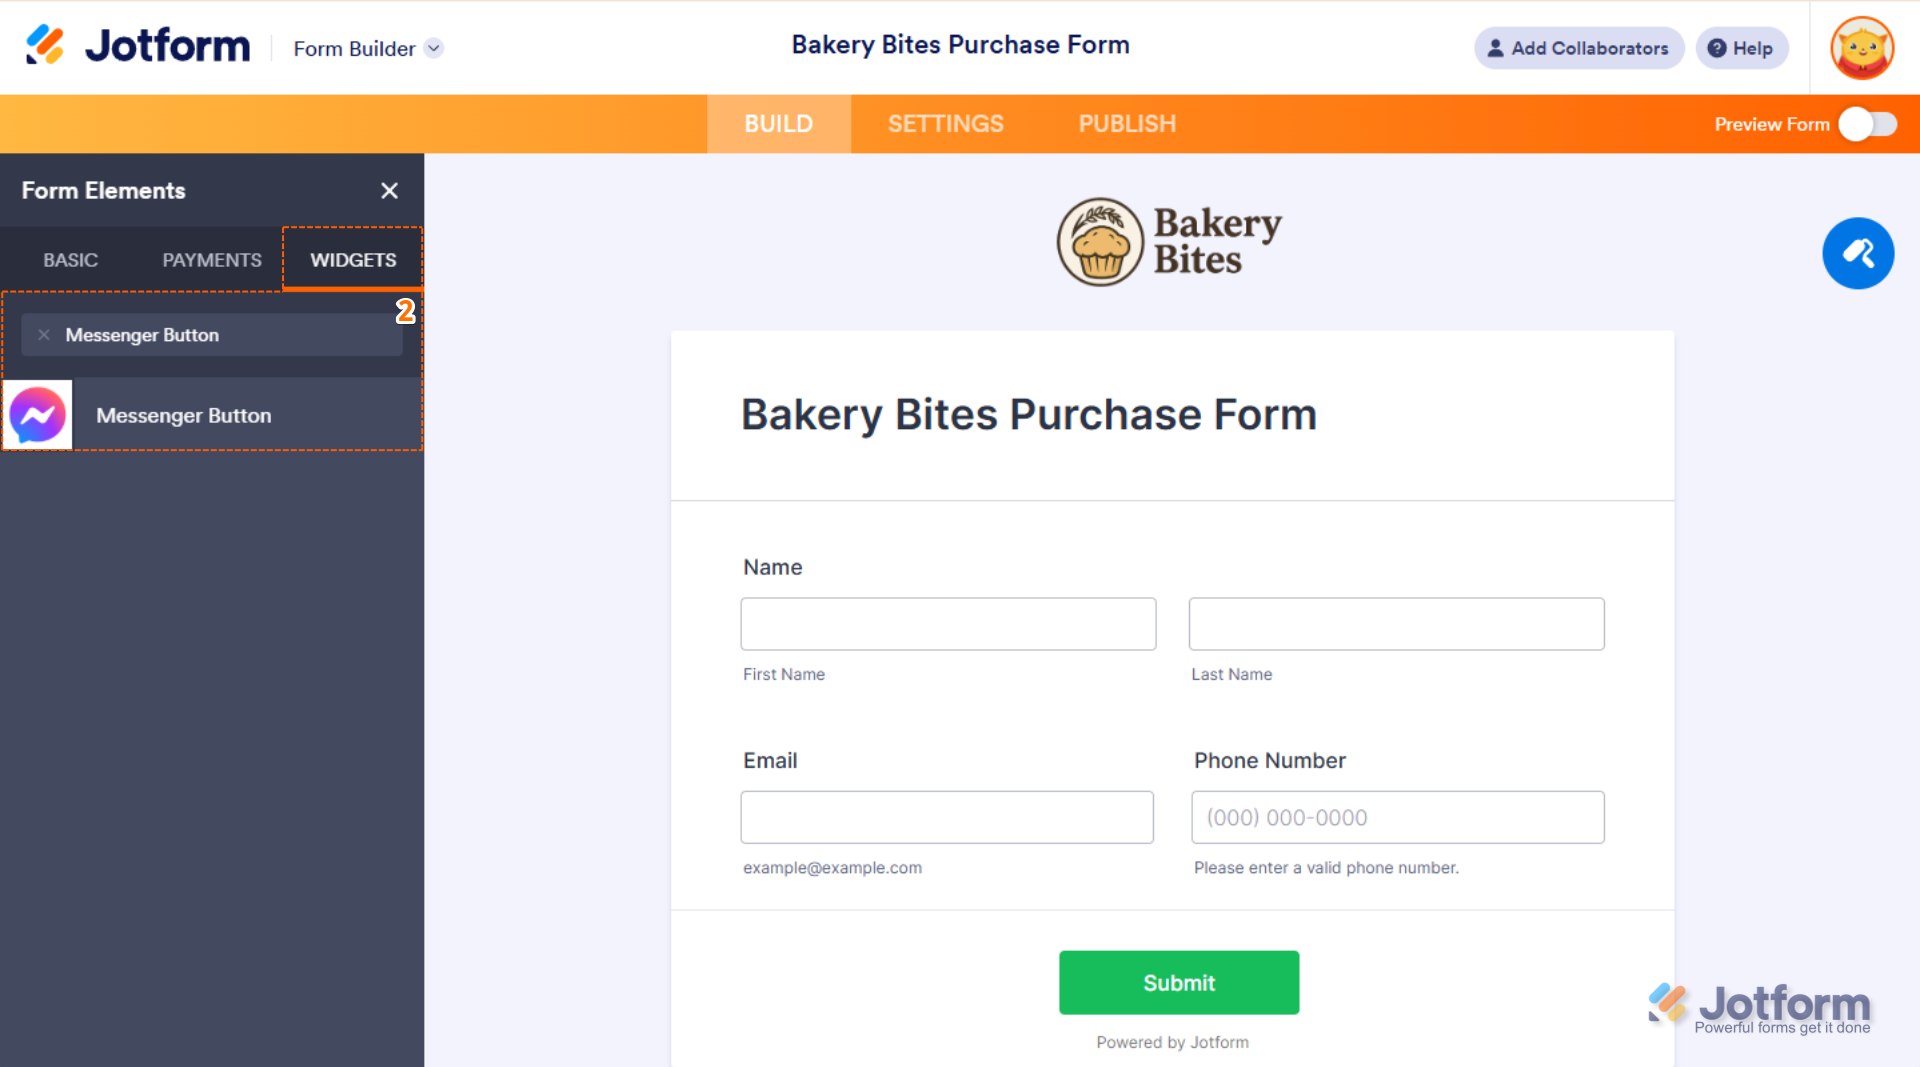
- Now, in the Form Elements menu, under the Widgets tab, search for Messenger Button and click on it to add it to your form.
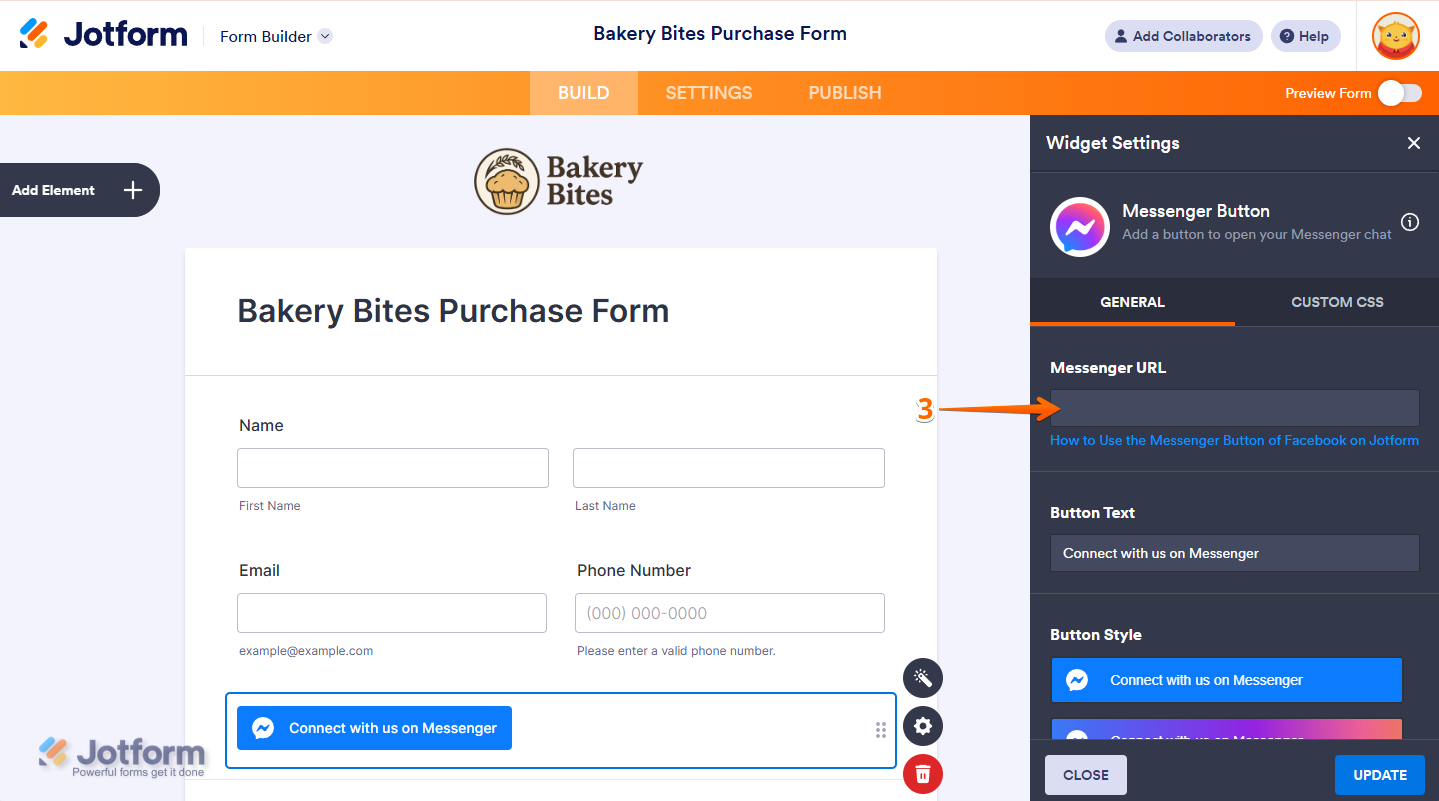
- Next, in the Widget Settings menu that opens on the right side of the page, paste your Messenger URL in the Messenger URL field. Check our guide about Getting the Messenger URL from Meta Business Suite to learn more.
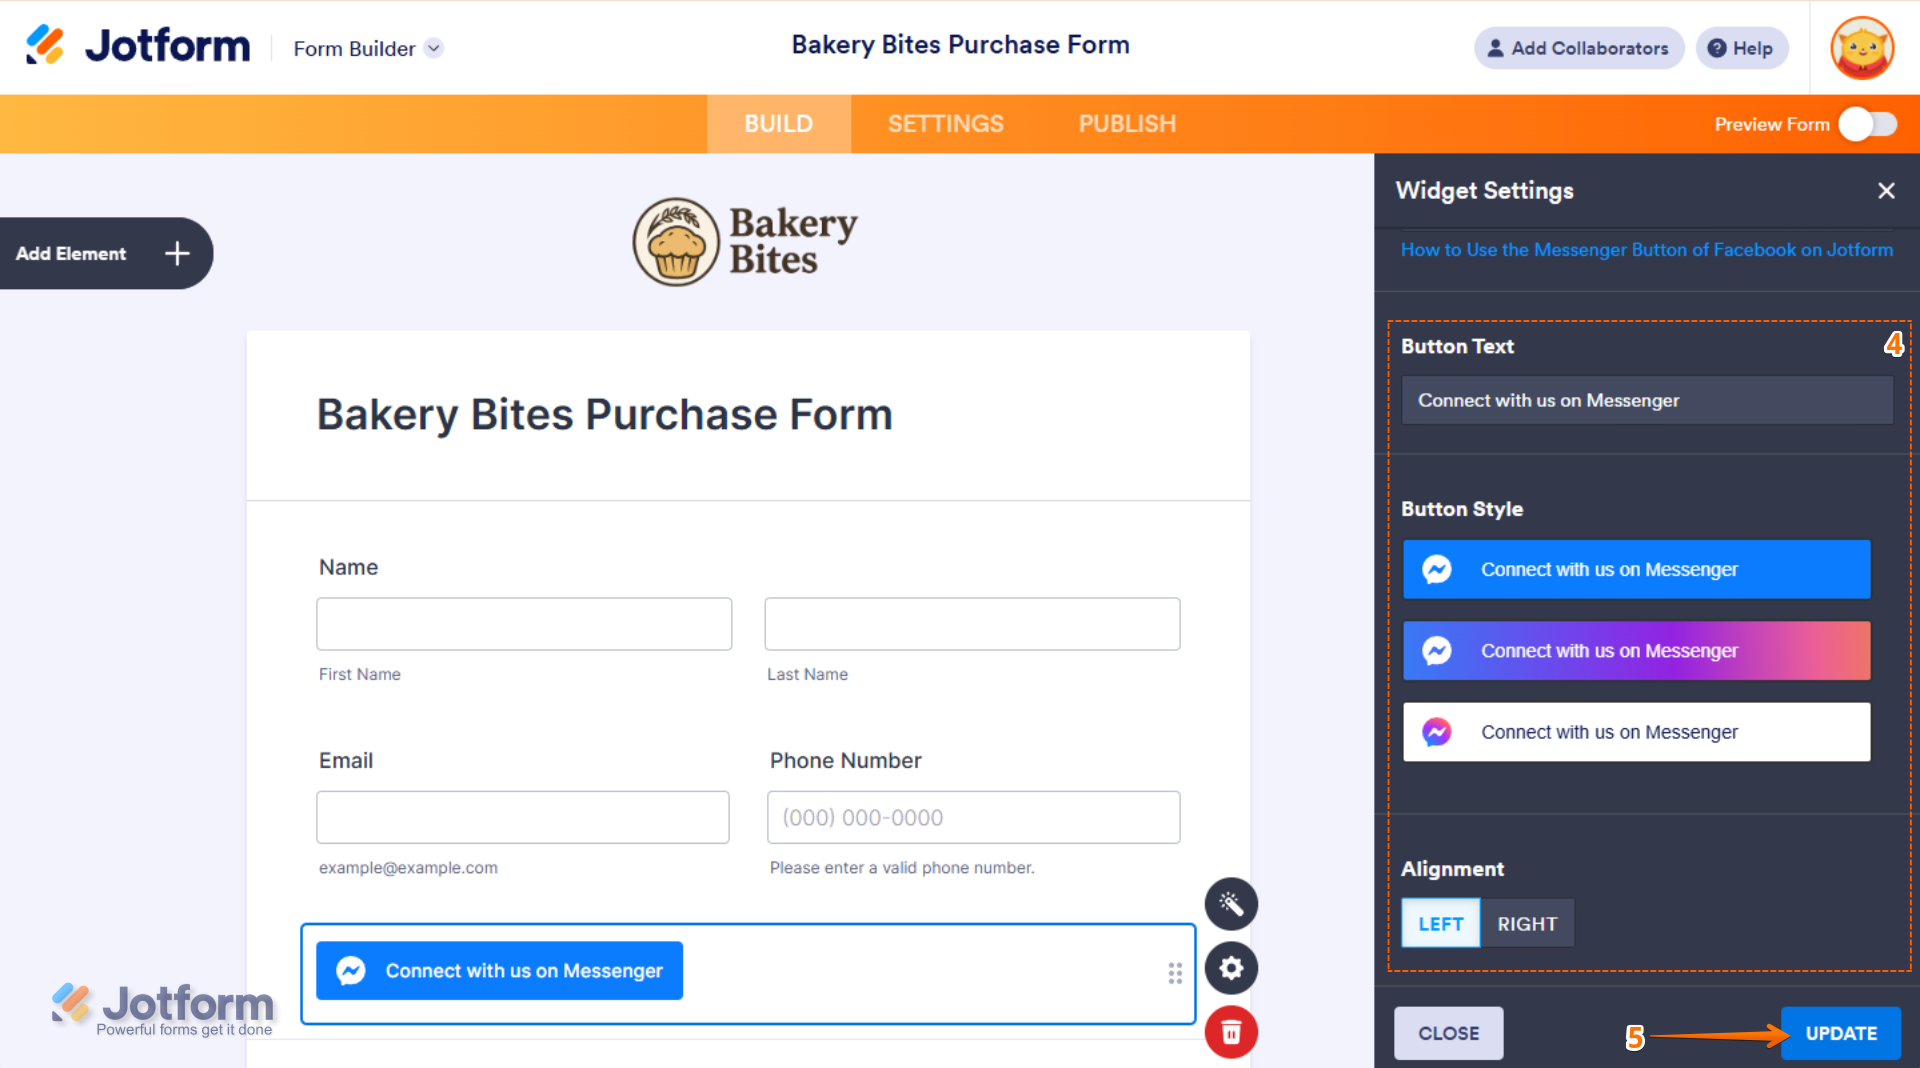
- Now, you can further customize your widget with the following options:
- Button Text — Choose the text you want on your button.
- Button Style — Choose what you want the button to look like.
- Alignment — Position the button on the left or right side of the form.
- Finally, click on Update and you’re all set.
You can check out this demo form to see it in action.
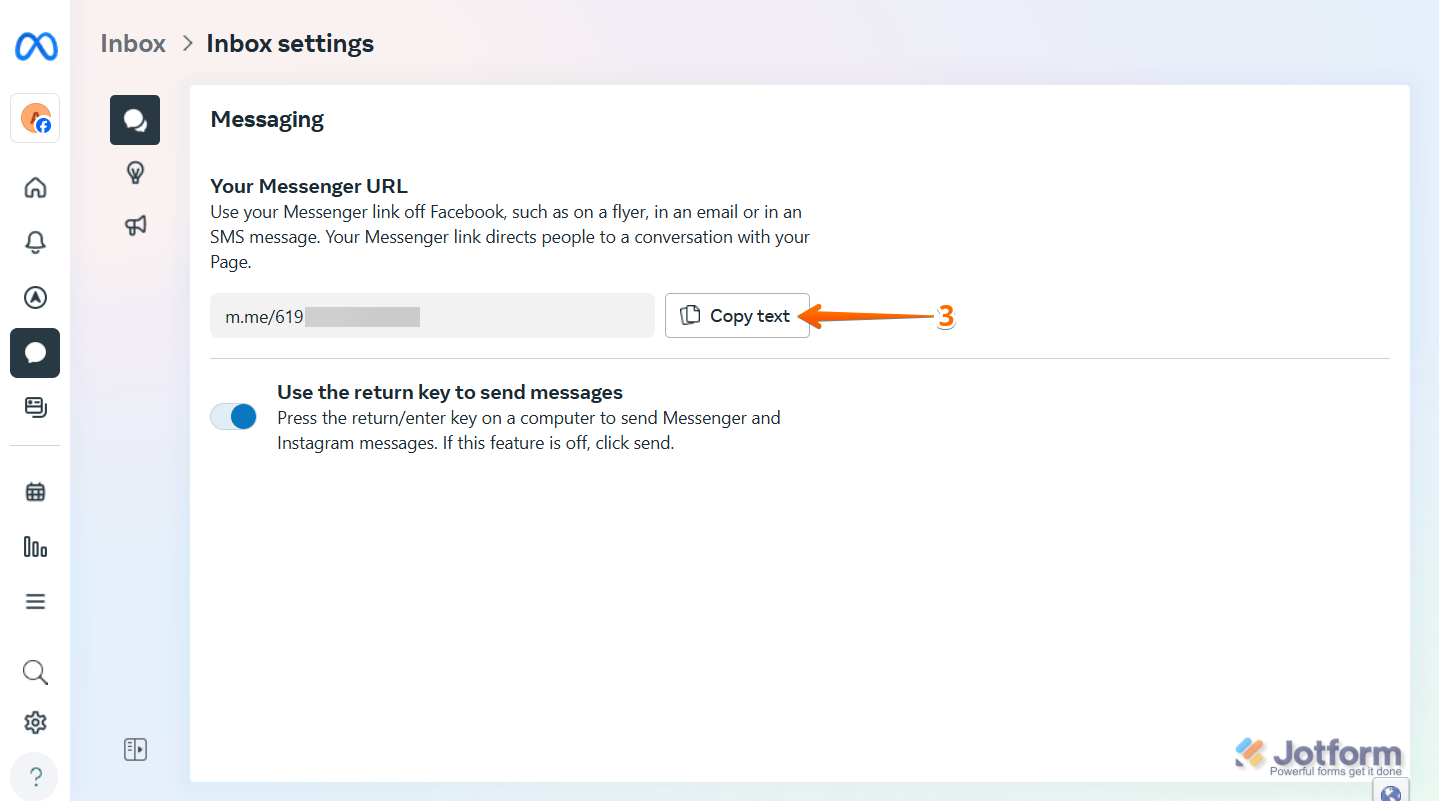
Getting the Messenger URL from Meta Business Suite
You can get your Messenger URL from your Meta Business Suite. Here’s how to do it:
- Go to the Meta Business Suite page, and in the menu on the left of the page, click on the Inbox icon.
- Then, click on the Gear icon in the menu at the top of the page.
- Now, click on Copy Text and you’re all set.

Send Comment: