Jotform makes managing your payment gateways easier than ever, so you can spend less time on setup and more time getting things done. With Jotform’s new Reusable Payment Connections, you no longer have to reconnect your payment accounts every time you build a new form, app, or AI tool. Whether you’re selling products, collecting donations, or offering subscriptions, this feature helps you save time and simplify your setup—all while keeping things flexible and secure.
What’s New?
In the past, setting up payment gateways meant redoing the process for every new form, app, or AI tool—plus juggling extra steps just to switch between live and test modes.
With Reusable Payment Connections, those hassles are gone. Now you can:
- Create Once, Use Anywhere — Set up your payment gateway once and reuse it across multiple forms, apps, and AI tools.
- Seamlessly Switch — Jump between gateways or accounts without re-entering credentials.
- Simplify Test-to-Live Transitions — Move from test mode to live mode in just a few clicks—no disconnects, no rework.
Getting to Your Reusable Payment Connections
If you’ve already integrated your form with a payment gateway, reusing it is a breeze. Just follow these simple steps:
- In Form Builder, click on Add Element on the left side of the page.

- In the Form Elements menu, under the Payments tab, search for the payment gateway you’d like to use, like Stripe, for example. Once you find it, simply click on it, or drag and drop it to where you want it on your form.

- Then, in the Payment Properties menu on the right side of the page, click on the Plug icon.
- Now, in the Payment Connections window that pops up, select a connection and then click on Use.
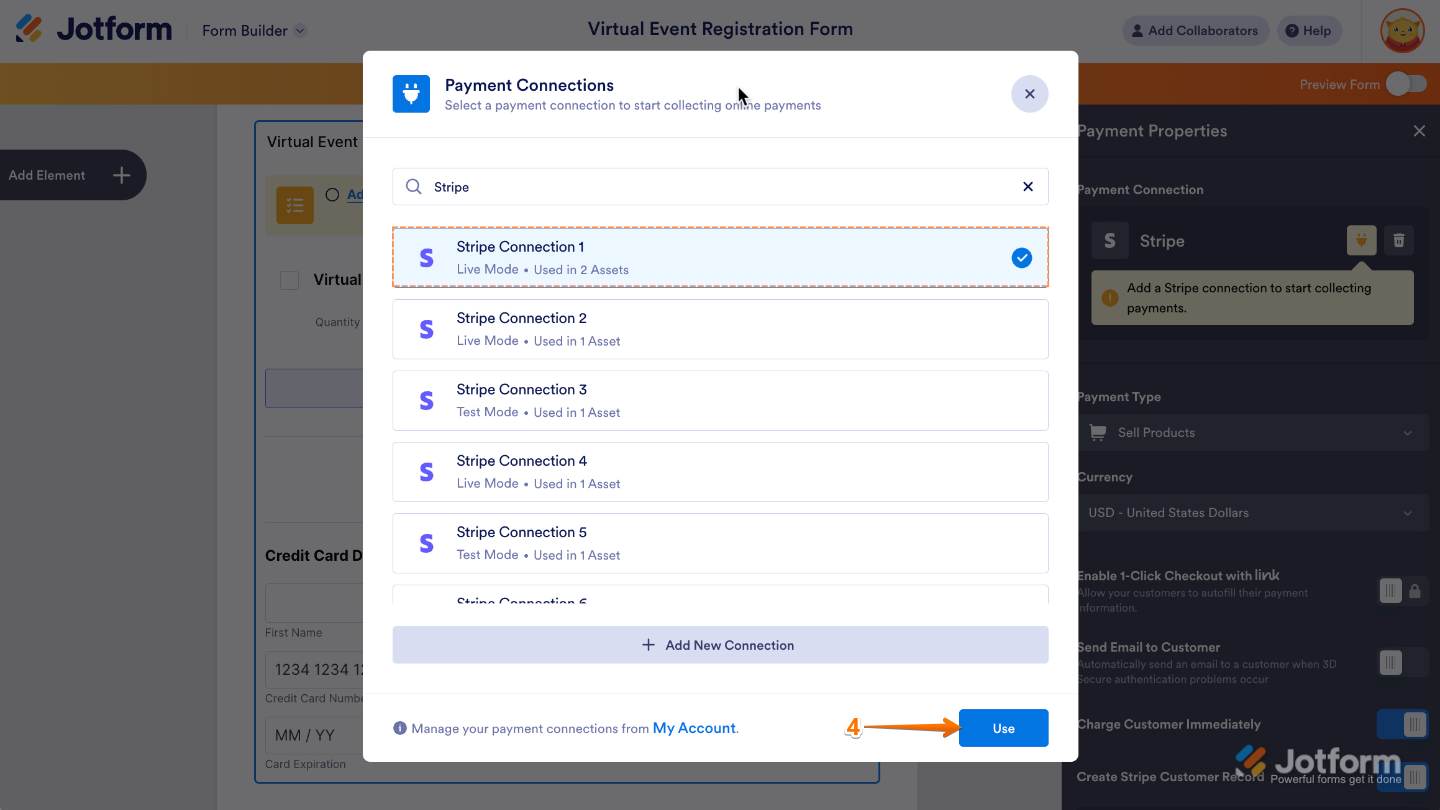
That’s it. You’ve successfully integrated your form with a payment gateway.
Easily Access and Switch Between Payment Connections
With everything in one place, managing your payment setup is simpler than ever. Whether you’re switching gateways or updating your reusable connections, it only takes a few clicks. Here’s the quick way to get it done:
- In Form Builder, click on the Credit Card icon on the right side of the page.
- Next, in the Payment Properties menu on the right side of the page, click on the Plug icon.
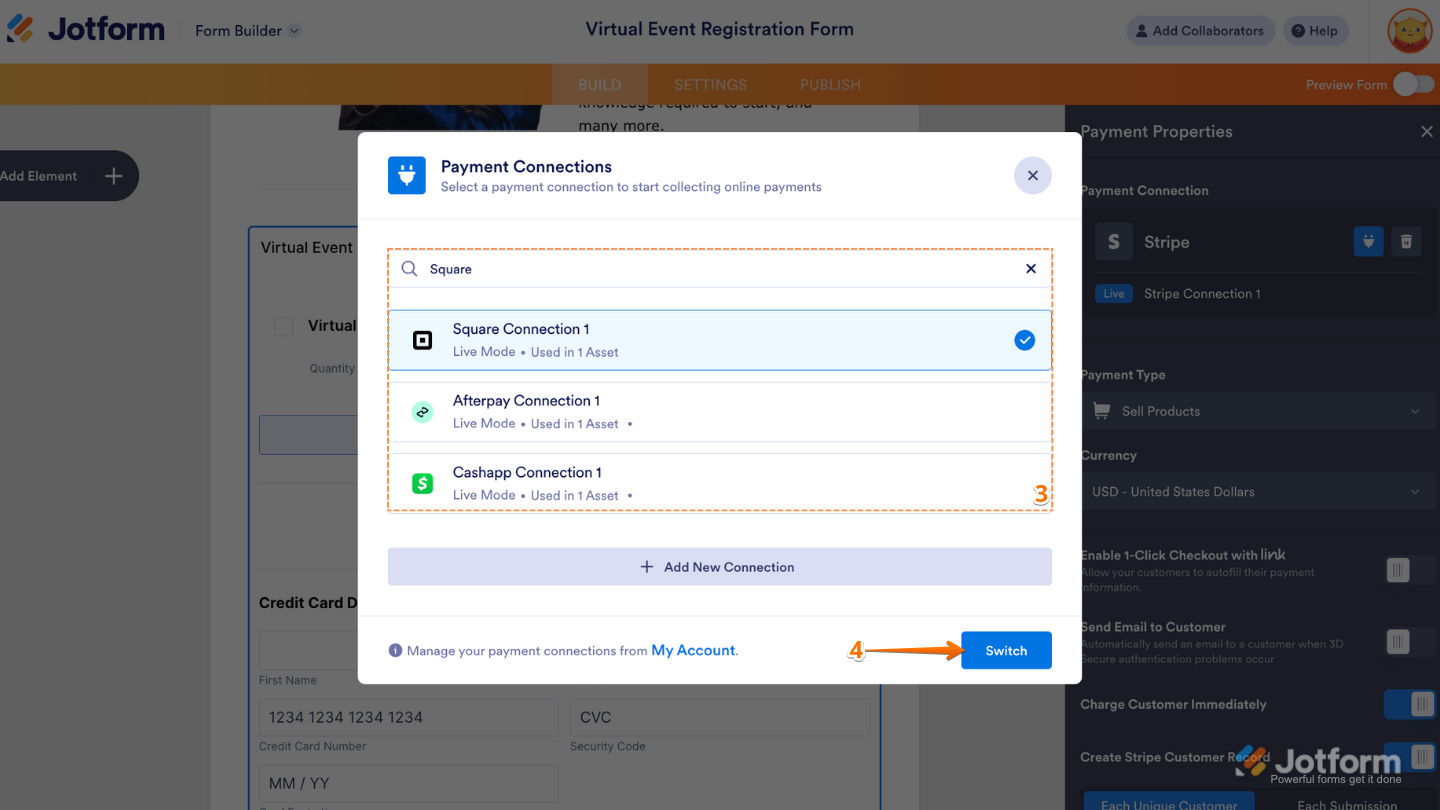
- Then, in the Payment Connections window that comes up, search for the new payment gateway you want to use and then select a connection.
- Once you’re done, click on Switch.
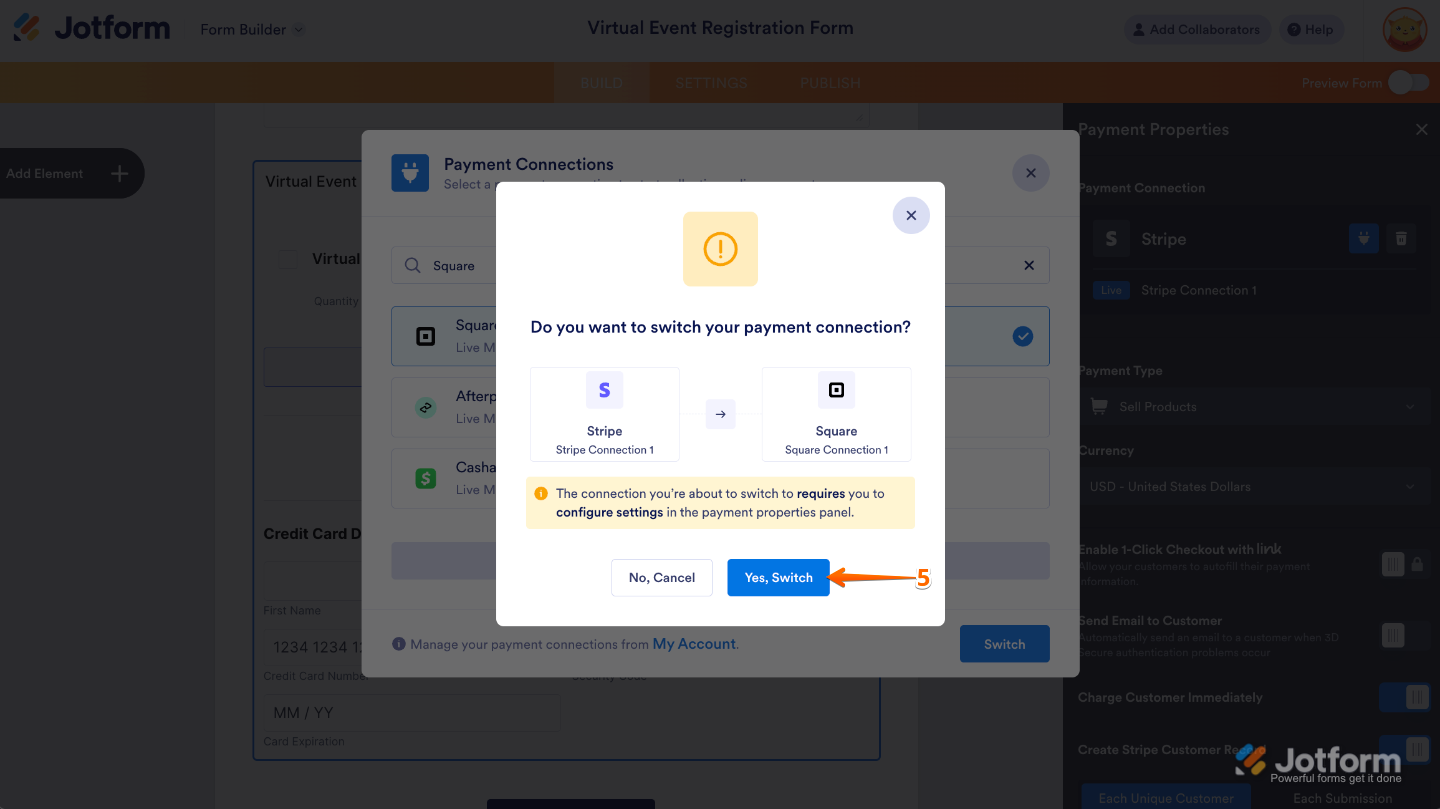
- Now, in the Do You Want to Switch Your Payment Connection modal that shows up, click on Yes, Switch.
Rolling Out and Here to Help
We’re gradually rolling out this new feature and moving your existing connections into the updated system—no extra steps needed on your end. If anything looks off, just reach out to our Support Team anytime. Your feedback means a lot and helps us to keep improving. More updates are on the way, and as always, thanks for choosing Jotform.

Send Comment: