Jotform AI Chatbot is Jotform’s advanced tool, allowing you to create customizable conversational chatbots to enhance your online forms. By leveraging AI agent technology, this chatbot provides a more interactive and intuitive experience for your respondents, helping them fill your form quickly, accurately, and efficiently.

Jotform AI Chatbot is available on WordPress. Install it, set it up, and embed it on your WordPress-made website to start collecting and processing data in conversational AI. Let’s start!
Installing the Jotform AI Chatbot Plugin
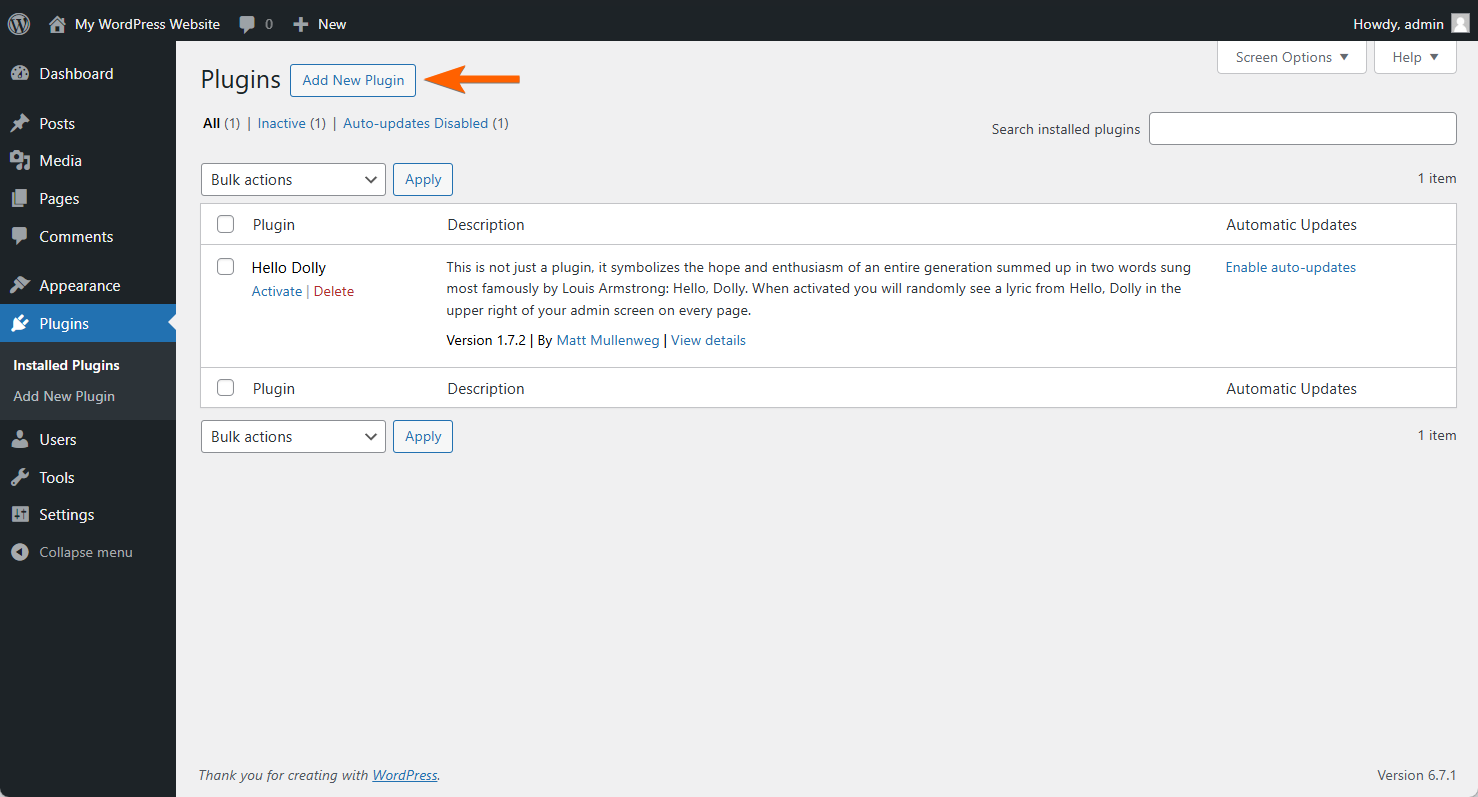
To install the AI chatbot for WordPress, you must do so through the WordPress Plugin directory. Here’s how:
- On the Plugins section of your WordPress dashboard, click the Add New Plugin button.
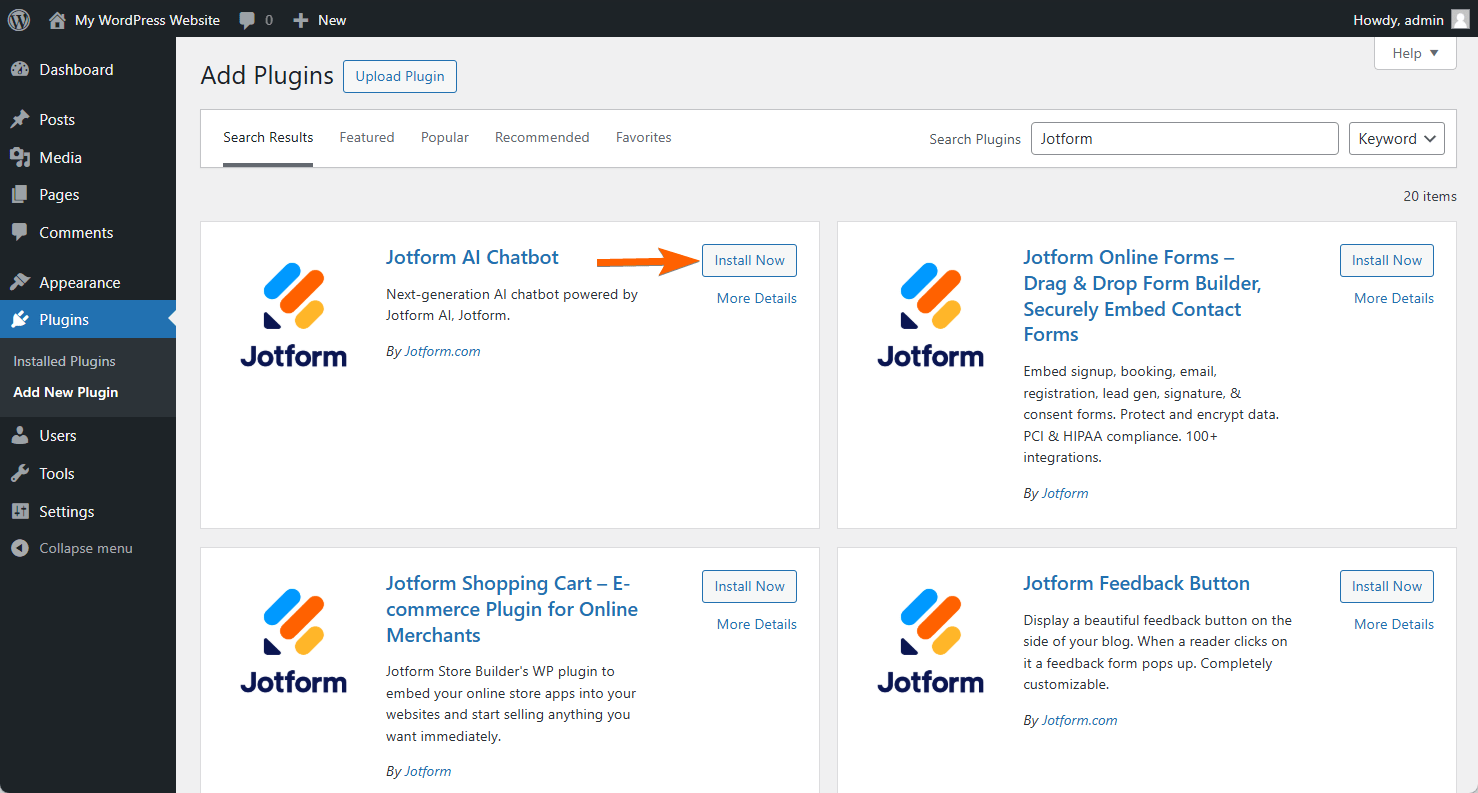
- Search for Jotform AI Chatbot, and Install and Activate it.
Once installed, you should see the Jotform AI Chatbot on your WordPress dashboard.
Connecting Your Jotform Account
The next step to using the Jotform AI Chatbot plugin is to connect your Jotform account. Here’s how you can do that:
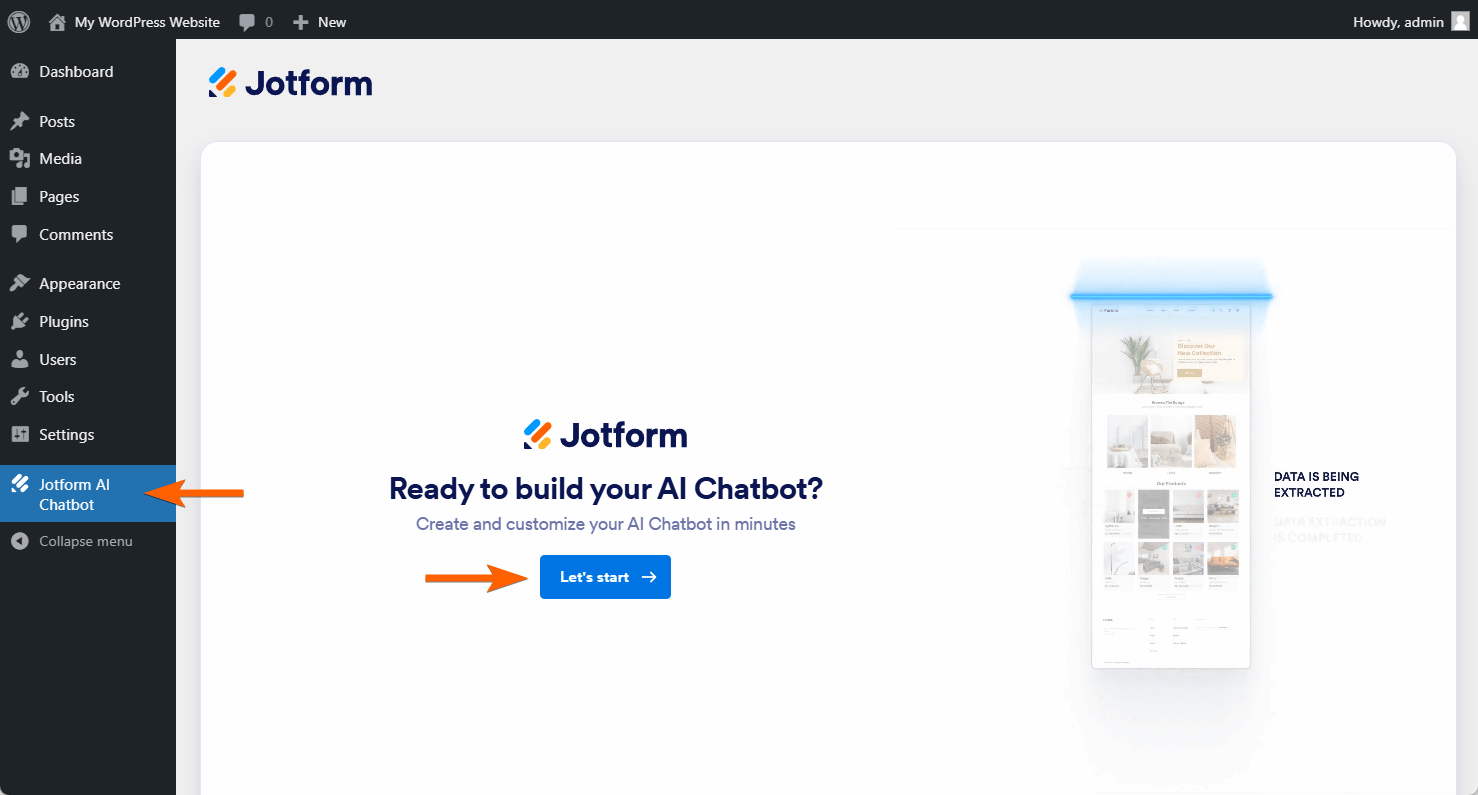
- Go to the Jotform AI Chatbot menu on your WordPress dashboard.
- Click the Let’s Start button.
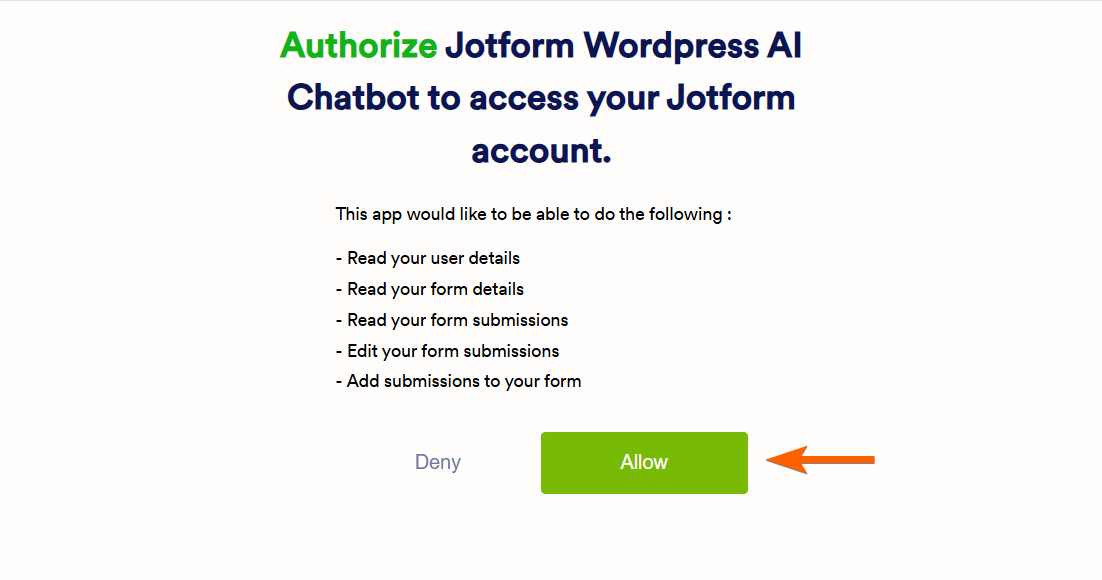
- Click the Allow button from the authorization screen. Once authorized, you should be ready to set up the Jotform AI Chatbot.
Setting Up and Styling Your Jotform AI Chatbot
To set up your Jotform AI Chatbot
- Choose whether to manually describe the AI Agent you want to create or choose from the available ready-to-use templates.
- Assuming you’ve chosen your option, click the Create AI Chatbot button to proceed.

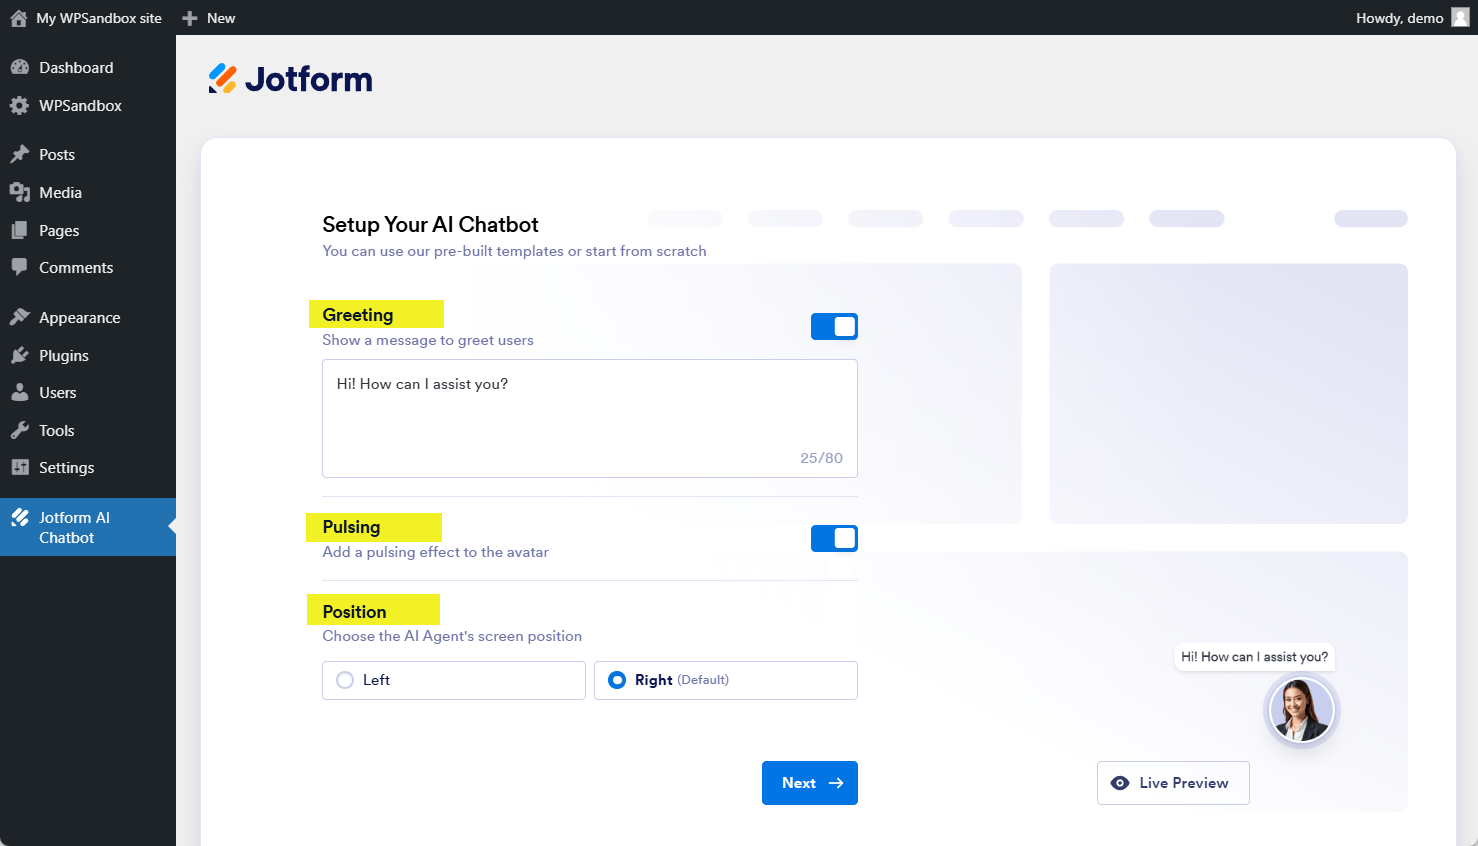
- Set up the following options, and click on Next.
- Greeting — Show a message to greet users.
- Pulsing — Add a pulsing effect to the avatar.
- Position — Choose to position your AI Agent’s screen to the left or right side of the page.
- Style your AI Agent screen by choosing from the listed Color Scheme, or do it manually by adjusting the following:
- Agent Background Style — Select the Start and End Colors. This color will be specific to the top part of the Agent screen.
- Chat Style — Select the Background Color, Font Family, and Font Color. This style will be specific to the overall chat box.
- Button Style — Buttons are the Close (X icon), Menu (hamburger icon), Suggestion (sparking starts icon), Speak (microphone icon), and Send (arrow icon).

- Click the Next button to start training your AI agent.
Training Your Jotform AI Agent
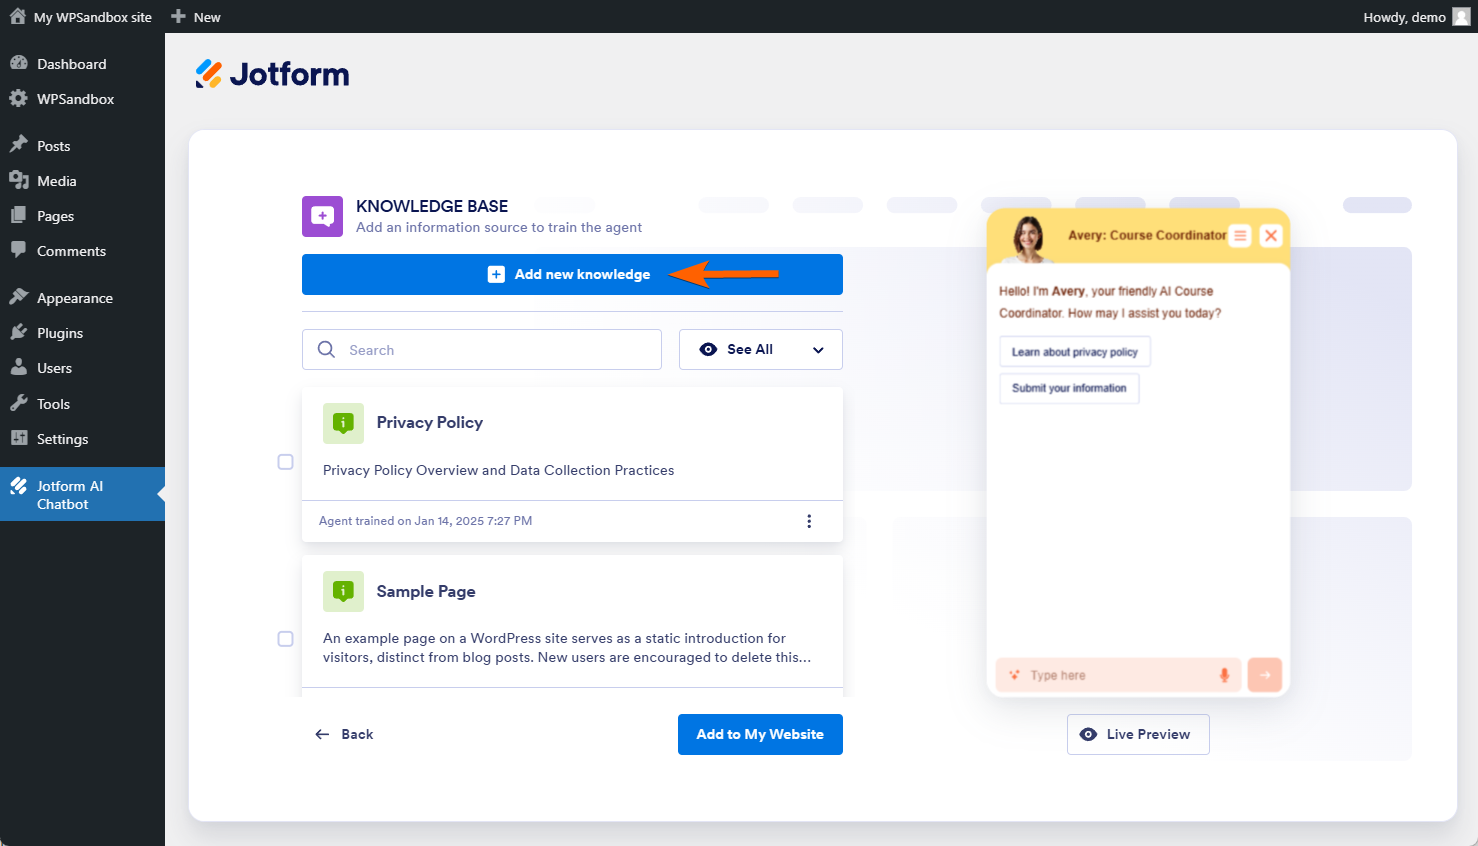
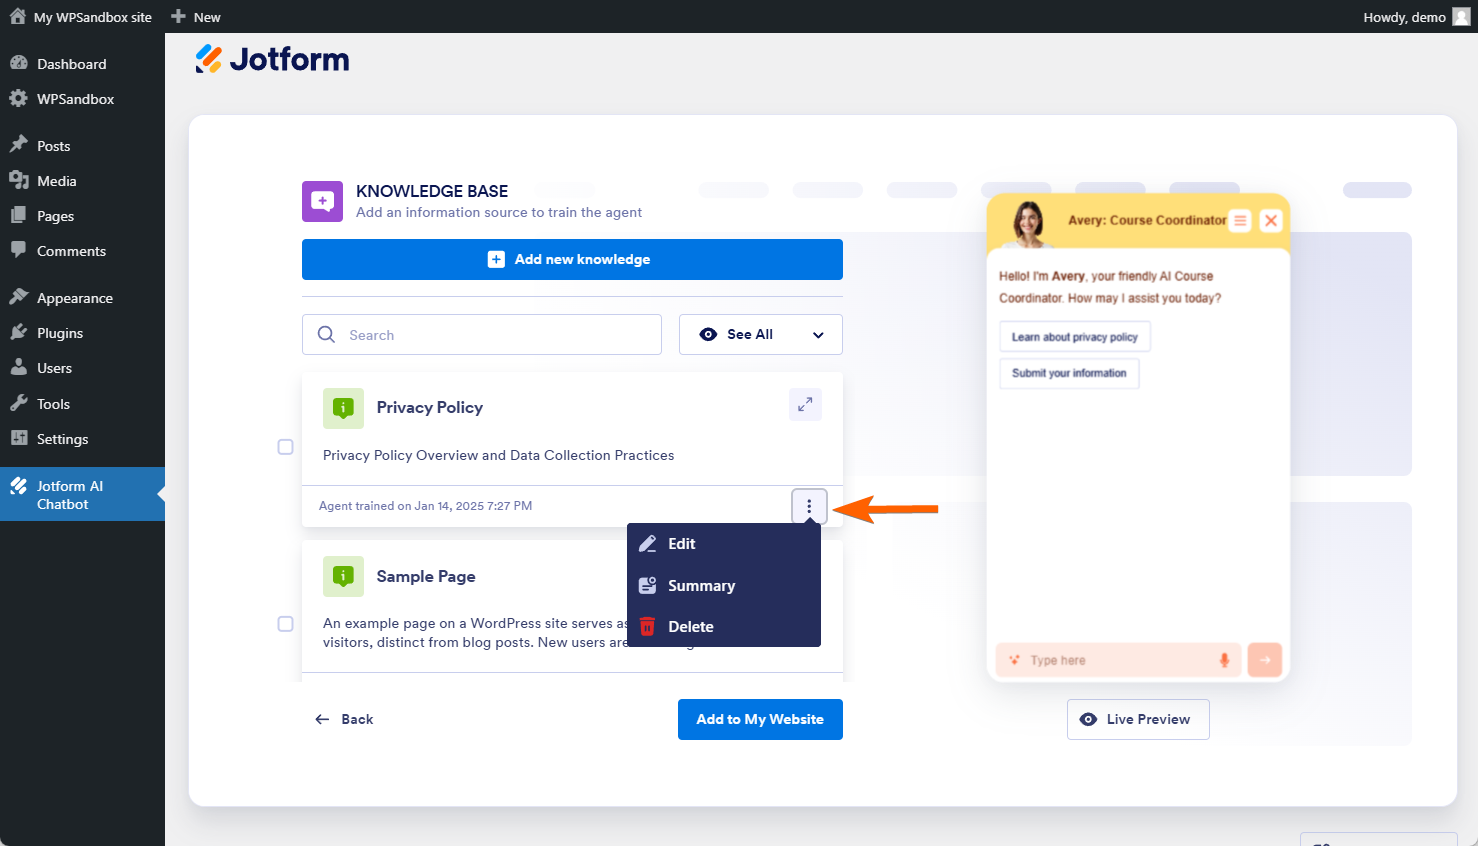
Jotform AI Agent will add your pages as part of your knowledge-based items. You can see them on the page. You can edit the knowledge-based items or add one. To add
- Click the Add New Knowledge button at the top.
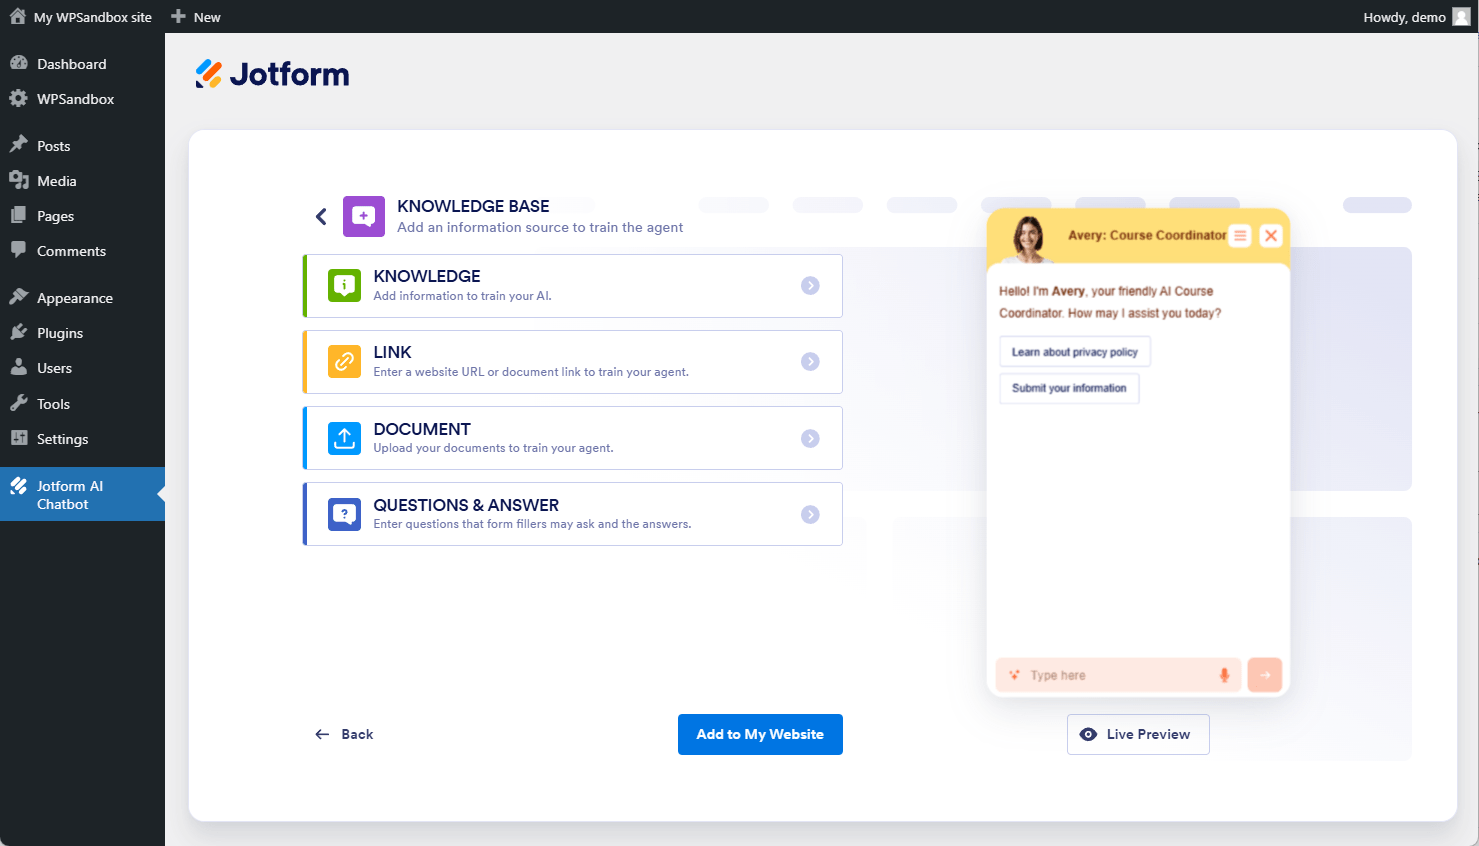
- Choose from the list of the following options:
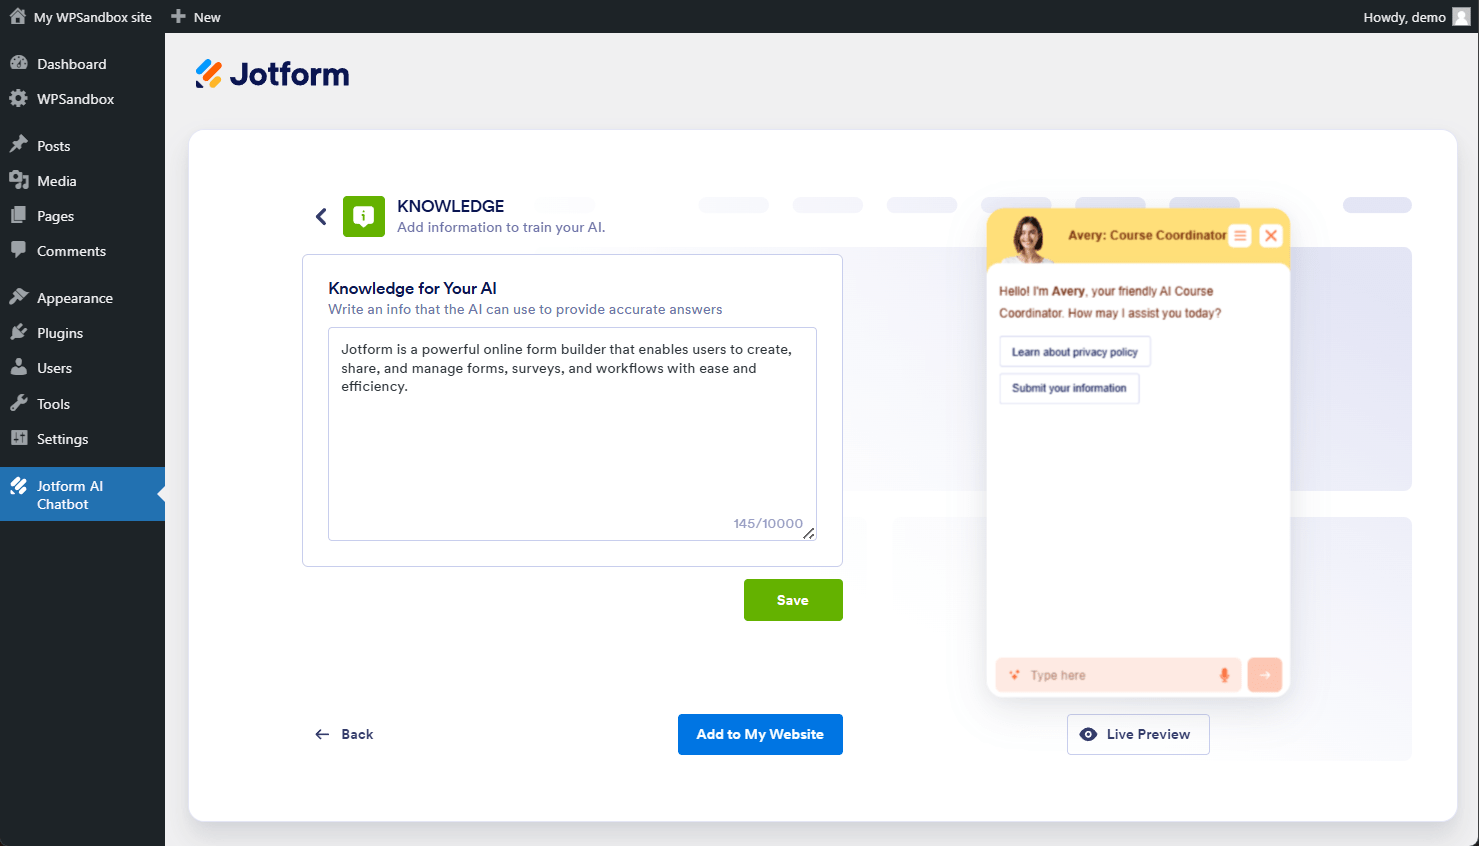
- Knowledge — Add any information related to training your AI agent.
- Link — Enter a link to an external resource or a document to train your AI Agent.
- Document — Upload a specific document to train your AI Agent.
- Question & Answer — Enter a question and its answer that form fillers may ask your AI agent.
- Assuming you’ve chosen Knowledge, enter the details and click the Save button.
To edit an existing knowledge-based item, click on the Menu (vertical ellipsis icon) from the item and click on the Edit option.
Adding Jotform AI Chatbot to Your Website
After completing the setup and training of your AI agent, proceed with adding it to your website. Here’s how you can do it:
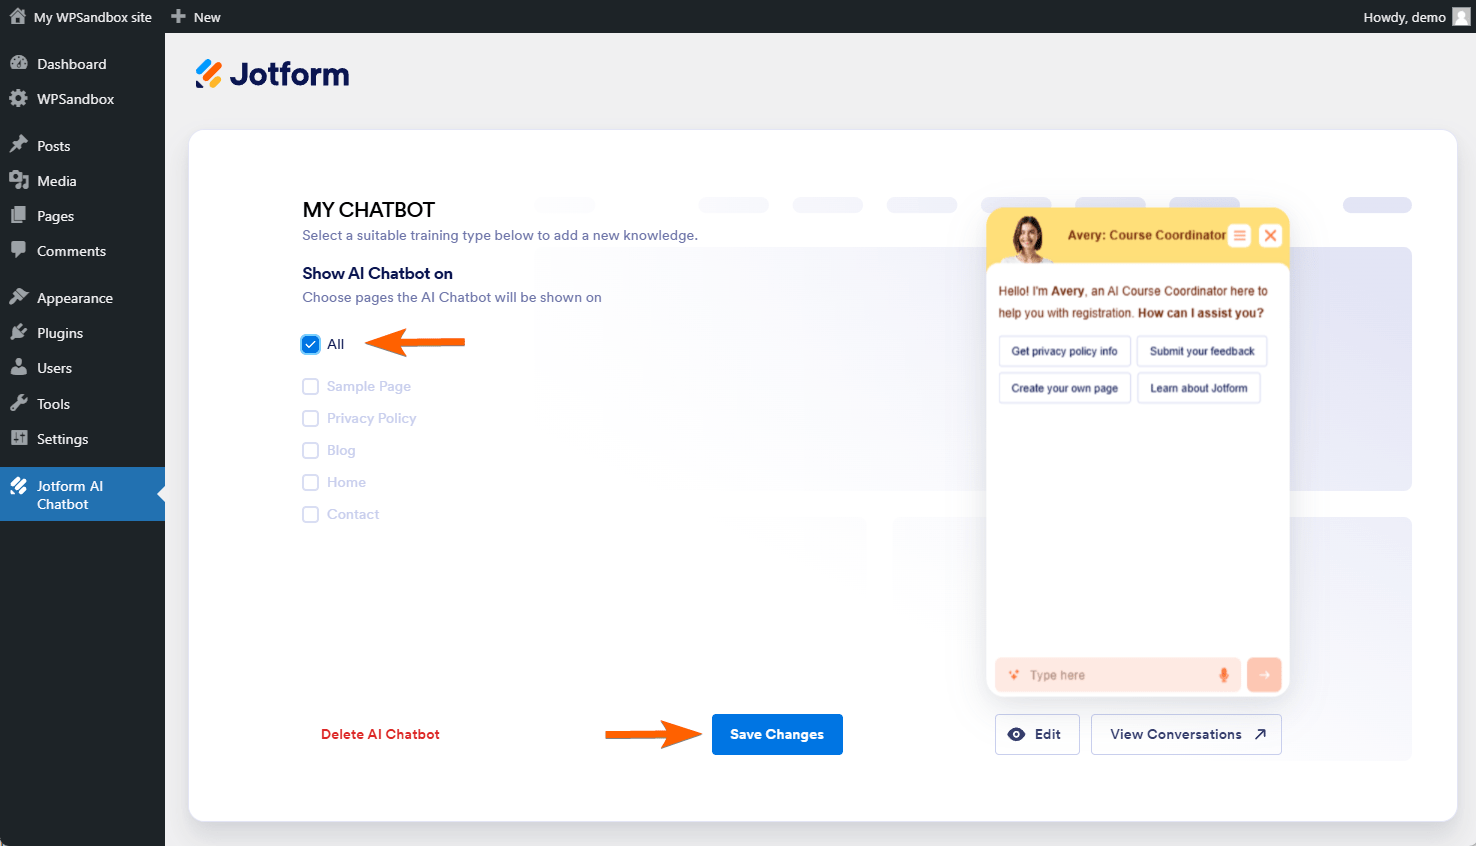
- Click the Add to My Website button.
- All option is selected by default. Uncheck it to select from the individual pages.
- Click the Save Changes button to finally add it.
Managing Jotform AI Chatbot
After saving the changes, you will have a few options to manage your Jotform AI Chatbot. On the page, you’ll see the following:
- Delete AI Chatbot — Click this option to delete your AI Chatbot and start over.
- Edit — Click this button to edit the styles and add new knowledge-based items to your AI chatbot.
- View Conversations — To view your AI conversations, click this button. It will open a new tab on your current browser that redirects you to the conversations page.
Note
Deleting your AI Chatbot will delete it from the list of your agents from the My Agent page, which would include the whole conversation gathered while it’s added to your website. However, Jotform will keep the form and its submissions in your list of My Forms.
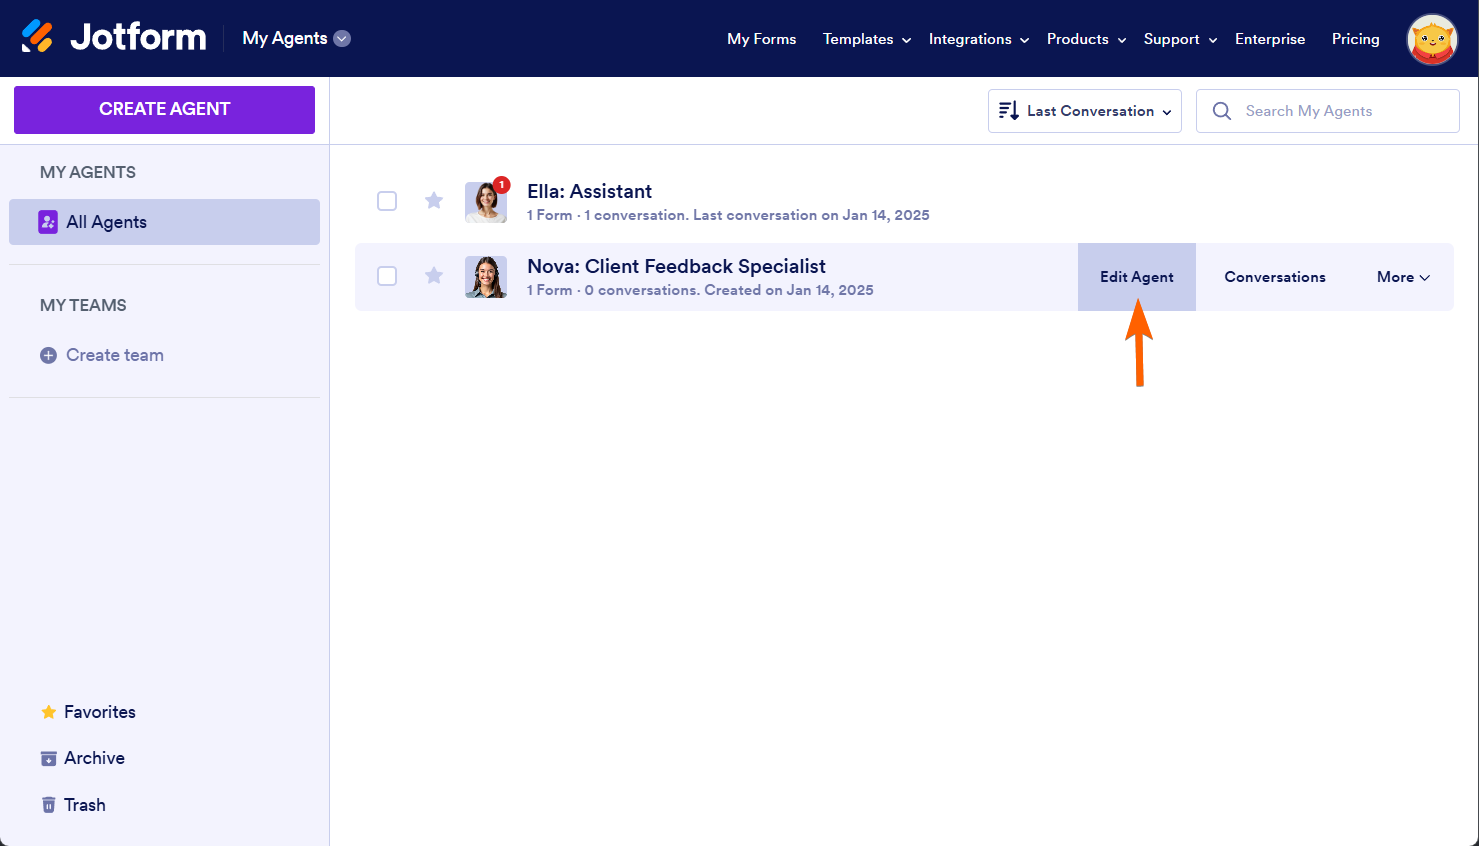
If you want to fully manage your AI Chatbot by changing the AI Persona, adding Actions, Adding Forms, or even teaching your agent, you must go to your agent’s list through the My Agent page and edit it.

Send Comment: