Switching your form’s payment gateway is a simple way to offer new payment options to your customers. When switching, it’s also important to keep your form functional and your data secure during the transition.
Switching the Payment Gateway
Switching to a different payment gateway is a simple process using the current native flow. Here’s how to do it:
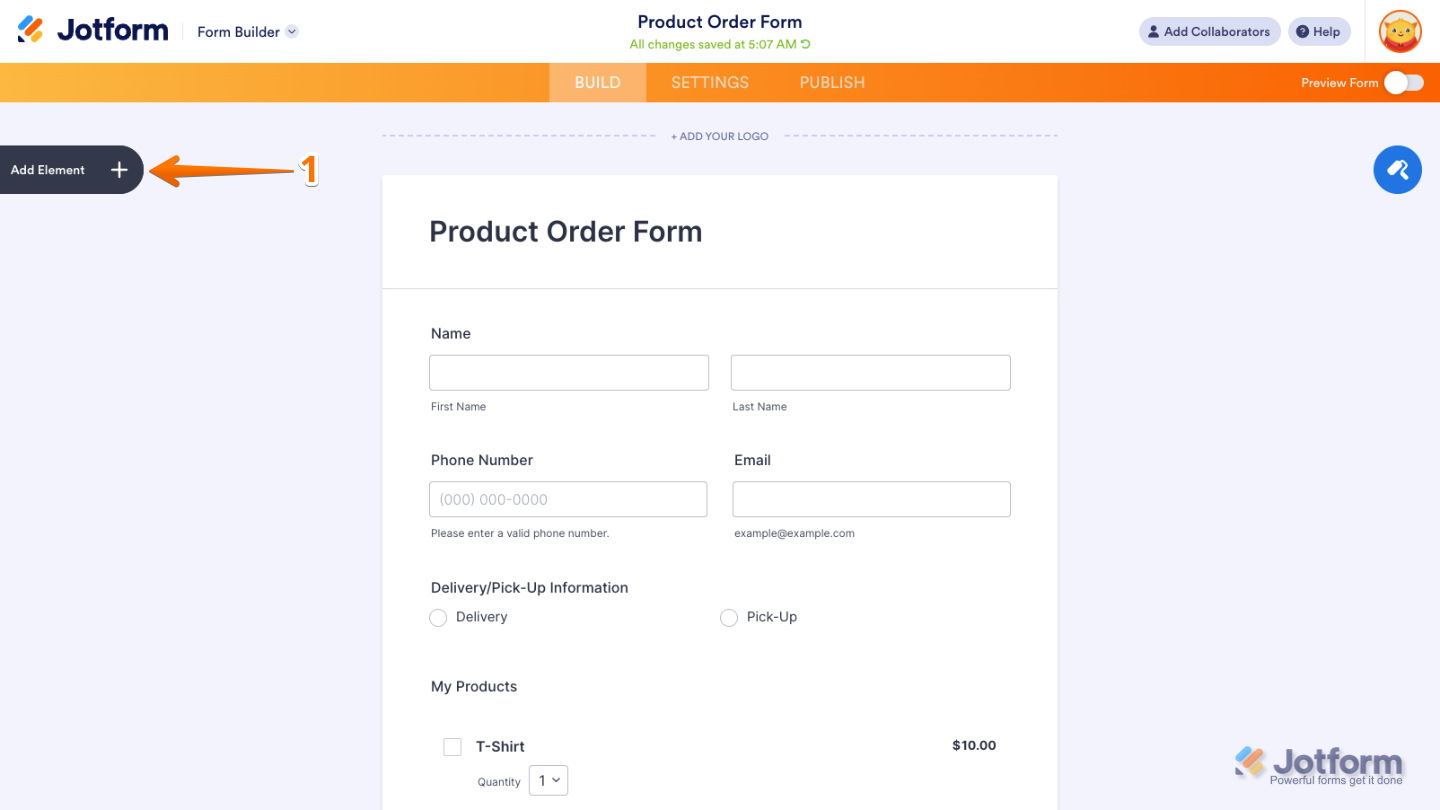
- In Form Builder, click on Add Element on the left side of the page.
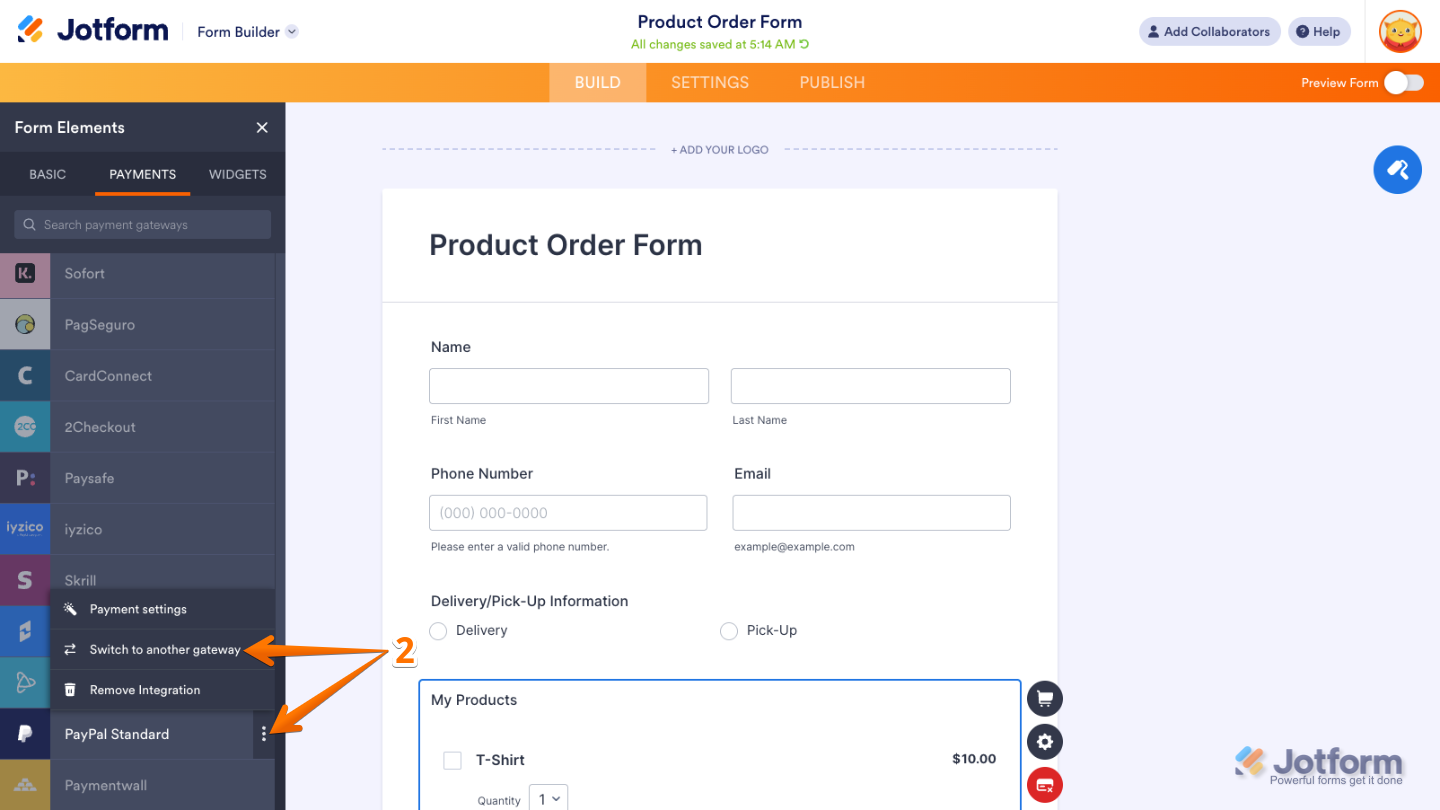
- Now, in the Form Elements menu, under the Payments tab, look for the current payment gateway, for example, PayPal Standard. Then click on the Three Dots icons and click on Switch to Another Gateway.
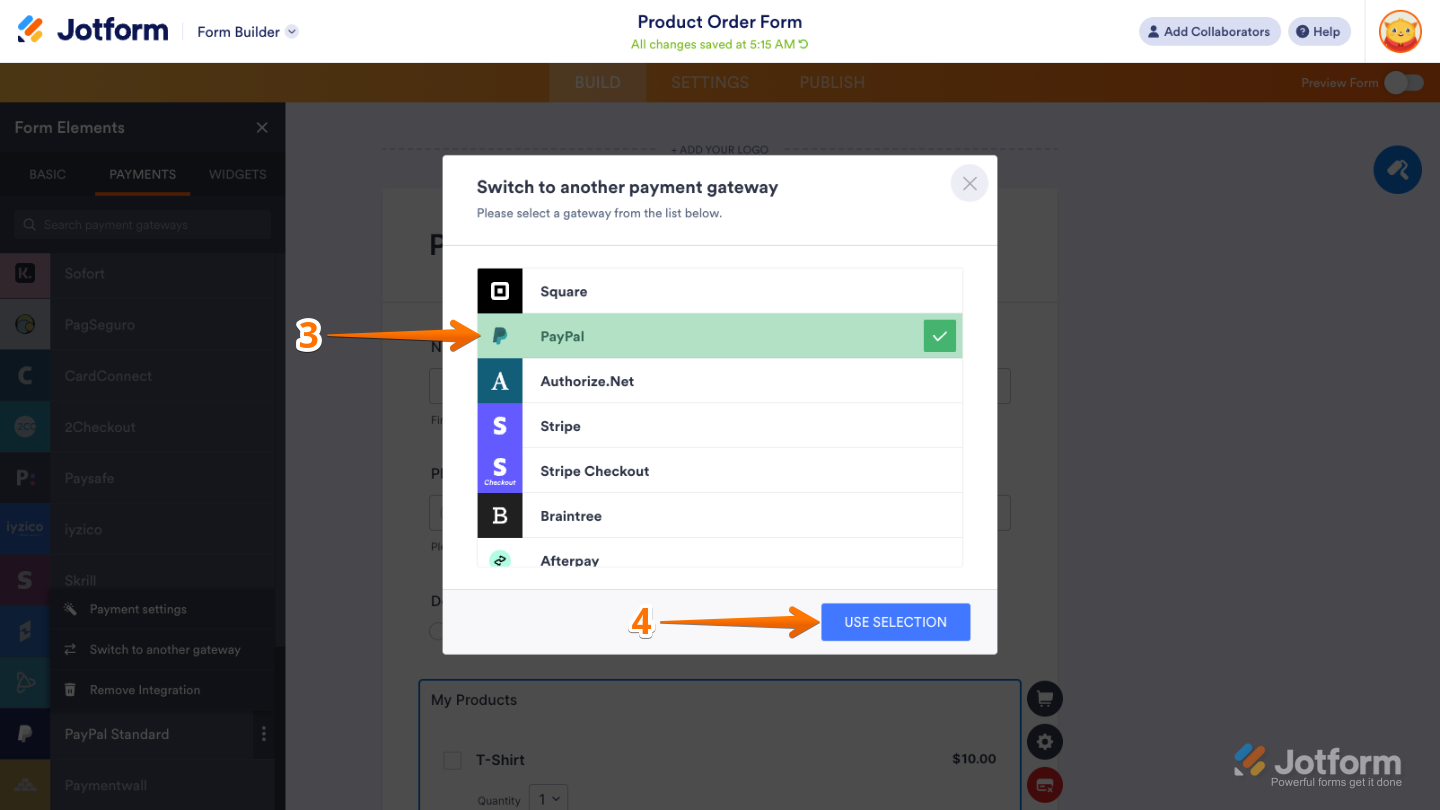
- Next, in the Switch to Another Payment Gateway window that opens, select the payment gateway you want to switch to. For example, PayPal.
- Then, click on Use Selection at the bottom of the window.
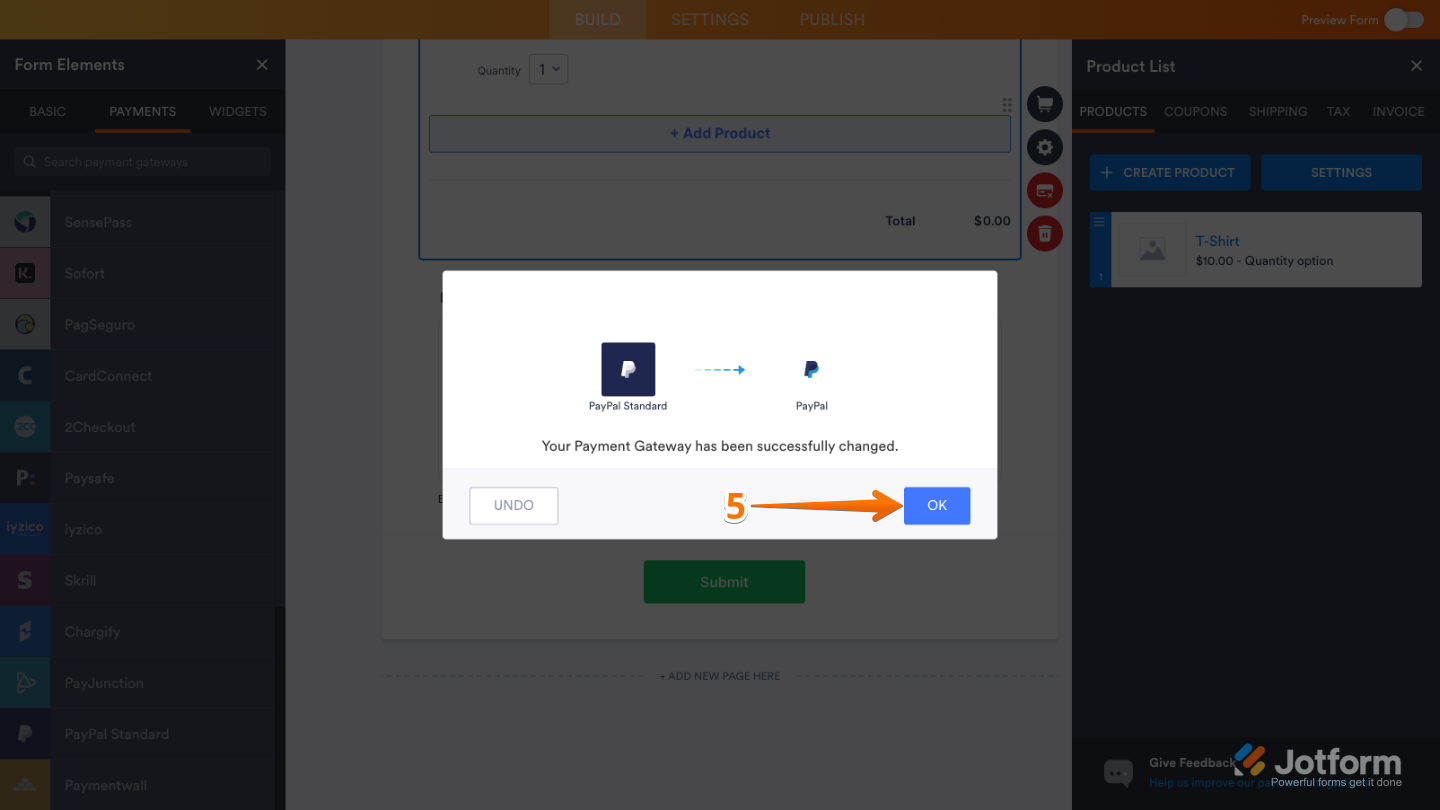
- Now, in the Confirmation window that opens, click on Ok, and you’re all set.
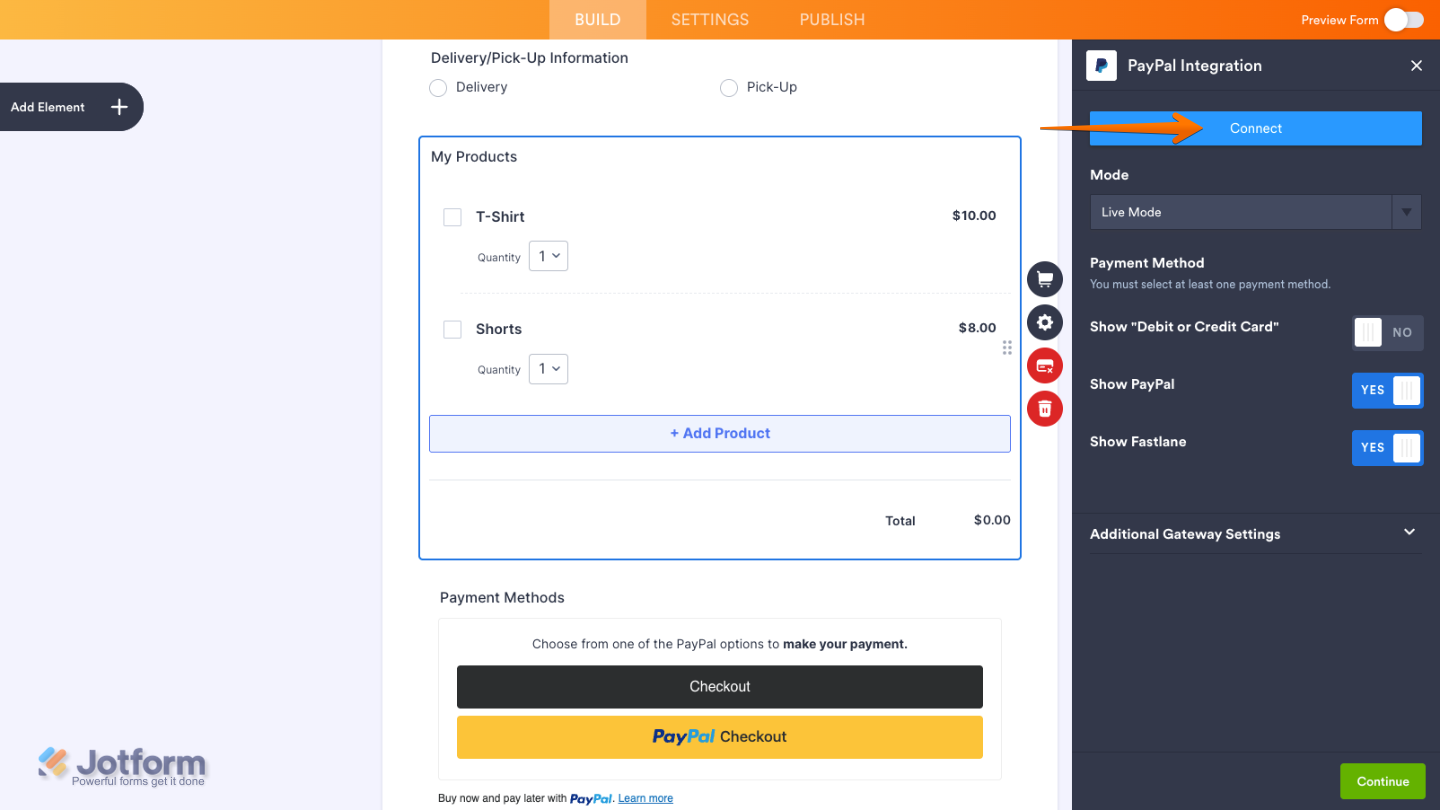
Now, you’ll need to set up your account using the newly selected gateway. In the example above, we used PayPal. To complete the setup, click on Connect to link your PayPal account.
Switching Reusable Connections
You can easily switch to another payment gateway through the Payment Properties, You’ll just need to make sure you’ve set up or added a Payment Connection to it. Here’s how to do it:
- In Form Builder, click on the Payment field and click on the Credit Card icon.
- Then, in the Payment Properties window that opens on the left side of the page, click on the Plug icon.
- Now, in the Add PayPal Connection window, select the other connection. For example, PayPal.
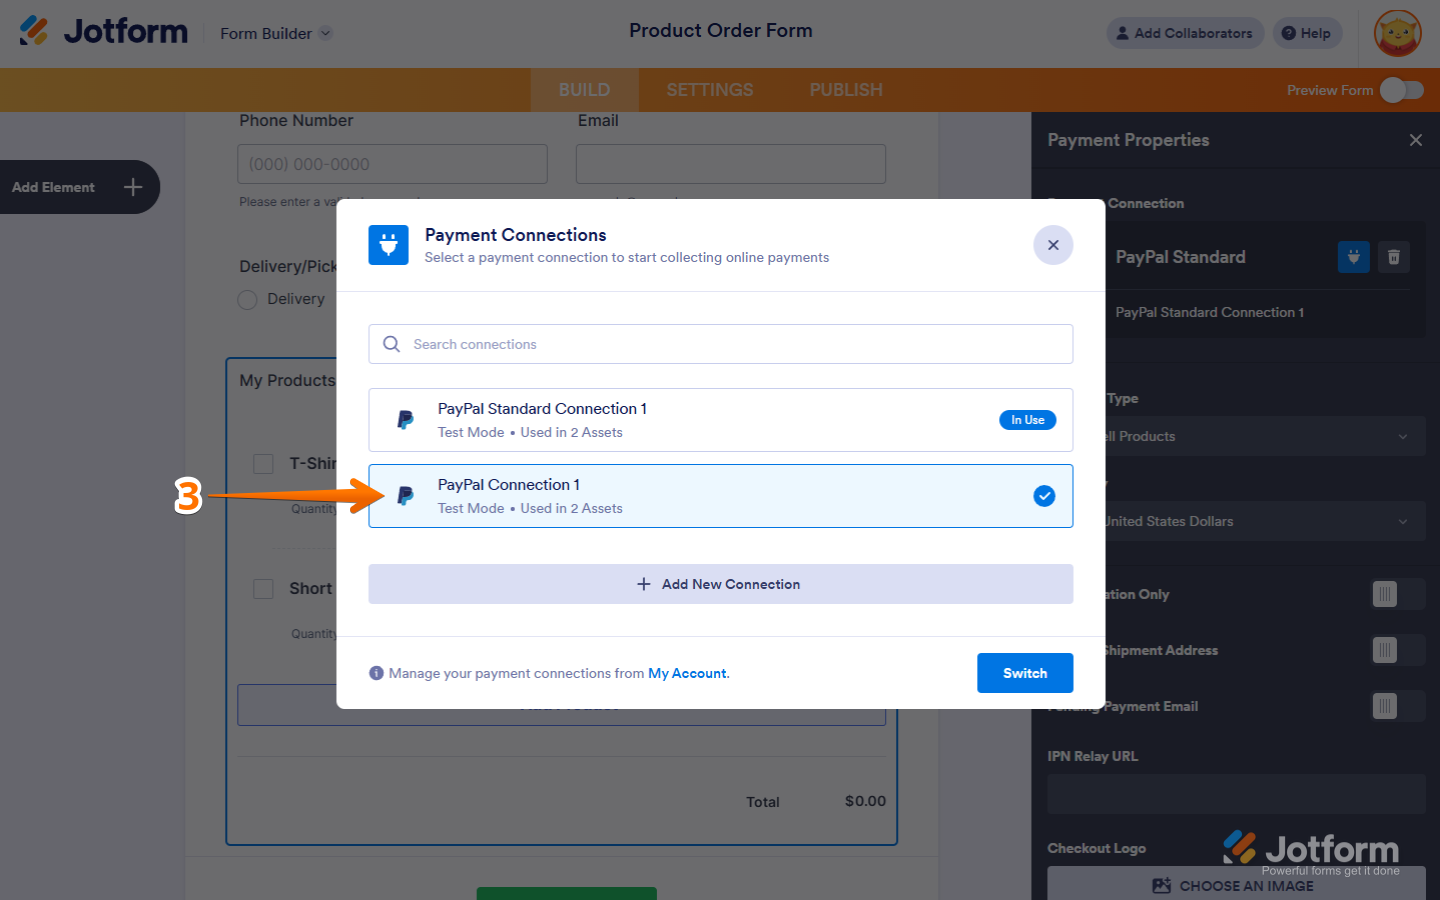
Note
Before switching, make sure the payment connection you want to use is already added. If not, just click Add New Connection to set it up. Check out this guide about How to Add and Manage Reusable Payment Connections for more details about it.
- Then, click on the Switch at the bottom of the window.
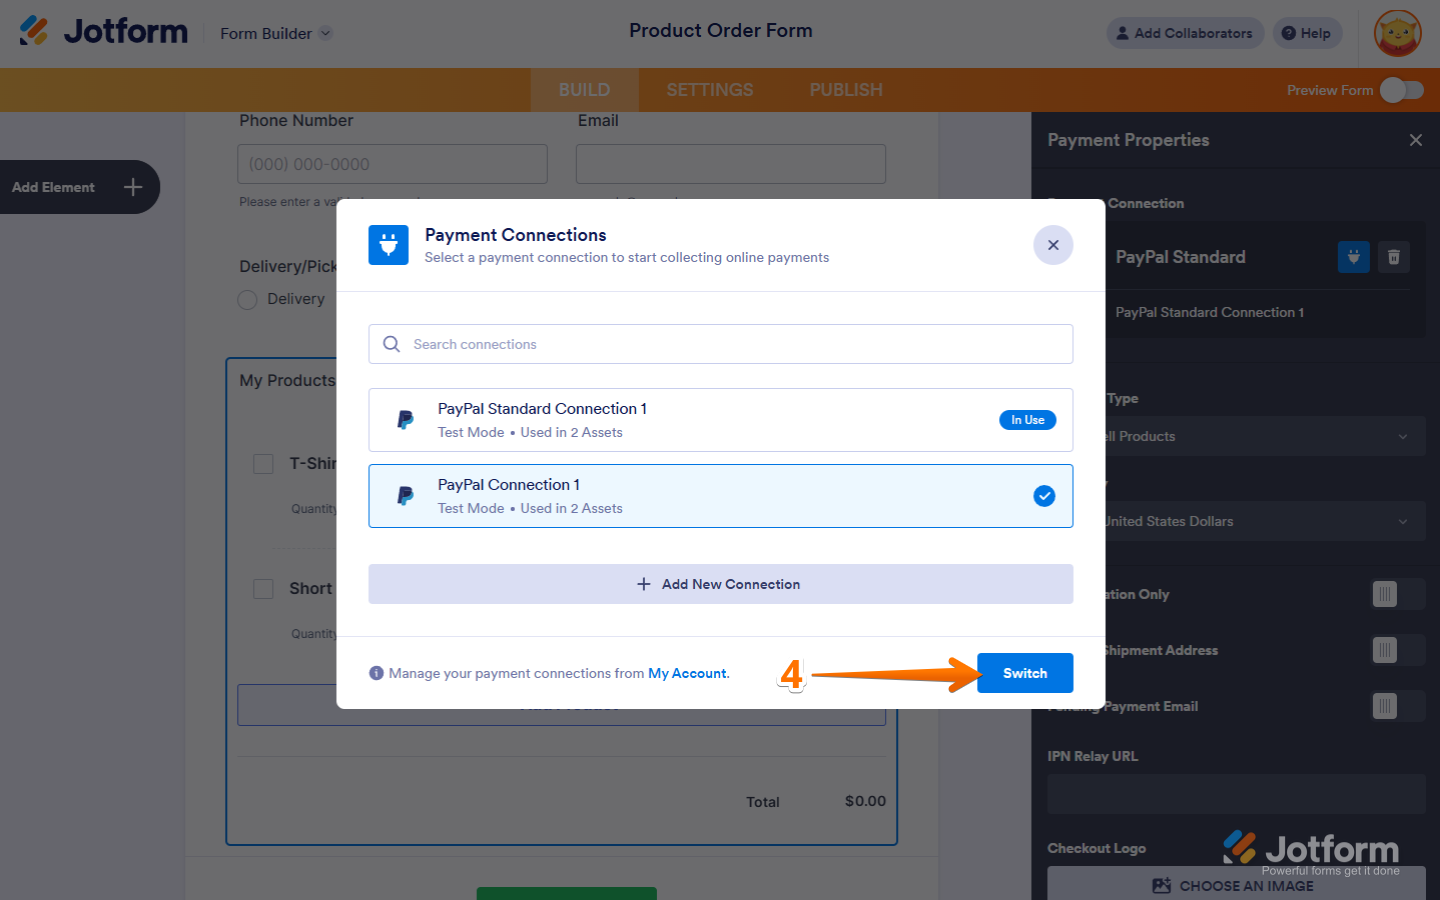
- Now, in the Confirmation window that opens, click on Yes, Switch, and you’re all set.


Send Comment:
7 Comments:
38 days ago
There is no 3 dots in the payment section
68 days ago
Where are the 3 dots?? There are no 3 dots...
78 days ago
It does not give "three dots" to select from in payment section. How else can we do this??
85 days ago
Hello, I am trying to follow your directions to update my Paypal gateway, however, I do not have the 3 dots next to PayPal Standard as shown in your diagram. Please advise. Thank you!
87 days ago
I've spent the last hour trying to get this set up for the updated PayPal. I set up a business account but it won't connect no matter what I do.
87 days ago
Hello, I am trying to follow your directions to update my Paypal gateway, however, I do not have the 3 dots next to PayPal Standard as shown in your diagram. Please advise. Thank you!
98 days ago
What is going on here? I've been asked to do this process and it's asking for signed documents, loggin into my clients PP account and now it has completly mucked up the enitre integration, forcing us to start over. This entire process makes no sense ... at all