With Jotform Enterprise, you can easily set up Single Sign-On (SSO) using OneLogin. This lets your team log in with their OneLogin credentials, giving you more control over account access and security. Just connect your OneLogin account, adjust your SSO settings, and you’re good to go.
Note
You can now let users log in using either Single Sign-On (SSO) or their email and password. You also have the option to require SSO for guest users.
Setting Up the OneLogin SAML App
Before setting up OneLogin SSO in your Jotform Enterprise account, you’ll need to create a SAML app in your OneLogin Admin Dashboard. It’s easier than you think—here’s what to do:
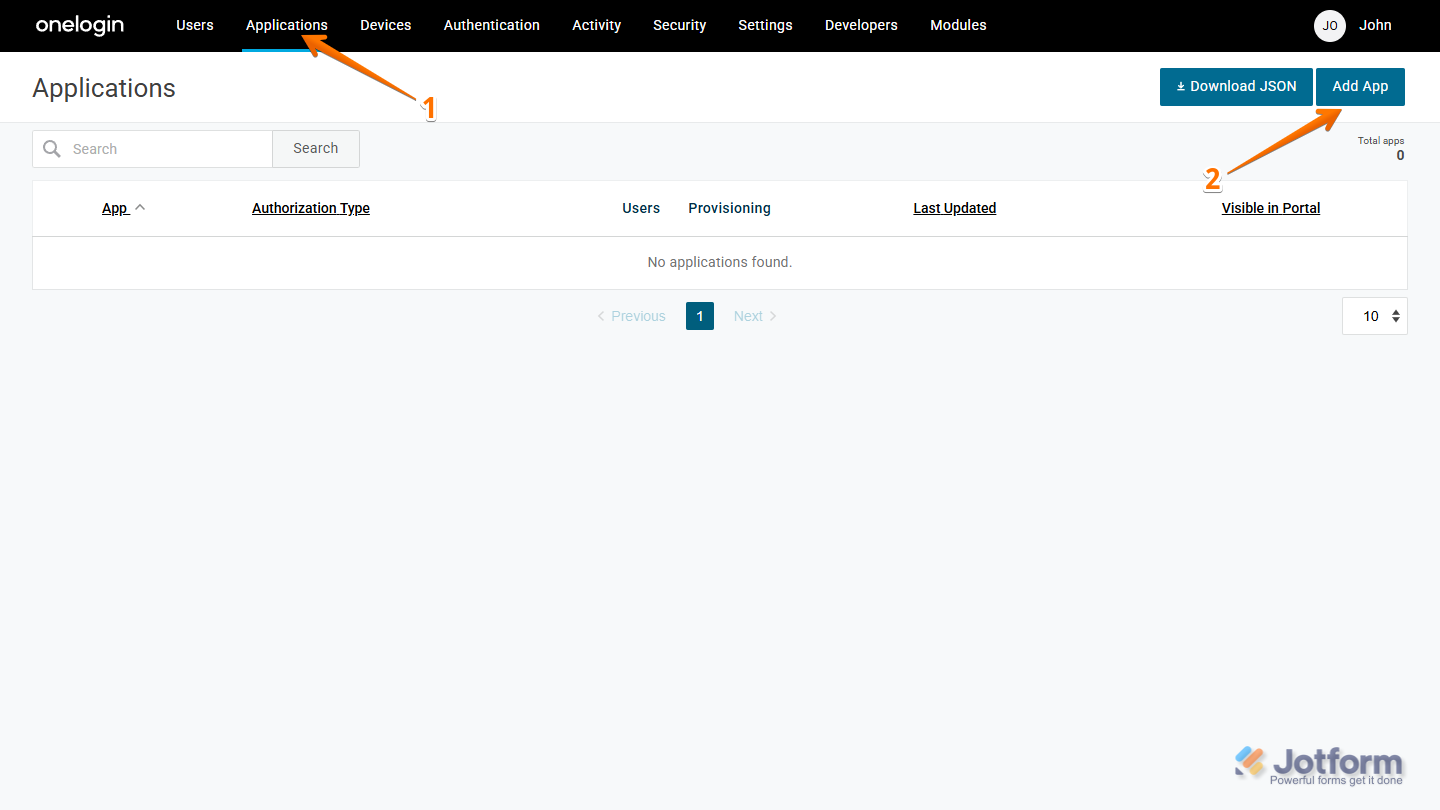
- Log in to your OneLogin Admin account and in your OneLogin Admin Dashboard, in the black navigation bar at the top of the page, click on Application.
- Then, in the top-right corner of the page, click on Add App.
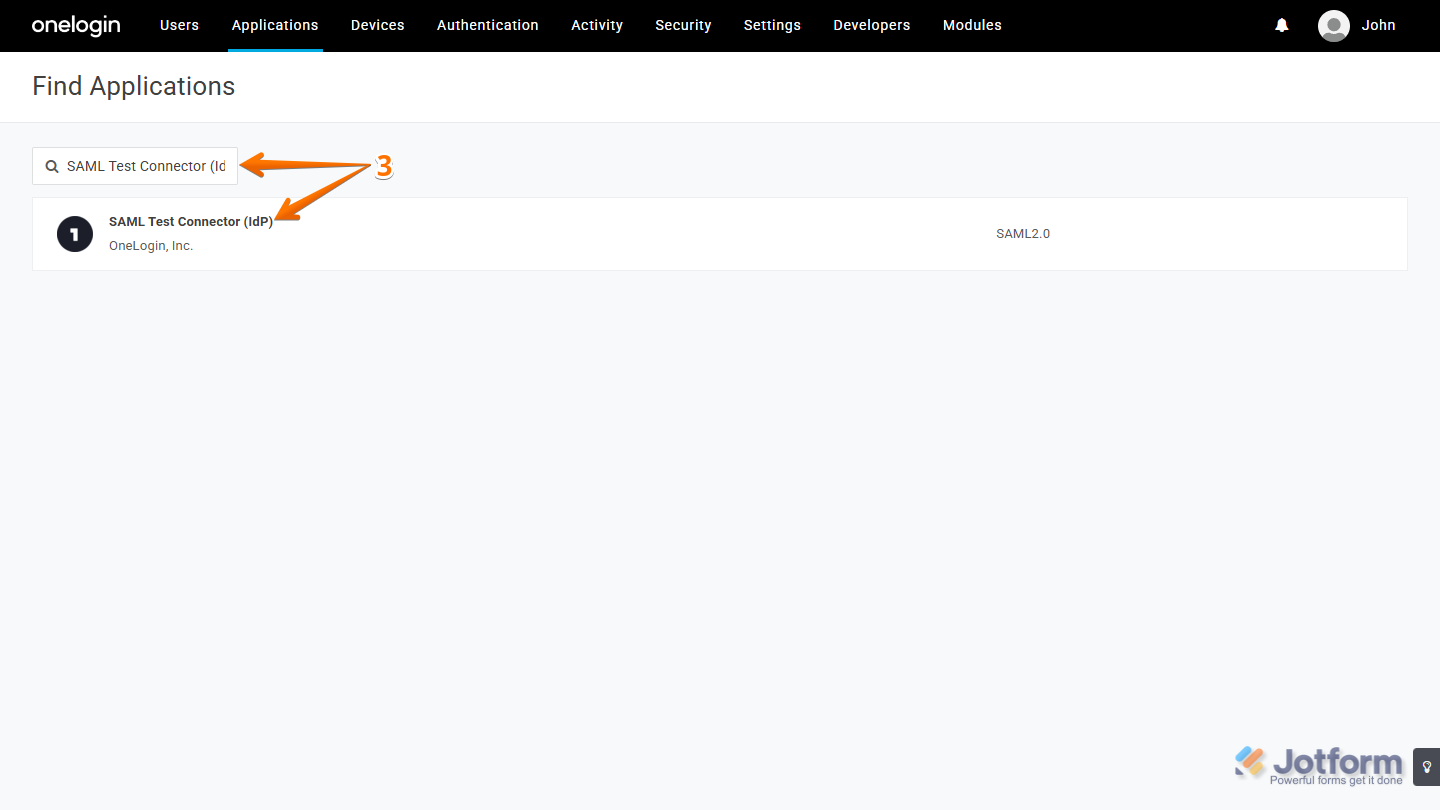
- Now, search for SAML Test Connector (IdP) and click on it.
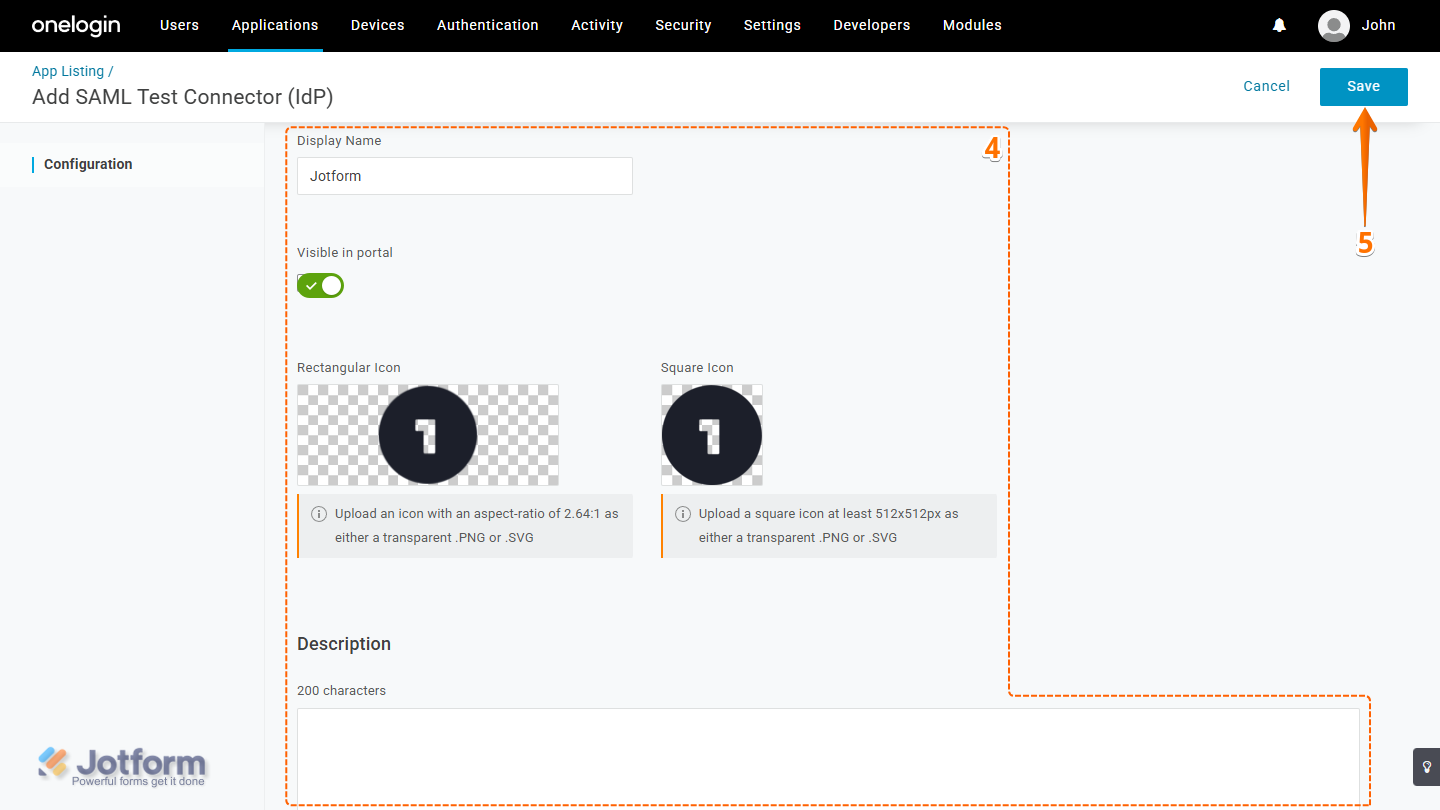
- Next, on the Add SAML Test Connector page, set up these things:
- Display Name — Give your app a name that’s easy to recognize.
- Visible in Portal —This is turned on by default, so users will see the app in their OneLogin portal unless you switch it off.
- Rectangular Icon — Upload an icon with a 2.64:1 aspect ratio as a transparent .PNG or .SVG file.
- Square Icon — Upload a square icon at least 512 × 512 px as a transparent .PNG or .SVG file.
- Description — Add a short description of what the app’s for.
- Then, click on Save in the top-right corner of the page.
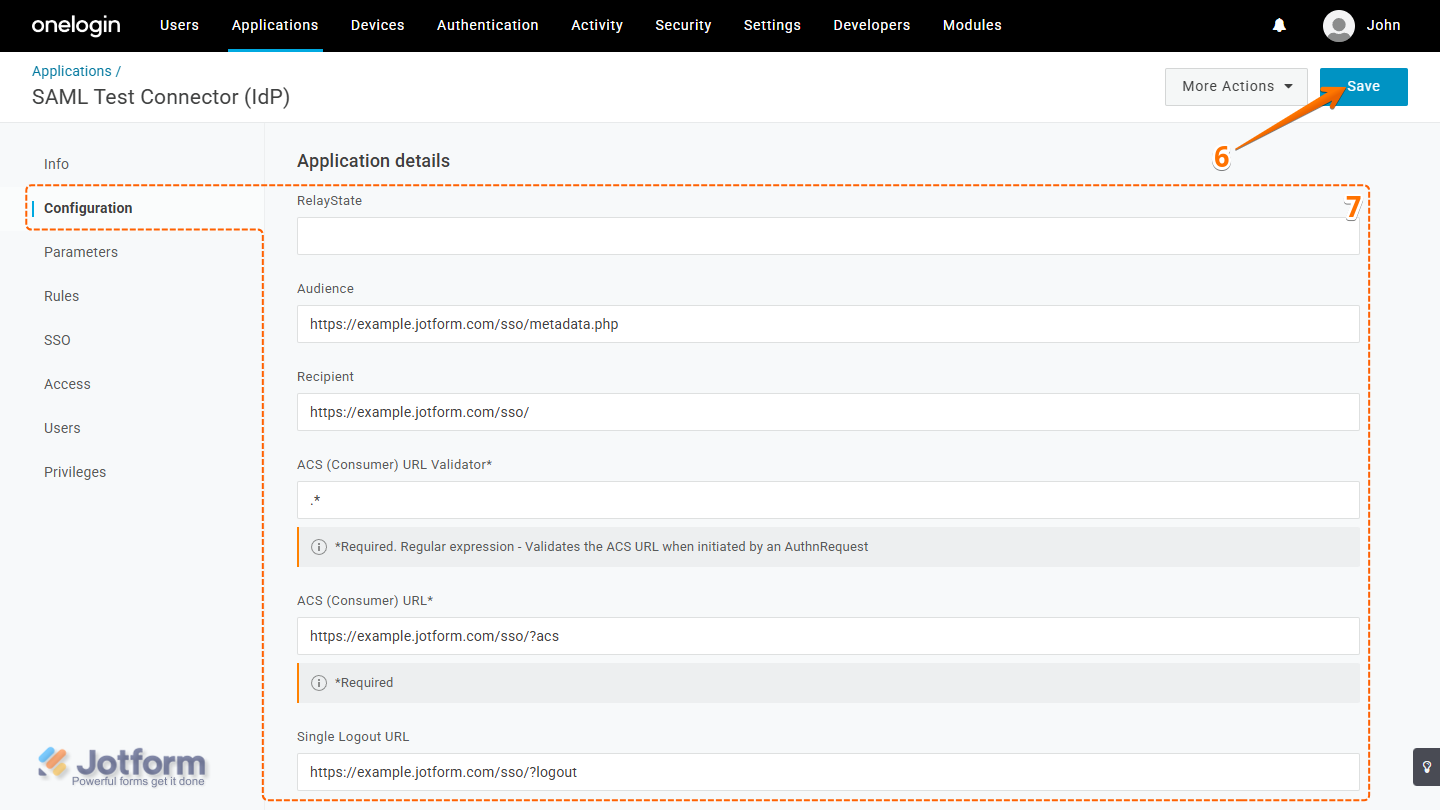
- Now, in the menu on the left, click on Configuration and fill in these details. Take a look at our guide on How to Obtain Service Provider Metadata from Jotform Enterprise to learn more about them.
- Audience — Enter your Jotform Entity ID. For example: https://example.jotform.com/sso/metadata.php
- Recipient — Enter your Jotform Service Provider Assertion Consumer Service URL without ?acs. For example: https://example.jotform.com/sso/
- ACS (Consumer) URL Validator — Enter .* (a dot followed by an asterisk)
- ACS (Consumer) URL — Enter your full Assertion Consumer Service URL. For example: https://example.jotform.com/sso/?acs
- Single Logout URL — Use the same URL as above, but replace ?acs with ?logout. For example: https://example.jotform.com/sso/?logout
- Then, click on Save in the top-right corner of the page.
- Now, in the menu on the left, click on SSO to view your SAML App details and you’re all set. You’ll need this information to set up SSO in your Jotform Enterprise account.

Enabling and Configuring OneLogin SSO in Your Jotform Enterprise Account
Now that you’ve got your SAML details ready, log in to your Jotform Enterprise account to set up the SSO connection. It only takes a minute—here’s how:
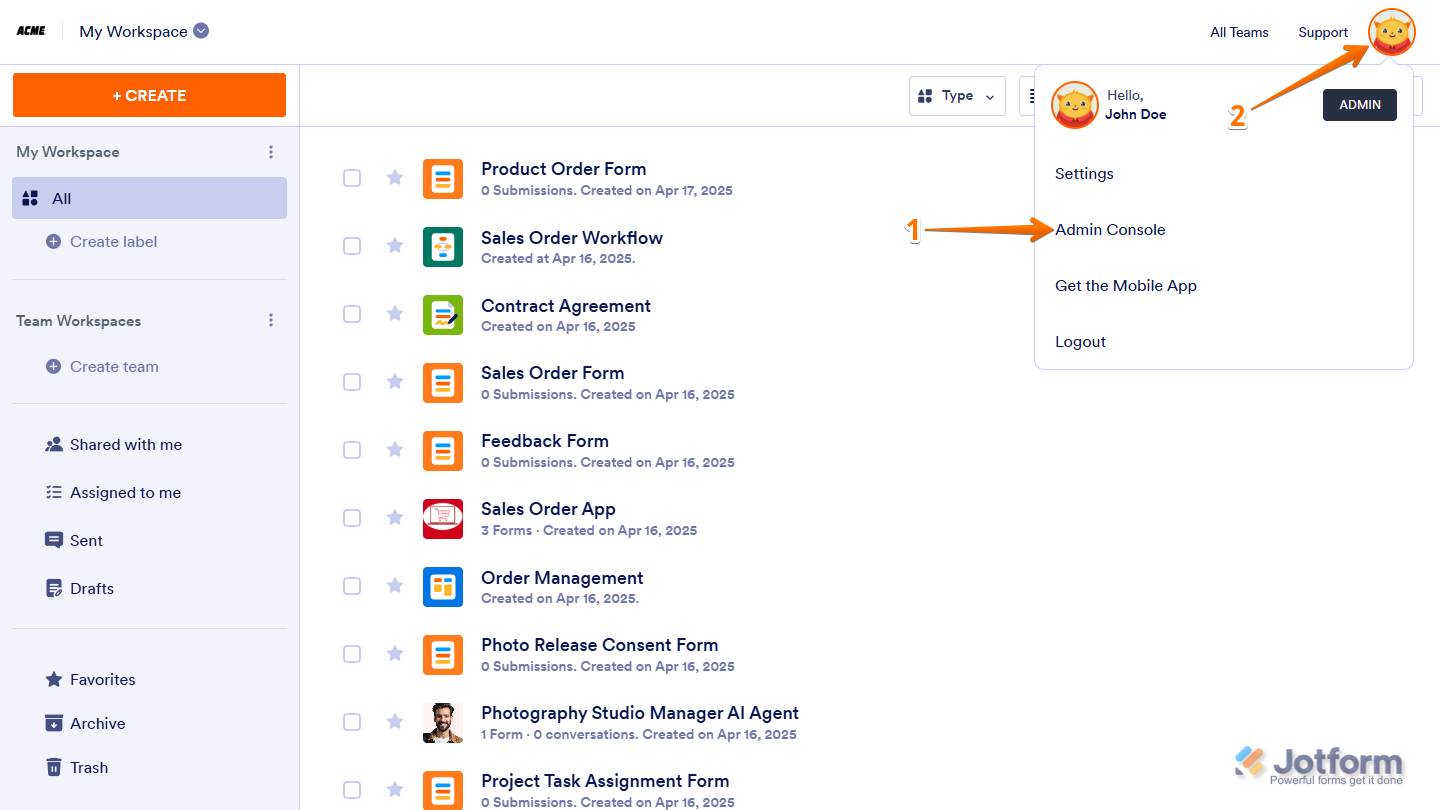
- On your My Workspace page, click on your Avatar/Profile picture in the top-right corner of the screen.
- Then, in the Dropdown menu that comes up, click on Admin Console to open your Admin Dashboard page.
- Click on the Settings in the menu on the left to open your Settings Dashboard.
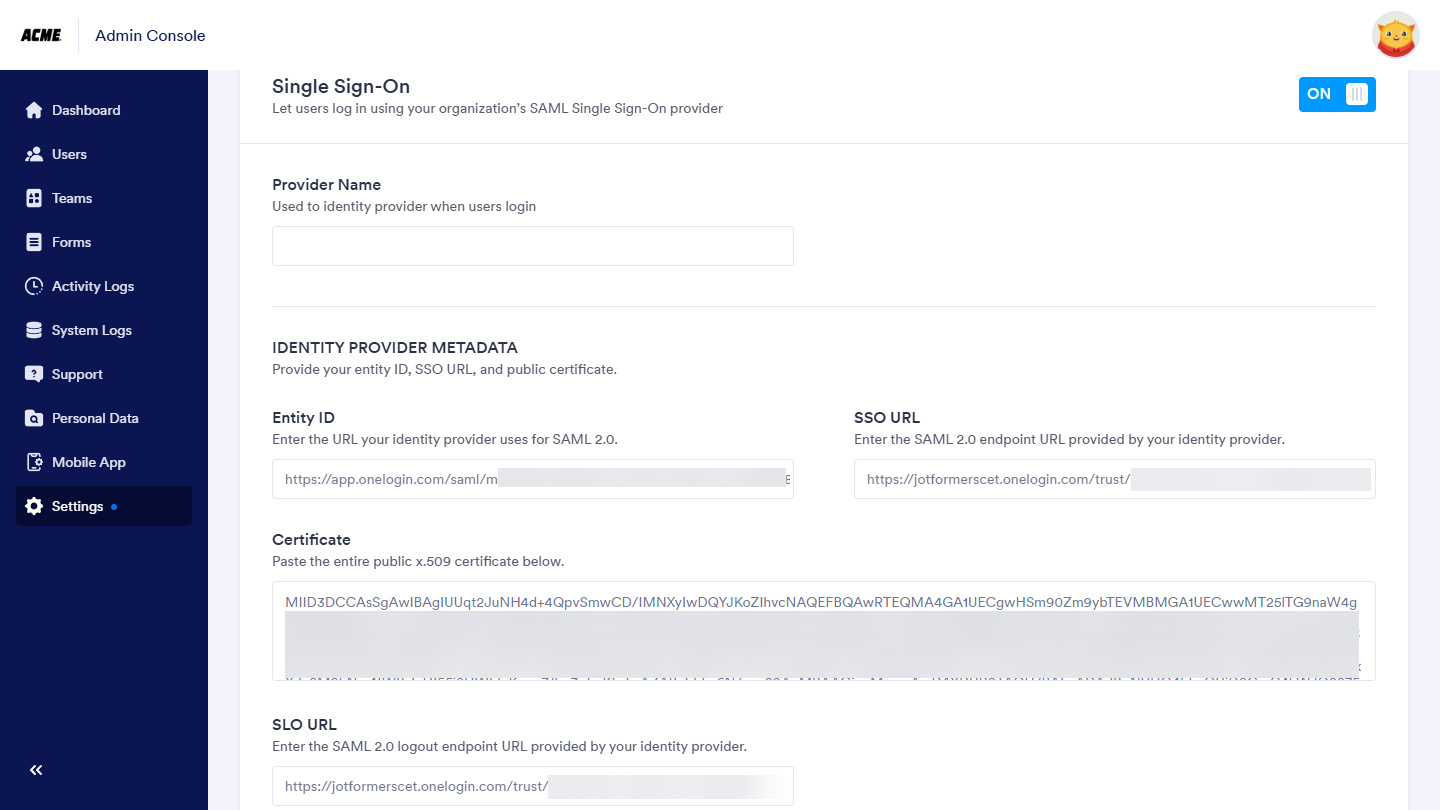
- Scroll down to the SSO Settings section and toggle on Single Sign-On.
- Then, in the Provider Name field, enter the name you want users to see on the login page.
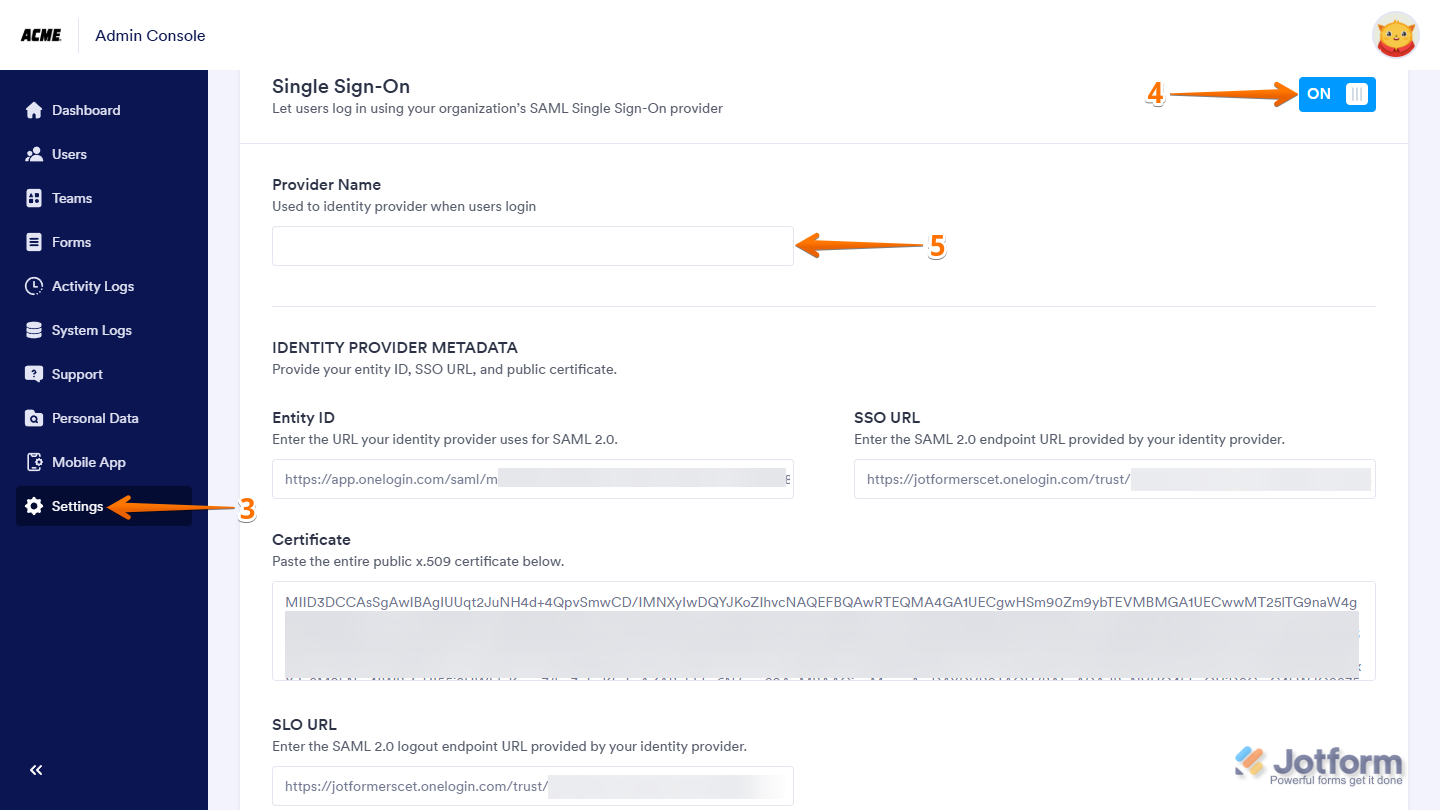
- Now, in the Identity Provider Metadatasection fill in these details:
- Entity ID — Enter your OneLogin Issuer URL.
- SSO URL — Enter your OneLogin SAML 2.0 Endpoint (HTTP).
- Certificate — Paste your OneLogin X.509 Certificate.
- SLO URL — Enter your OneLogin SAML 2.0 Endpoint (HTTP) (used for logout requests).
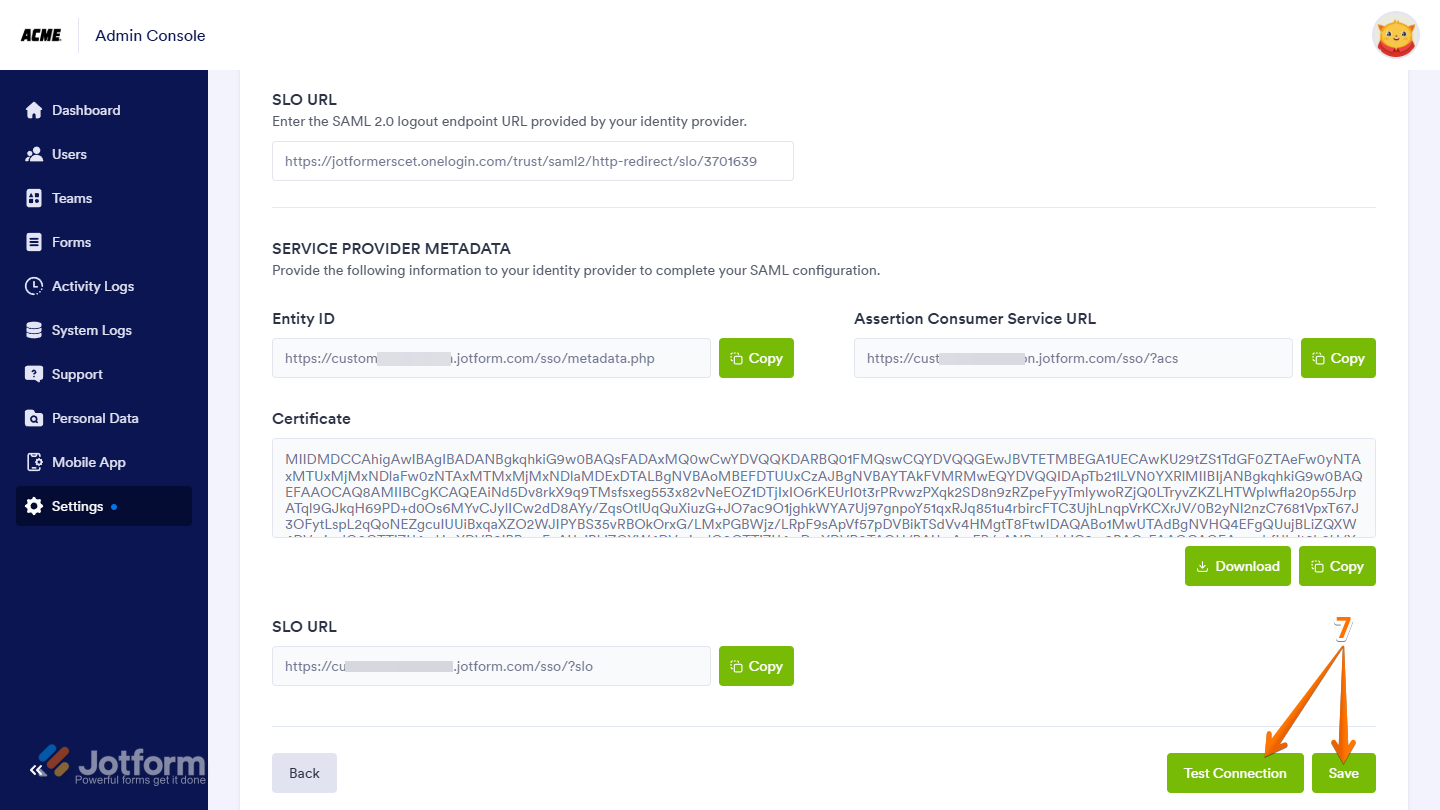
- Finally, click on Test Connection to make sure everything’s working correctly. If it’s successful, click on Save to apply your SSO settings—and you’re good to go.
Now, once you turn on SSO, you’ll see these extra options under the SSO settings:
- Allow Email Login for Licensed Users — This lets licensed users log in with their email and password too, not just through SSO.
- Require Single Sign-On for Guest Accounts — This makes sure guest users can only sign in through SSO, adding a bit more security.
- SSO SCIM Provisioning Settings — This helps you automatically manage users by syncing with your identity provider, so you don’t have to update things manually.


Send Comment:
1 Comments:
More than a year ago
this connector SAML Test Connector (IdP w/attr) is no longer in the onelogin list of apps