With Jotform Enterprise, you can connect Okta’s Single Sign-On to your forms in just a few steps. To get started, make sure SSO’s enabled on your Jotform Enterprise server and that you have an Okta admin account. Once it’s set up, your team can log in quickly and securely using Okta.
Notes
- When SAML is enabled, the app’s regular sign-in page is disabled—users can only log in through Okta.
- Jotform Enterprise doesn’t support backup sign-in URLs, so users can’t use their standard username and password. If needed, you can reach out to Jotform Enterprise Support to turn off SAML.
- The Jotform Enterprise SAML integration currently supports SP-initiated SSO, IdP-initiated SSO, and Just-in-Time (JIT) provisioning.
Setting Up the Okta SAML App
Before setting up Okta SSO in your Jotform Enterprise account, you’ll need to create a SAML App in your Okta Admin Dashboard. It’s easier than you think—here’s what to do:
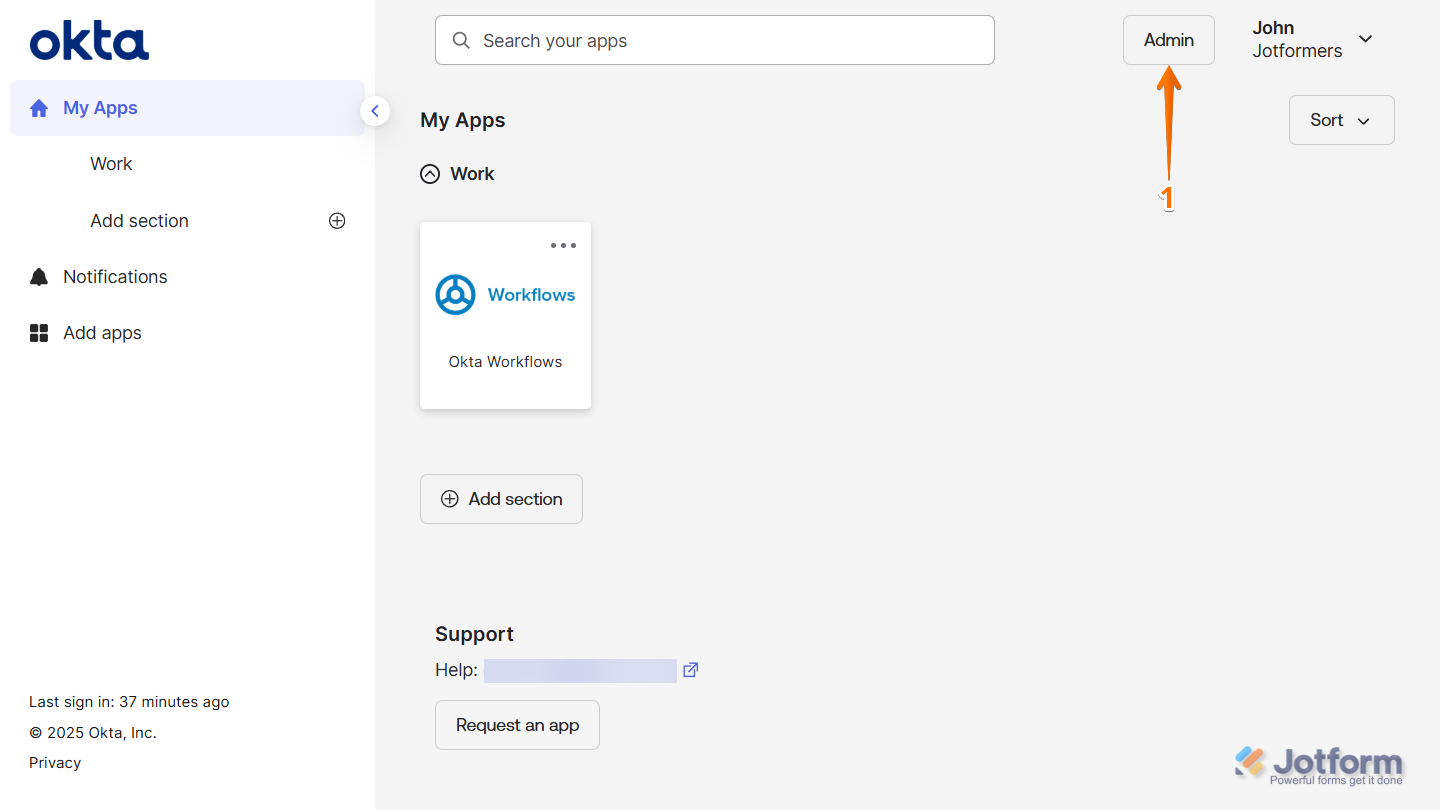
- Log in to your Okta Admin account and click on Admin on the top-right side of the page.
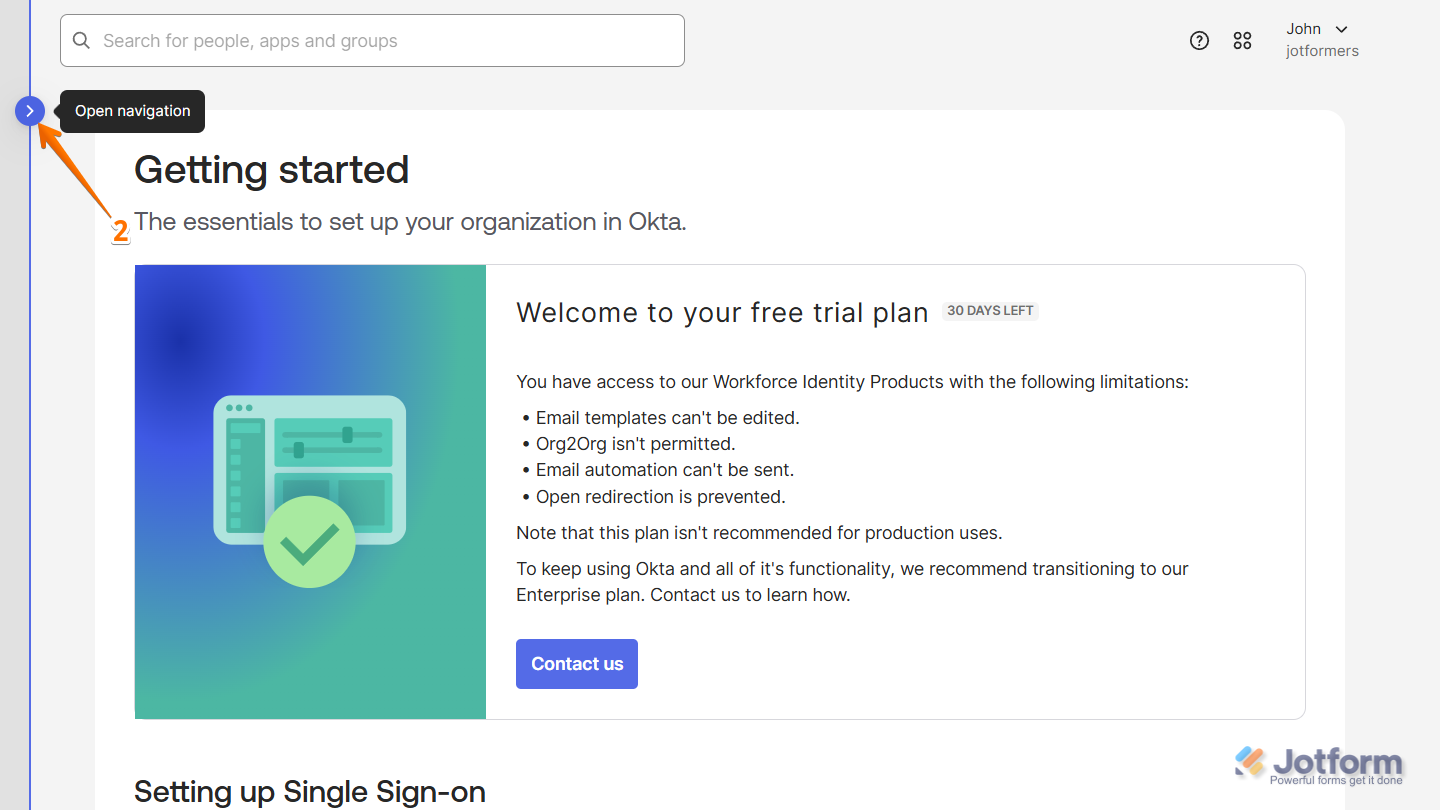
- Now, on the left side of your Getting Started page, click on the Rightward Arrow icon to open the Navigation menu.
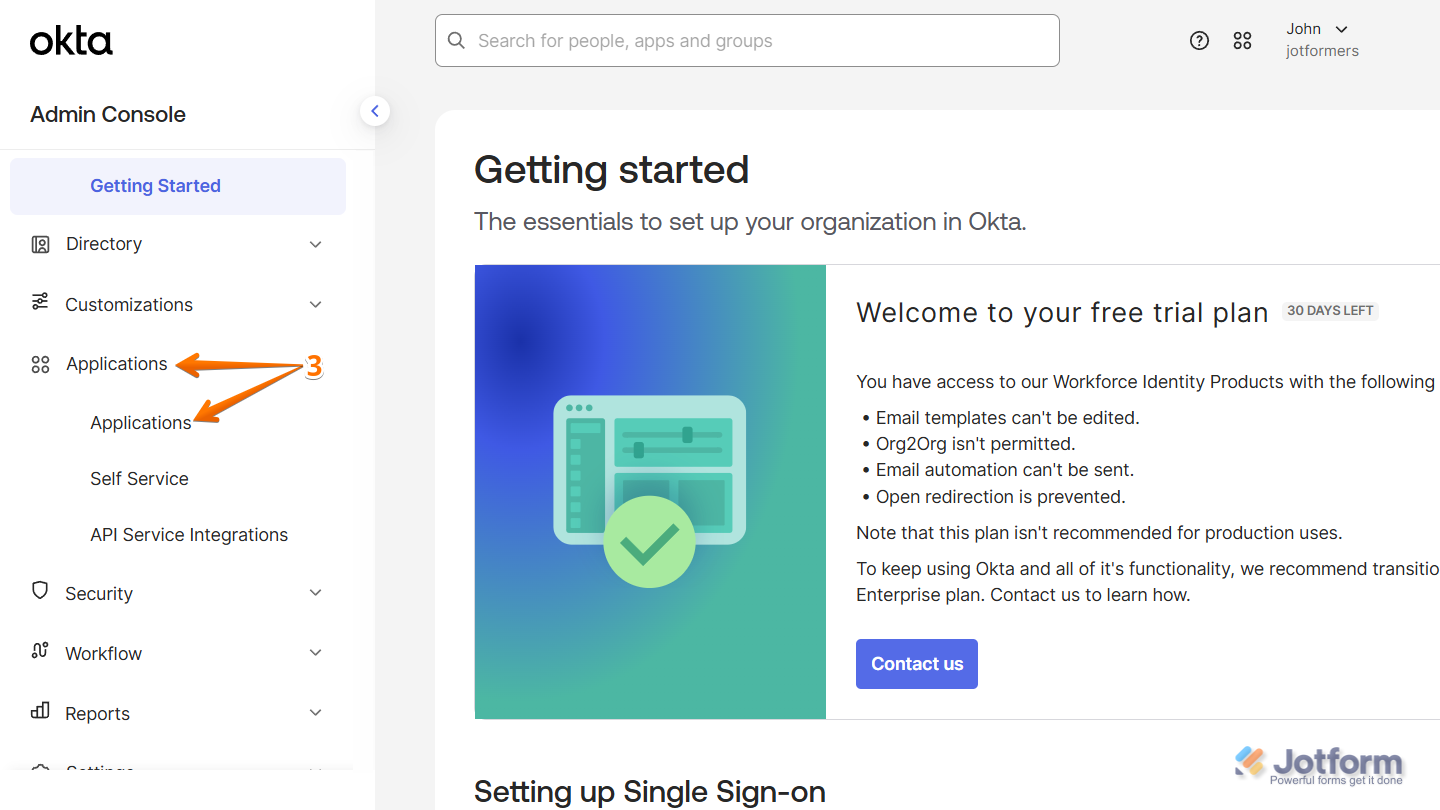
- Then, in the Navigation menu that comes up, click on Applications, and in the Submenu that comes up, click on Applications again to continue.
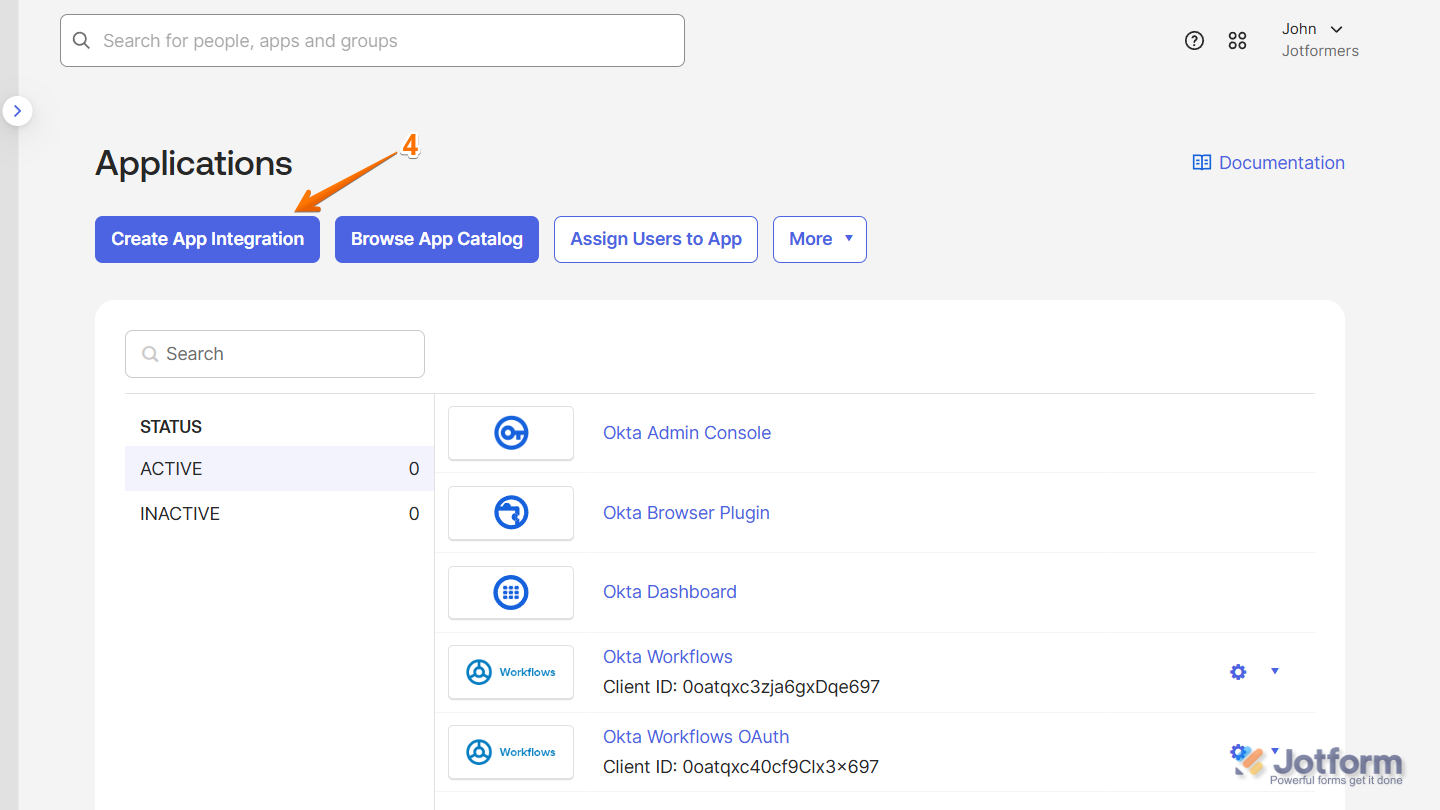
- Next, click on Create App Integration.
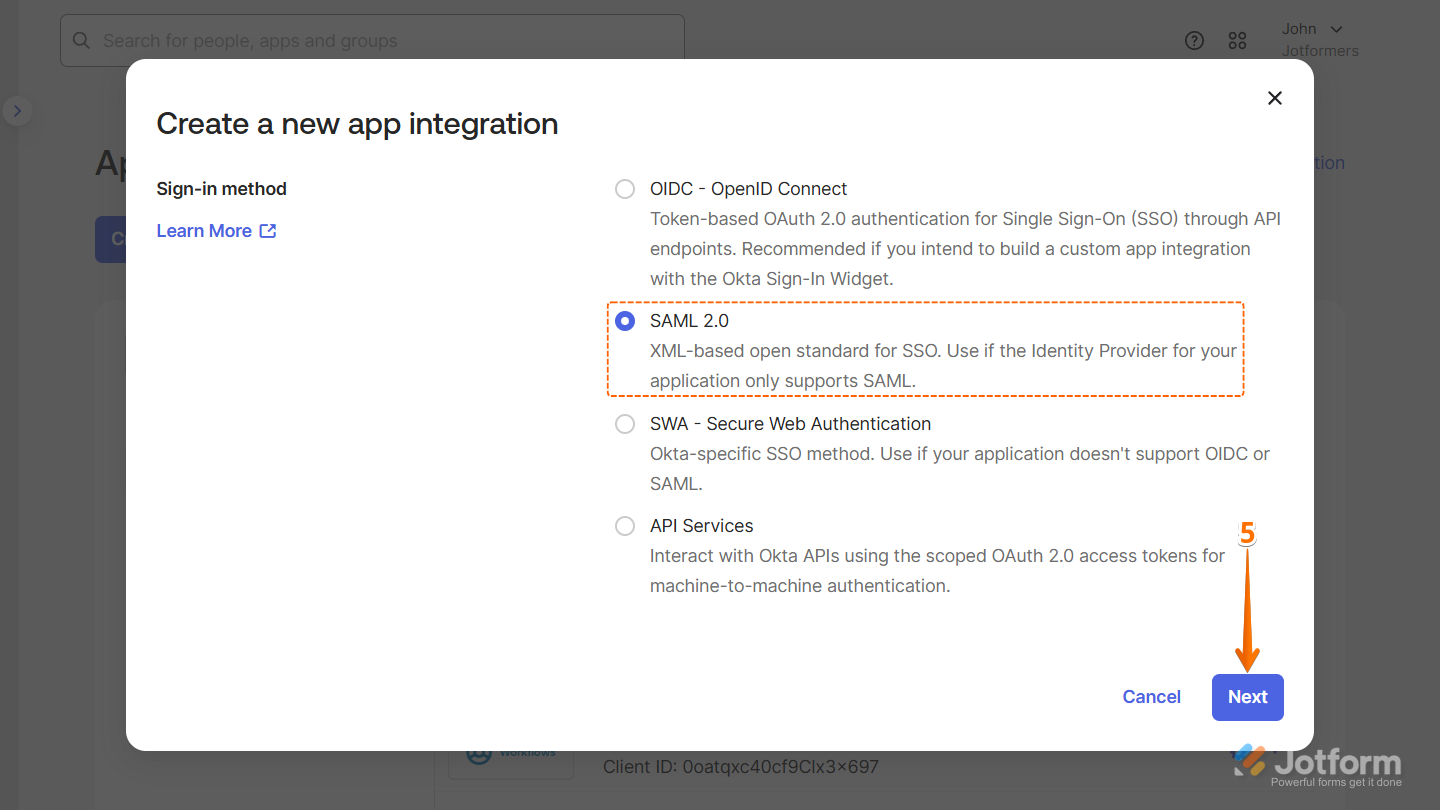
- Then, in the Create App Integration window that comes up, select SAML 2.0 and click on Next.
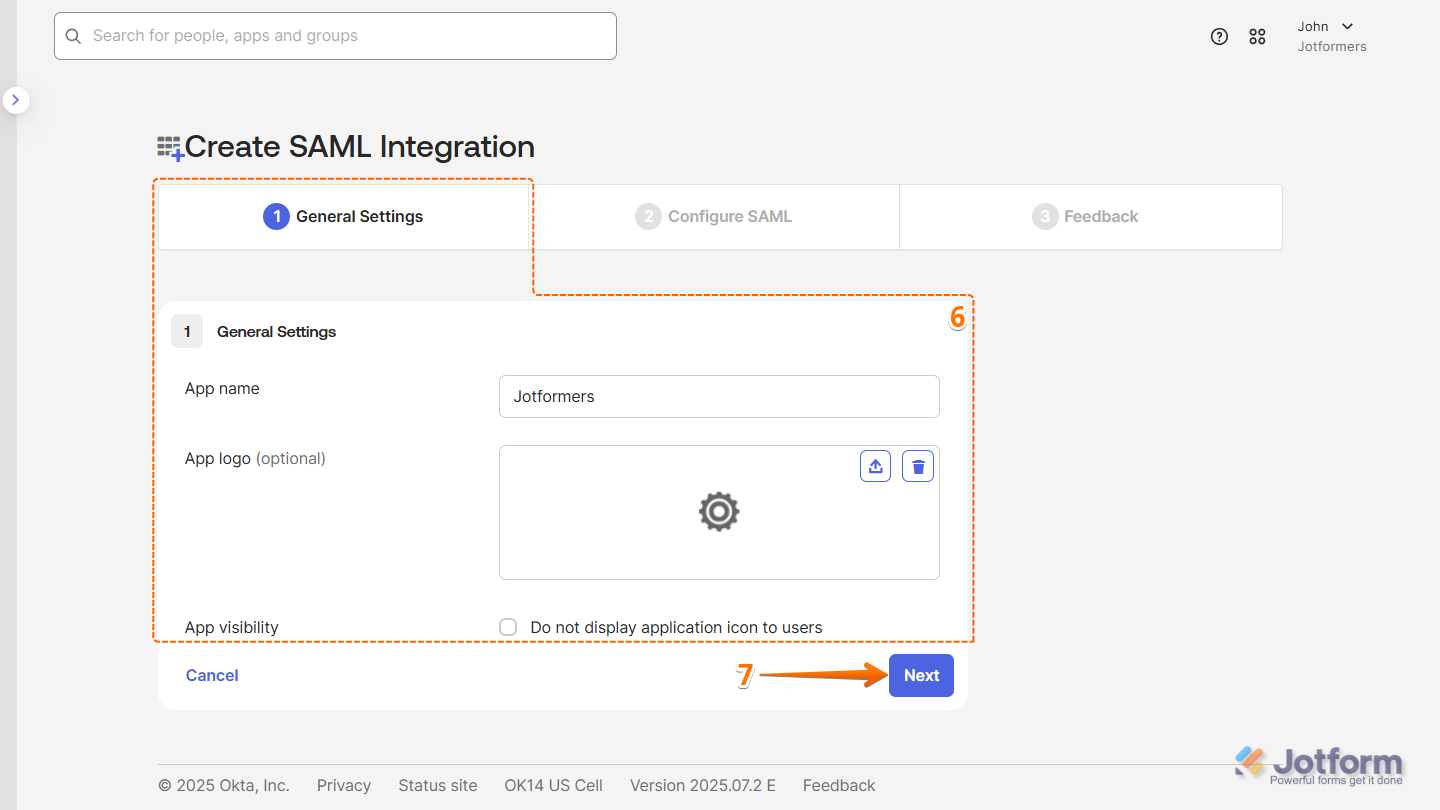
- Now, on the Create SAML Integration page, under the General tab, set up these things:
- App Name — Enter a name for your app so users can recognize it easily.
- App Logo — Upload a logo that users will see during login.
- App Visibility — Check the box to show the app on the User Dashboard, or leave it unchecked to hide it.
- Then, click on Next.
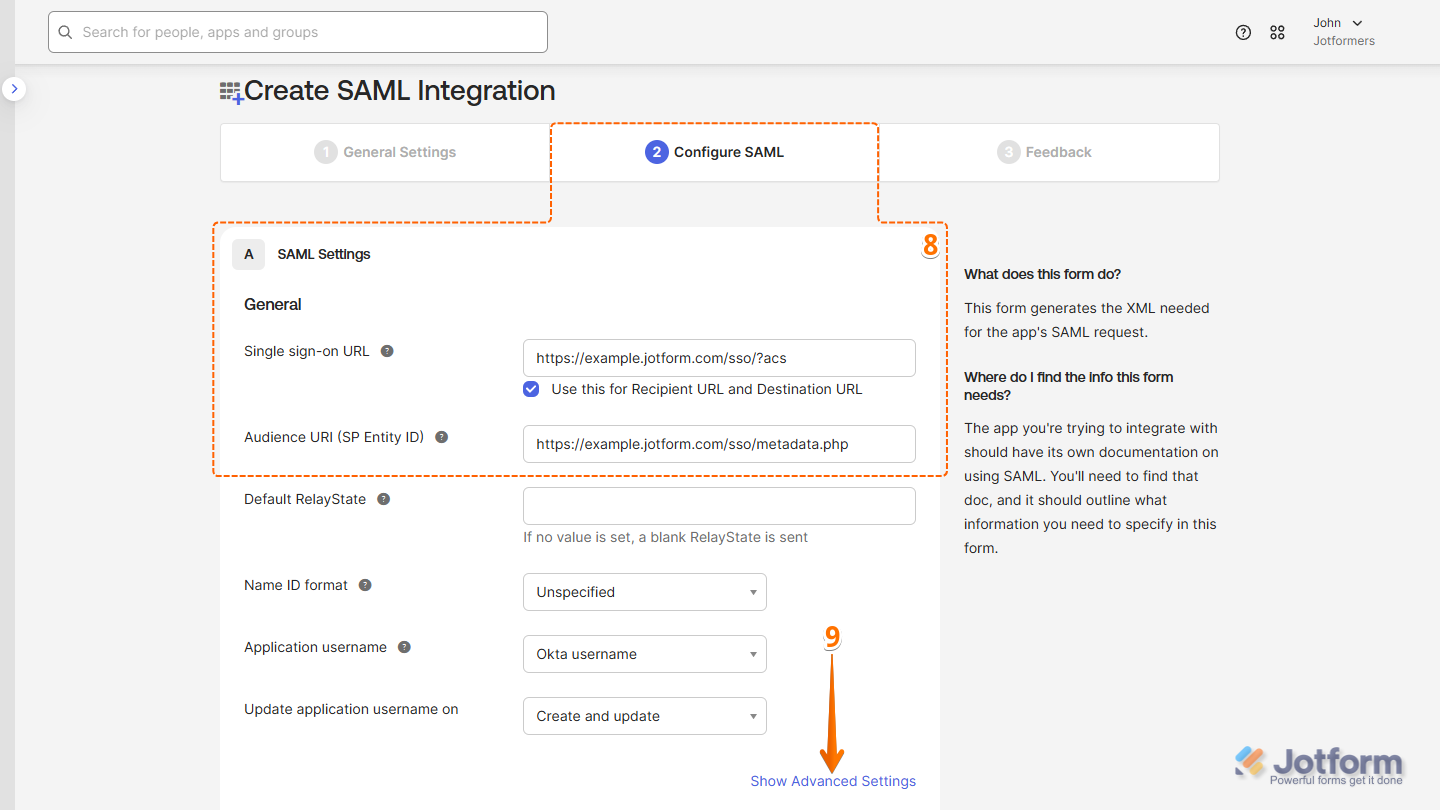
- Now, under the Configure SAML tab, fill in these details. Take a look at our guide on How to Obtain Service Provider Metadata from Jotform Enterprise to learn more about them.
- Single Sign on URL — Enter your full Assertion Consumer Service URL. For example: https://example.jotform.com/sso/?acs
- Audience URI (SP Entity ID) — Enter your Jotform Entity ID. For example: https://example.jotform.com/sso/metadata.php
- Then, click on Show Advanced Settings.
- Next, in the Signature Certificate field, click on Browse files to upload your SPM Certificate.

- Once the SPM certificate’s uploaded, check the box next to Enable Single Logout to allow the application to initiate single logout.
- Then, enter this info:
- Single Logut URL — Enter your full Assertion Consumer Service URL replacing ?acs with ?slo. For example: https://example.jotform.com/sso/?slo
- SP Issuer — Enter your Jotform Entity ID. For example: https://example.jotform.com/sso/metadata.php

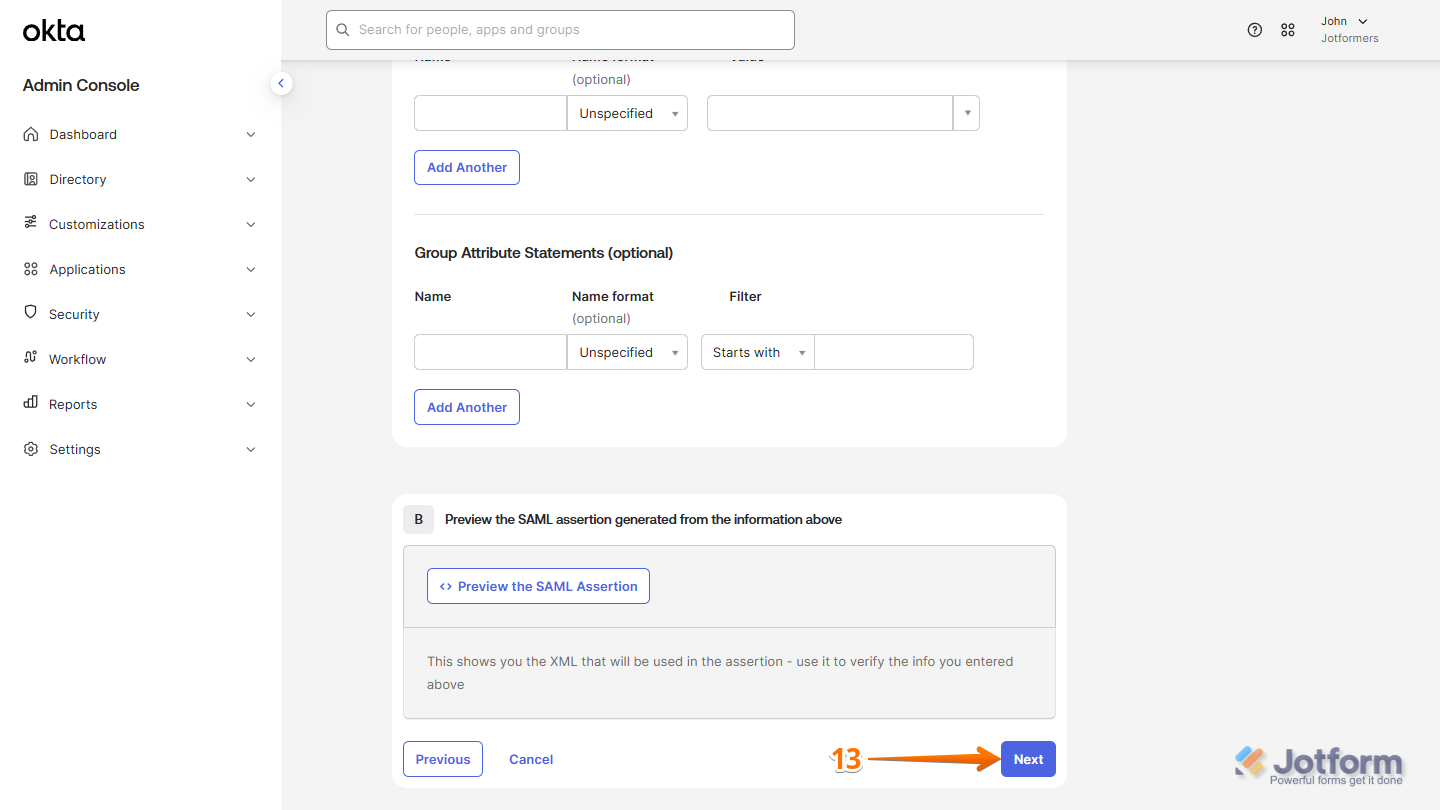
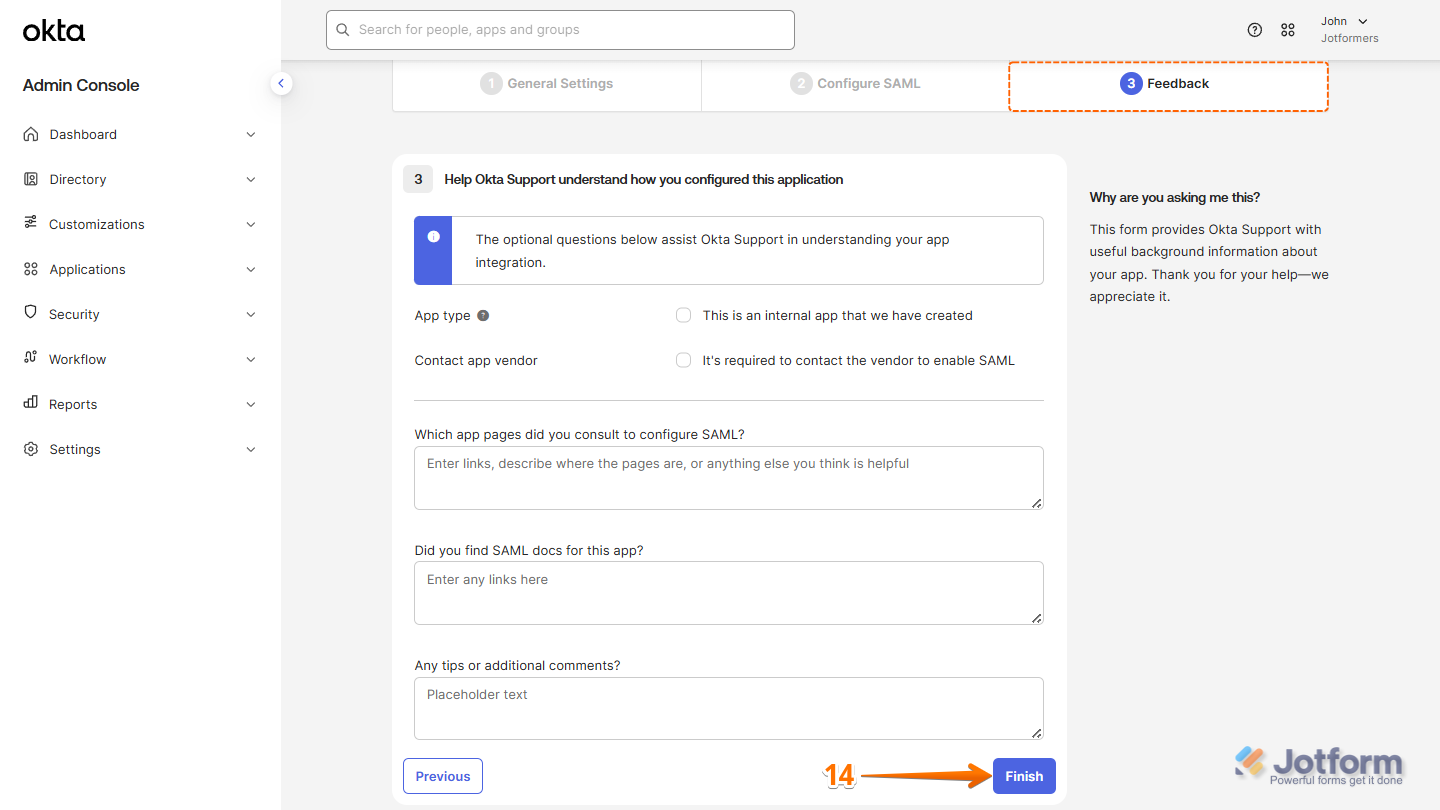
- Now, scroll down to the bottom of the page and click on Next.
- Then, under the Feedback tab, click on Finish.
- After that, you’ll be redirected to the Sign On tab. In the bottom-right corner of the page, click on View SAML Setup Instructions, and you’re all set.
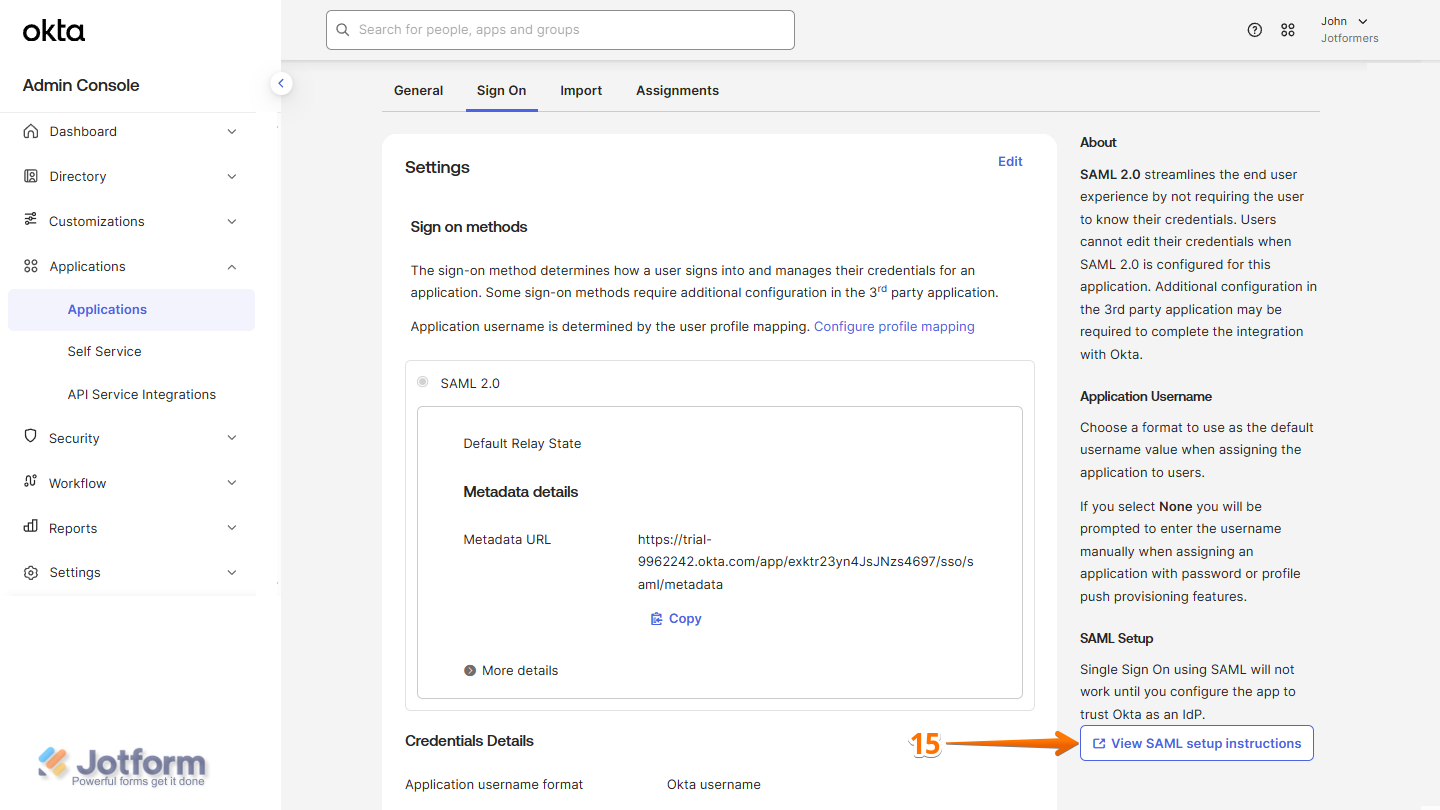
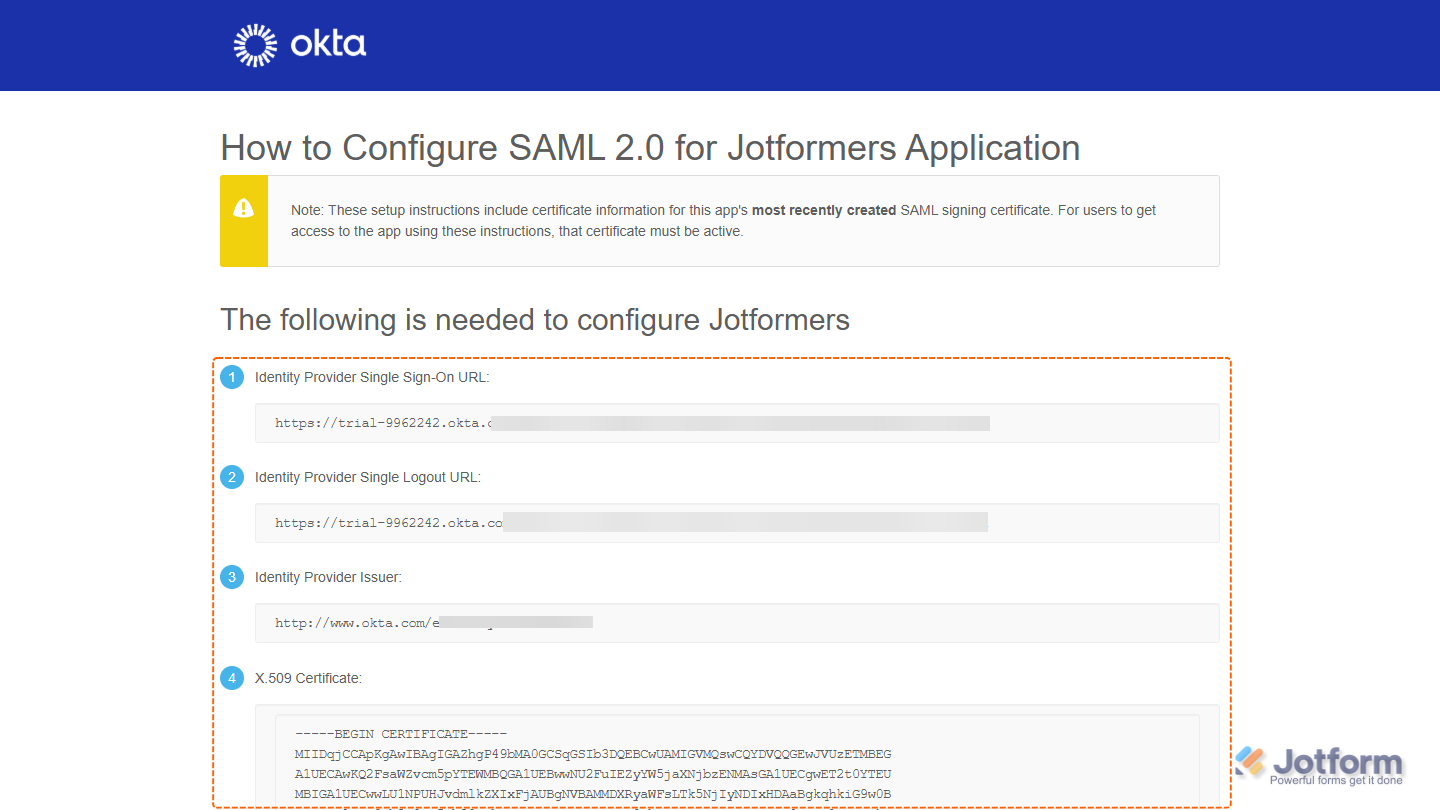
Now, you’ll be able to view your SAML App details. You’ll need this information to set up SSO in your Jotform Enterprise account.
Enabling and Configuring Okta SSO in Your Jotform Enterprise Server
Now that you’ve got your Okta SAML details ready, log in to your Jotform Enterprise server to set up the SSO connection. It only takes a minute—here’s how:
- On your My Workspace page, click on your Avatar/Profile picture in the top-right corner of the screen.
- Then, in the Dropdown menu that comes up, click on Admin Console to open your Admin Dashboard page.

- Click on the Settings in the menu on the left to open your Settings Dashboard.
- Scroll down to the SSO Settings section and toggle on Single Sign-On.
- Then, in the Provider Name field, enter the name you want users to see on the login page.

- Now, in the Identity Provider Metadatasection fill in these details:
- Entity ID — Enter your Okta Issuer URL.
- SSO URL — Enter your Okta SAML 2.0 Endpoint (HTTP).
- Certificate — Paste your Okta X.509 Certificate.
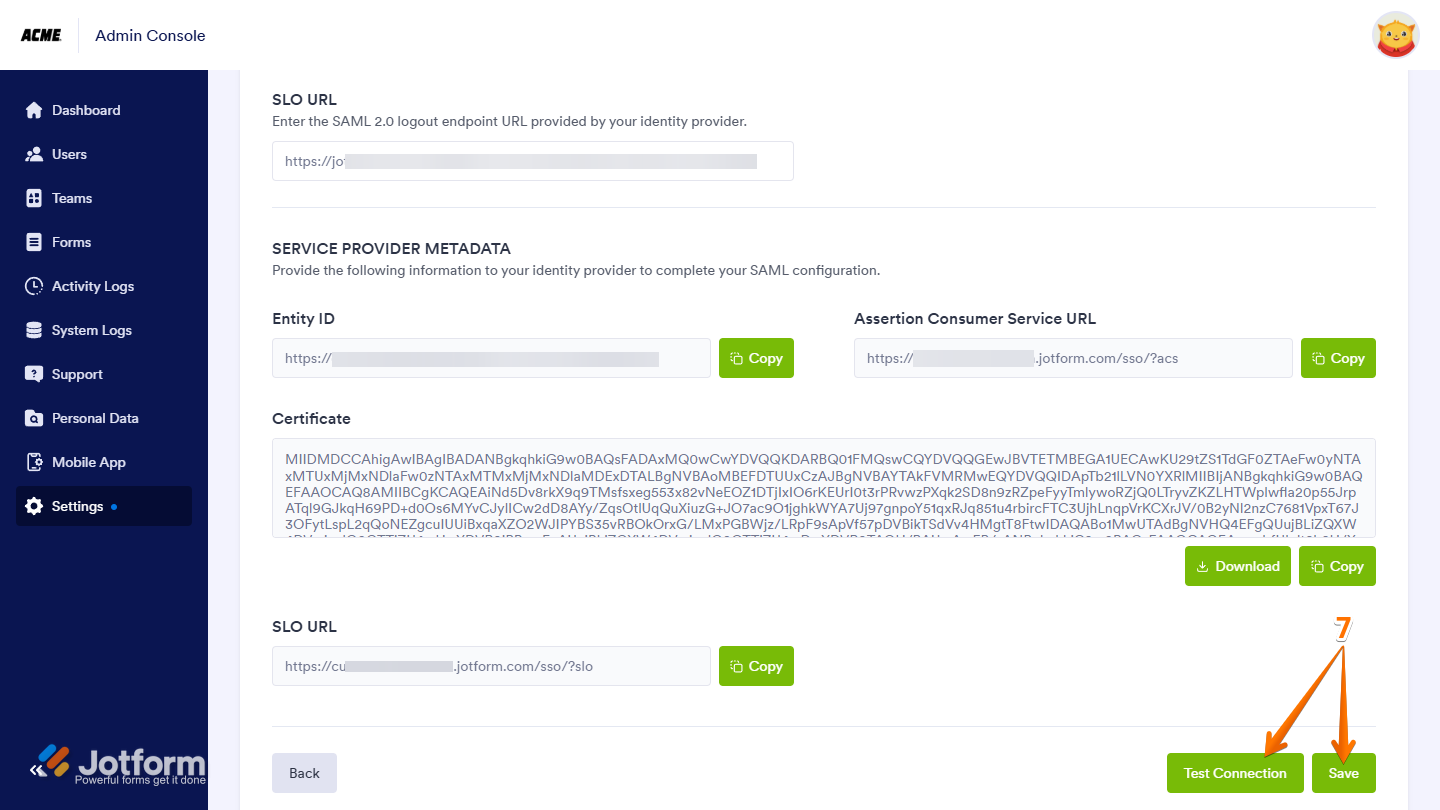
- SLO URL — Enter your Okta Identity Provider Single Logout URL.

- Finally, click on Test Connection to make sure everything’s working correctly. If it’s successful, click on Save to apply your SSO settings—and you’re good to go.
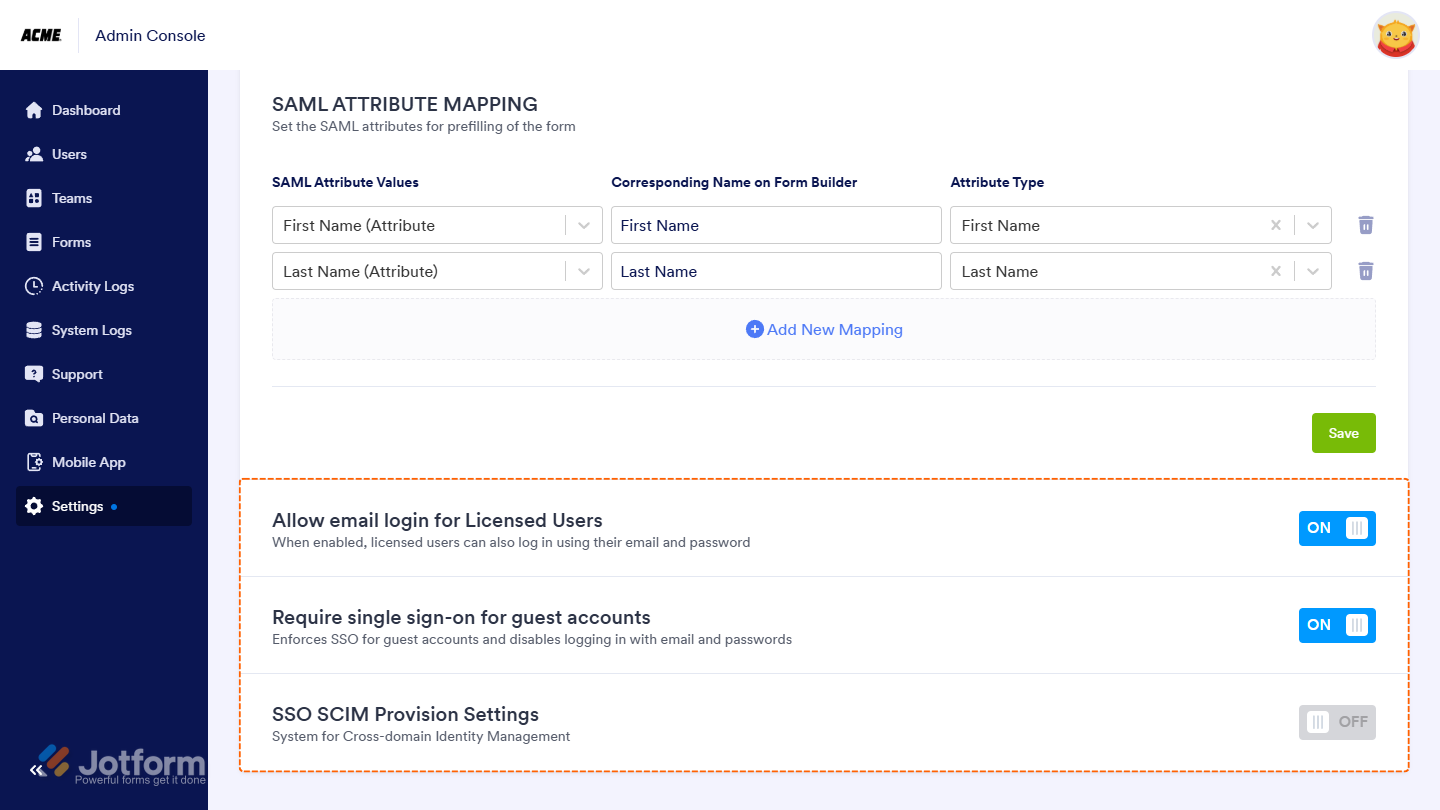
Once you’ve turned on SSO, you’ll see these extra options under the SSO settings:
- Allow Email Login for Licensed Users — This lets licensed users log in with their email and password too, not just through SSO.
- Require Single Sign-On for Guest Accounts — This makes sure guest users can only sign in through SSO, adding a bit more security.
- SSO SCIM Provisioning Settings — This helps you automatically manage users by syncing with your identity provider, so you don’t have to update things manually.
Notes
- Jotform Enterprise supports SAML attributes like email (user.email), name (user.name), and surname (user.surname). You can add and manage additional attributes in the Jotform Enterprise Admin Dashboard.
- Users can log in with either SSO or their email and password. You can also choose to require SSO for guest users.


Send Comment: