Overview
As an Admin, you can restrict access to your server based on an IP address. If needed, later on, you can also remove IP addresses from the list of restrictions. However, only IP Addresses listed as “Trusted Networks” will be able to access your server after adding any networks to the list.
How to Change Network Access
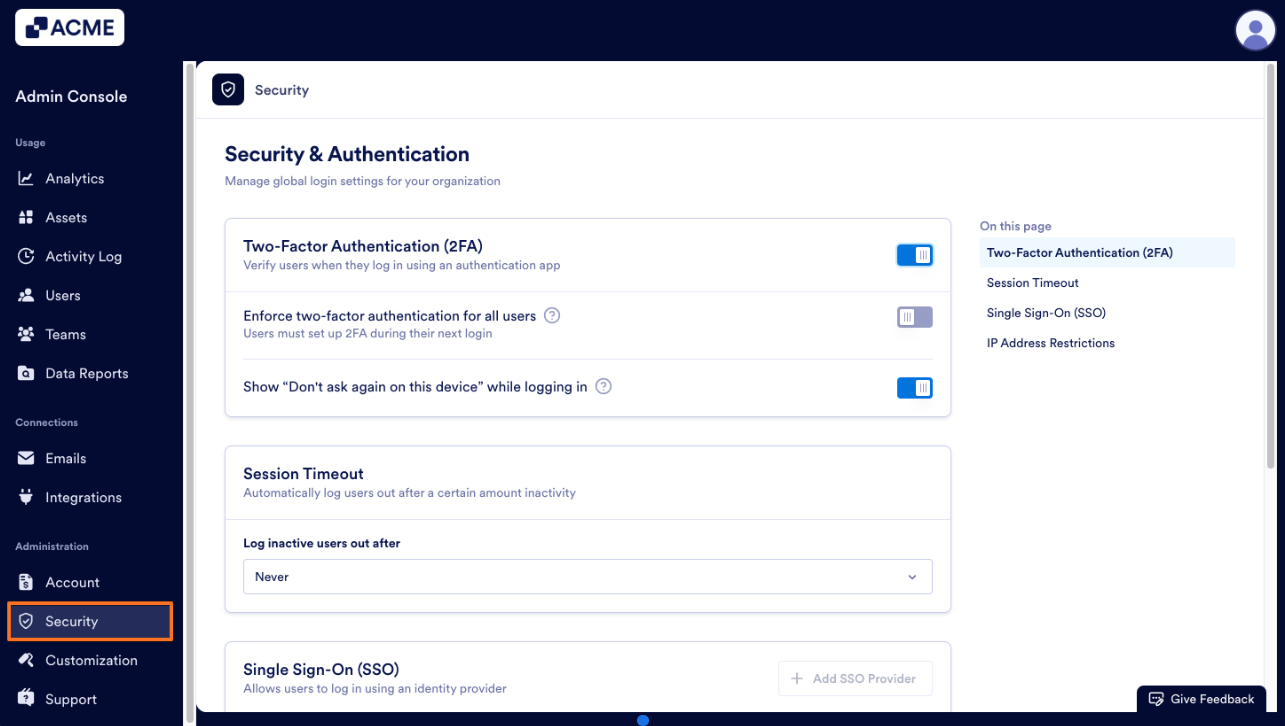
- In the Admin Console, click on Security on the left-hand side of the page.

- At the bottom of the page, click on the Add Network button below IP Address Restrictions.

- Next, review the IP Address that’s listed as your own and make sure Network Status is listed as Trusted Network.
- If you need to add additional IP addresses, click Add Another Network.
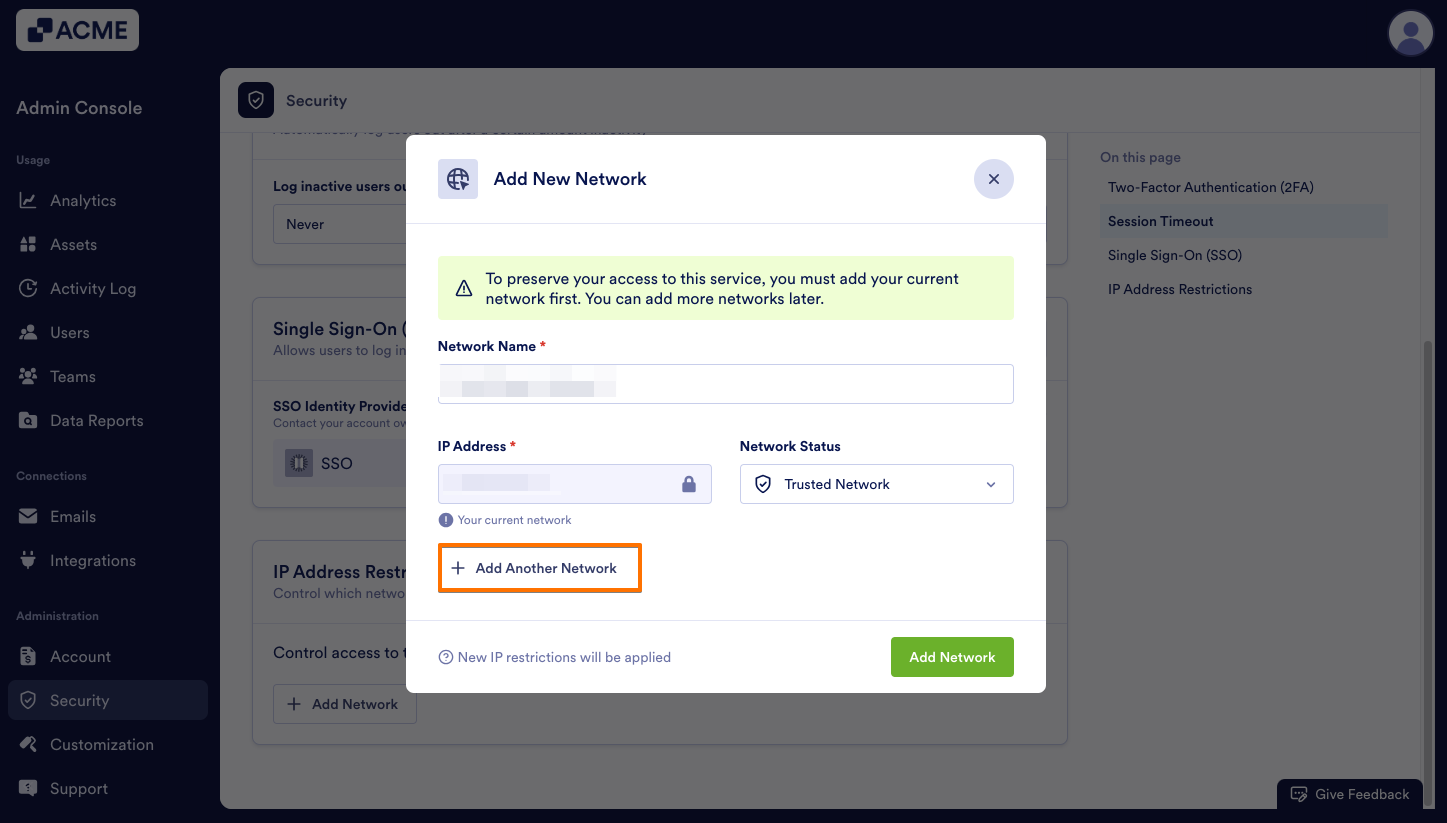
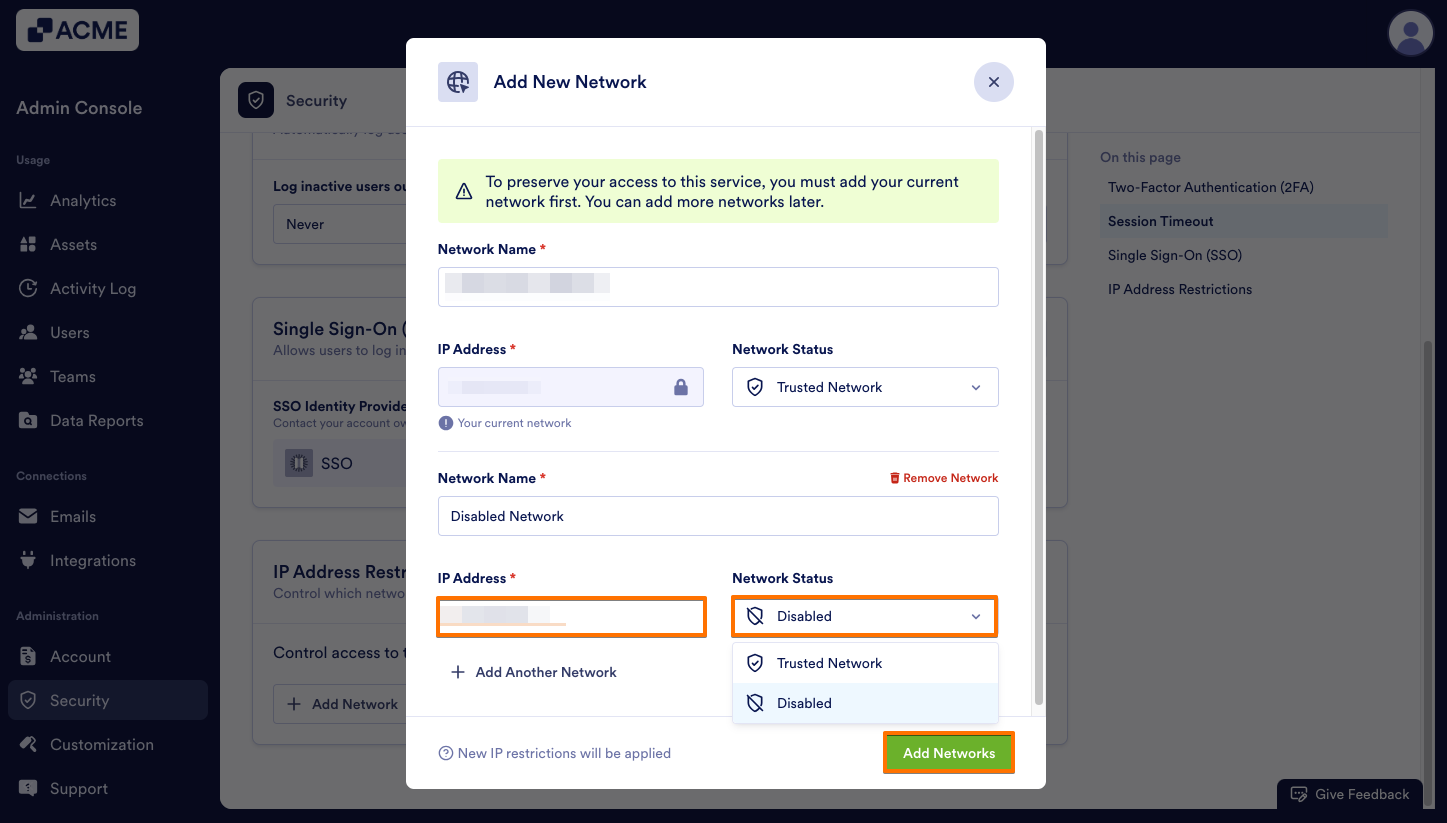
- Then, enter the Network Name, IP Address and select either Trusted Network or Disabled. Trusted Networks are able to access the server, while Disabled Networks will be blocked.

- Then, click on Add Network(s).
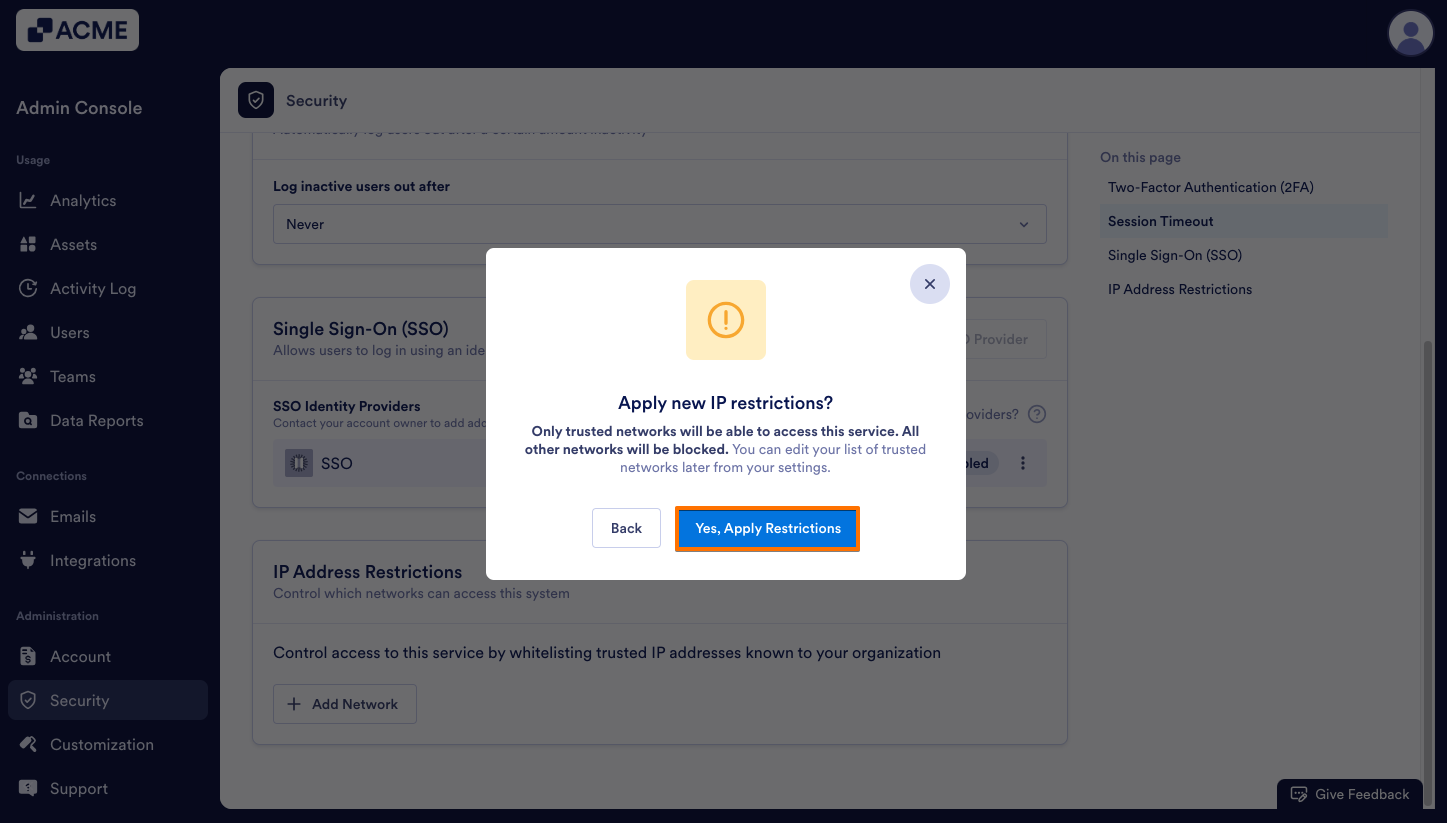
- Finally, in the pop-up window, click Yes, Apply Restrictions to enable the IP Restrictions.
Tip: Once you have added IP Addresses for the first time, you can view them from “Security”. You won’t be able to edit the IP Address of the first Trusted Network, but all future Trusted Networks will allow you to set other IP Adresses.
Managing a Trusted or Disabled IP Address
Need to change an IP Address from Trusted to Disabled or vice versa? You can do this in the Admin Console as well.
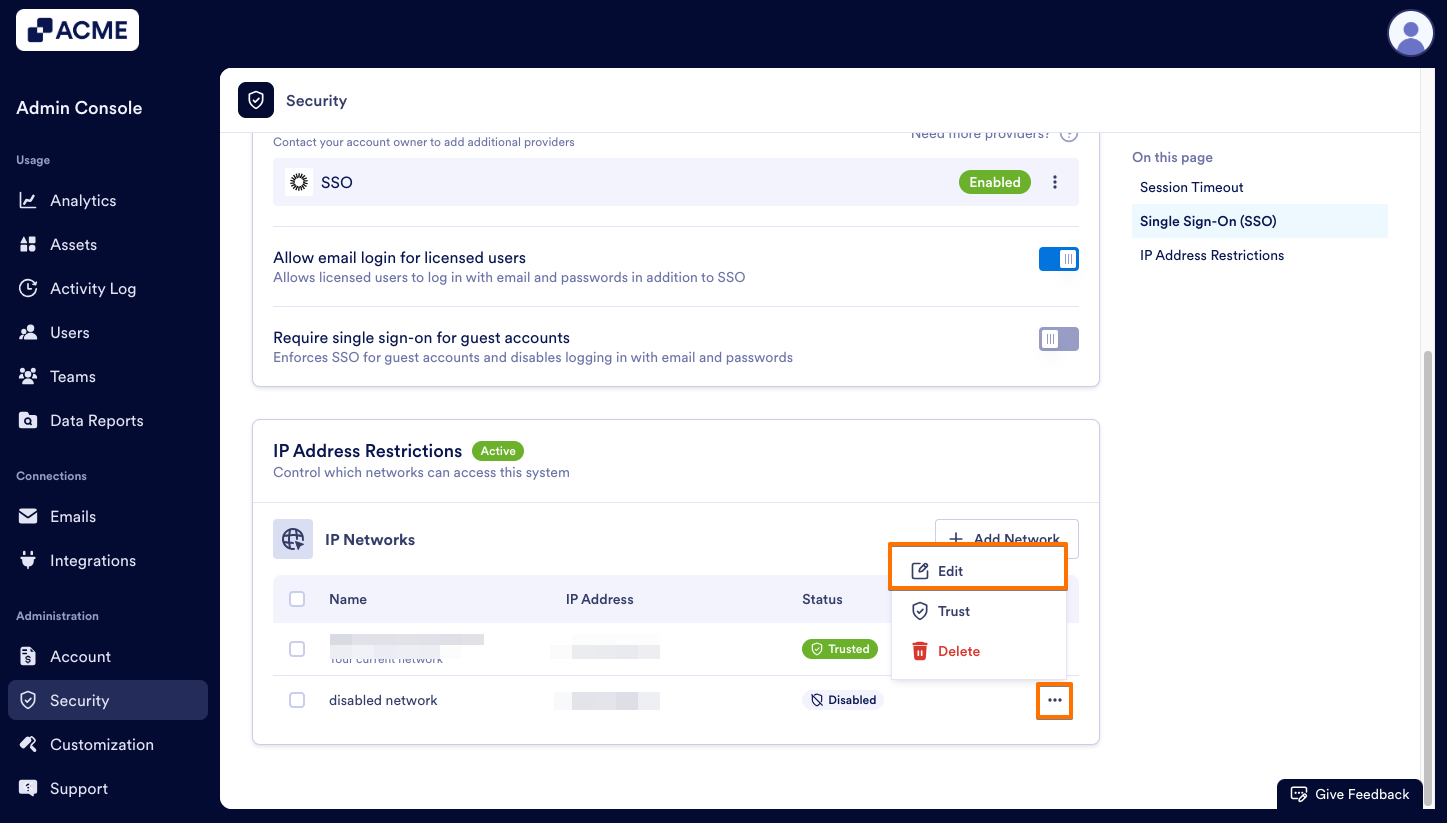
- In the Admin Console, click on Security on the left-hand side of the page and scroll down to IP Network Restrictions.
- Then, click on the three-dot menu next to the IP Address you’d like to Edit.
- Select Edit from the menu.
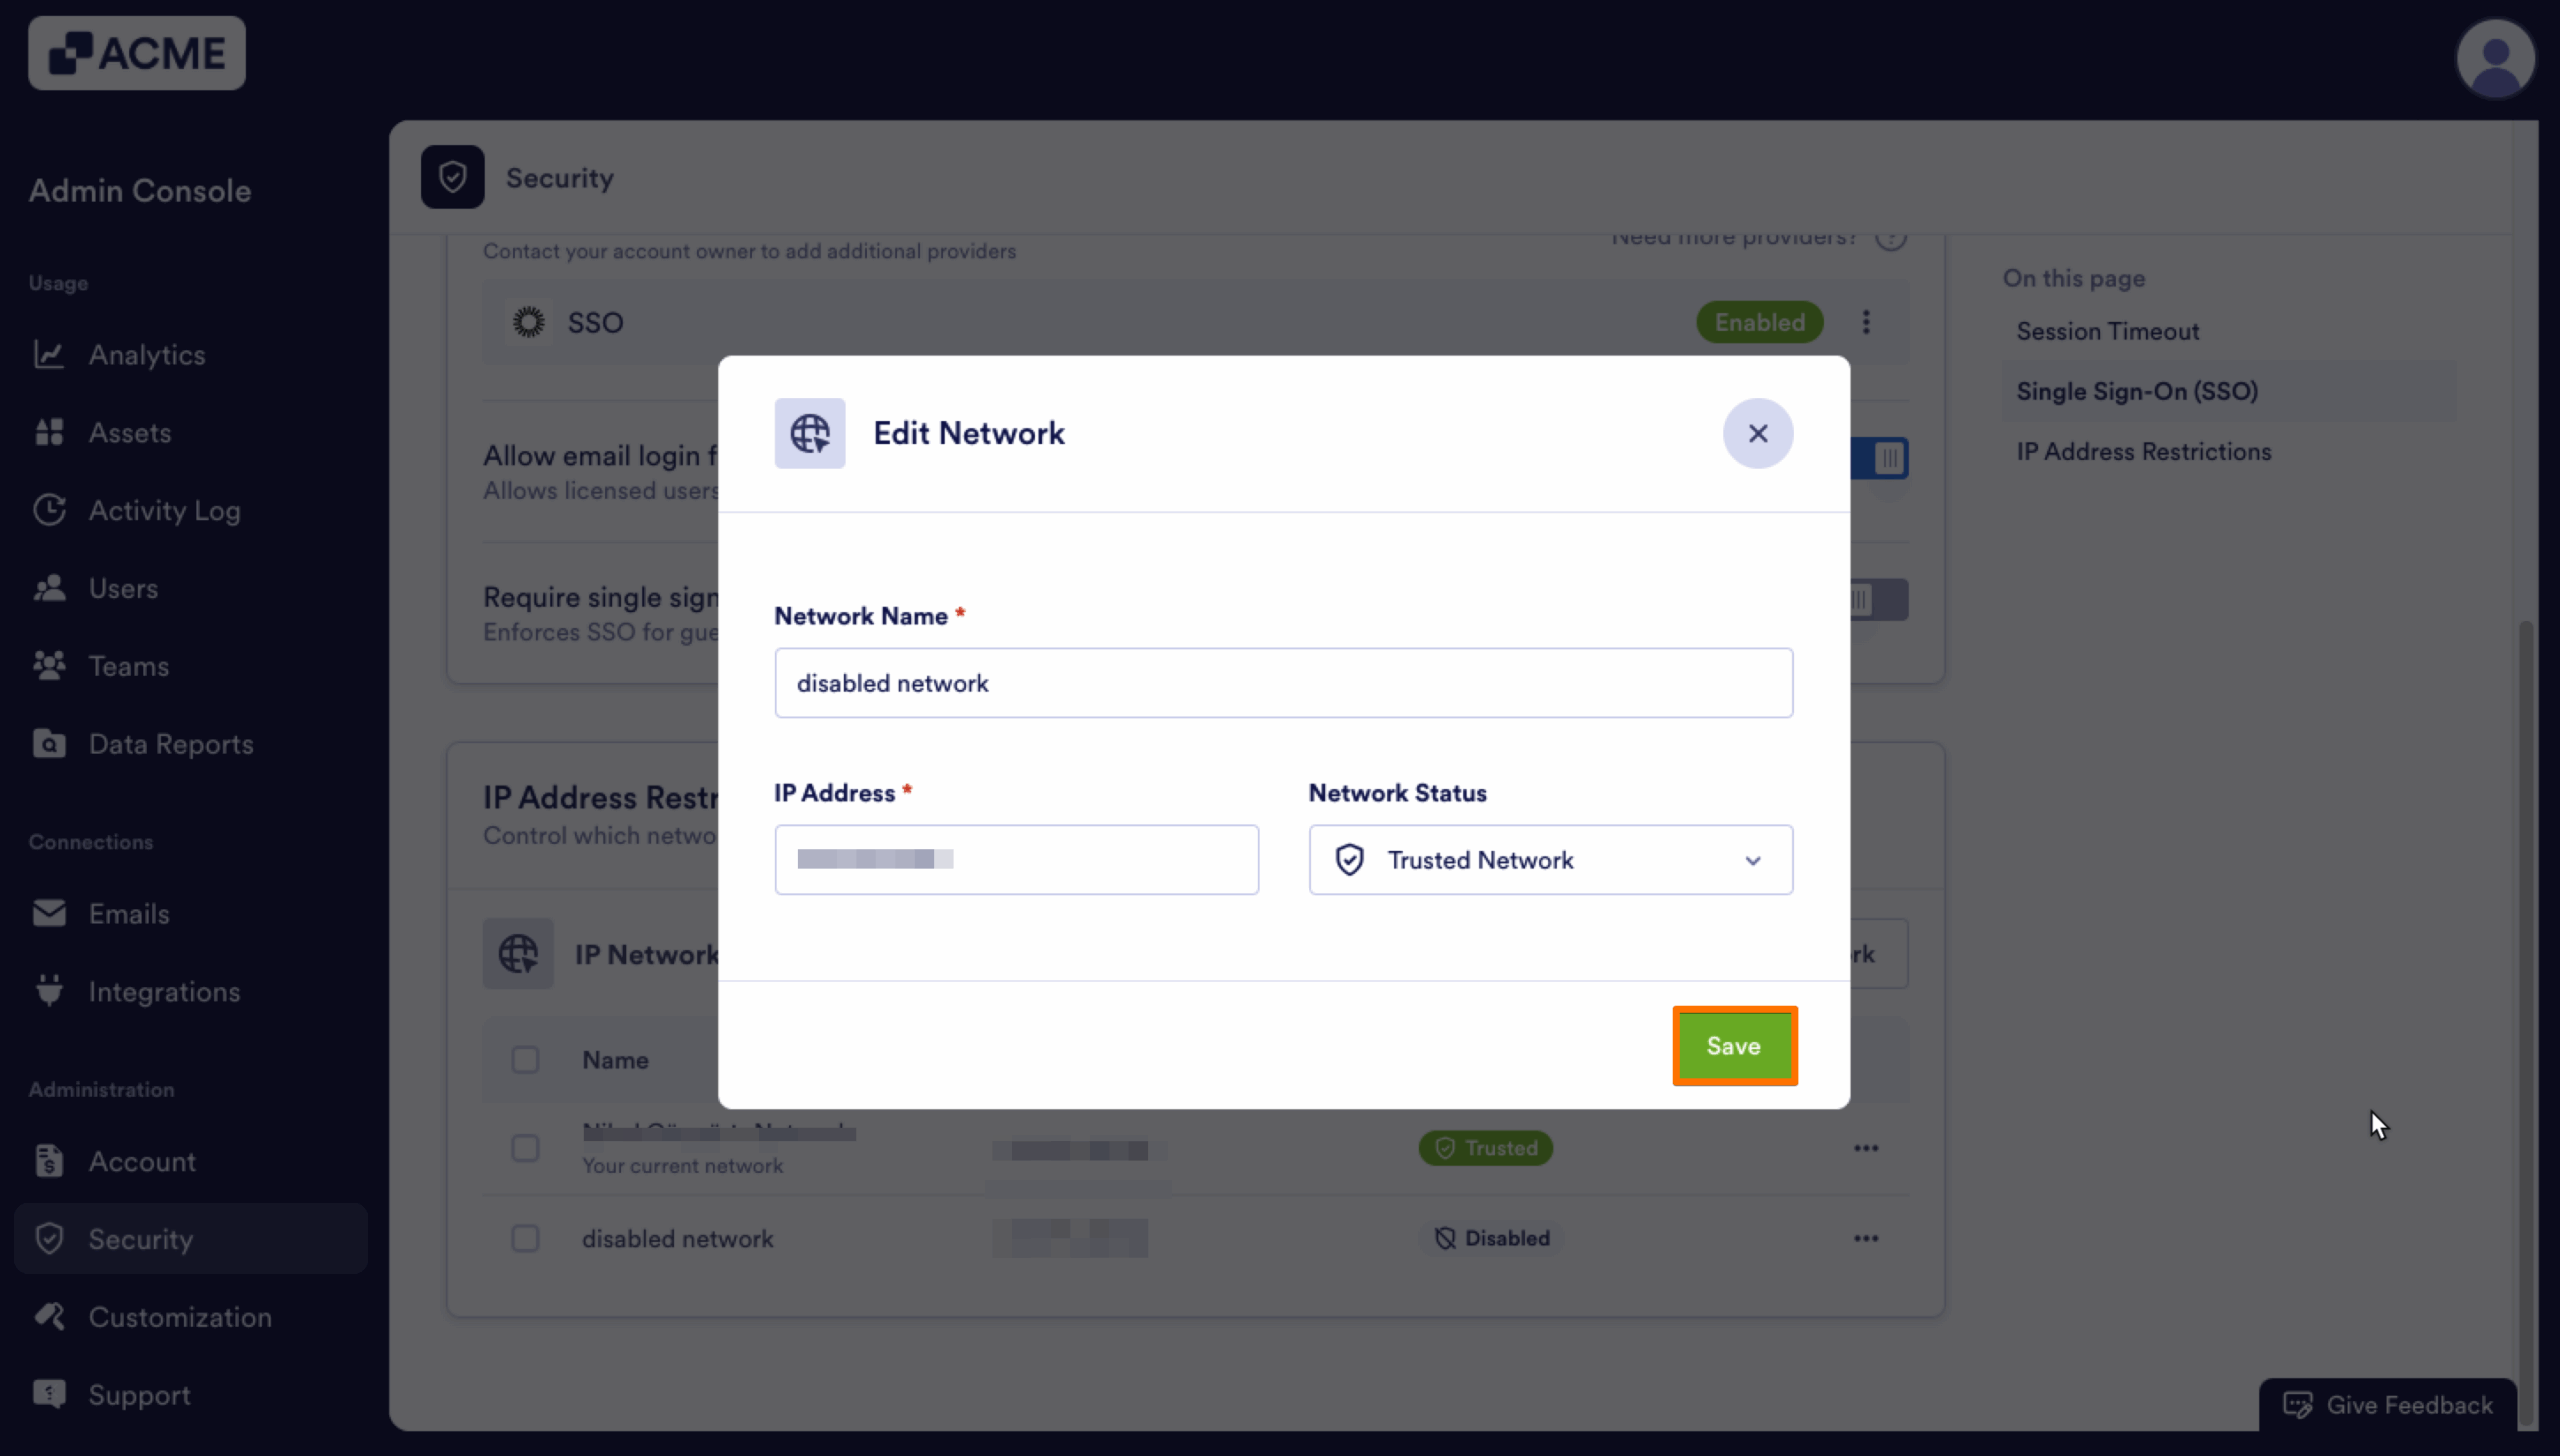
- Next, change the Network Information in the pop-up window.
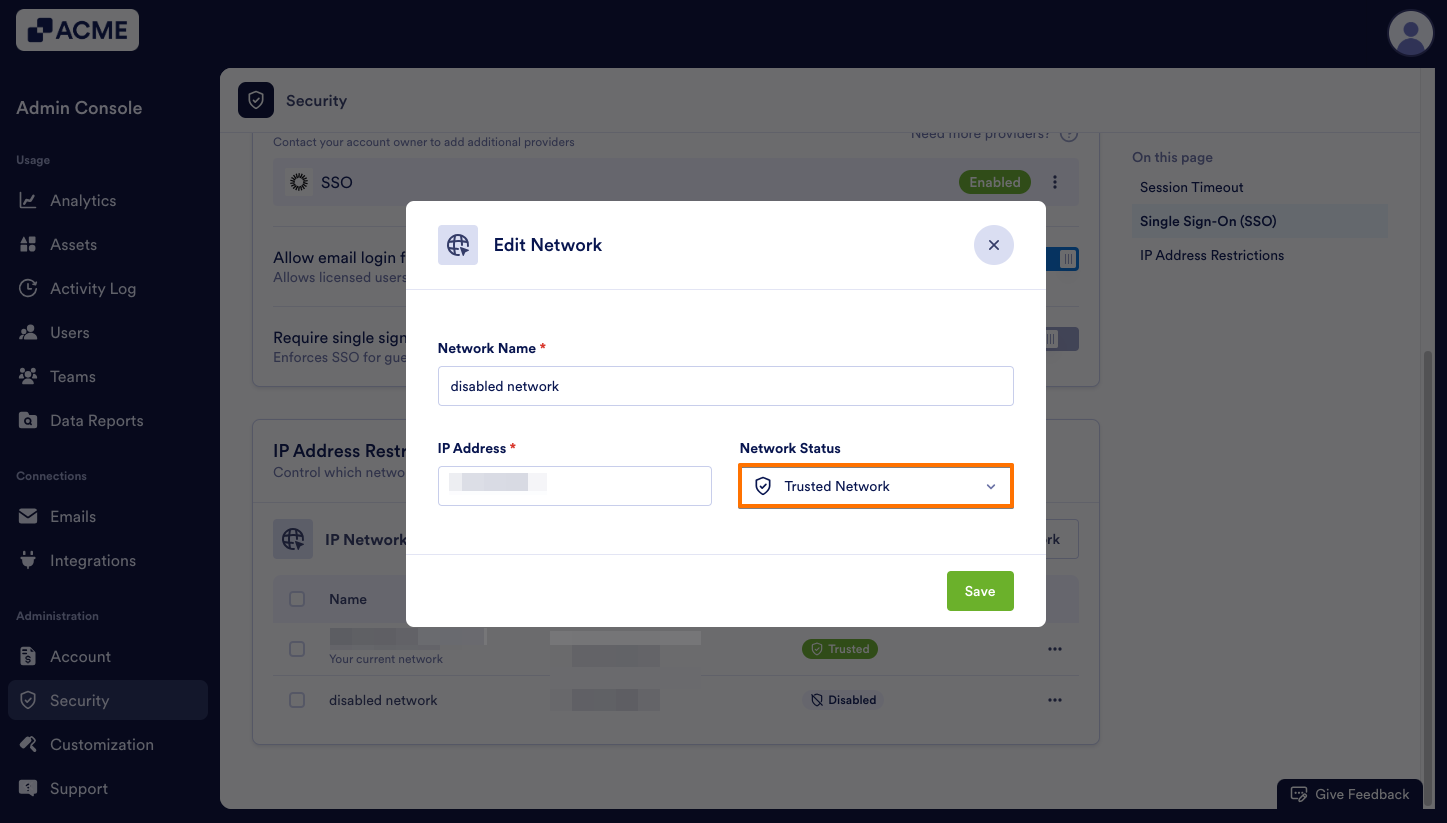
- Finally, click Save.
Deleting IP Addresses
If you ever need to remove an IP Address, either from the list of trusted addresses or disabled ones, you can do this in the Admin Console as well. Let’s walk through this process together:
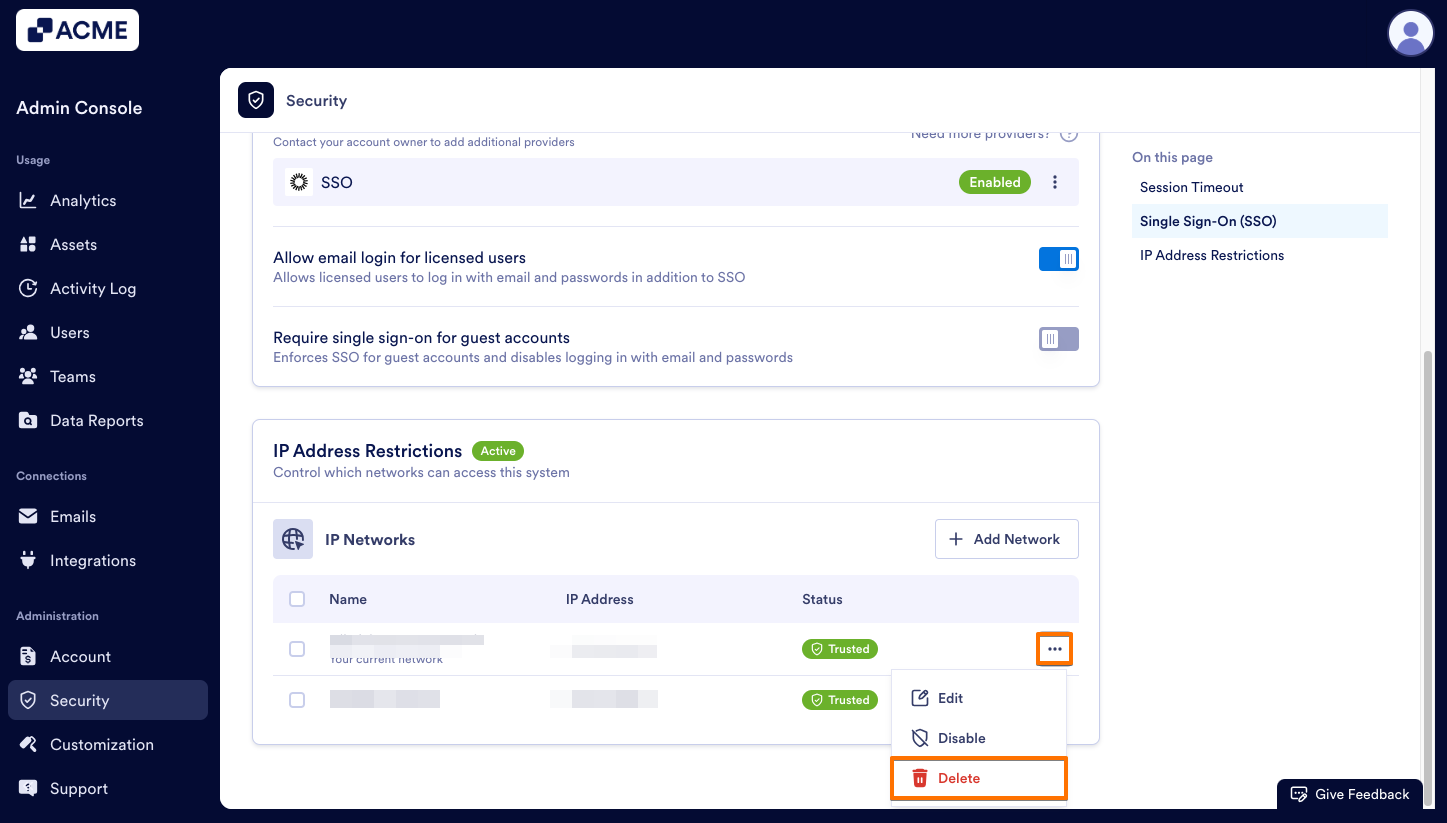
- In the Admin Console, click on Security on the left-hand side of the page and scroll down to IP Address Restrictions.

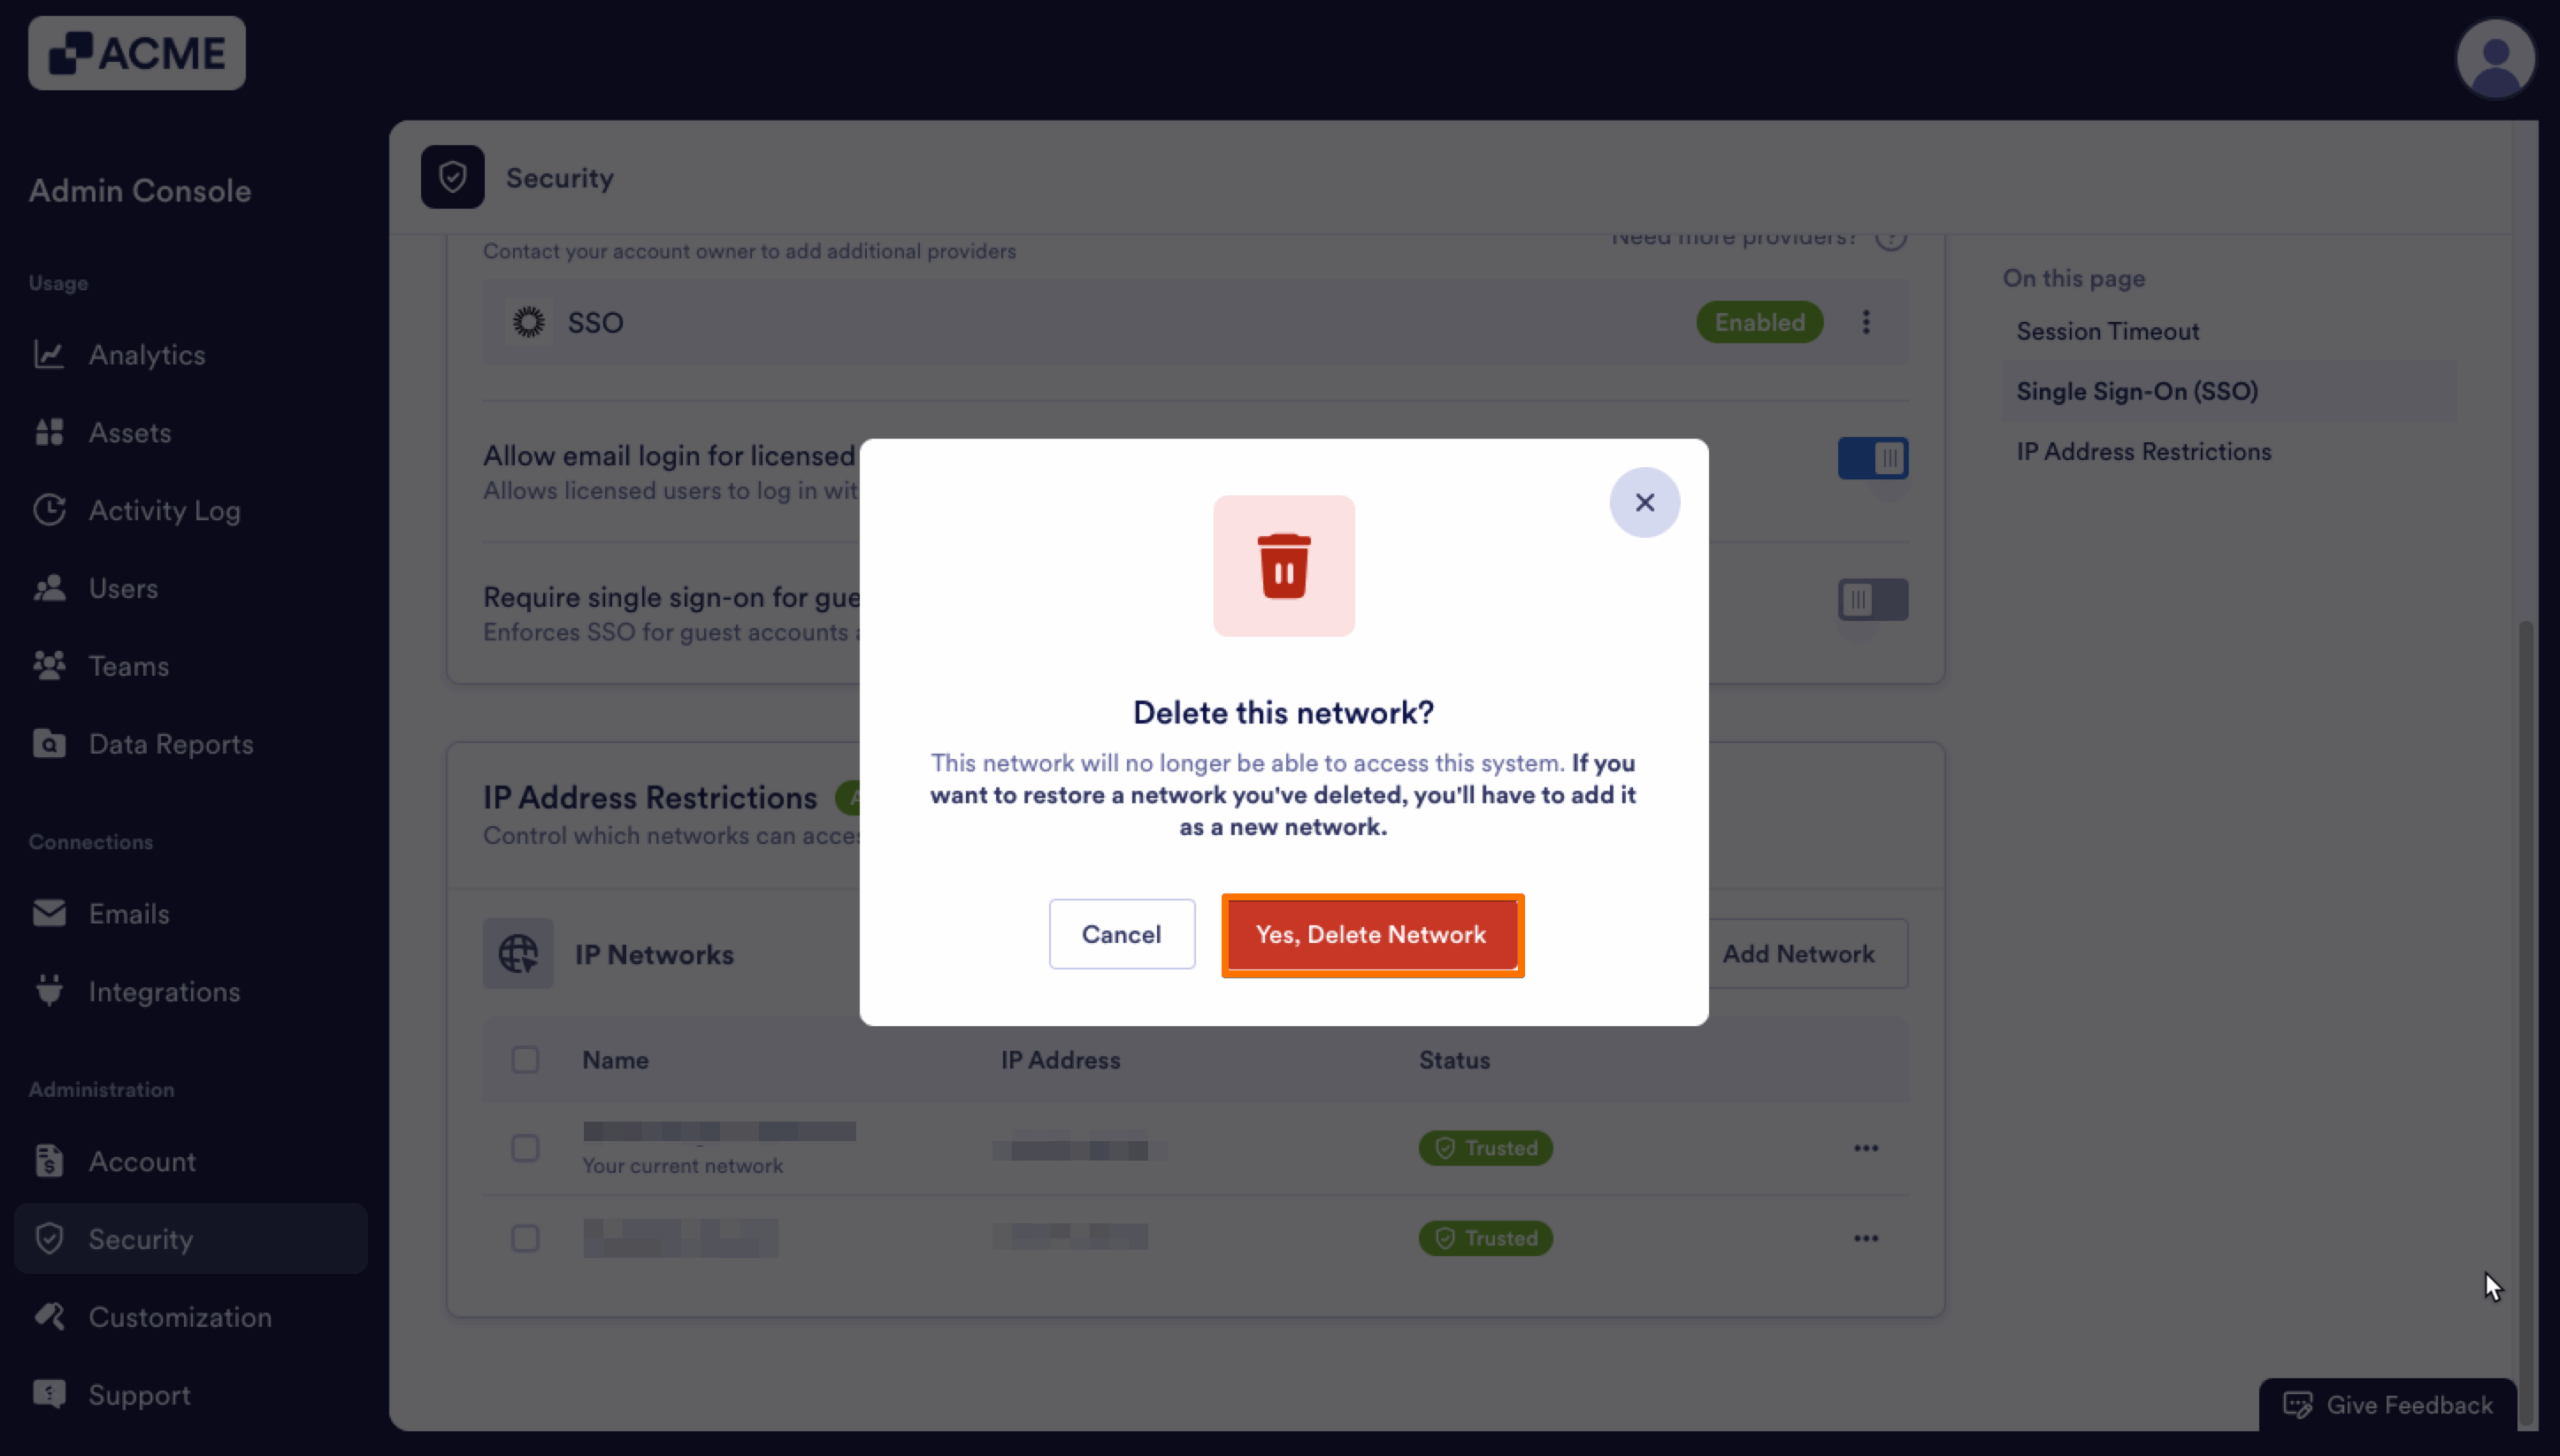
- Then, click on the three-dot menu next to the IP Address you’d like to delete.
- Select Delete from the drop-down menu.
- In the pop-up, click Yes, Delete.
Making Bulk Changes to IP Addresses
You can also make changes to the IP Addresses in bulk, either updating their status or deleting them.
Changing IP Address Status in Bulk
- Under IP Address Restrictions, click on the checkbox next to the IP Addresses you’d like to change.
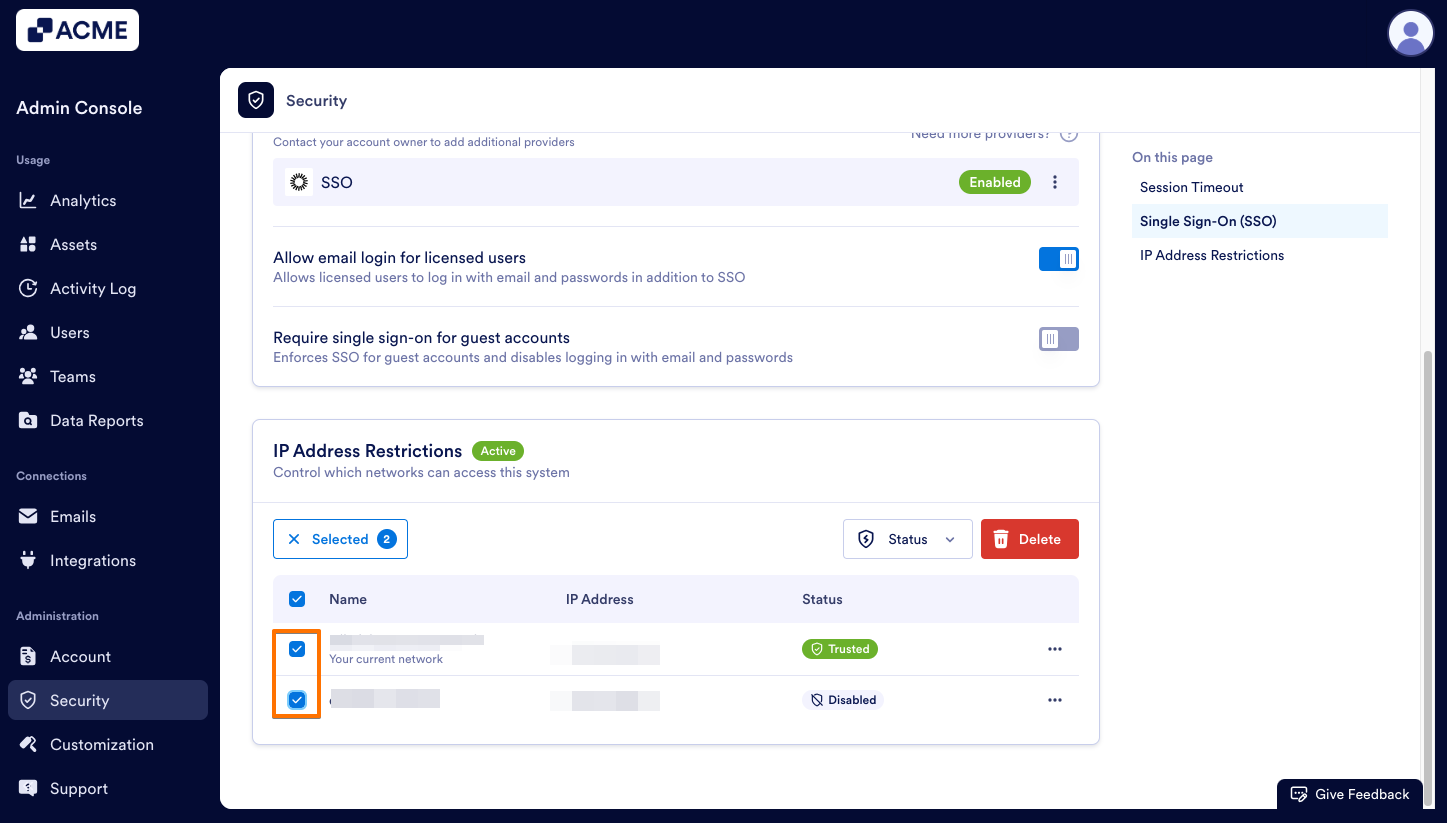
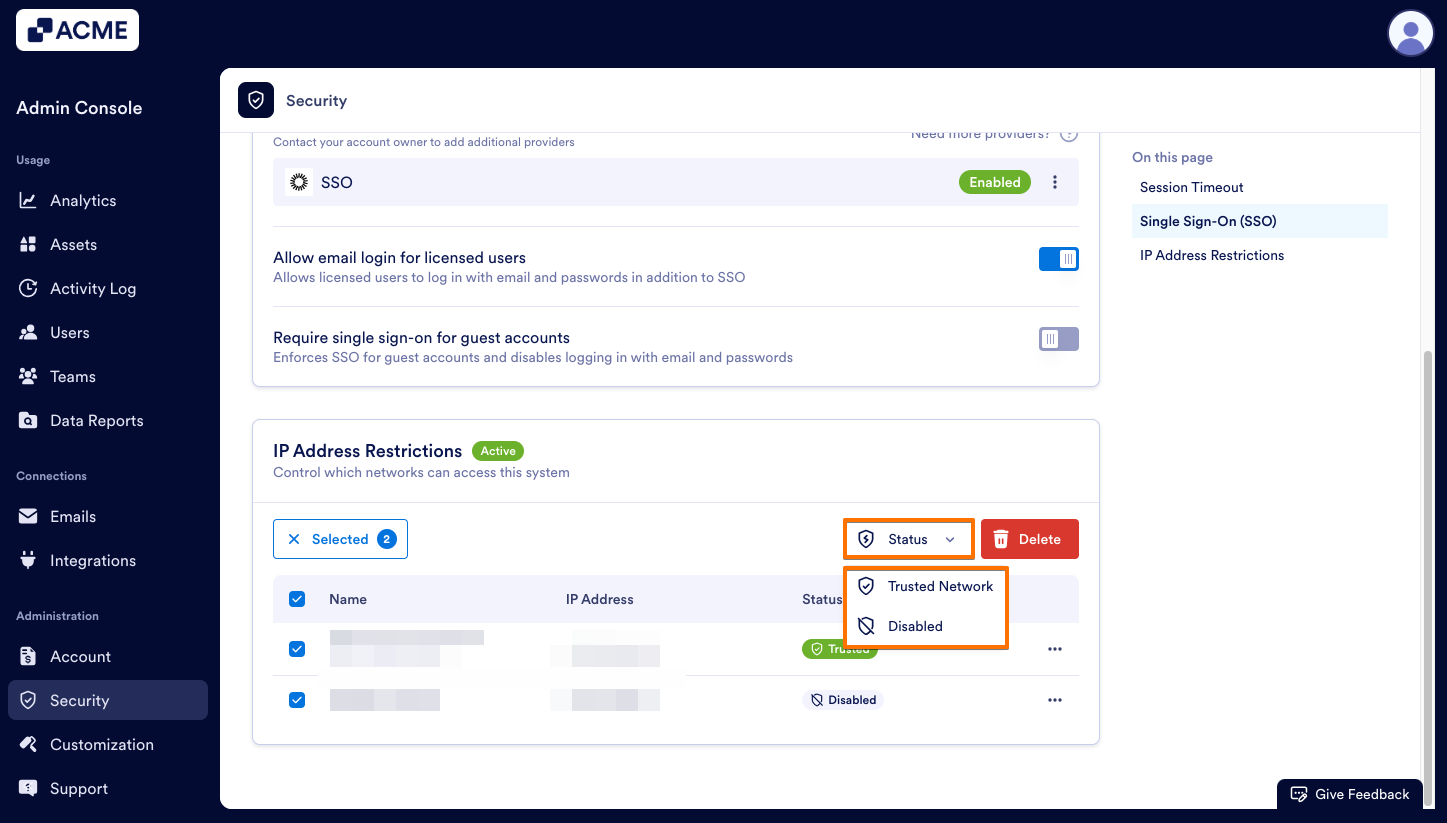
- Next, click on the Status in the upper right-hand corner of IP Address Restrictions.
- Now, select the new status of the IP Address.
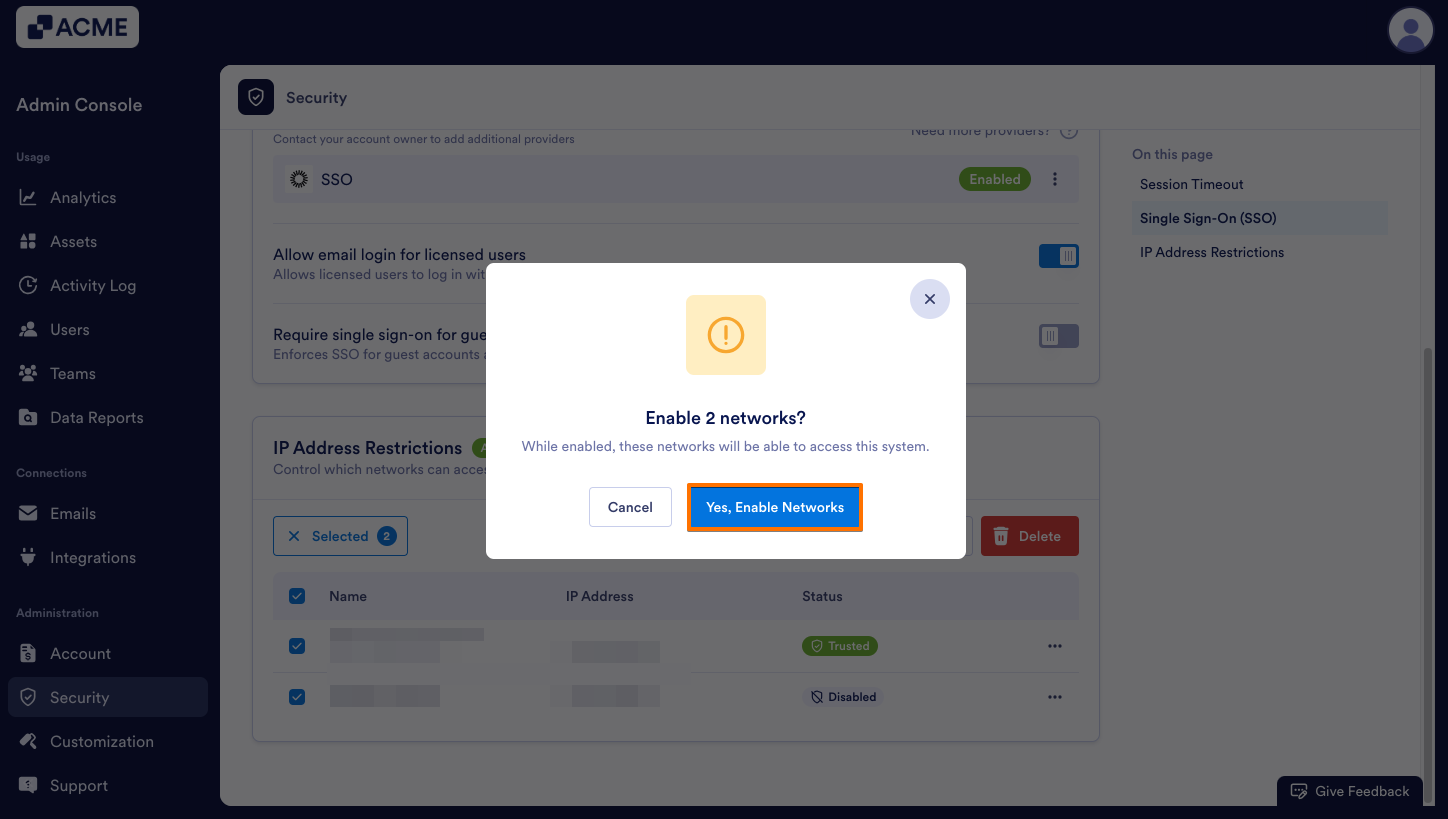
- Finally, click on Yes, Enable Networks or Yes, Disable Networks depending on the new status.
Bulk Deleting IP Addresses
- Under IP Address Restrictions, click on the checkbox next to the IP Addresses you’d like to delete.

- Next, click on Delete in the upper right-hand corner of IP Address Restrictions.

- Finally, click Yes, Delete All Networks in the pop-up window.
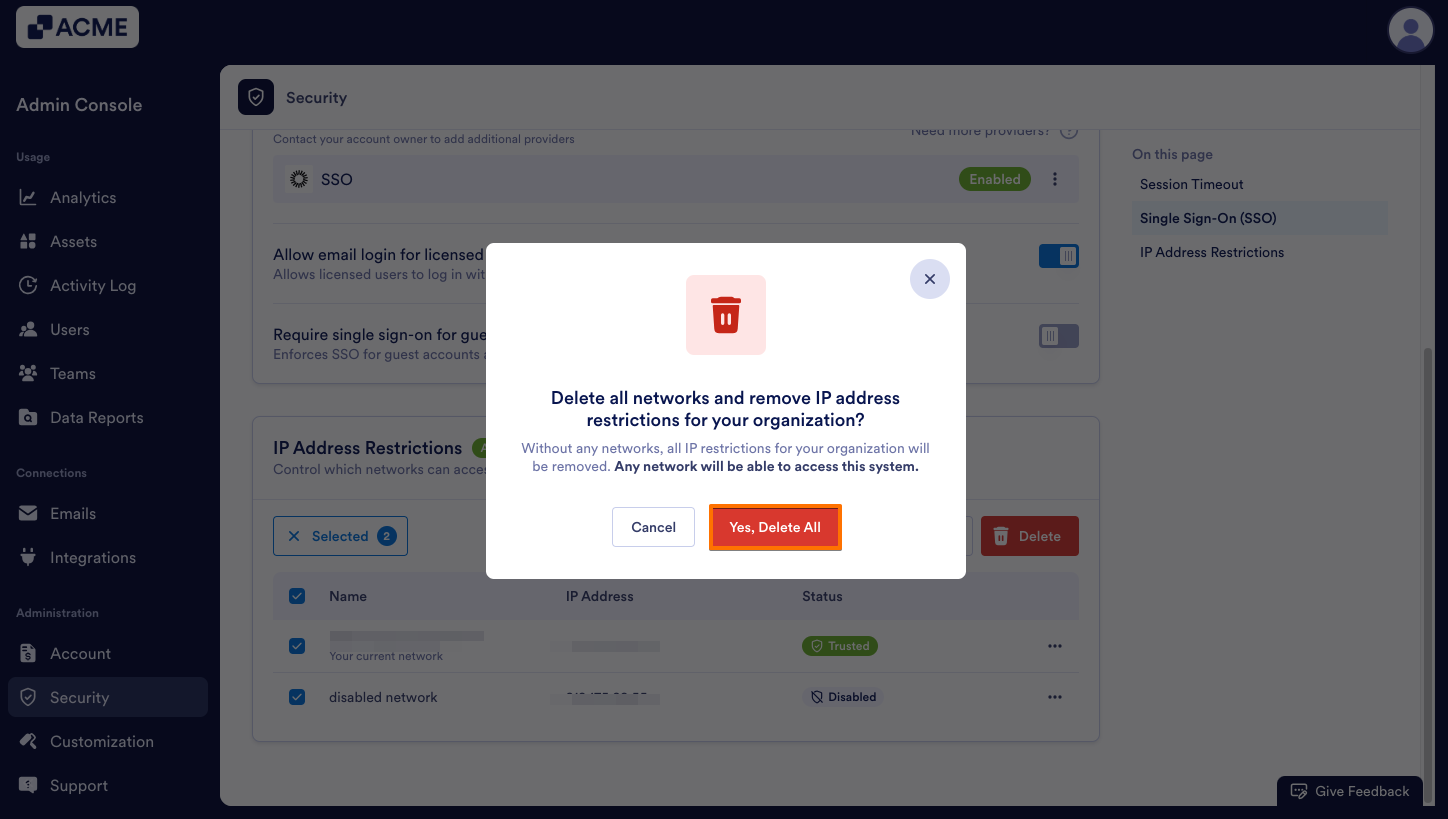
Tip: If you delete all IP addresses, both trusted and disabled ones, any IP Address will be able to access your server.

Send Comment: