With Jotform Workflows fully integrating Jotform Sign through the Sign Document element, requesting and collecting signatures can now be part of your approval processes. You can set up your workflow to send documents for signature either after a request is submitted, based on the outcome of the request, or before you end the workflow. The signing process must be completed for the workflow to continue, and you can set different paths based on the outcome of the signed document.
Adding Sign Document Element
Follow these steps to add the Sign Document element to your workflow:
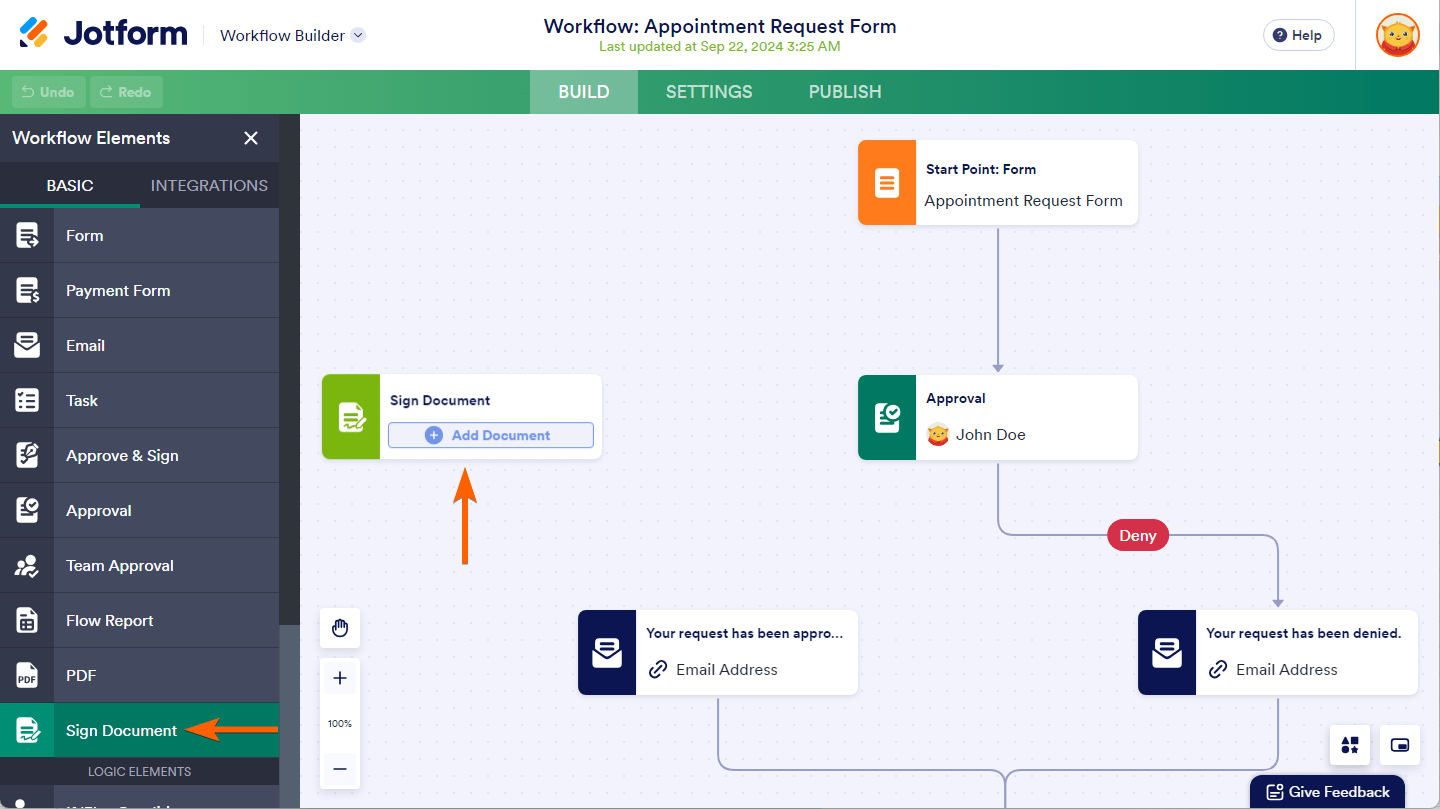
- In Workflow Builder, click on Add Element on the left side of the screen to open the Workflow Elements menu.
- Under the Basic tab, drag and drop or click on the Sign Document element to add it to your workflow canvas.
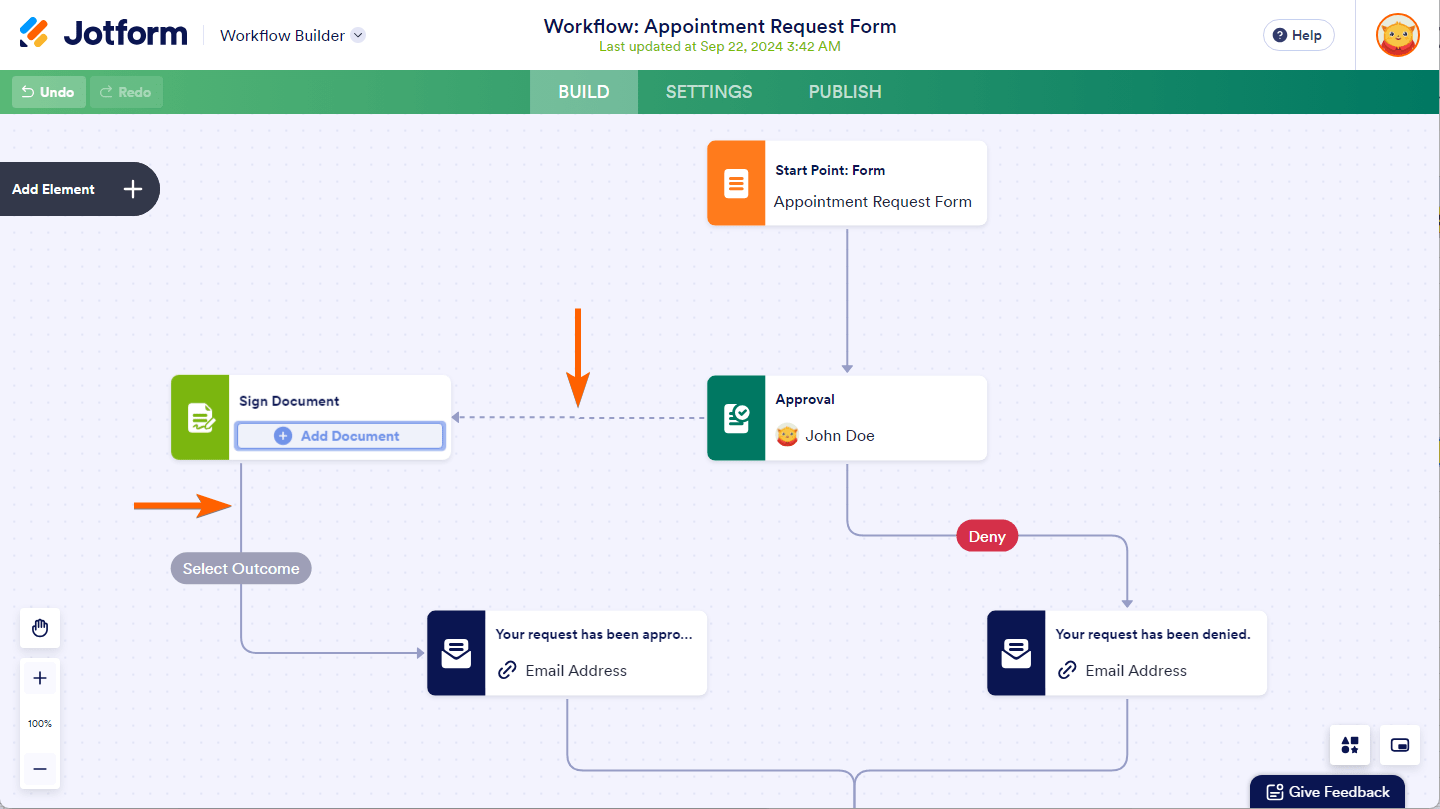
- Next, draw a flow line to and from the Sign Document element to connect it to other elements. See How to Add and Connect Elements in Jotform Workflows to learn more.
Setting Up Sign Document Element
Follow these steps to start setting up the Sign Document element in your workflow:
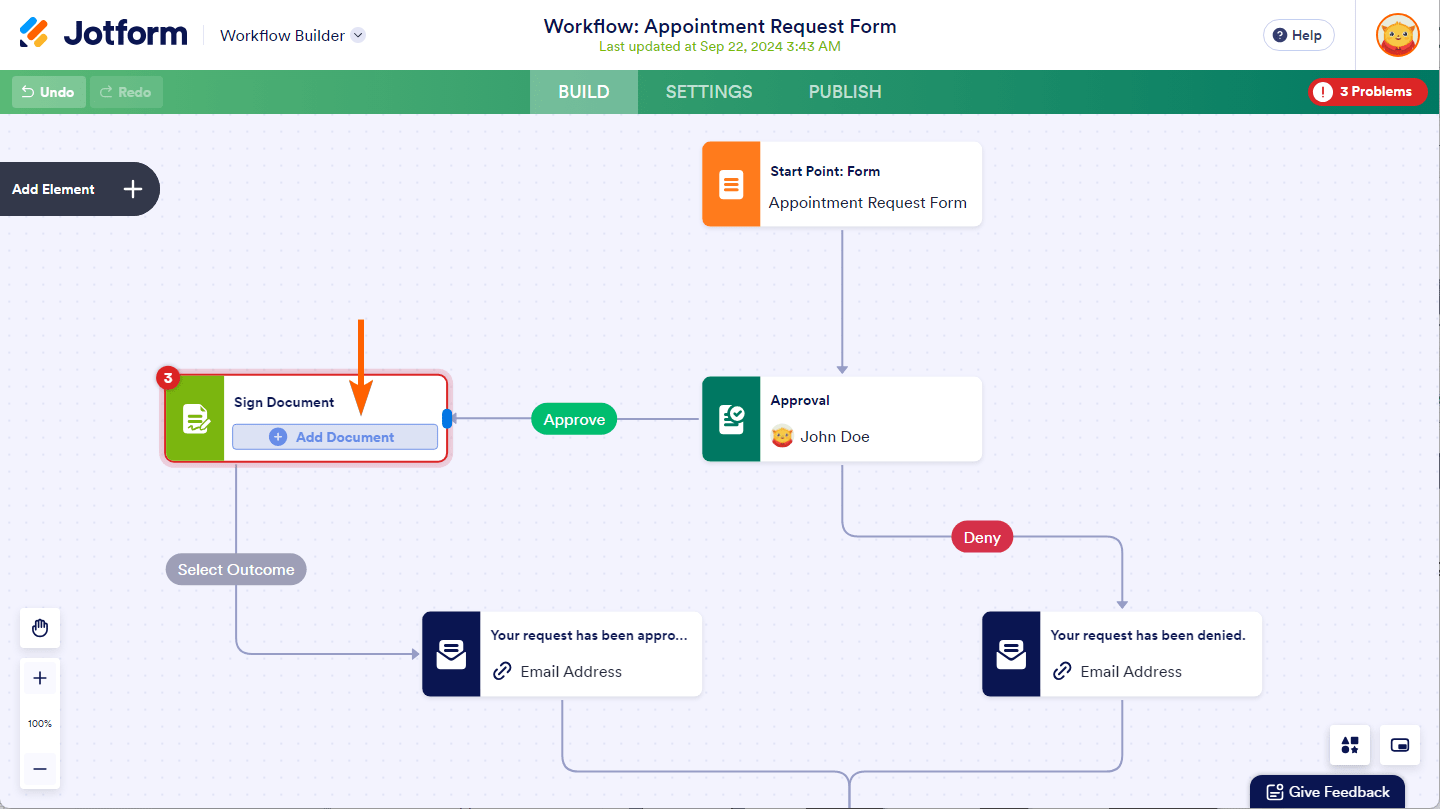
- In Workflow Builder, click on the Add Document button on the Sign Document element in your canvas.
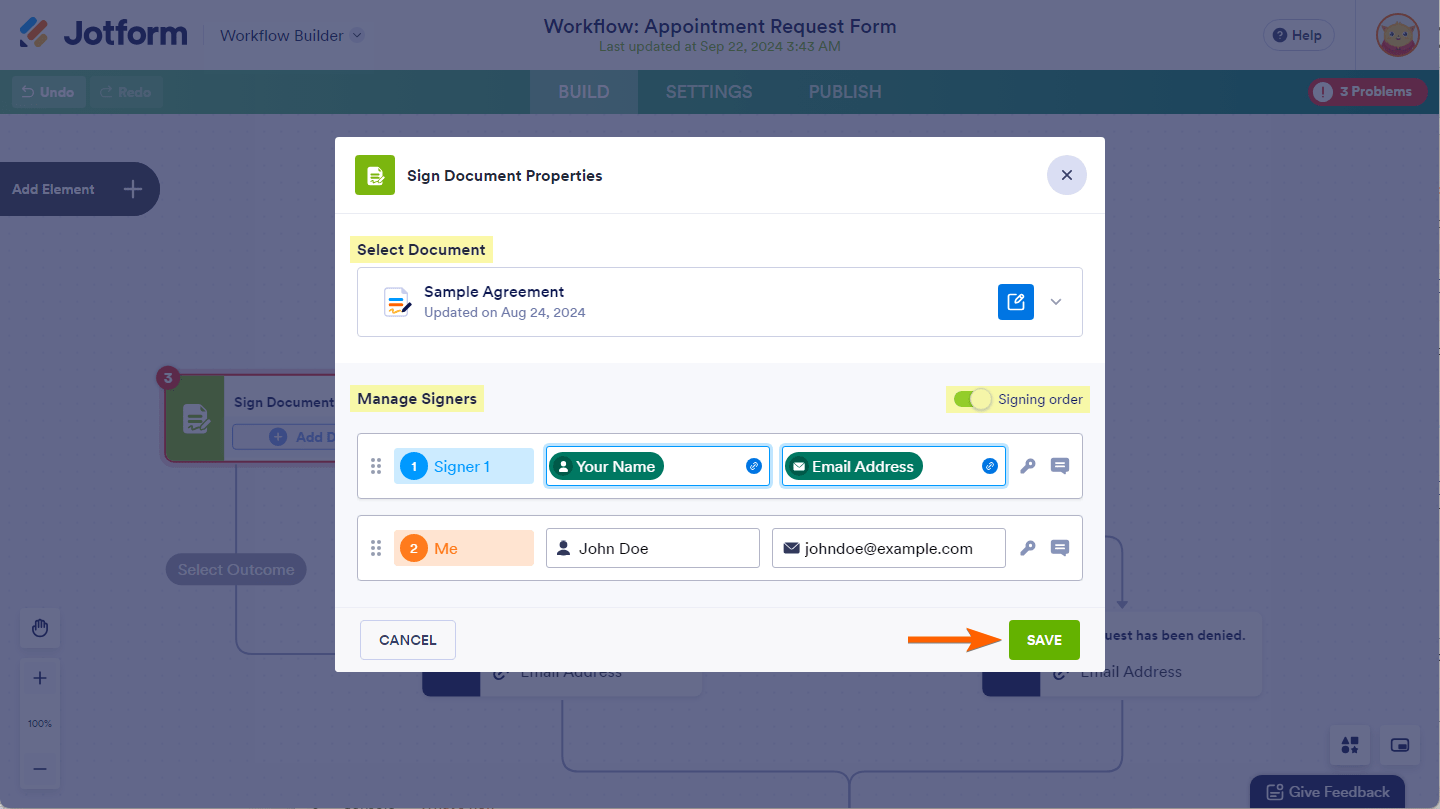
- In the Sign Document Properties window, select a document from your account, then assign signer roles by providing their name and email address. This enables the Save button; click on it once you’re done.
Here’s a summary of what each Sign Document element setting is for and how you can set them up:
- Select Document — This is where you select the Sign Document you want signed in the approval process. It’s a dropdown menu listing all available Sign Documents in your account. Click on the dropdown to scroll through and choose the one you want to use for the Sign Document element. You can also use the search bar in the dropdown to find a specific Sign Document by name.
- Signing Order — This option appears when you select a Sign Document requiring two or more signers; toggle it on to send the document to one signer after another. The Drag Handle icon will appear to the left of each signer listed under Manage Signers, allowing you to click, hold, and move rows to arrange the order of signers.
- Manage Signers — This section lists all the signers required to complete your selected Sign Document. You can enter the name and email address of your signers manually, or click on the Link icon in the signer fields to choose and use a valid name and email field from a form that’s part of your workflow. The Key icon to the right of the signer fields lets you establish an access code for your Sign Document that signers need to provide to review and sign it. You can use the Message icon beside it to include a custom message in the email that will be sent to your signers.
Selecting a Sign Document Outcome
You can set your approval flow on different paths based on the result of the Sign Document. Select an outcome when you connect a Sign Document element to another element in your workflow using a flow line.
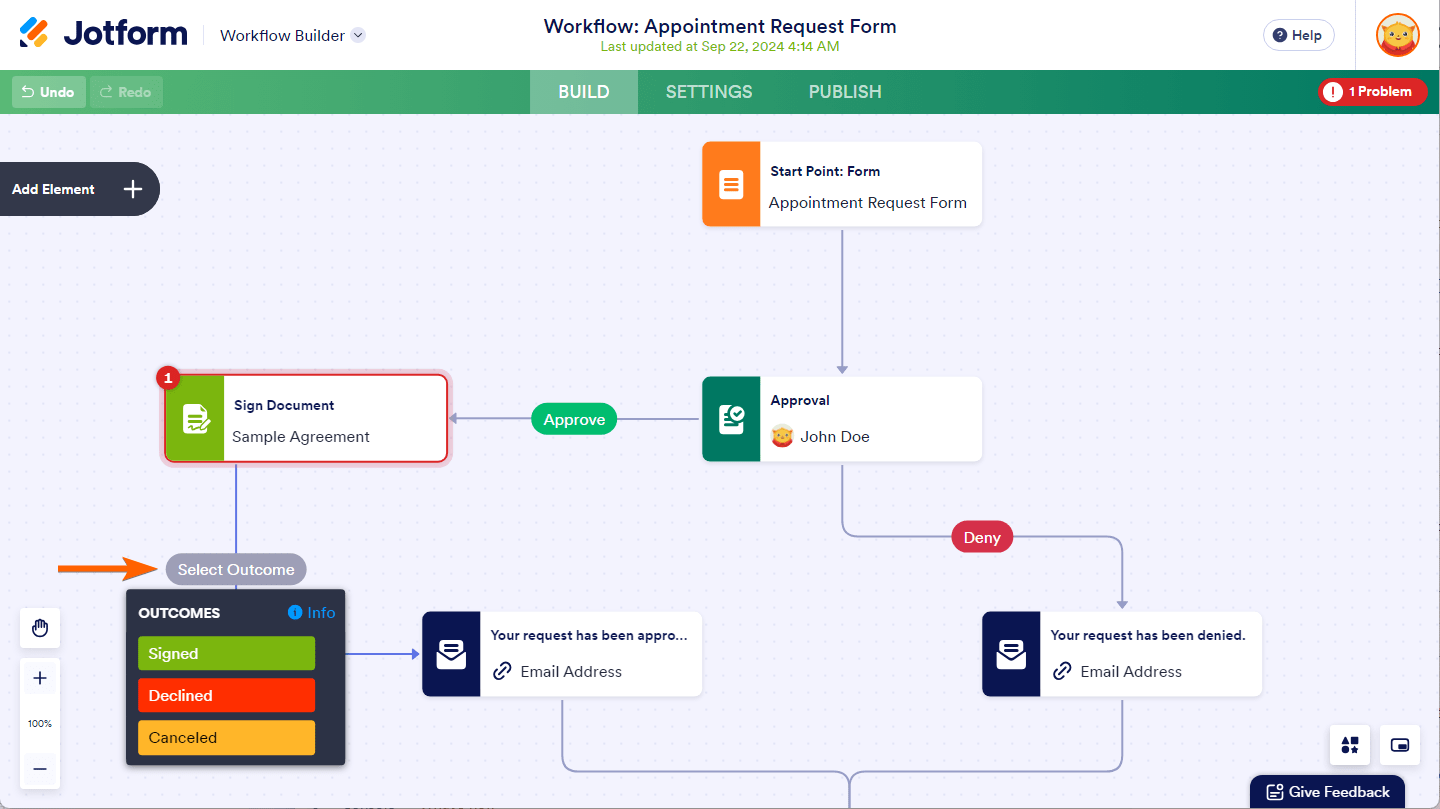
You can choose from three possible outcomes of the Sign Document process, and here is what each outcome means for setting the appropriate path in your workflow:
- Signed — All signers have completed the sign request.
- Declined — At least one signer declined the sign request.
- Canceled — You, the document owner, canceled the sign request.
Updating Sign Document Element Properties and Outcome
You can click on the Gear icon on the right of a Sign Document element to open the Sign Document Properties window, or double-click on the Sign Document name on the element to open it again once it’s set up.
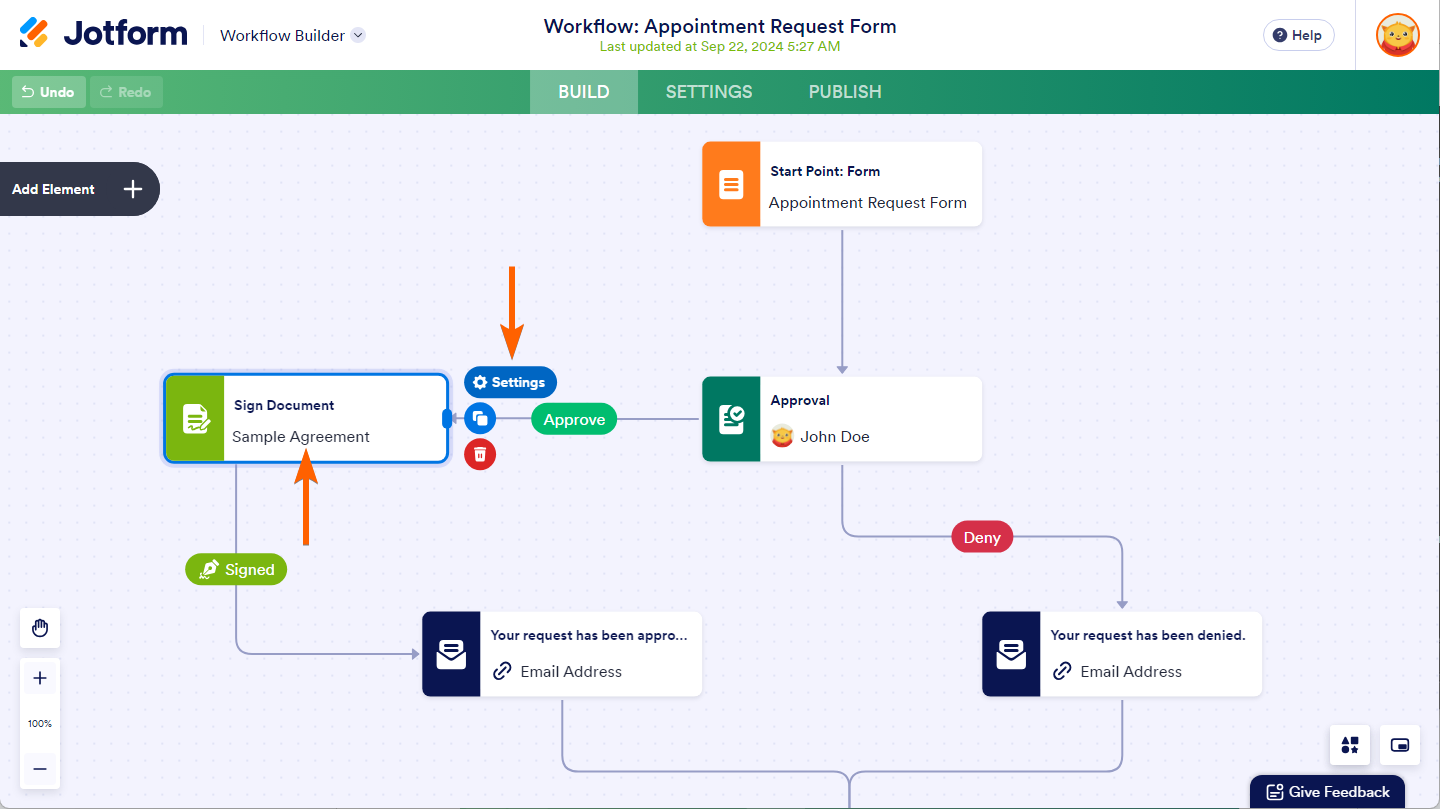
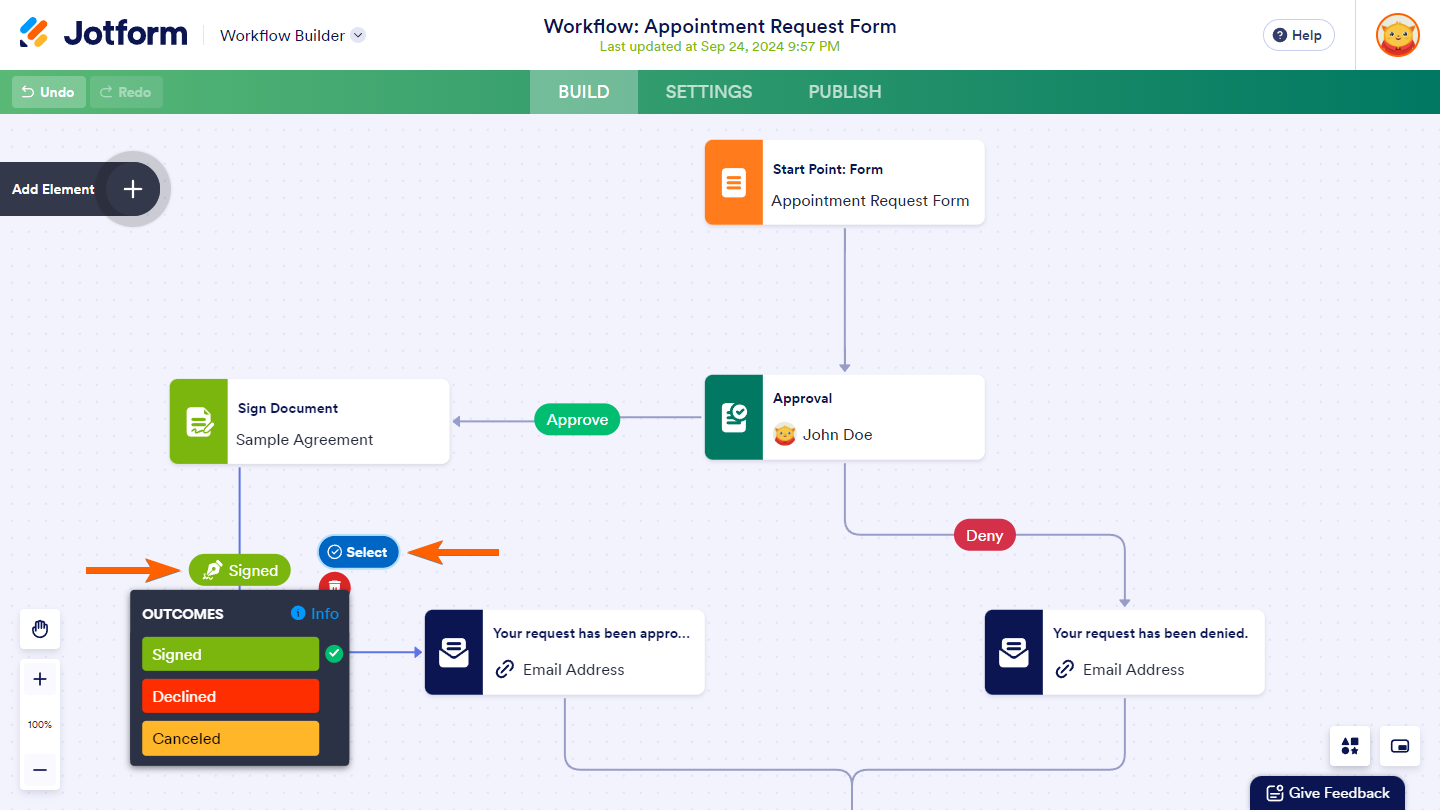
To change a selected outcome, you can either click on it or the Select button to its right that shows when you click on the flow line.
Tracking Sign Document Submissions
You can open the Sign Document included in your workflow in Sign Inbox to view sign request status and submissions. You can also access it through the Jotform Inbox. Additional detailed instructions are available in the following user guides:


Send Comment:
8 Comments:
68 days ago
Just wondering if there's been any development on Rocky Seftel's post from 10/7/22? This would be a very helpful function.
More than a year ago
Do you have to have an account? What level of service do you need?
More than a year ago
Just wondering if there's been any development on Rocky Seftel's post/request from 10/7/22?
I'm hoping to find some capability like this for form building
More than a year ago
Muchas gracias por enseñarme a como crear mi s formulario
More than a year ago
Hi Rocky,
Currently it is not possible to send filled form for Sign.
It is only possible to send pre-uploaded documents for sign within an approval flow. As mentioned in the how-to-guide, form data can be used to set signers dynamically.
We have added your request to our backlog, but when or if it's developed depends on our workload, how viable it is and how many other users also request it.
When there are updates, we'll circle back and let you know.
More than a year ago
same question as rocky seftel. this would be great functionality to have with 2nd user determined per the name / email in one of the original form fields.
More than a year ago
I definitely am hoping for the same thing Rocky Seftel is seeking. Interested in hearing the answer.
More than a year ago
Hi Great new feature! Is it possible to send each filled form for approval? So basically I want:
1 - User fills form
2- Form gets turned into a PDF
3- PDF gets sent to 2nd user to sign
For each unique filled form