Preventing spam form submissions is a crucial aspect of form management. Spam can flood your forms with unwanted data, leading to inaccurate analytics results. By implementing effective anti-spam measures, you can ensure that your forms remain secure and efficient.
In Jotform, one of the methods of preventing spam is to add a captcha element. You can also use a combination of setting limits by IP address, a unique field in your form, configuring a widget that can validate the email address or setting up a conditional logic to hide the submit button based on the user’s pattern of providing data.
Adding a Captcha Field
We recommend the captcha method as it is the most effective and easy way to prevent spam entries to your form.
To add a captcha
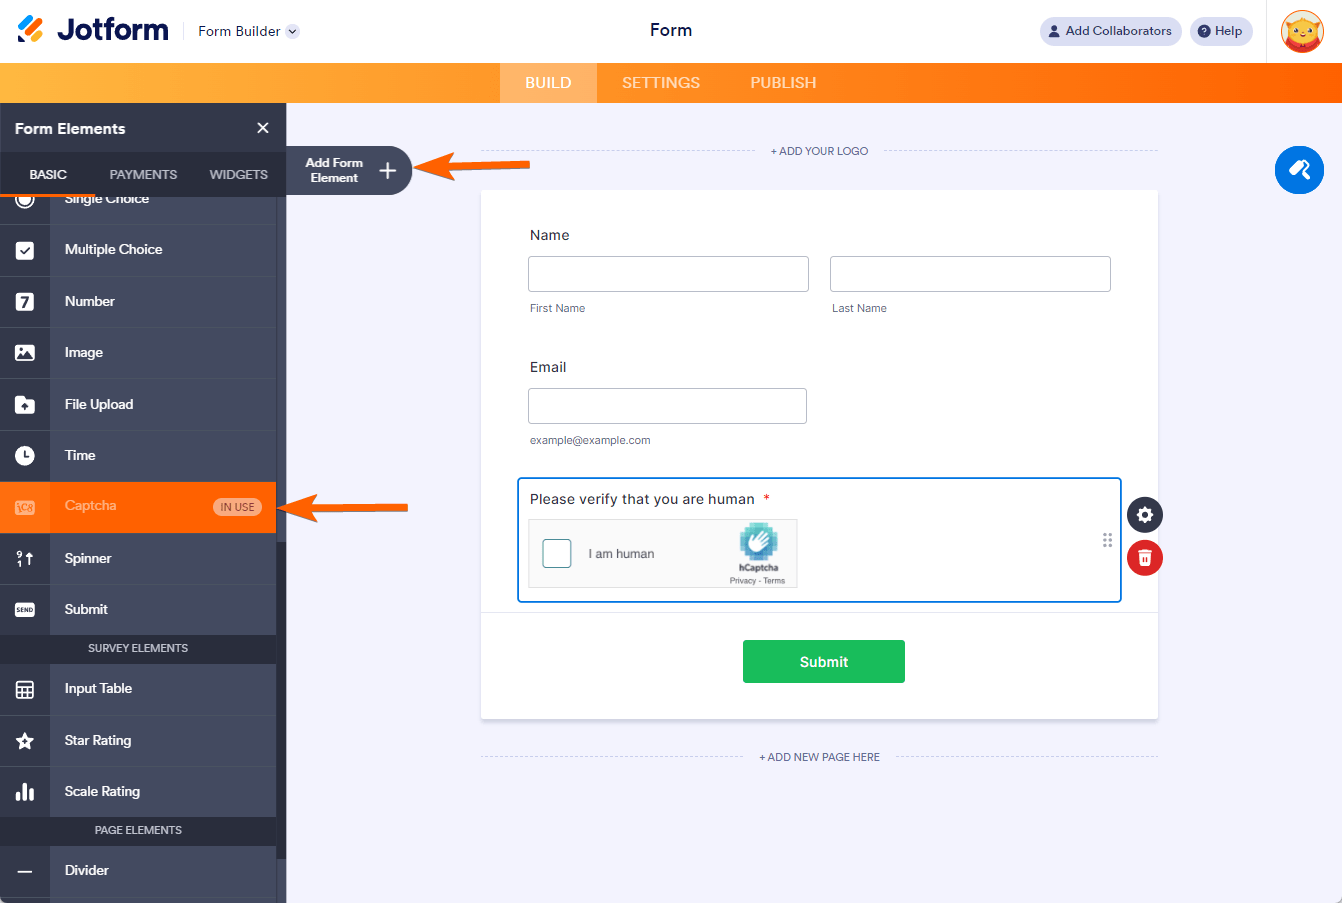
- In the Form Builder, click the Add Form Elements button.
- Under the Basic Elements, click or drag and drop the Captcha field to add.
You can keep the default hCAPTCHA or change it to reCAPTCHA. Visit How to Add a CAPTCHA to Your Form to learn more.
Adding and Setting up the Email Validator Widget
The Email Validator widget is one of the most effective tools that you can use to prevent spam submissions. Your form respondents cannot submit the form until they validate their email address with a code sent to their email address.
The only requirement to make the widget work is to set up a custom sender email with SMTP. Visit How to Set up SMTP for a Form to add one.
To add the Email Validator widget
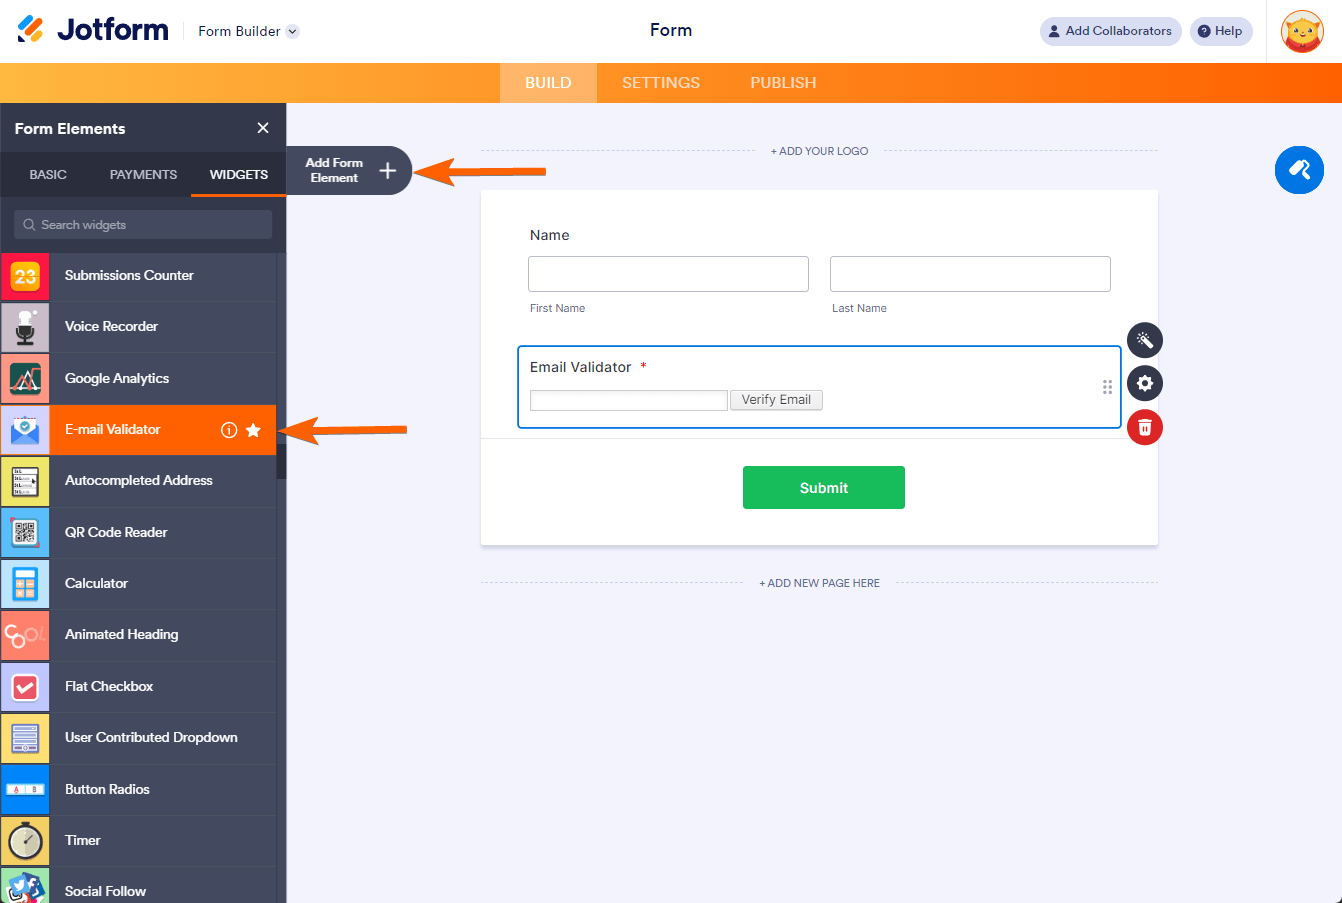
- In the Form Builder, click the Add Form Elements button.
- Go to the Widgets tab.
- Search for and click Email Validator from the list. You can also drag/drop it to add.
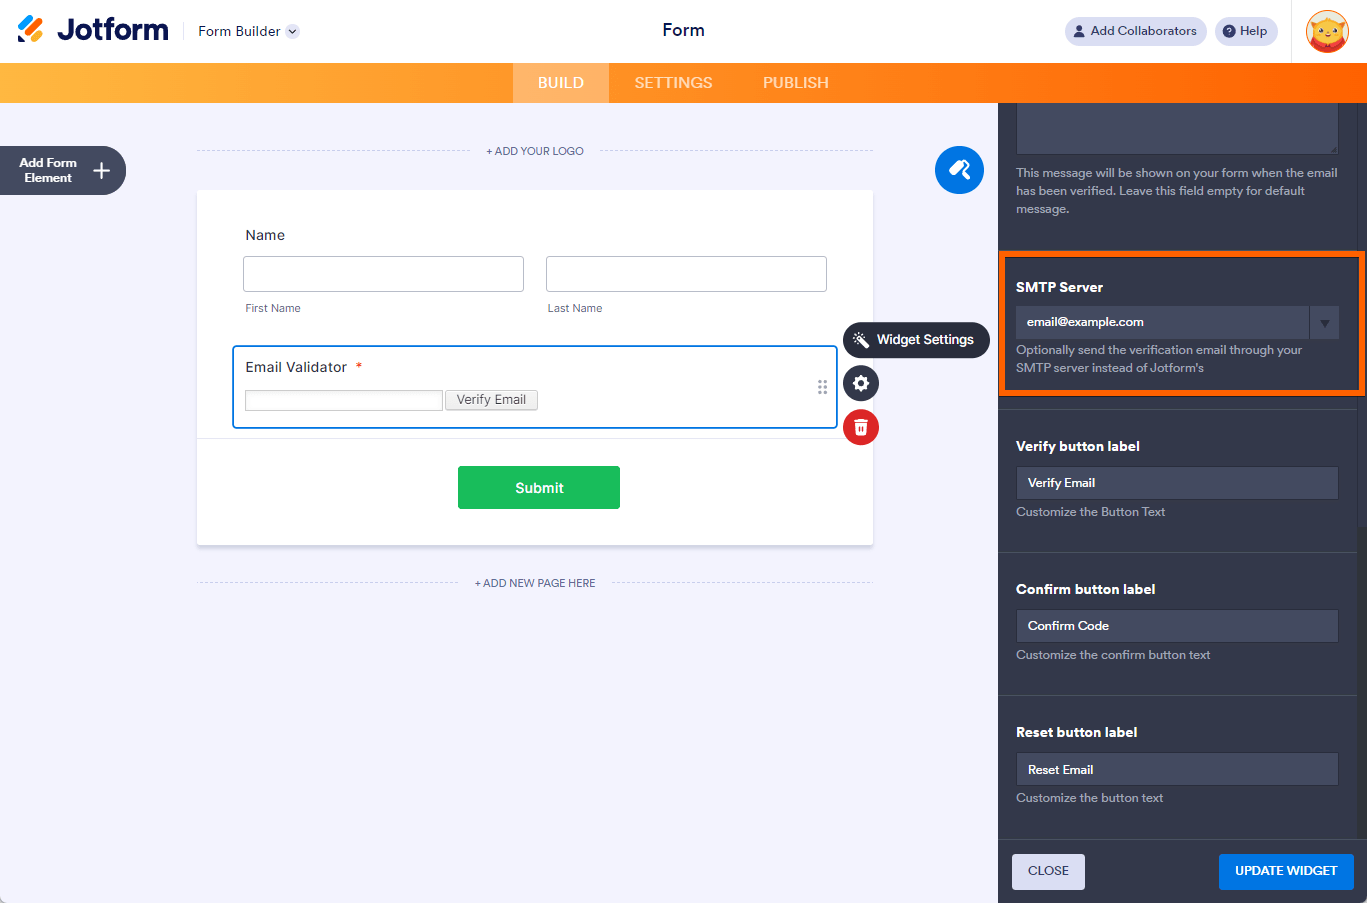
- In the Widget Settings, select SMTP Server, which will be the custom sender email. The widget will not work without it.
Alternatively, you can also set up the Clearout Email Validation widget. Clearout offers a freemium plan with 100 credits for free accounts, with a subscription required for usage beyond this limit.
Setting up a Unique Submission Limit
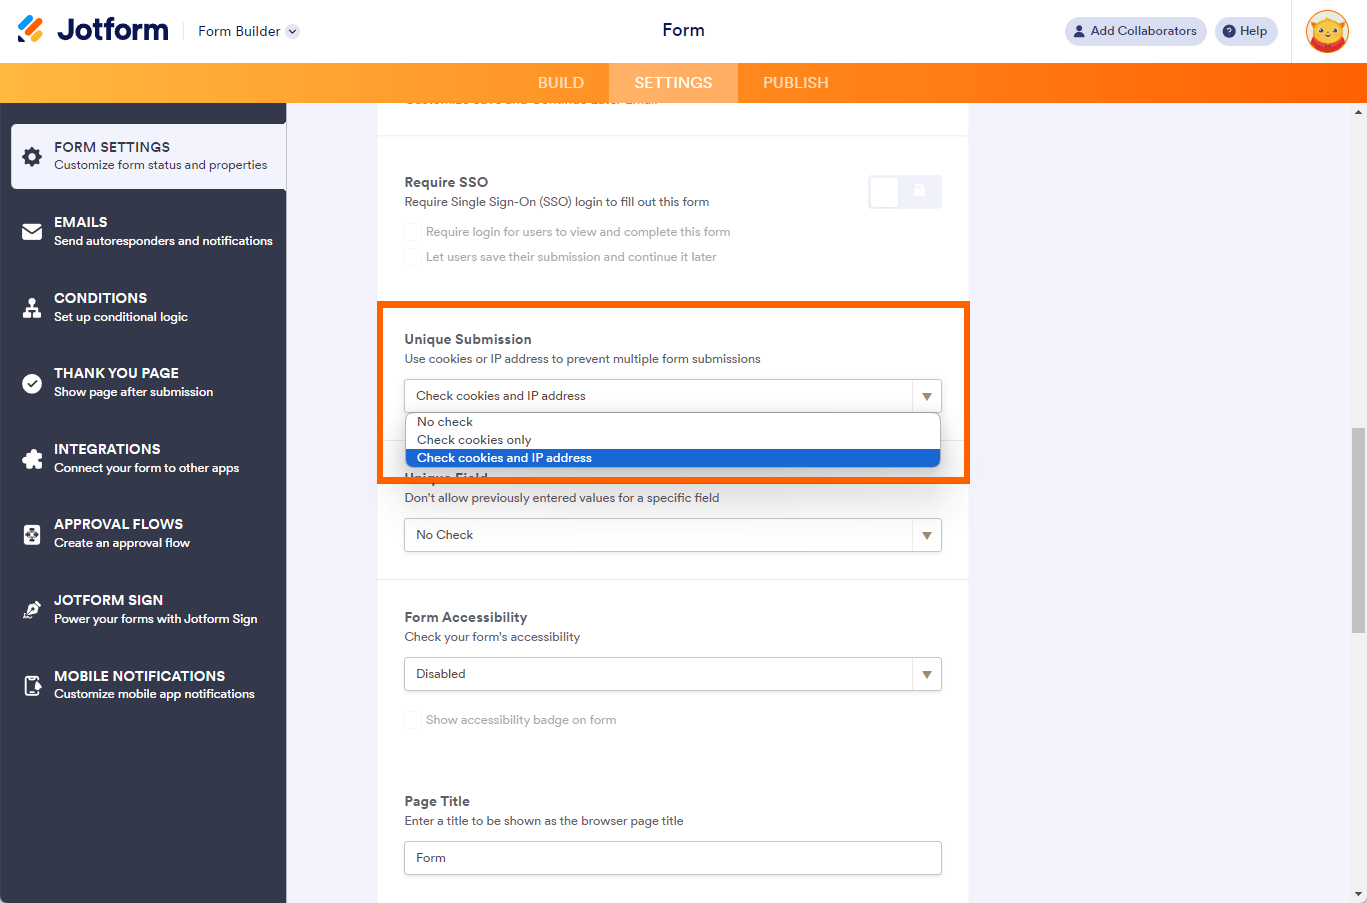
The Unique Submission feature has the following options:
- Check Cookies Only — Also called Loose Check. When you choose this option, the form will check whether the submission came from the same browser. It uses cookies stored in the user’s browser’s storage to verify duplicate submissions.
- Check Cookies and IP — This is also called Strict Check, which means the form checks whether the submission came from the same browser and IP Address.
If you see one IP address for the spam submissions, Jotform recommends the Strick Check method. However, we do not recommend this method if your target audience comes from the same network, i.e., school, office, or organization.
To set up the Unique Submission limit
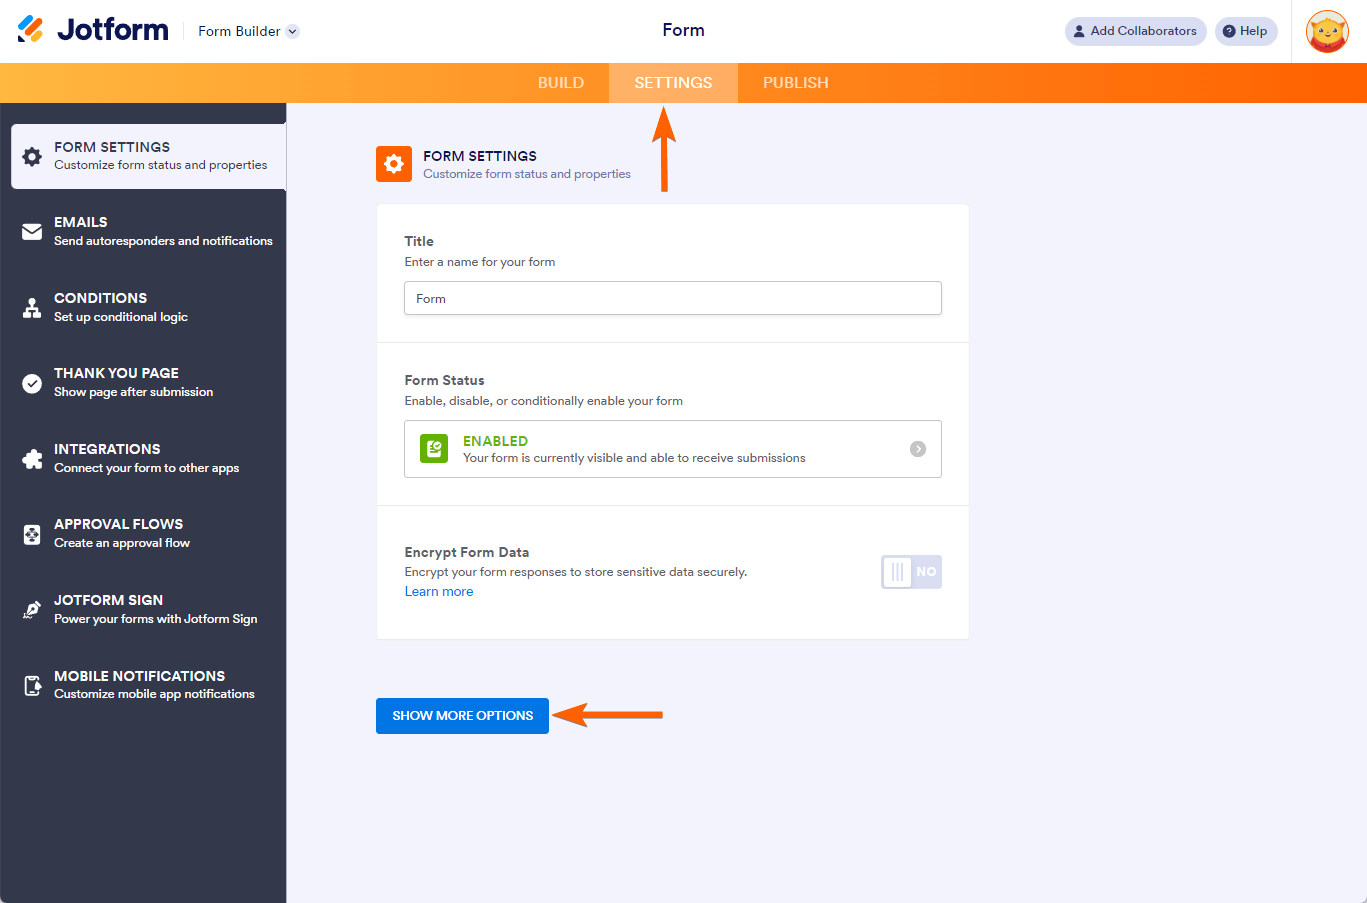
- In the Form Builder, go to the Settings tab.
- Click the Show More Options button.
- Scroll down to the Unique Submission and select the appropriate option.
Setting up the Unique Field Limit
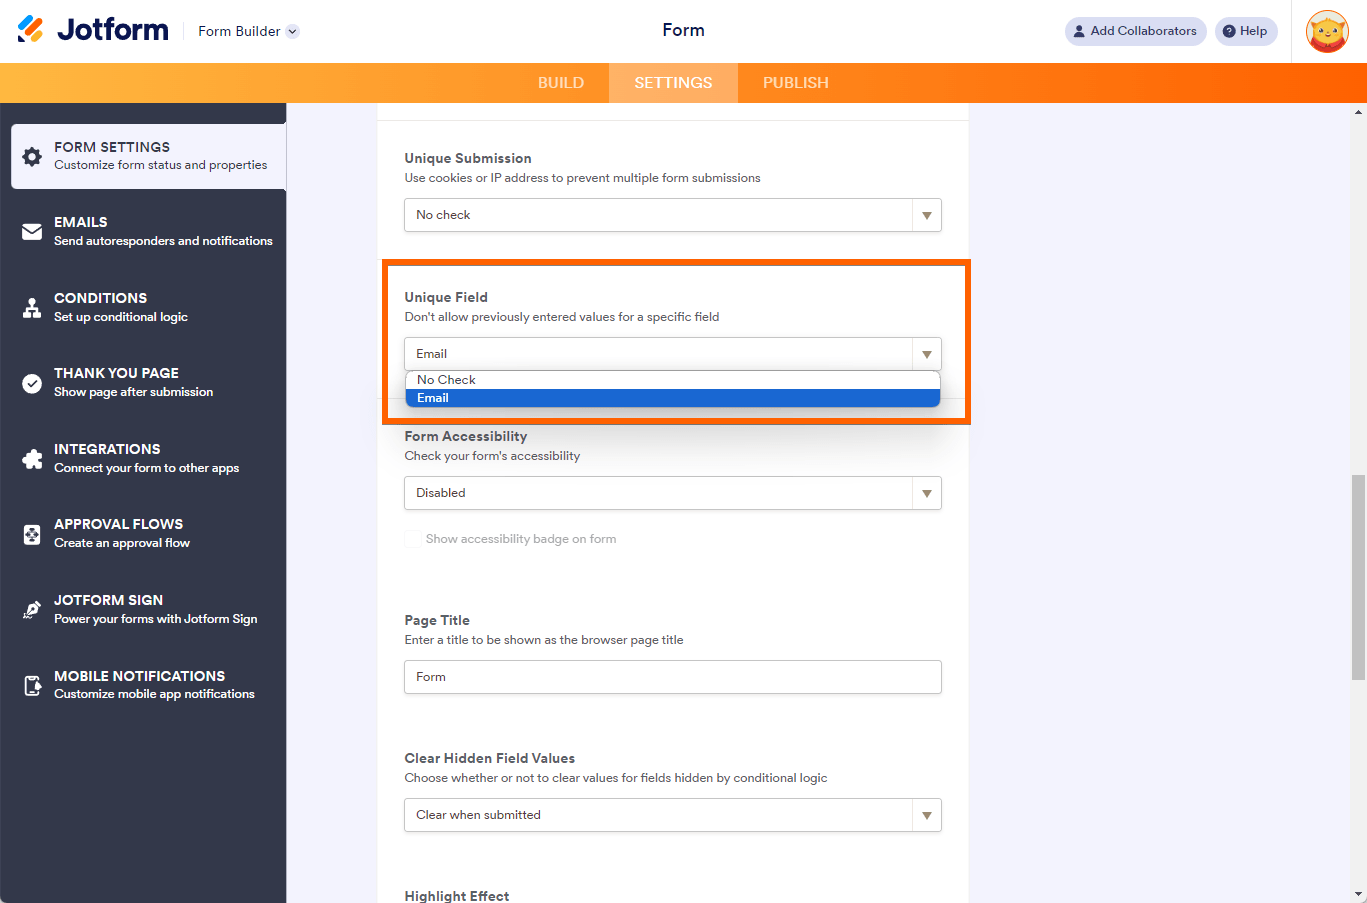
This works similarly to the Unique Submission but it targets the unique field from your form. If you see that the spam comes from the same email address, you can select the Email Address field as the limit.
It’s still in the Settings tab, below the Unique Submission as shown in the image below:
You can also do some trick to select multiple fields. Visit How to Set up the Unique Field Limit Using Multiple Fields for more details.
Disallowing Free Email Addresses
This option isn’t recommended for your clients that uses free email address, such as Gmail, Yahoo, Hotmail, etc.. However, you could instruct them to use business email, so they can still submit the form.
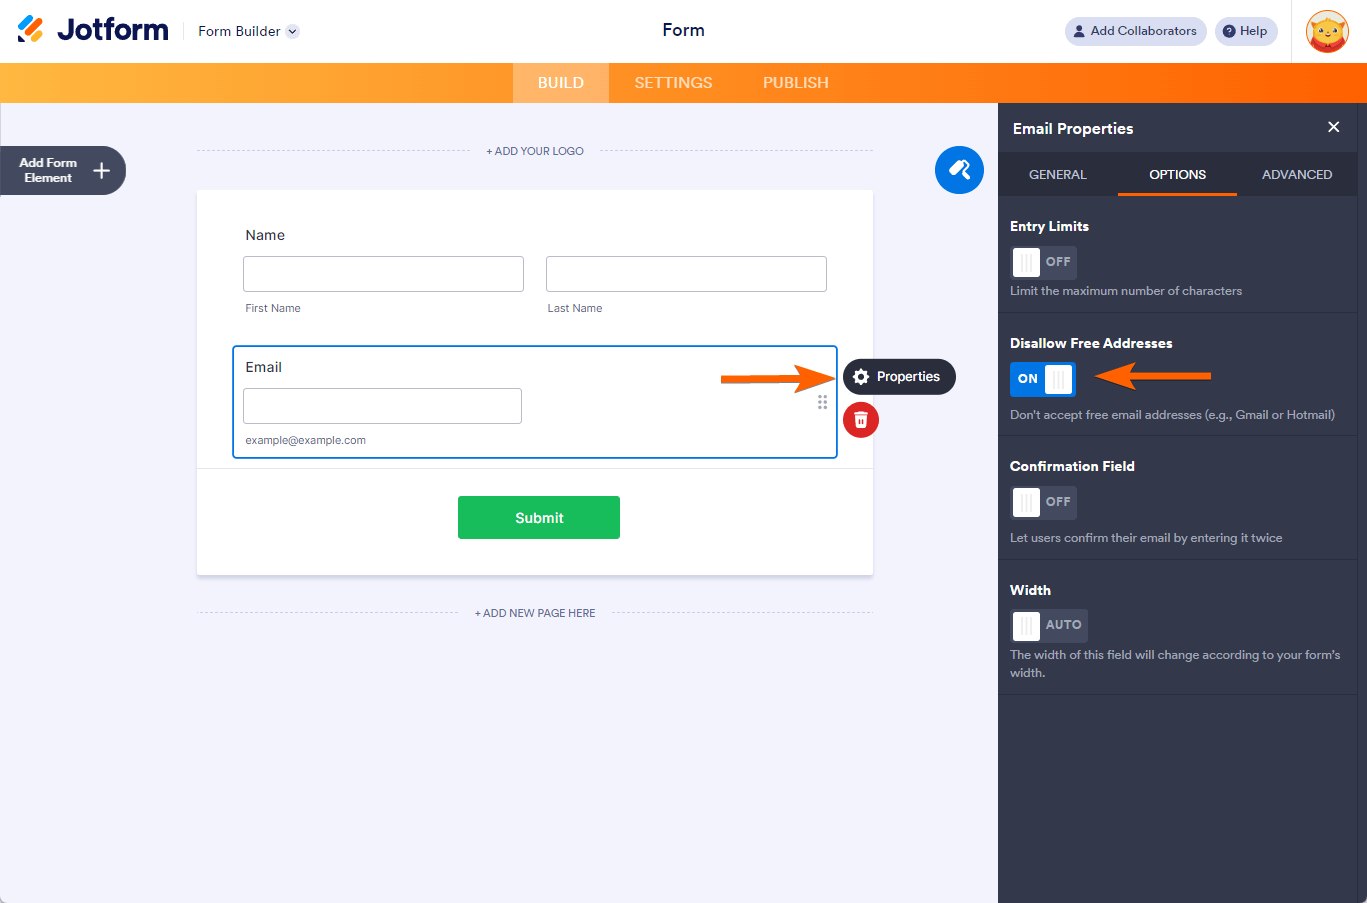
To enable Disallow Free Email Addresses
- In the Form Builder, click the Email field.
- Select Properties in Gear/Cog Wheel icon.
- Go to the Options tab.
- Toggle Disallow Free Email Address option.
Note
The Disallow Free Addresses is available with the native Email field in the Form Builder only. It’s not available with any email widgets.
Setting up the Password Protect Form Feature
This one restricts your form users to submit your form without knowing the password you set.
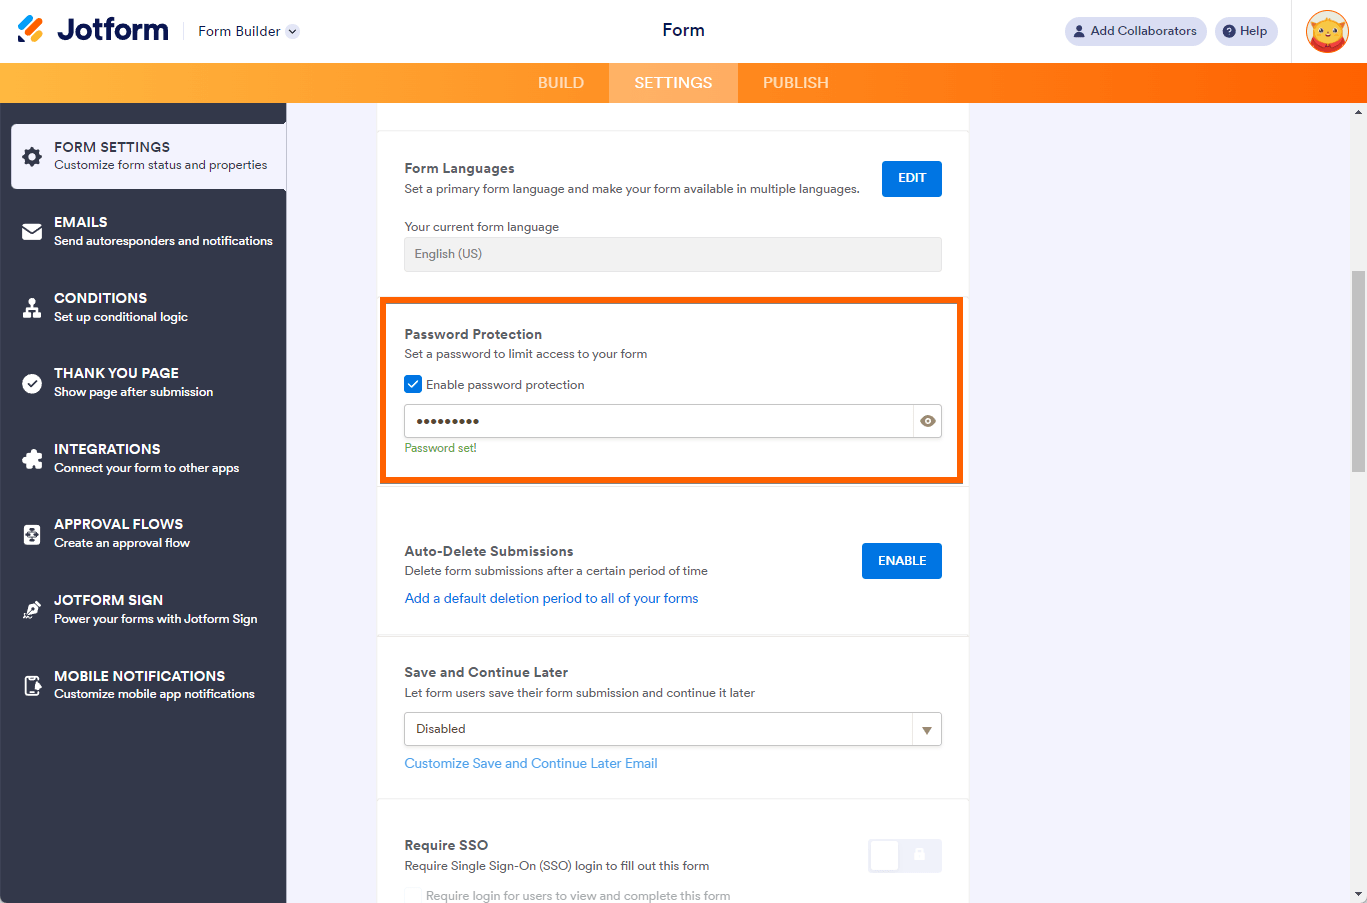
To set a form password
- In the Form Builder, go to the Settings tab.
- Select Show More Options button.
- Under the Password Protection, check the Enable password protection and set your password accordingly.

Send Comment: