With Digest Emails, you get to choose exactly what information you want to see. From submission summaries to charts and detailed entries, it’s all up to you. Let’s go through the settings so you can customize your emails and make them as effective and relevant as possible.
Accessing the Digest Email Layout Page
To customize your Digest Email Layout page, you’ll need to access the Digest Email you created. Here’s how to do it:
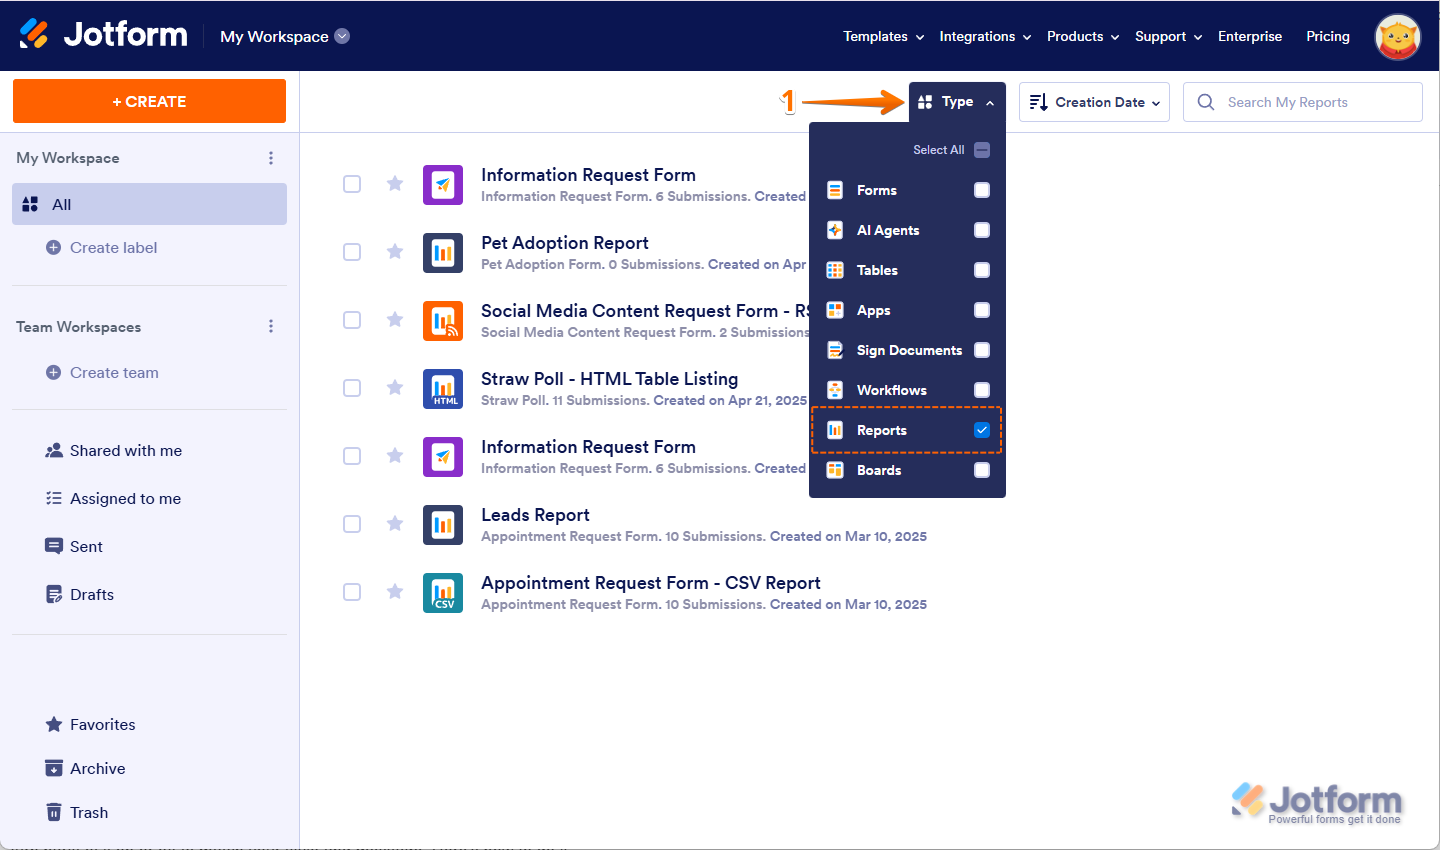
- On your My Workspace page, click on Type at the top and in the Dropdown menu that opens, uncheck the boxes next to all the assets except Reports, so only they’ll be shown on the page.
- Now, hover your mouse over the report you want to edit and click on Edit on the right side of the page.
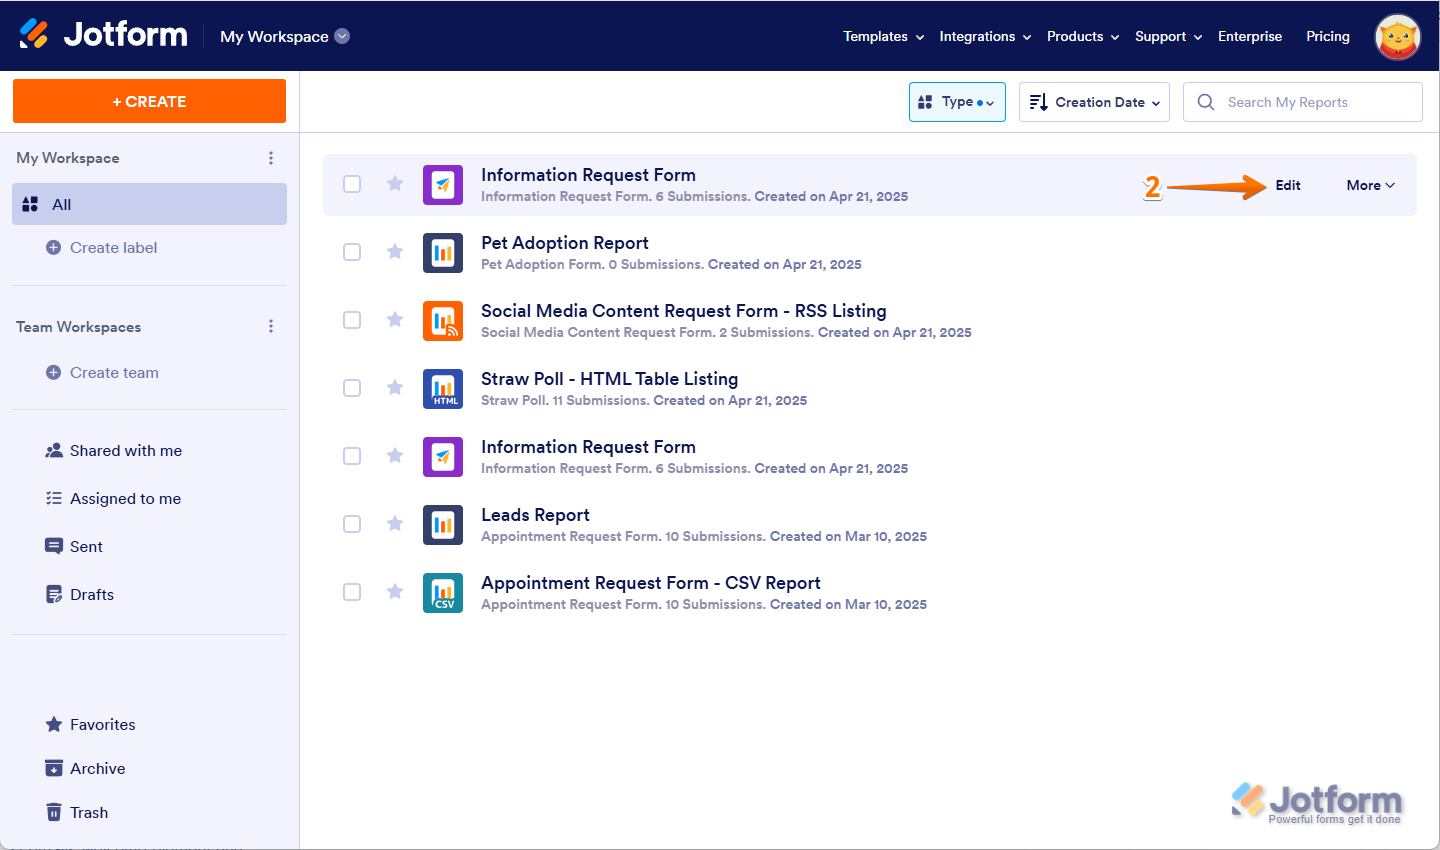
That’s it! You’ll now be redirected to your Digest Email Layout page to further customize it
Customizing the Welcome Message
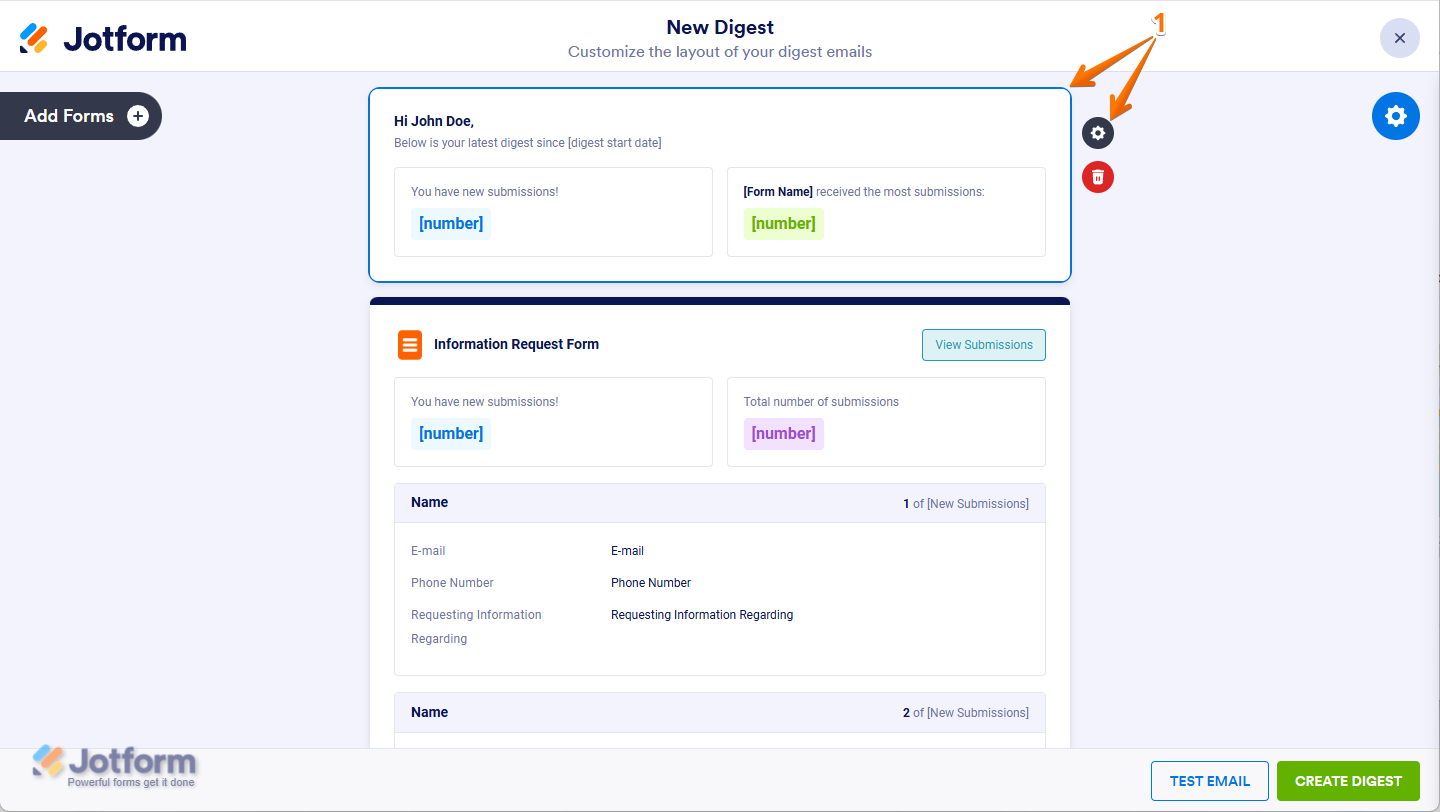
Your Welcome section is the first thing people see in your Digest Email — so make it count! You can easily turn parts of it on or off to match your style and message. Here’s how:
- On the Digest Email Layout page, click on the Welcome section, and then click on the Gear icon on the right.
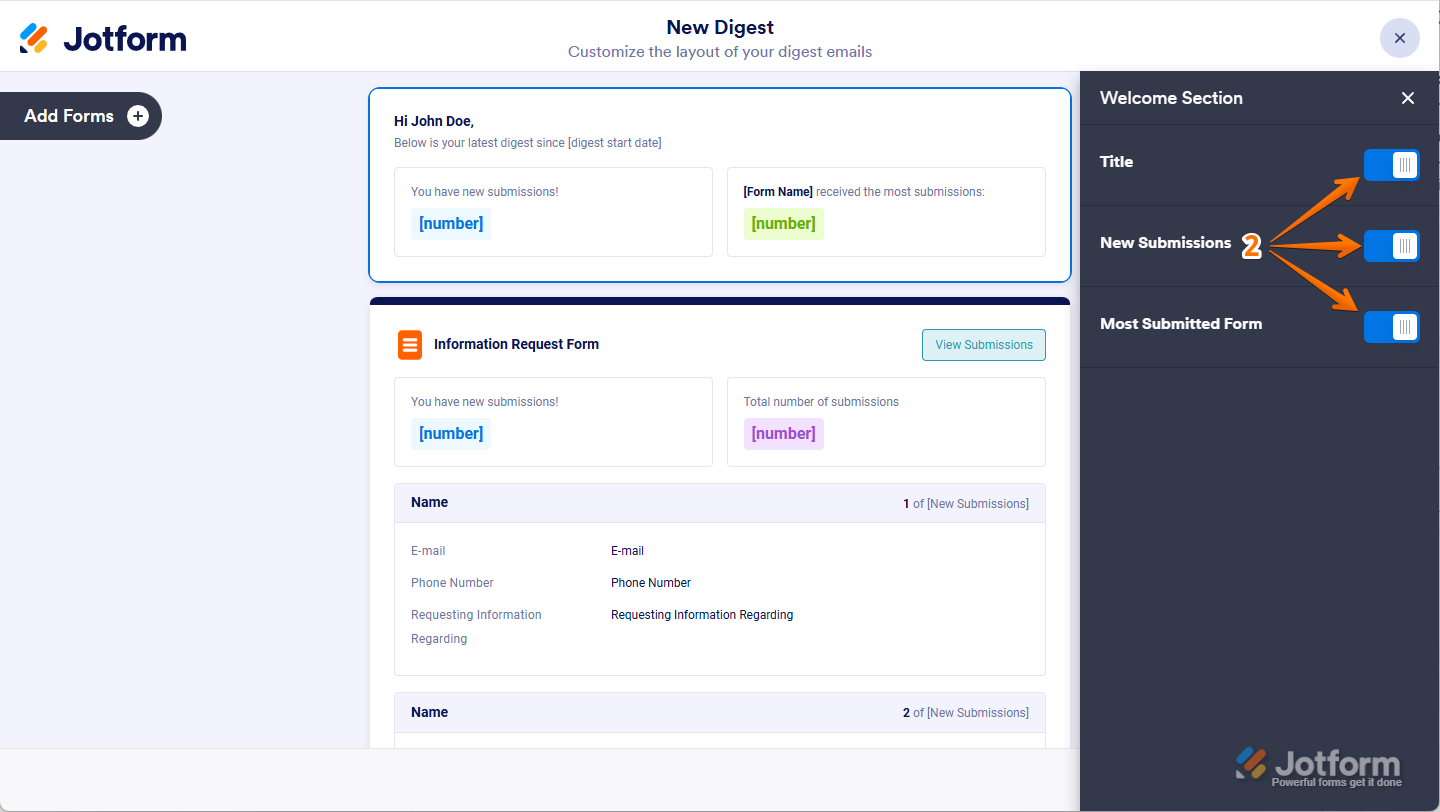
- In the menu that opens, you can Toggle the following options On or Off:
- Title — Show or hide the custom title at the top of your digest email.
- New Submissions — Display the total number of new submissions since the last email.
- Most Submitted Form — Highlight the form that received the most submissions during the selected period.
You can customize the content shown for each form in your Digest Email by adjusting the options under the Submission Summary Settings.
Customizing the Submission Summary
You can customize the Submission Summary to choose what’s shown in your Digest Email. Here’s how to do it:
- On the Digest Email Layout page, click on the Submission Summary section, and then click on the Gear icon on the right.
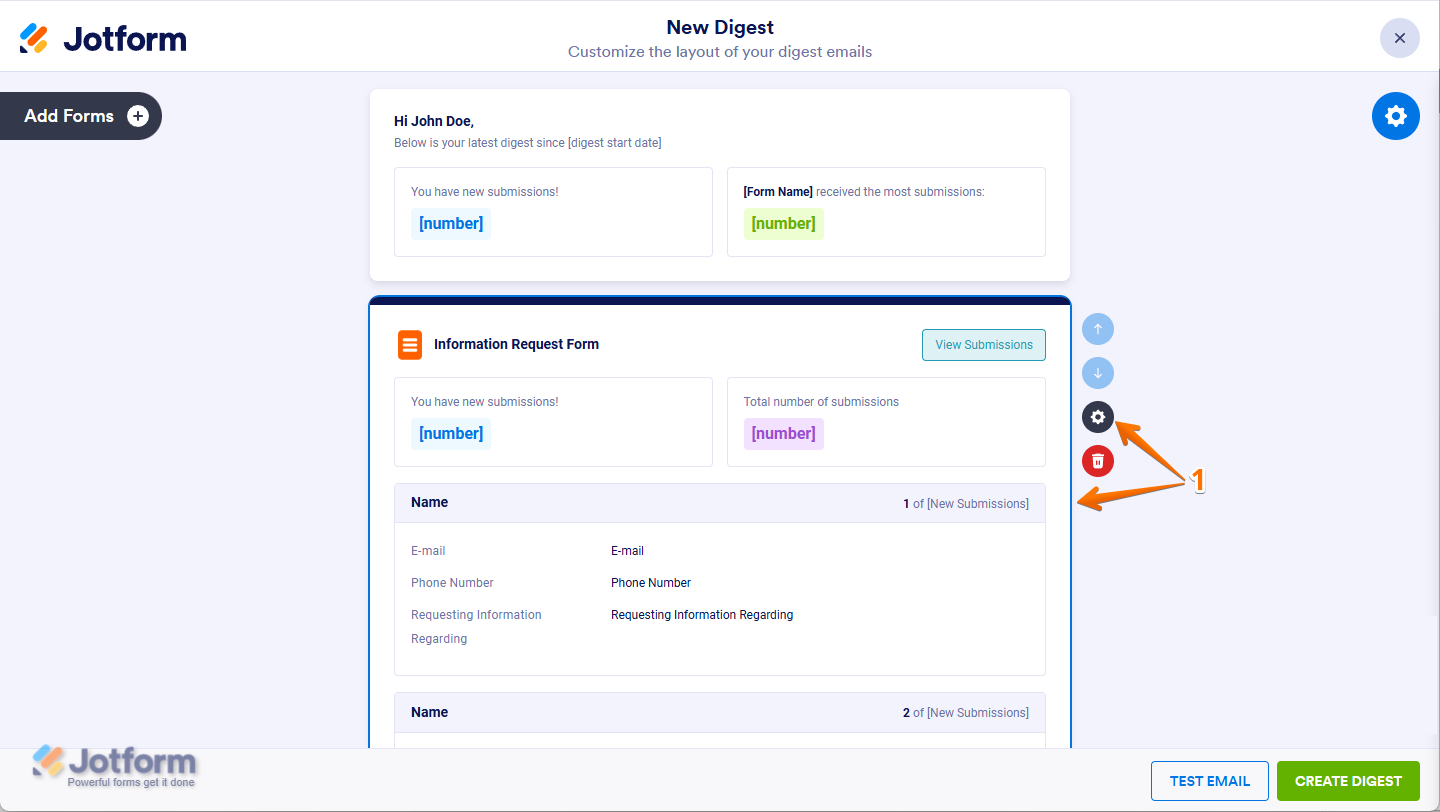
- In the menu that opens, you’ll see three tabs: Overview, Chart, and Submissions.
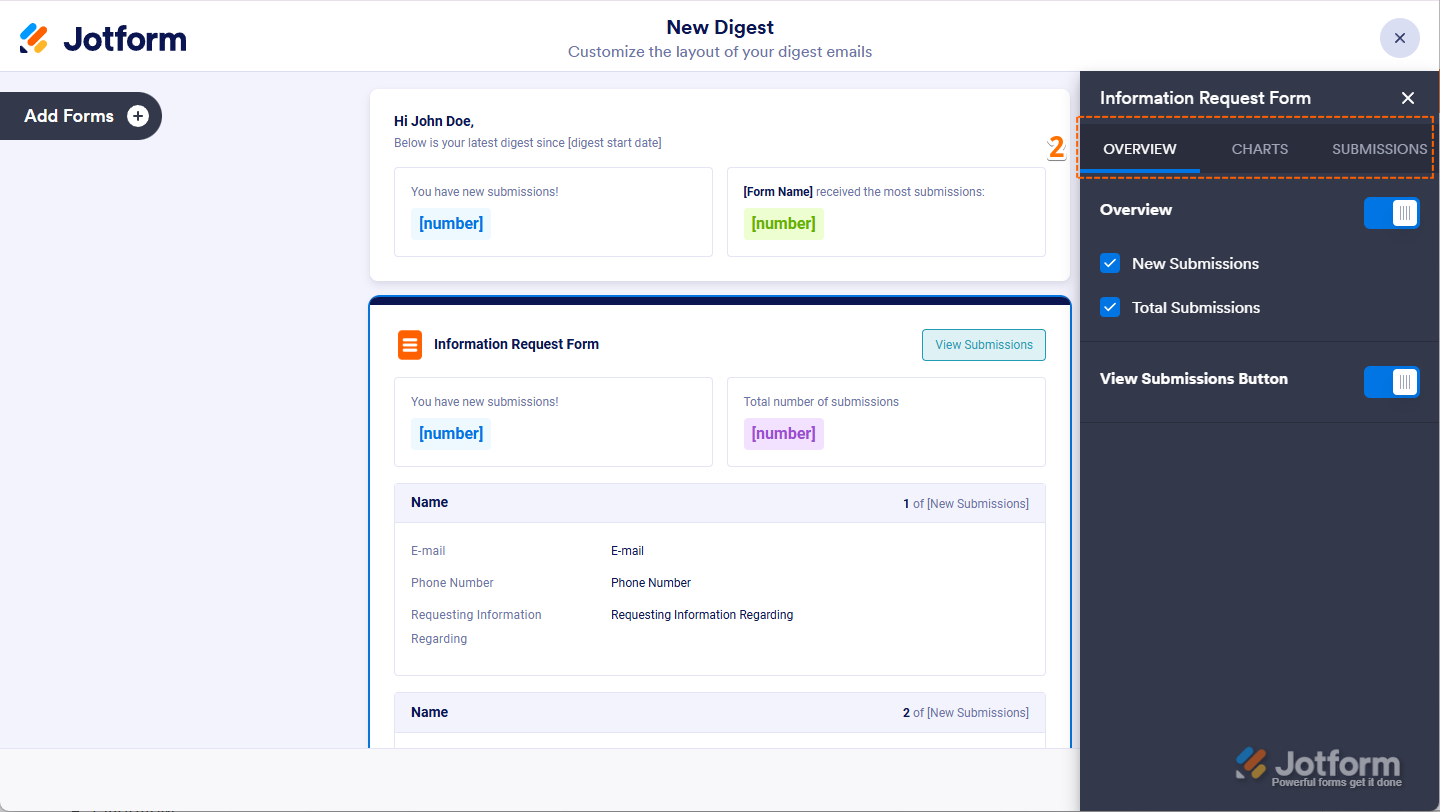
Let’s explore each tab below.
The Overview Tab
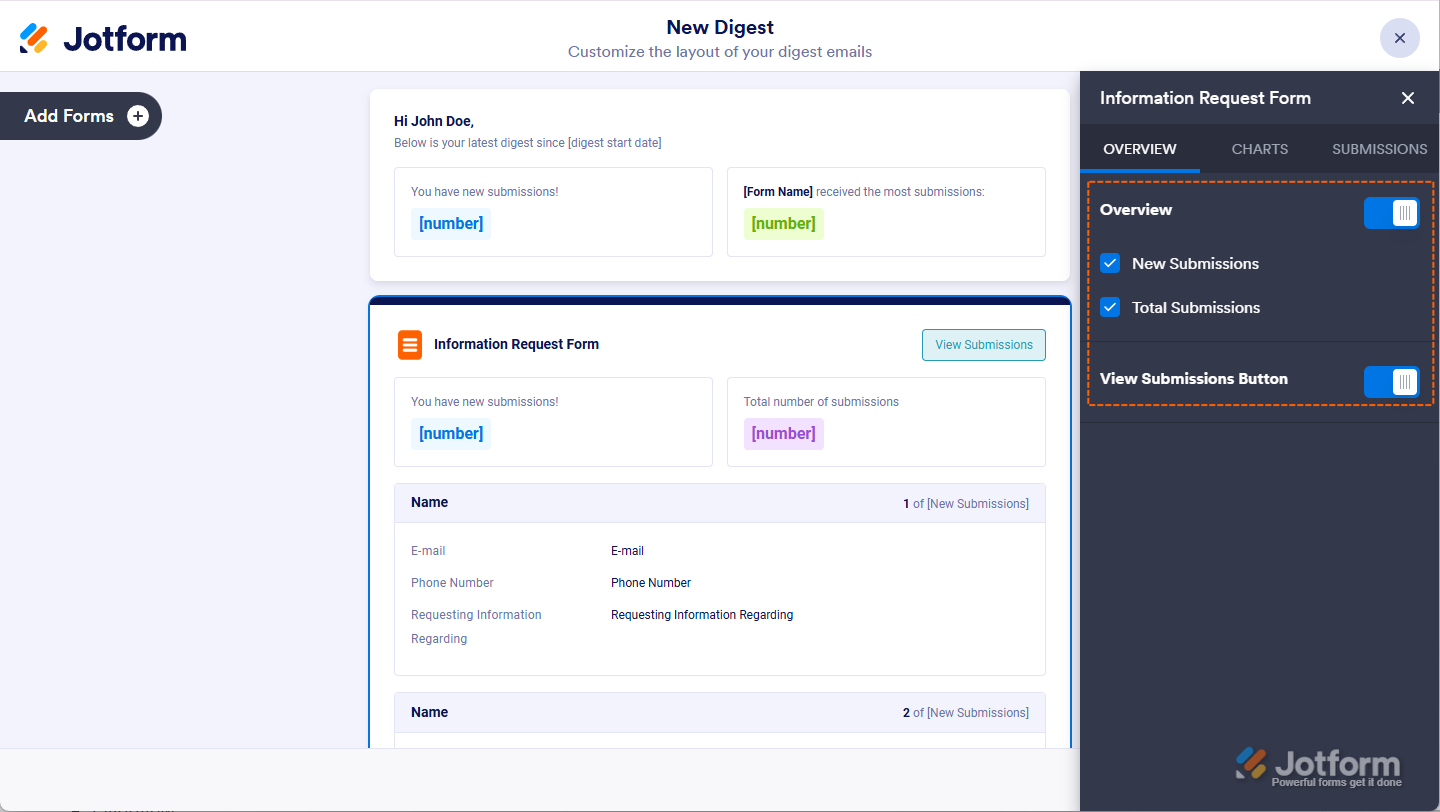
Under the Overview tab, you can hide or show the Overview or View Submissions button, depending on what you want your recipients to see. You can:
- Overview — Toggle this on to display both New Submissions and Total Submissions. You can also check or uncheck each option based on what you want to show.
- View Submissions — Enable this to add a button that lets recipients view individual submissions directly.
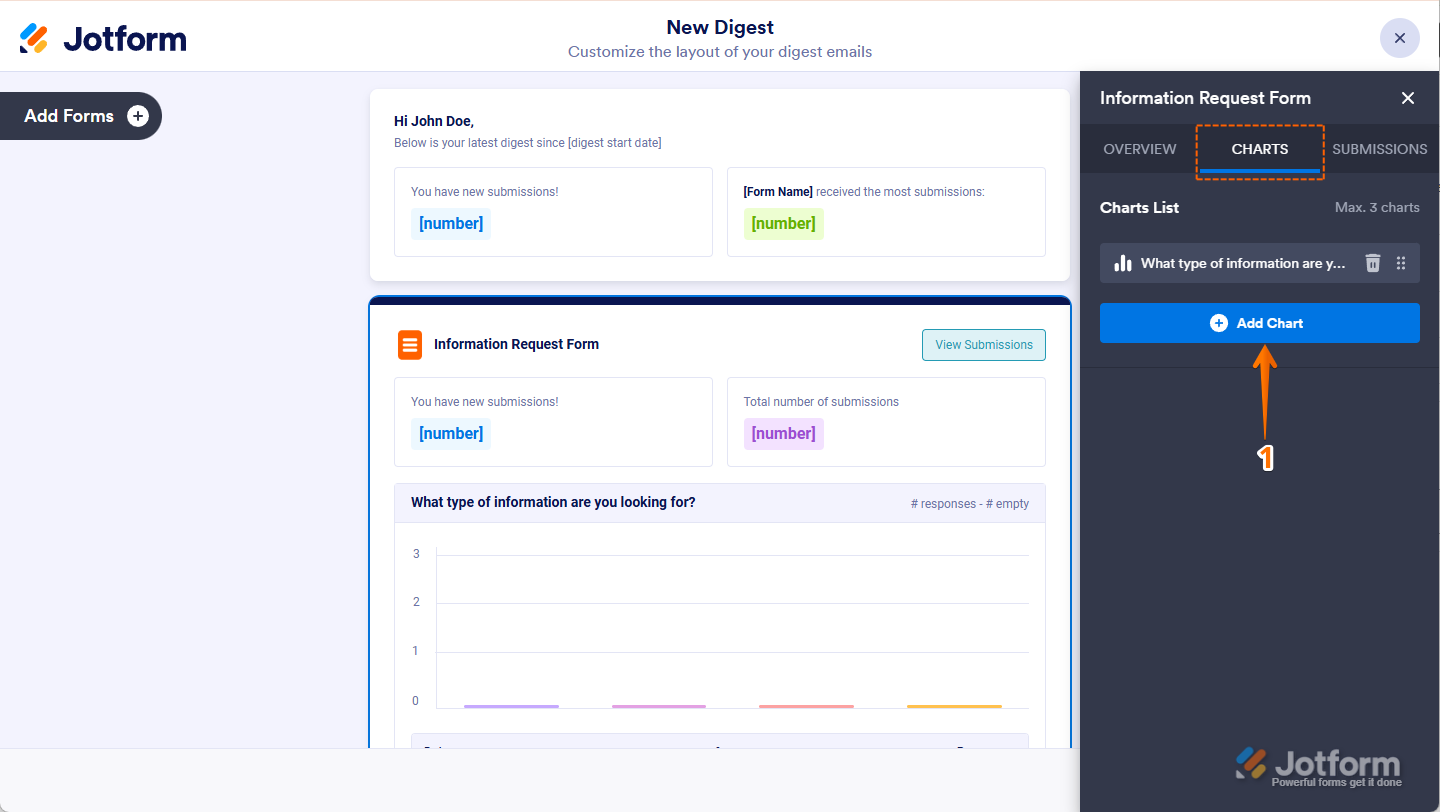
The Chart Tab
Under the Chart tab, you can show your form data visual way. You can add charts to your Digest Email using supported question types to highlight key insights at a glance. Here’s how to do it:
- Under Charts Tab, click on Add Cart to add automatically a question field.
Notes
- You can add up to 3 charts to your Digest Email.
- The first three questions on your form will automatically be represented as Charts.
- Charts can only be created from the supported field types: Single Choice, Multiple Choice, Dropdown, Star Rating, and Yes or No questions on Card Forms.
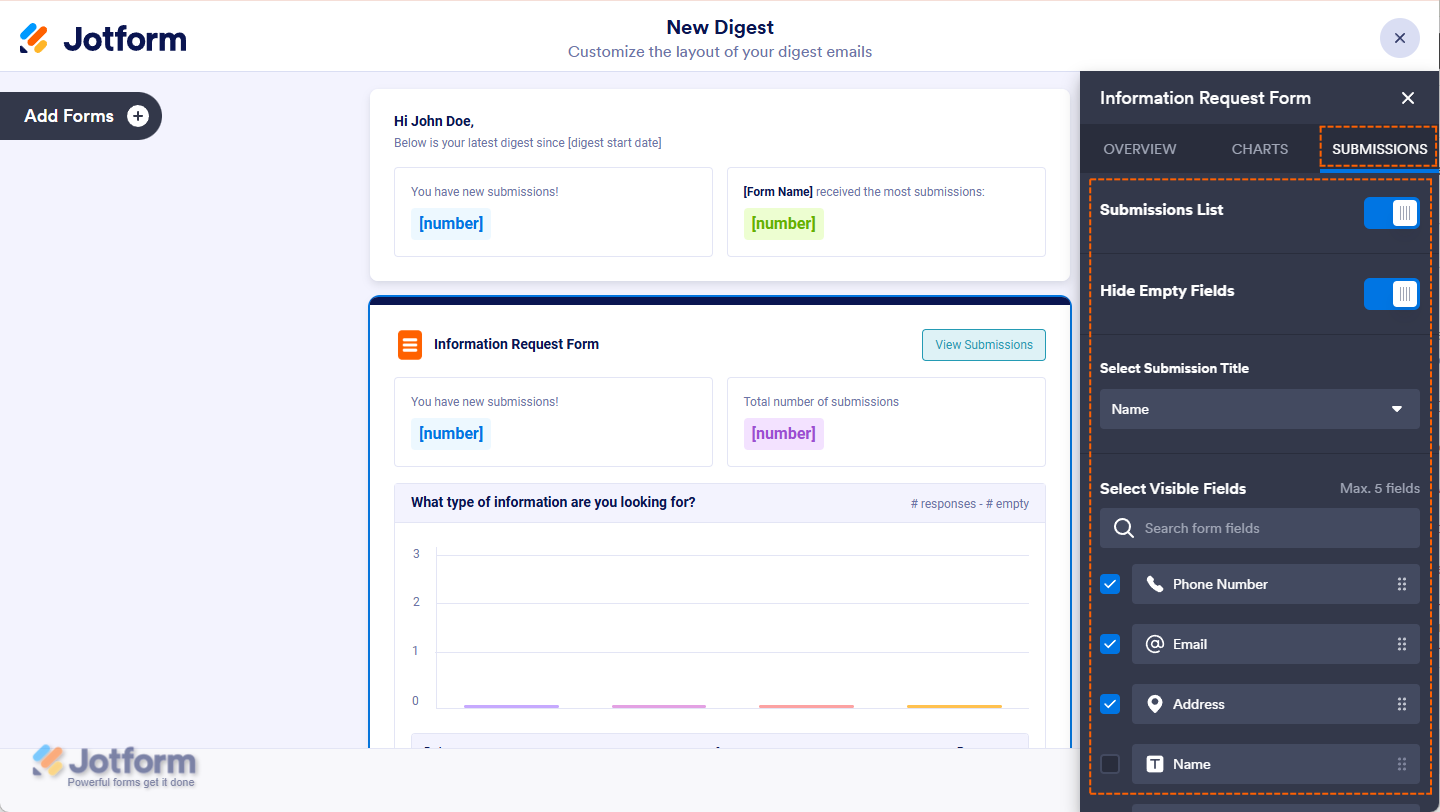
The Submissions Tab
Customizing whats shown in your Digest Emails is a simple way to tailor them to show only the details that matter to you. Here, you can:
- Submissions List — Enable this to include a list of submissions in your Digest Email.
- Hide Empty Fields — Toggle this On to automatically hide any fields that don’t contain data.
- Select Submission Title — Choose which field to use as the title for each submission. This option only appears when the Submissions List is turned on.
- Select Visible Fields — Pick up to 5 fields to display in the email. This option also only appears when the Submissions List is turned on.
Customizing the Digest Email Settings
The settings on the right side of the Digest Email Layout page are mainly for customizing the email itself like the subject line, sender name, and schedule. Here’s how to do it:
- On the Digest Email Layout page, click on the Gear Icon
- Then, in the window that opens, you can set up the following Digest Email options:
- Subject — Enter a subject line for it.
- Recipients — Add the recipient’s email address.
- Repeats — Choose how often to send it: daily, weekly, or monthly.
- Send Date — Select when to send it. The available options will change depending on how often you choose to send it.
- Send Time — Select the best time to send it.
- Time Zone — Choose the time zone for it. The default is based on your Account Time Zone Settings.
- Now, click on Save at the bottom of the window and you’re all set!
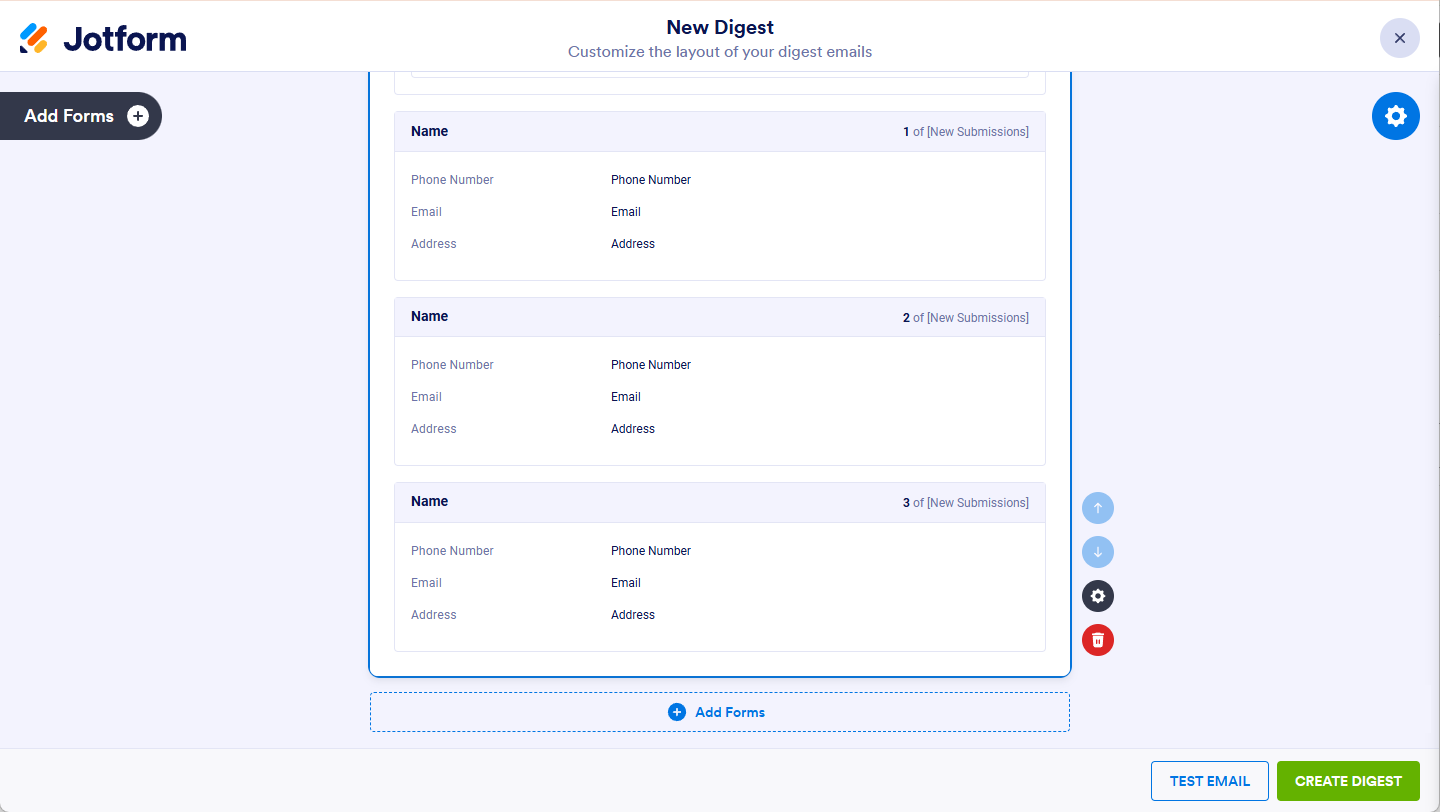
Adding Forms to Your Digest Email
If you’d like to add another form to your Digest Email, there are two ways to do it. Here’s how:
- On the Digest Email Layout page, click on Add Forms in the top-left corner of the screen.
- Or, scroll down and click on Add Forms at the bottom of the page.
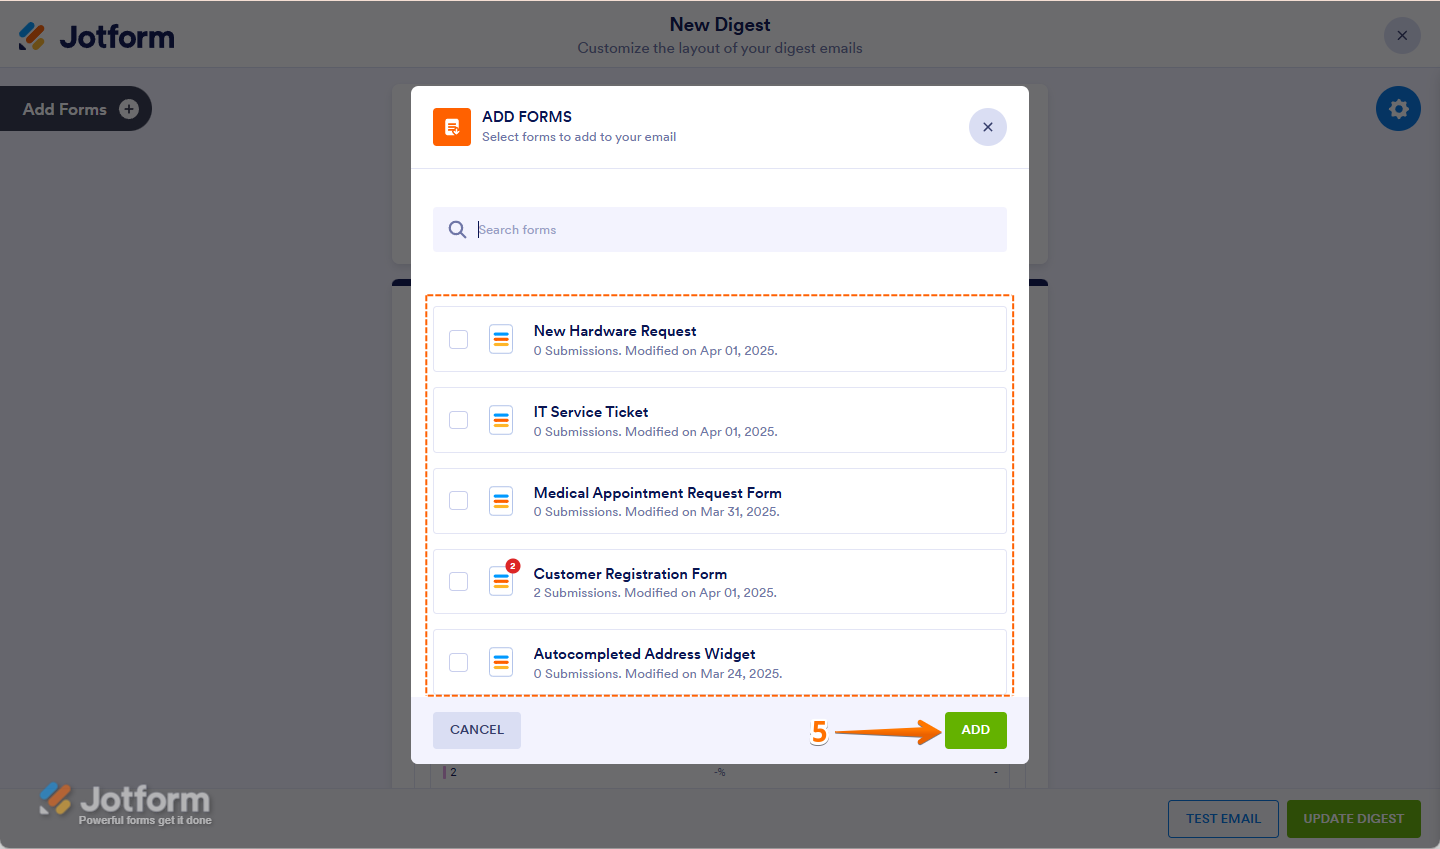
- Now, in the Add Forms window that opens, select the form you want to attach, and then click on Add.
And that’s it! With these settings, you can make your Digest Emails show exactly what matters to you. Feel free to come back and update your preferences anytime.

Send Comment:
6 Comments:
5 days ago
This guide is really clear hanks for breaking it down! I especially appreciate how you explained using the Digest Email Layout page to toggle elements like charts, submissions, and titles to tailor the digest. It makes regular reports much more meaningful and easier to manage.
More than a year ago
There are controls such as Age, ZIP Code, and Date --- it would be great if Digest reports could be generated for these kind of free-form but distinct valued variables.
More than a year ago
Hi There,
Is there a way to add a PDF Copy to my digests?
More than a year ago
Hi there,
How do I change Jotform logo on my Weekly Digests?
Thanks,
More than a year ago
How can you add a personal message or reminder to the digest email?
More than a year ago
HOW DO I CHANGE MY LOGIN EMAIL