You can customize Jotform Boards to align with your business process, allowing you to manage tasks more efficiently and stay organized. With flexible customization options, you can tailor workflows, set priorities, track progress, and collaborate seamlessly with your team. This ensures a streamlined process that enhances productivity and keeps your projects on track.
Applying Theme in Your Jotform Boards
Customizing the appearance of your Jotform Boards enhances visibility, improves organization, and makes task management more engaging. With built-in theme options, you can personalize your board’s look to match your workflow, brand, or personal preference. Here’s how you can do it:
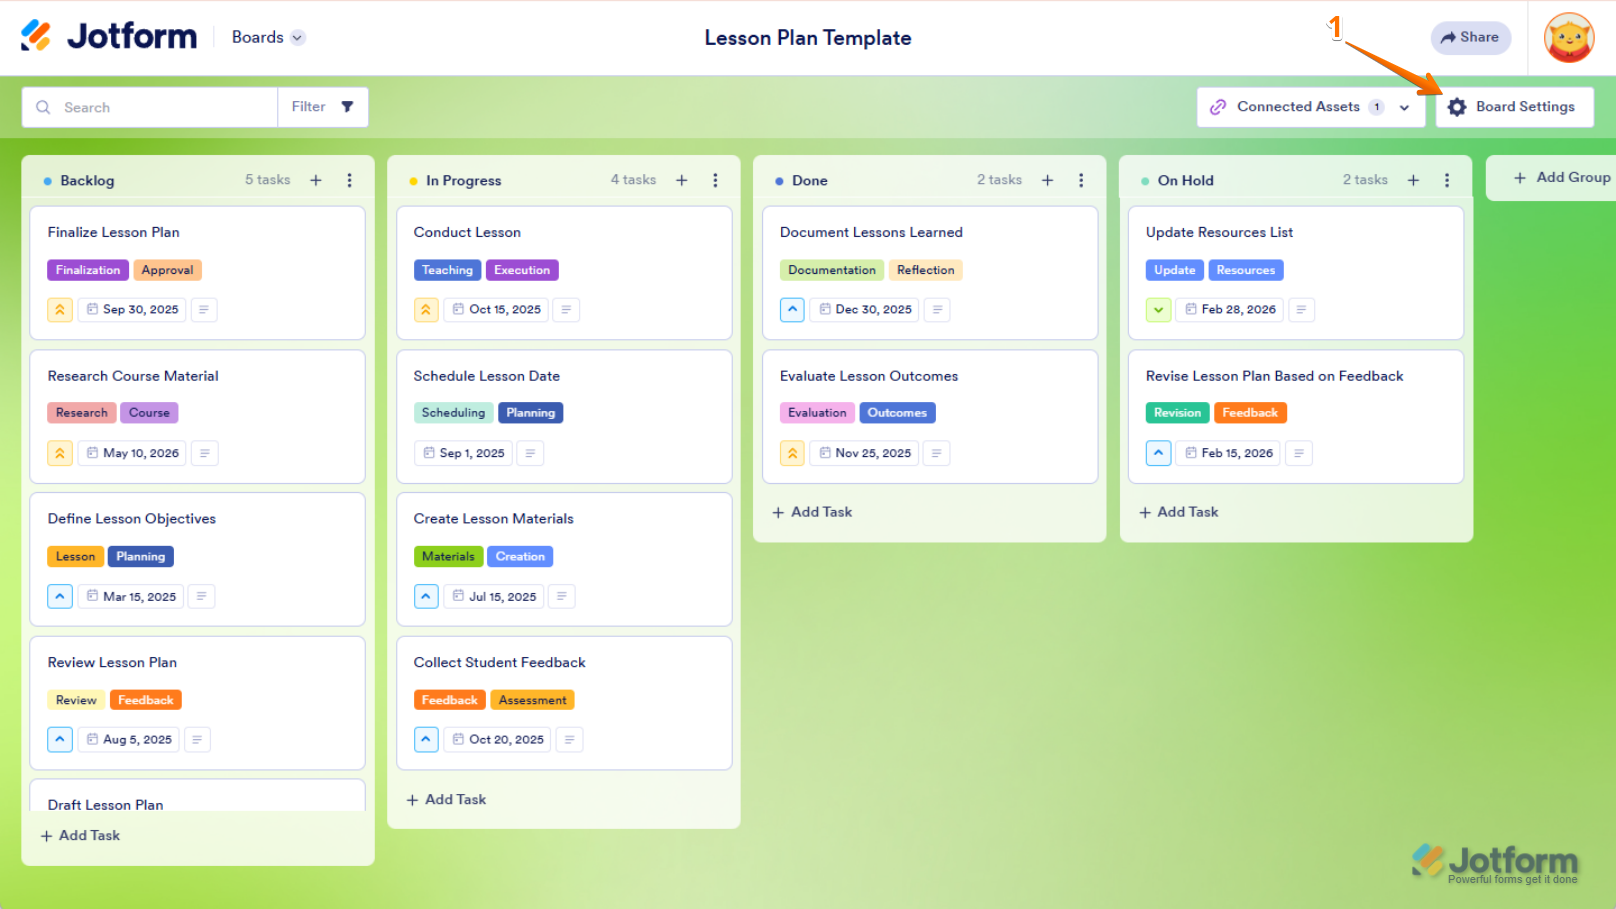
- On your Jotform Board, click on Board Settings in the top-right corner of the page.
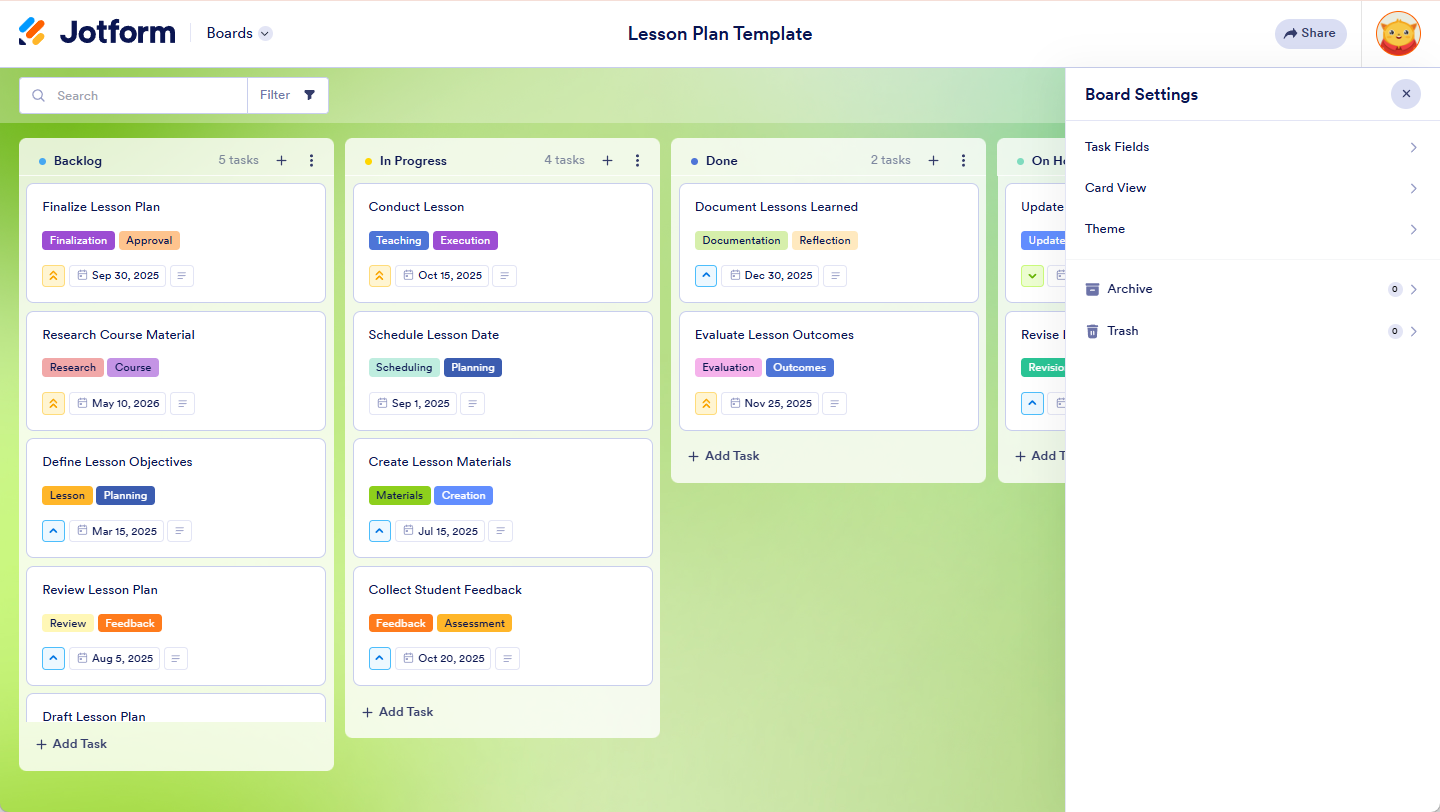
- In the menu that opens, click on Themes.
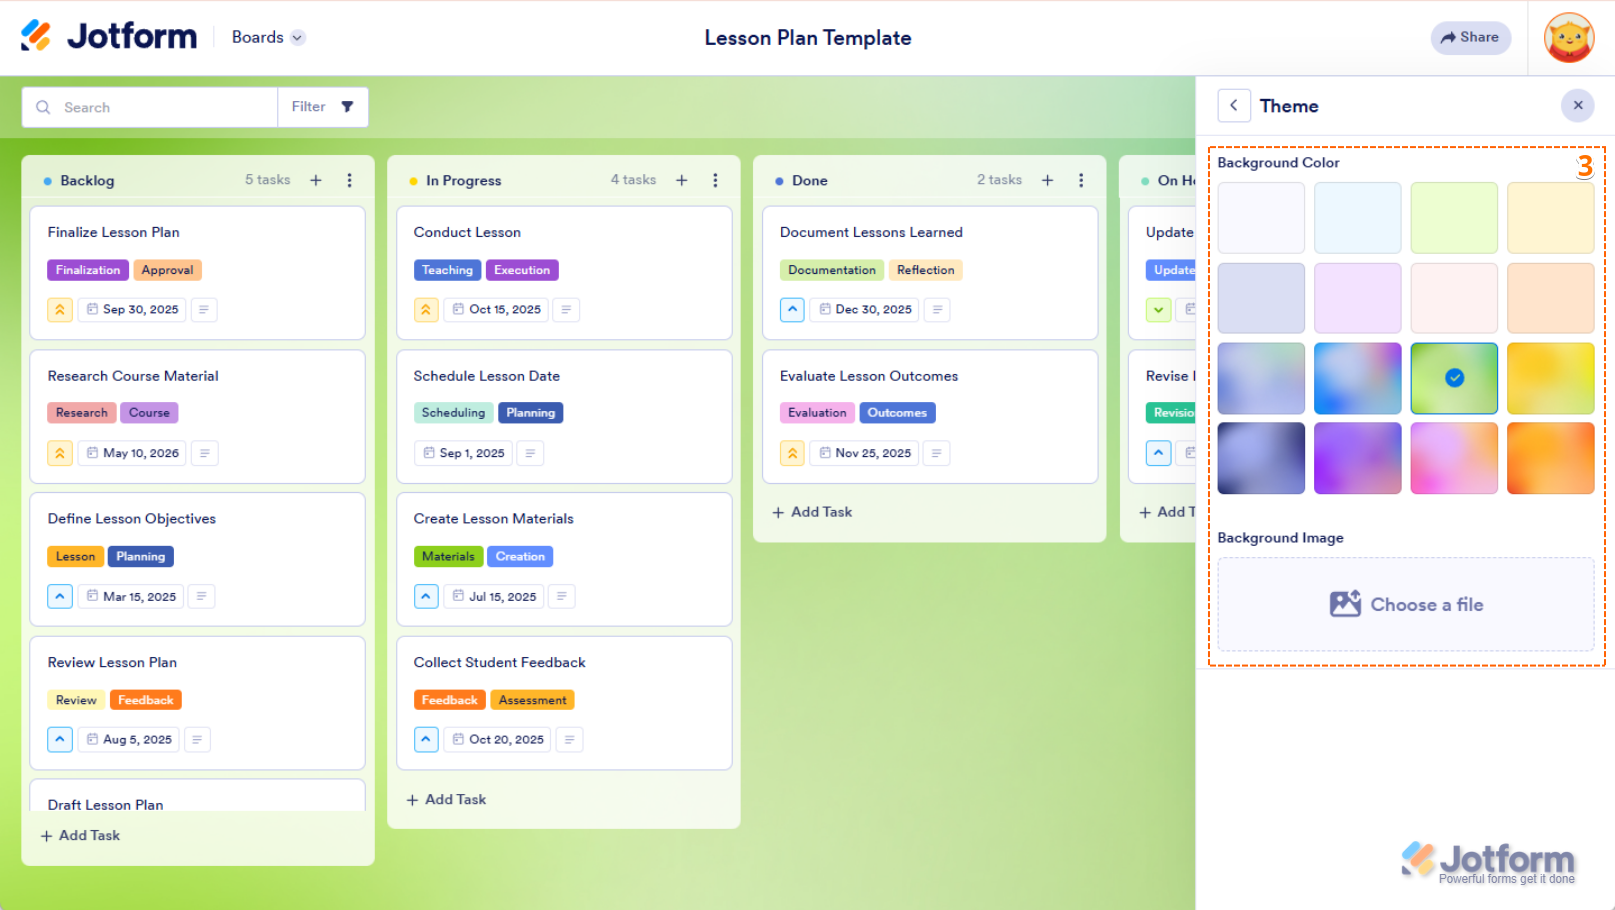
- Now, choose a Preset Background Color or click on Choose a File to upload your own background image.
That’s it. Your selected theme has now been automatically applied to your board.
Editing the Card Layout
There are two ways where you can edit your card layout. You can do this through the Board Settings or with the Connected Assets.
Editing Card Layout Through Board Settings
You can easily show and hide your field by editing your card layout through board settings. Let’s do it:
- On your Jotform Board, click on Board Settings in the top-right corner of the page.
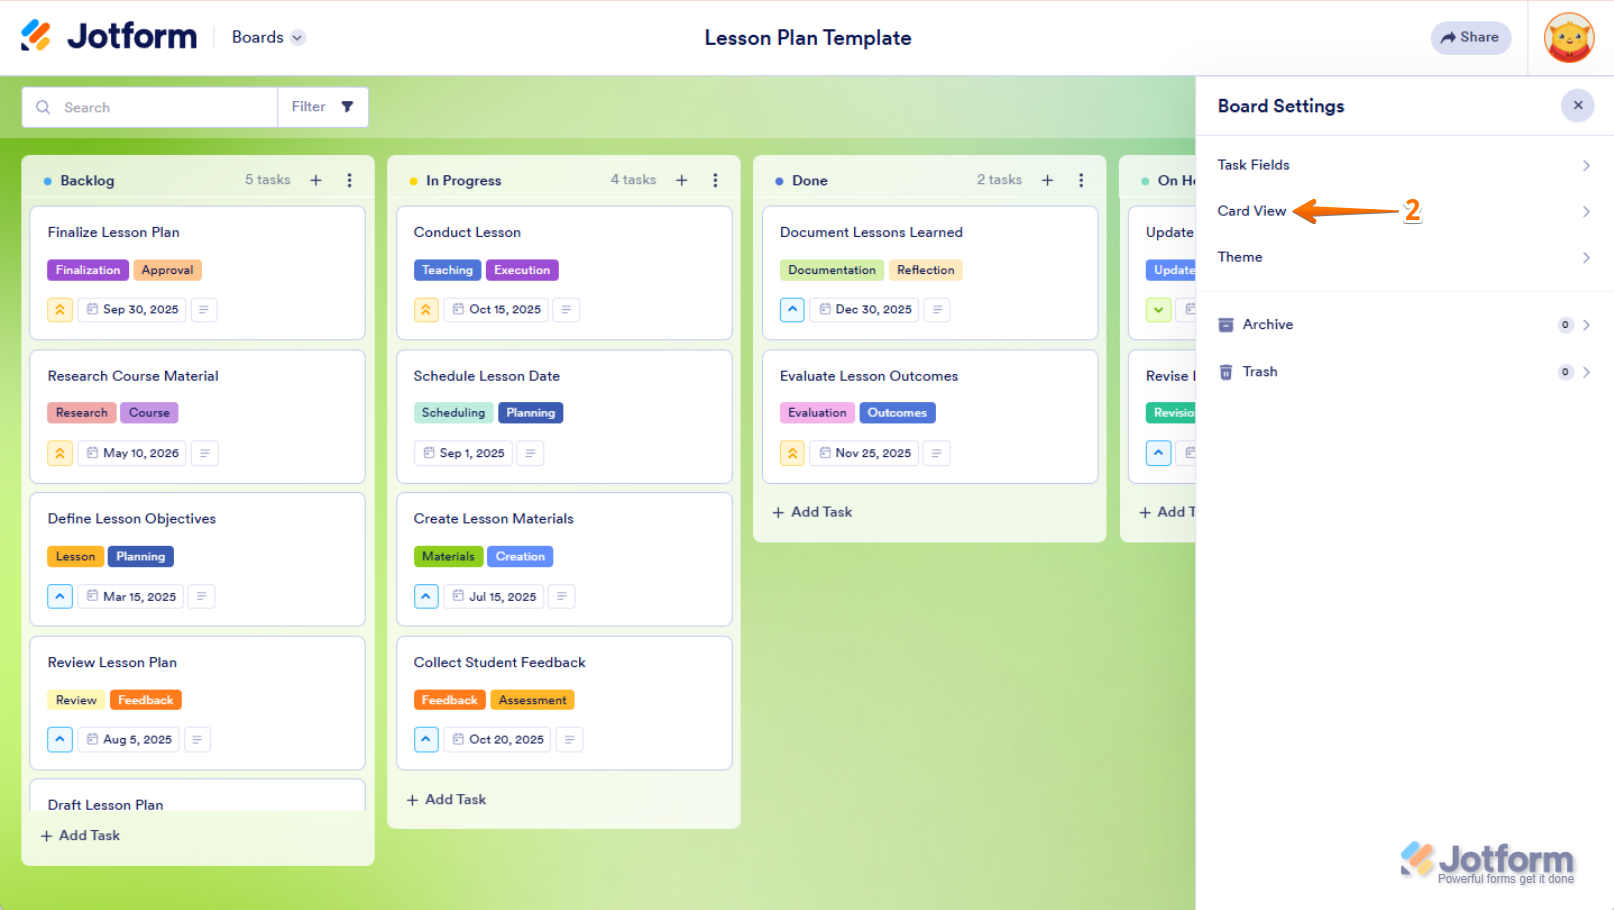
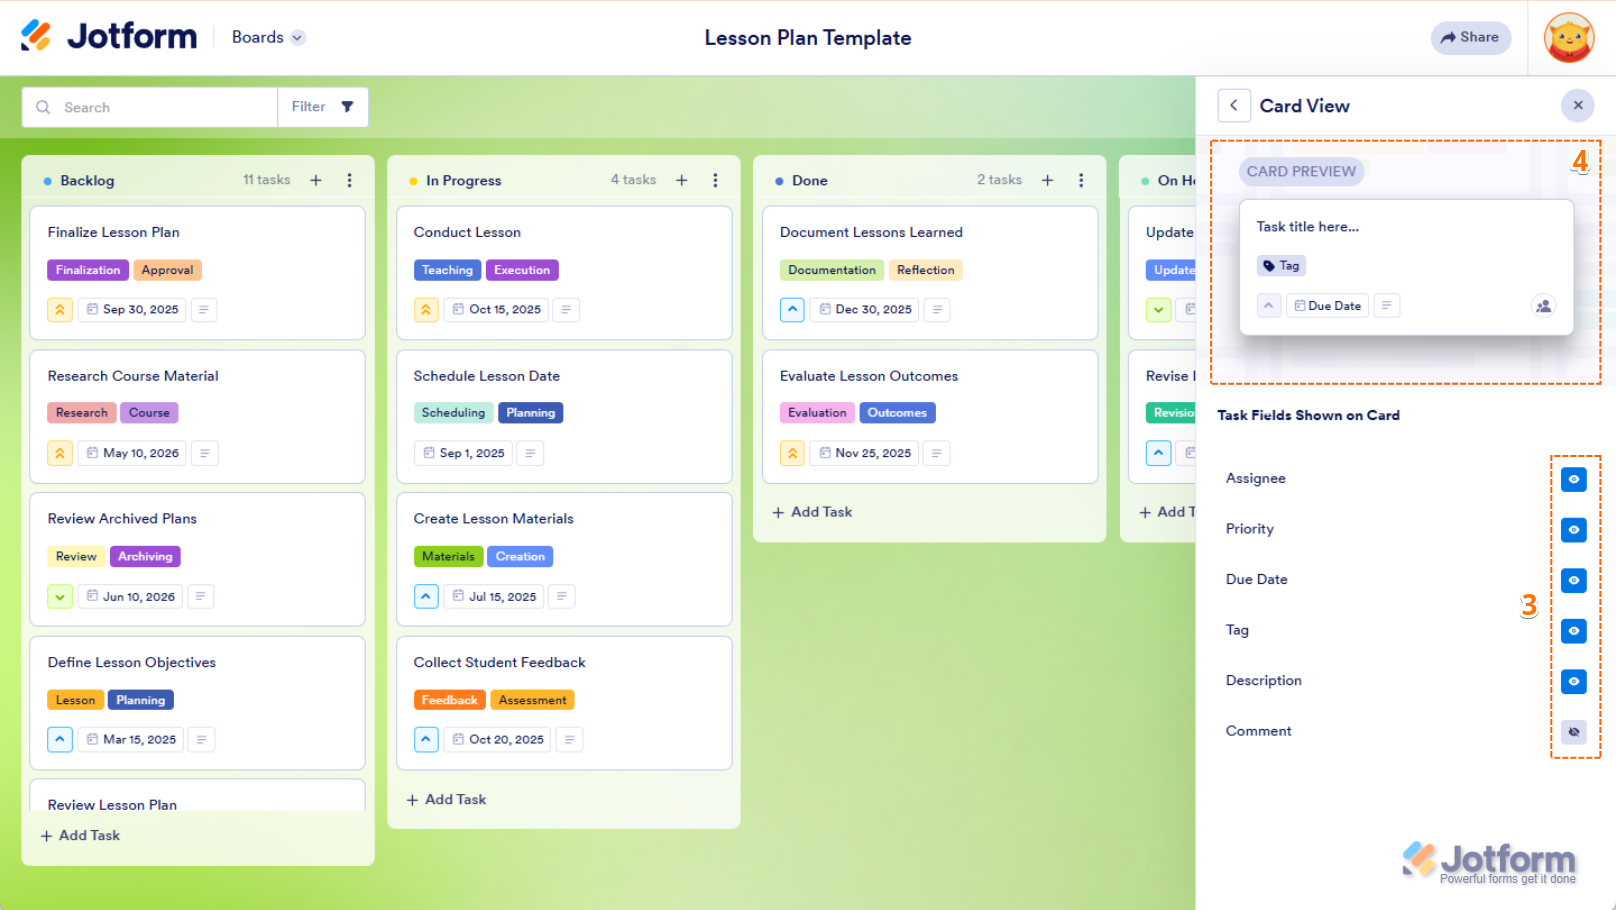
- In the menu that opens, click on Card View.
- Now, click on the Eye icon on the right side of a task field to hide or display it.
- While you’re here, you can also preview the new card to see what it’ll look like.
That’s it, you’re all set. You’ve now successfully edited your Card Layout through the Board Settings.
Editing Card Layout Through Connected Assets
If you have an existing form connected to your boards, you can also edit your card layout through the Connected Assets. Here’s how:
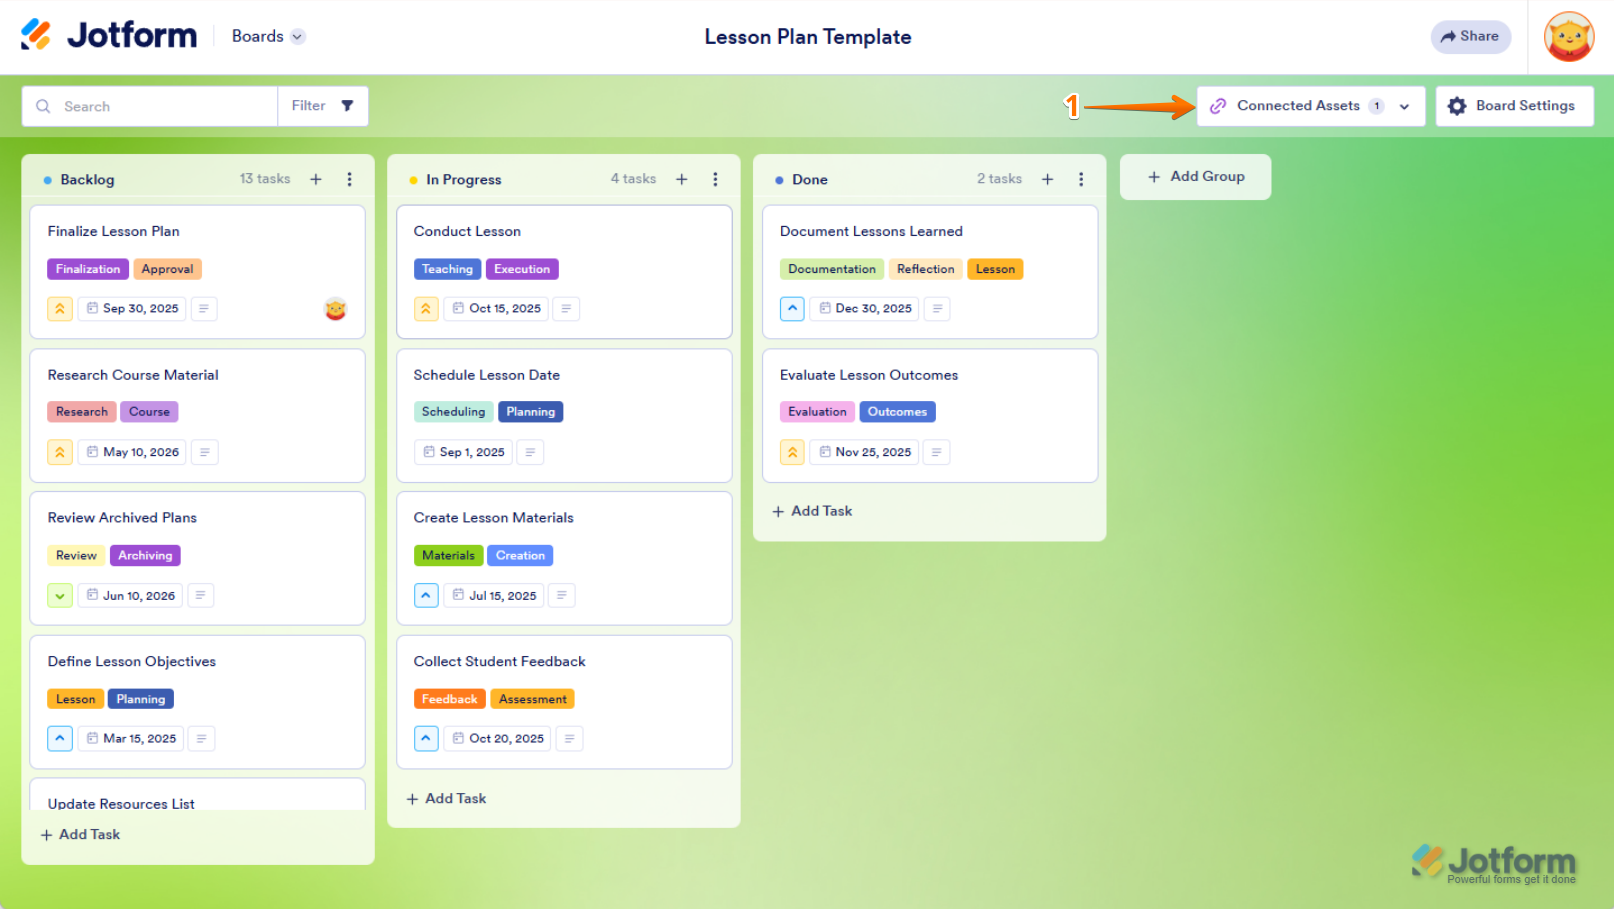
- On your Jotform Boards, click on Connected Assets at the top menu.
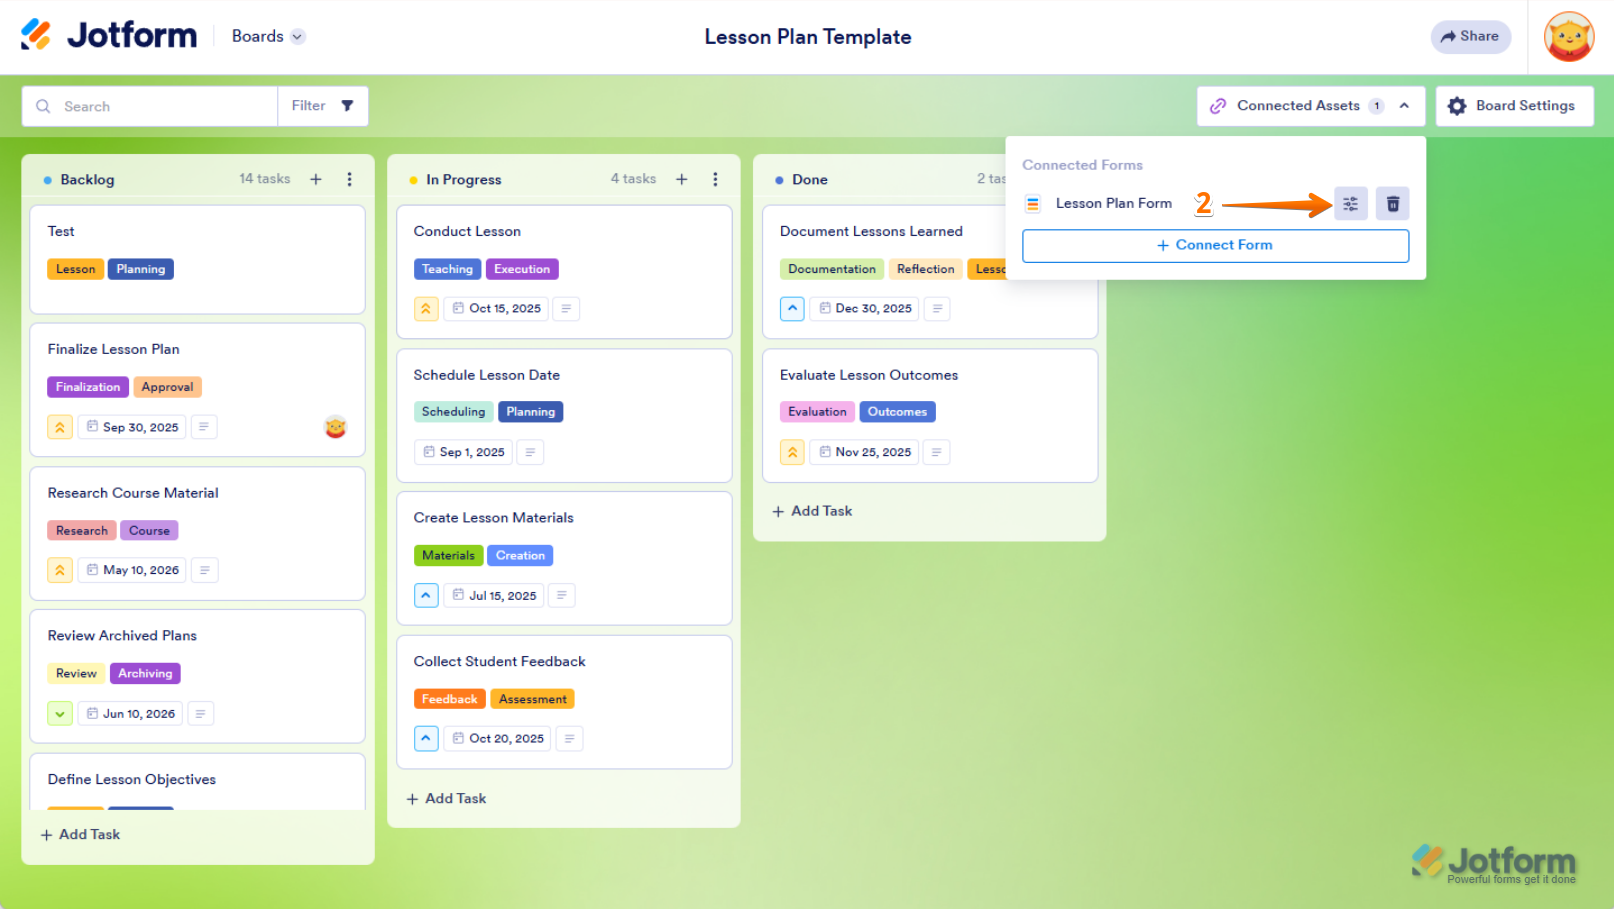
- Then, in the menu that shows up, click on Slider Icon.
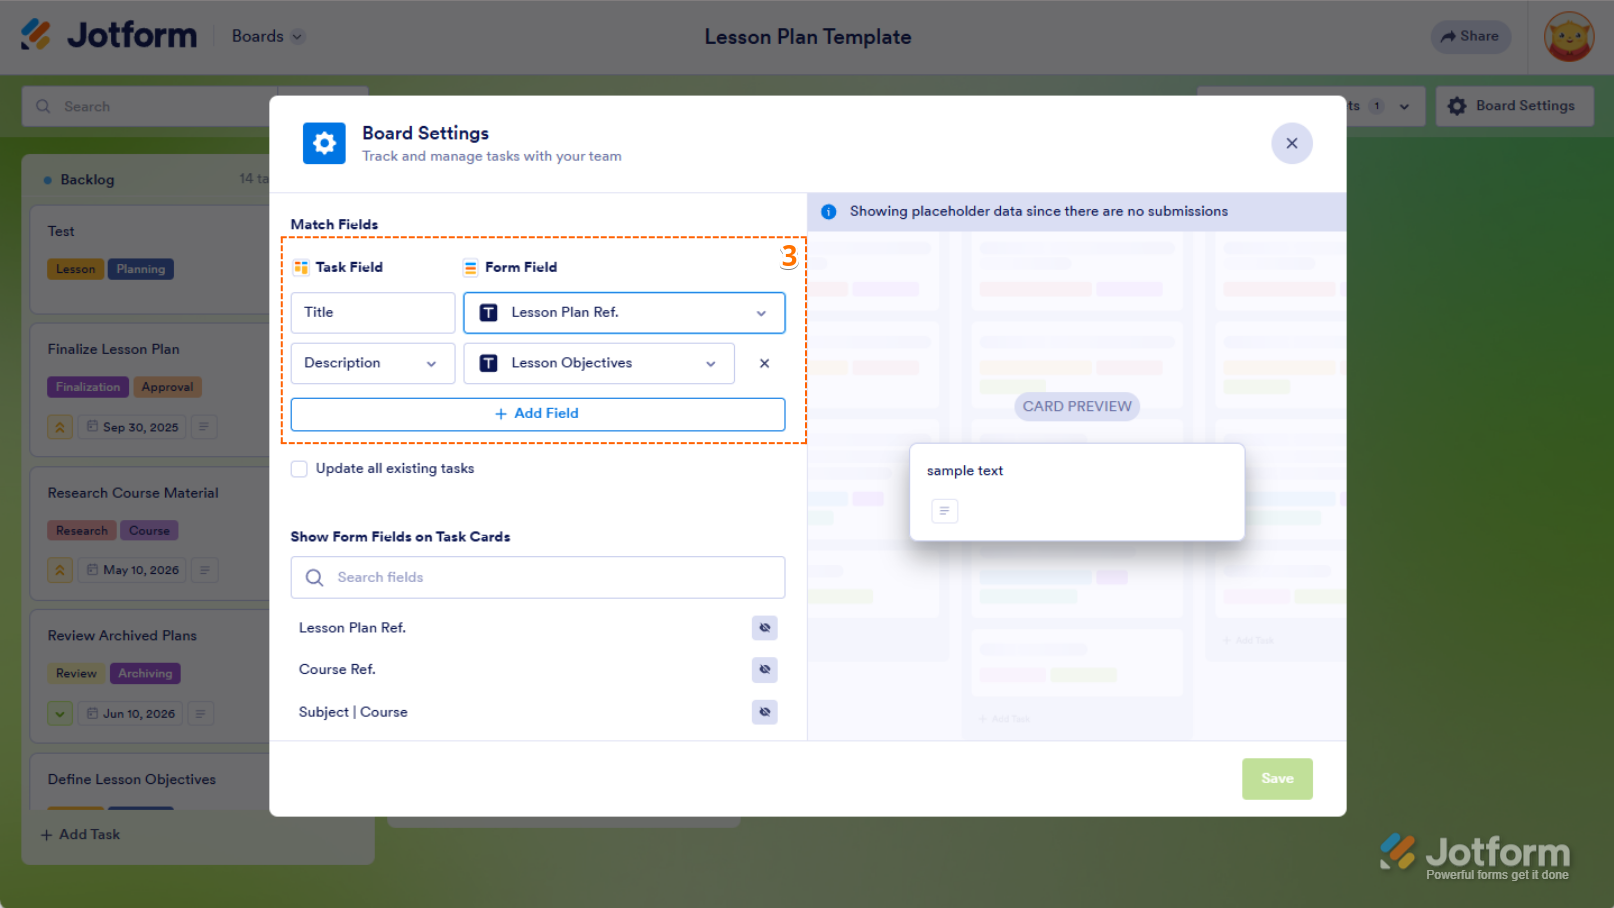
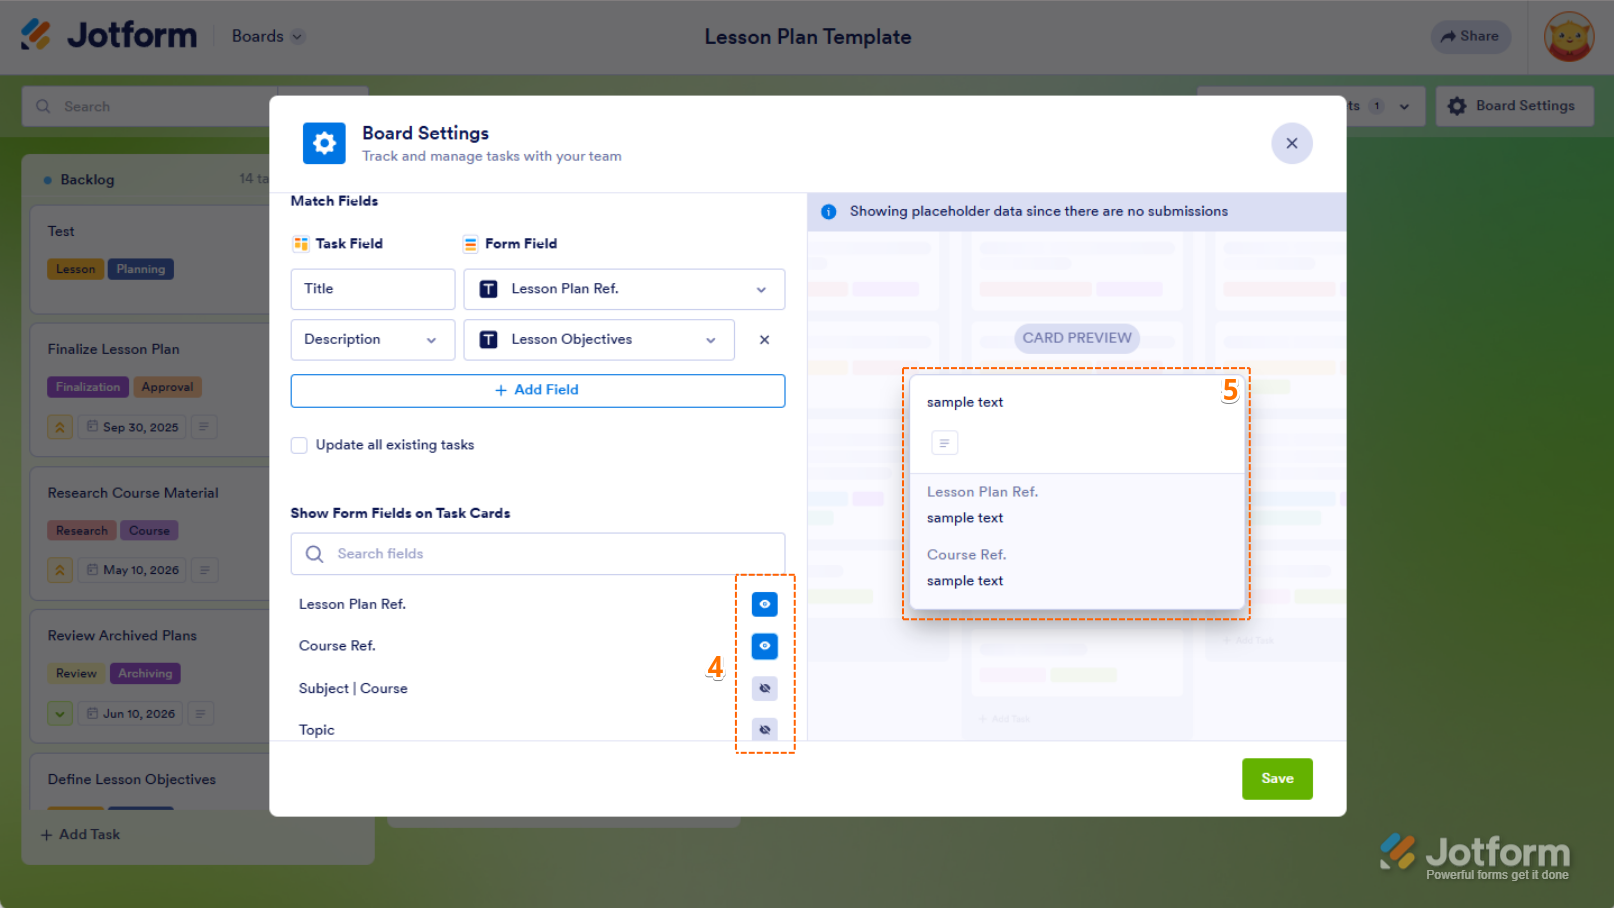
- Now, in the window that opens, you can match the Task Field to the Form Field and Add a New Field if needed.
- Under the Show Form Fields on Task Card section, you can click on the Eye icon to hide or display the task fields.
- While you’re here, you can also preview the new card to see what it’ll look like.
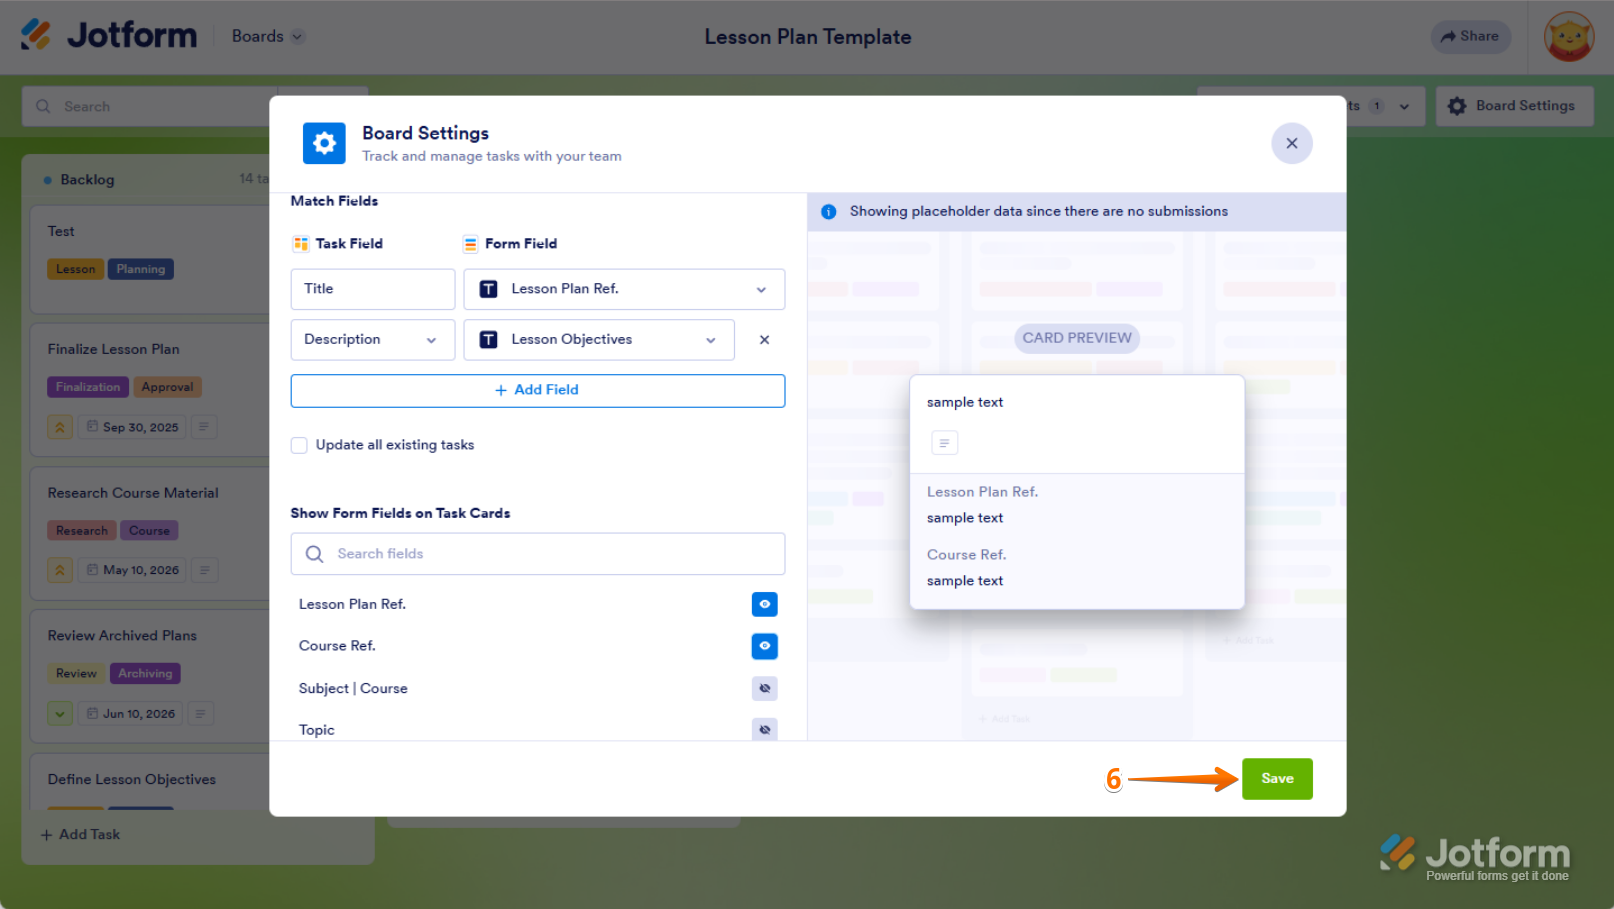
- Finally, click on Save at the bottom of the window to save your changes.
That’s it, you’re all set. You’ve now successfully edited your Card Layout.
Managing Groups in Jotform Boards
Jotform Boards allows you to customize your workflow by renaming, reorganizing, and managing your groups according to your needs.
Adding a Group
You can also add a new group to better organize your tasks. Let’s do it:
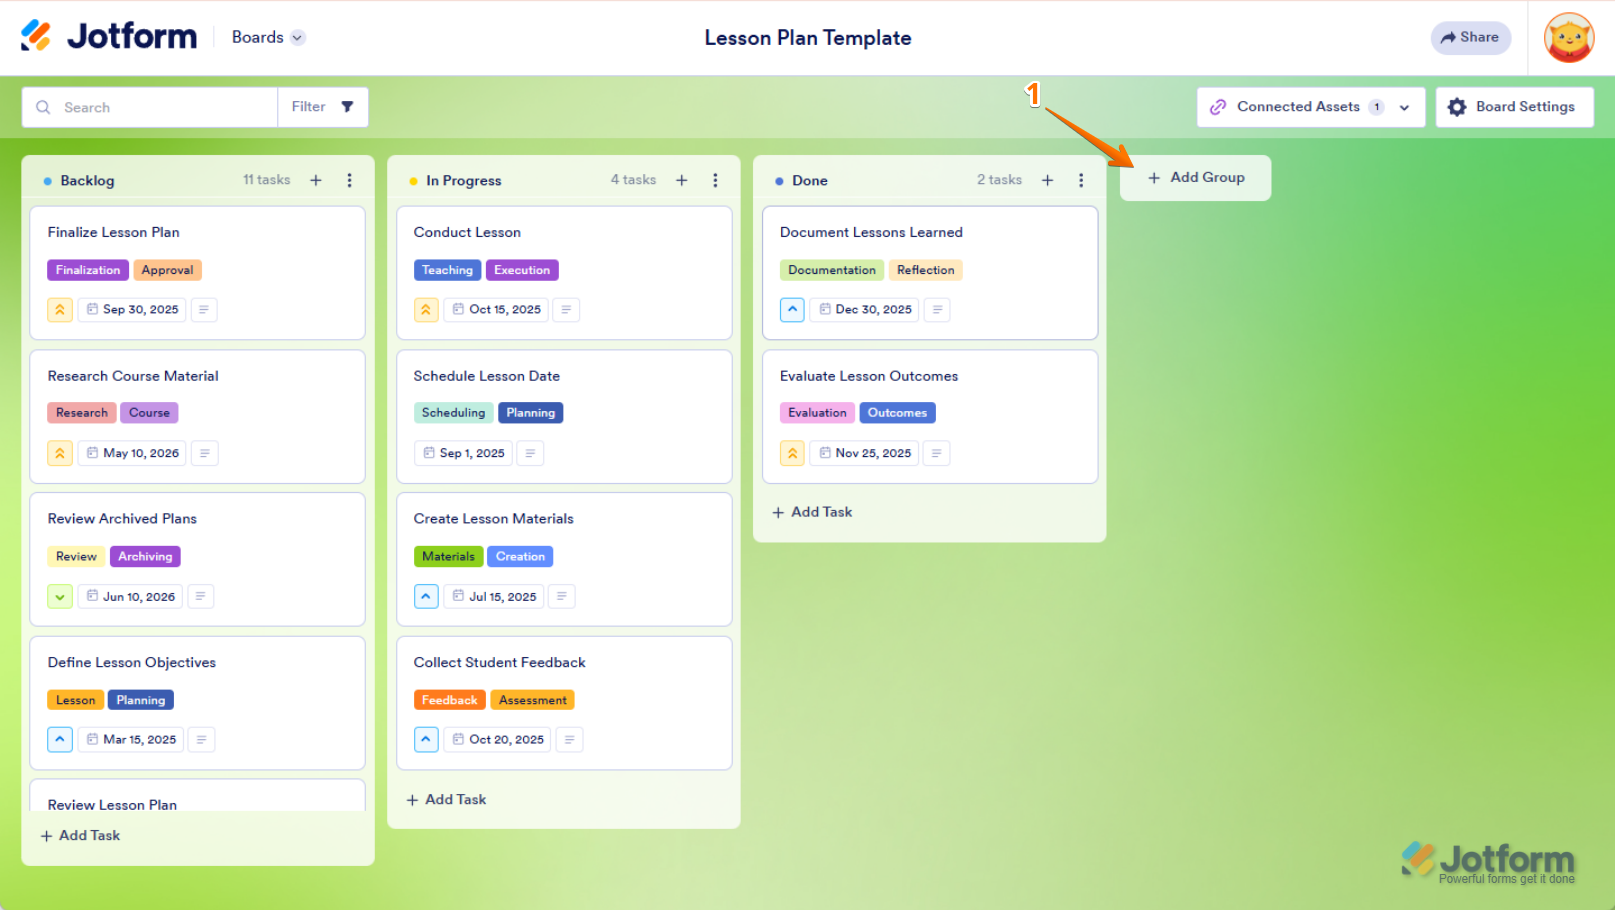
- On your Jotform Board, click on + Add Group on the top-right side of your board.
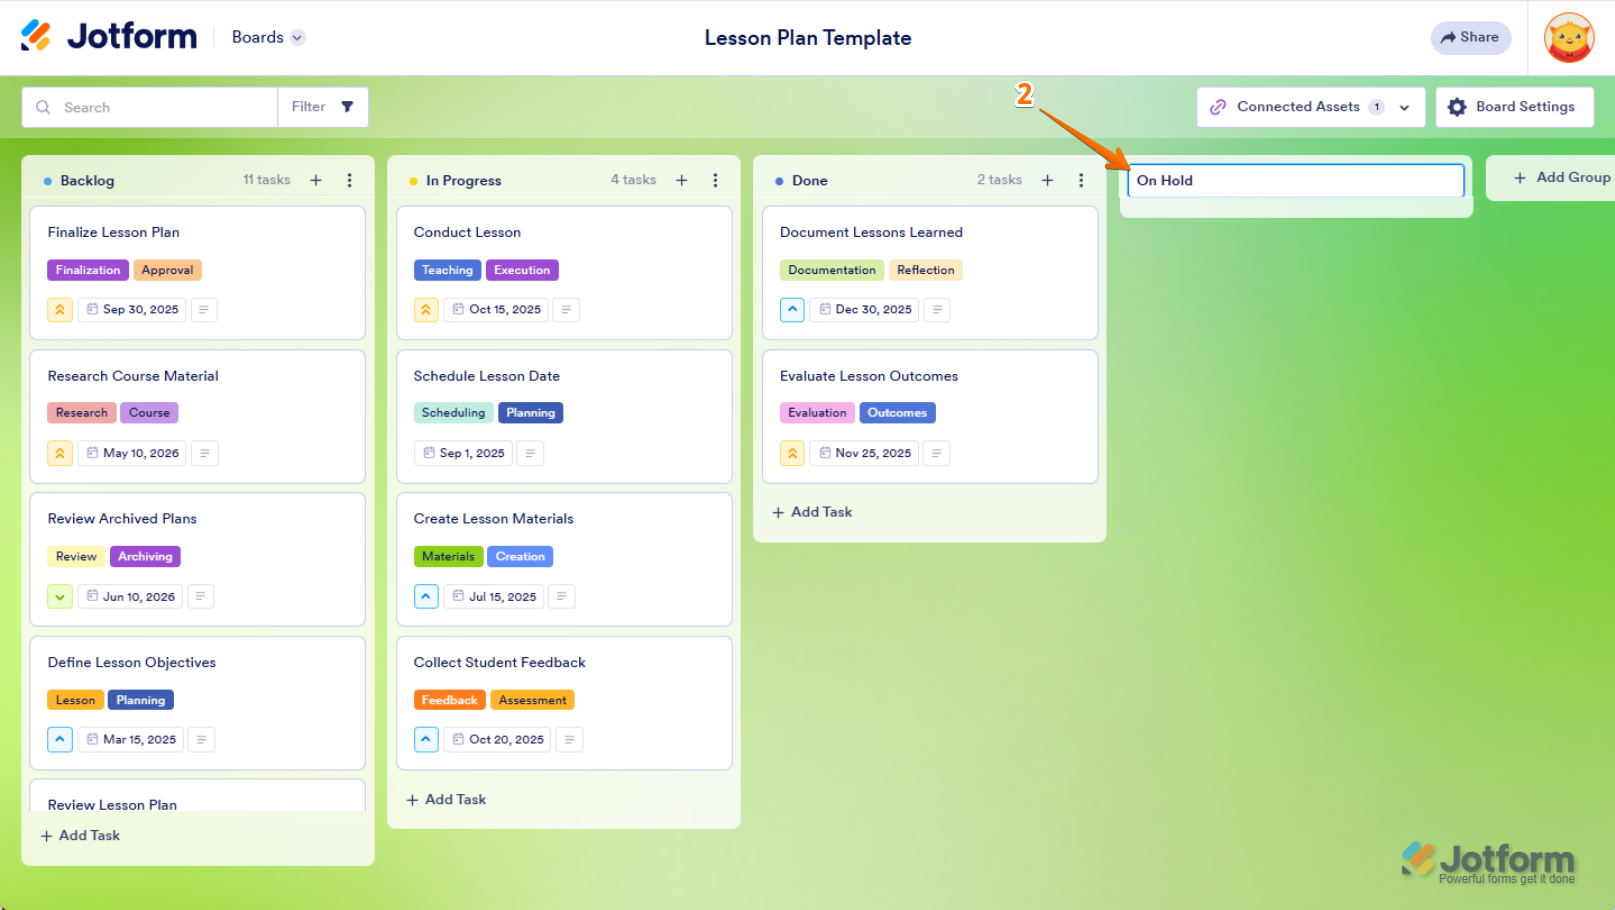
- Then, enter a Title for your group.
As an alternative, you can:
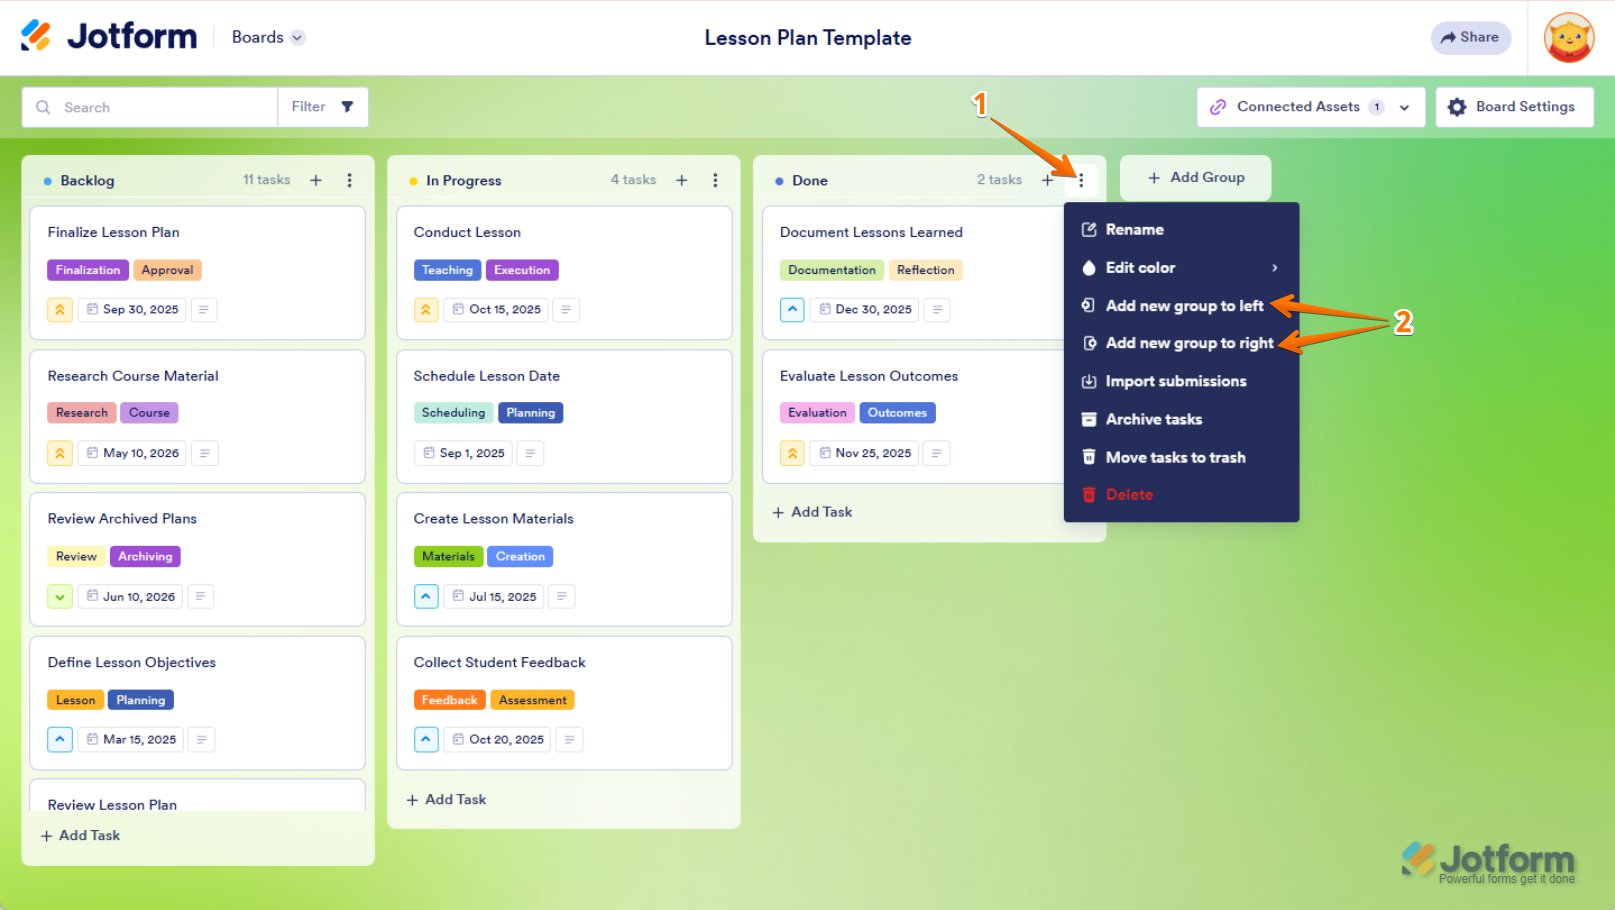
- Click on the Three Dots icon on the top-right side of your group.
- Then, select Insert Group to Left or Insert Group to Right to place a new task where you want it.
That’s it. You’ve now successfully added a new group to your board.
Renaming a Group
You can rename a group to better reflect its purpose within your workflow. Check out the steps below to see how it’s done:
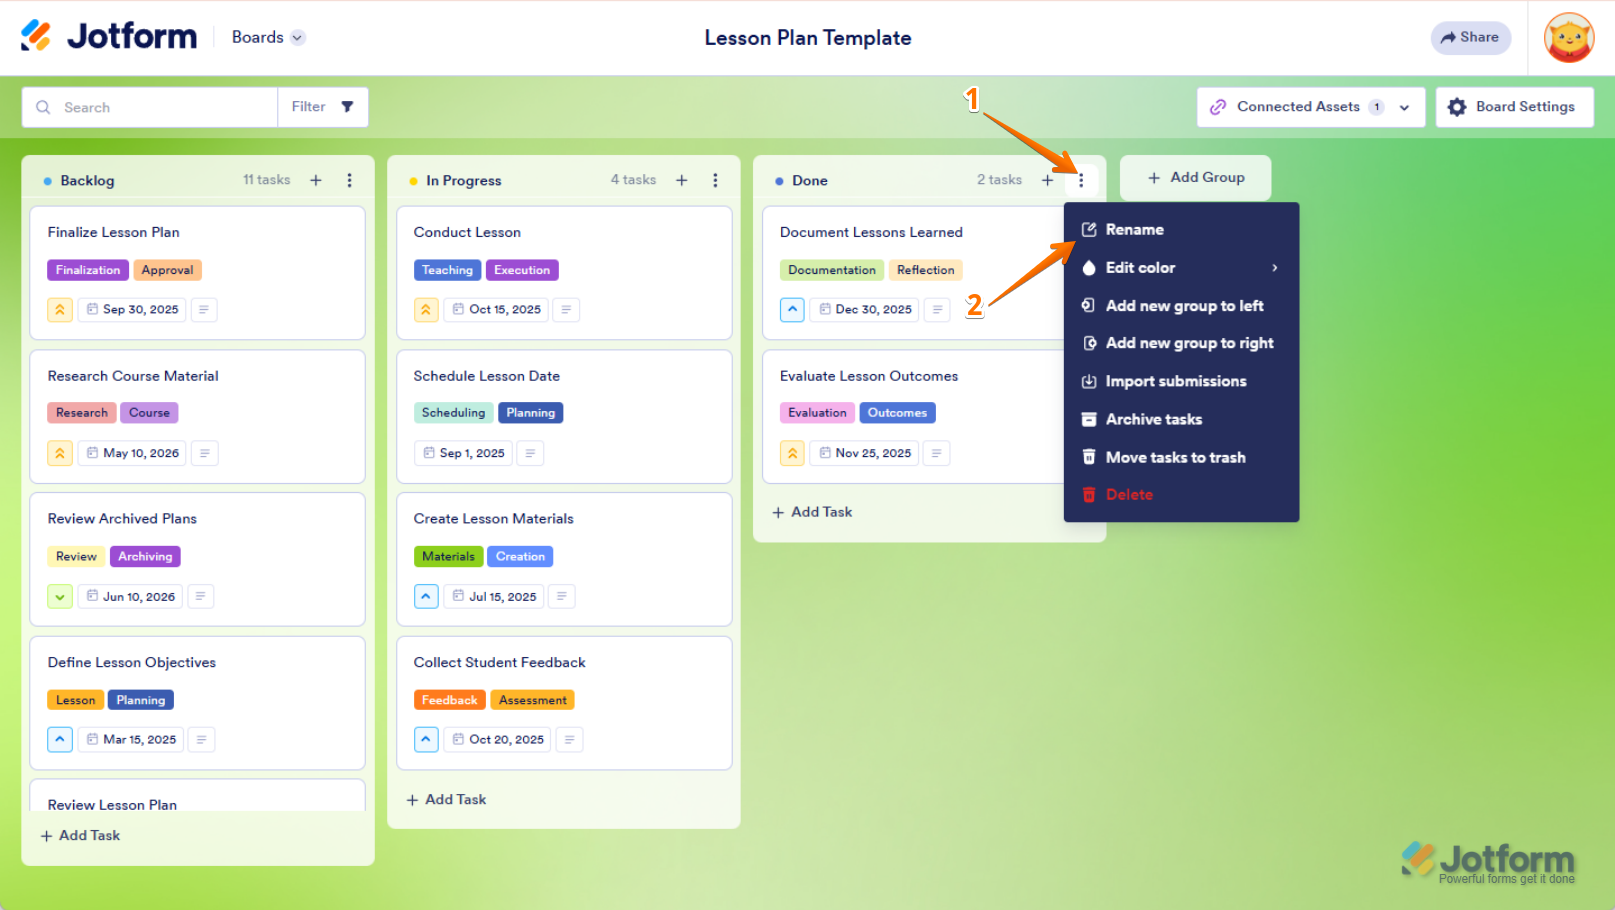
- On your Jotform Board, click on the Three Dots icon on the top-right side of your group.
- Then, in the Dropdown menu that comes up, click on Rename.
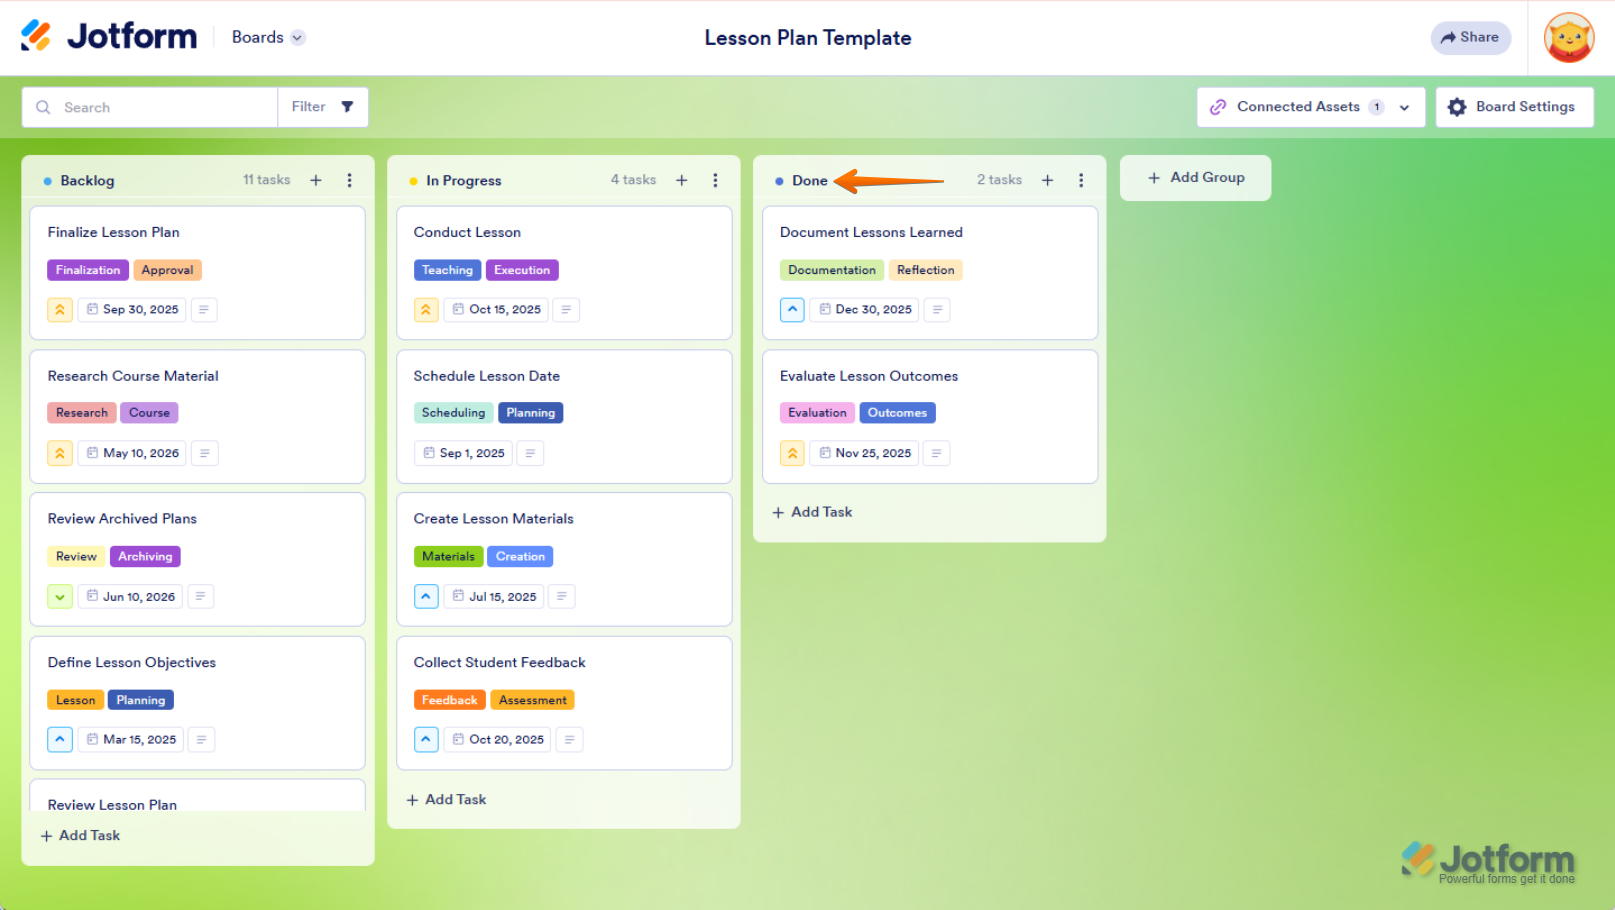
As an alternative, you can double-click on the Group Title to edit it.
That’s it. Your group has now been successfully renamed.
Deleting a Group
If you no longer need a group, it’s easy to remove it from your board. Here’s how to do it:
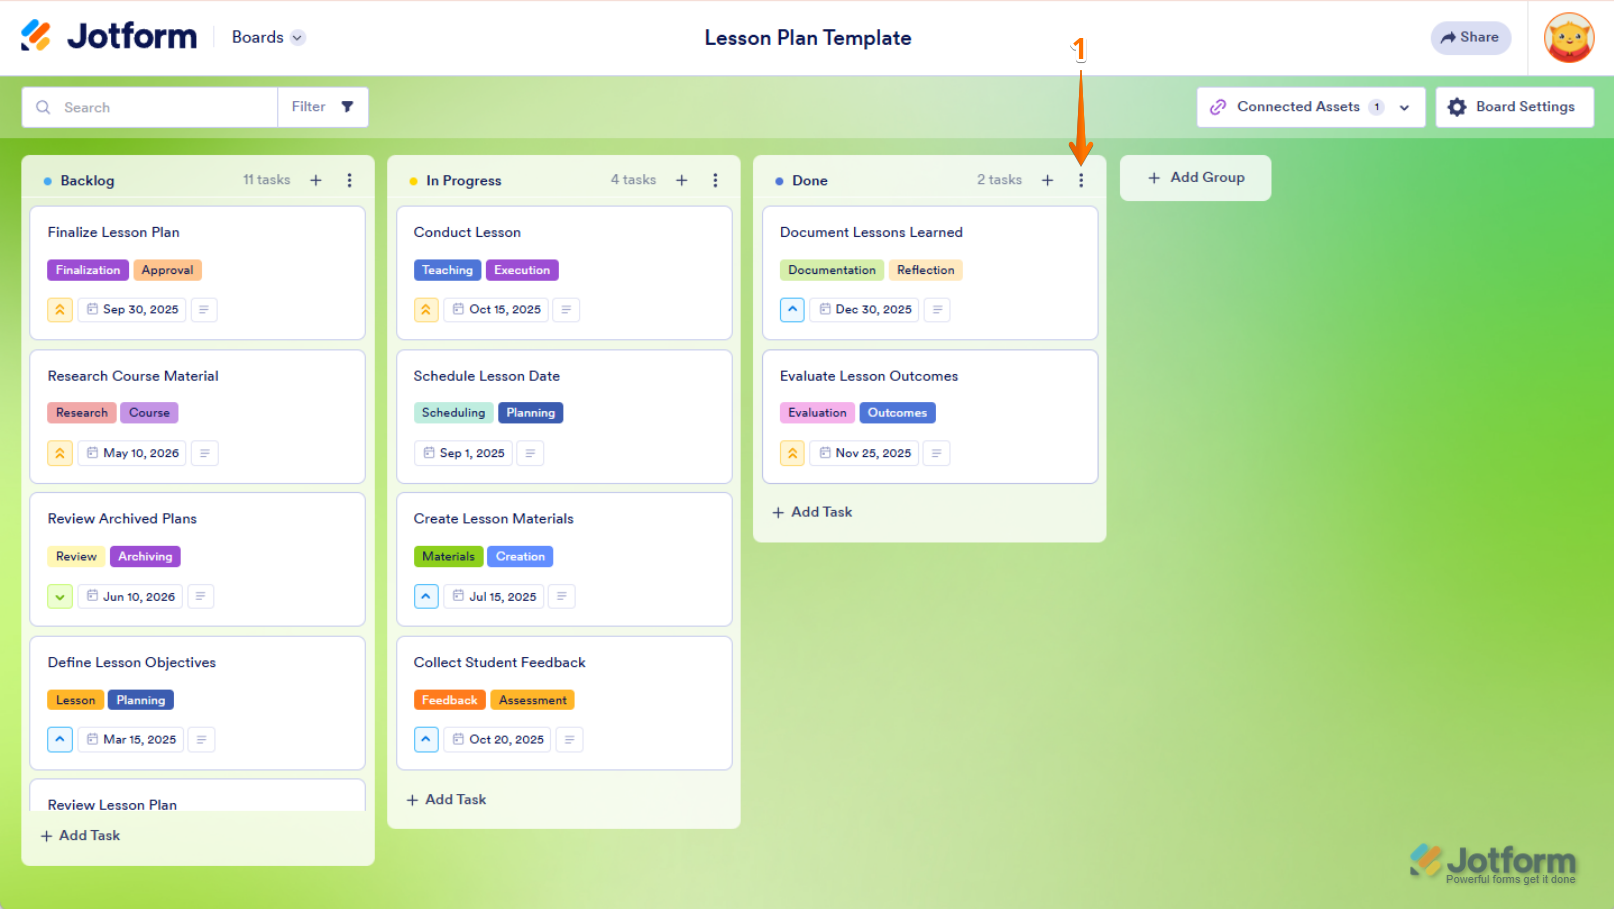
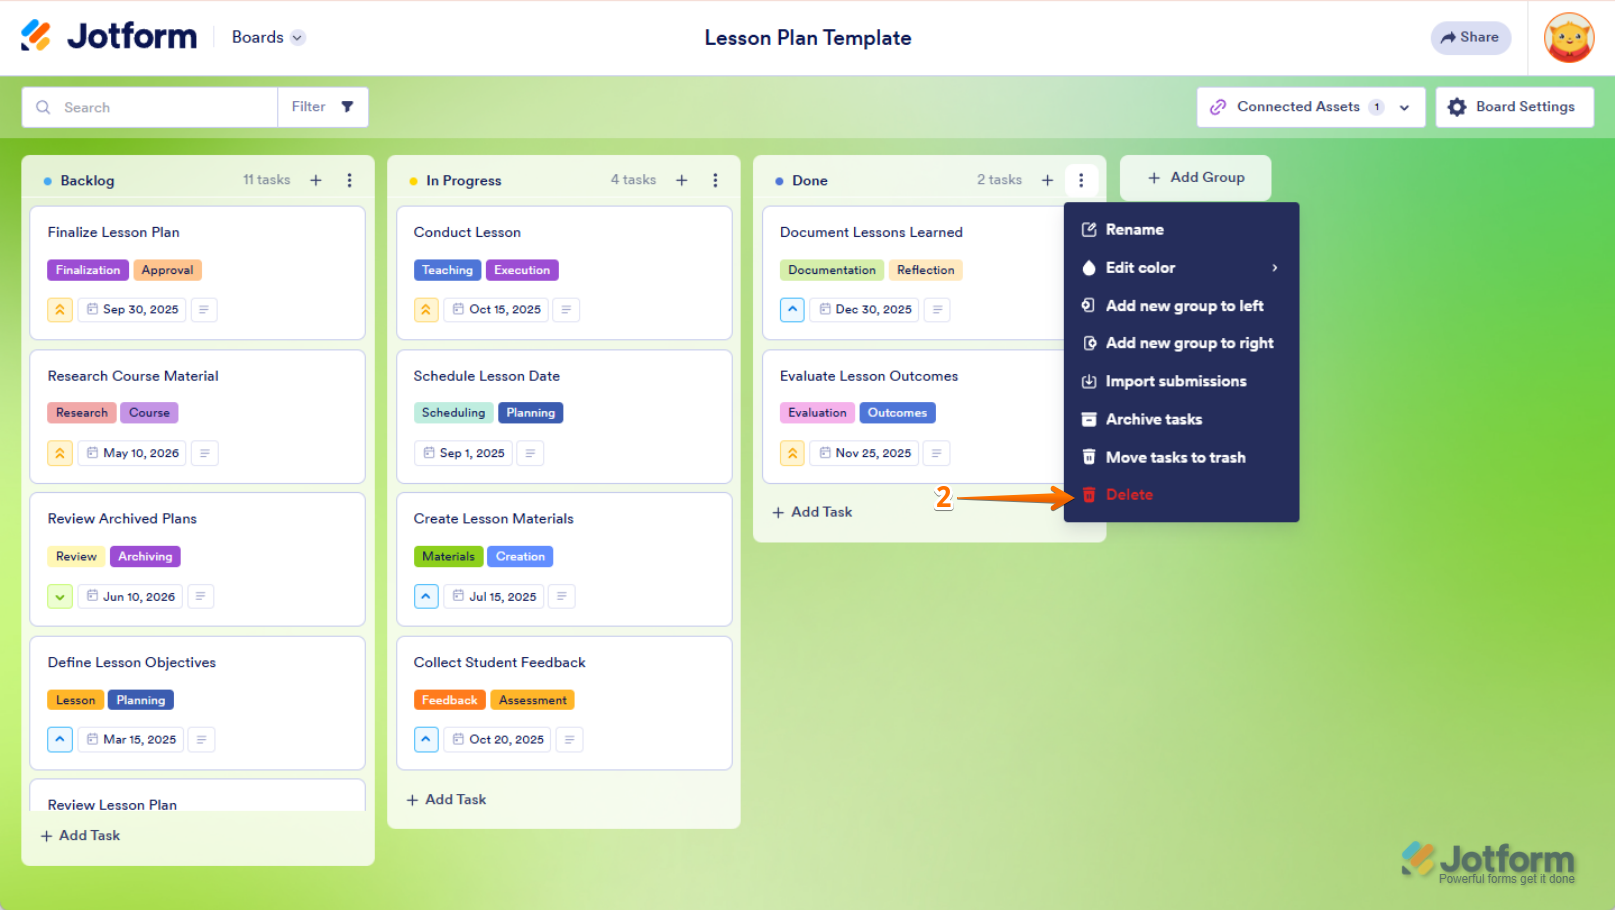
- On your Jotform Board, click on the Three Dots icon on the top-right side of the group that you want to delete.
- Then, in the Dropdown menu that comes up, click on Delete.
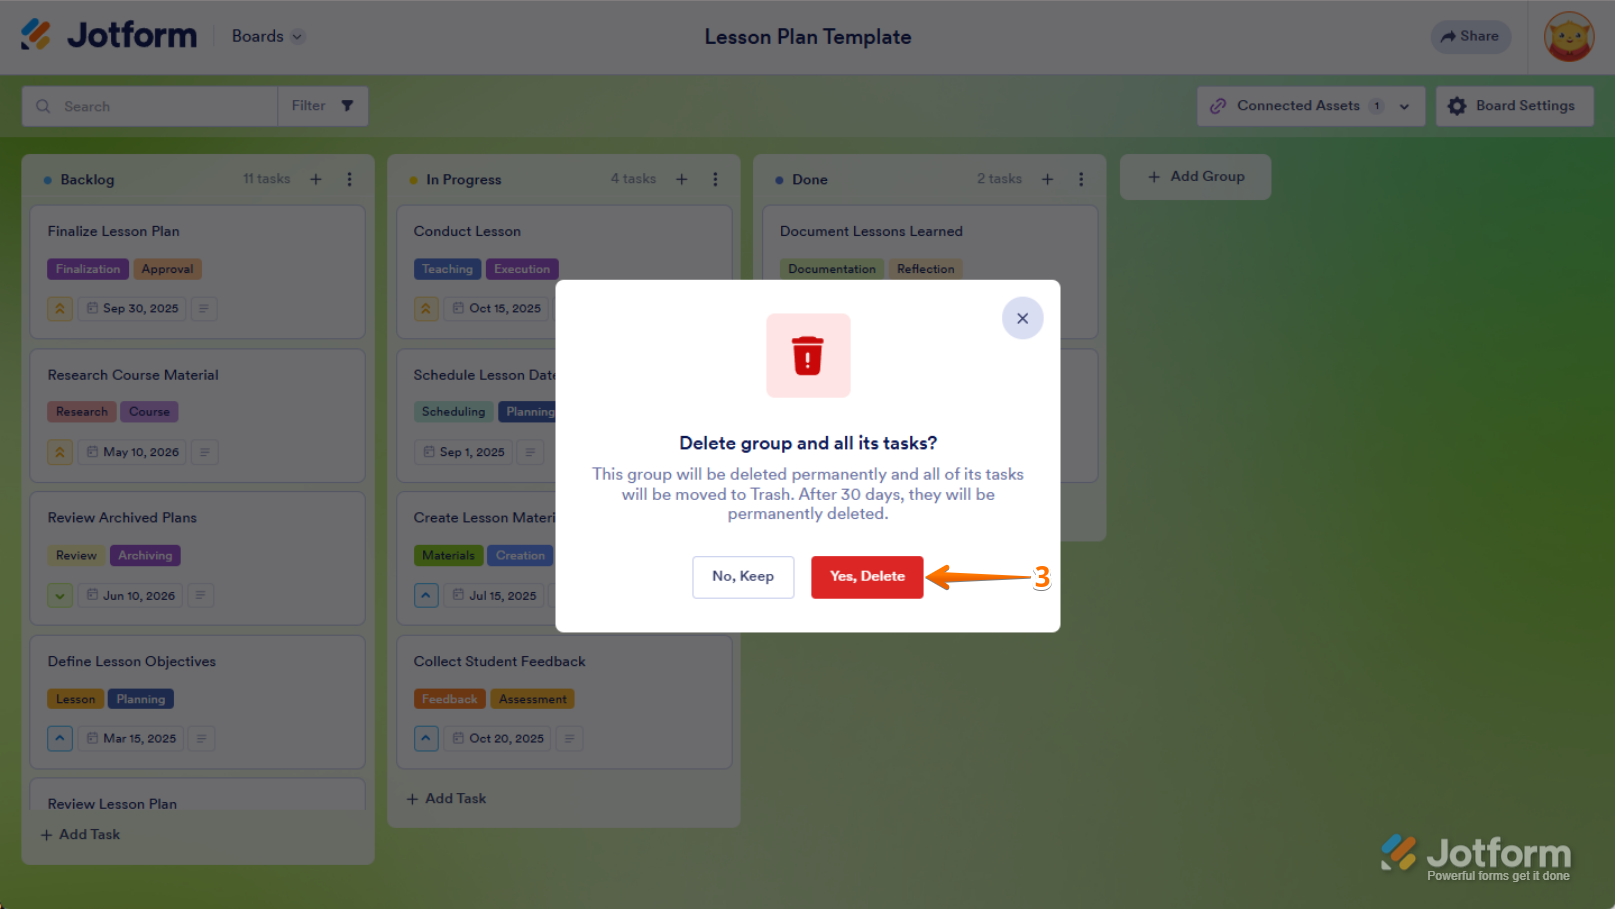
- In the Confirmation window that pops-up, click on Yes, Delete, and you’re all set.
That’s it. You’ve successfully deleted the group.
Managing Task Fields on Jotform Boards
You can customize task fields to fit your needs by adding new ones, editing existing ones, and adjusting key details like assignees, priorities, and due dates.
Adding New Task Fields
You can add new task fields to any group you want depending on your needs. Let’s do it:
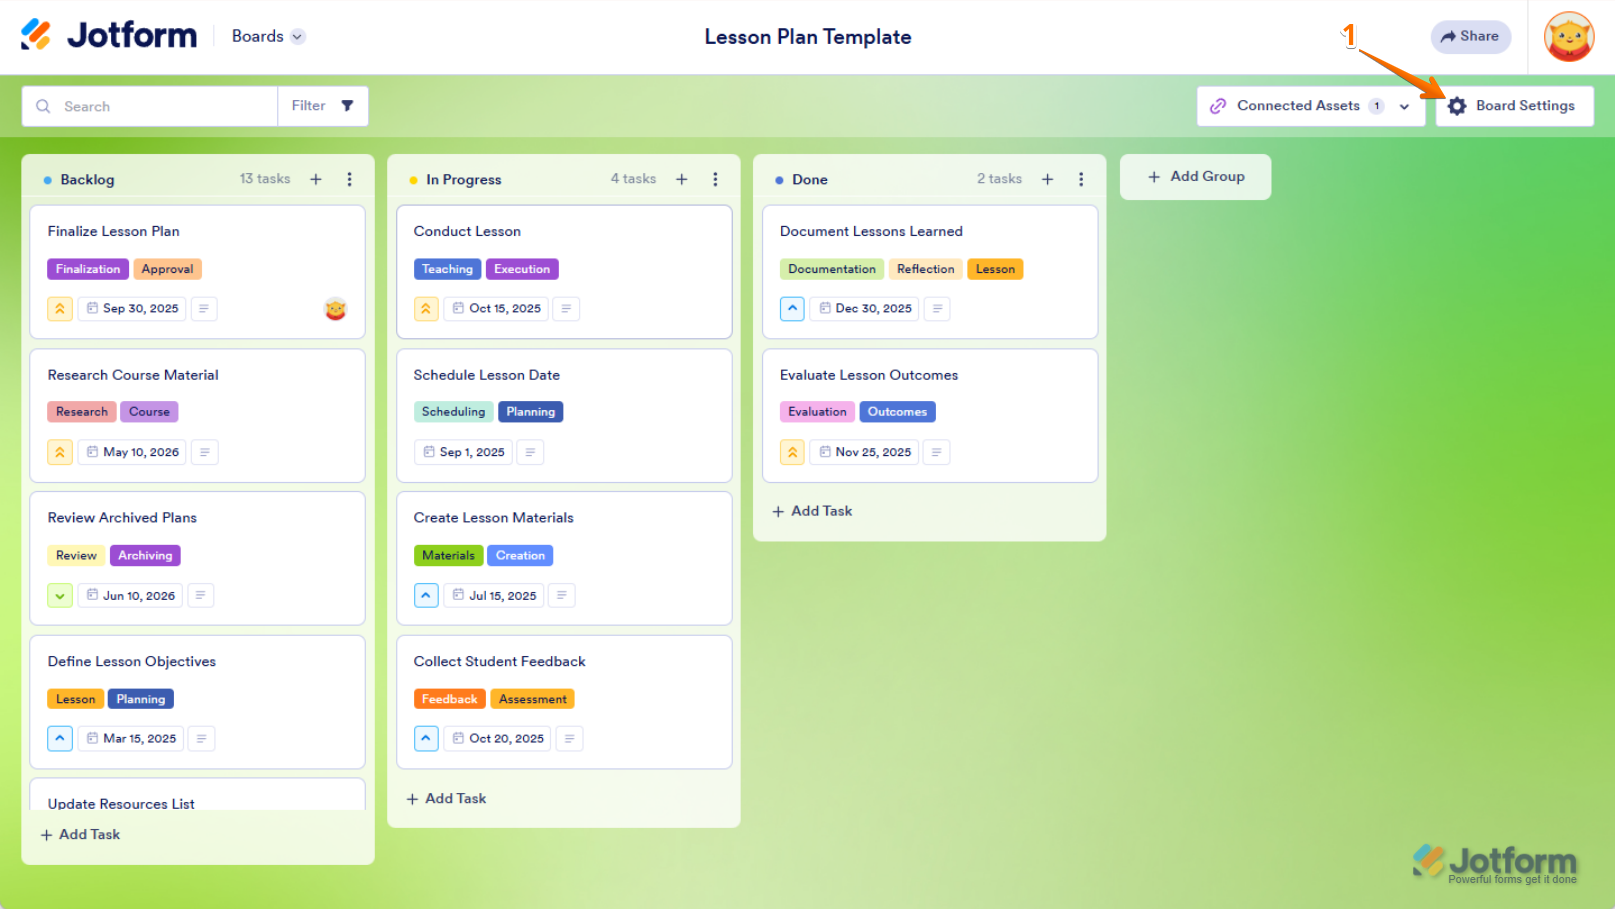
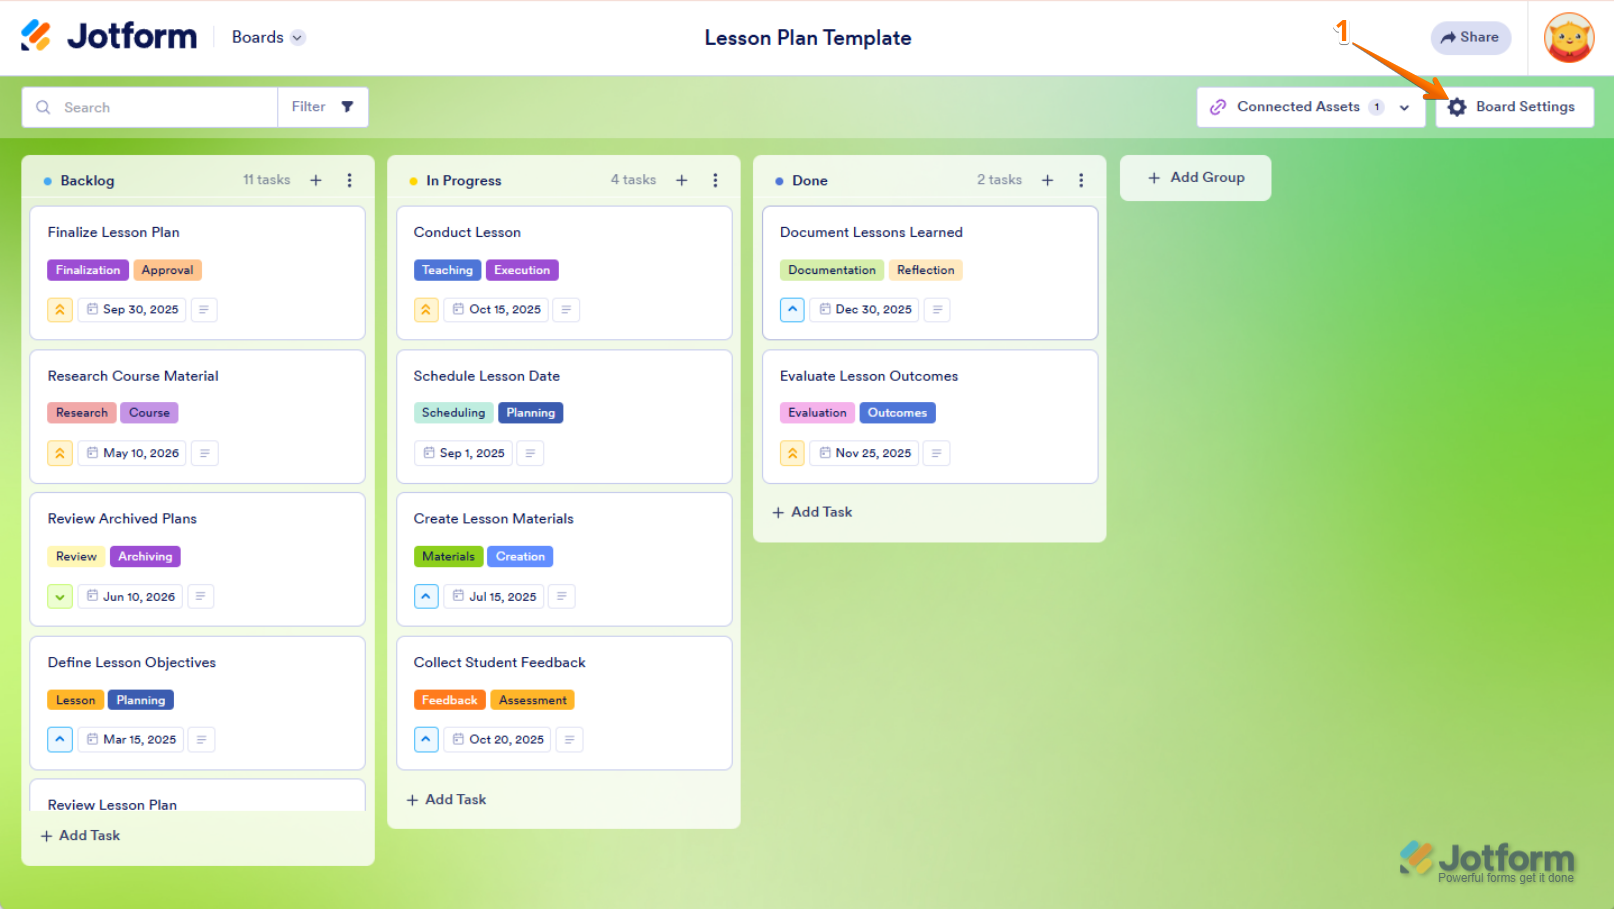
- On your Jotform Board, click on Board Settings in the top-right corner of your screen.
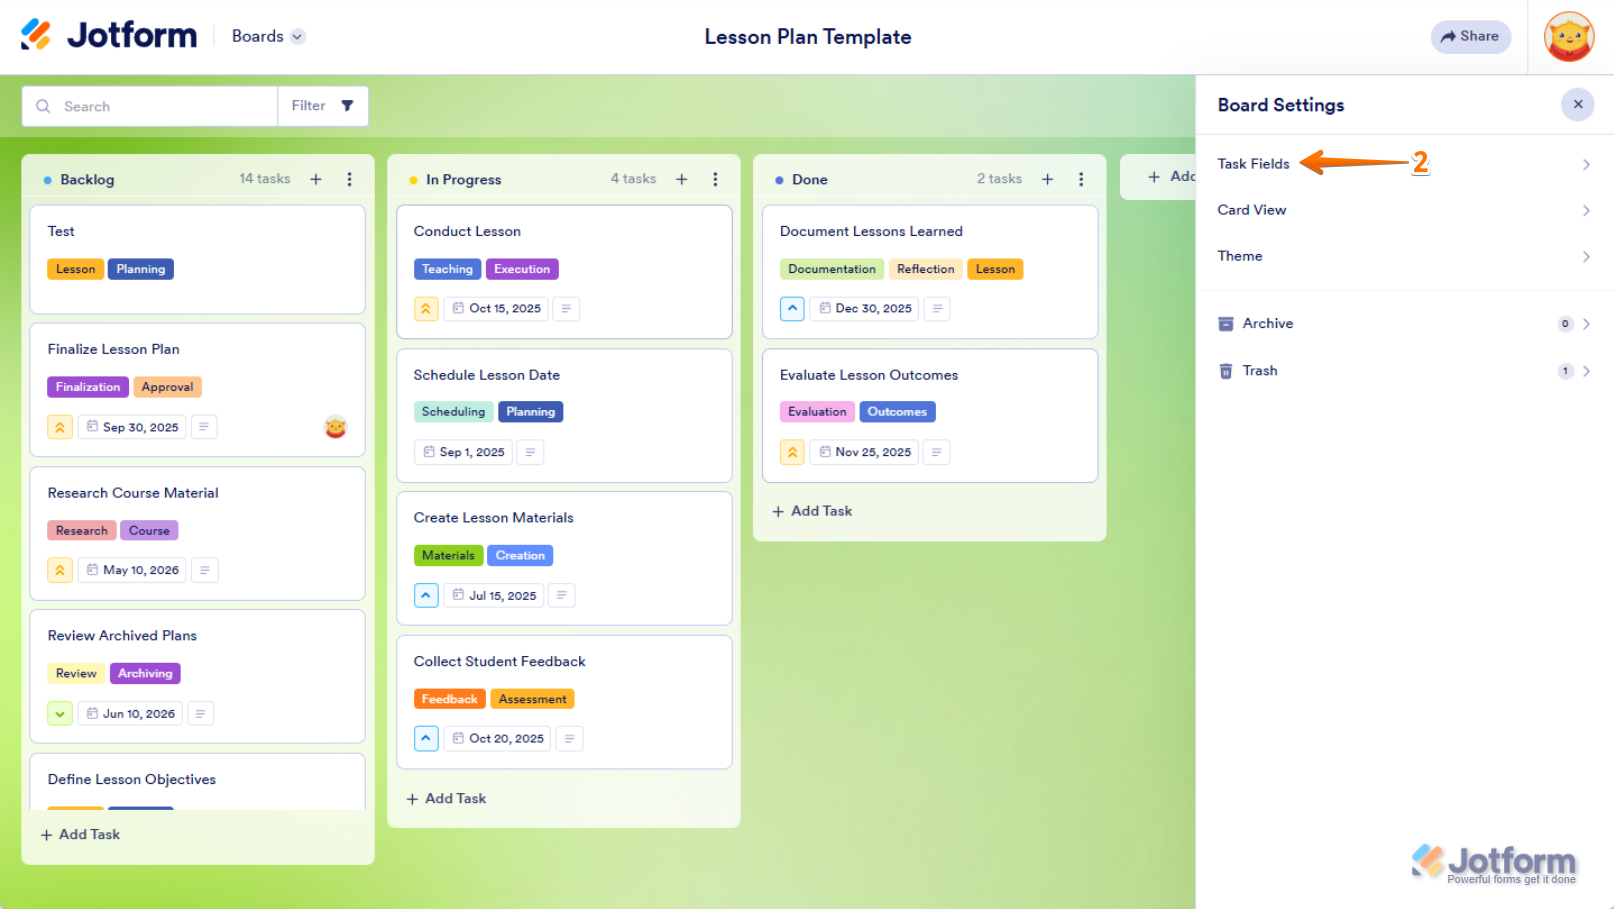
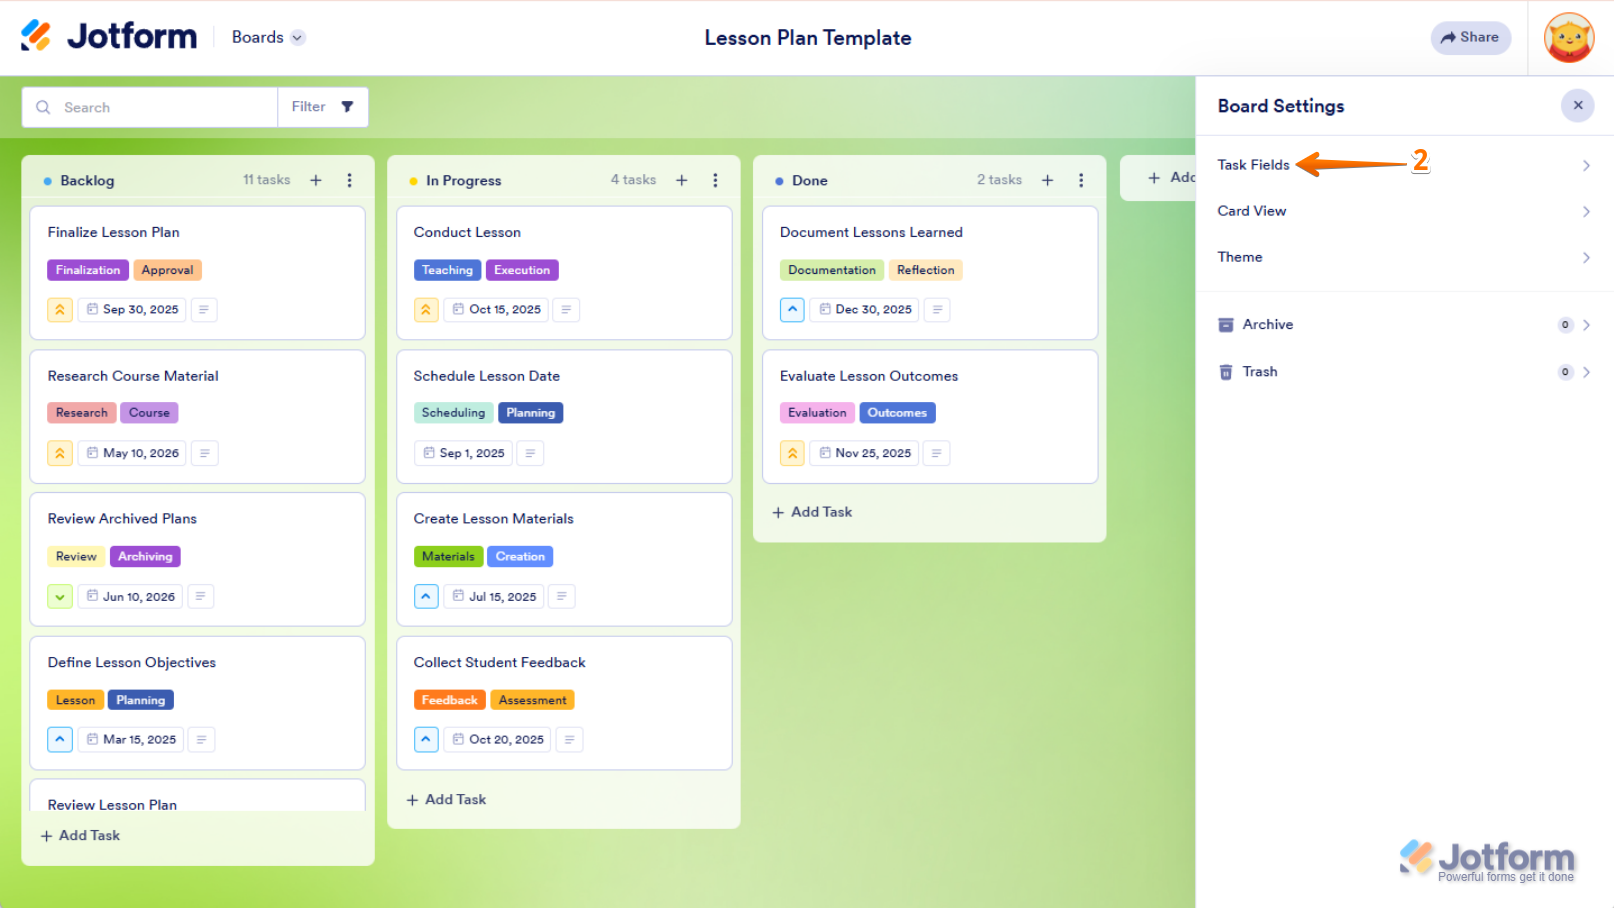
- In the menu that opens, click on Task Fields.
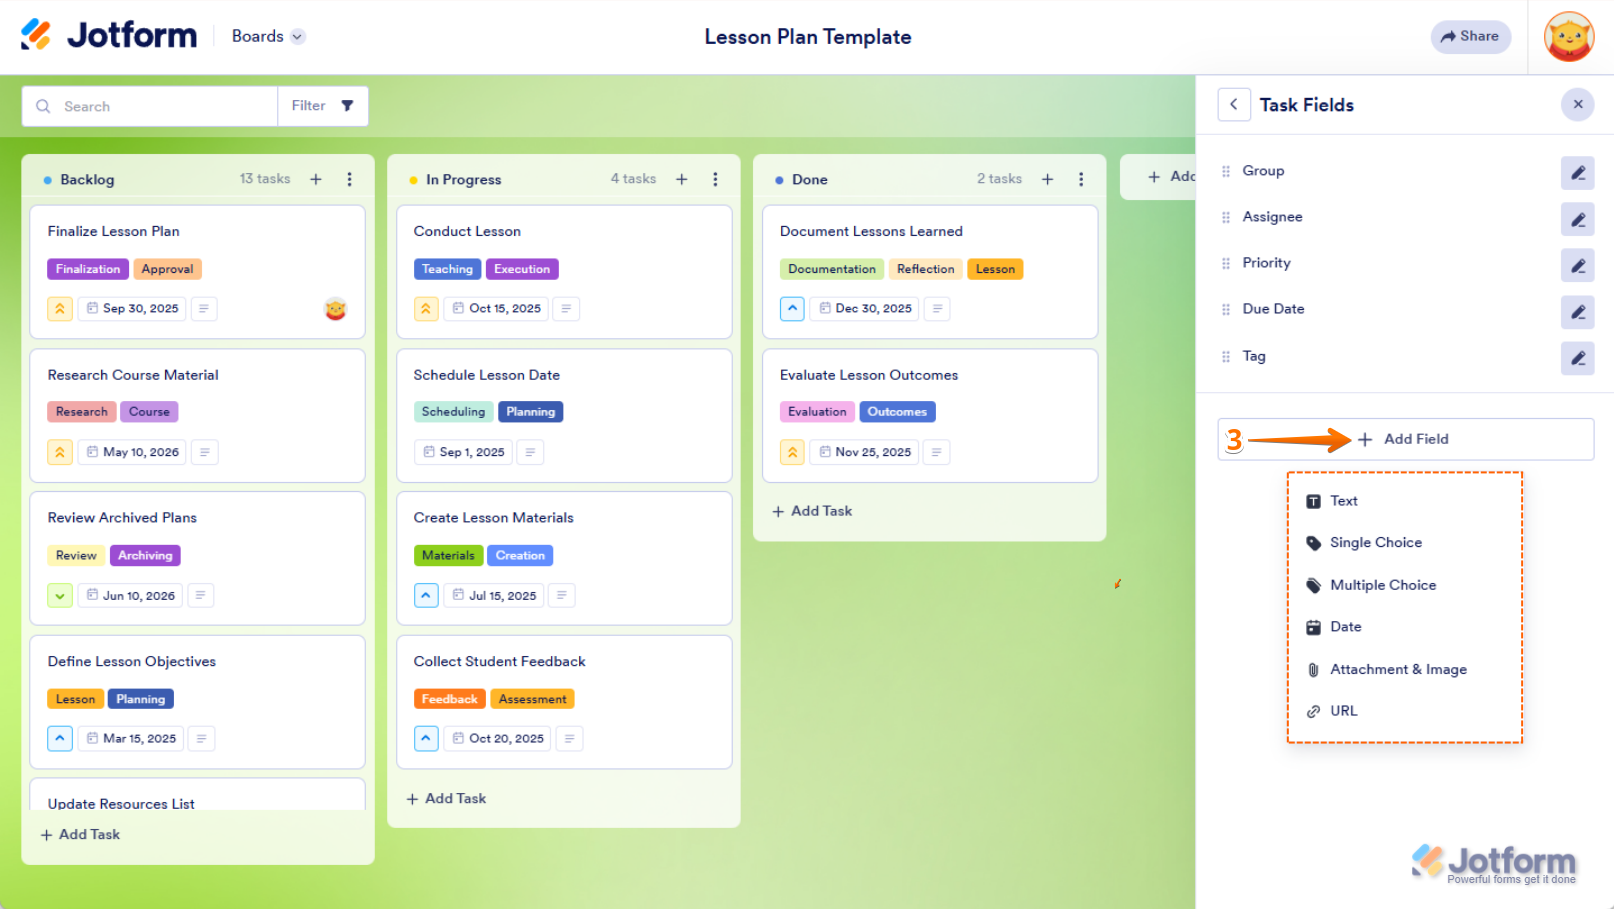
- Now, click on +Add Field and select from the following fields:
- Text — Enter a plain text response.
- Single Choice — Select one option from a predefined list.
- Multiple Choice — Choose multiple options from a predefined list.
- Date — Pick a date from the calendar.
- Attachment & Image — Upload a file or an image.
- URL — Enter a web link.
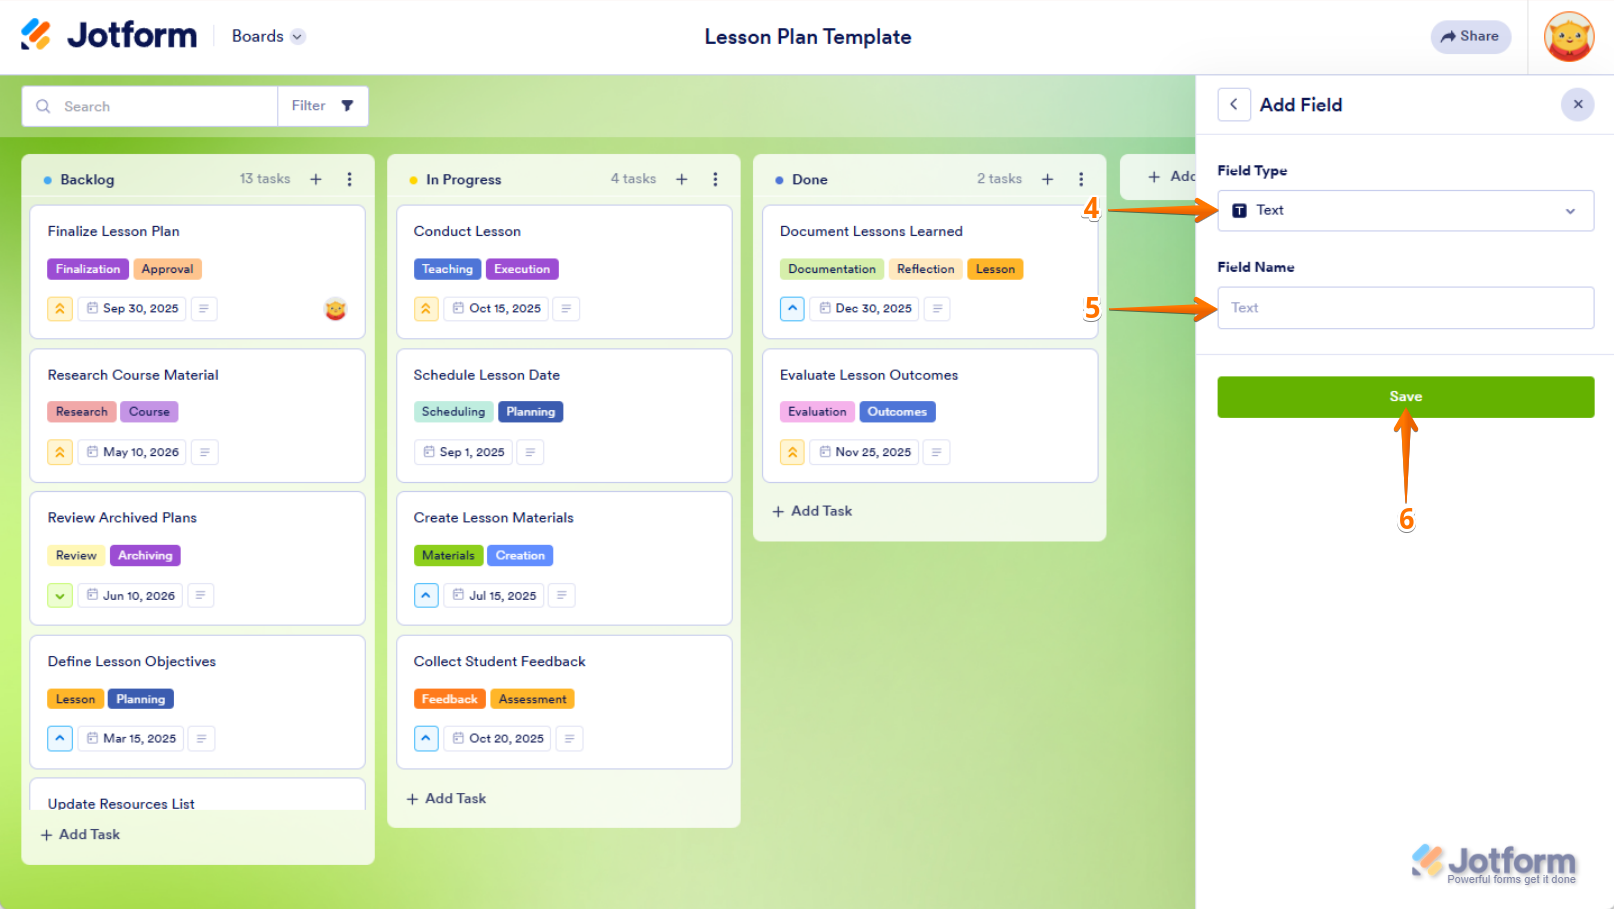
- Click on the Field Type section if you want to change the type to a different one.
- Then, under that, in the Field Name section, enter a name for the field.
- Finally, click on Save, and you’re all set.
That’s it. You’ve now successfully added a new task field.
Notes
- You can only add 5 custom fields on your board.
- All the added fields will appear in all the tasks on the board.
Editing Task Fields
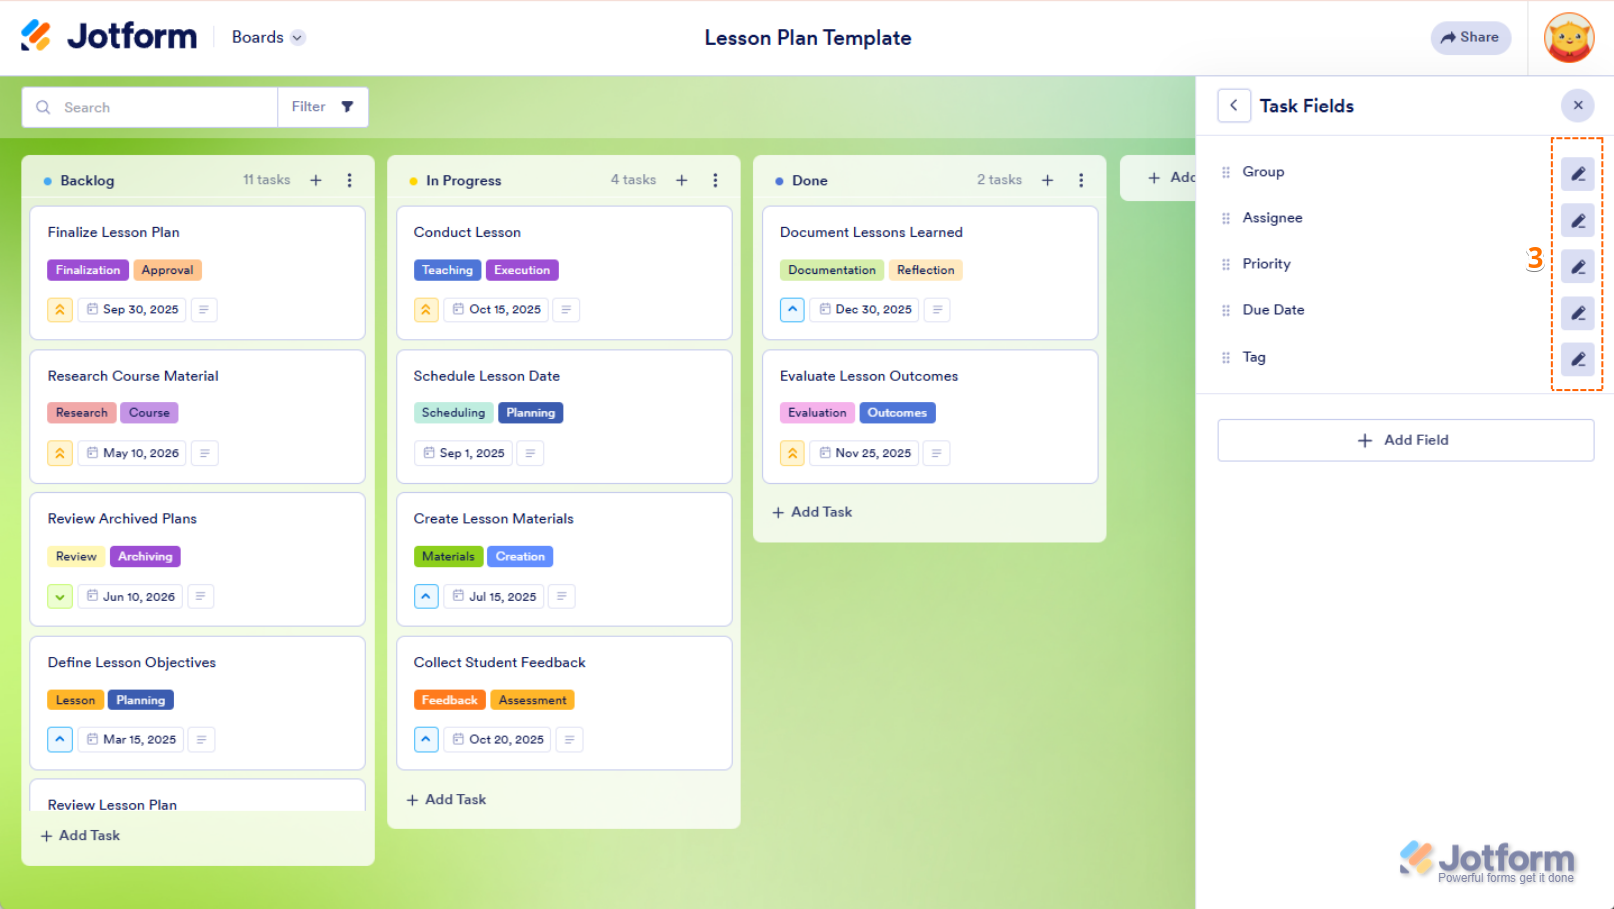
You can edit groups, assignees, priorities, due dates, and tags directly from Board Settings to better organize and manage your tasks. Here’s how to do it:
- On your Jotform Board, click on Board Settings in the top-right corner of the page.
- In the menu that opens, click on Task Fields.
- Now, click on the Pencil icon on the right side of the task field you want to change or update, and then configure it the way you want it.
That’s it. You’ve successfully updated now your task fields.


Send Comment: