Overview
Your Enterprise Server contains important information — as an Admin, you can set up Two-Factor Authentication (2FA) to help keep that information safe. This additional level of protection can be managed in the Security section of the Admin Console, and is available both organization-wide and on a user-by-user basis.
In this guide, we’ll cover managing Two-Factor Authentication for individual users. If you’d like to manage this on an organization-wide basis, have a look at our alternate guide, How to Configure and Enforce Two-Factor Authentication (2FA) Organization-Wide in the Admin Console.
* Note that 2FA can’t be enabled through Jotform if you’re using SSO (since your login security and restrictions would be controlled by that integration instead).
Setting up Two-Factor Authentication
If you don’t already have Two-Factor Authentication enabled on your server, you’ll need to turn that on before you’ll be able to configure your user-specific settings. Let’s walk through setting that up, together:
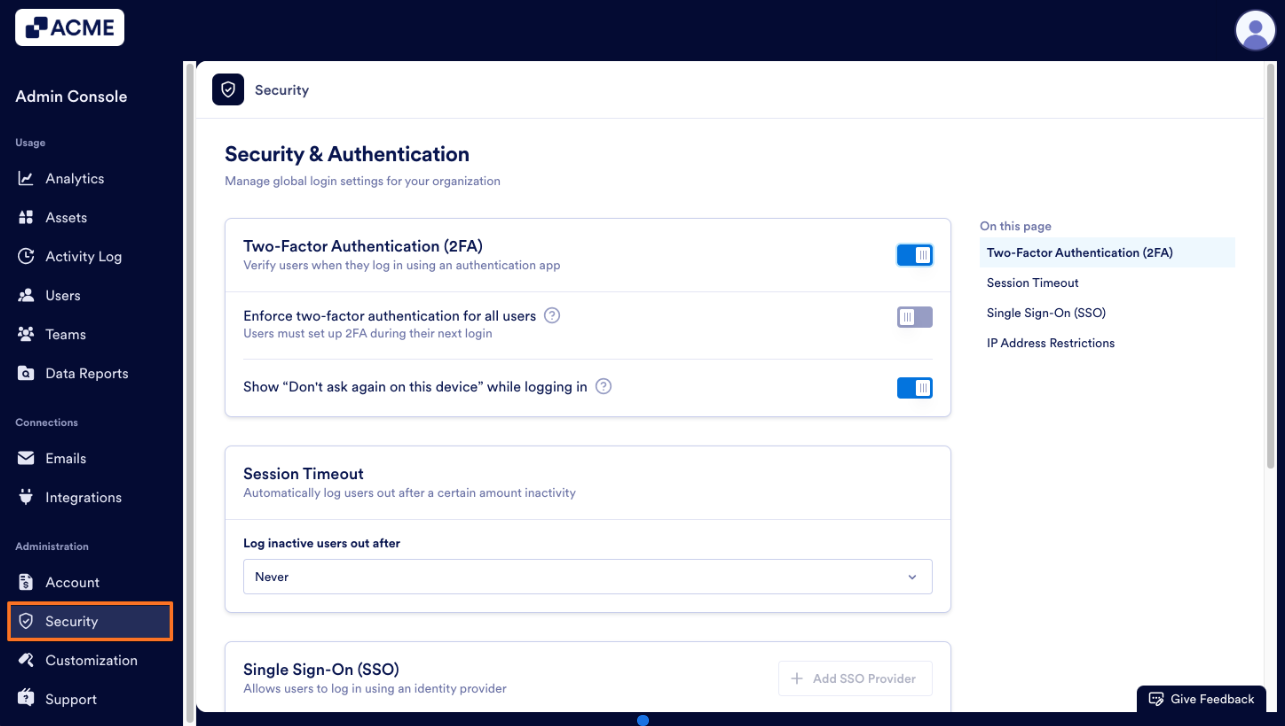
- In the Admin Console, click on Security on the menu on the left side of the screen.
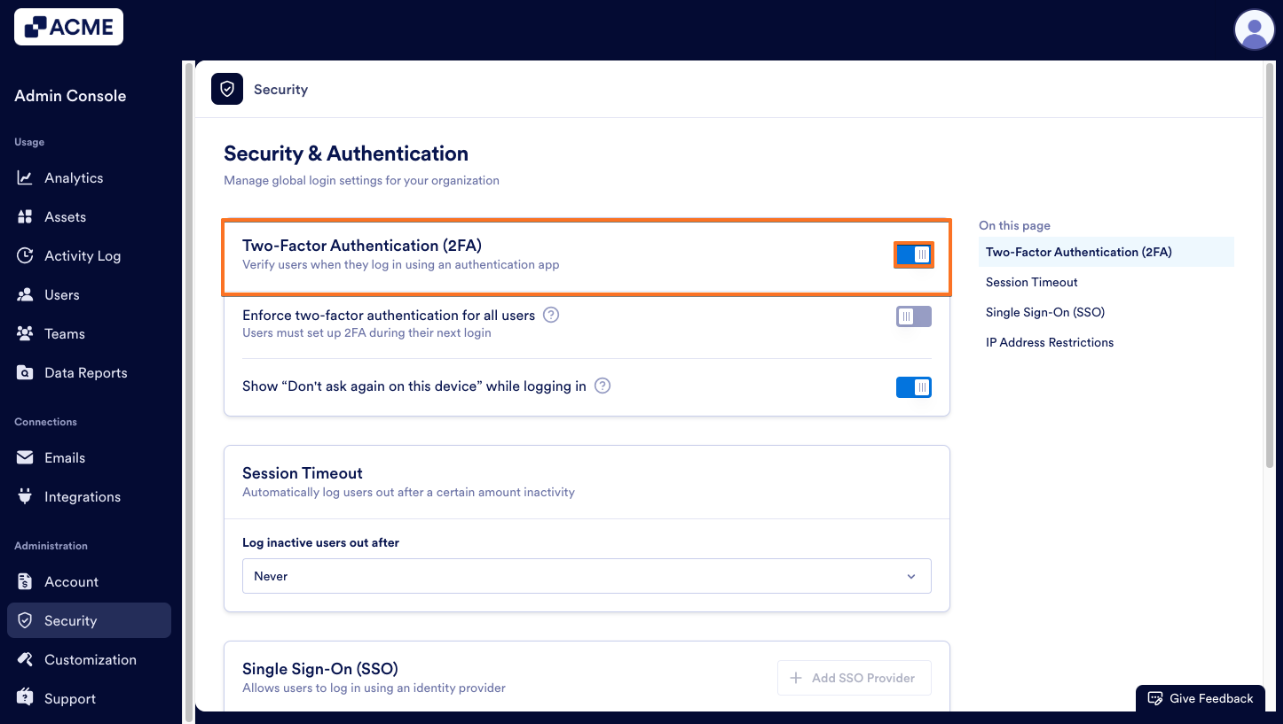
- Then, toggle On the switch next to Two-Factor Authentication (2FA) if it isn’t already enabled.
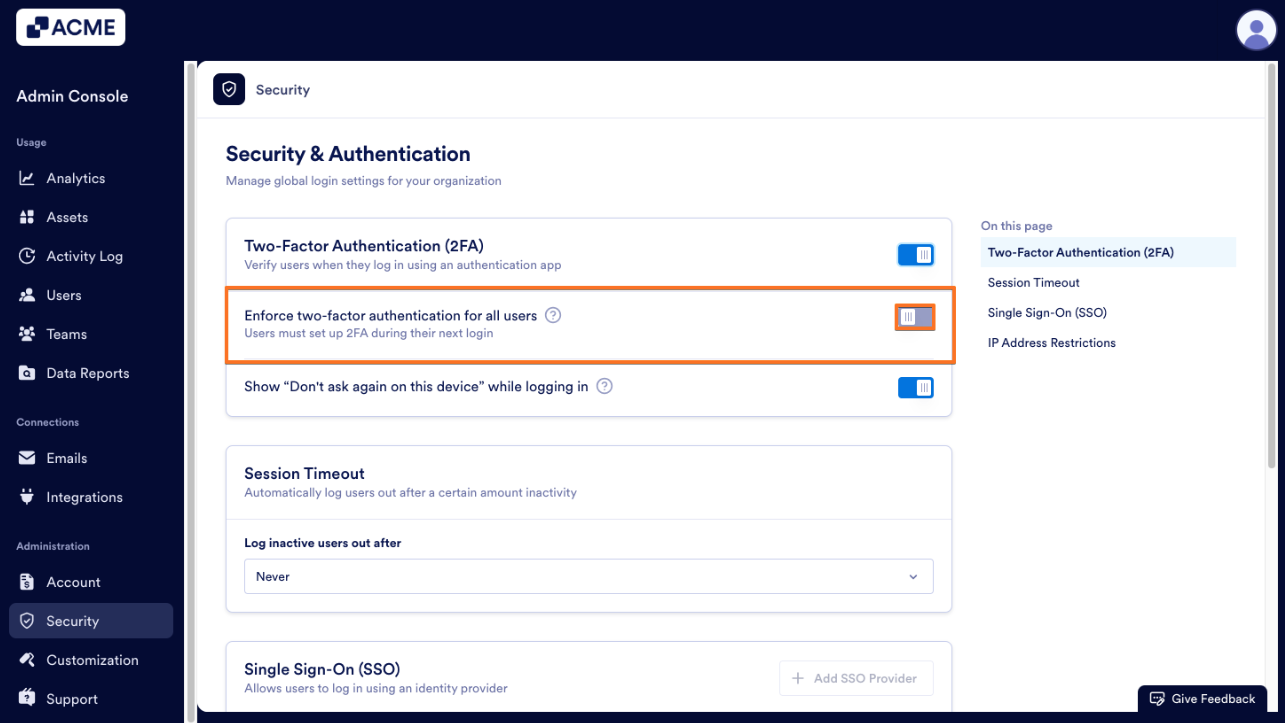
- Toggle Off the switch next to Enforce two-factor authentication for all users.
Settings
- Enforce two-factor authentication for all users: This setting requires all users to set up 2FA. If this is off, you can manually enforce 2FA on a user-by-user basis. If this is enabled, individual 2FA can’t be set up.
- Show “Don’t ask again on this device” while logging in: This setting creates a checkbox users can click to prevent having to reauthenticate every time they log in.
Enforcing 2FA for Individual Users
If you don’t want to globally enforce two-factor authentication, you can enforce it on a user-by-user basis. Two-factor authentication needs to be enabled in the Security settings first, with Enforce two-factor authentication for all users toggled Off.
Let’s walk through how to set that up:
- In the Admin Console, click on Users on the left-hand side of the page.

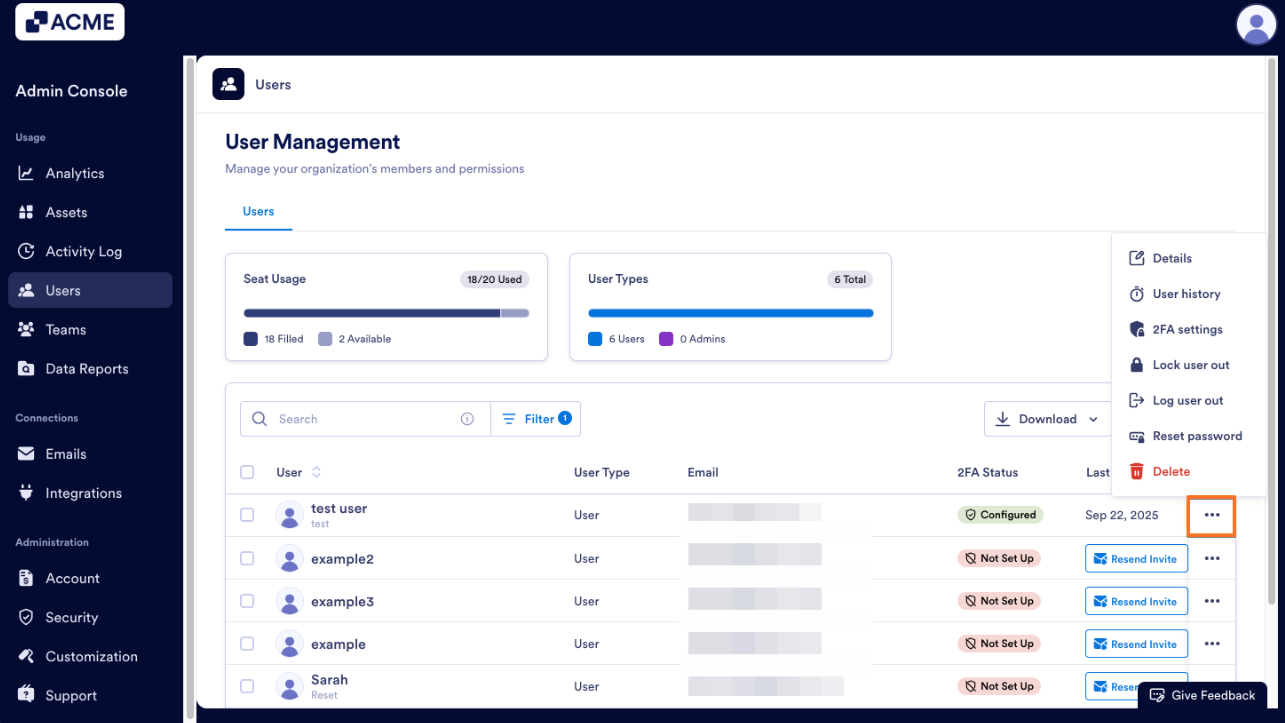
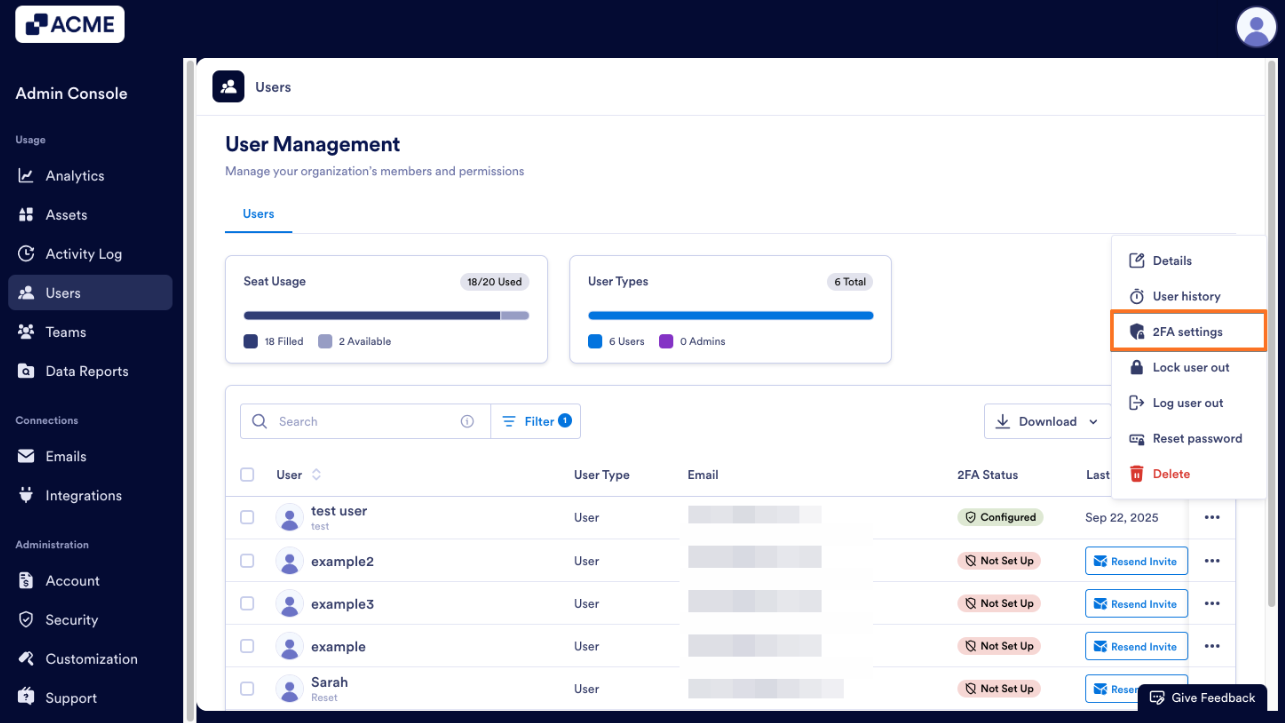
- Then, click on the three-dot menu for the user you’d like to enforce two-factor authentication for.
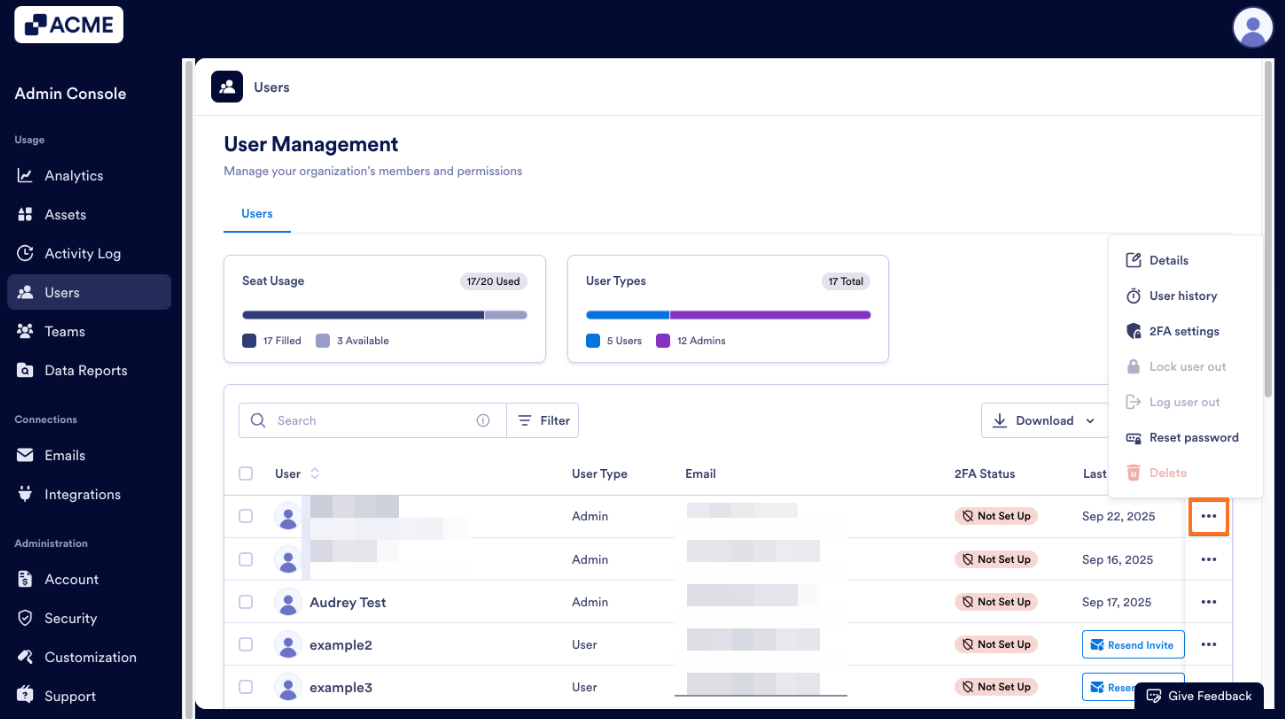
- Next, click on 2FA Settings from the menu.

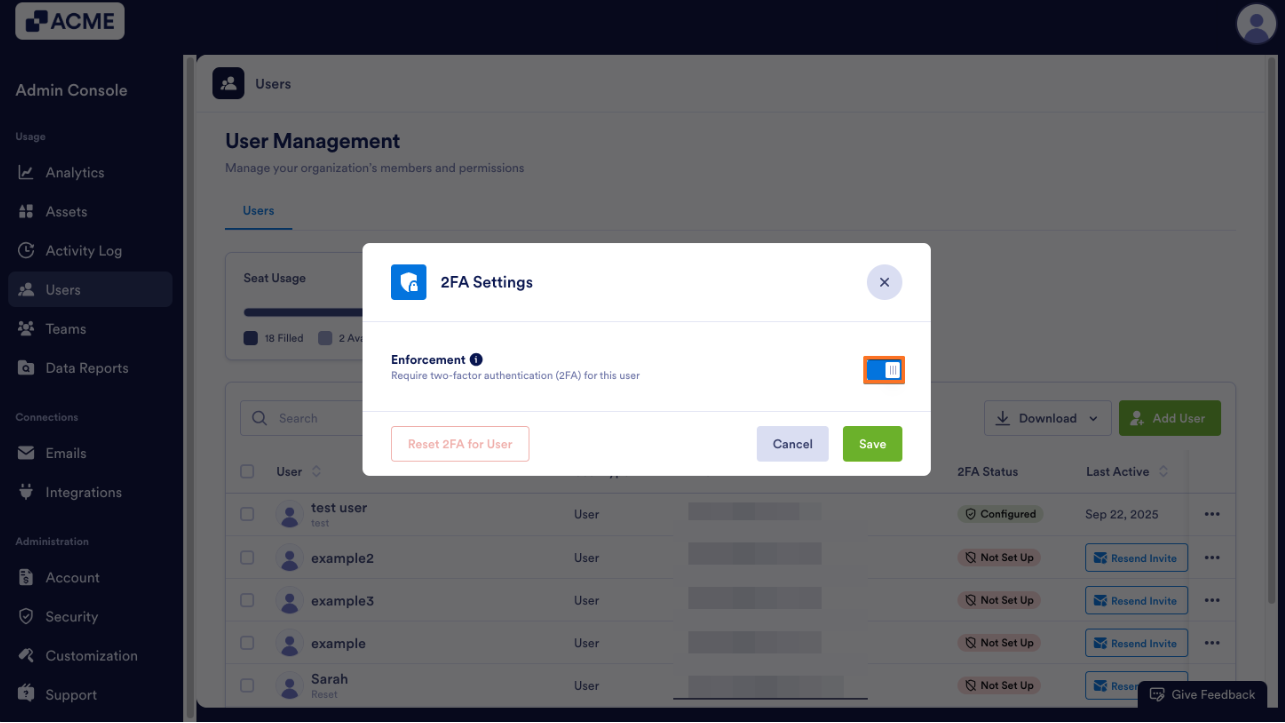
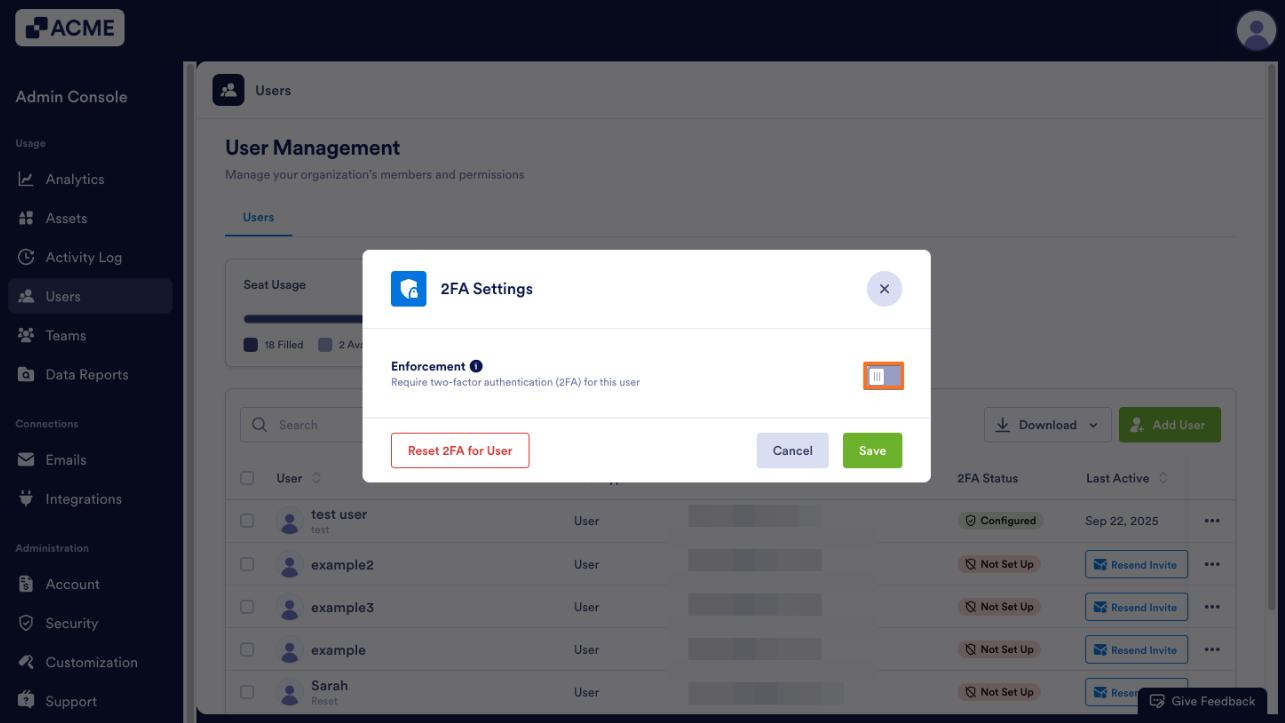
- Next, toggle On the switch next to Enforcement.
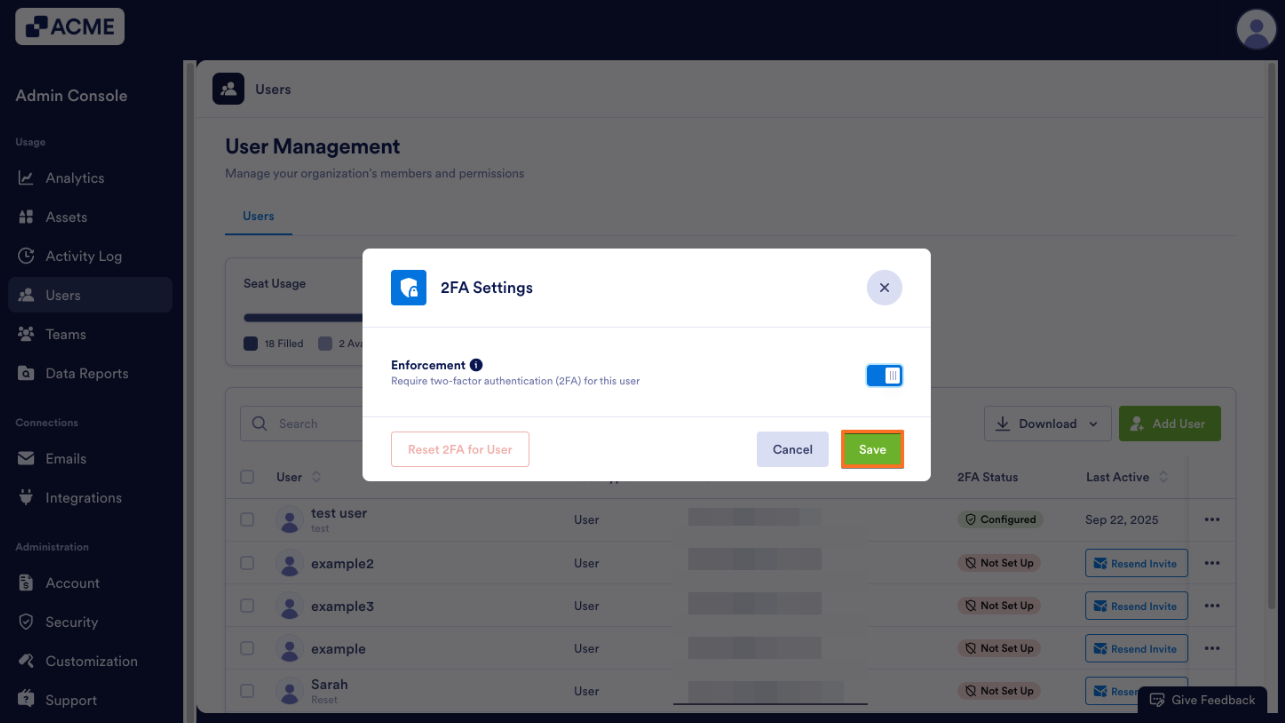
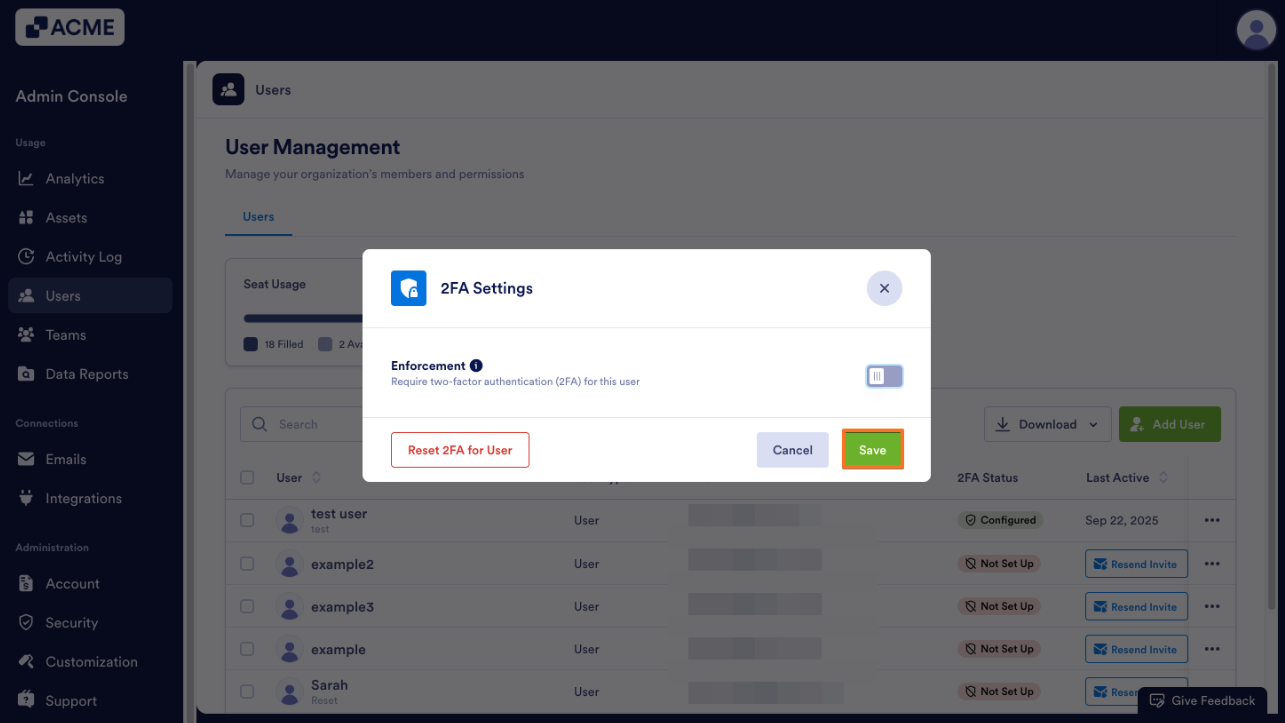
- Finally, click Save.
Configuring 2FA Settings
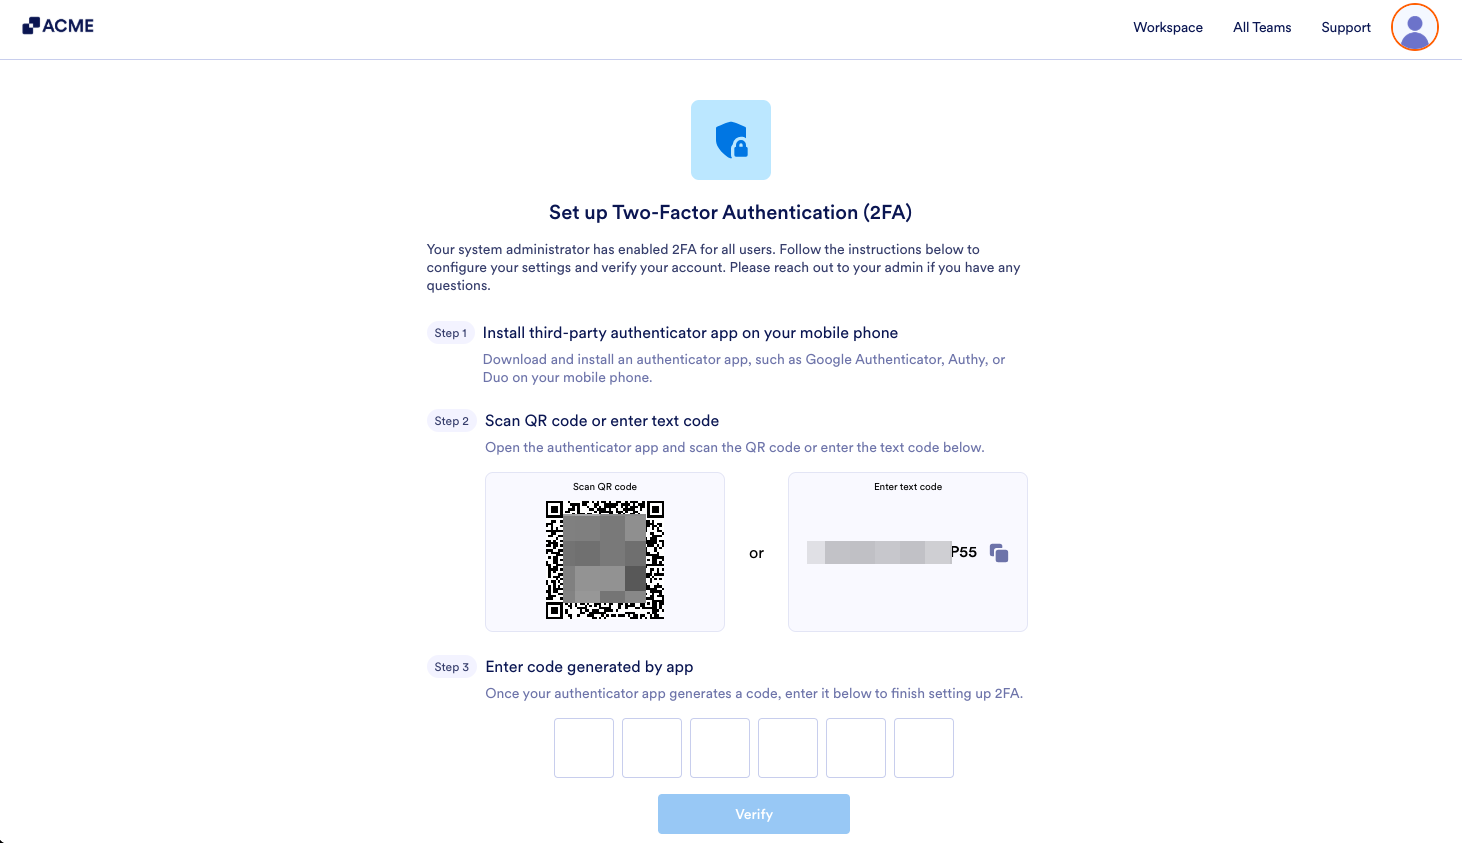
When 2FA is enforced for a user, they’ll be prompted to set up 2FA when they log in again. They’ll be prompted to set up 2FA using an app like Google Authenticator, Authy, or Duo, and then scan a QR code to link the accounts. Here’s how that’ll look on their end:
Managing 2FA for Individual Users
As an Admin, you can also disable or reset the 2FA authentication for users from the Admin Console.
Disabling 2FA
- In the Admin Console, click on Users.

- Then, click on the three-dot menu next to the user you’d like to disable 2FA for.
- Next, click on 2FA Settings from the menu.
- Then, toggle Off the switch next to Enforcement.
- Finally, click Save.
Resetting 2FA
- In the Admin Console, click on Users.

- Then, click on the three-dot menu next to the user you’d like to disable 2FA for.

- Next, click on 2FA Settings from the menu.

- Then, click on Reset 2FA.
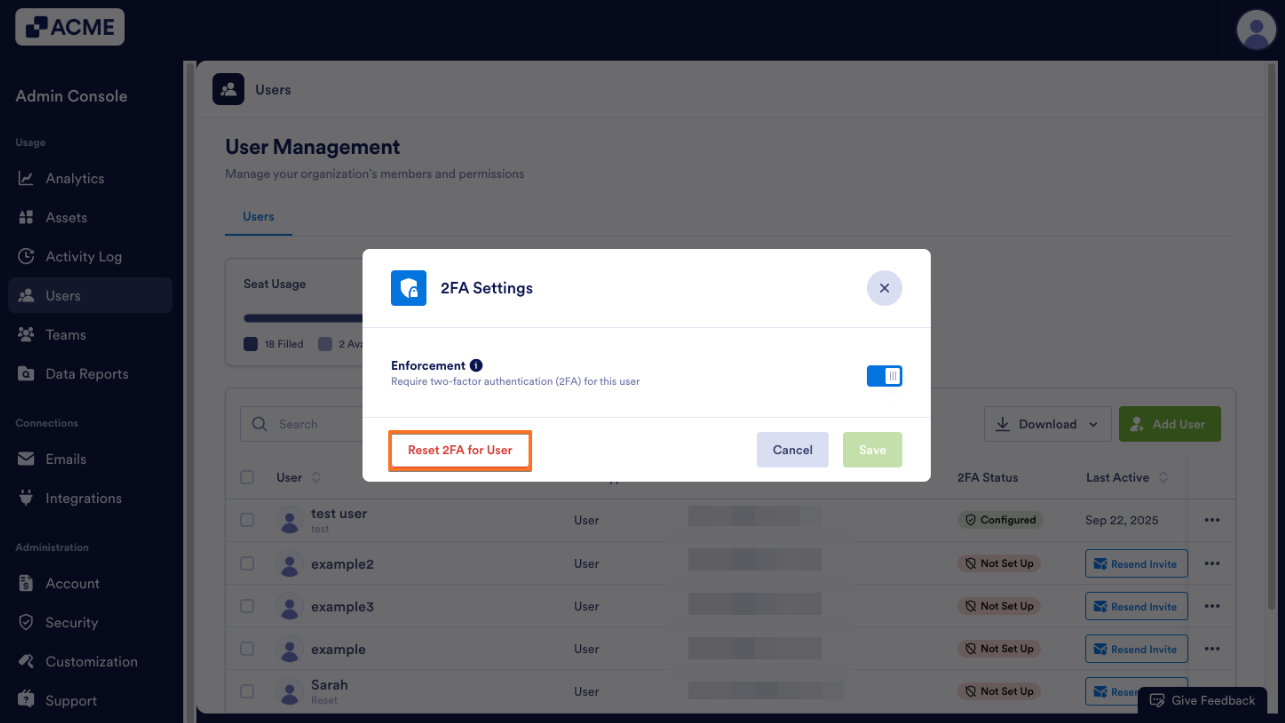
- Finally, click Yes, Reset 2FA in the pop-up window.
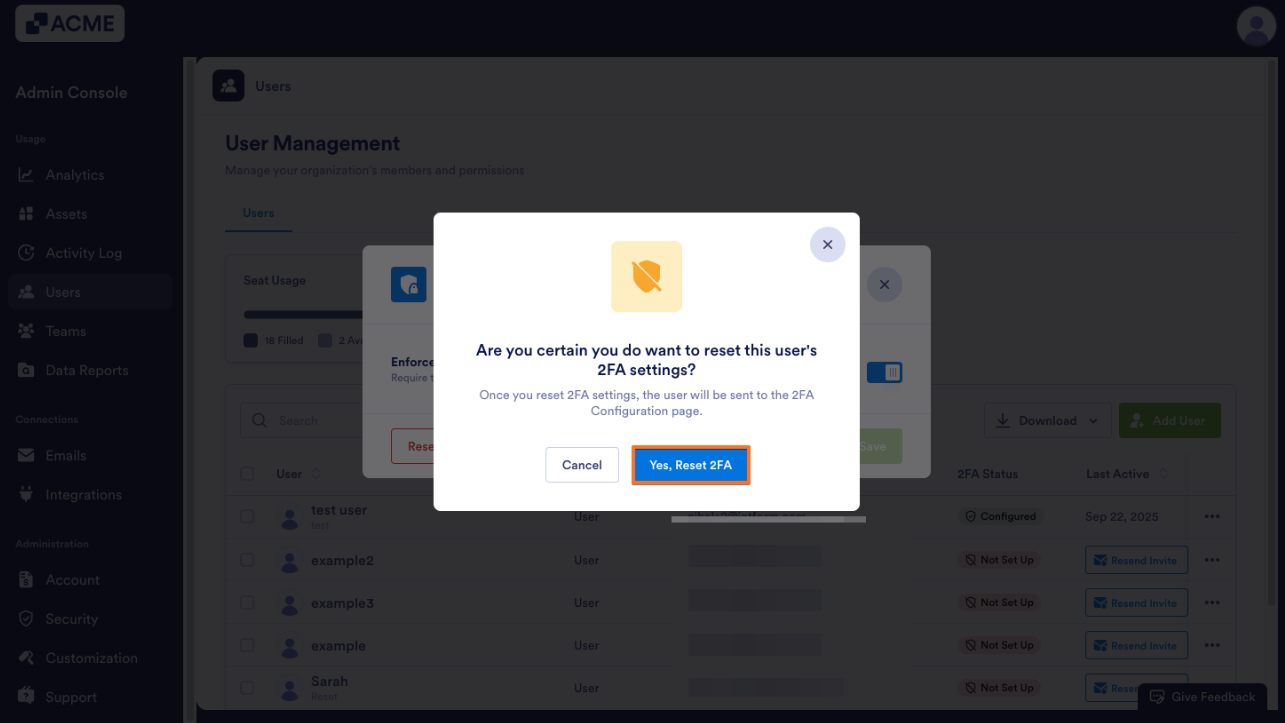
Afterward, users will need to follow the steps to configure 2FA for their account.

Send Comment: