As as admin, you can customize the sender email address for notification emails, autoresponders, and more in the Admin Console. To do this, you’ll need to set up a Simple Mail Transfer Protocol (SMTP), and then add the associated email address.
Process
Creating Sender Emails
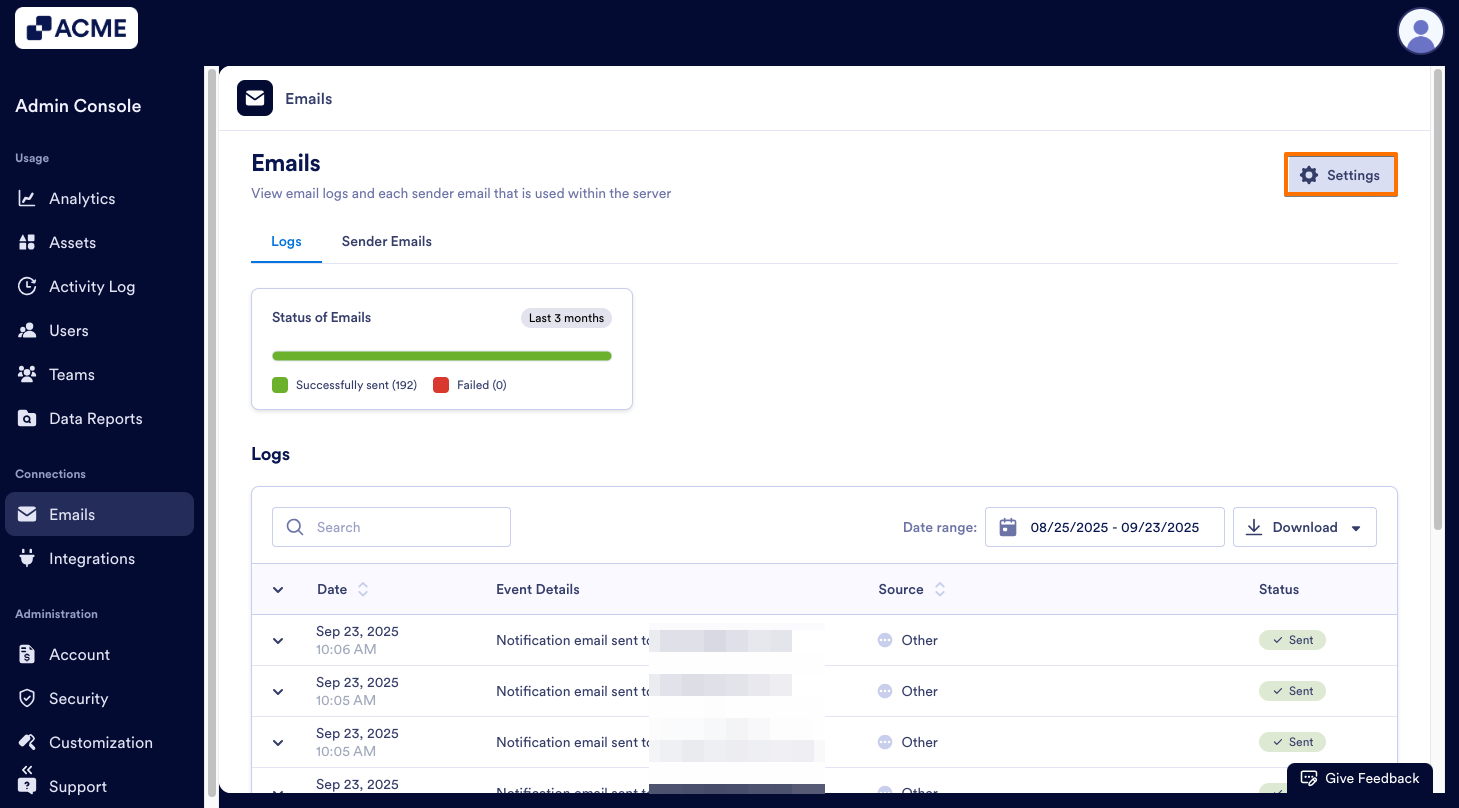
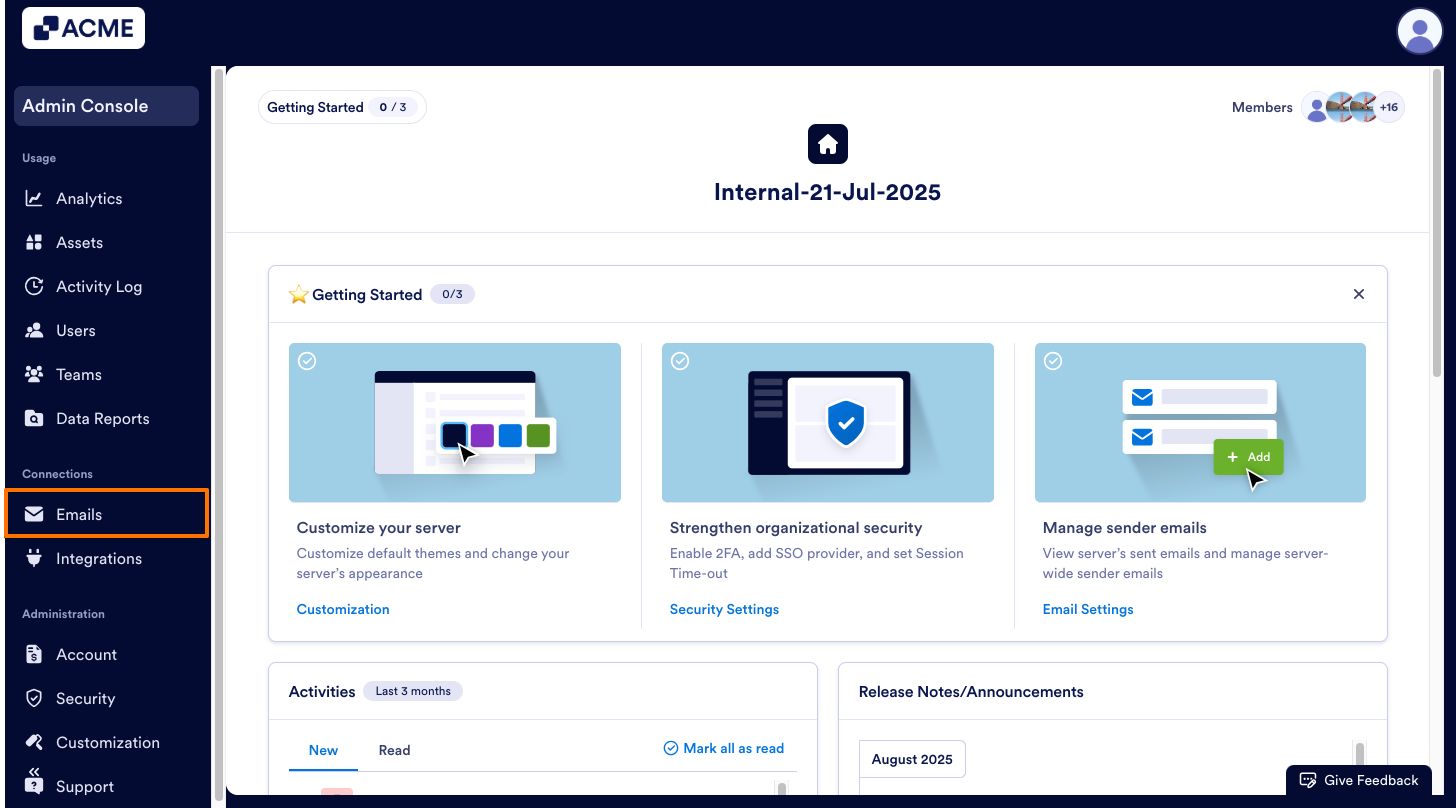
- In the Admin Console, select Emails under Connections.

- Click on the gear icon to open the Sender Email Configuration settings.
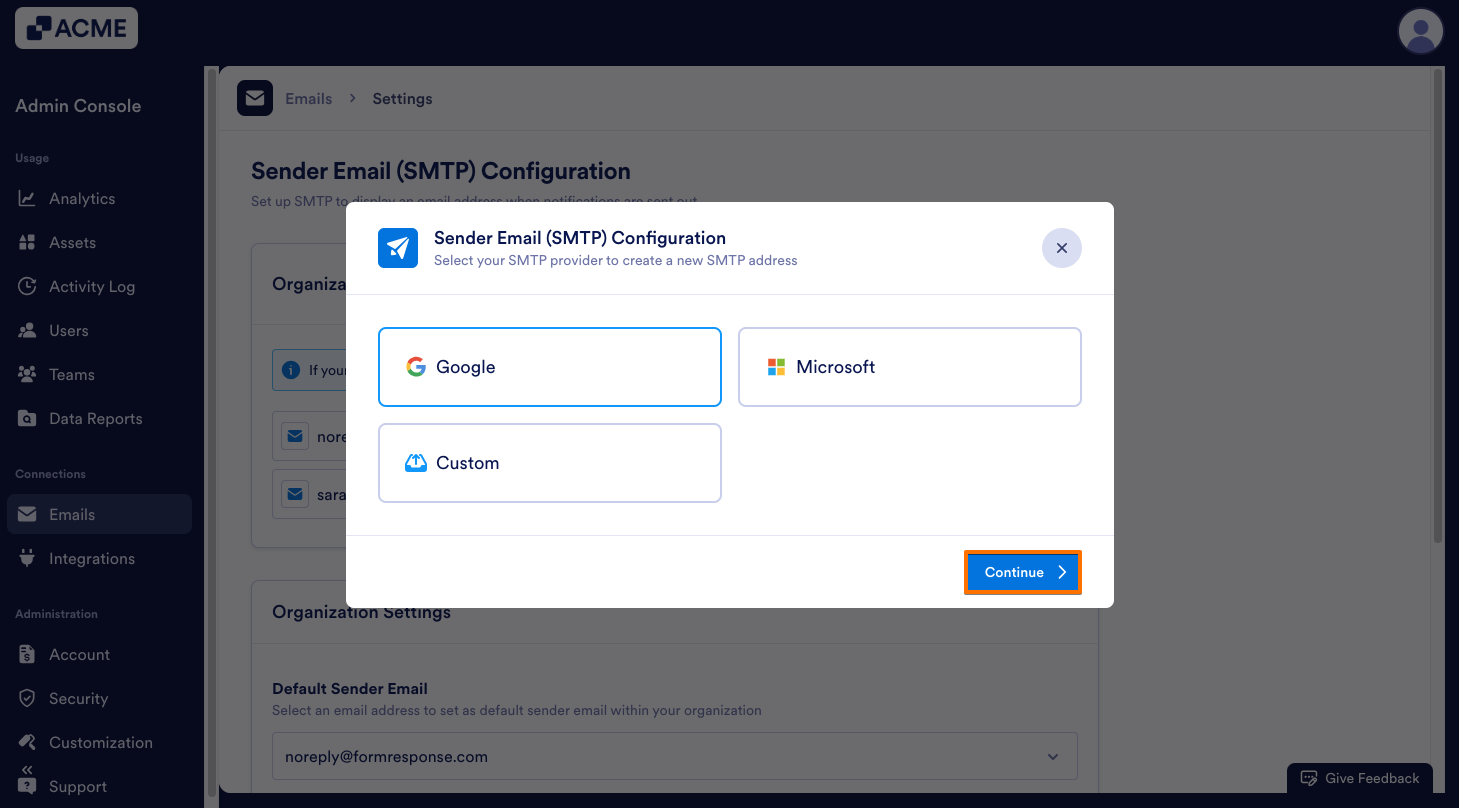
- Next, click on Add Sender Email.

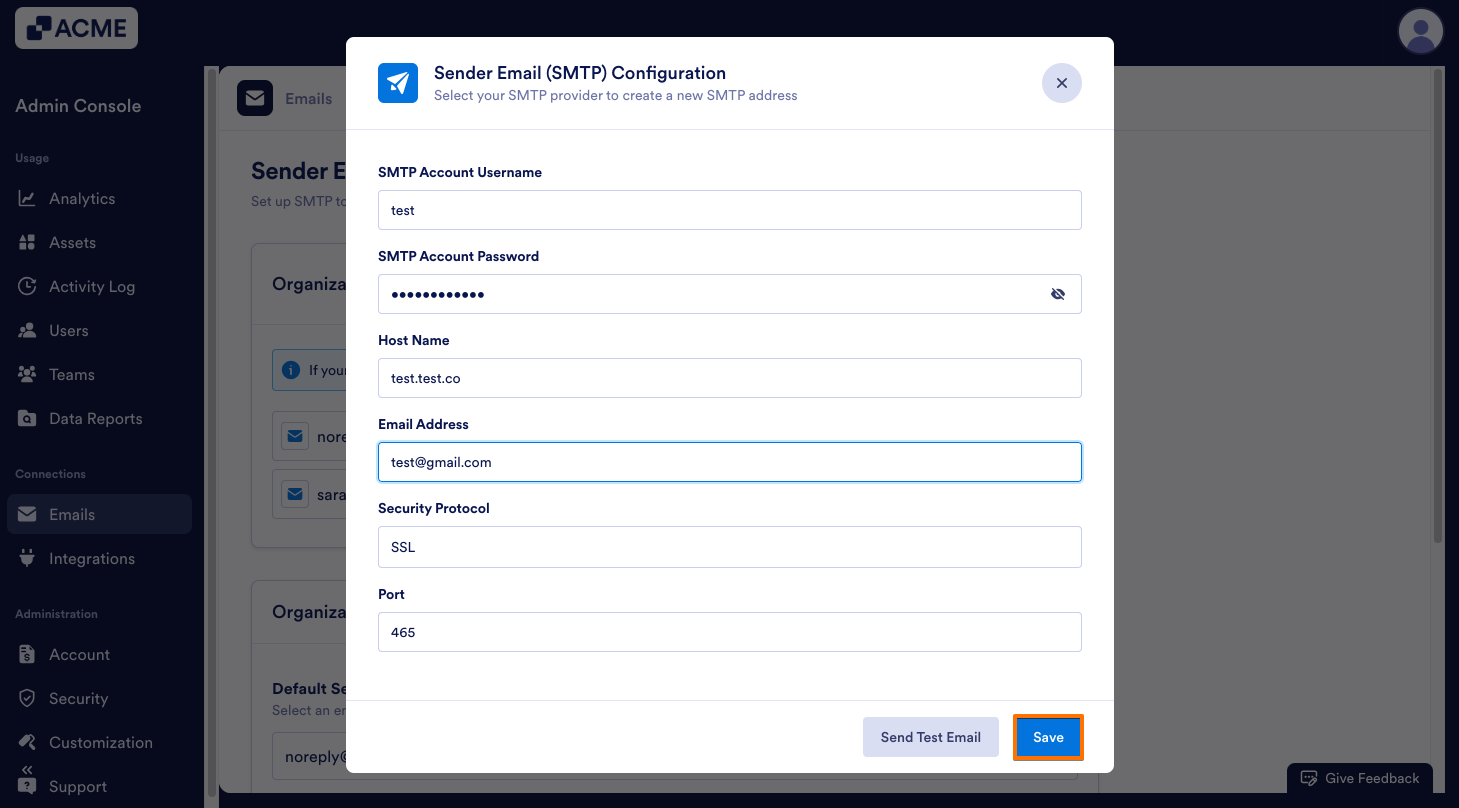
- In the pop–up window, select the SMTP provider and click Continue.
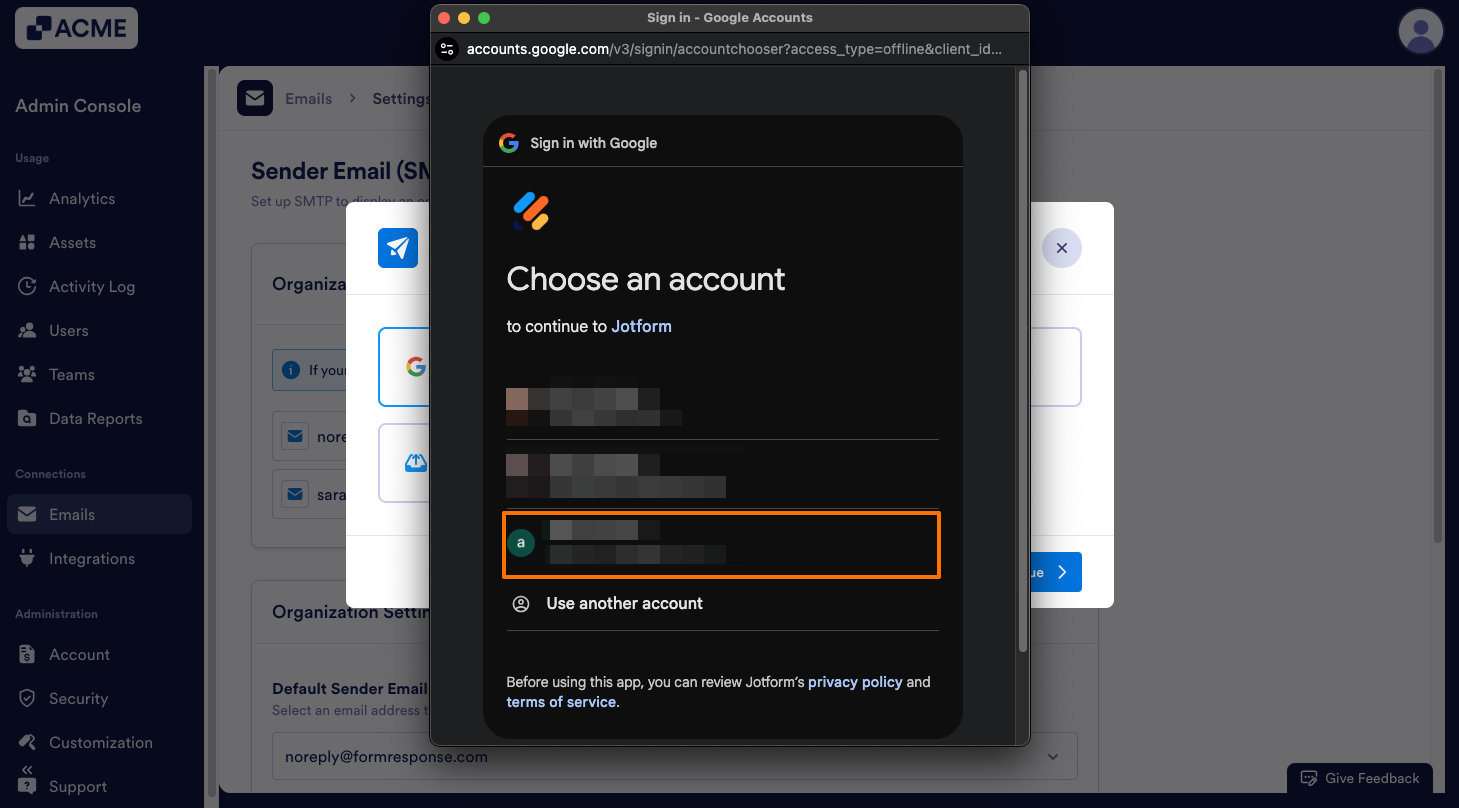
- For Google and Microsoft, log into your account to authenticate the connection.
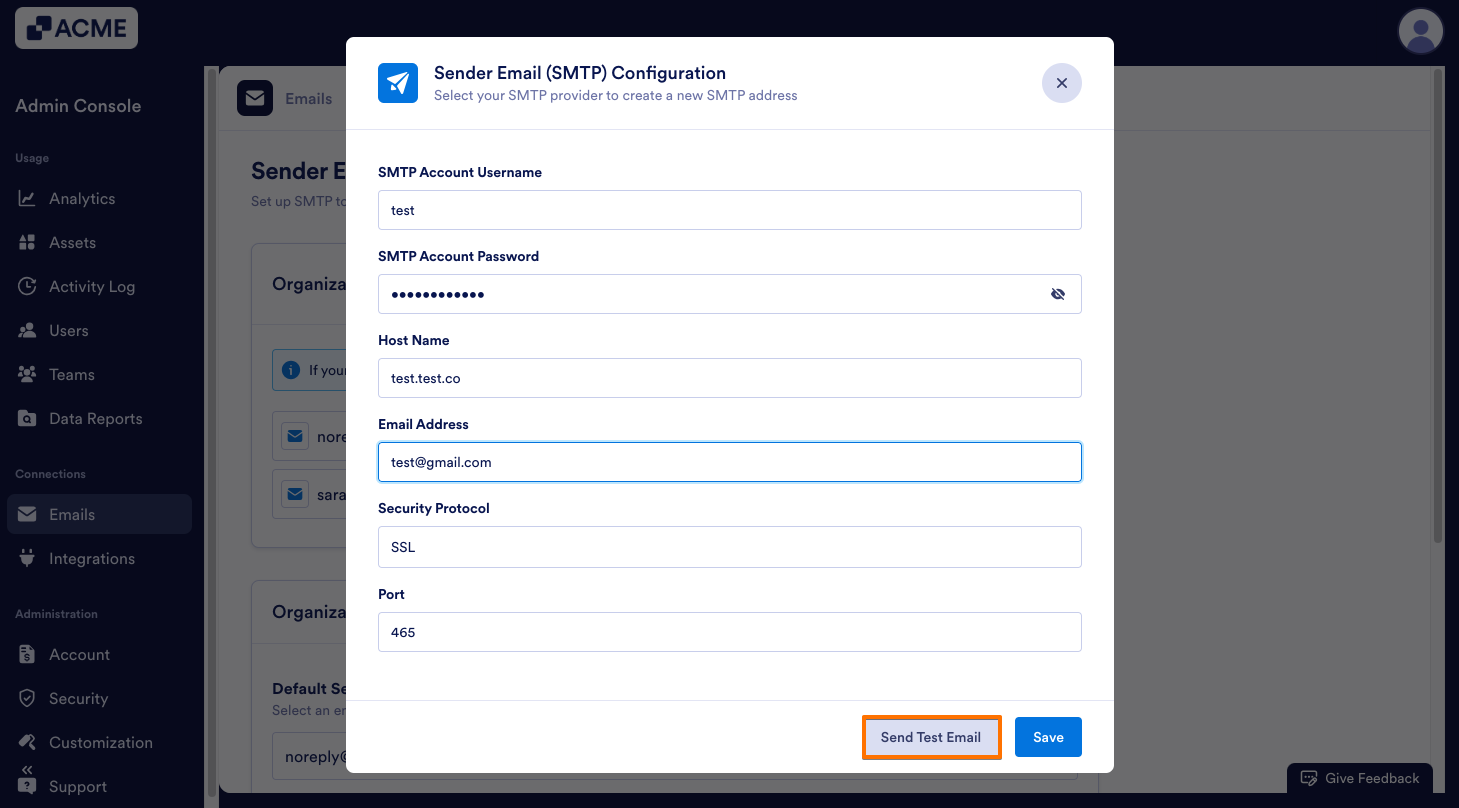
- For a custom connection, enter the SMTP details, including the Security Protocol and Port.
- To test the sender email, click Send Test Email.
- Finally, click Save.
Editing Sender Emails
After the Sender Email is set up, you can edit or delete it. Let’s walk through this together:
- In the Admin Console, select Emails under Connections.

- Click on the gear icon to open the Sender Email Configuration settings.

- Now, search for the sender email you’d like to manage and click on the three dot menu.

- To update the email, click on Edit (custom connections) or Reauthenticate (Google or Microsoft).
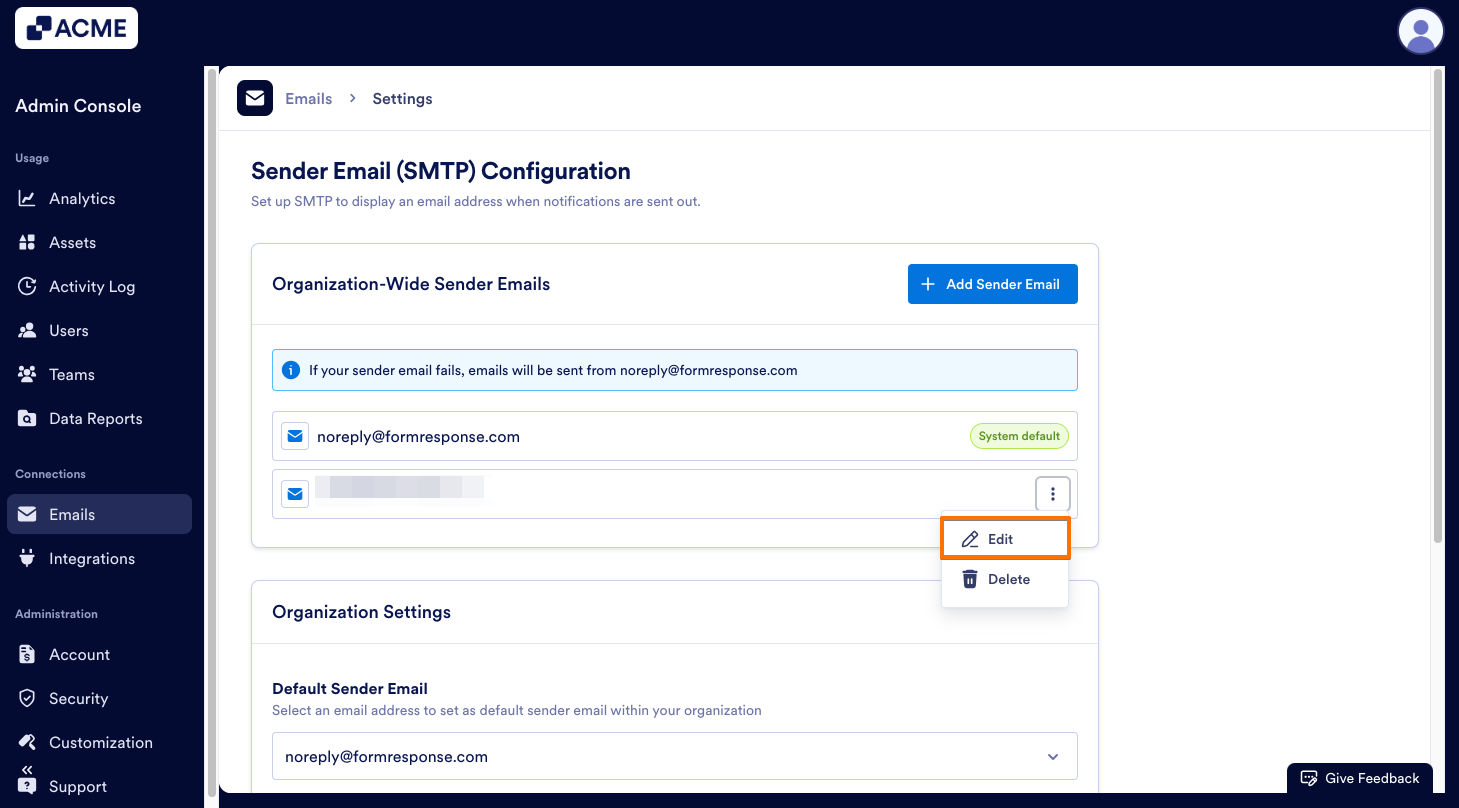
- Then, follow the steps in the pop-up windows and click Save.
Deleting Sender Emails
Let’s walk through the process of deleting a sender email:
- In the Admin Console, select Emails under Connections.
- Click on the gear icon to open the Sender Email Configuration settings.

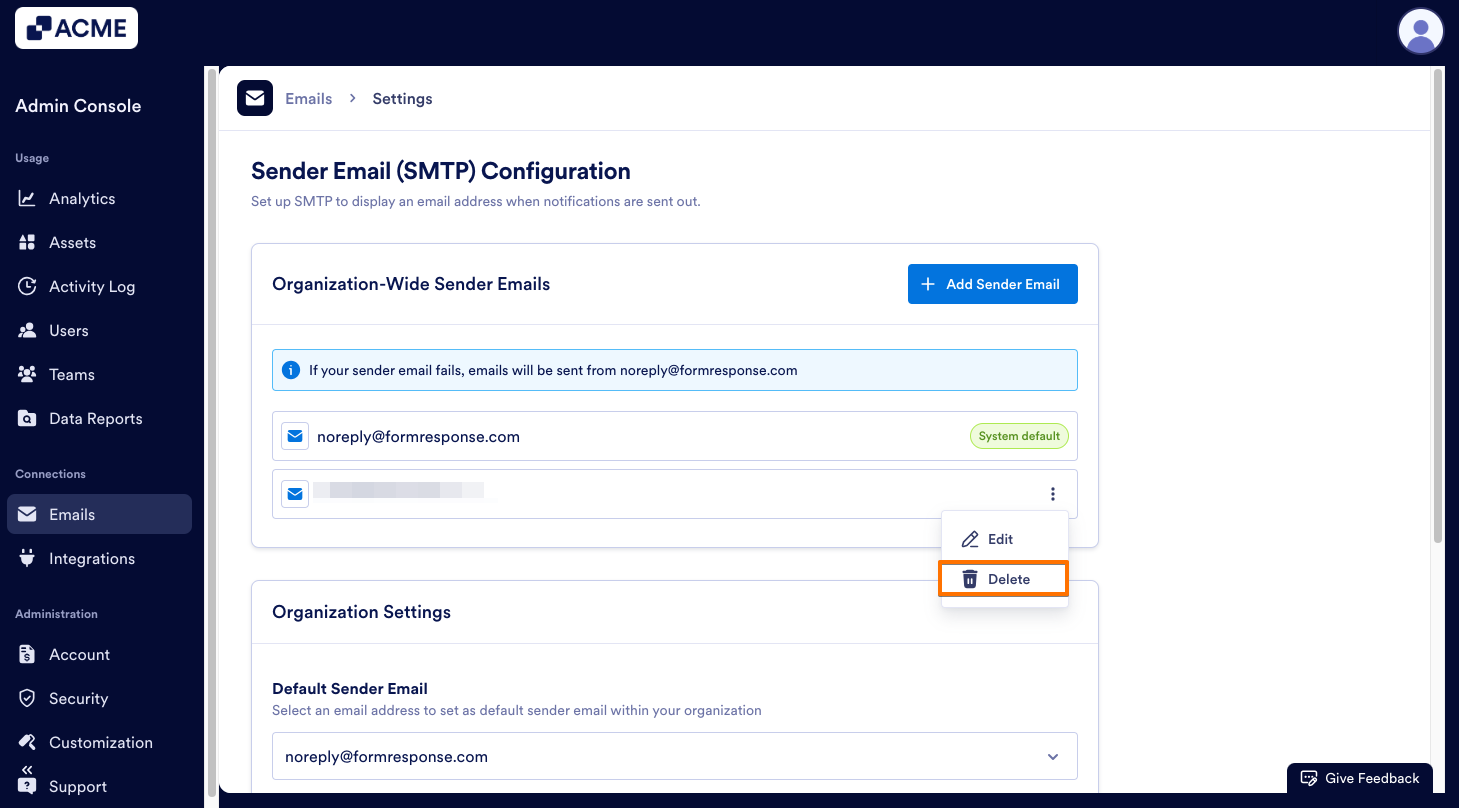
- Now, search for the sender email you’d like to manage and click on the three dot menu.

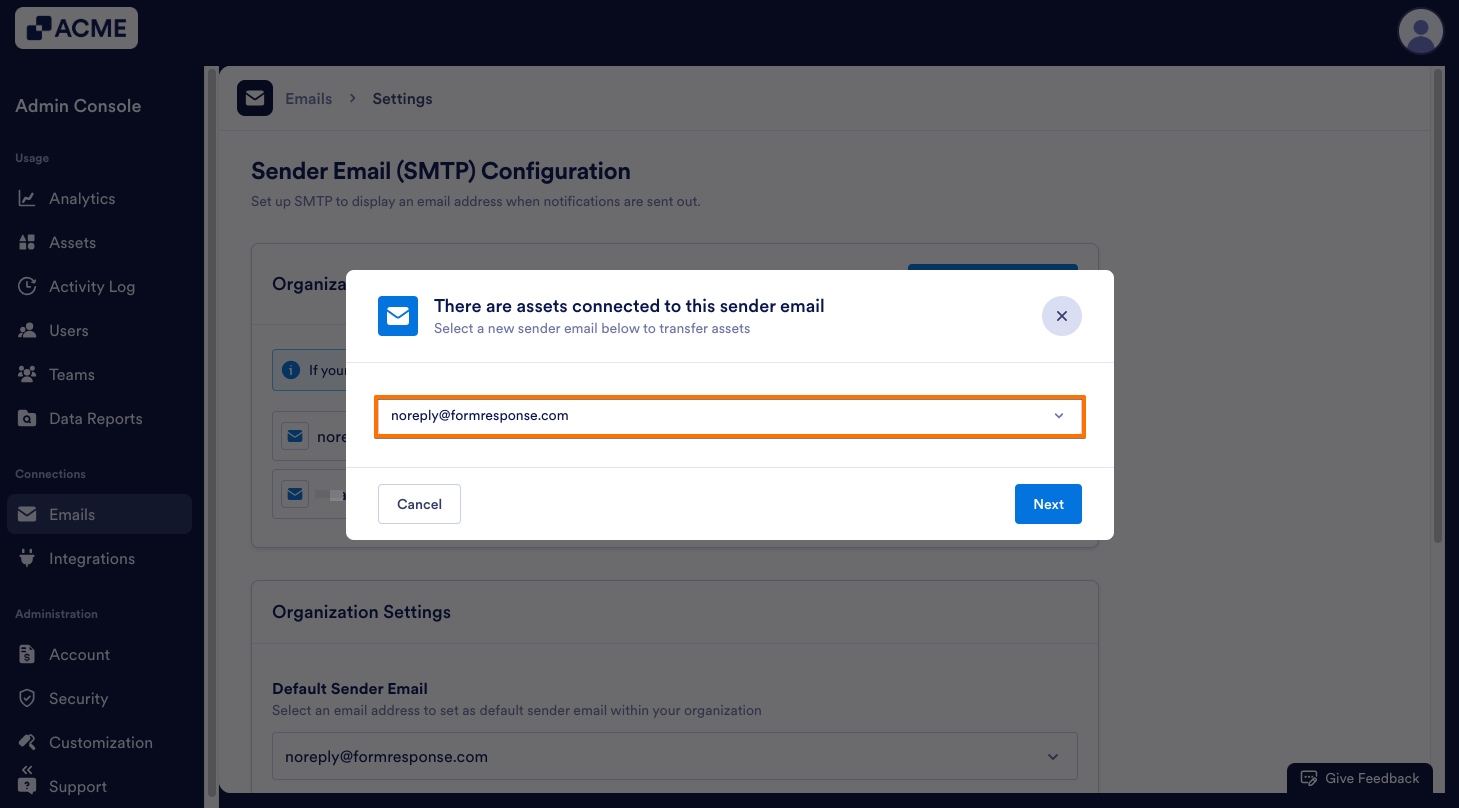
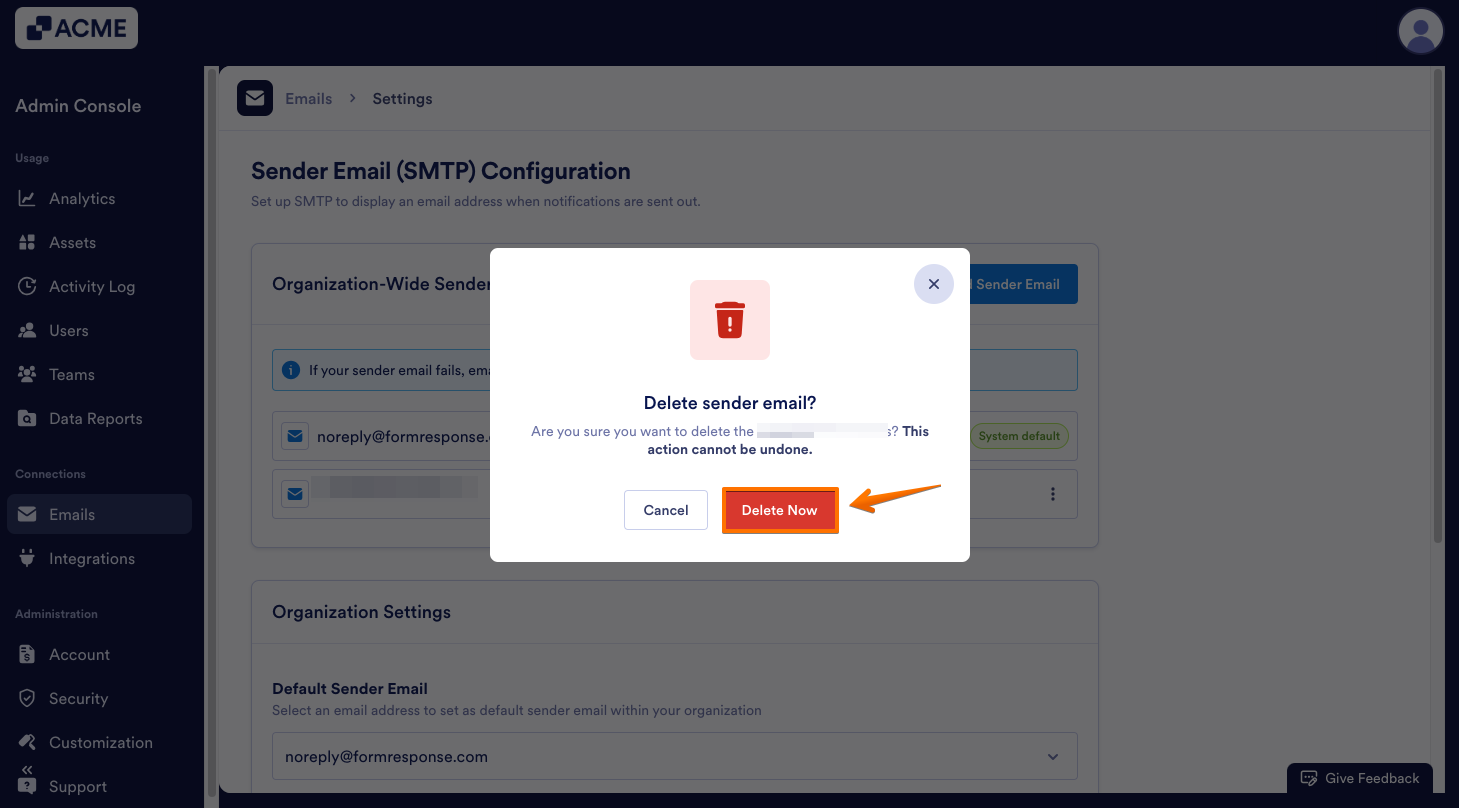
- Click on Delete. The system will look for connected assets.
- If there are connected assets, select a new sender email to transfer the assets to and click Next.
- Then, click on Delete Now to finalize deleting the email.

Send Comment: