Keeping your workspace organized makes it easier to find and manage your assets. You can favorite, archive, or delete assets based on your needs. Favoriting allows quick access to important assets, archiving stores those you don’t need right now, and deleting removes the ones you no longer need. Using these options helps keep your workspace clean and easy to navigate.
Managing Archived Assets
Archiving helps keep your workspace organized by moving assets out of your main view without permanently deleting them. Archived assets are disabled and won’t be active, but you can restore them anytime if needed. This feature is useful for storing items you may need later, while keeping your workspace clutter-free. Check out the steps below to see how to archive and unarchive assets.
Archiving an Asset
It’s really easy to archive an asset. Let’s do it:
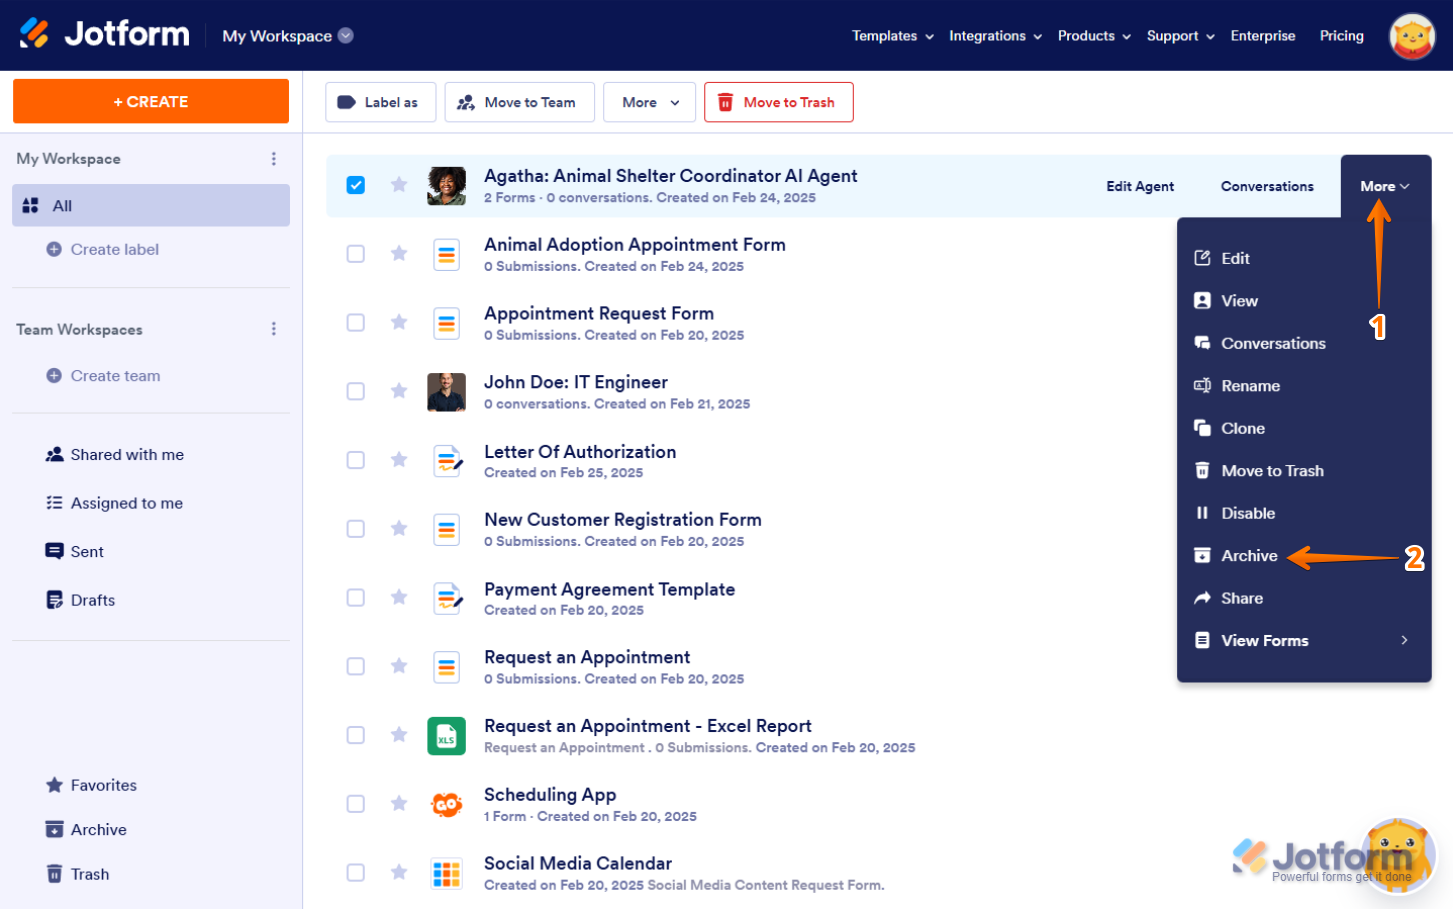
- On your My Workspace page, hover your mouse over the asset and click on More on the right side of the screen.
- In the More menu that opens up, click on Archive.
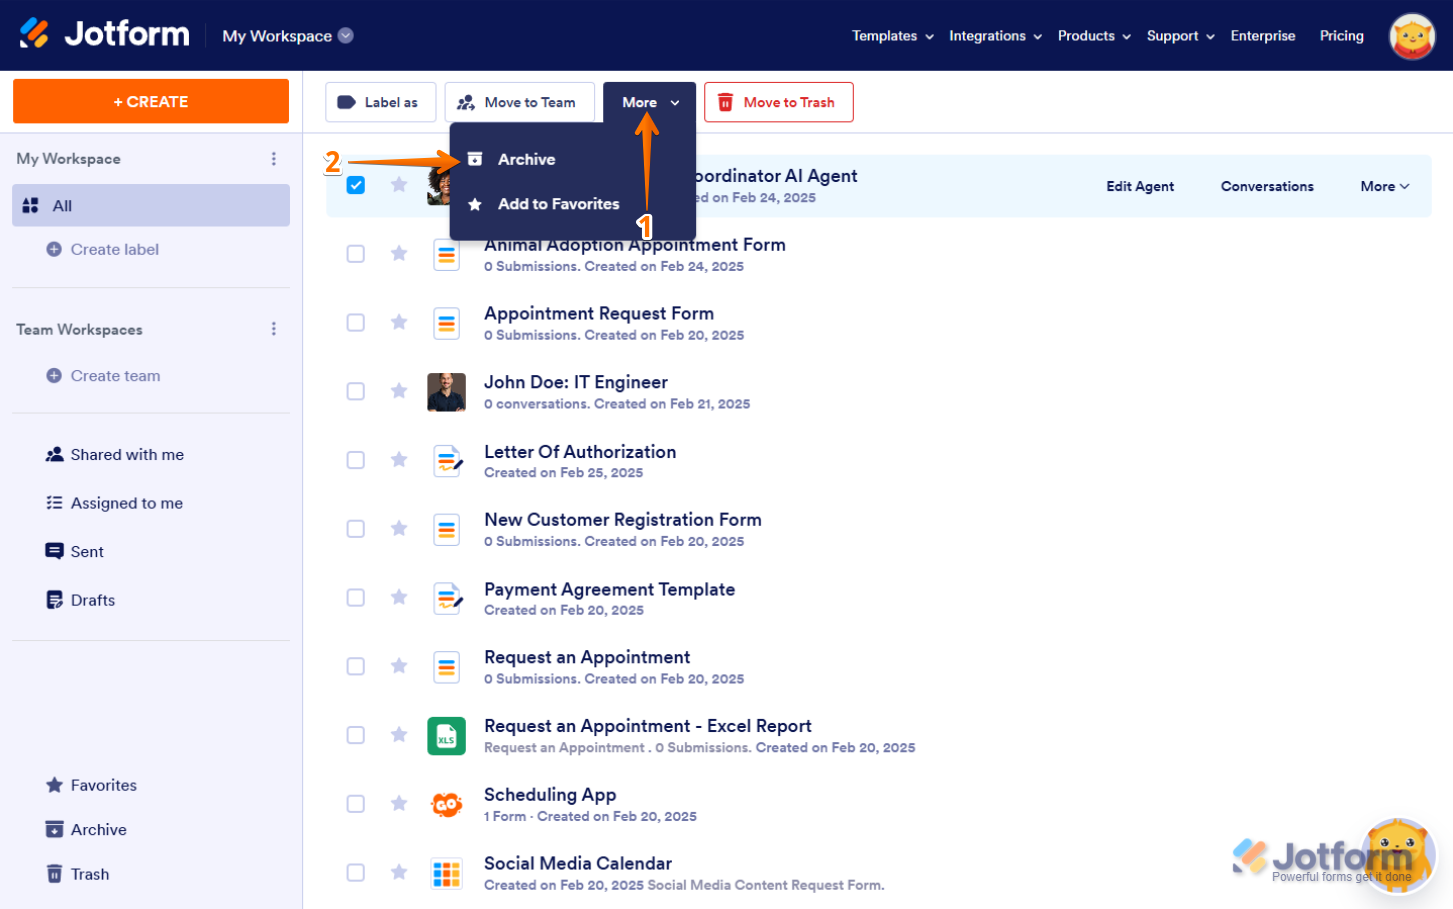
As an alternative, you can also click on the More menu in the menu at the top of the page, and then click on Archive.
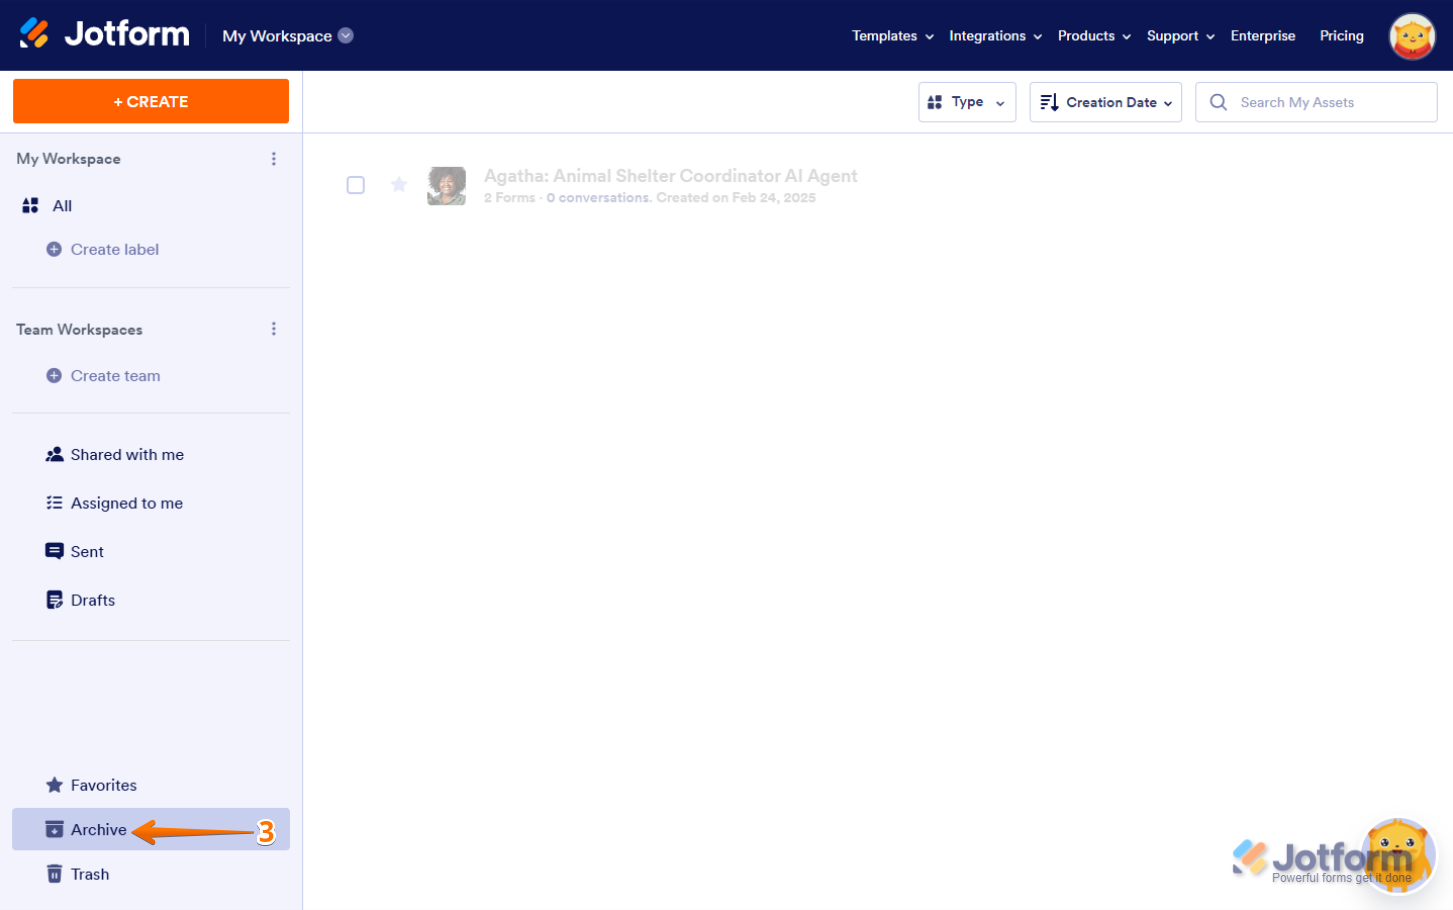
- Once archived, the asset will automatically move to the Archived folder at the bottom of the menu on the left.
Note
You can only archive multiple assets if they’re of the same type. If you select different types of assets, you won’t see the option to archive them. Also, Sign Documents can’t be archived.
Unarchiving an Asset
If you need to use an archived asset again, you can restore it by unarchiving it. Here’s how:
- On your My Workspace page, click on the Archived tab in the menu on the left.
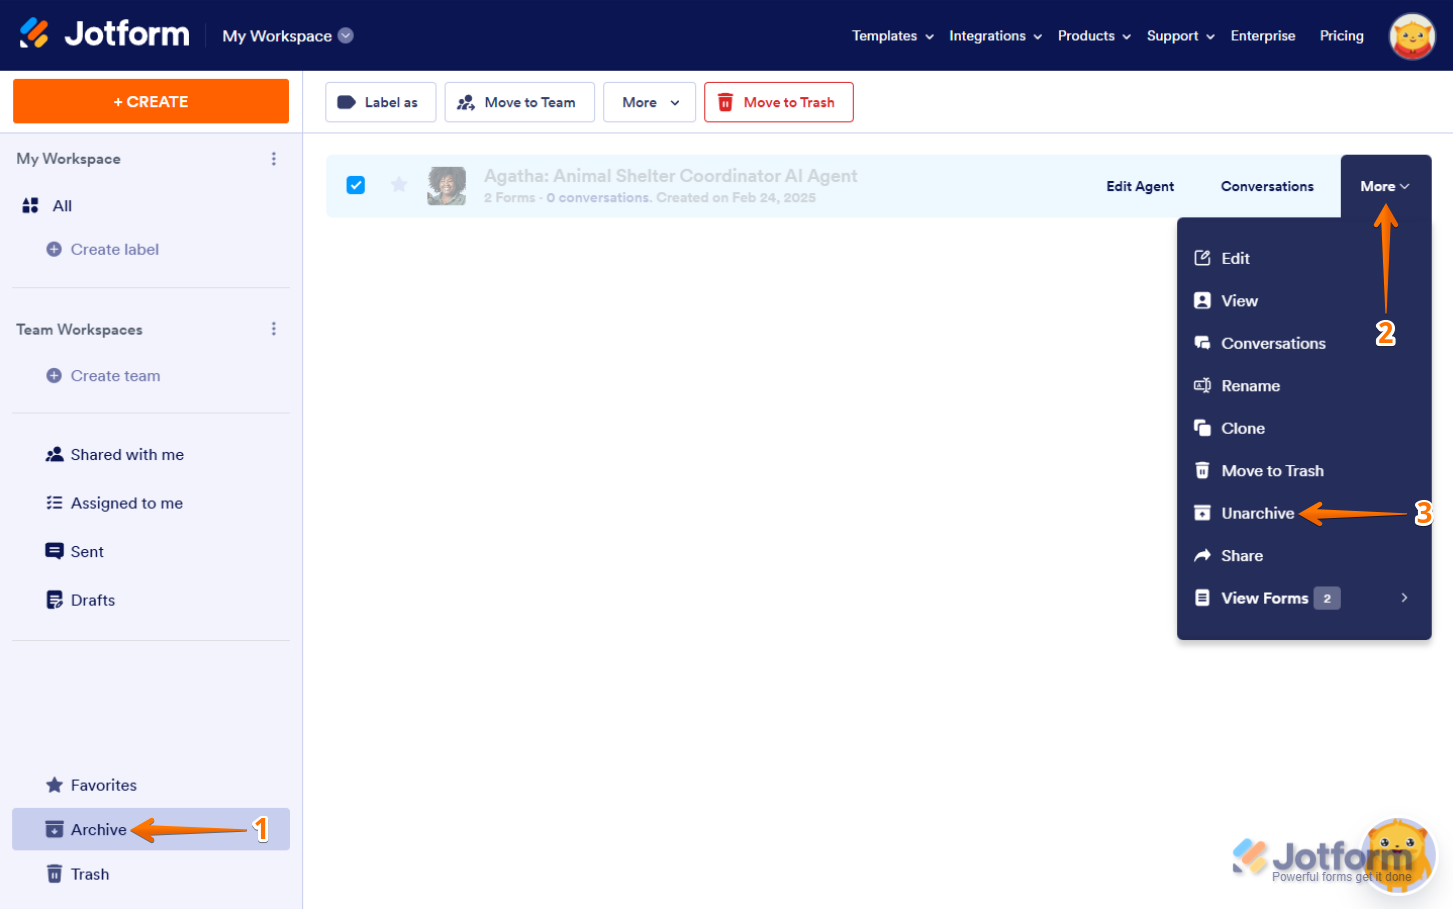
- Hover your mouse over the asset and click on More on the right side of the screen.
- Now, in the More menu, click on Unarchive, and you’re all set.
That’s it. The asset is now active again and back on your My Workspace page.
Managing Deleted Assets
Keeping your workspace organized includes properly handling deleted assets. When you delete an asset, it moves to the Trash folder, where it stays for 30 days before being permanently removed. Until then, you can restore it if needed or purge it for immediate, permanent removal. Check out the steps below to see how to delete, restore, and permanently remove assets from your workspace.
Deleting an Asset
Deleting an asset is easy to do. Let’s do it:
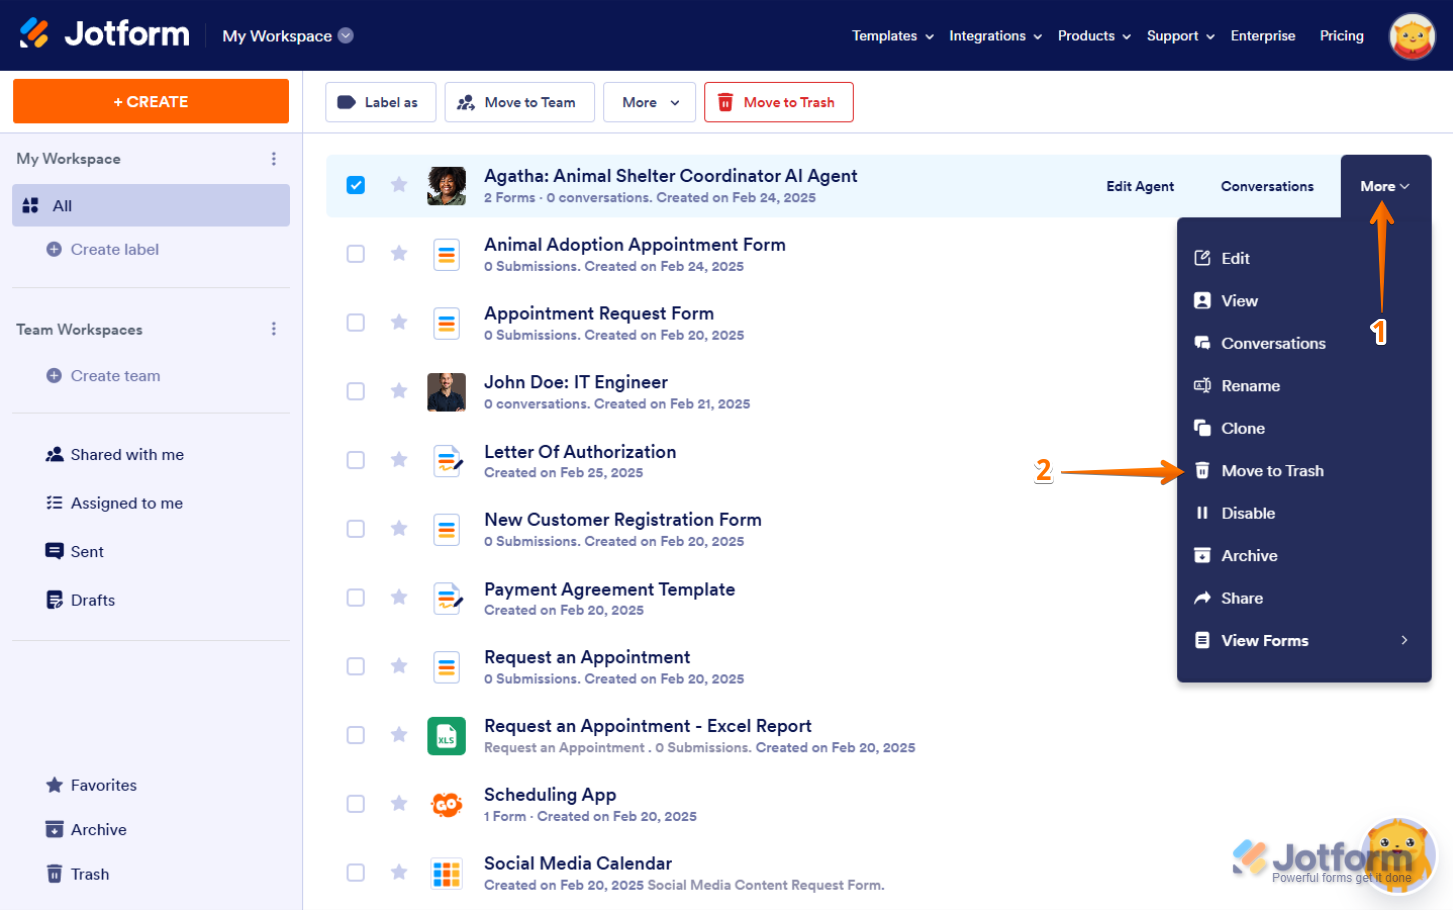
- On your My Workspace page, hover your mouse over the asset and click on More on the right side of the screen.
- In the More menu that opens up, click on Move to Trash.
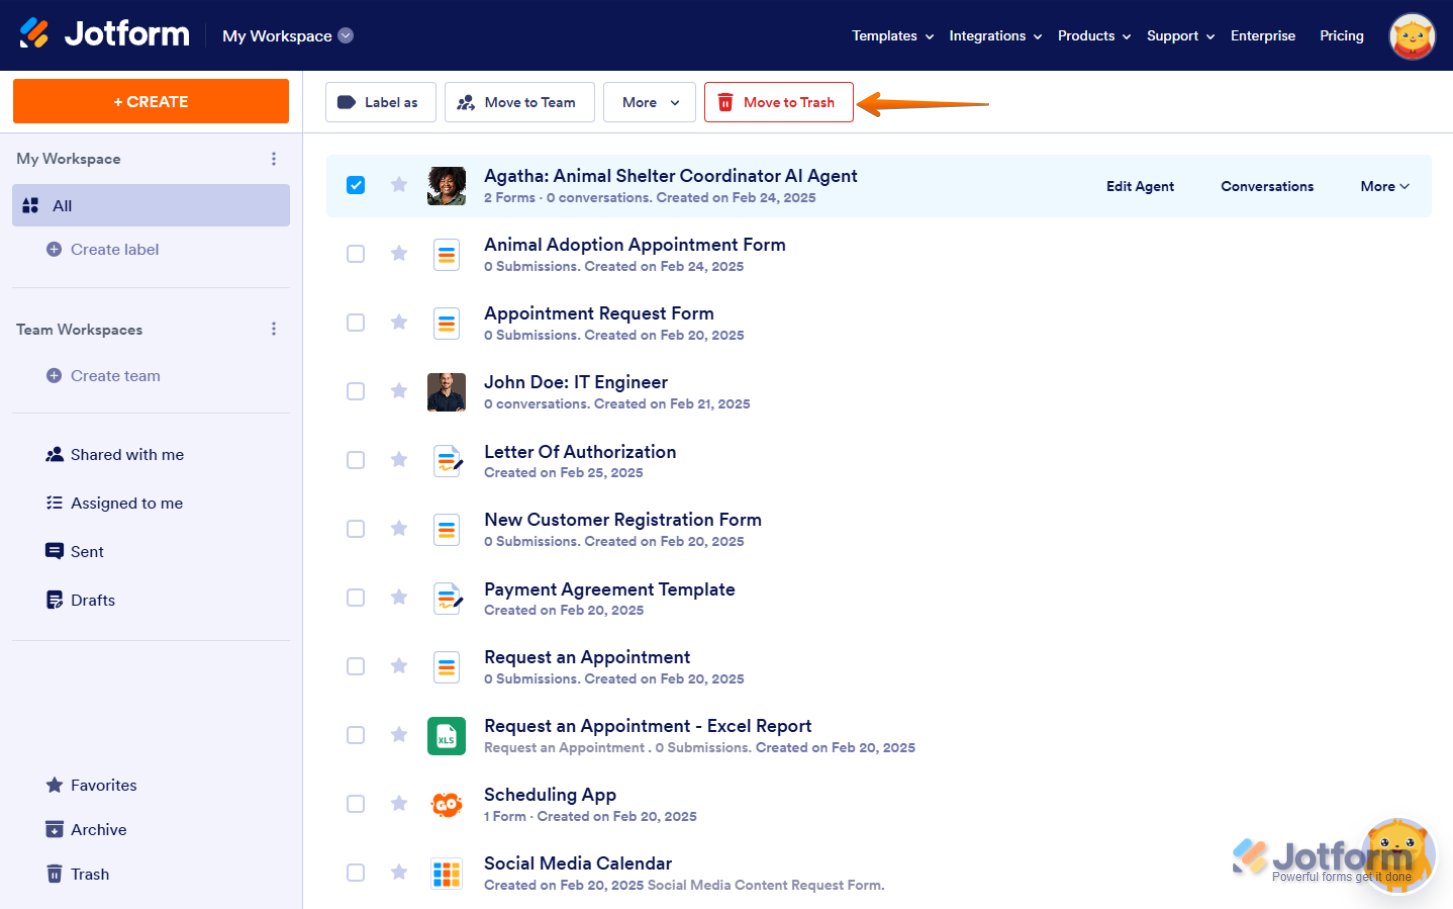
As an alternative, you can also click on Move to Trash in the menu at the top of the page.
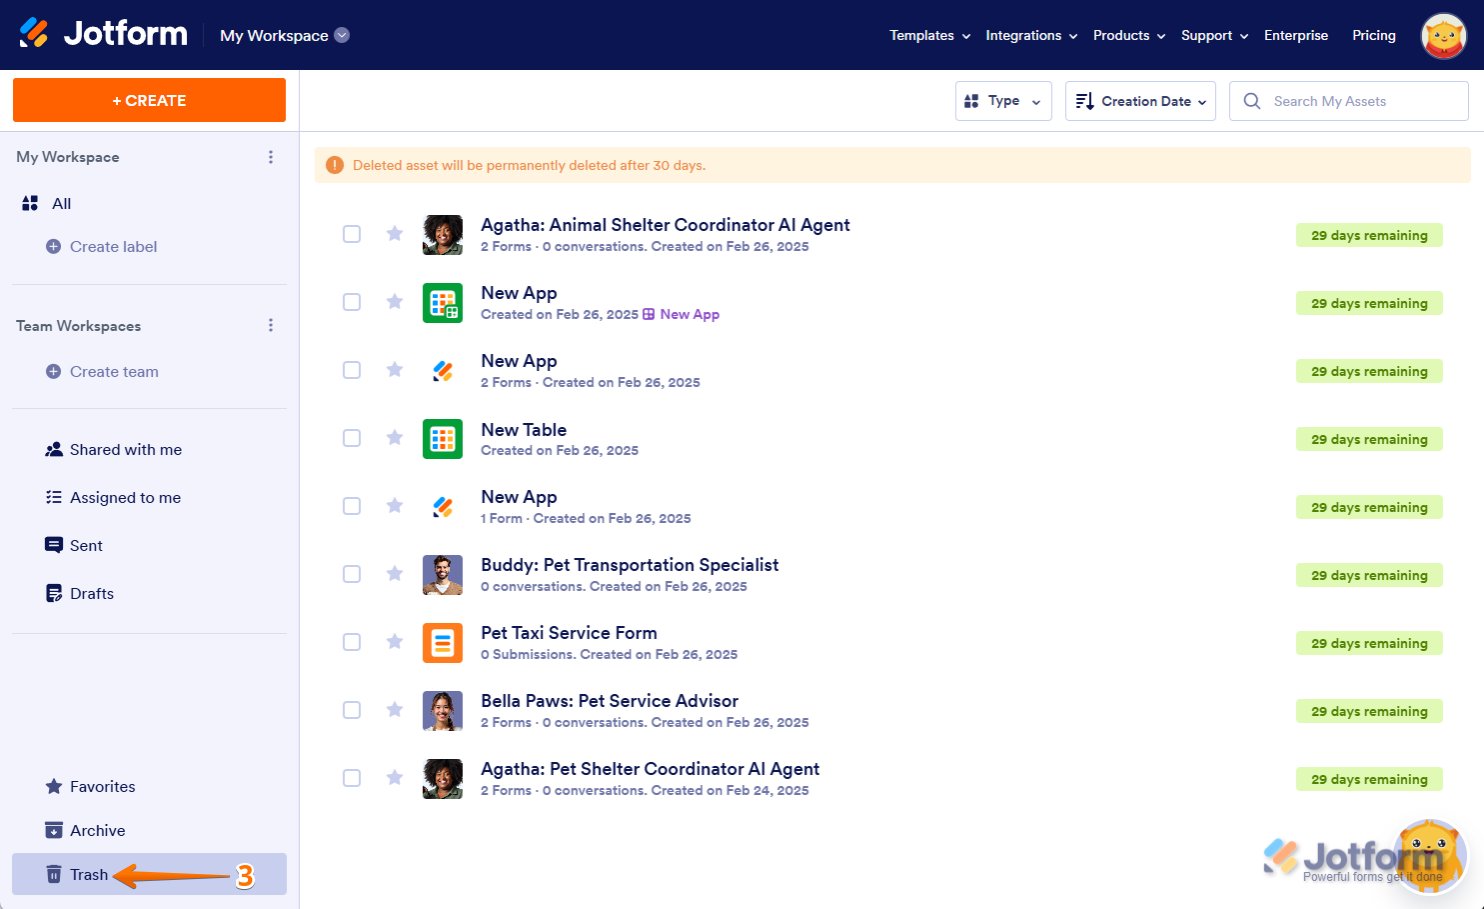
- Once deleted, the asset will automatically move to the Trash folder at the bottom of the menu on the left.
Deleting Multiple Assets
Check out the steps below to see how to delete multiple assets at the same time:
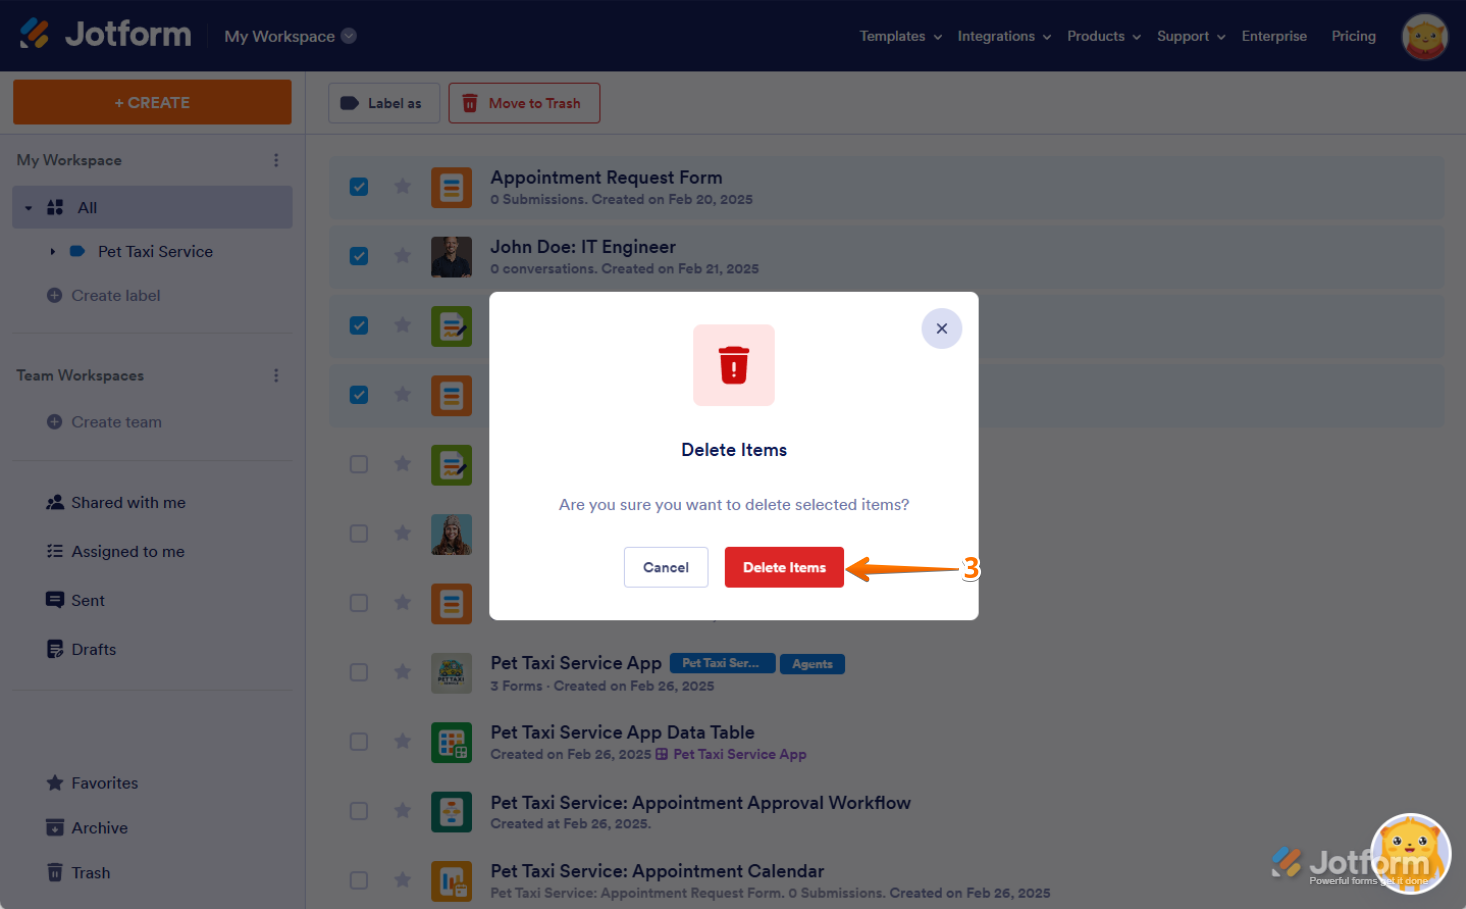
- On your My Workspace page, put checks in the boxes next to the assets you want to delete.
- Then, in the menu that comes up at the top of the page, click on Move to Trash.

- In the Confirmation window that pops-up, click on Confirm, and that’s it.
Purging an Asset
Purging an asset permanently deletes it from the trash folder, so it can’t be recovered. Just make sure you no longer need it before doing that. Here’s how:
- On your My Workspace page, in the menu on the left, scroll down and click on Trash.
- Then, hover your mouse over the asset and click on Purge.
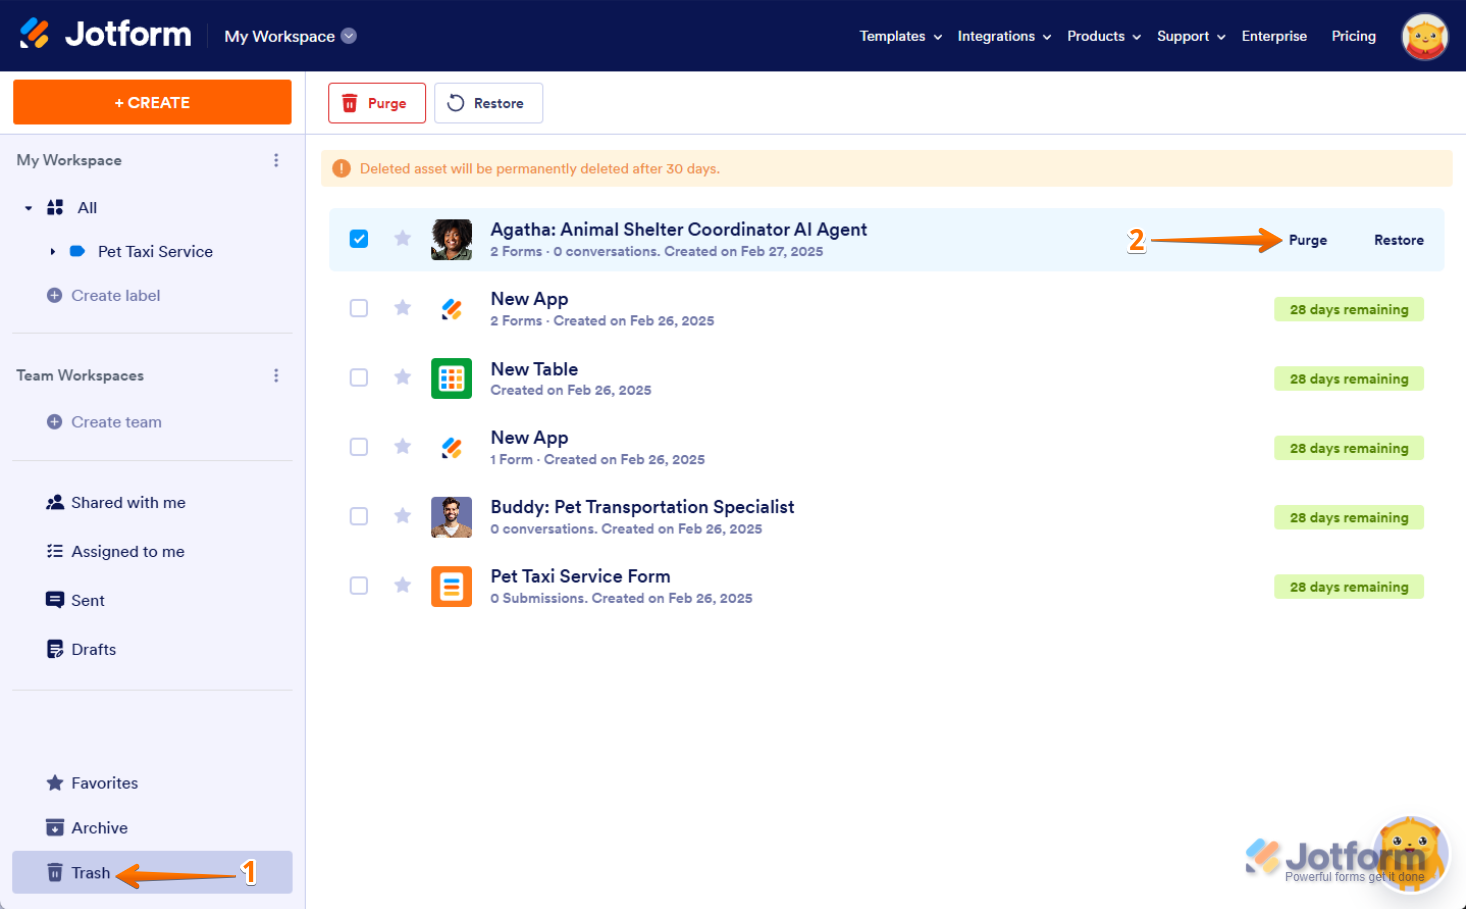
As an alternative, you can also click on Purge in the menu at the top of the page.

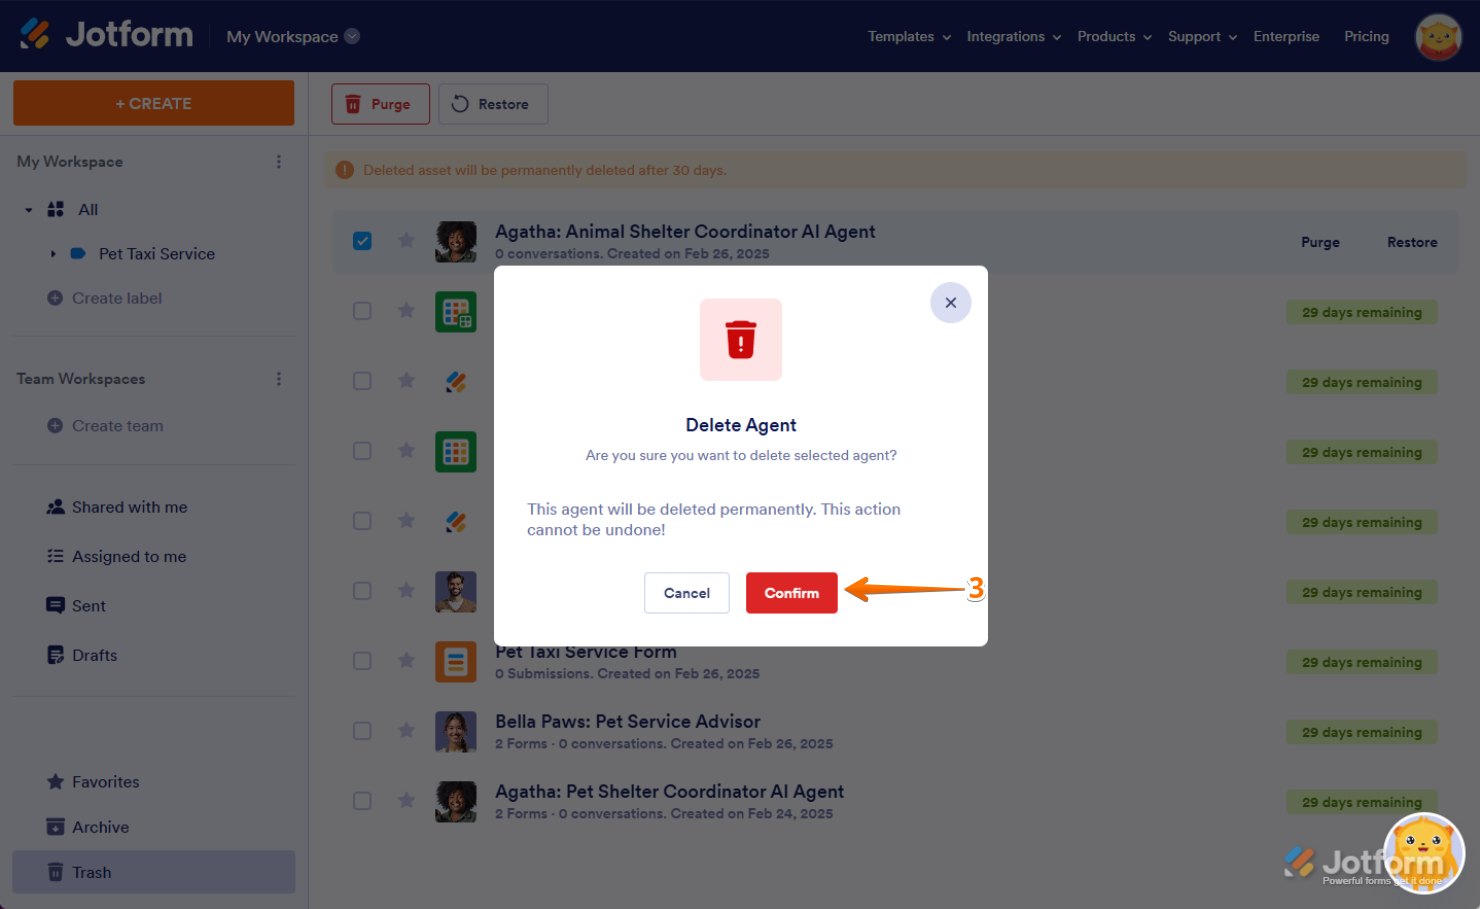
- In the Confirmation window that pops-up, click on Confirm, and that’s it.
Purging Multiple Assets
Check out the steps below to see how to purge multiple assets at the same time:
- On your My Workspace page, in the menu on the left, scroll down and click on Trash.
- Next, put checks in the boxes next to the assets you want to purge.
- Then, in the menu that comes up at the top of the page, click on Purge.

- In the Confirmation window that pops-up, click on Confirm, and that’s it.

Restoring a Deleted Asset
Let’s restore your deleted assets. Checkout the steps below:
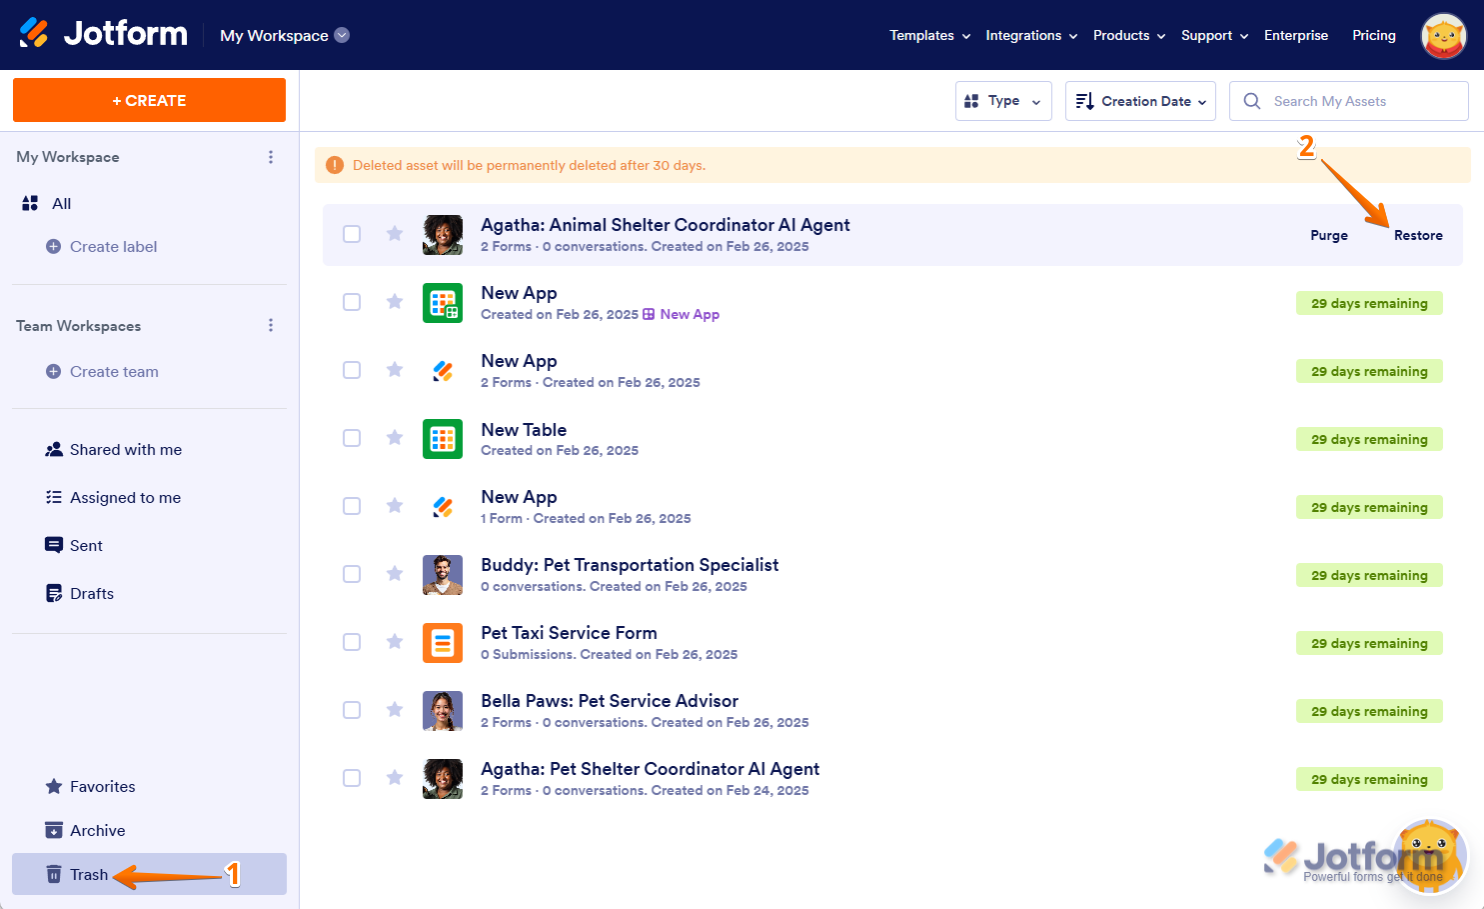
- On your My Workspace page, in the menu on the left, scroll down and click on Trash.
- Then, hover your mouse over the asset and click on Restore, and that’s it.
Restoring Multiple Deleted Assets
Restoring Multiple Deleted Assets is easy to do. Here’s how you can do it:
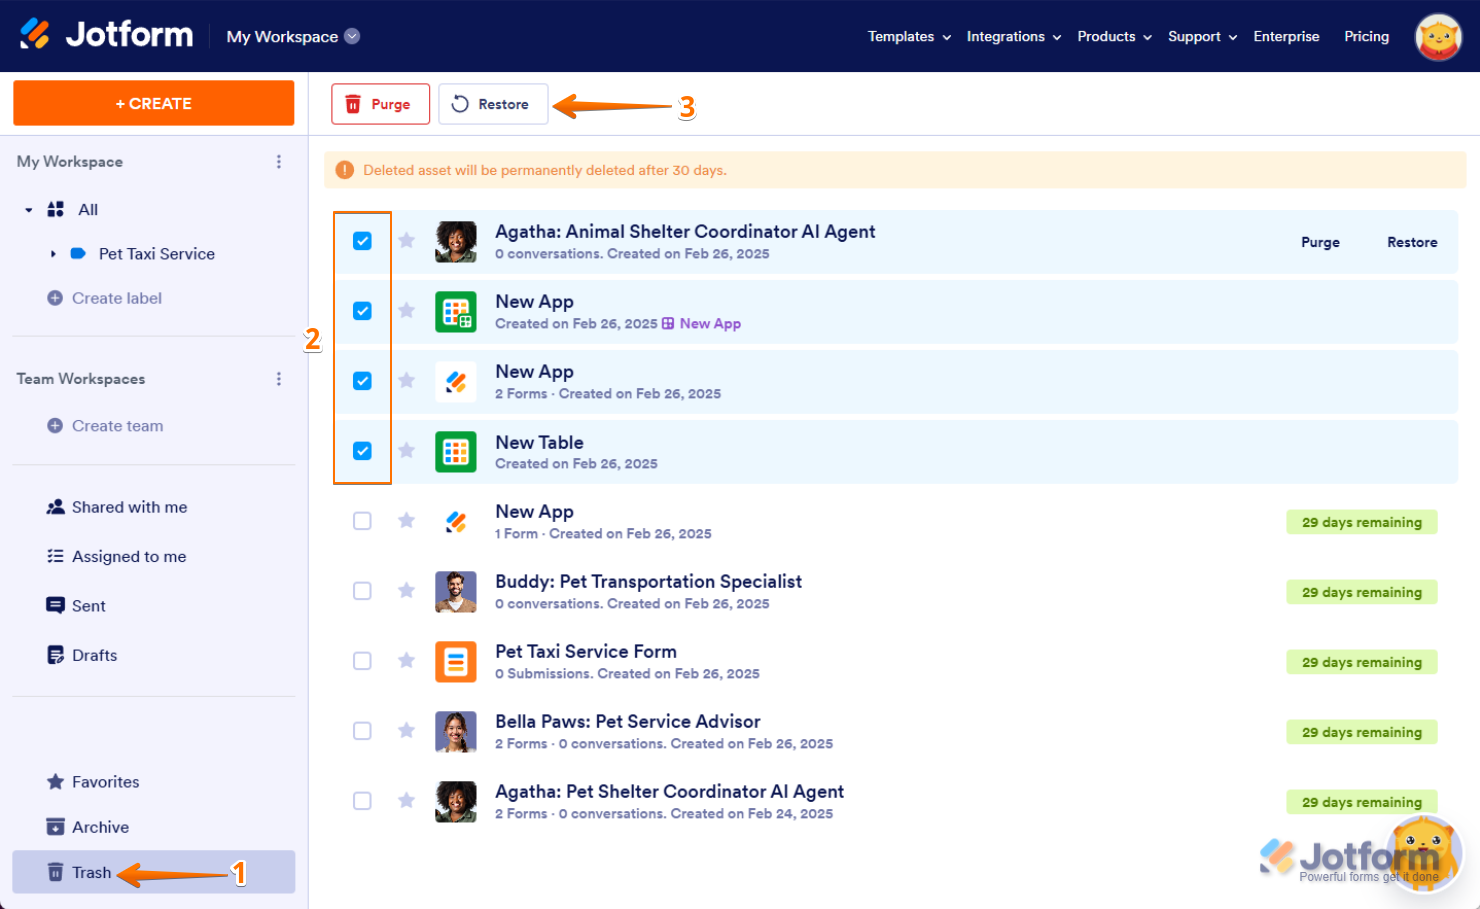
- On your My Workspace page, in the menu on the left, scroll down and click on Trash.
- Next, put checks in the boxes next to the assets you want to delete.
- Then, in the menu that comes up at the top of the page, click on Restore, and you’re all set.
That’s it. The asset is now active again and back on your My Workspace page.
Managing Favorite Assets
Marking an asset as a favorite makes it easy to find and access it later. If you frequently use certain assets, adding them to your favorites saves time by keeping them in one place. Here’s how to do it:
- On your My Workspace page, select the asset that you want to favorite and click on the Star icon next to it.
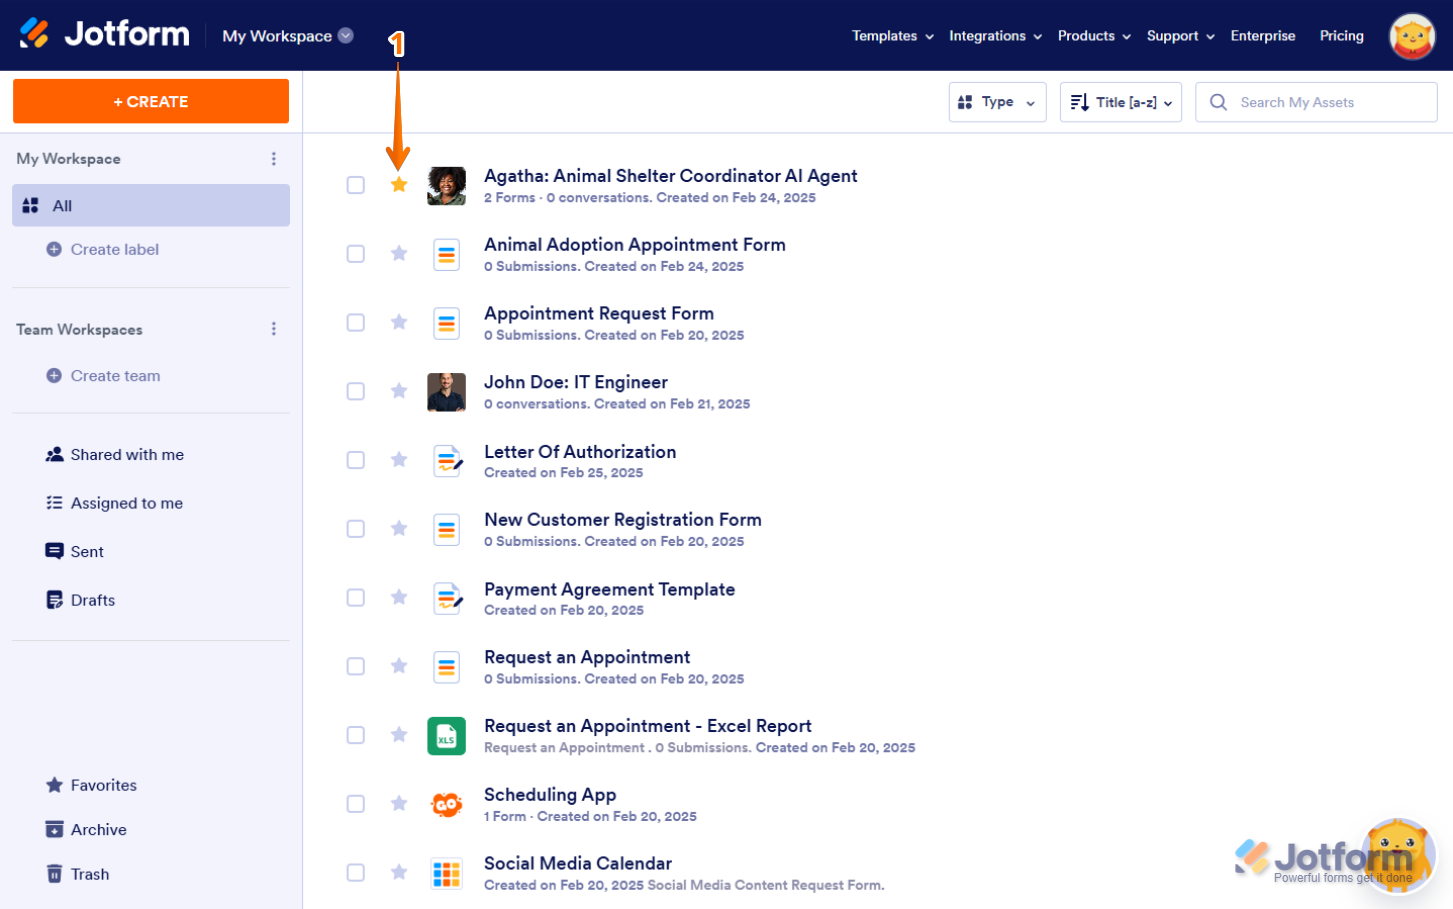
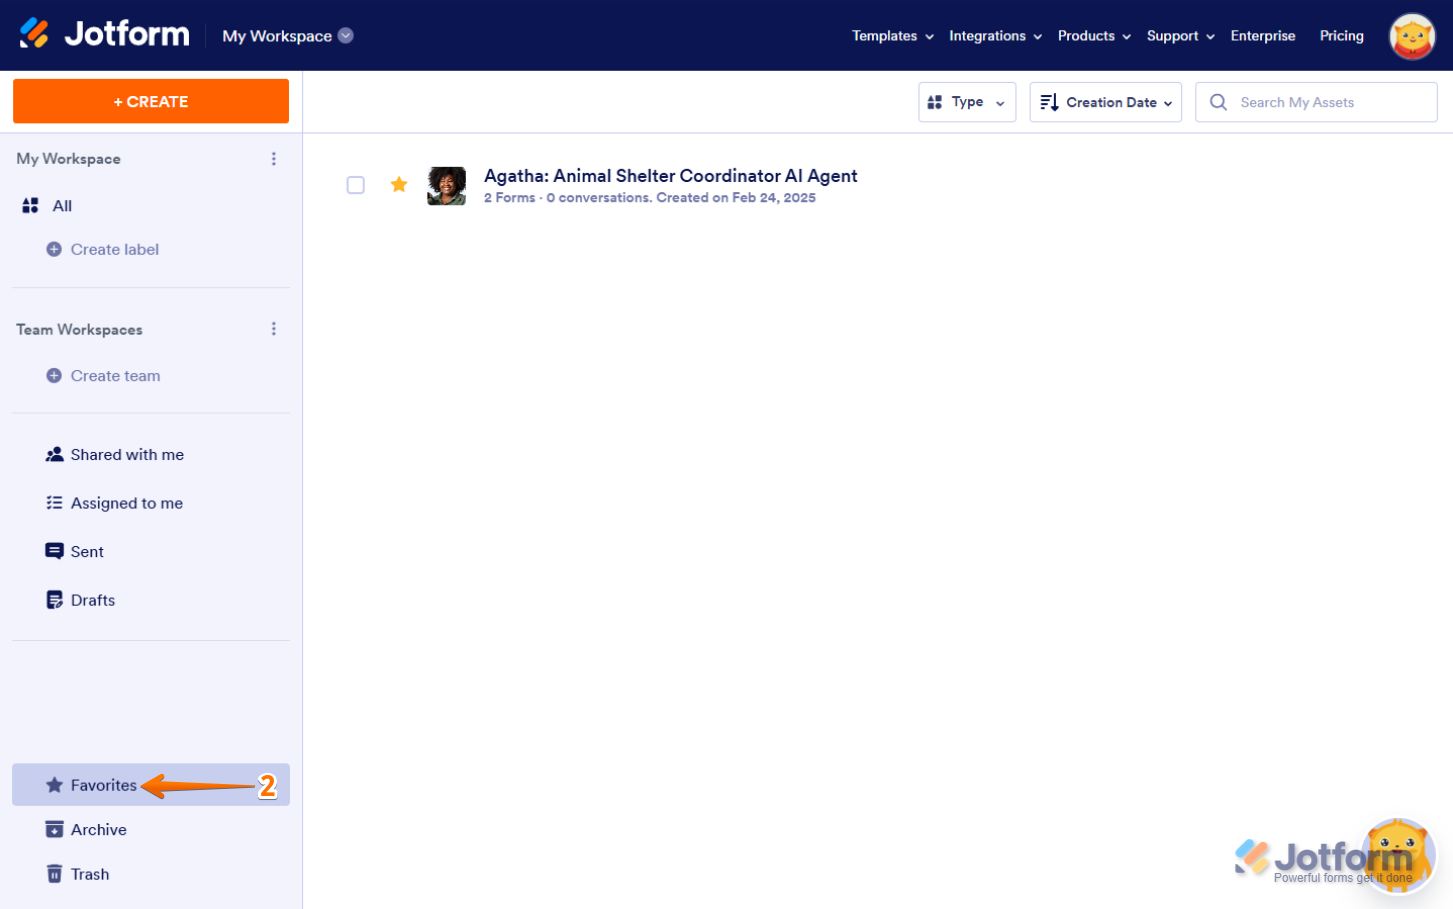
- Now, the asset will automatically move to the Favorites folder in the menu on the left.
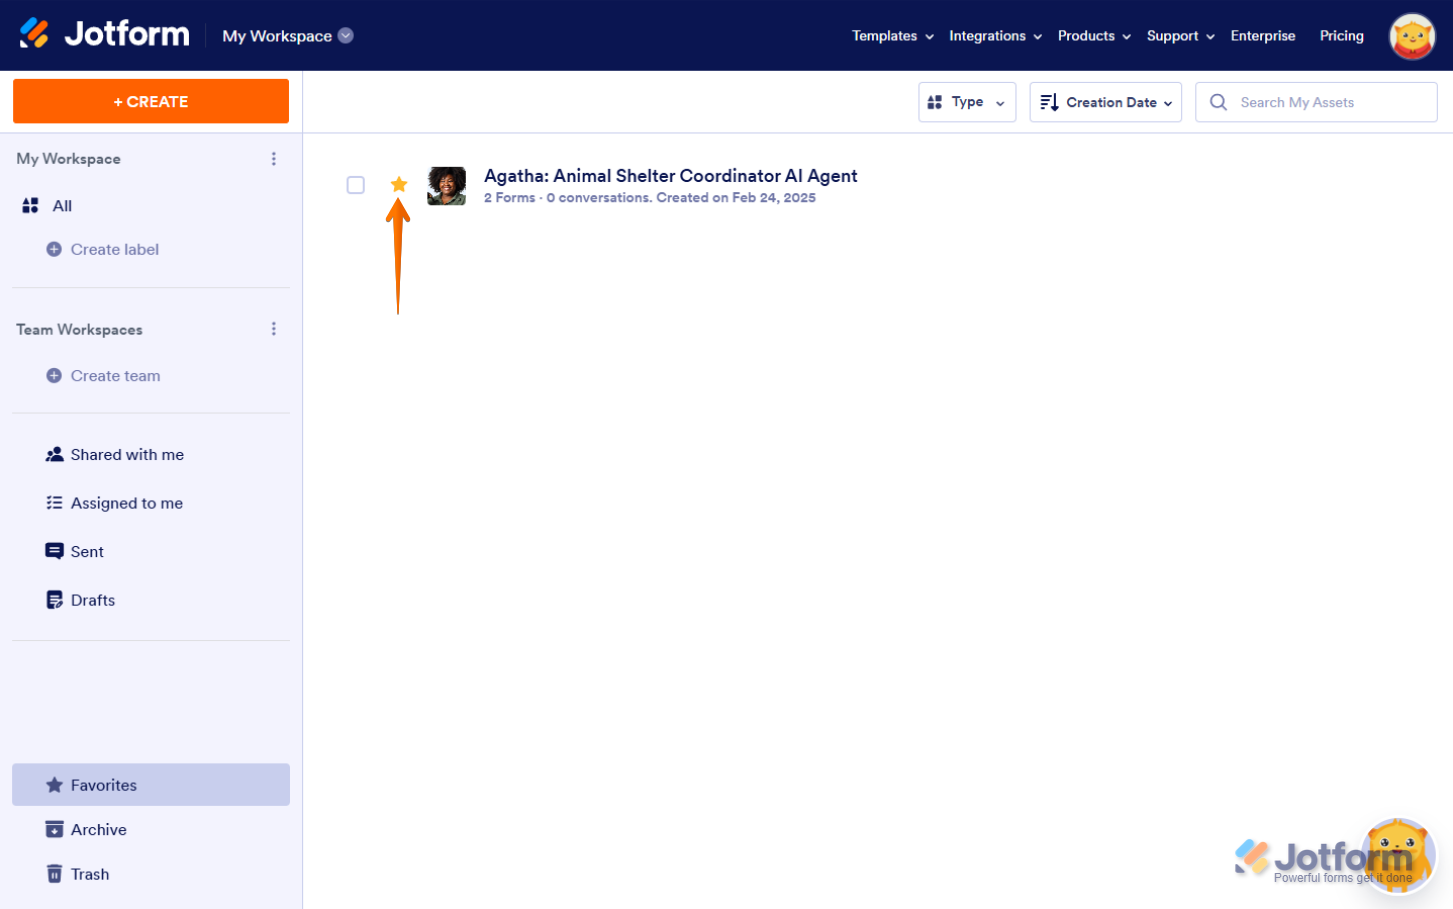
To remove an asset from your Favorites, just click the Star icon again to unstar it.

Send Comment: