With Jotform, you can accept payments with Apple Pay & Google Pay by connecting a supported provider such as Stripe Checkout, PayPal, or Square. This setup gives your users a faster and easier way to pay through your form, even without a direct integration.
Adding and Setting Up Apple Pay & Google Pay
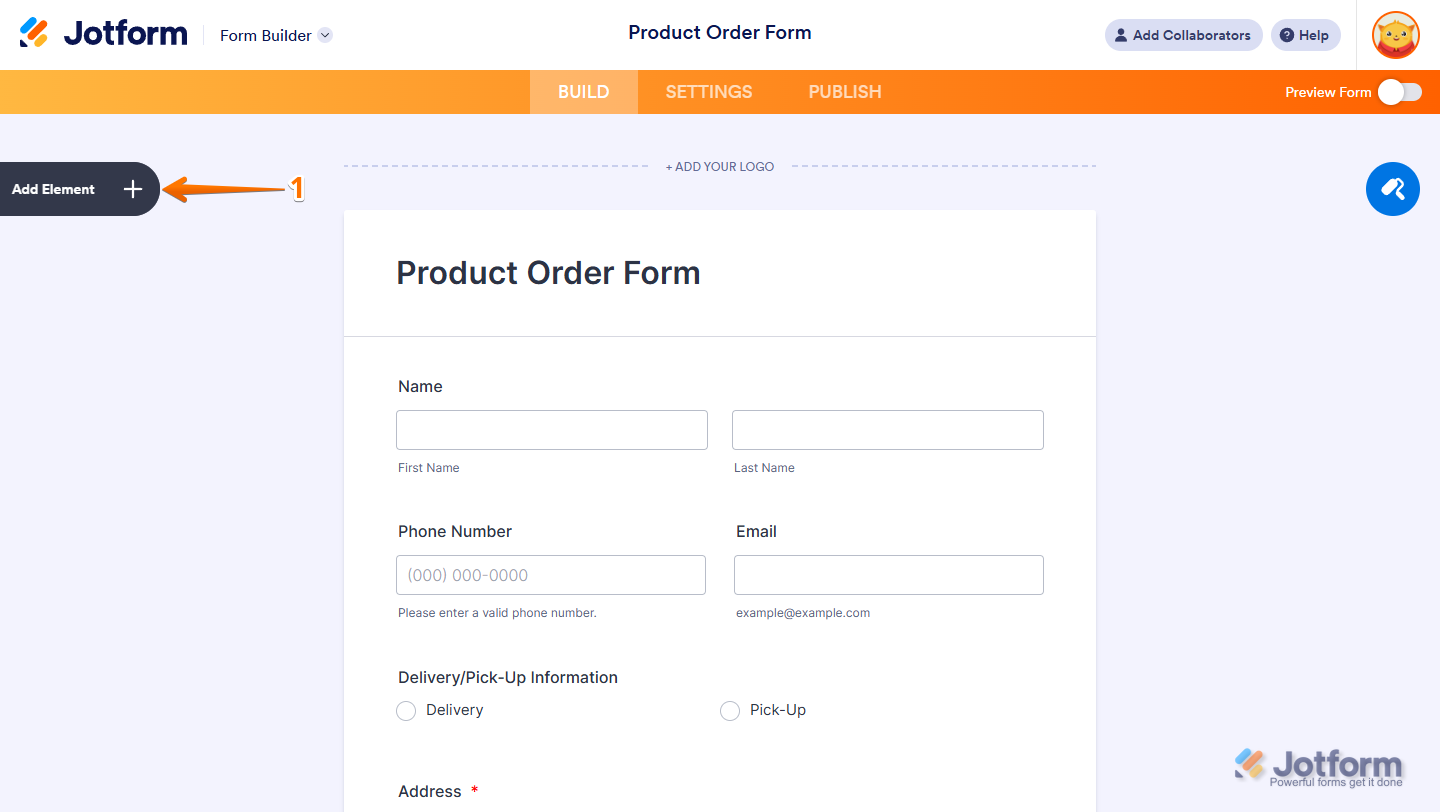
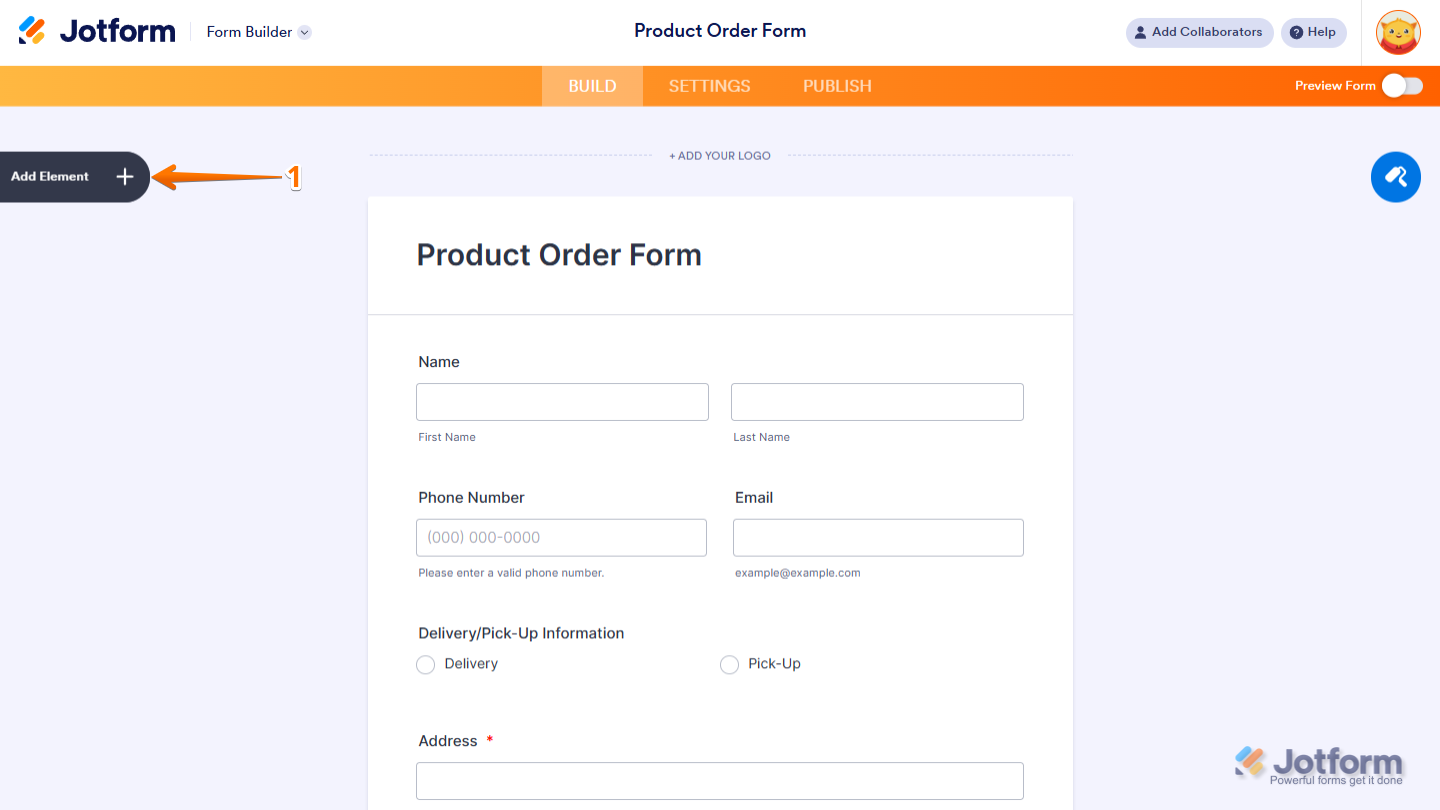
Whether you’re creating a new form or updating an existing one, adding and setting up the Apple Pay & Google Pay payment field only takes a second—here’s how to get going:
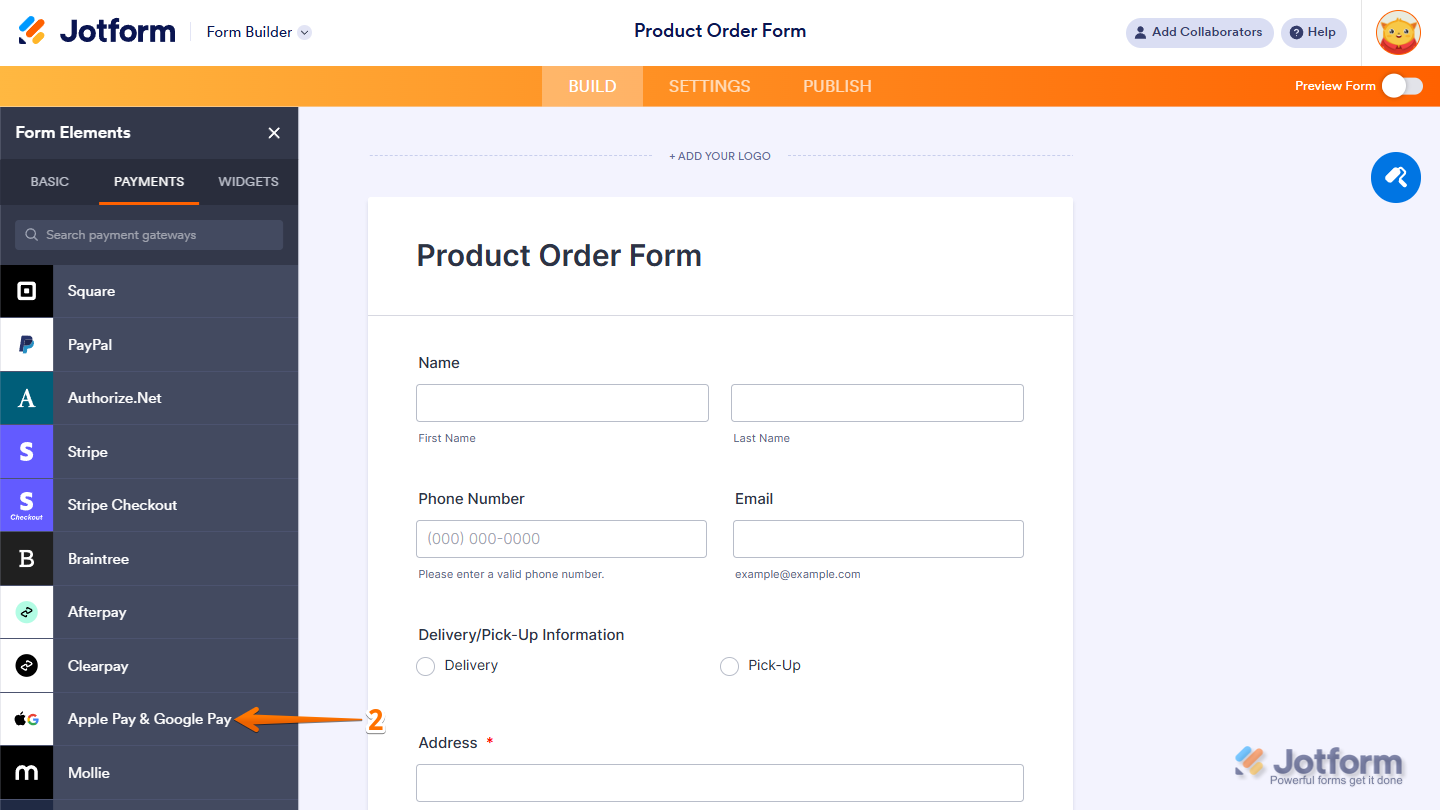
- In Form Builder, click on Add Element on the left side of the page.
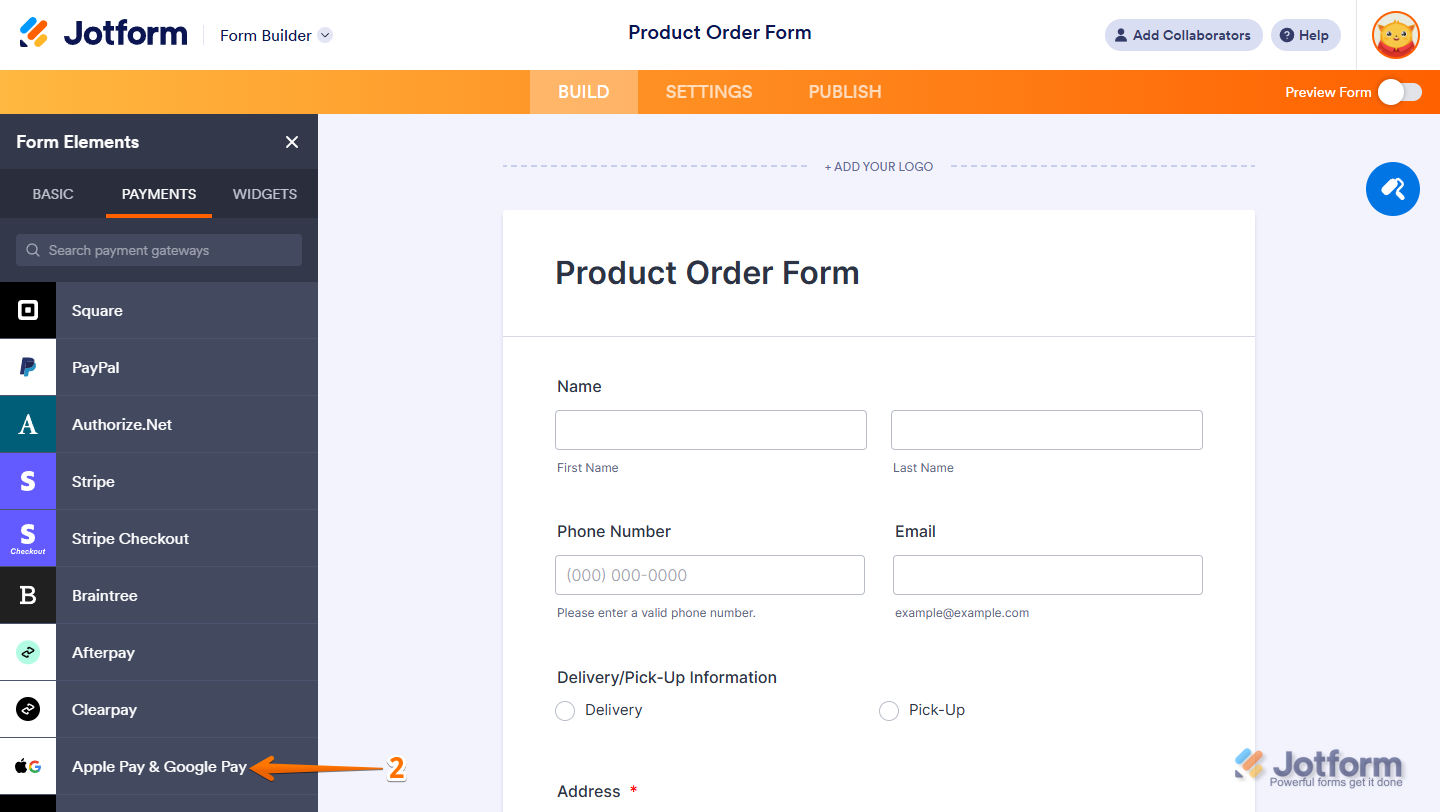
- Now, in the Form Elements menu, under the Payments tab, click on Apple Pay & Google Pay to add it to your form.
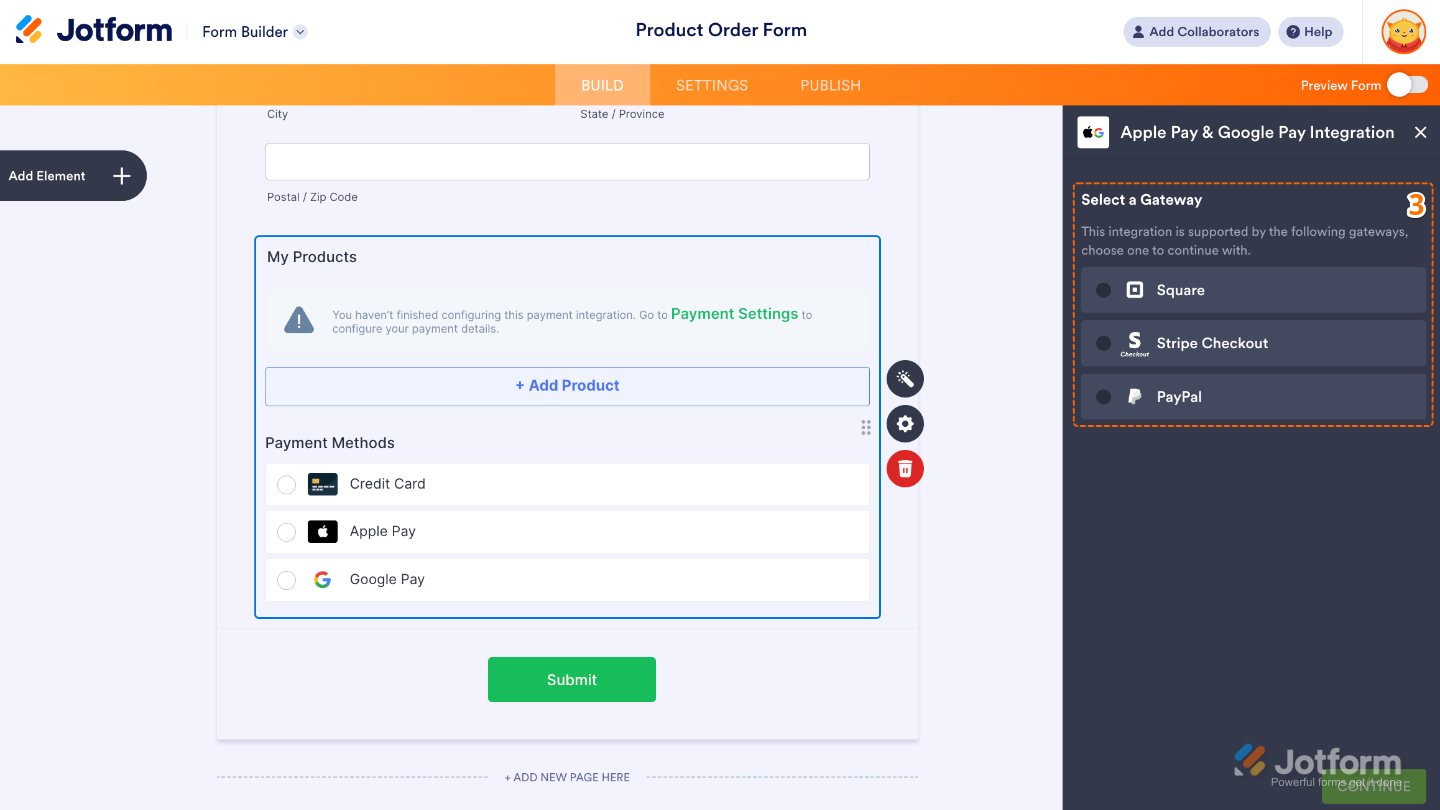
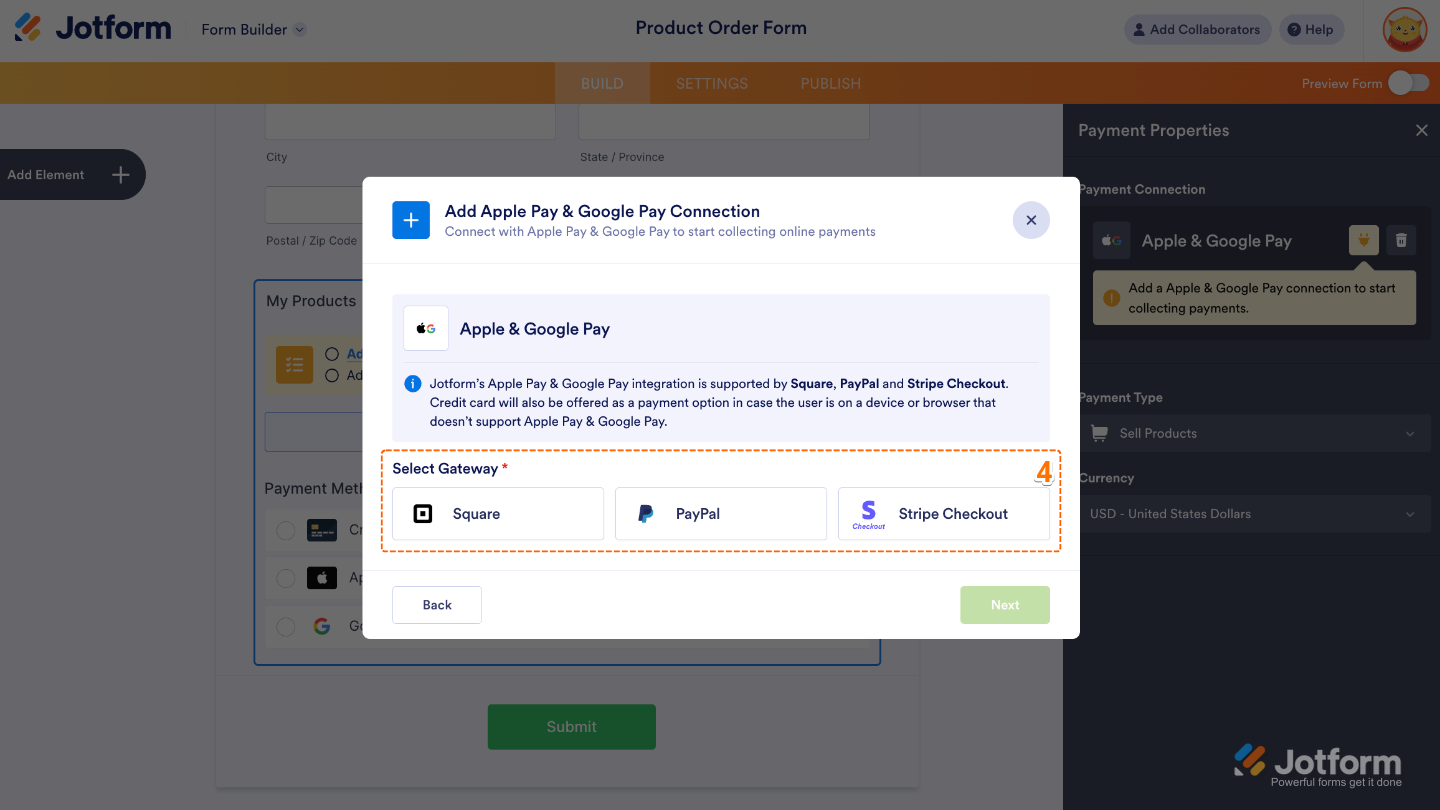
- Next, in the Apple Pay & Google Pay Integration window on the right, choose one of the supported payment providers:
- Square — Connect your Square account to accept Apple Pay & Google Pay directly through your form.
- Stripe Checkout — Use Stripe Checkout to enable Apple Pay & Google Pay as payment options during checkout.
- PayPal — Link your PayPal account so you can start accepting Apple Pay & Google Pay right from your form.
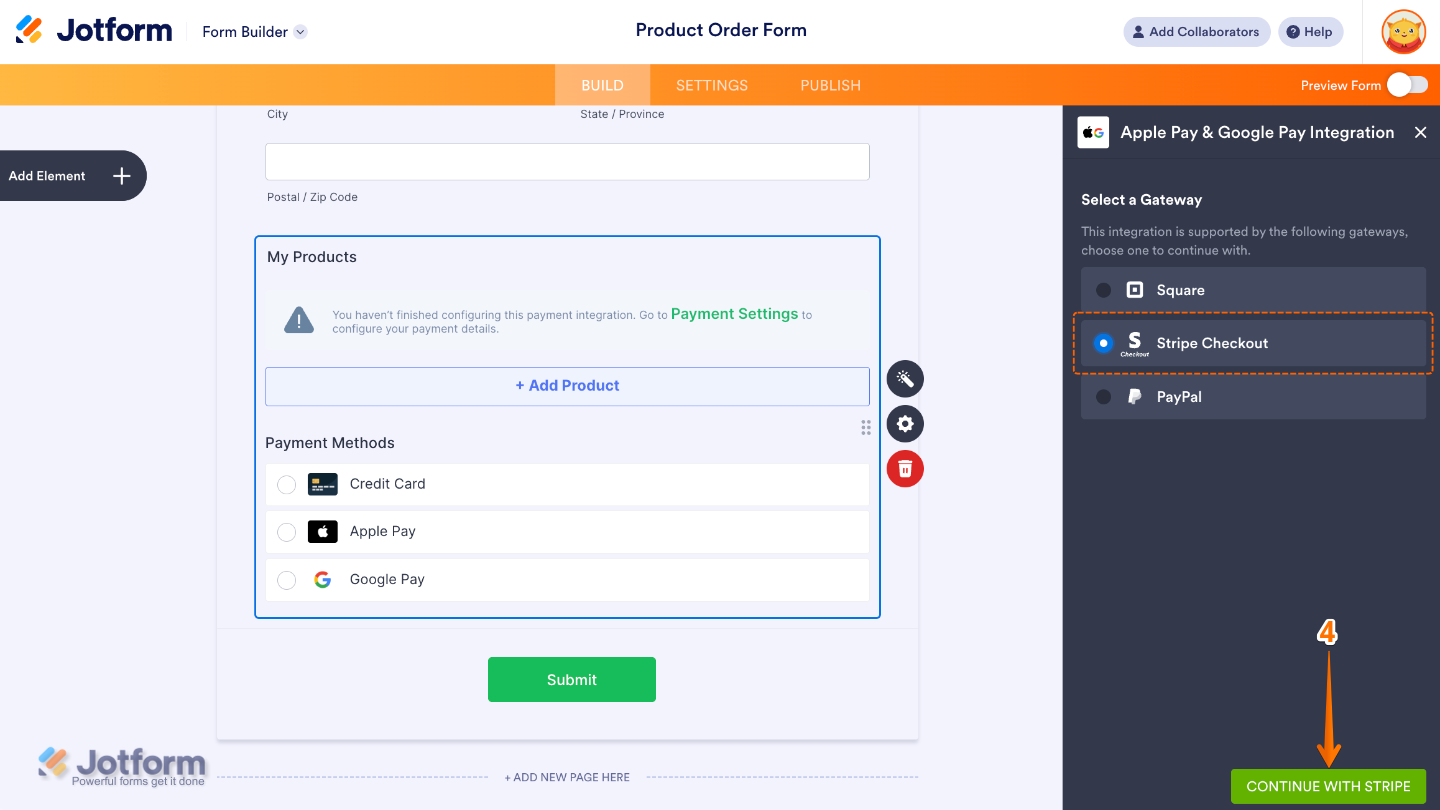
- After selecting your payment provider, for example, Stripe Checkout, click on Continue with Stripe.
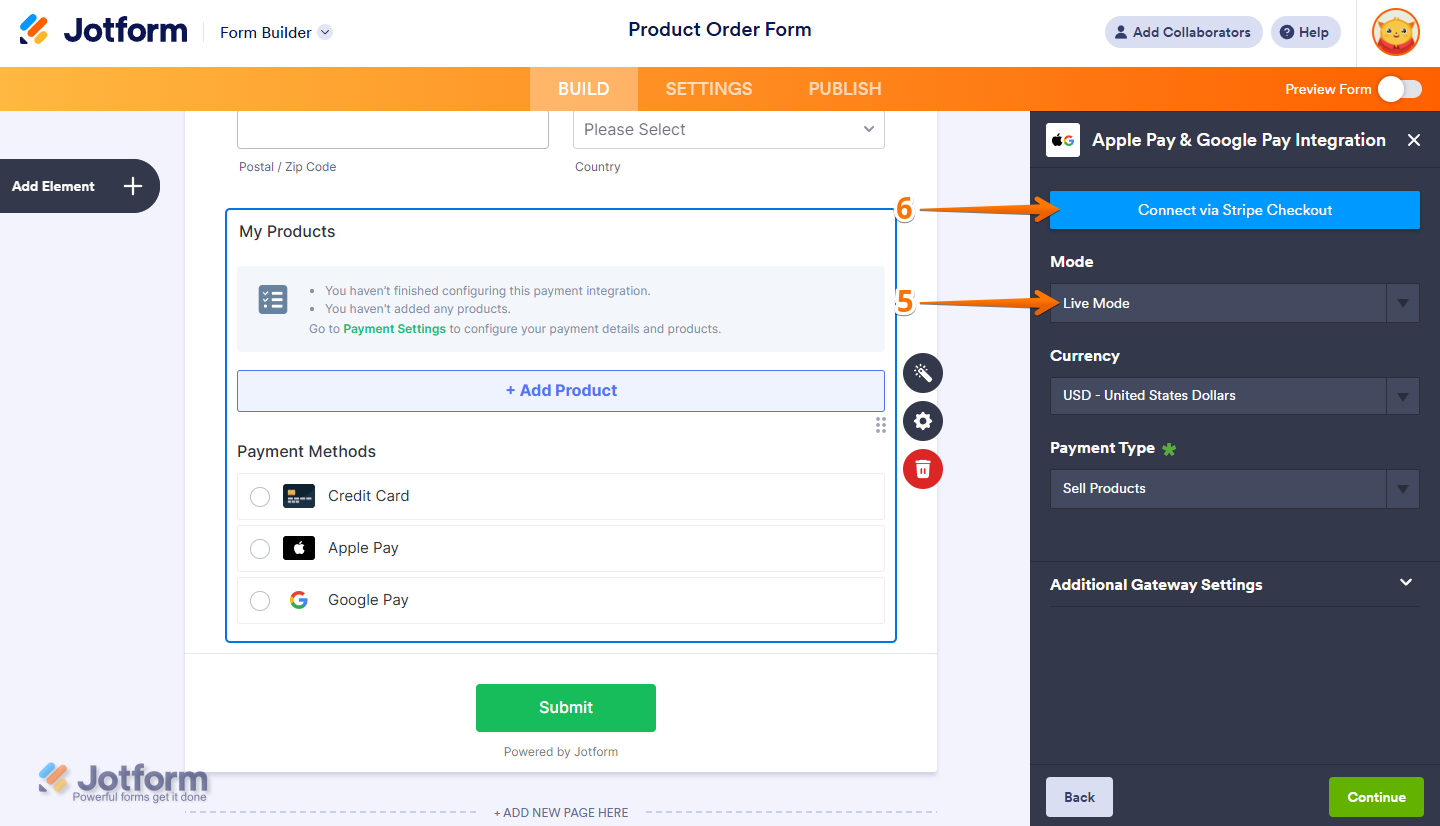
- Next, in the Apple Pay & Google Pay Integration window that opens on the right, select one of these modes from the Mode Dropdown menu:
- Live Mode — Accept real payments from customers.
- Test Mode — Simulate payments for testing purposes without charging actual cards.
- Once you’re done, click on Connect via Stripe Checkout and sign in to the Stripe Checkout account linked to it.
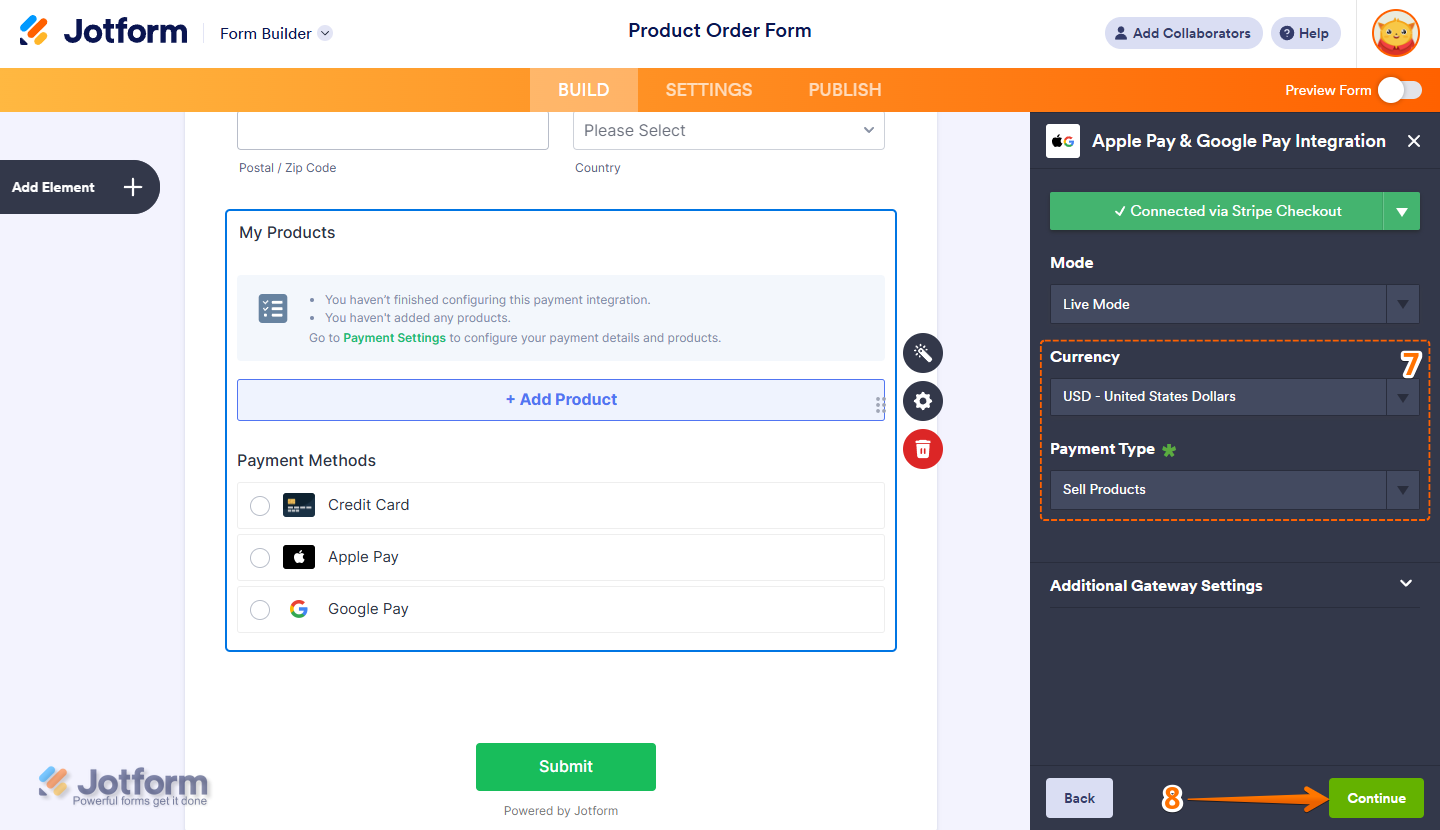
- Once your Stripe Checkout account is connected, set up the following things:
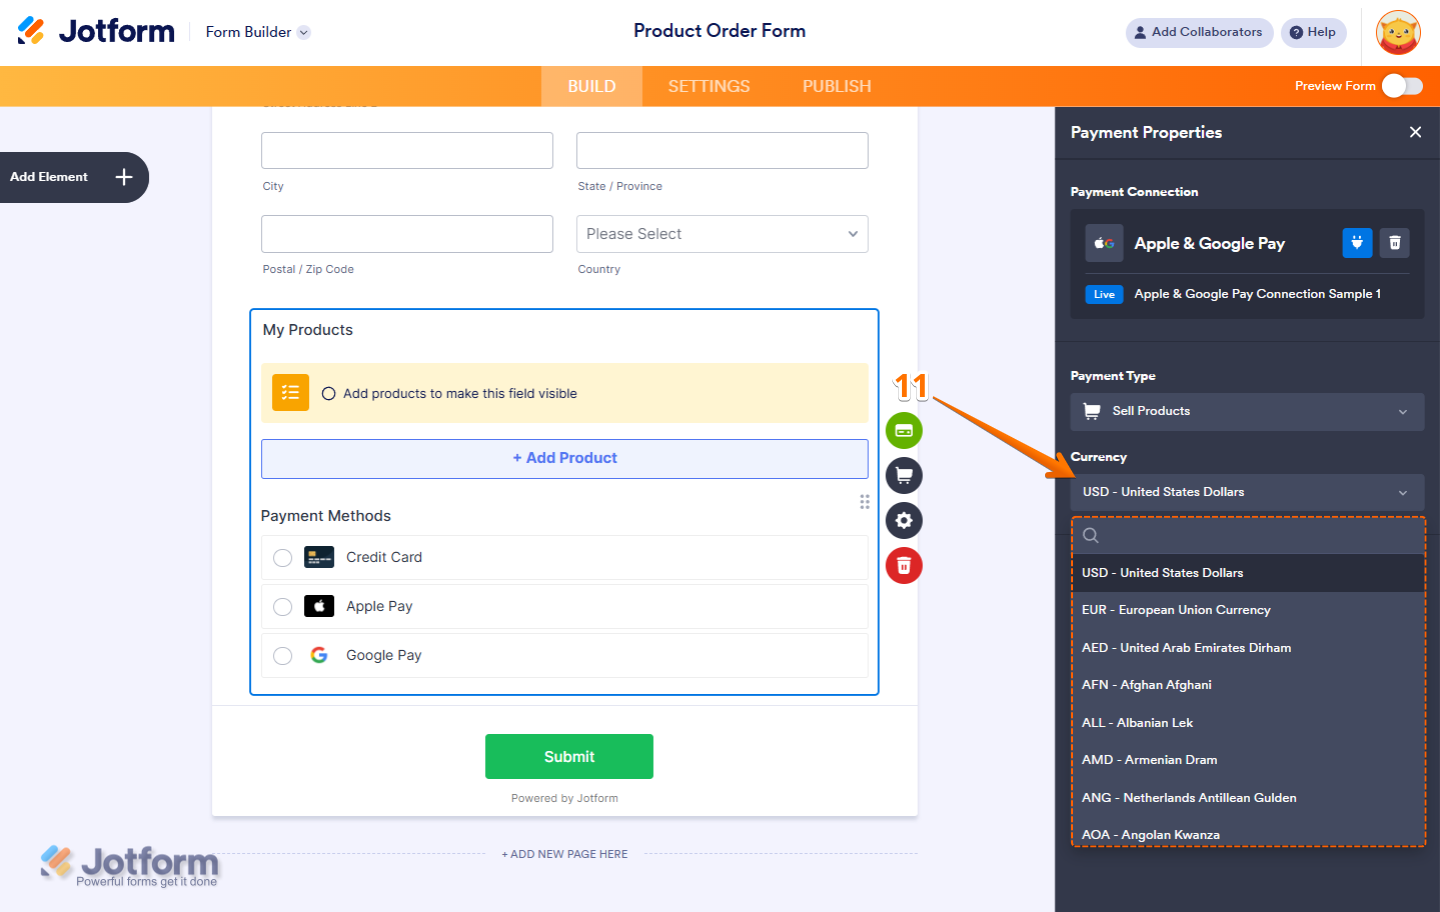
- Currencies — Choose the currency you want to use. For Stripe, you’ll find a complete list of currencies available on the Stripe Currencies page. If you selected Square, the currency is locked based on your Square account settings.
- Payment Type — Select the type of payment you want to collect: Sell Products, Sell Subscriptions, User-Defined Amount, or Collect Donations. If you selected Square, it supports Selling Products, Donations, and User-Defined Amounts only.
- Once everything’s set for the Sell Products and Sell Subscriptions payment types, click on Continue to start creating products and subscriptions for your payment field. For the User Defined Amount and Collect Donations payment types, just click on Save at the bottom.
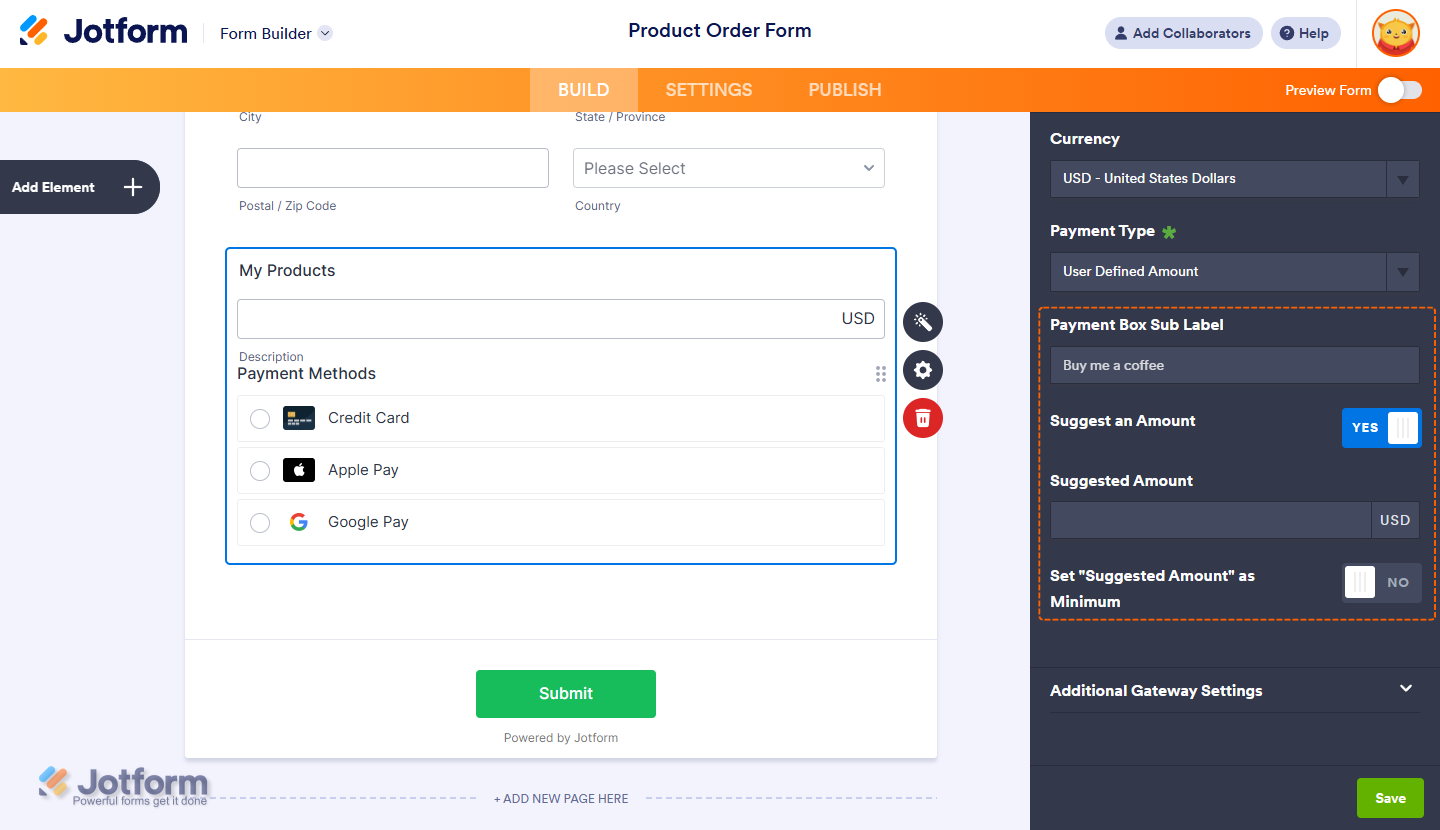
For the User-Defined Amount and Collect Donations payment types, you can enter a description that’ll be shown under the payment box on your form. You can also suggest an amount and set it as the minimum or get the price from a Form Calculation widget, which is useful when you want to pass a calculated amount to your payment field instead of getting it from users. For a full breakdown of how to do it, head over to our guide on How to Pass a Calculation to a Payment Field.
When you expand the Additional Gateway Settings of the Apple Pay & Google Pay Integration section, you’ll see this list of options you can adjust based on the payment type you chose:
- Customer Email Field — Select the form field where users enter their email address for receipt or communication purposes.
- Custom Data Field — Use this to send extra data (like user ID or reference number) to your payment provider.
- Show Total Price on the Form — Enable this to display the total amount directly on your form before users are redirected to the checkout page.
- Users Can Select Multiple Products — This is only available with the Sell Products payment type and is enabled by default. You can toggle this off if you want customers to select only one (1) product per submission.
- Charge Customer Immediately — Enable this if you want to charge the customer right away.
- Clickable Image Preview — This is only available with the Sell Products and Sell Subscriptions payment types and is enabled by default. You can toggle this Off to prevent customers from enlarging product or subscription images.
- Use Decimals — This is only available with the Sell Products and Sell Subscriptions payment types and is enabled by default. You can toggle this Off to hide decimals on both the item prices and total amount.
- Decimal Separator — Choose whether to use a period (.) or comma (,) as the decimal separator based on your regional formatting.
- Send Receipt Email — Enable this to automatically send a receipt to the customer after a successful payment.

Notes
- If you chose Stripe Checkout, you’ll see options for Credit Card, Apple Pay, and Google Pay in Form Builder. But these options won’t appear directly on your form. Instead, they’ll show up on the Stripe Checkout Payment page depending on these requirements mentioned below.
- Apple Pay & Google Pay aren’t supported on all devices and browsers. Google Pay works with Chrome, Firefox, Safari, Edge, Opera, and UC. Apple Pay only works with Safari.
- Apple Pay & Google Pay are automatically enabled when using Square. For Stripe, you’ll need to enable them manually. You’ll find more info in our guide on How to Activate a New Payment Method in Stripe.
- While you (as the form owner) can configure Apple Pay & Google Pay, your users must also have these set up in their browsers. This means they must have a valid payment method saved in their Google Pay or Apple Pay account. If not, these payment options won’t be shown on the payment screen.
Integrating Apple Pay & Google Pay with Reusable Payment Connections
With Jotform’s Reusable Payment Connections feature, you can set up payment integrations like Apple Pay & Google Pay and reuse the same configuration on your other forms without needing to configure it again. To get going, here’s what you’ll do:
- In Form Builder, click on Add Element on the left side of the page.
- Now, in the Form Elements menu, under the Payments tab, click on Apple Pay & Google Pay to add it to your form.
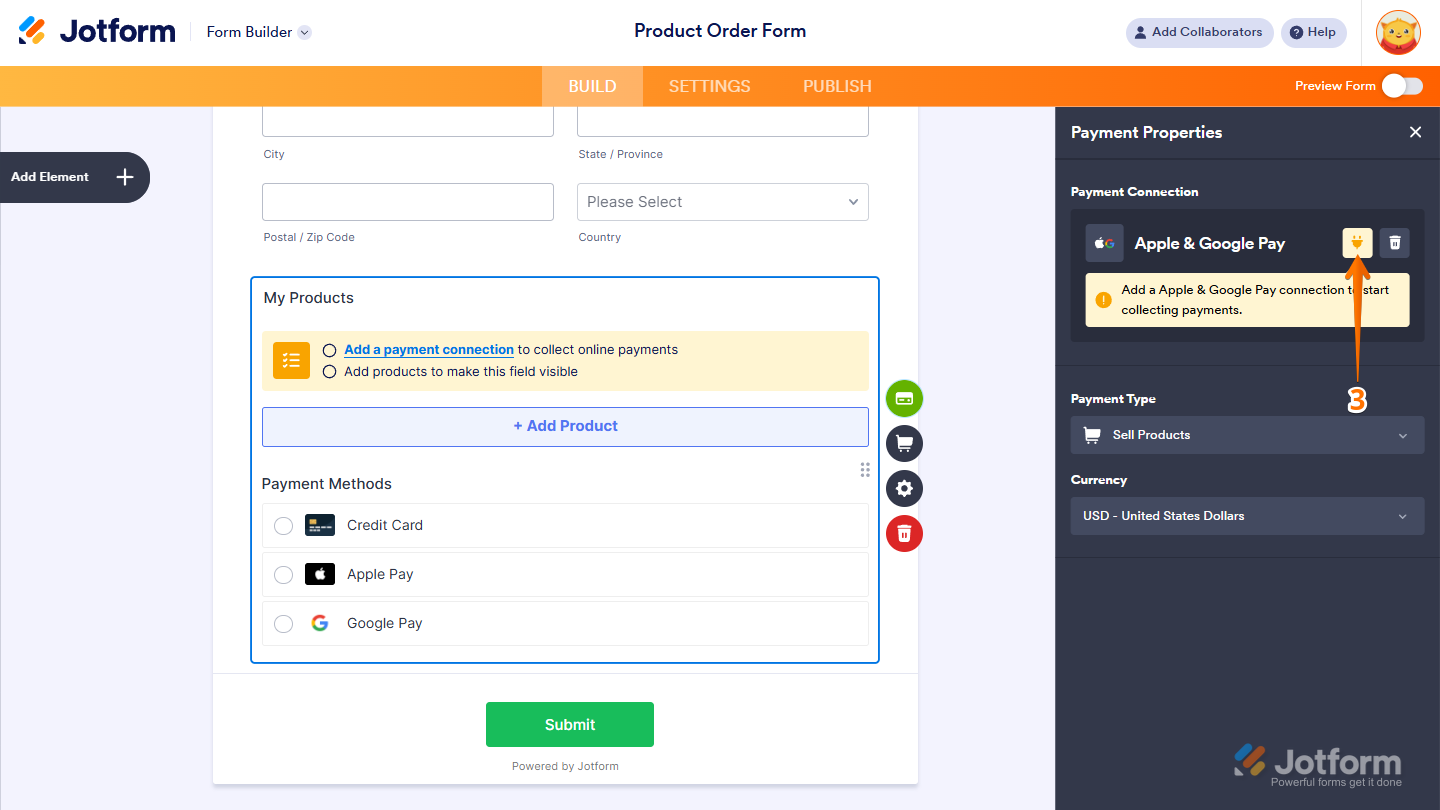
- Then, in the Payment Properties section that opens on the left side of the page, click on the Plug icon.
- Next, in the Apple Pay & Google Pay Connection window that opens on the right side of the page, choose one of the supported payment providers:
- Square — Connect your Square account to accept Apple Pay & Google Pay directly through your form.
- PayPal — Link your PayPal account so you can start accepting Apple Pay & Google Pay right from your form.
- Stripe Checkout — Use Stripe Checkout to enable Apple Pay & Google Pay as payment options during checkout.
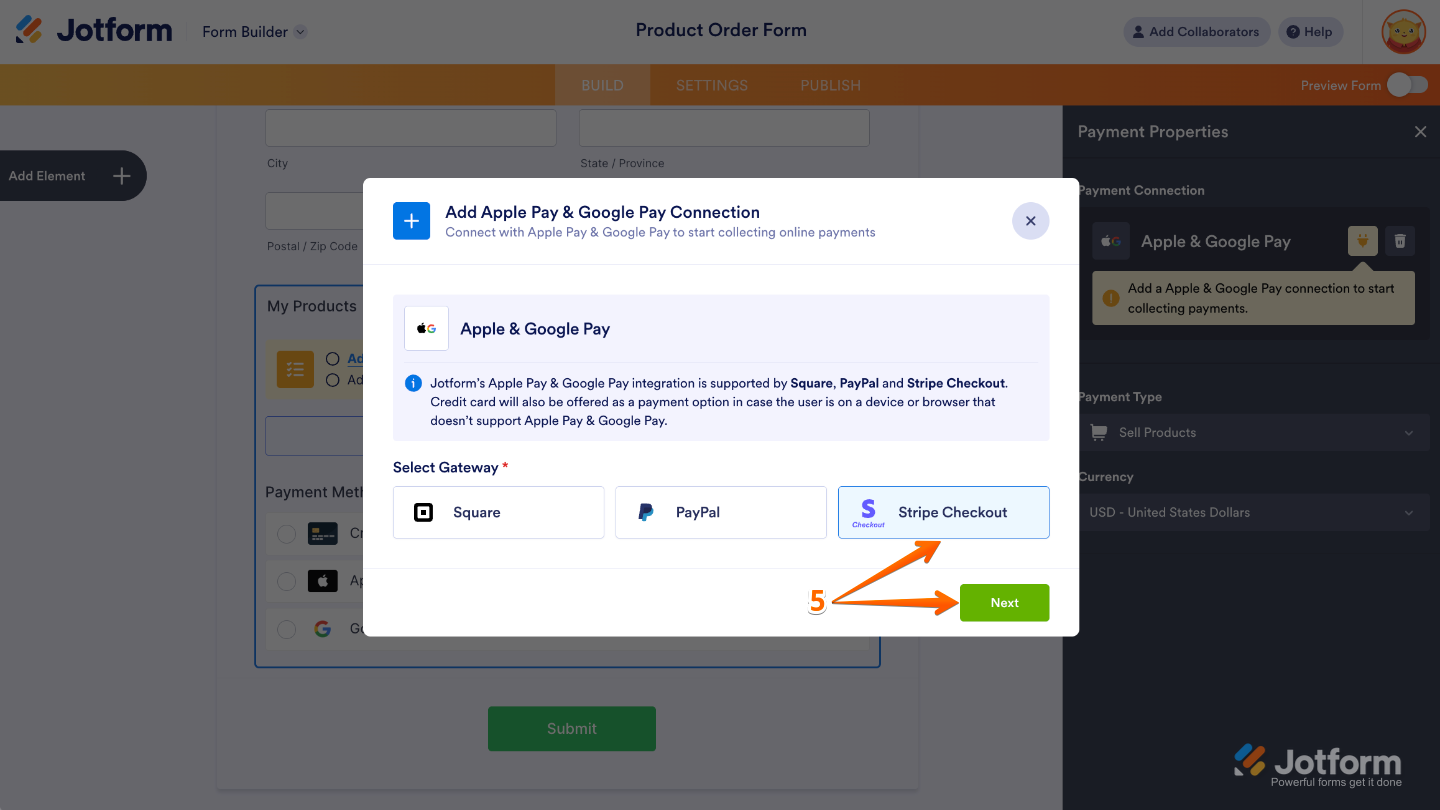
- After you select a payment provider, for example, Stripe Checkout, click on Next.
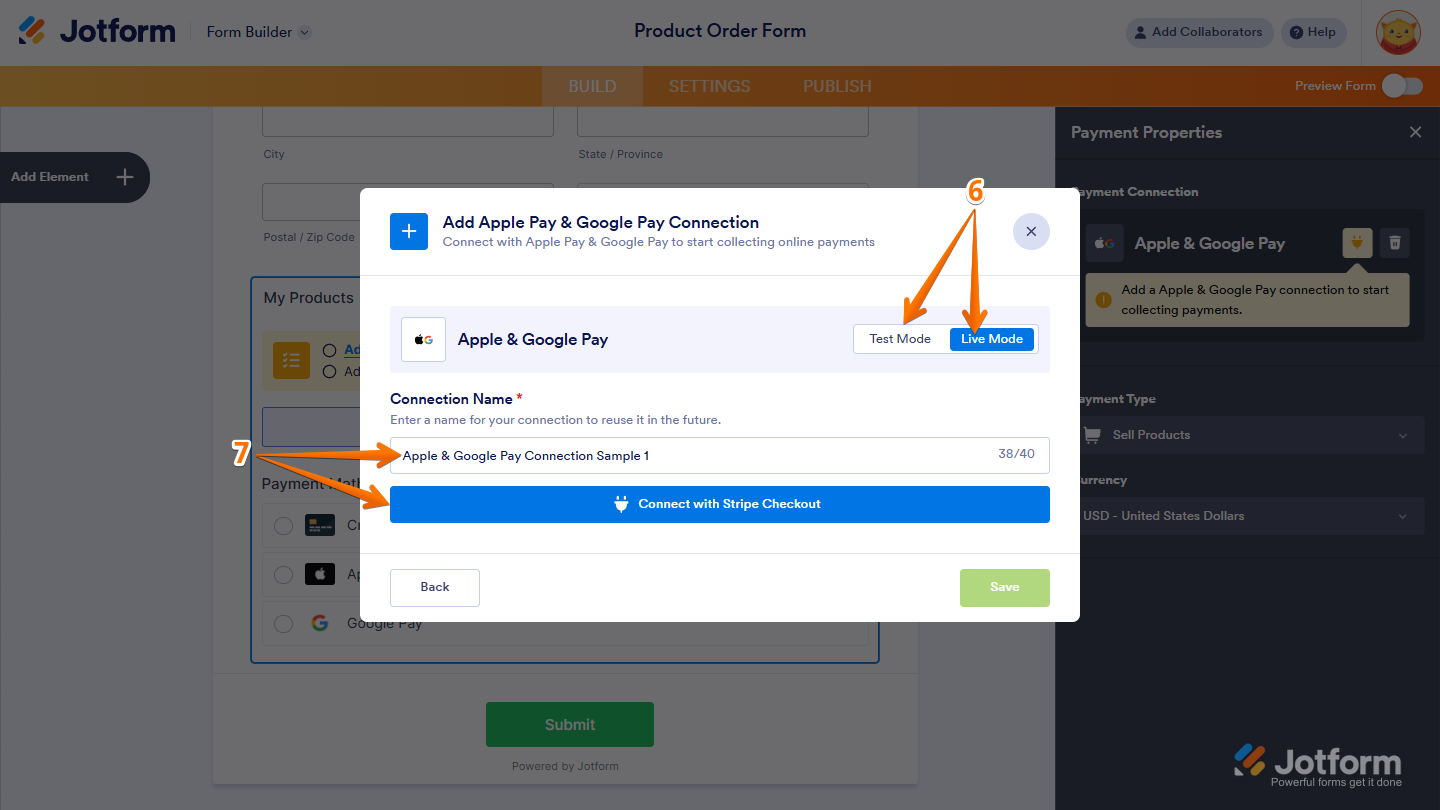
- Now, in the Apple Pay & Google Pay window, click on either Test Mode or Live Mode at the top to select the environment for your payment connection.
- Then, in the Connection Name section, enter a name you haven’t used in other reusable payment connections in your account, if there are any, and click on Connect with Stripe Checkout.
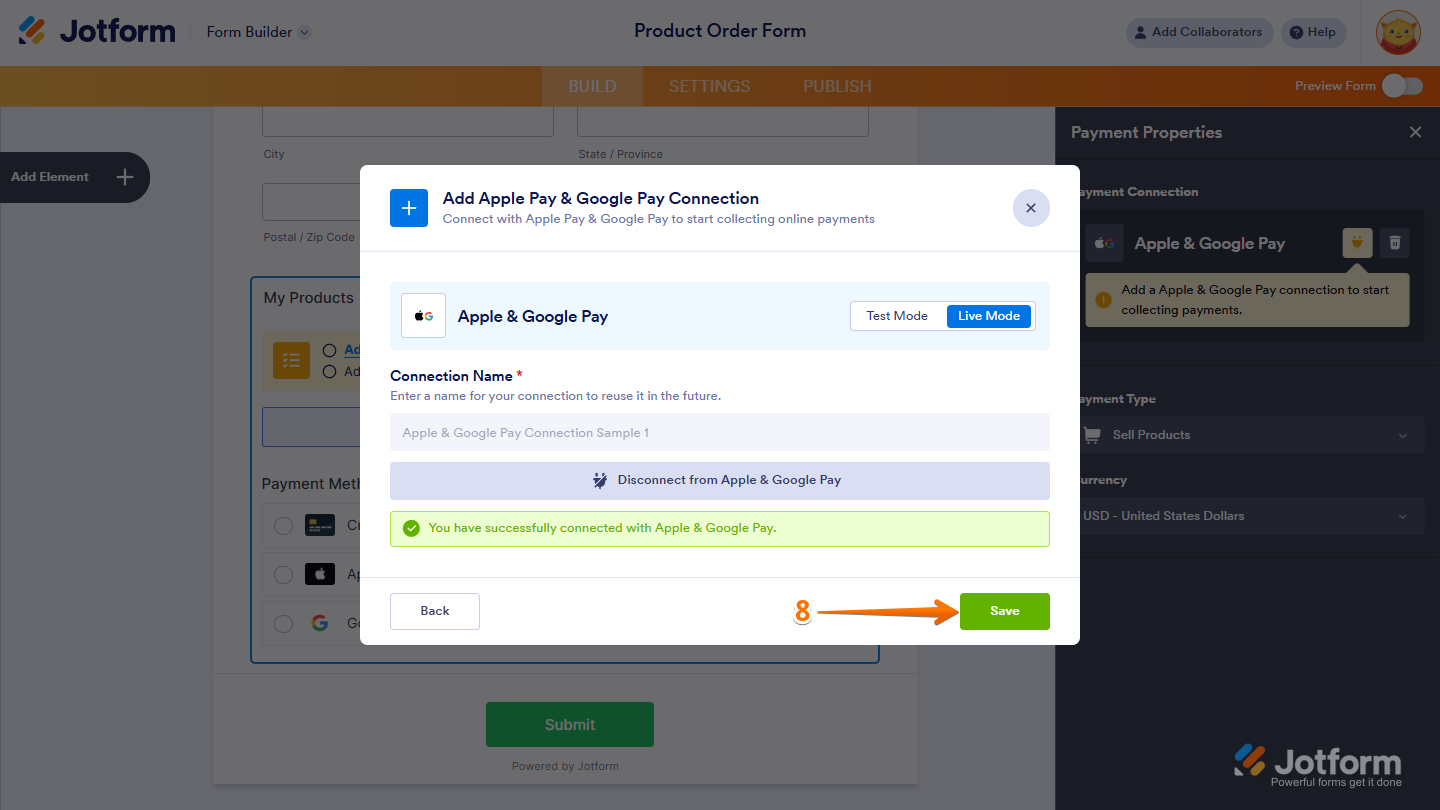
- Once it’s connected, click on Save at the bottom to add the reusable payment connection to your account.
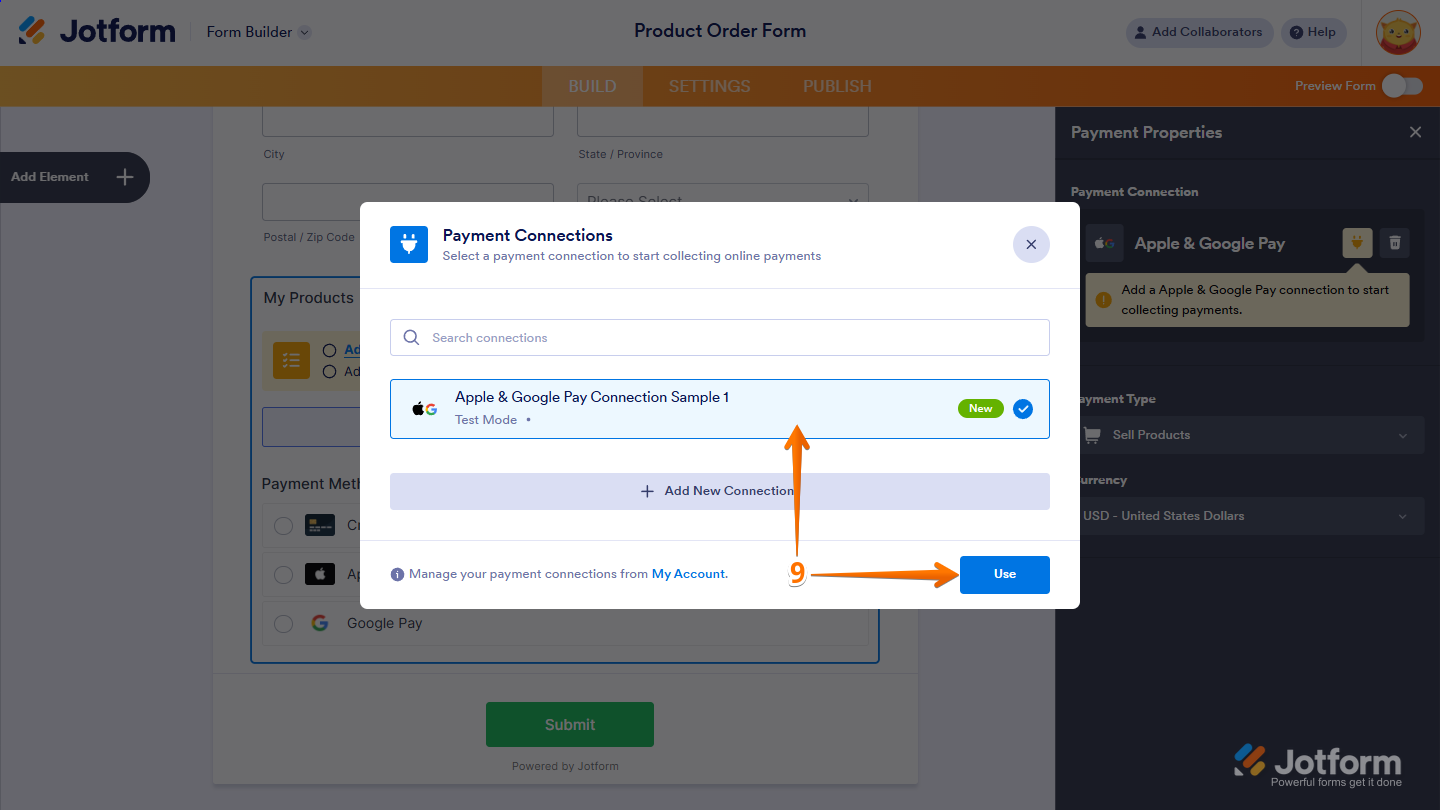
- Now, in the Payment Connections window, click on the Apple & Google Pay Connection you’ve just added, and then click on Use at the bottom.
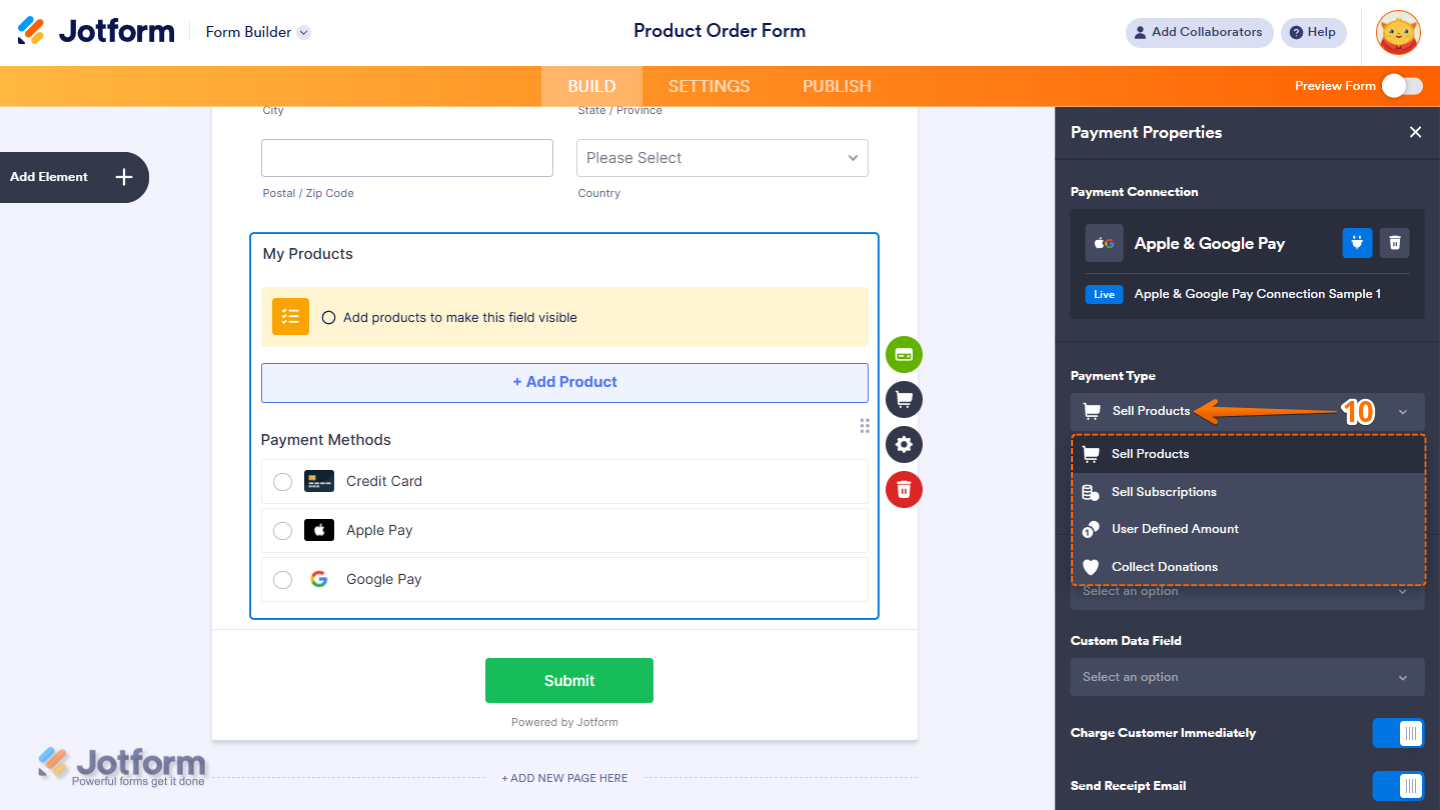
- After that, in the Payment Type Dropdown menu, select what you’d like the payment to be processed for:
- Sell Products — This is selected by default. Use this to sell physical or digital goods at a fixed price, allowing customers to make a one-time purchase.
- Sell Subscriptions — Choose this to charge customers on a recurring basis for services, memberships, or other ongoing access.
- User-Defined Amount — This lets customers enter the amount they want to pay. It’s useful for tipping, custom amount pricing, or flexible payments.
- Collect Donations — Select this to accept voluntary contributions. It’s commonly used for fundraising, nonprofit support, or charitable causes.
- Then, in the Currency Dropdown menu, select one of the currencies available with the integration. Check out the Stripe Currencies page for a complete list of those.
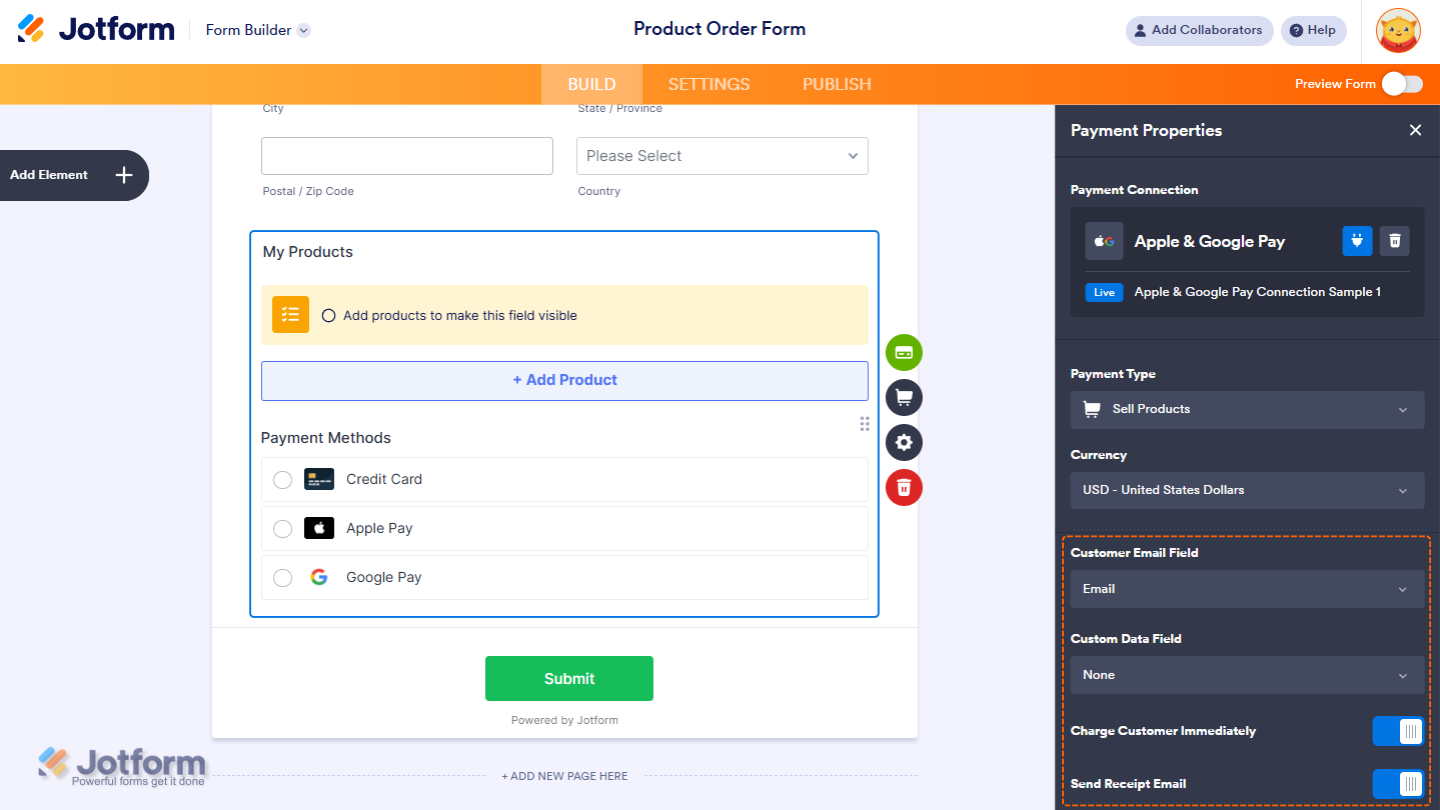
You can also adjust these other gateway settings if needed:
- Customer Email Field — Select the form field where users enter their email address for receipt or communication purposes.
- Custom Data Field — Use this to send extra data (like user ID or reference number) to your payment provider.
- Charge Customer Immediately — Enable this if you want to charge the customer right away.
- Send Receipt Email — Enable this to automatically send a receipt to the customer after a successful payment.
And you’re all set! You’ve successfully set up your Apple Pay & Google Pay Reusable Payment Connection. Now, you can use this same configuration on any other form or app you create. Explore our guide on How to Add and Manage Reusable Payment Connections to dive in deeper.
We’ve also got some other helpful guides that you might want to take a look at:
- Setting Up Your First Order Form
- How to Set Up a Recurring Payment Option
- How to Add Options to Payment Forms
- How to Add Coupon Code to Payment Forms
- How to Add Tax to Your Payment Form
- How to Add Shipping Cost to Payment Forms
- How to Generate an Invoice for Your Payment Form
- How to Enable and Manage Product Stocks in Payment Fields

Send Comment:
1 Comments:
More than a year ago
Is it possible to enable Apple Pay and Google Pay to sell subscriptions? Looks like I can only enable it to sell products.