With Jotform Teams, you can easily manage roles and permissions for your Enterprise server’s team members, allowing you to assign responsibilities, control access levels, and ensure efficient collaboration across your organization.
Giving roles to your Team Members is pretty simple. Here’s how to do it:
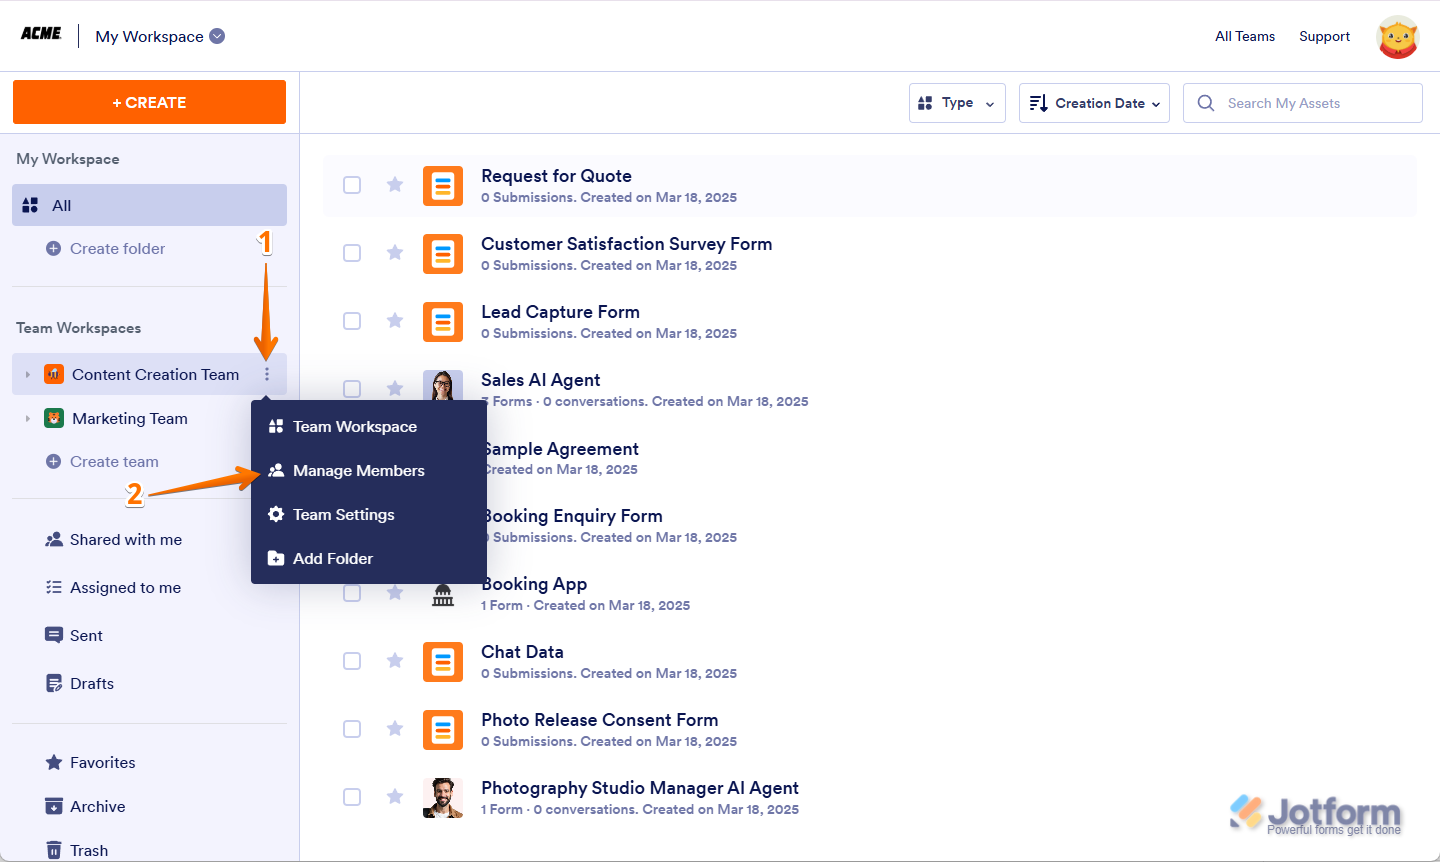
- On your My Workspace page, hover your mouse over the team you want to manage on the left side of the screen and click on the Three Dots icon.
- In the Dropdown menu that opens up, click on Manage Members.
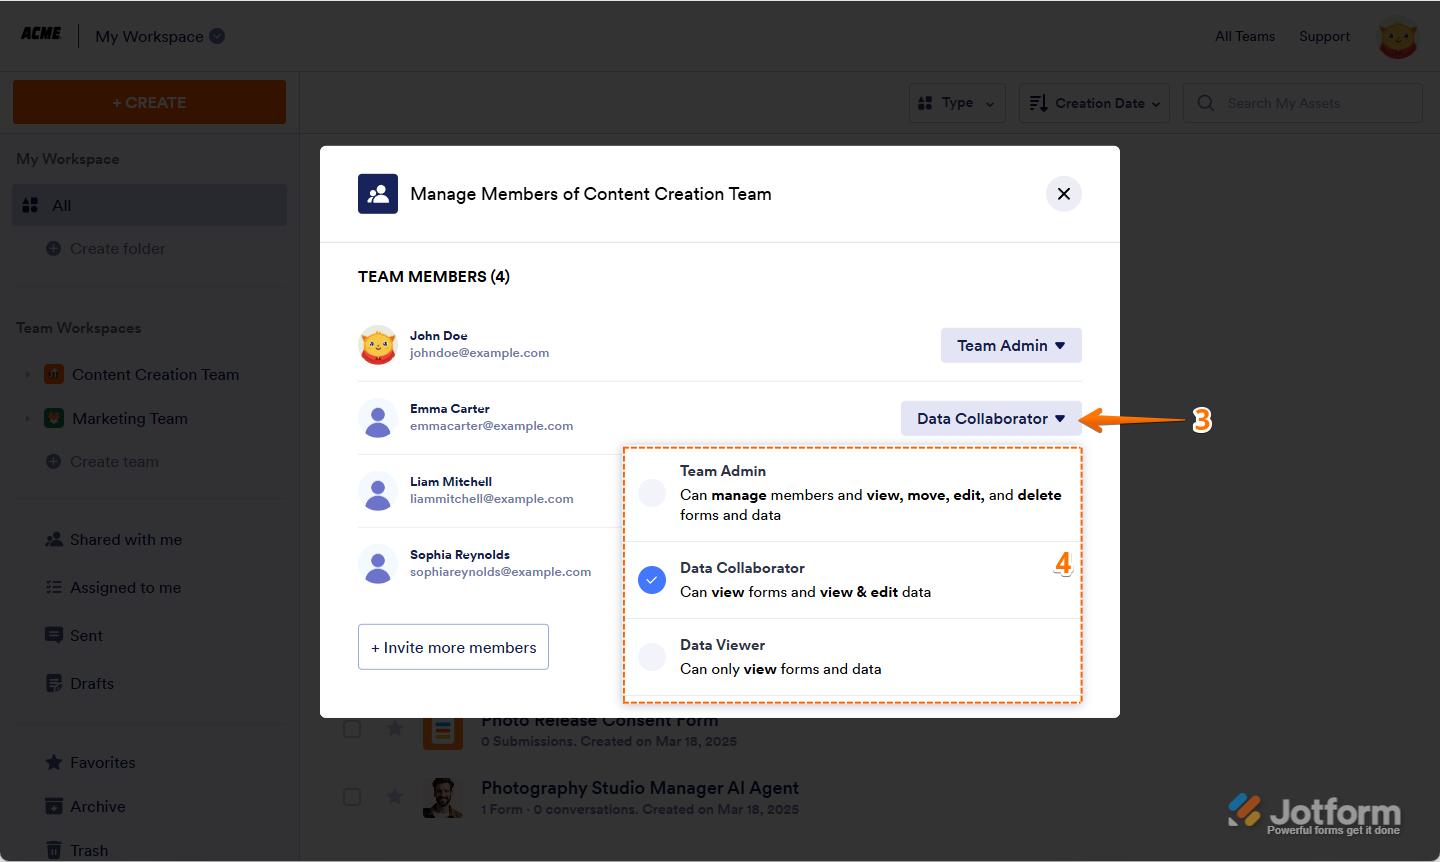
- In the window that opens, click on the Downward Arrow icon on the right side of your team member.
- Now, select from the following role options:
- Team Admin — Can manage members and view, move, edit, and delete assets and data.
- Data Collaborator — Can view assets and edit data.
- Data Viewer — Can only view assets and data.
- Creator — Can view and edit assets, but can’t view data.
- Remove from Team — Can revoke a member’s access and remove them from the team.
Note
You can also manage your members from your team’s settings and Workspace pages. Check out this guide on Managing Team Members to learn more about it.
That’s it! With just a few clicks, you can tailor your team’s access and responsibilities — keeping your workspace organized, and your data secure.


Send Comment: