With Stripe Checkout, you can customize your payment methods to offer multiple payment options for your customers. Stripe offers this feature as a Dynamic Payment Method. It allows you to use a particular configuration to control which payment methods to display when you connect your Stripe account to apps such as Jotform.
When the Dynamic Payment Method is active, Stripe automatically shows the most relevant payment methods based on a customer’s location.
Below are the steps on how to turn a payment method on or off with Stripe Checkout:
- Log in to your Stripe dashboard.
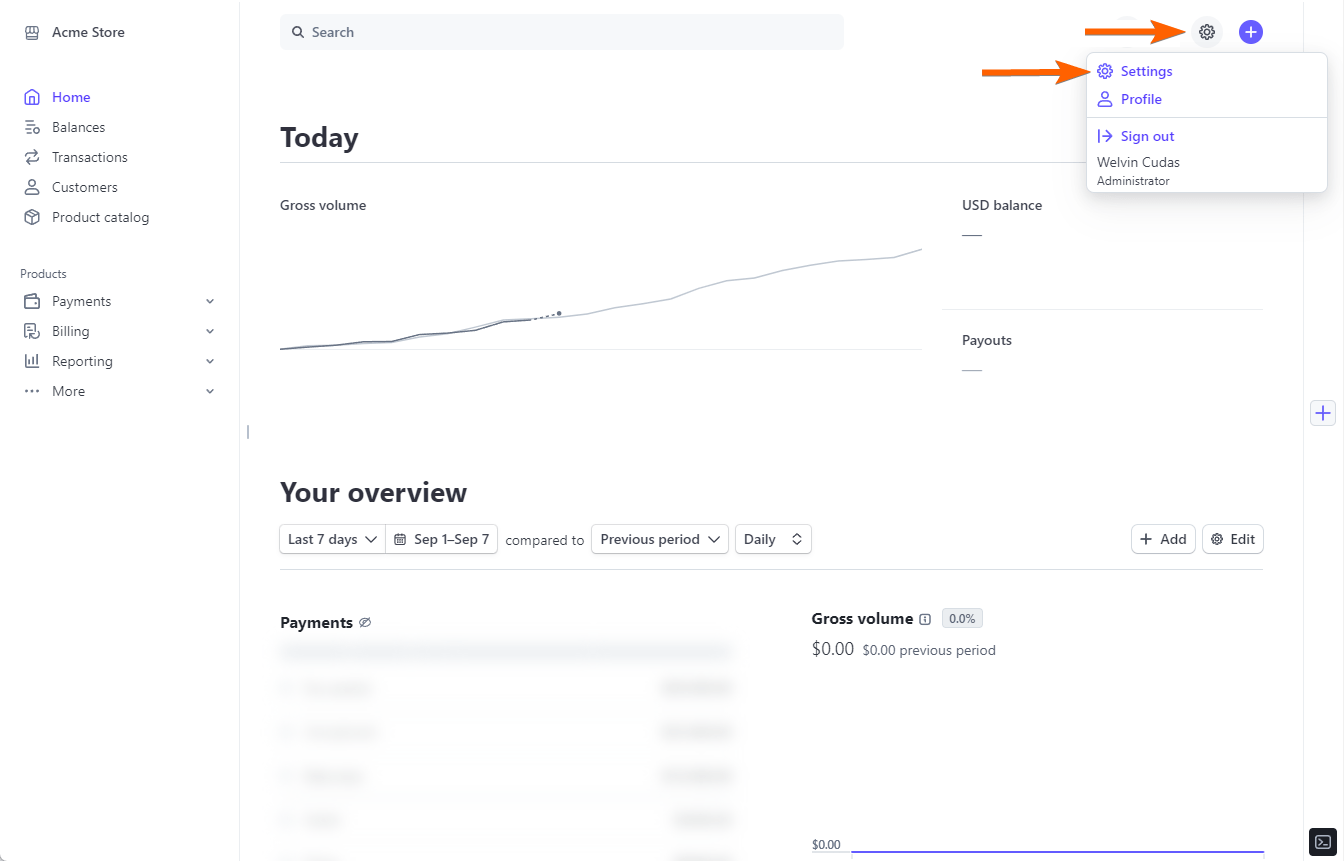
- Click the Settings (gear icon) at the upper right side of the navigation.
- Click the Settings option from the dropdown.
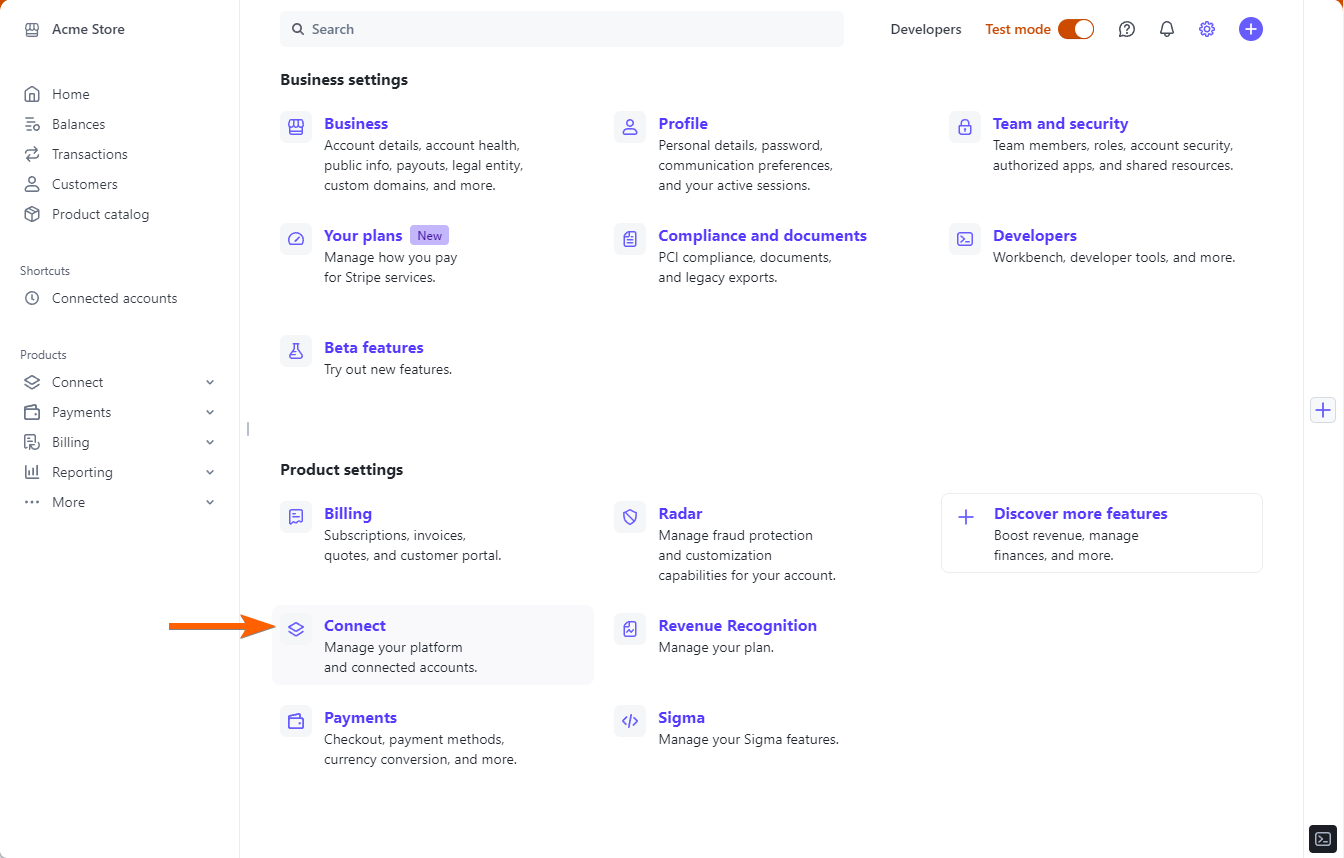
- Select Connect from the list of Stripe features. Ensure that the Connected account is already set up on your account. Visit Stripe – How Connect Works to learn more.
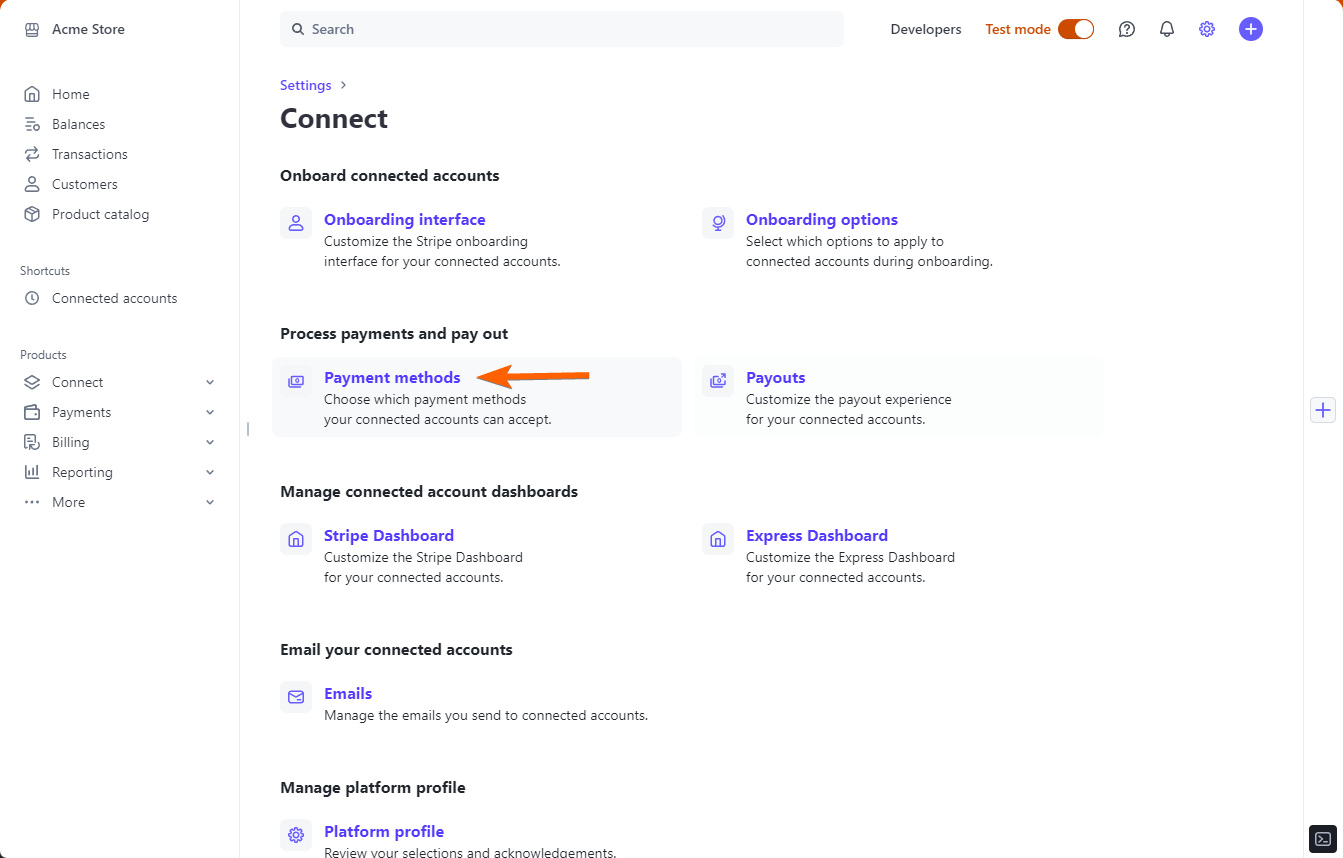
- Choose Payment Methods from the list.
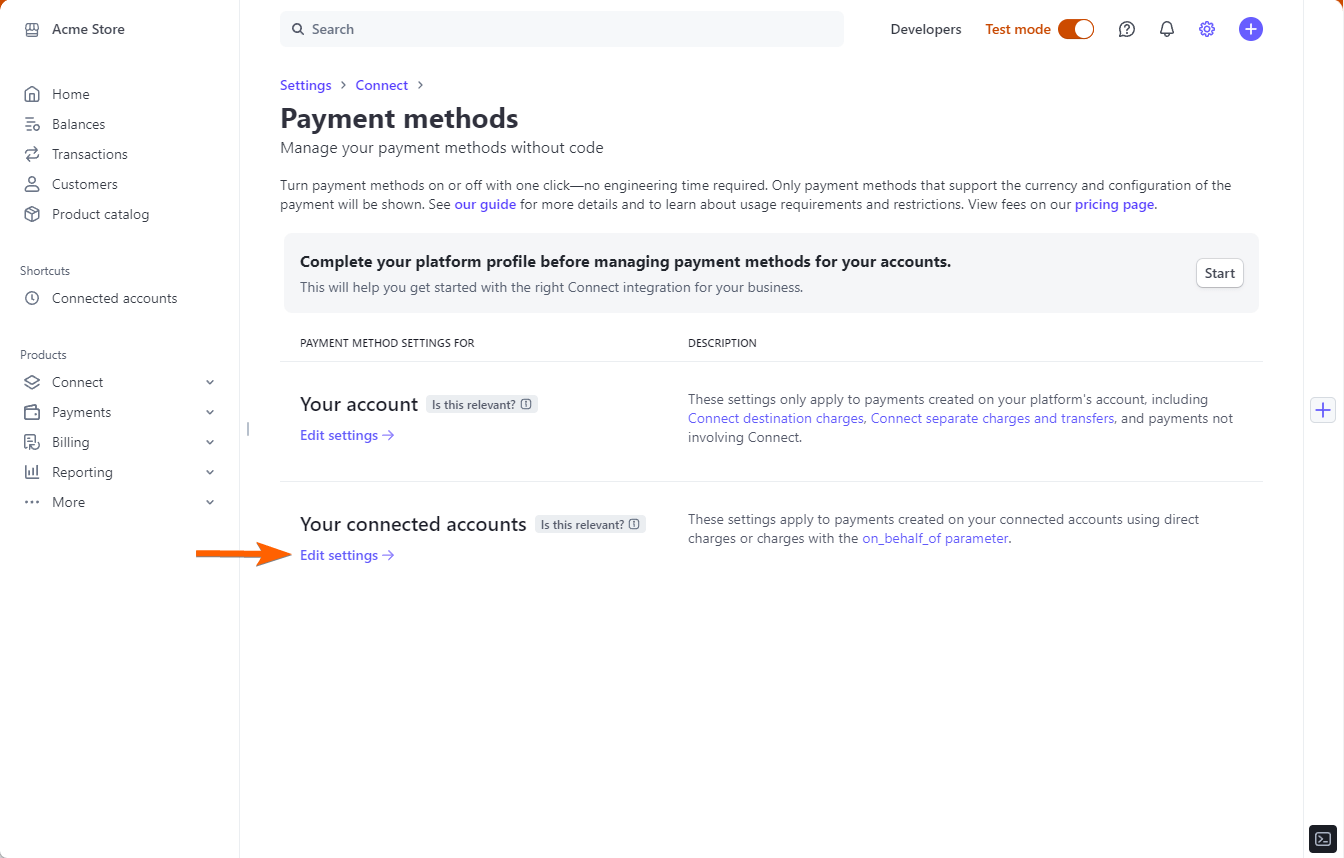
- Click the Edit Settings from the Your Connected Accounts section.
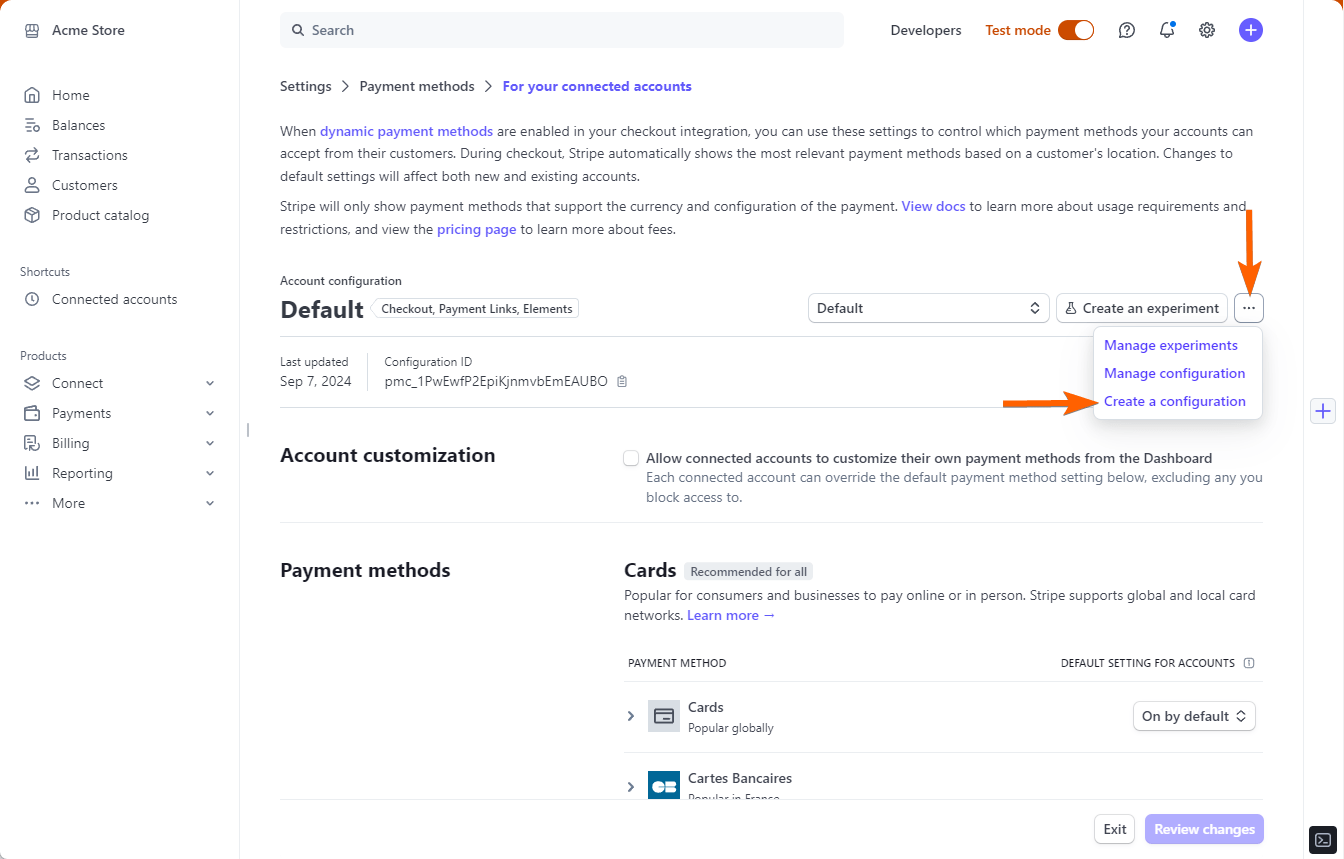
- At this stage, you can now enable or disable your payment methods with Stripe Checkout. However, this will be your default configuration. If you wish to control the payment methods for Jotform, you must create a new configuration. To do so, click the 3-dots menu from the toolbar, and choose Create a configuration option.
See also: Stripe – Payment method configurations.
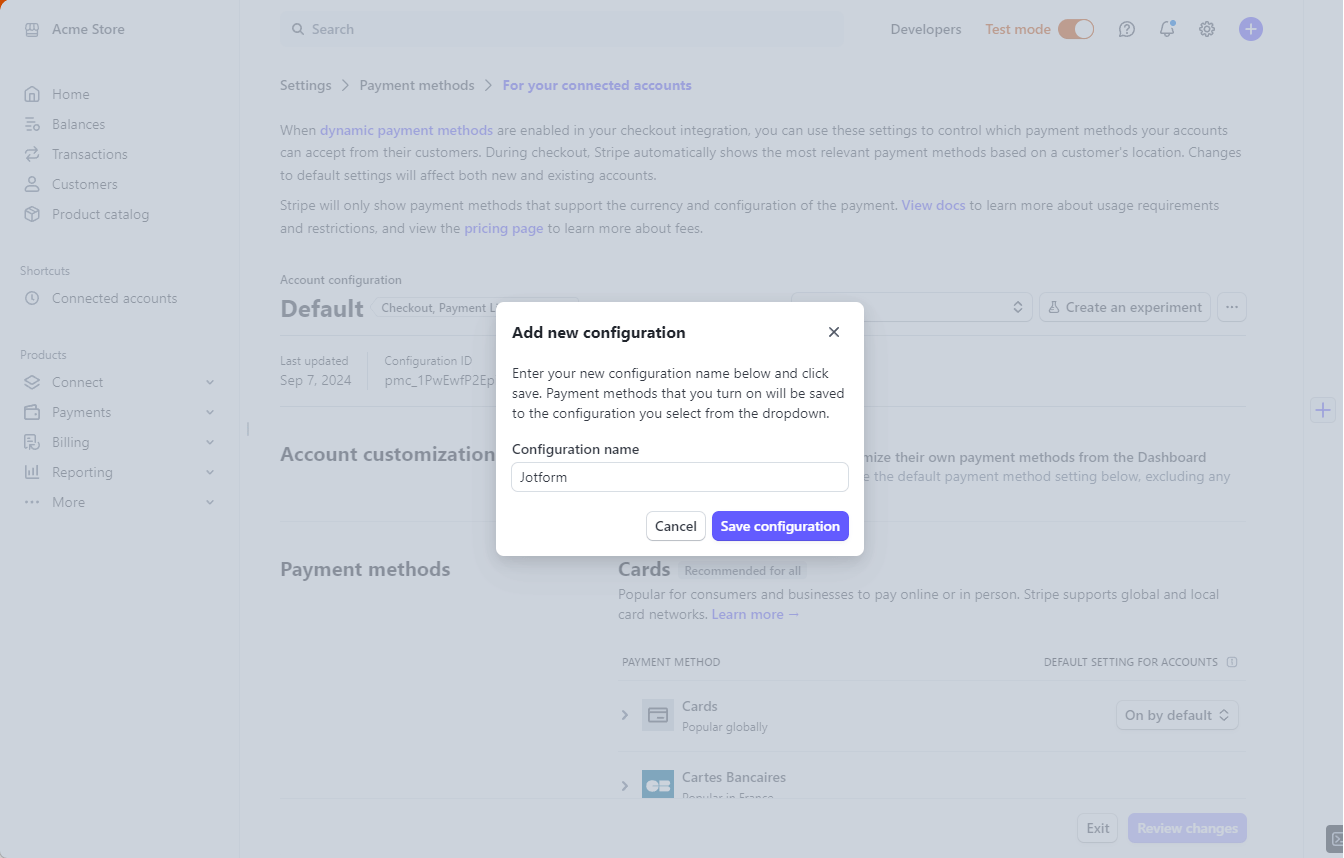
- Give the configuration a name, and save it.
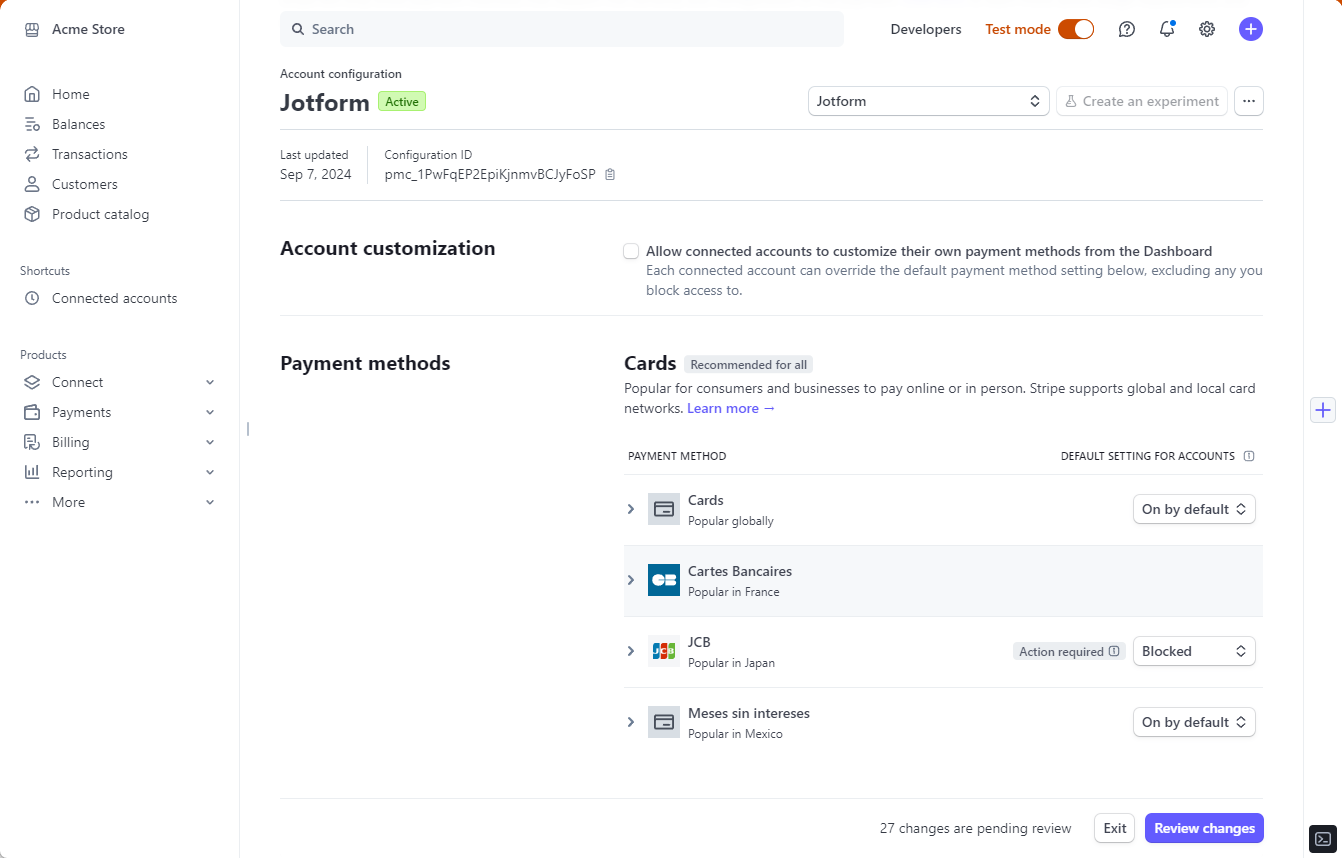
- You should see the new configuration you’ve created. Enable or disable the payment methods as shown. Click the Review Changes button after.
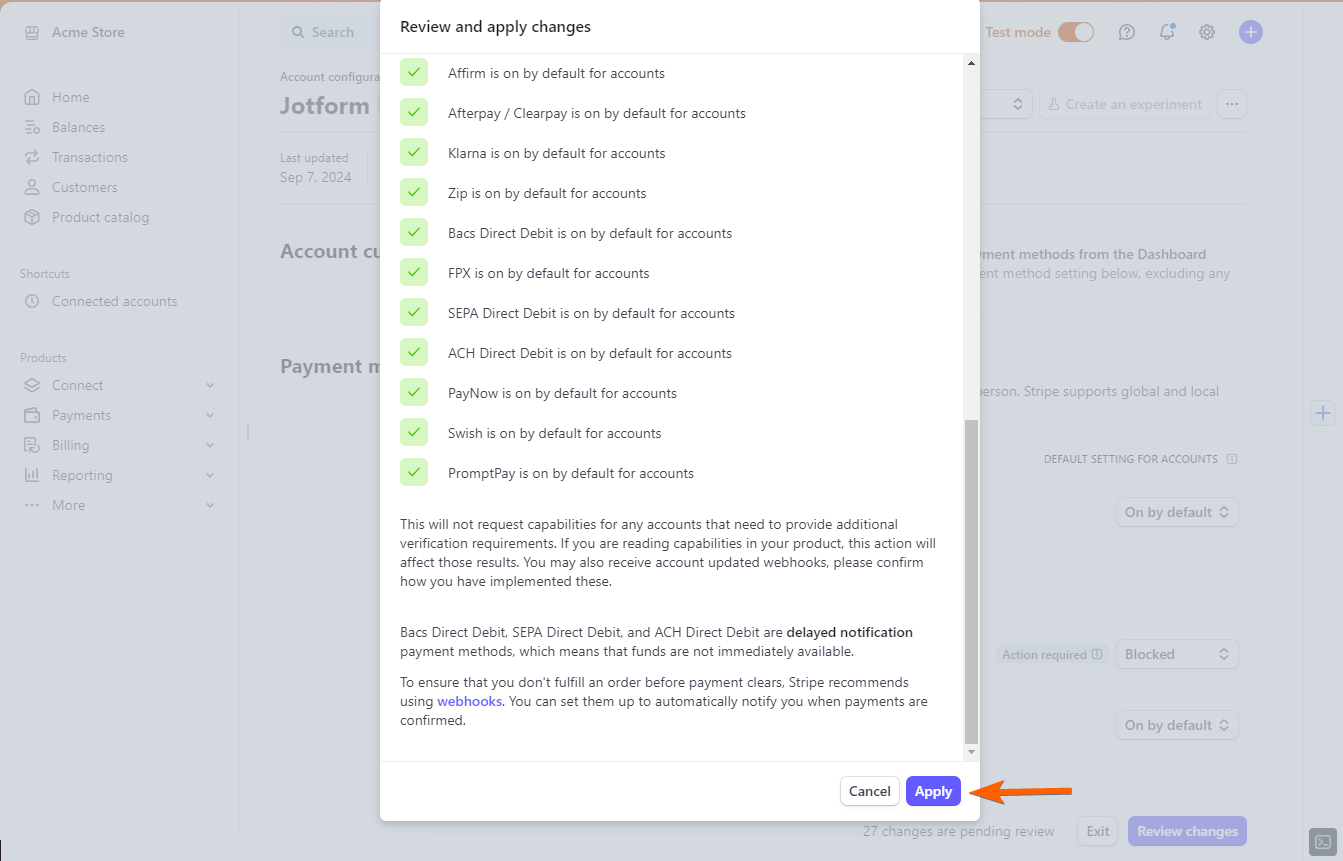
- Finally, click the Apply button to complete your setup.
Send Comment: