Overview
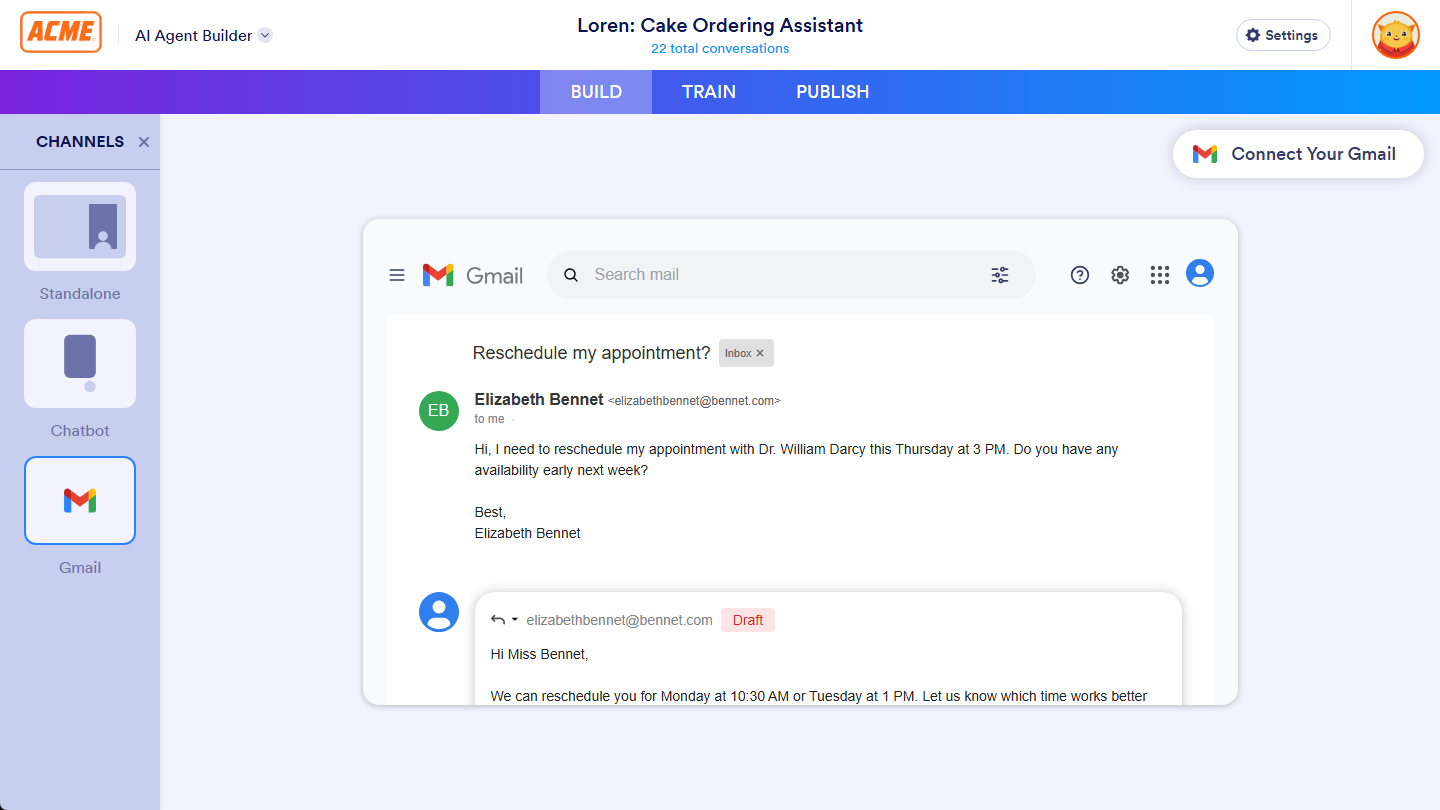
Within the Admin Console, admins can easily enable Gmail Agent, so users in their organization can create AI-powered assistants that simplify email management. These agents can draft replies, organize the inbox with smart labels, and help maintain consistent communication—all while giving users the final say before sending.
Enabling Gmail Agent Creation Organization Wide
It’s a valuable tool for teams that want to save time, keep their messaging aligned, and stay on top of busy inboxes. Once enabled, everyone on your server can start creating Gmail AI Agents immediately.
Once AI Agent creation is enabled on your Enterprise Server, enabling Gmail Agent for your users takes only a moment—here’s how:
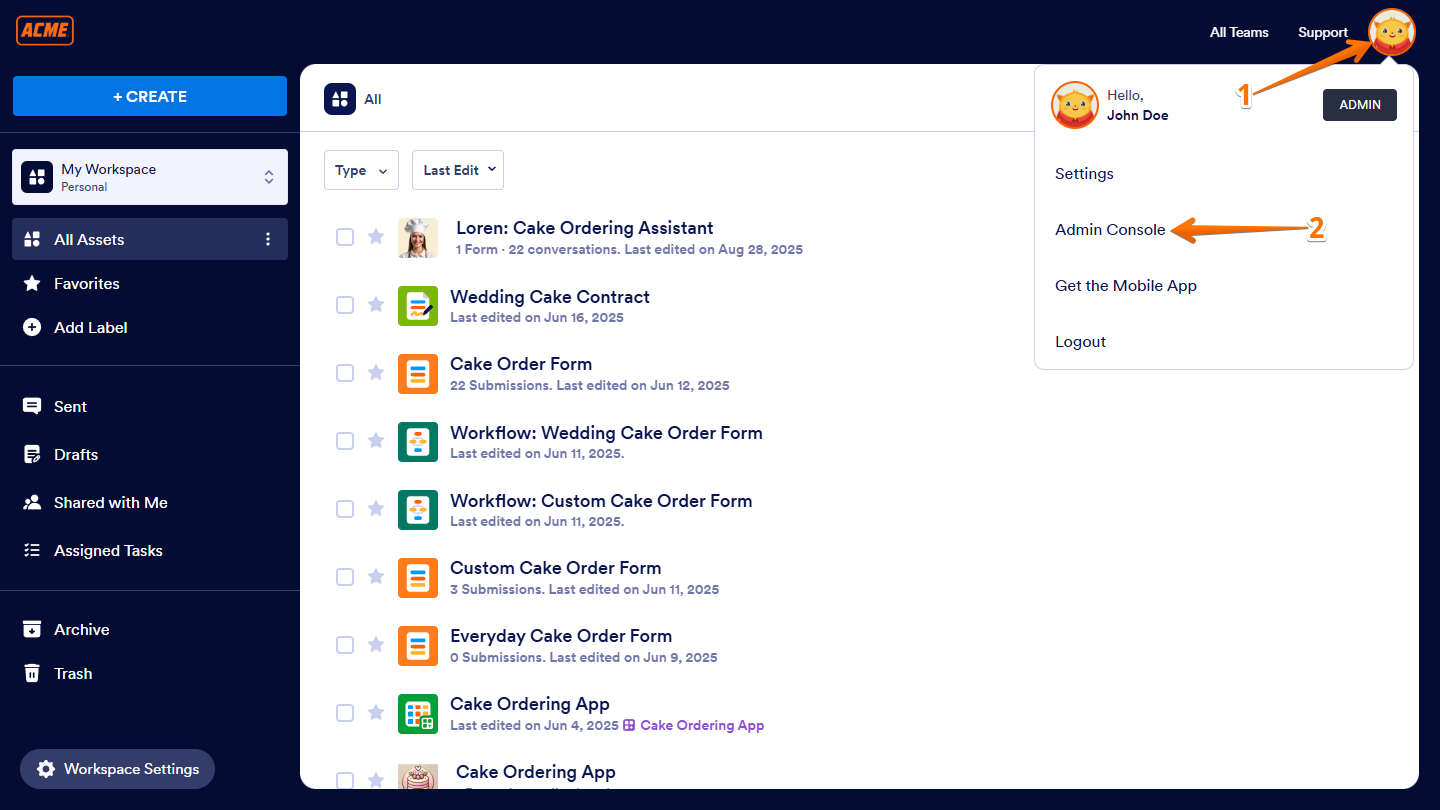
- In the top-right corner of your My Workspace page, click on your Avatar/Profile picture.
- Then, in the menu that comes up, click on Admin Console.
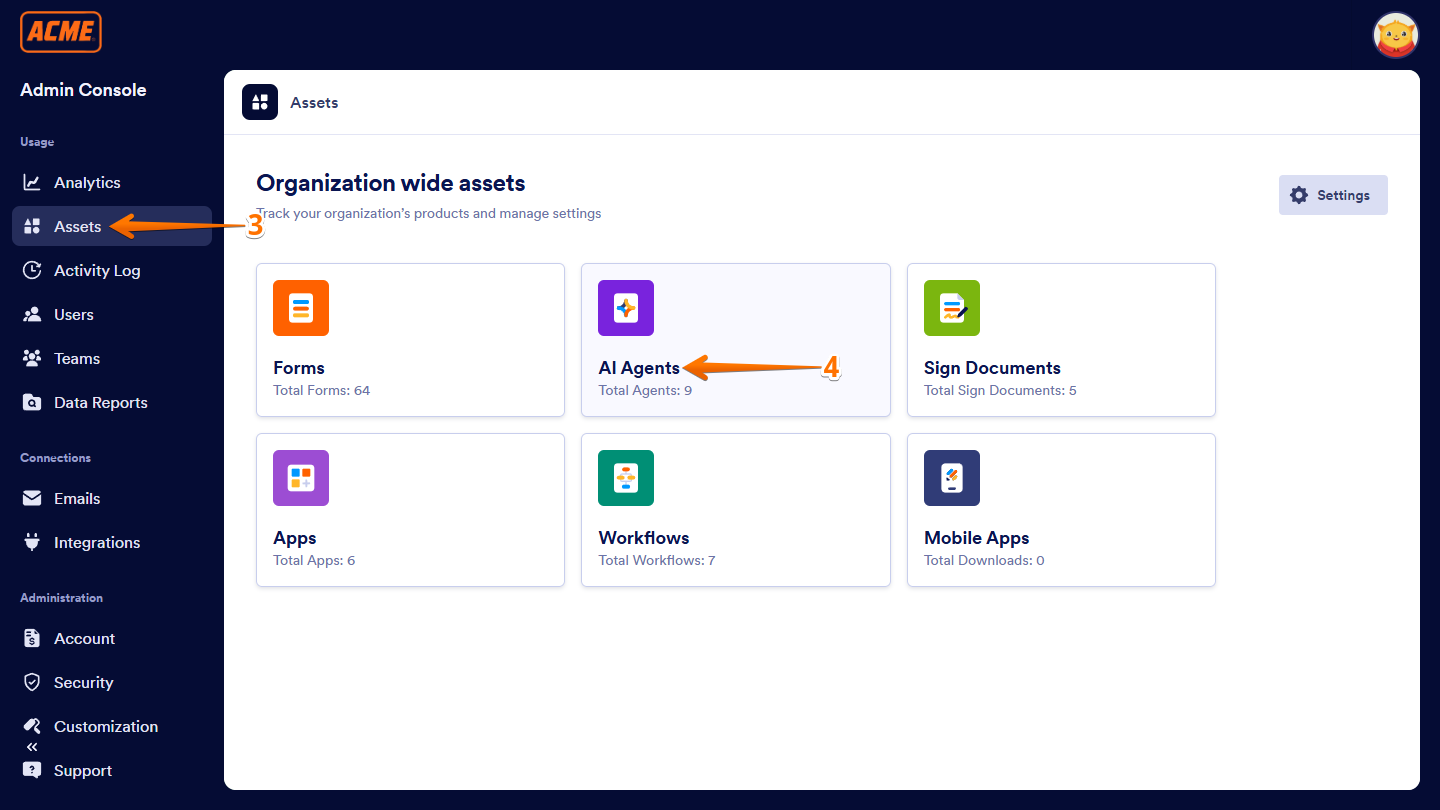
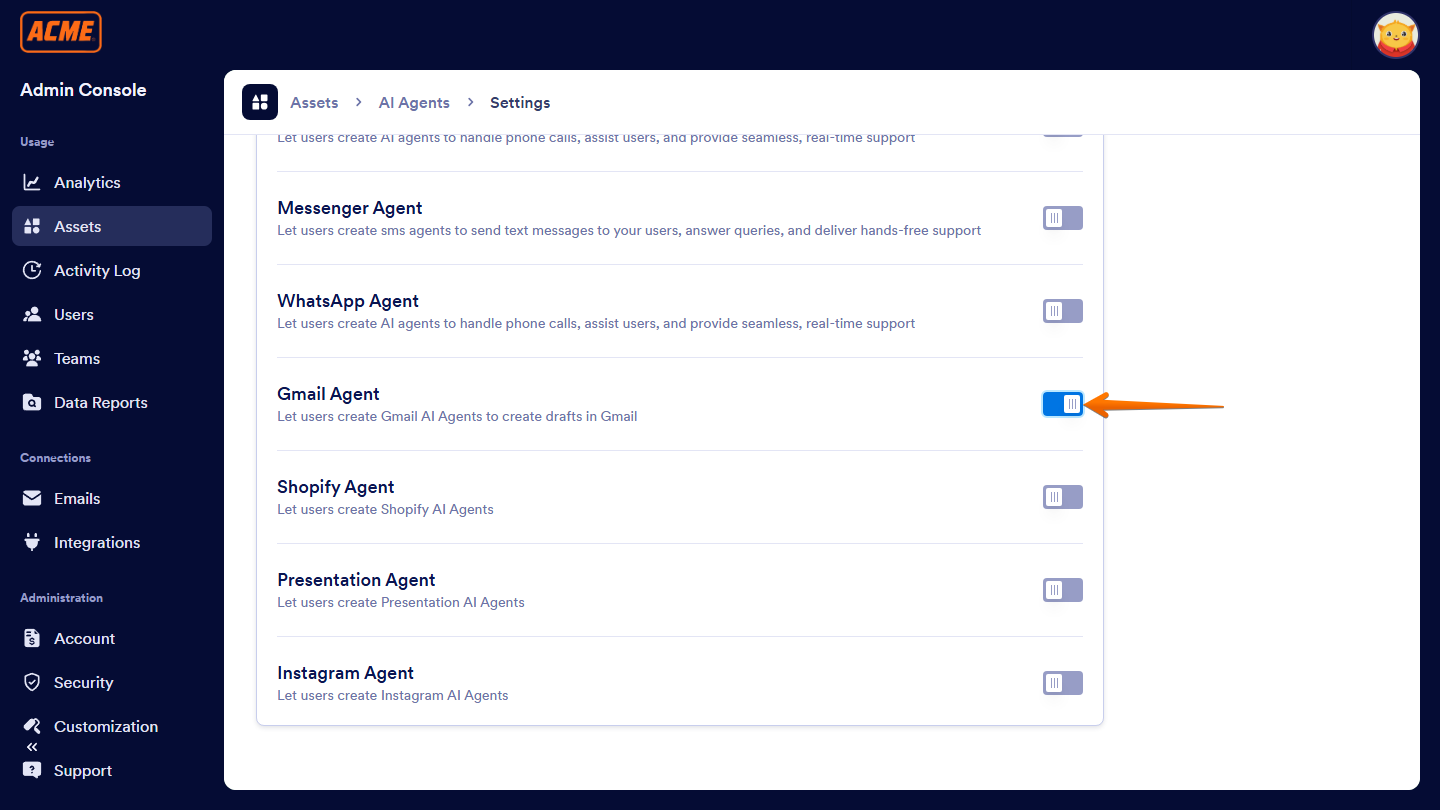
- Now, in the menu on the left side of the Admin Console page, click on Assets.
- Then, in the Organization Wide Assets section on the right, click on AI Agents.
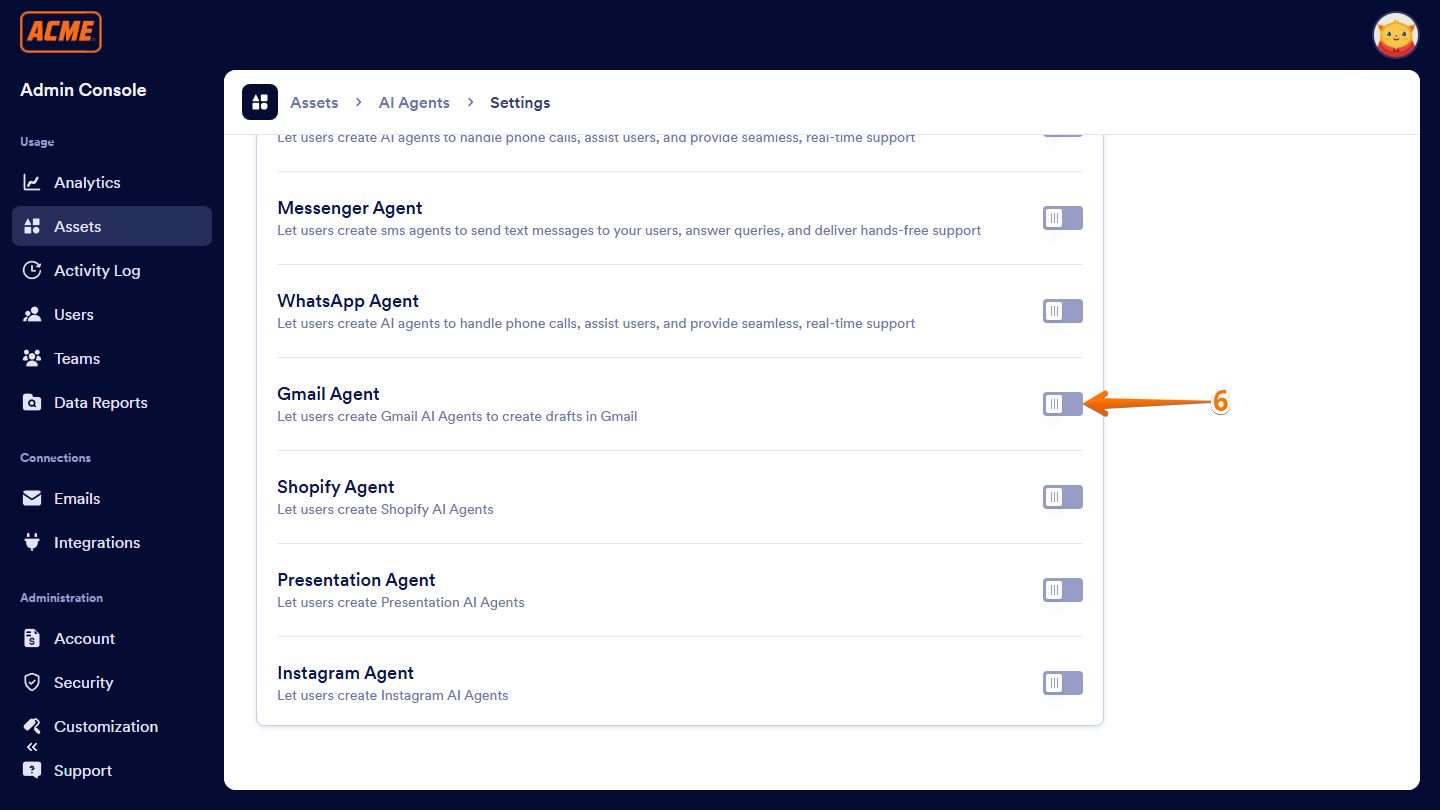
- Next, on the right side of the AI Agents section, click on Settings.

- Now, under the AI Agent Settings section, scroll down to Gmail Agent and, on the right side of it, toggle it on.
- Then, in the Enable Gmail Agents window that pops up, click on Yes, Enable.
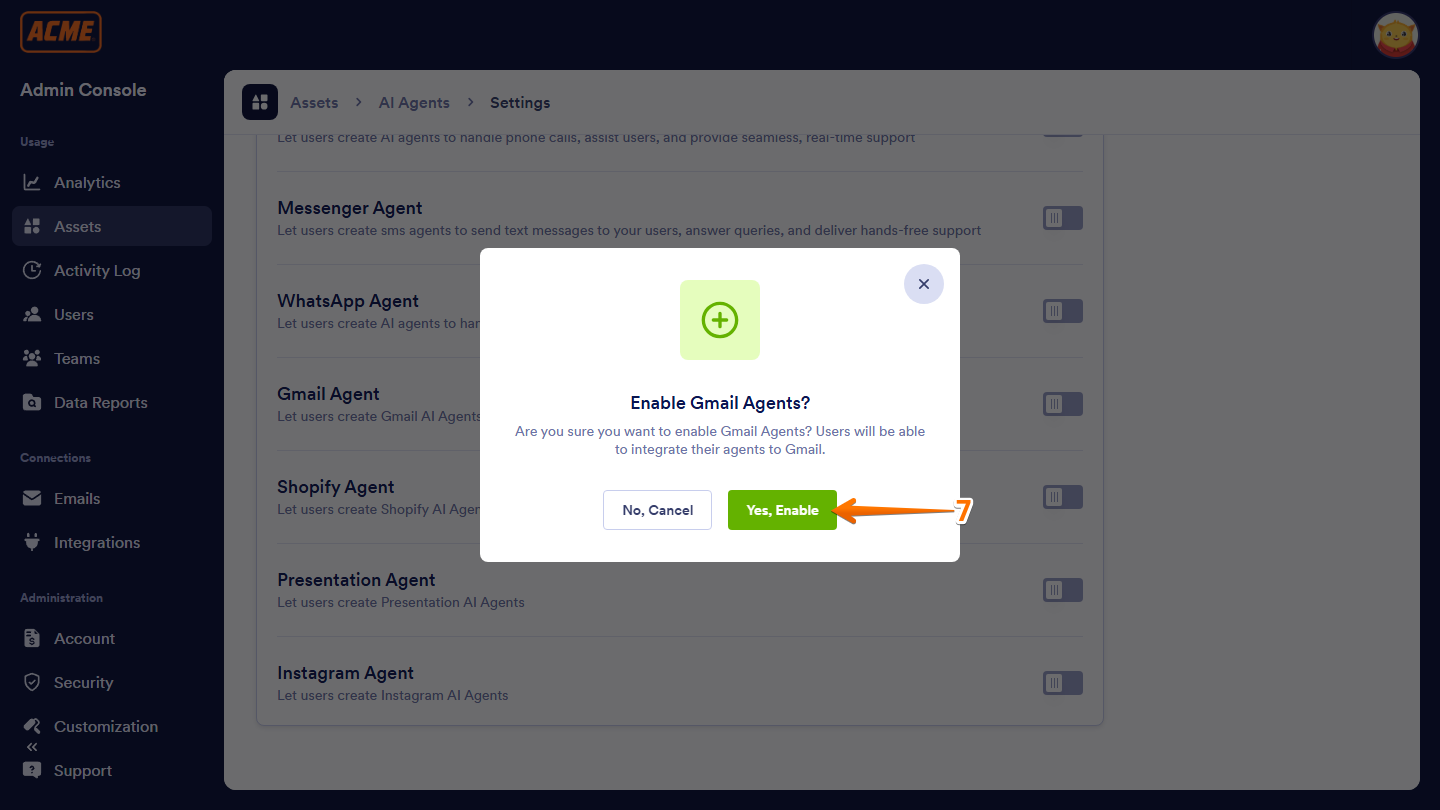
That’s it. Gmail Agent is now ready for your users.
Now, users can create AI Agents with Gmail interaction capability and connect them to their Gmail accounts to manage drafts and inbox organization.
Note: Disabling Gmail Agent will prevent users from creating new ones. Existing agents will also have their Gmail connections disabled.

Send Comment: