Beyond the avatar, you can style the entire conversation page where users interact with your AI Agent. From color schemes and fonts to layouts, logos, and background images, every element can be customized to complement your brand and enhance user engagement while seamlessly fitting into your website or platform.
You can customize the style of your AI Agent’s Conversation Page in a few easy steps. Here’s how to do it:
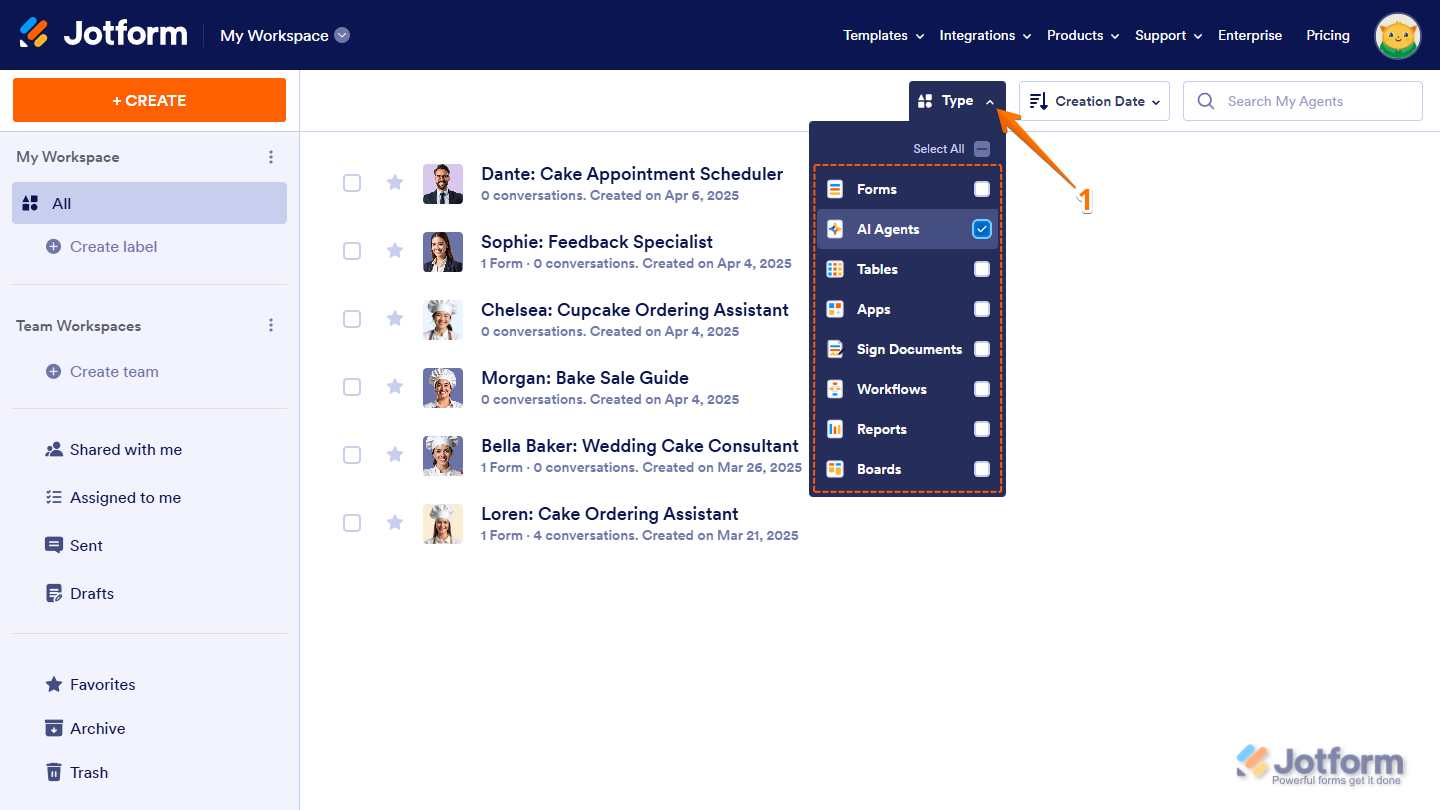
- On your My Workspace page, click on Type at the top and in the Dropdown menu that opens, uncheck the boxes next to all the assets except AI Agents, so only they’ll be shown on the page.
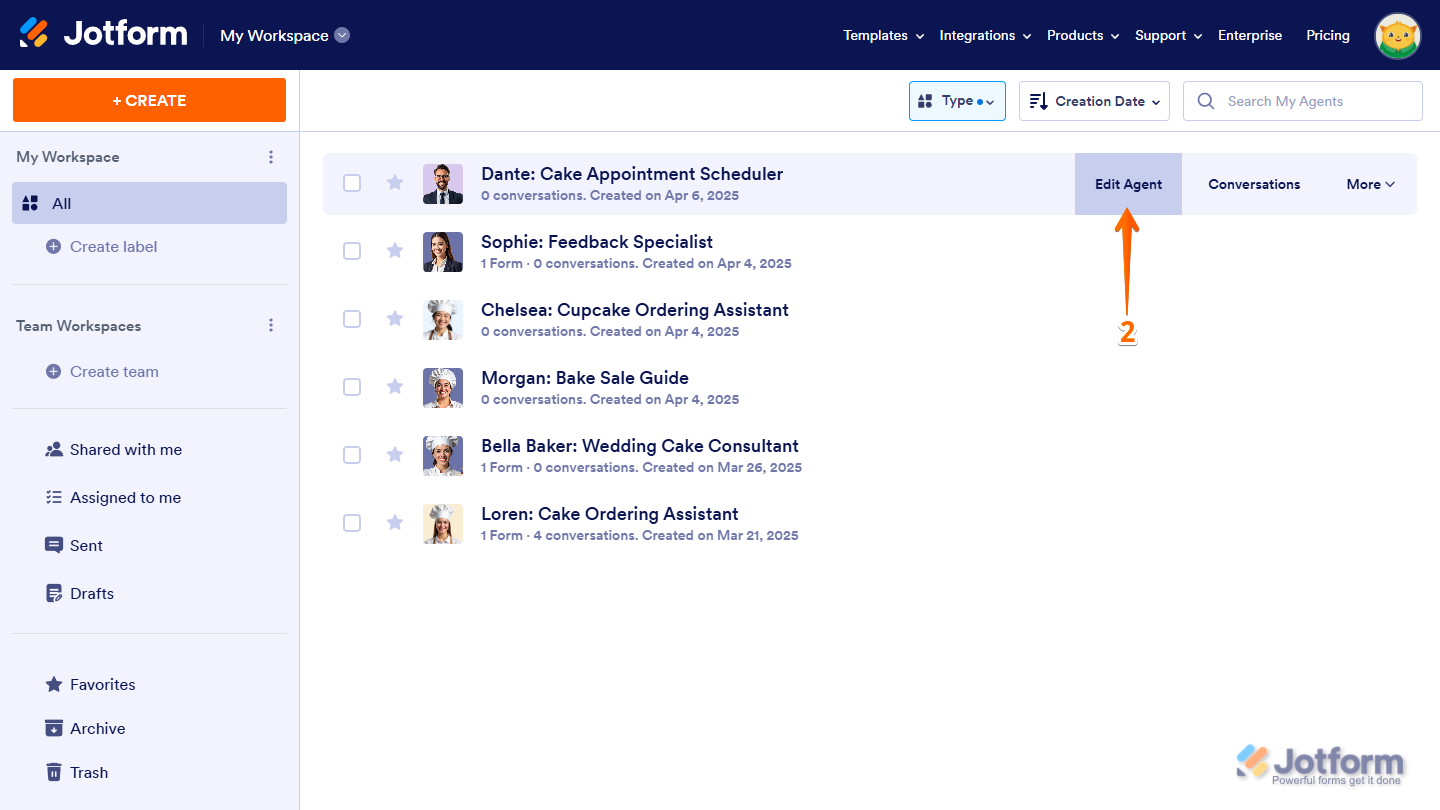
- Hover your mouse over your AI Agent and on the right side of the page, click on Edit Agent.
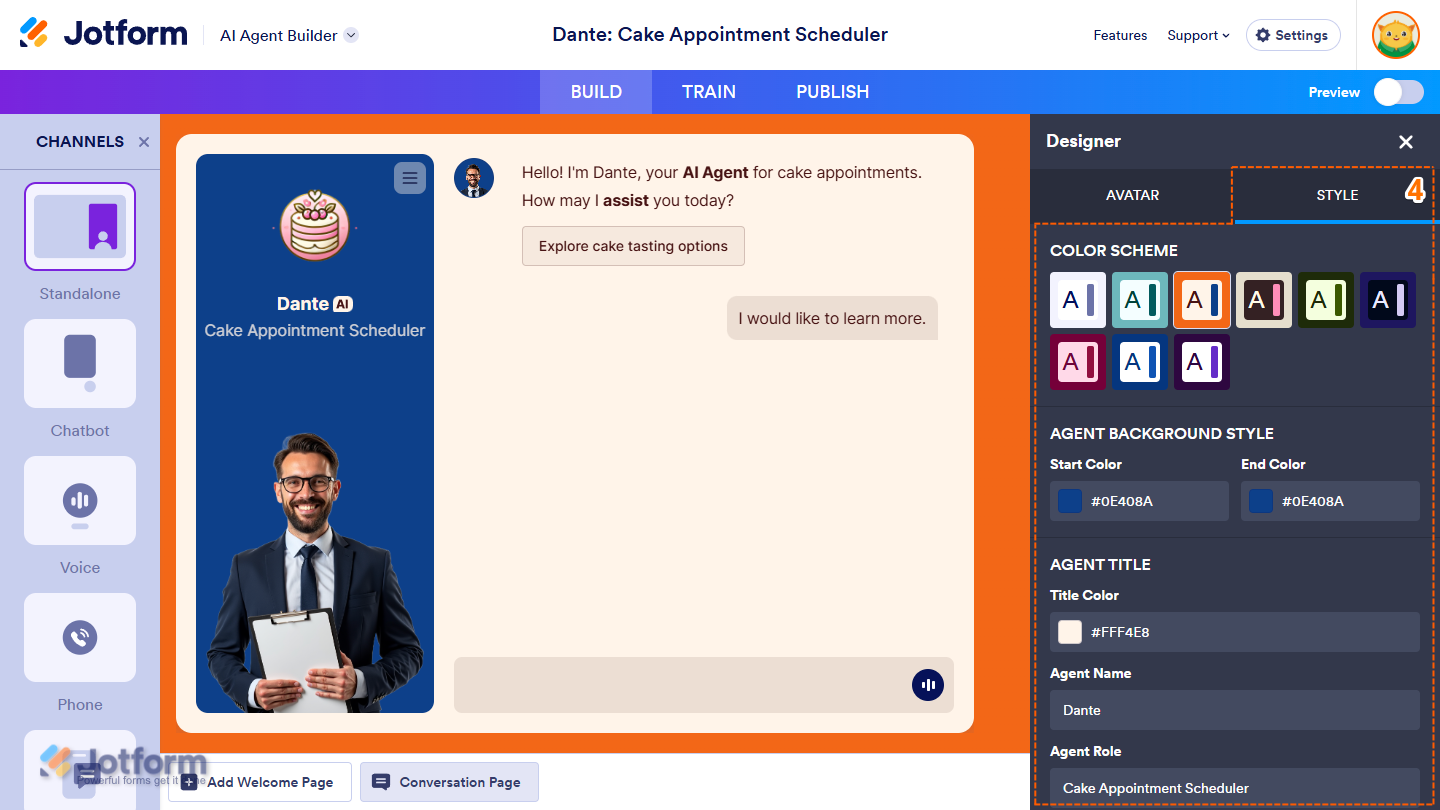
- In AI Agent Builder, click on the Paint Roller icon in the top-right corner of the page to open Designer.
- Now, under the Style tab, configure the following things to customize your AI Agent’s Conversation page:
- Color Scheme — Pick from a variety of predefined color schemes to give your conversation page a look that fits your brand.
- Agent Background Style — Apply a custom background to personalize the area behind your AI Agent’s avatar, using gradients to match your brand or create a specific mood.
- Start Color — Set the top color of the avatar’s gradient background.
- End Color — Sets the bottom color of the avatar’s gradient background.
- Agent Title — Customize what appears above your AI Agent’s avatar by adding a name and brief role description. It’s a simple way to introduce your agent to users.
- Agent Name — Set the display name for your AI Agent, like “Ava” or “Luna.” This personal touch appears above the avatar and helps make interactions feel more human.
- Agent Role — Add a short label that describes your agent’s purpose—for example, “Customer Support,” “Virtual Assistant,” or “Appointment Manager.” This helps users understand the agent’s role at a glance.
- Title Color — Choose the color of the Agent Title text (both name and role) to align with your brand or help it stand out visually.
- Page Background Style — Customize the entire conversation page’s background with a gradient or image to give it a more personalized feel.
- Start Color — Sets the top color of the page’s gradient background.
- End Color — Sets the bottom color of the page’s gradient background.
- Background Image — Use an image instead of a gradient. Upload your own, choose one from your saved collection, or generate one with AI.
- Chat Style — Personalize the chat area where conversations happen by adjusting the background, font, and text color to match your brand or style.
- Chat Background Color — Set the background color of the chat window.
- Font Family — Choose the font used for chat messages. Options include Inter, Circular, Times New Roman, and more.
- Chat Theme Color — Set the color of the chat text to improve readability and align with your visual theme.
- Button Style — Customize the look of the Send button on the conversation page to match your brand or design preferences.
- Button Color — Set the background color of the Send button.
- Icon Color — Change the color of the icon inside the Send button.
- Layout — Choose where the AI Agent’s avatar appears—on the left or right side of the Conversation page.
- Logo — Upload a logo that’ll appear on the welcome screen and above your AI Agent’s avatar to add a branded touch.
Note
Changes made in the Designer section of the AI Agent Builder are saved automatically and reflected in real time on your AI Agent and in the Style Design Preview on the left.

Send Comment: