Jotform’s Gmail Agent keeps your inbox organized—no more digging through messages or sorting emails by hand. By setting up Smart Labels, you can automatically categorize and prioritize emails based on sender, subject, or content. Whether you’re managing client inquiries, handling support requests, or tracking project updates, Gmail Agent helps you keep your inbox tidy by labeling messages as they arrive. This saves you time and helps you stay focused on what matters most.
Note
There’s no limit to how many Smart Labels you can create—add as many as you need to keep your emails organized.

Staying on top of your inbox just got easier with Smart Labels in Jotform’s Gmail Agent. And setting it up takes no time at all—here’s how:
- In AI Agent Builder, in the Channels menu on the left side of the page, click on the Gmail icon.
- Now, on the right side of the Example Email Draft, click on the Gear icon.
- Then, in the Gmail Agent Settings window that opens on the right side of the page, under the Label tab, click on Create New Label.
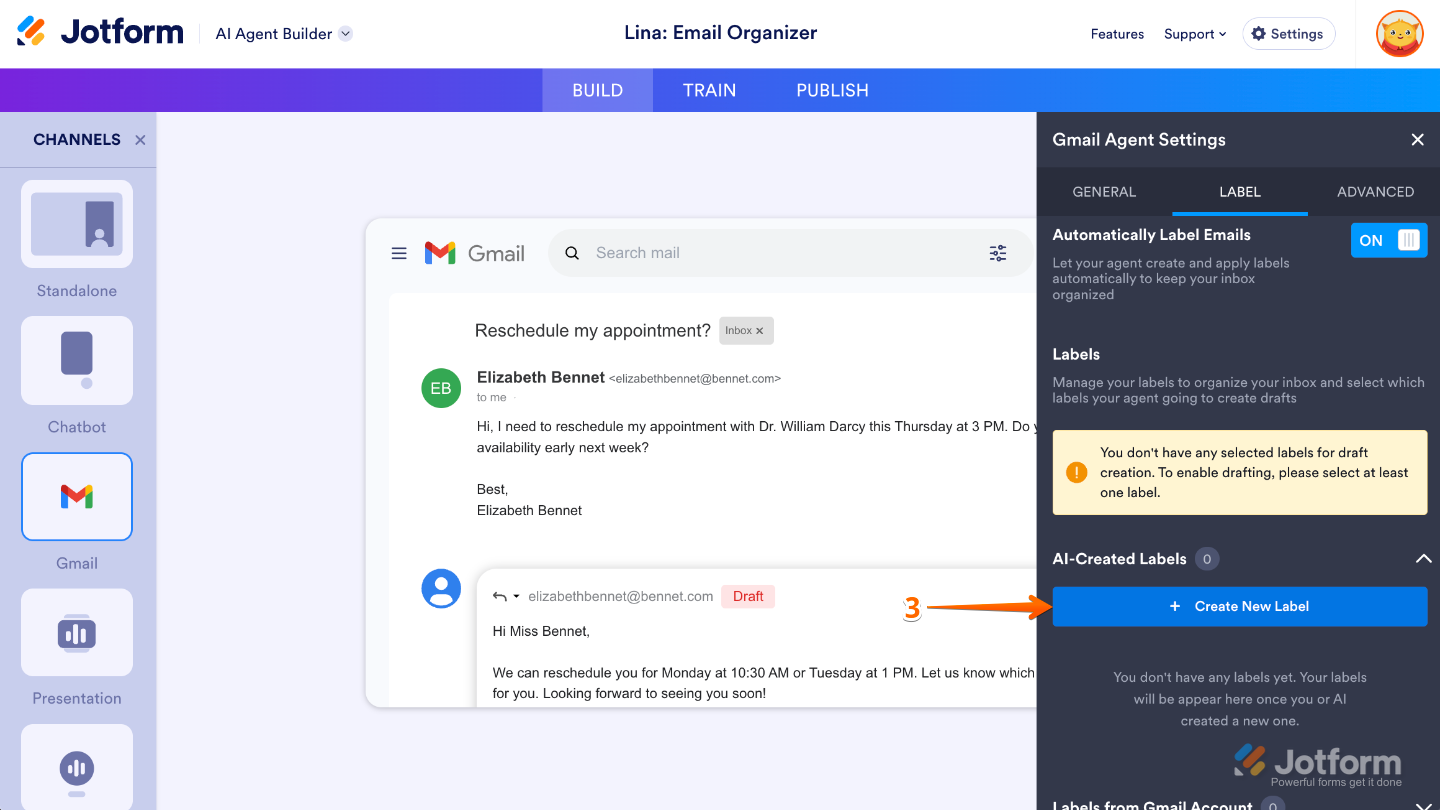
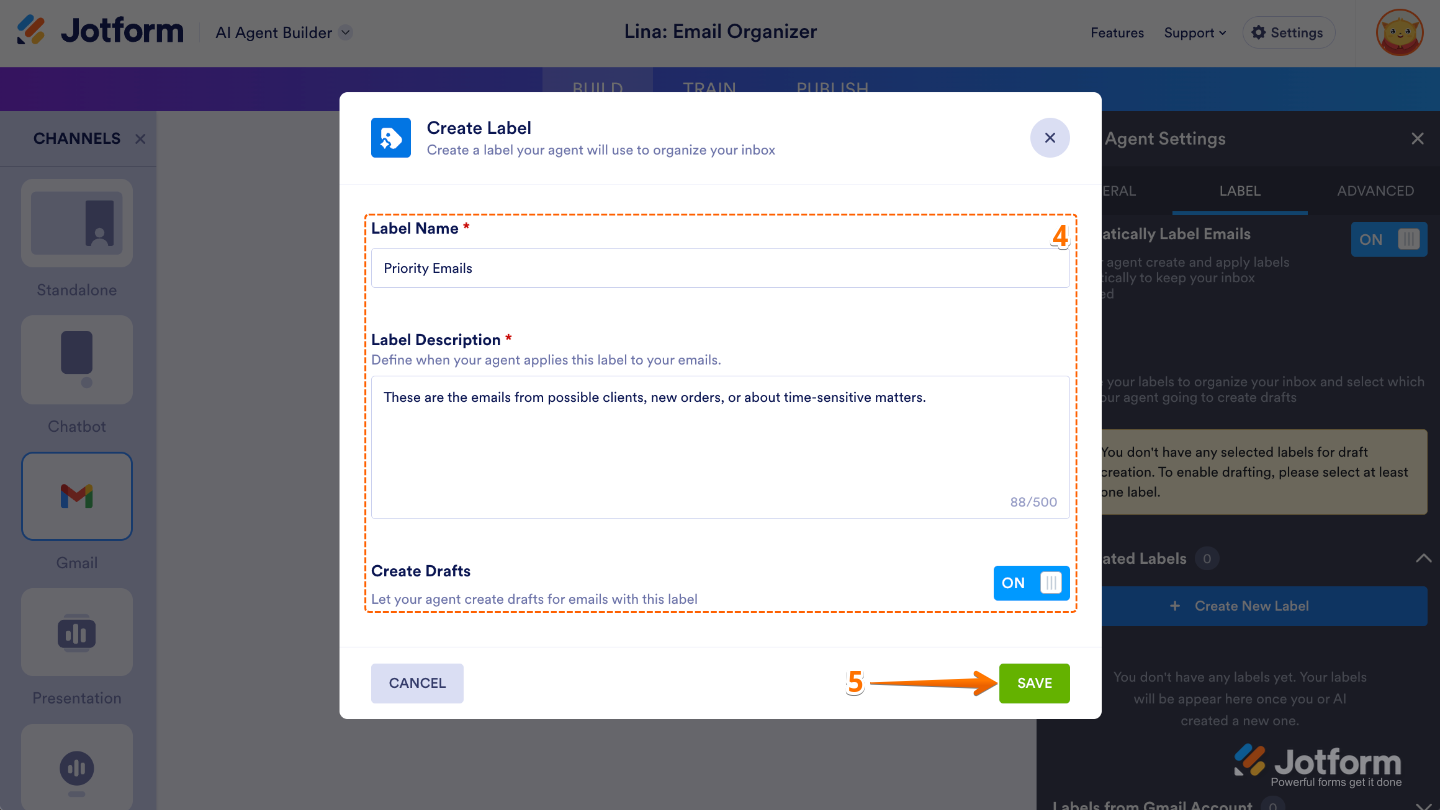
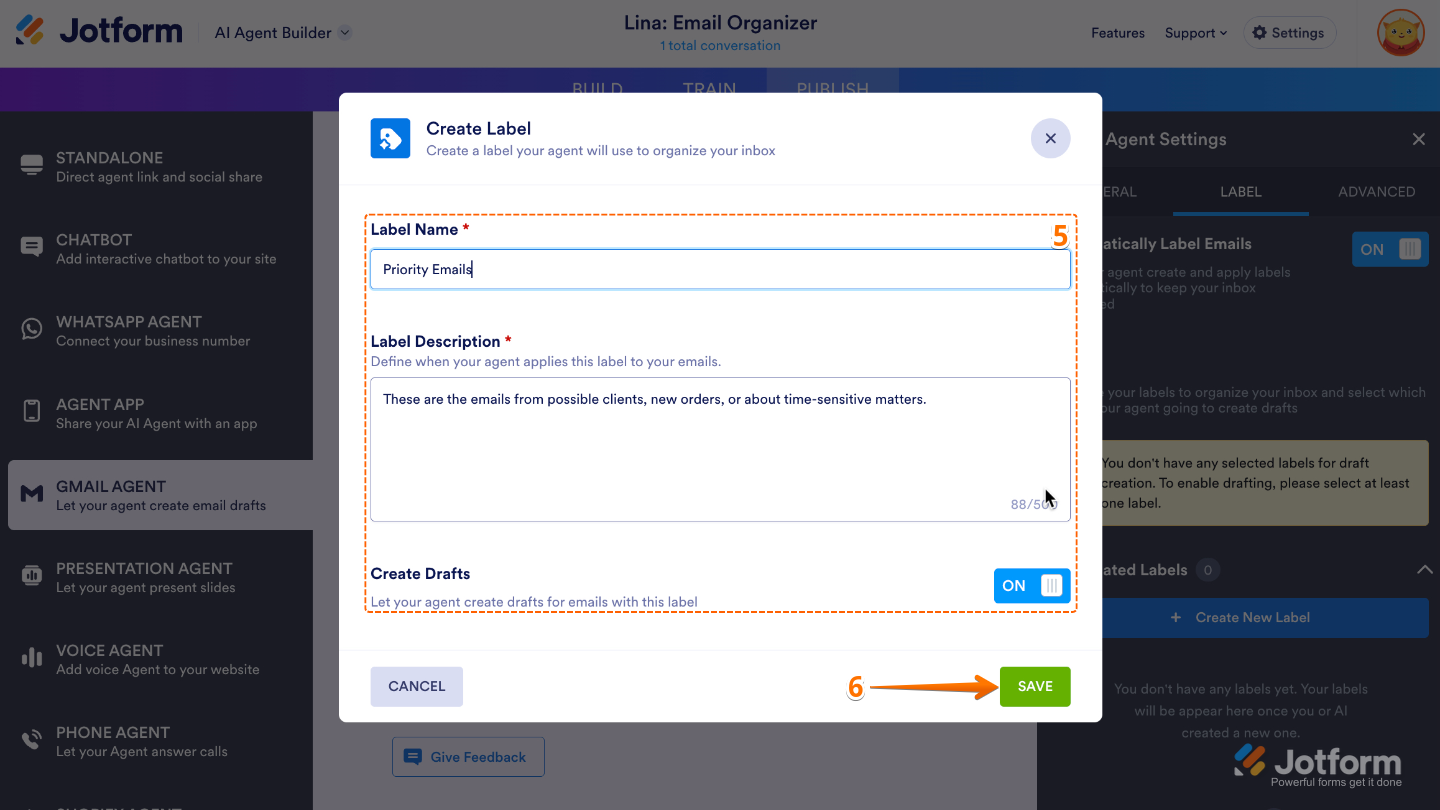
- Next, in the Create Label window, fill in these details:
- Label Name — Enter a name for your smart label.
- Label Description — Add a brief description to explain what the label’s for.
- Create Draft — When enabled, Gmail Agent will automatically create a draft reply for any email that matches the smart label.
- Once you’re done, click on Save.
That’s it. Gmail Agent’s now set to help you organize and recognize emails at a glance. If you’re looking to dive deeper into Jotform’s Gmail Agent features, these guides can help:
- How to Review AI-Generated Email Drafts Before Sending Them
- How to Customize Your Gmail Agent’s Tone and Responses
- How to Let Gmail Agent Learn from Your Past Replies
- How to Track Email Drafts in the Conversations Page
- How to Stop Gmail Agent from Drafting Replies to Certain Emails
- How to Add a Custom Signature to Gmail Agent Drafts
- How to Add a Custom Greeting Message to Gmail Agent Drafts
- How to Disable Your Gmail Agent
You can also create Smart Labels right from the Publish tab, quick and easy. Get started like this:
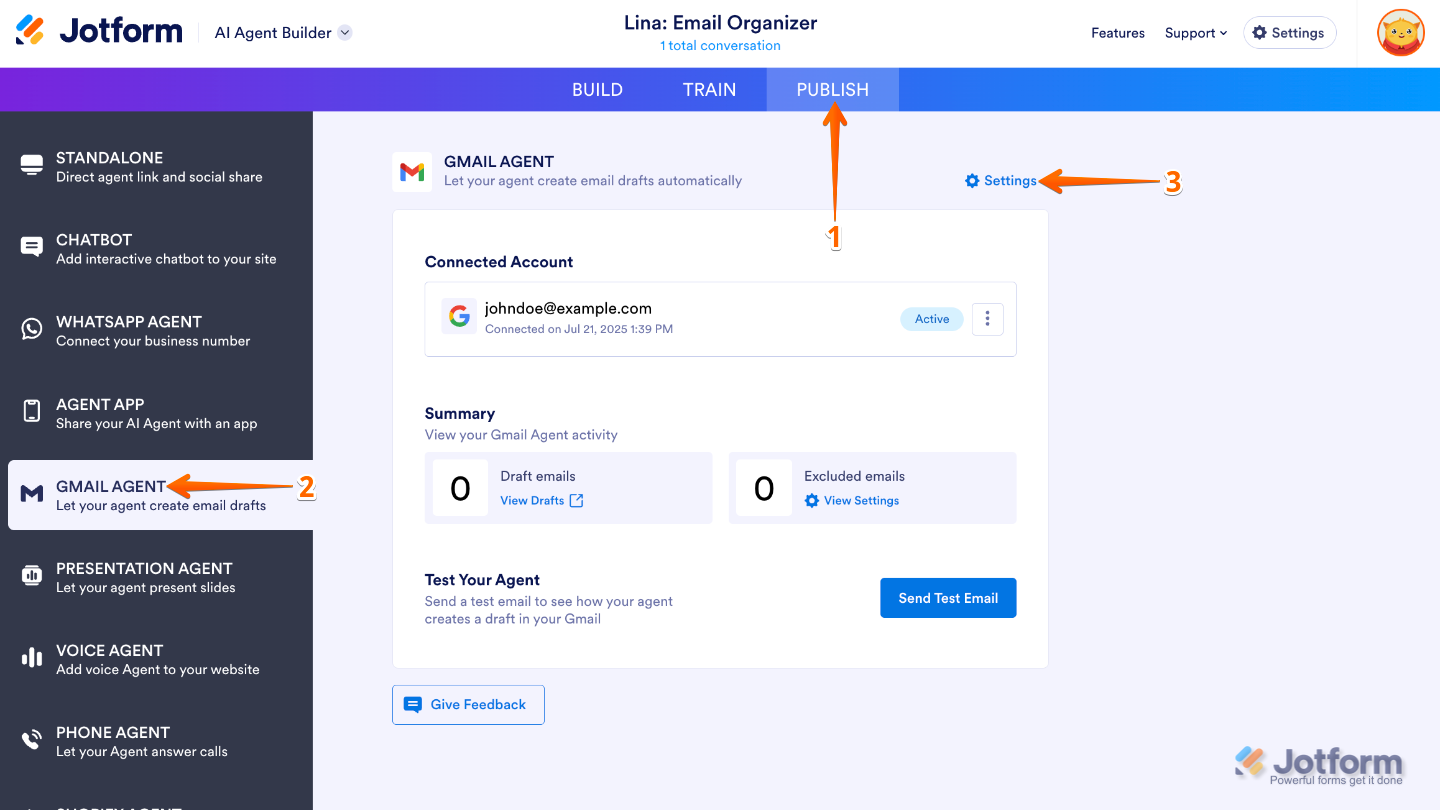
- In AI Agent Builder, in the blue navigation bar at the top of the page, click on Publish.
- Now, click on Gmail Agent in the menu on the left.
- Then, on the top-right side of the Gmail Agent section, click on Settings.
- Next, in the Gmail Agent Settings window that opens on the right side of the page, under the Label tab, click on Create New Label.
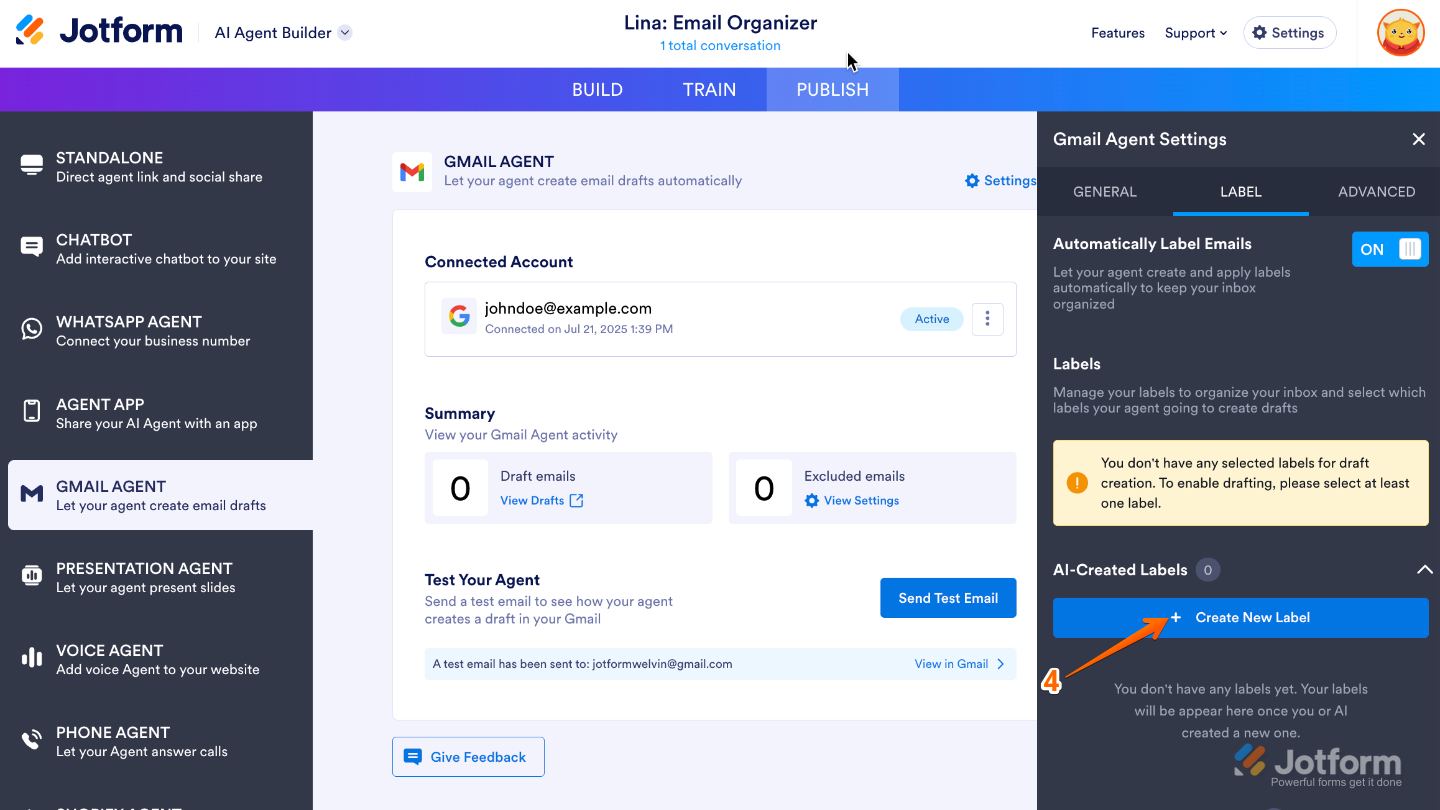
- After that, in the Create Label window, enter this info:
- Label Name — Enter a name for the smart label.
- Label Description — Add a brief description to explain what the label is for.
- Create Draft — When enabled, Gmail Agent will automatically create a draft reply for any email that matches the smart label.
- Once you’re done, click on Save.
Pro Tips
- Give your labels clear, specific names so it’s easy to spot the right emails at a glance.
- Take a moment now and then to review your Smart Labels and make sure they still match your current workflow.

Send Comment: