Jotform Sign lets you connect your documents to your board, making it easy to create tasks based on signed documents. When a document is signed, its details can automatically generate tasks, helping you track progress and take action without manually entering information. This integration keeps everything organized and ensures that important documents are linked directly to the tasks they relate to.
You can set up your Sign Document to create tasks on your board in a few easy steps. Here’s how to do it:
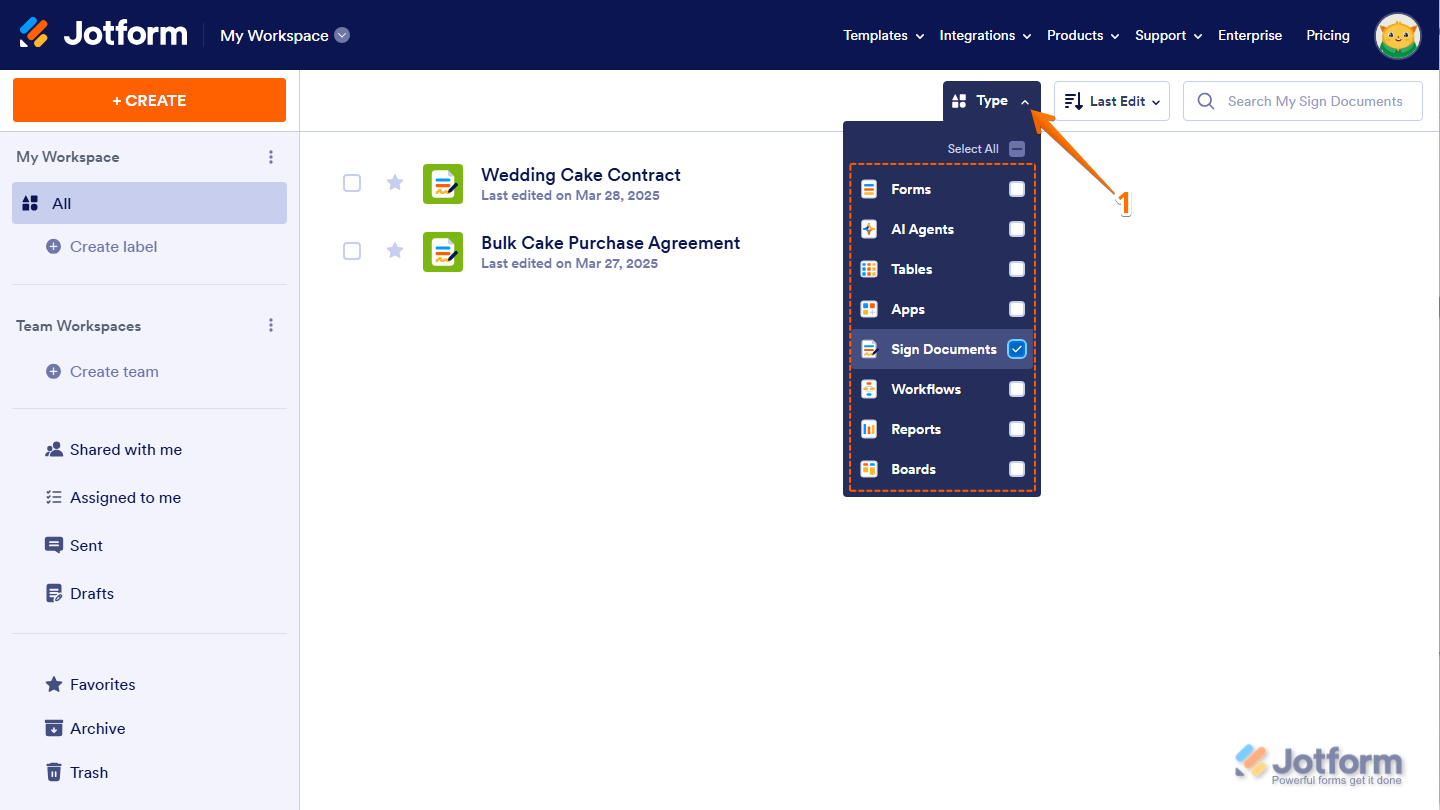
- On your My Workspace page, click on Type at the top, and in the Dropdown menu that opens, uncheck the boxes next to all the assets except Sign Documents, so only they’ll be shown on the page.
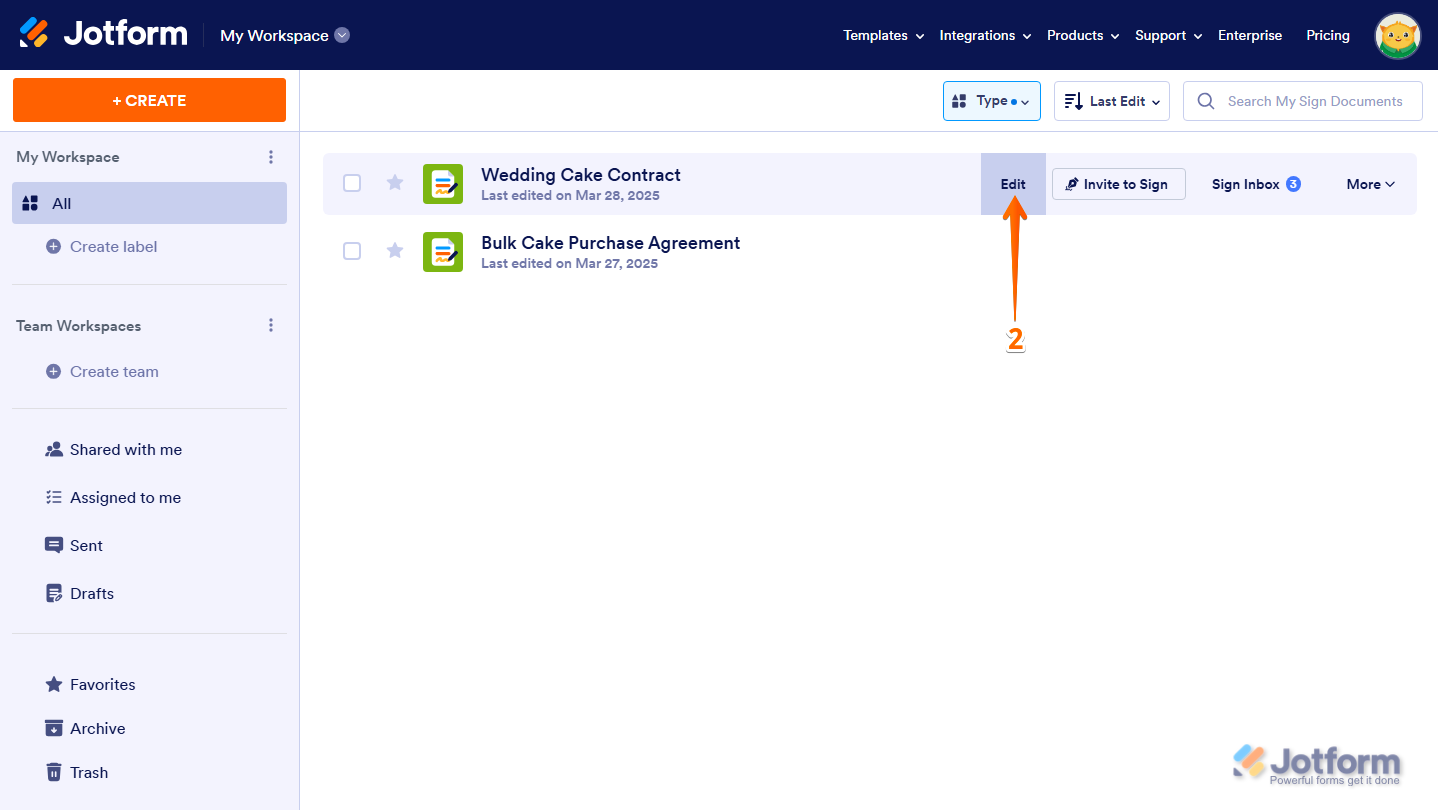
- Now, hover your mouse over the Sign Document that you want to automate task creation for your board from, and click on Edit on the right side of the page.
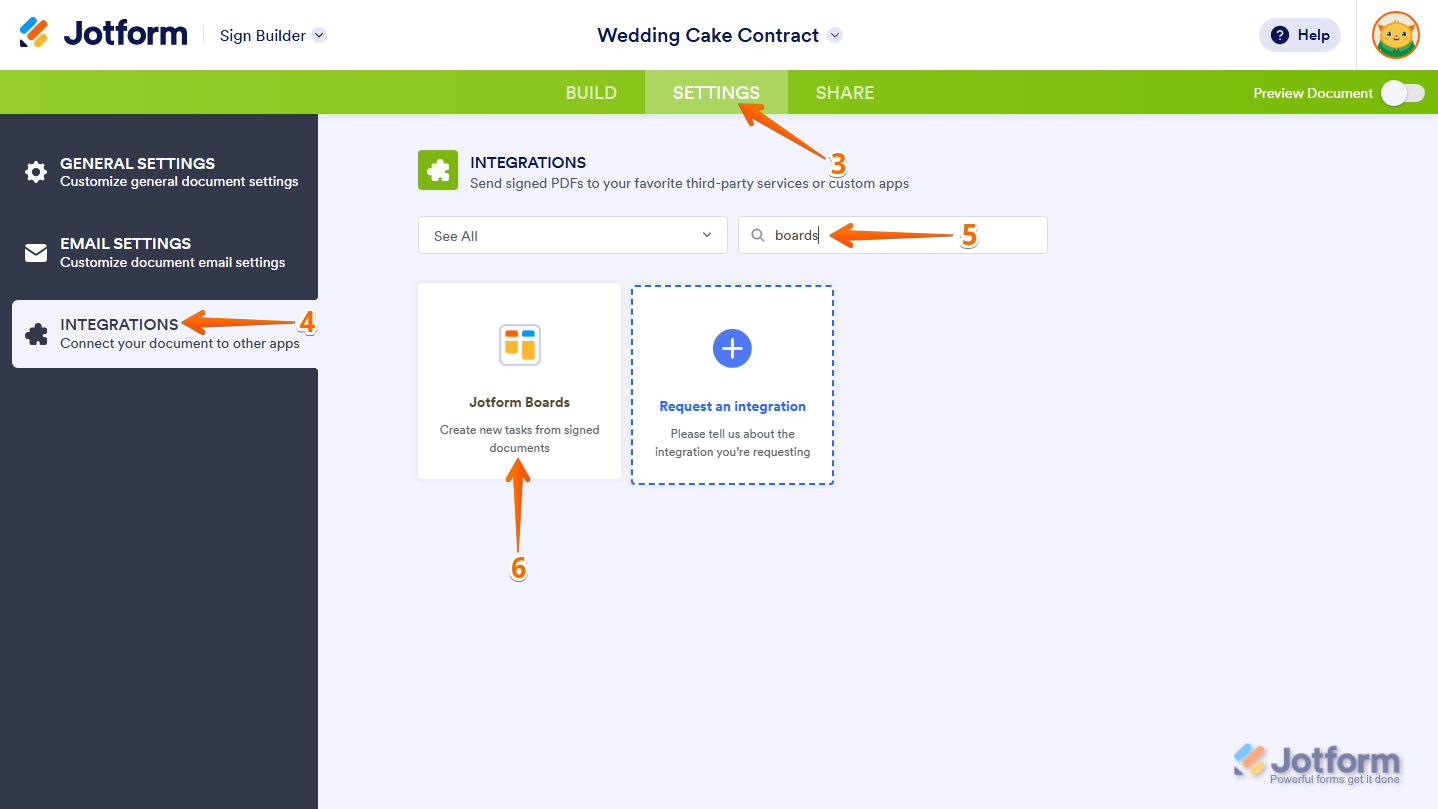
- In Sign Builder, in the green navigation bar at the top of the page, click on Settings.
- Now, click on Integrations in the menu on the left.
- Then, search for Boards at the top of the Integrations section.
- After that, click on Jotform Boards.
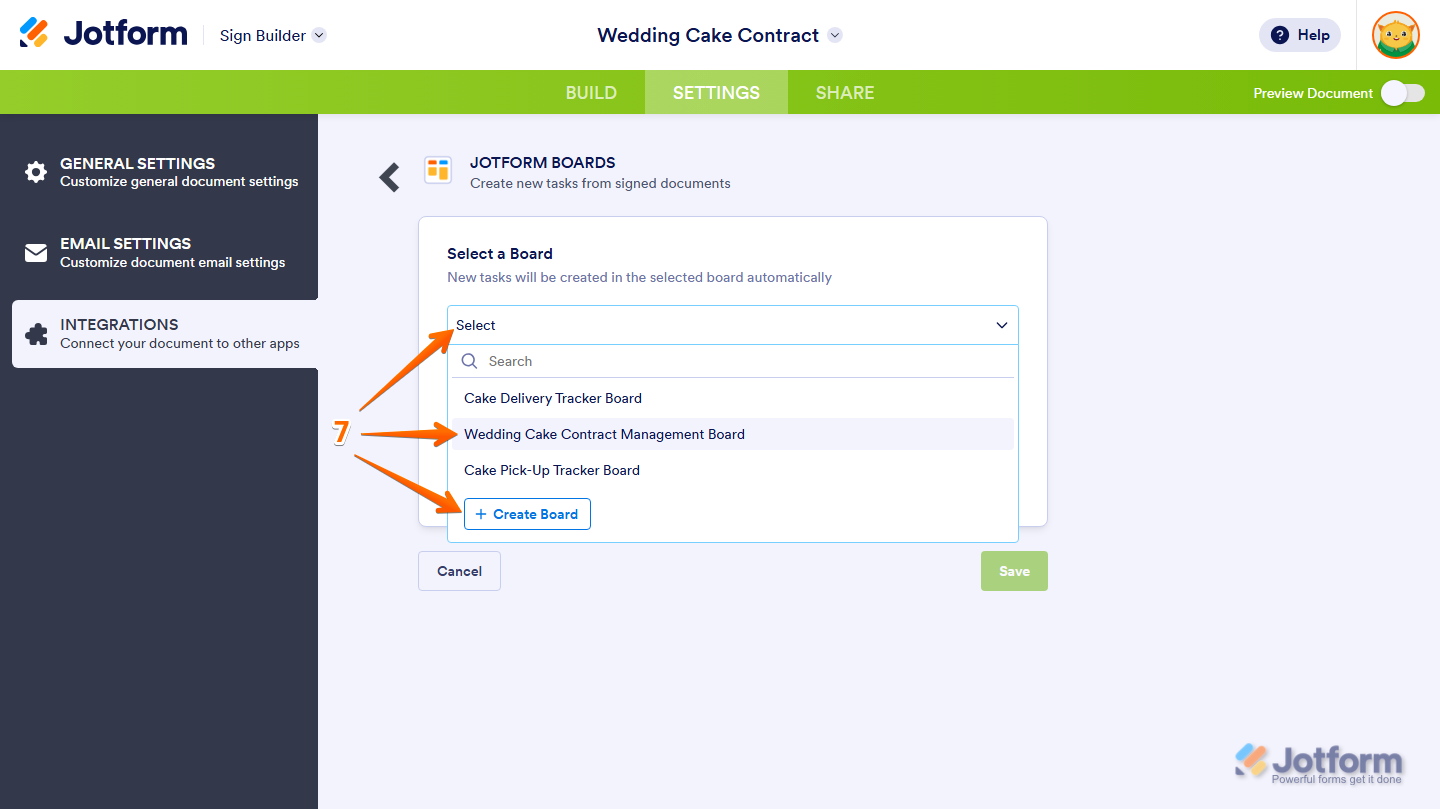
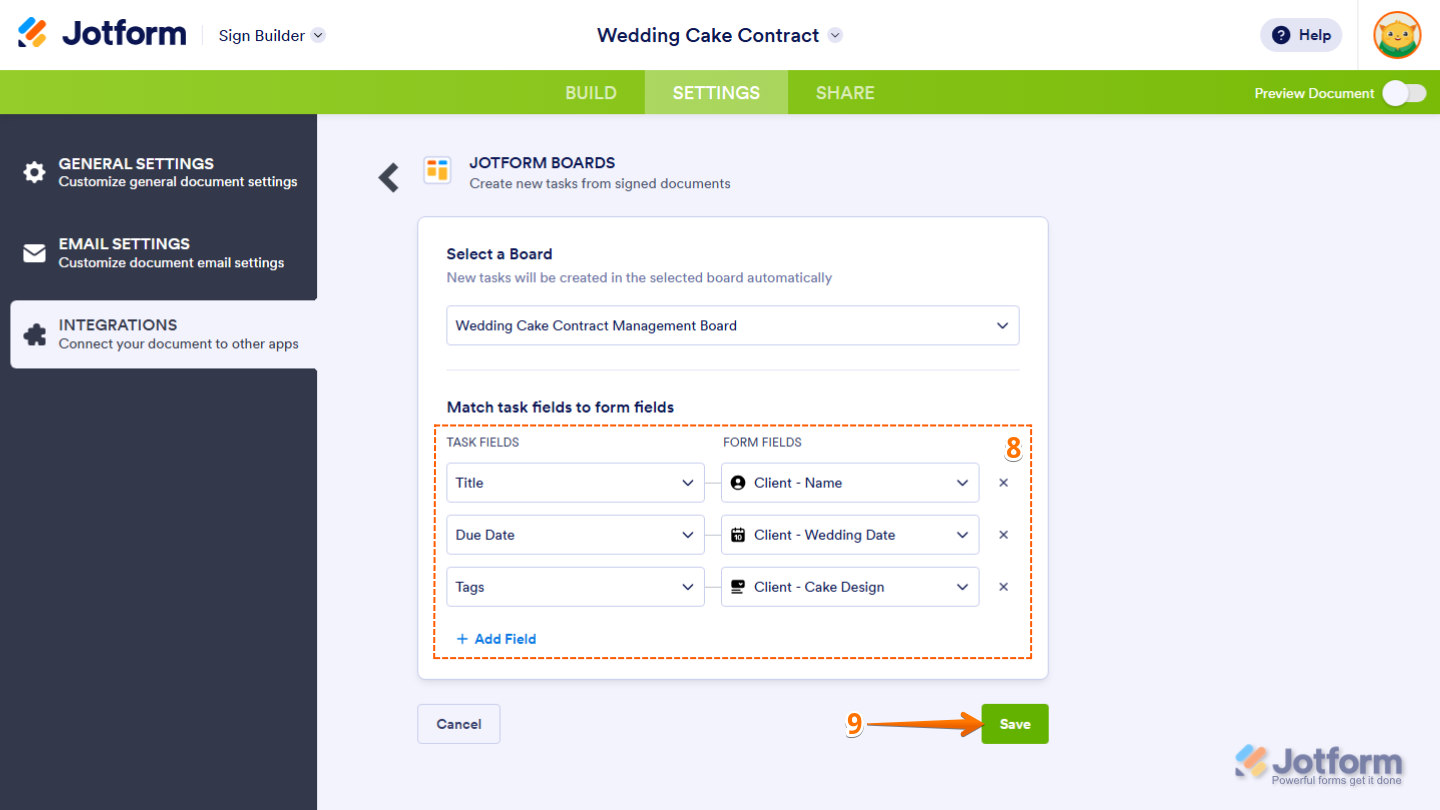
- Now, click on the Select a Board Dropdown menu to select the board that you want to create new tasks for. Use the Search bar at the top of the Board List menu to find one easily, or the Create Board button at the bottom to create a new one in a new browser tab.
- Next, click on the Dropdown menu under the Task Fields column to select a task field from your board, and then click on the Dropdown menu under the Form Fields column next to it, to select a form field that matches it.
On your board, the value of the task field will automatically come from the form field you match it to in your workflow. There’s a total of four (4) task fields, and you’ll need to have at least one (1) task field matched to continue. Use the Add Field button to set up the next one. Here are the different form field types each task field supports:
- Title — You can select a Name, Short Text, Long Text, Dropdown, Single Choice, Company, Job Title, or Website field to match this task field.
- Due Date — You can only select a Date field to match this task field.
- Tags — You can select a Single Choice, Multiple Choice, or Dropdown field to match this task field.
- Description — You can select a Name, Short Text, Long Text, Dropdown, Single Choice, Company, Job Title, or Website field to match this task field.
- After that, click on Save on the bottom-right side of the window to complete the setup.
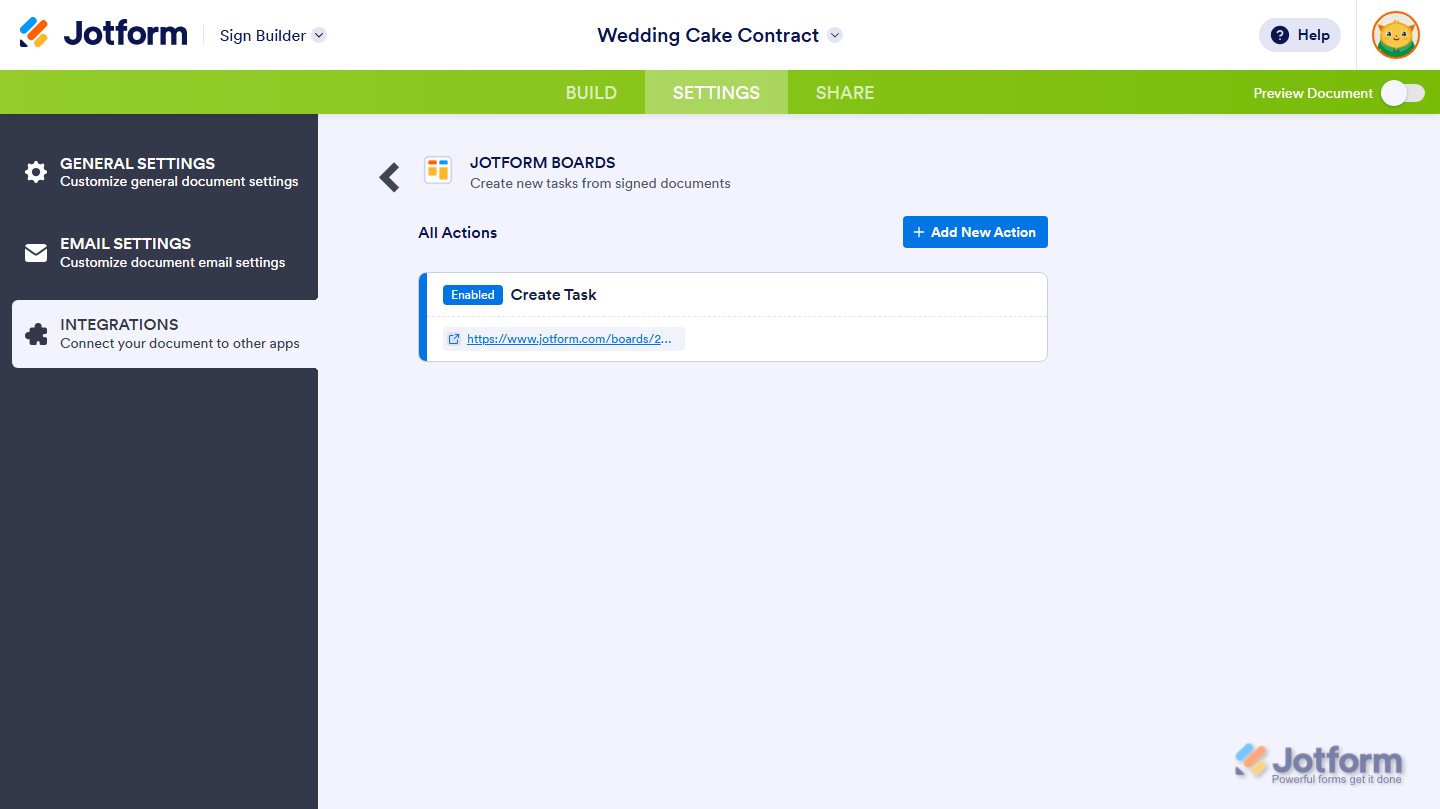
That’s it. You’ve successfully integrated your Sign Document with a board in your account.
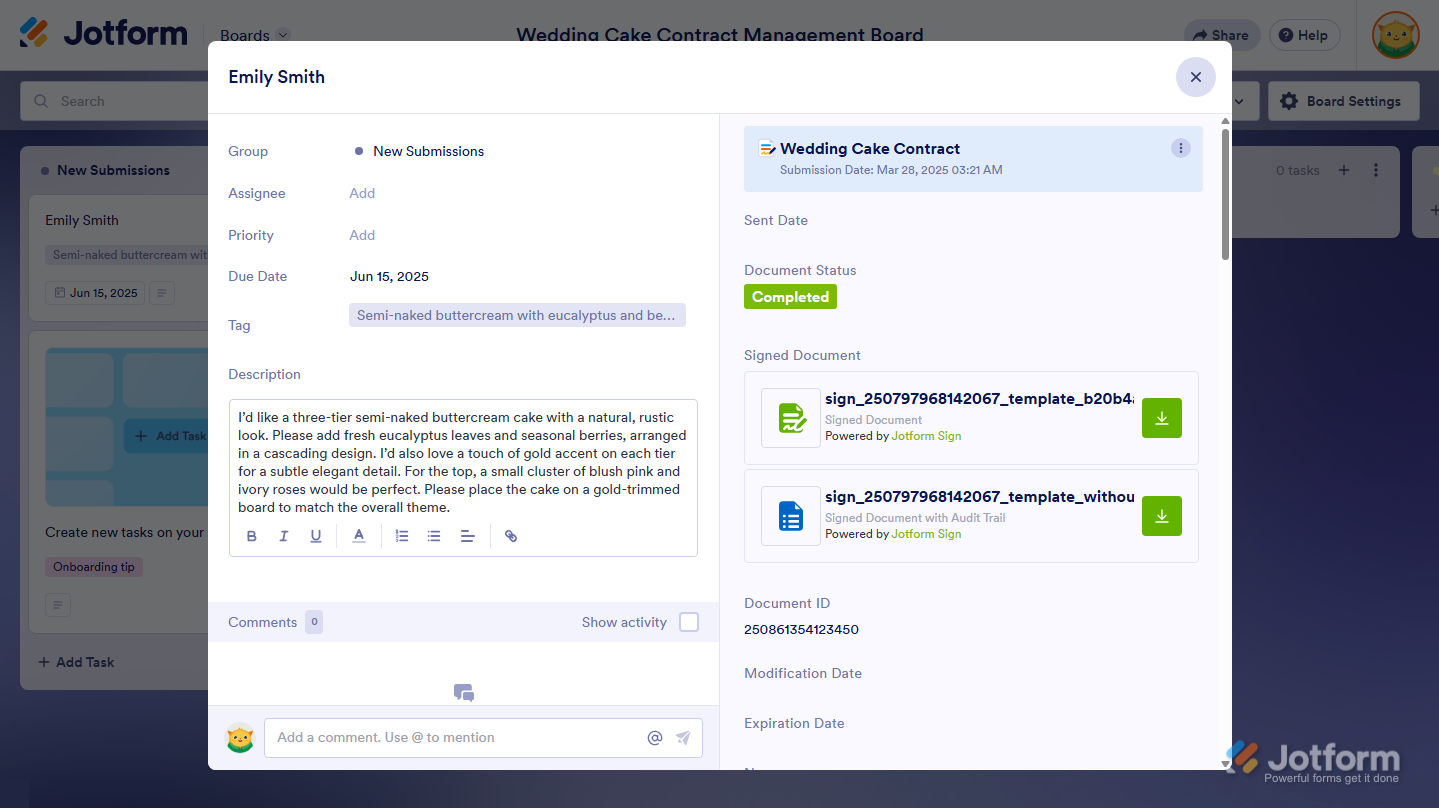
In the Task Details window on your Board, you’ll be able to review the signed document that the task details were pulled from.
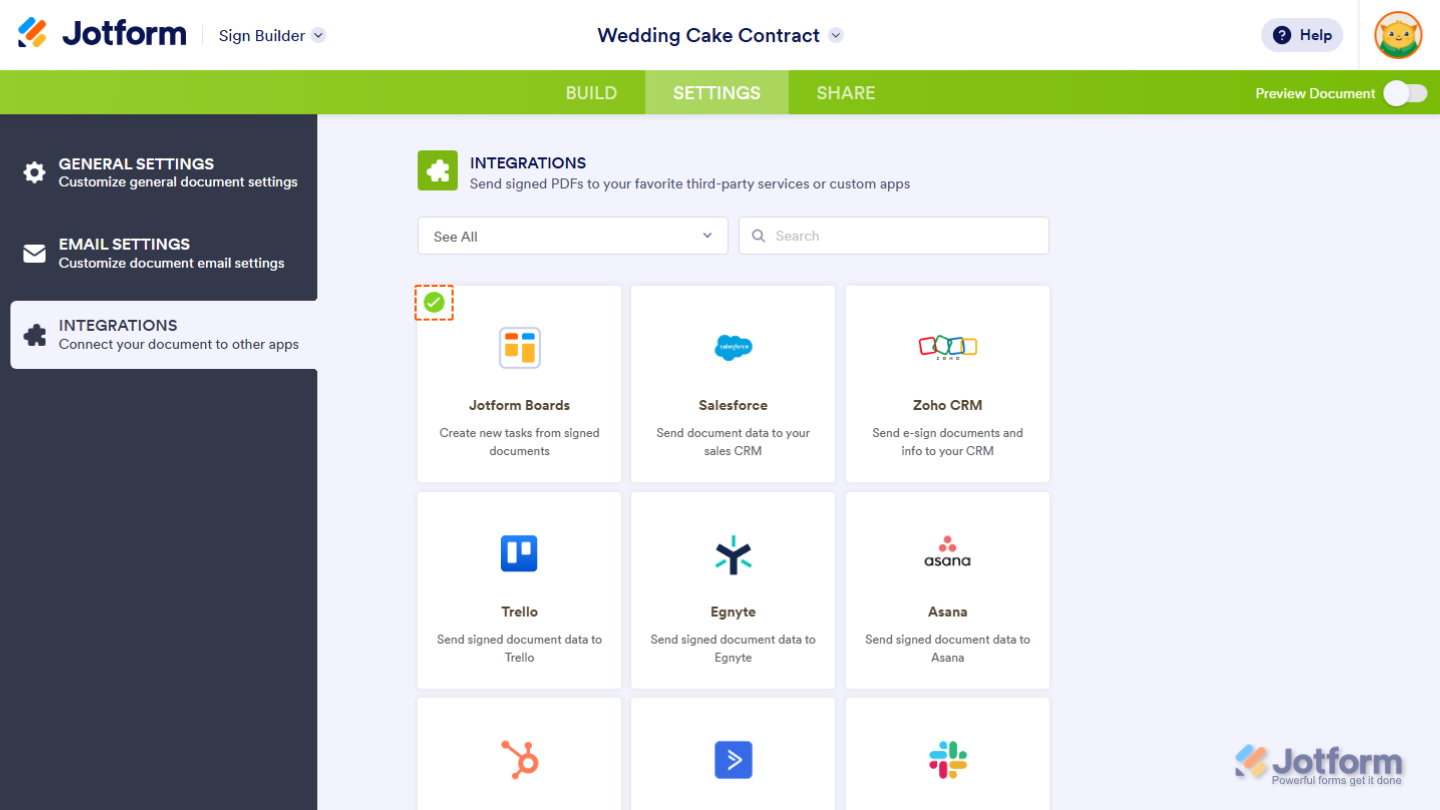
A green Encircled Checkmark icon showing on an option in the Integrations section of the Sign Builder Settings indicates that there’s an action created for that integration.
When you click on the Jotform Boards option with an existing action, you’ll be able to:
- Add a New Action — This allows you to set up automatic task creation from signed documents for another board in your account. To start, click on the blue Add New Action button on the right side of the Jotform Boards section.
- Open a Connected Board — This allows you to view the board connected to an action. Click on the link right below the name of the action to open it in a new browser tab.
- Edit an Action — This allows you to select a new board or reconfigure matched task fields and form fields for an action. Hover your mouse over an action and then click on the Edit icon that shows up on the right side of it to start editing it.
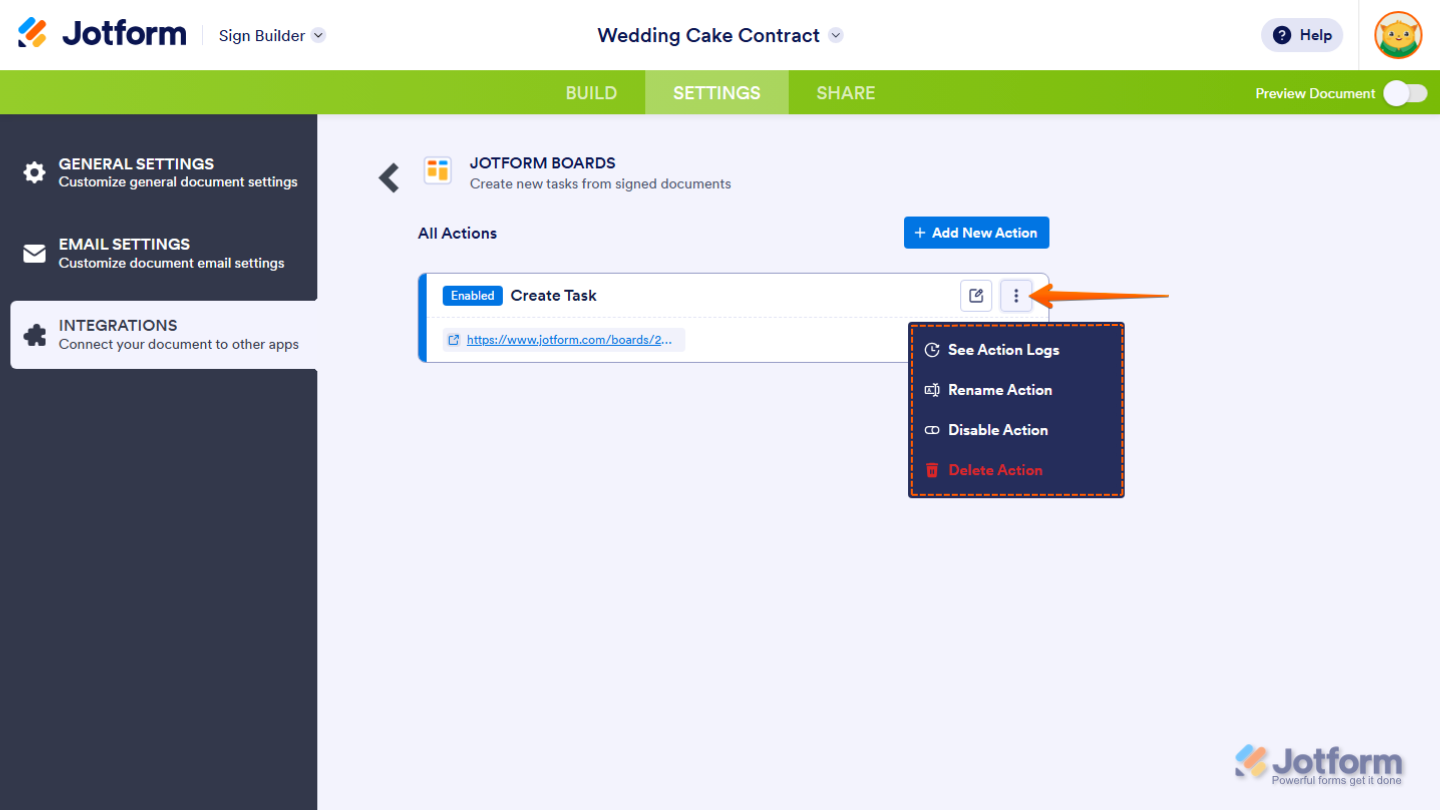
- Rename an Action — This allows you to give the action a clear name, helping you to quickly identify its purpose. Hover your mouse over an action and then click on the Three Dots icon that shows up on the right side of it, and select Rename Action in the menu that opens to start renaming it.
- Disable an Action — This allows you to stop using an action that you don’t want to delete yet. Hover your mouse over an action and then click on the Three Dots icon that shows up on the right side of it, and select Disable Action in the menu that opens to disable it. For disabled actions, you’ll see an Enable Action option instead.
- Delete an Action — This allows you to remove an action completely from the integration. Hover your mouse over an action and then click on the Three Dots icon that shows up on the right side of it, and select Delete Action in the menu that opens to delete it. In the Delete Confirmation window that pops up, click on Yes, Delete to confirm it.
- Check Action Logs — This allows you to view the list of successful and failed action runs from the last 7 days in the Action Logs window. Hover your mouse over an action and then click on the Three Dots icon that shows up on the right side of it, and select See Action Logs in the menu that opens to see the action runs status.
Notes
- A document must be completed and signed by all the assigned signers for it to appear as a new task on your board.
- A signed document can be connected to multiple boards at the same time, but each board must be different. You can’t create two actions connecting the same board.
- A single board can be connected to multiple Sign Documents at the same time.
- A disabled action shows a Disabled indicator, while an enabled action shows as Enabled.
- Deleted actions can’t be recovered. If you plan to use an action later, consider disabling it instead.
- Deleting an action doesn’t remove the task created using it on your Jotform Boards.

Send Comment: