Jotform Store Builder is an extension of Jotform Apps, enabling app owners to collect payments and orders more efficiently. It’s a no-code app, which means no coding skills are required to build your online store and collect payments from your customers.
Creating Your Jotform Store from Scratch in Jotform App
You can easily create your Jotform Store from scratch. Here’s how to do it:
- On your My Workspace page, click on Create on the top-left side of the screen.
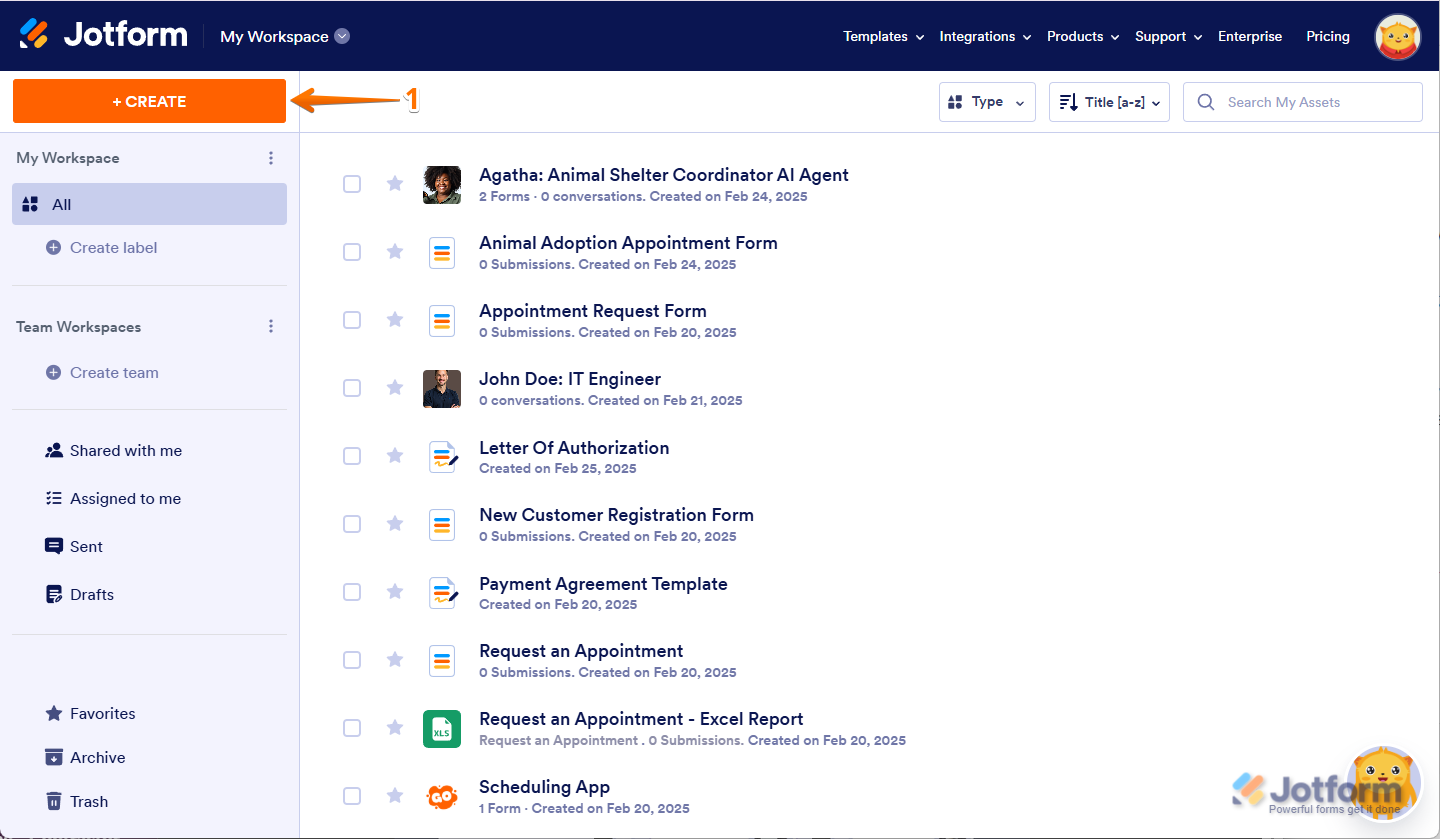
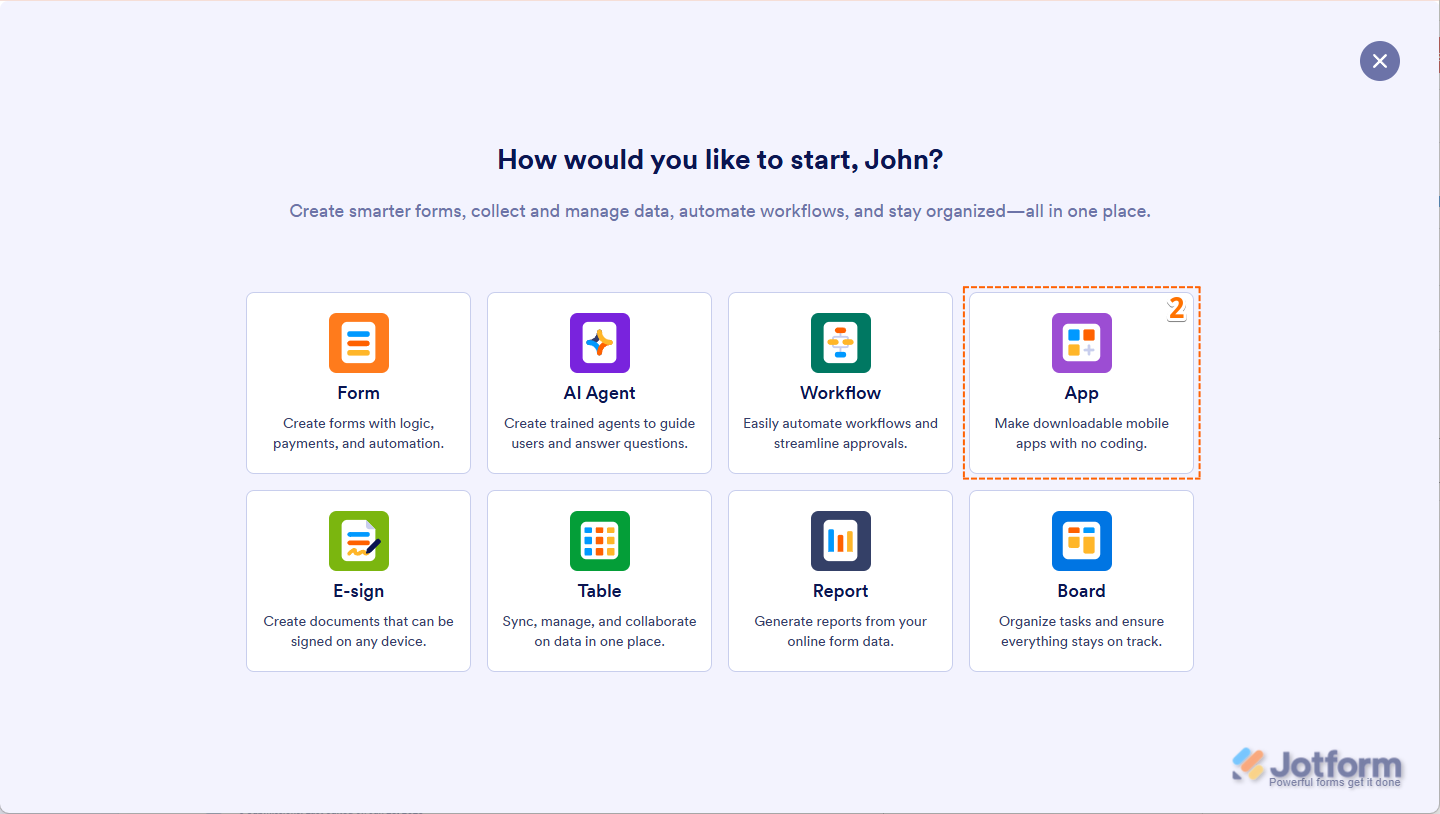
- In the window that opens up, click on Apps.
- Now, click on Build Store.
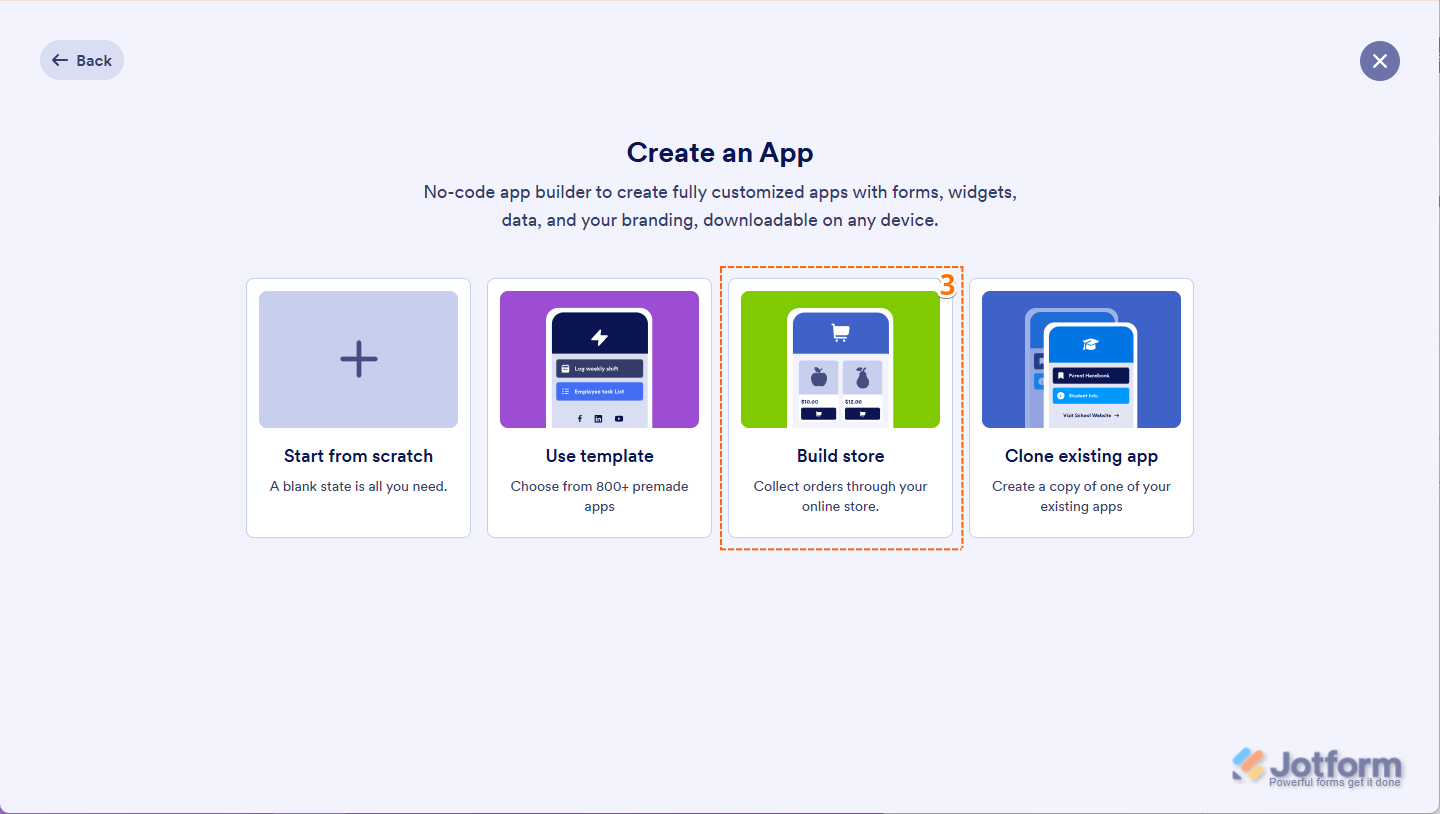
And that’s it! You’ll now be redirected to Jotform’s App Builder, where a product list has been automatically added.
Adding Your Products in the Jotform App
Now, it’s time to showcase what you’re selling. Add detailed information about each product, including prices and images. Let’s do it:
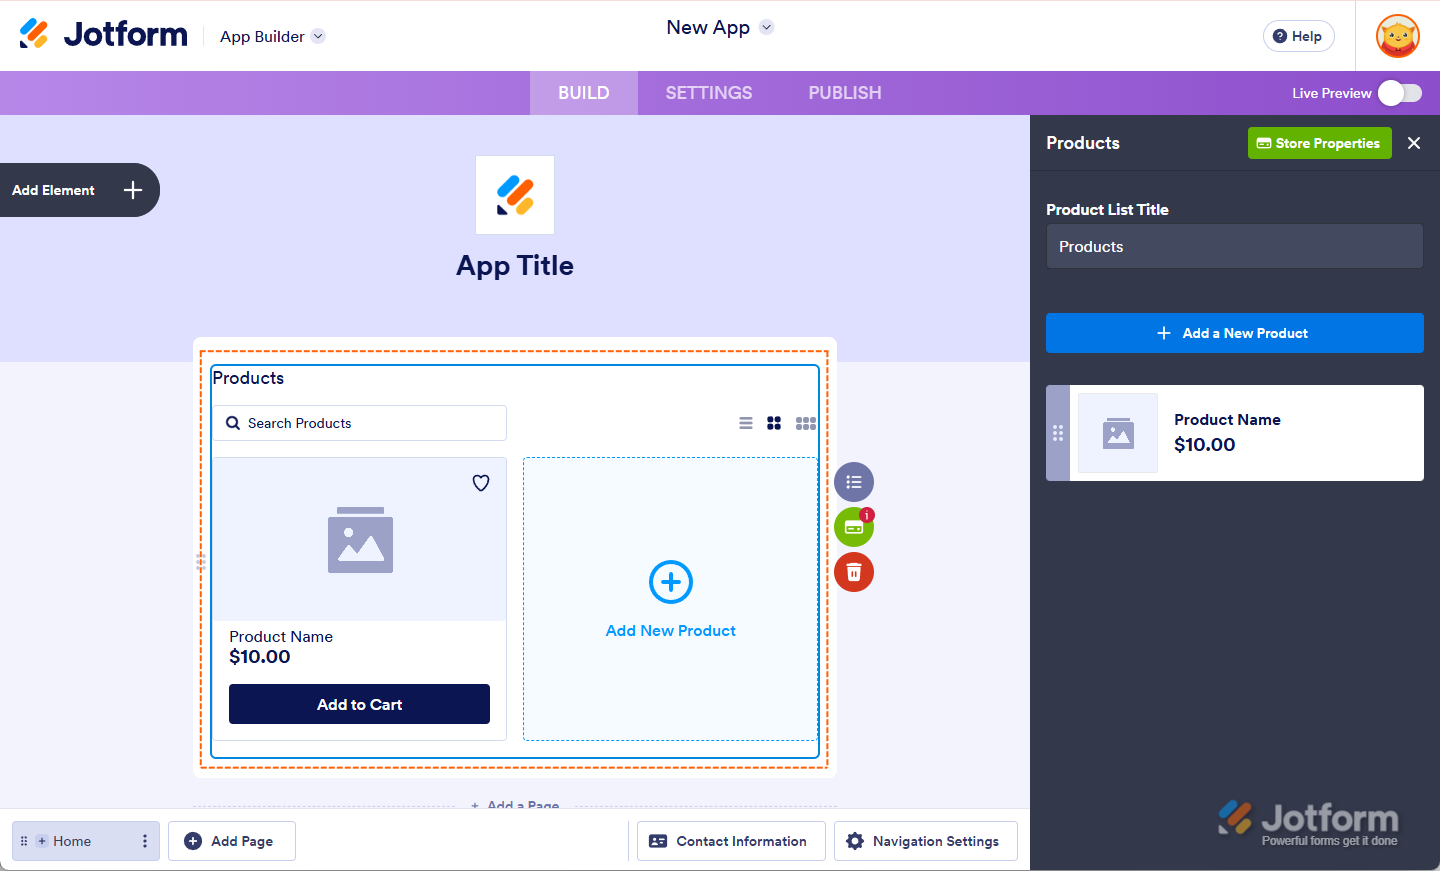
- In App Builder, click on the Menu icon on the right side of the Product list element.
- Then, in the Products menu that opens, enter a title in the Product List Title field and click on Add a New Product to start adding your items.
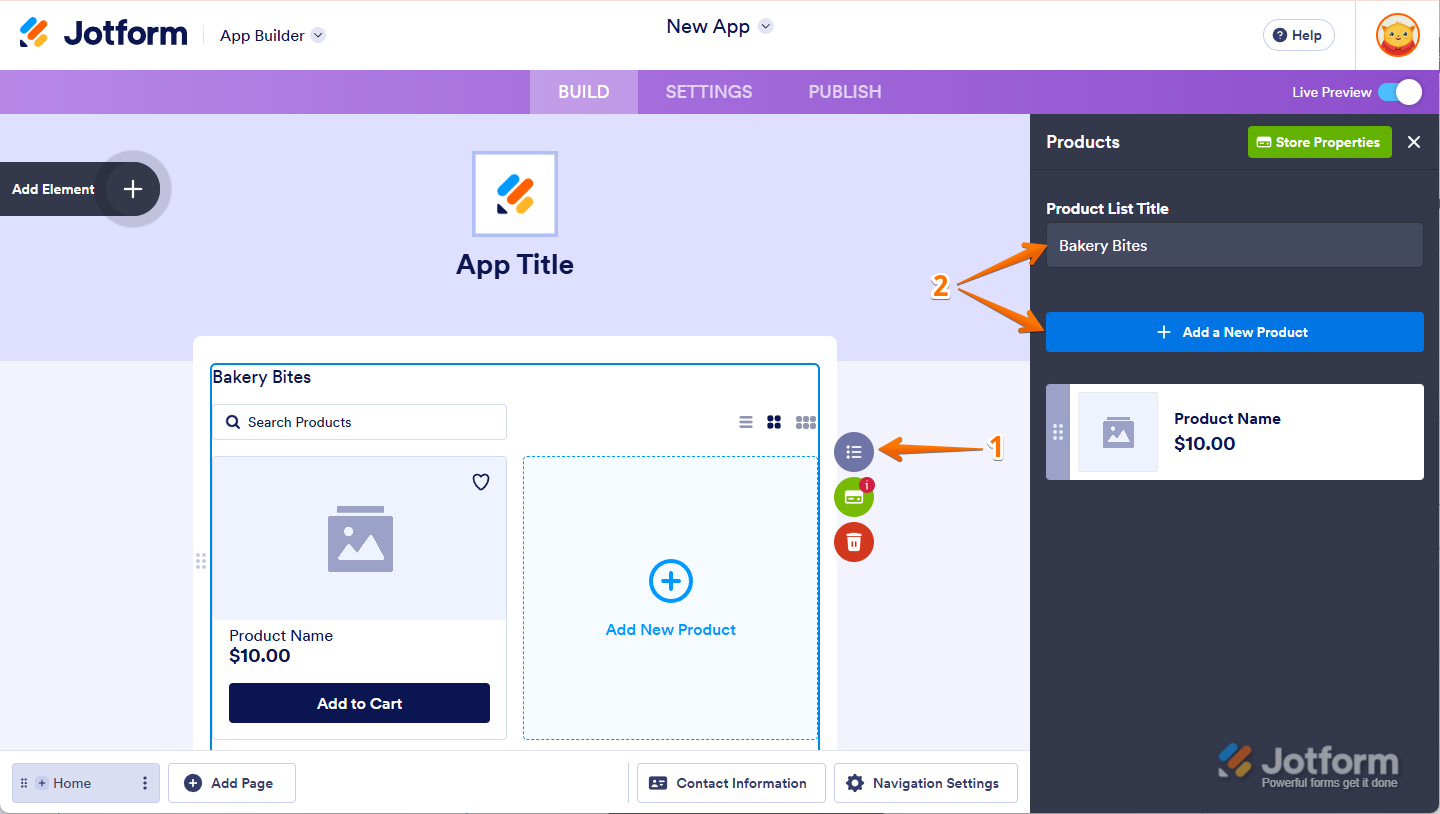
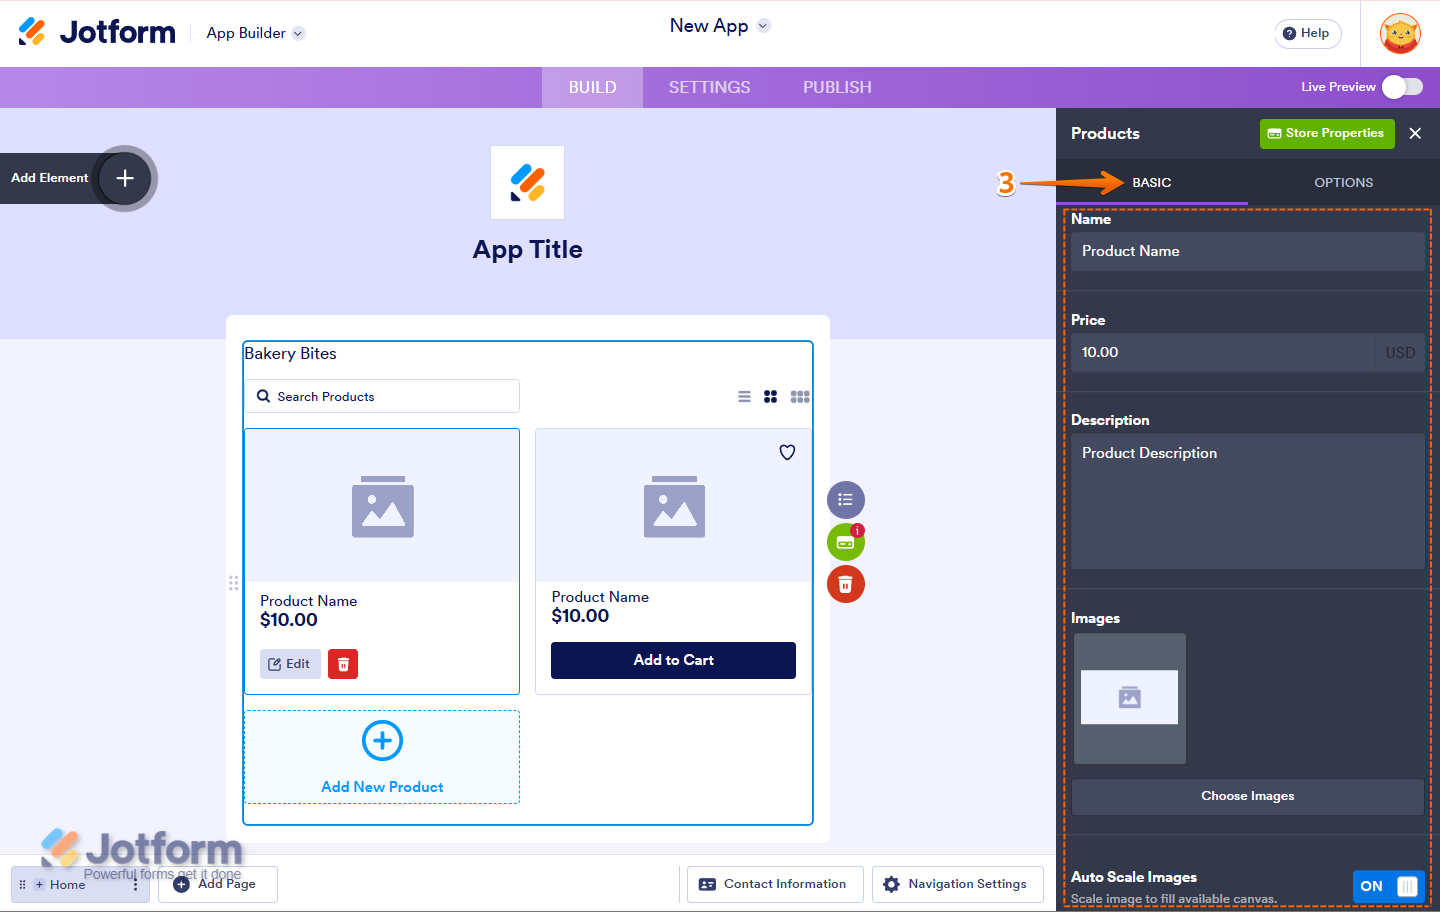
- Now, under the Basic tab, you can setup the following options:
- Name — Enter the product name.
- Price — Set the product price.
- Description — Add a description for your product.
- Choose Images — Upload an image, select one from My Images, or enter an image URL.
- Auto Scale Images — Turn this option On or Off if you want to Auto scale the image.
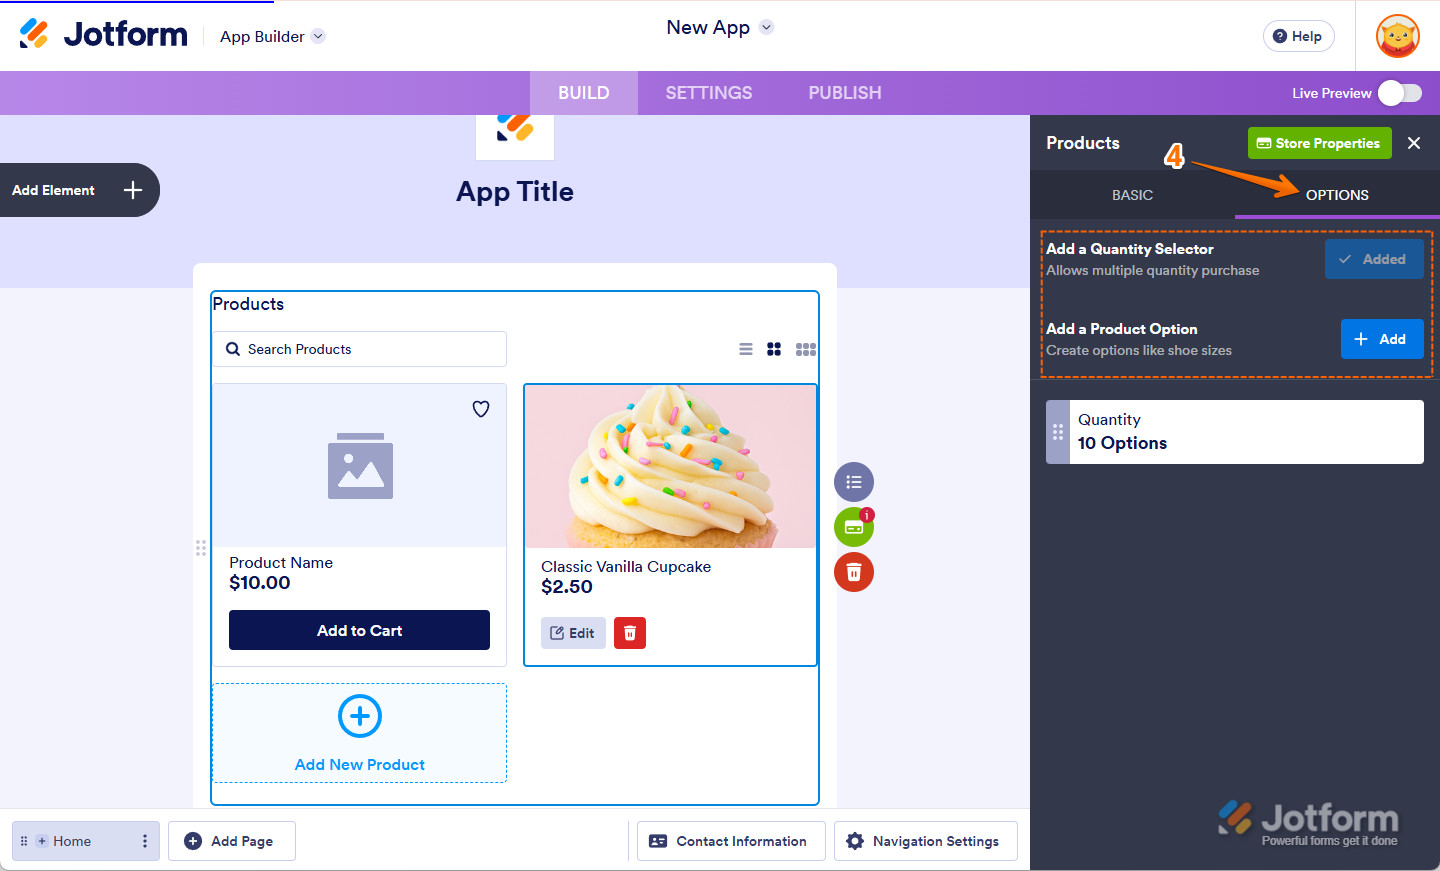
- Next, click on the Options tab to setup the following:
- Add a Quantity Selector — Allow customers to purchase more than one item. This option is added by default.
- Add a Product Option — Create product variants such as the color, shoe size, or t-shirt size to give customers more choices.
That’s it! You’ve now successfully added your products.
Editing Your Products in the Jotform App
As your product list grows, you may need to make updates or adjustments to the items you’ve added. Editing your products in the App Builder is simple and quick. Let’s do it:
- In App Builder, click on the Menu icon on the right side of the Product list element.
- Then, in the Products menu that opens, hover your mouse over to the product that you want to edit and click on the Pencil icon.
That’s it! You’ve successfully edited your products.
Setting Up Your Payment Gateway in Jotform App
The Product List doesn’t come with a payment method by default, so you’ll have to add it in the Store Settings. Let do it:
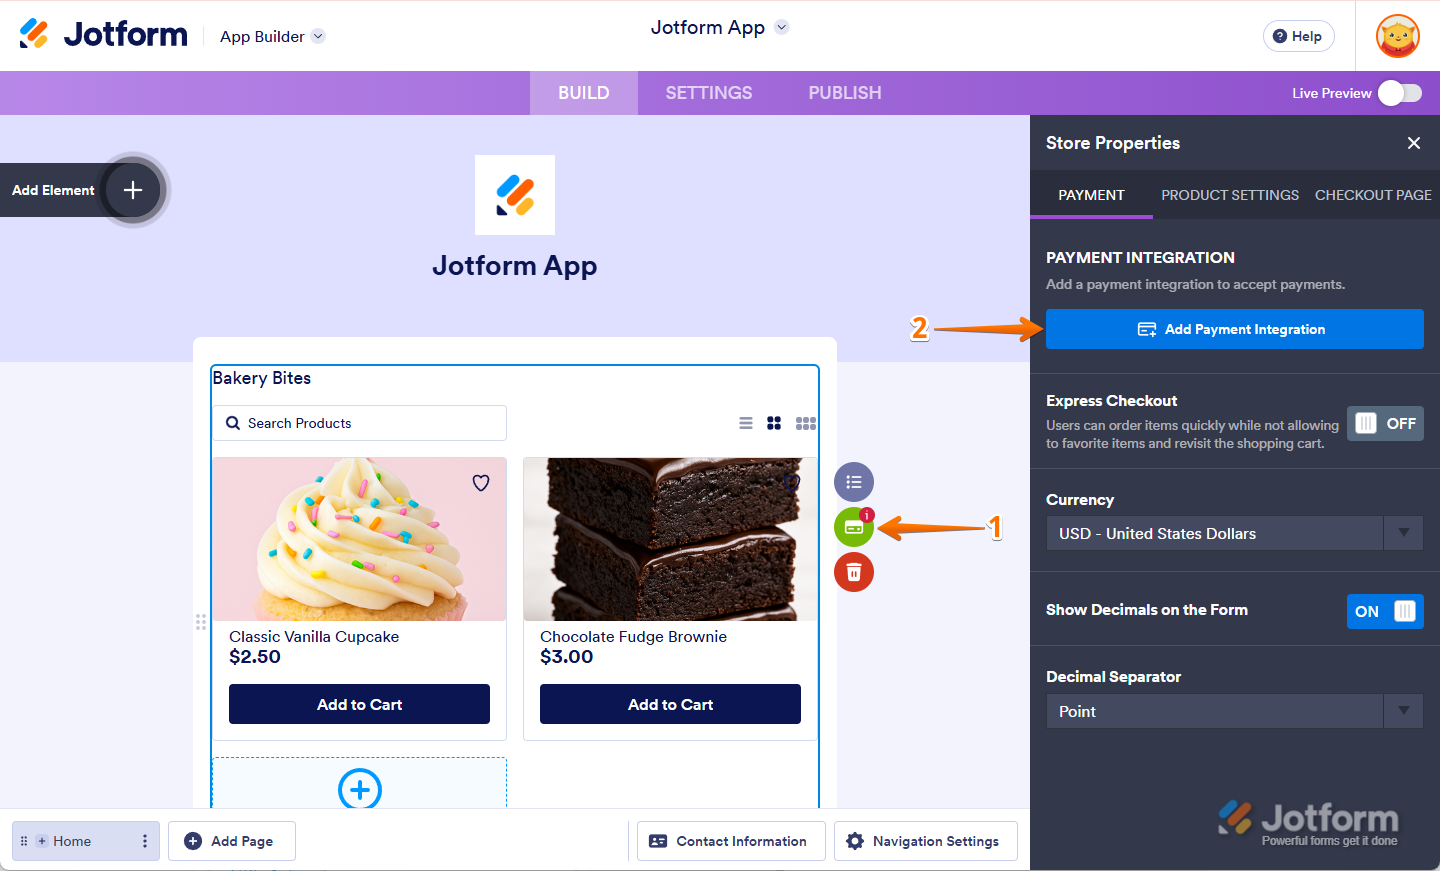
- In App Builder, click on the Credit Card icon on the right side of the Product list element.
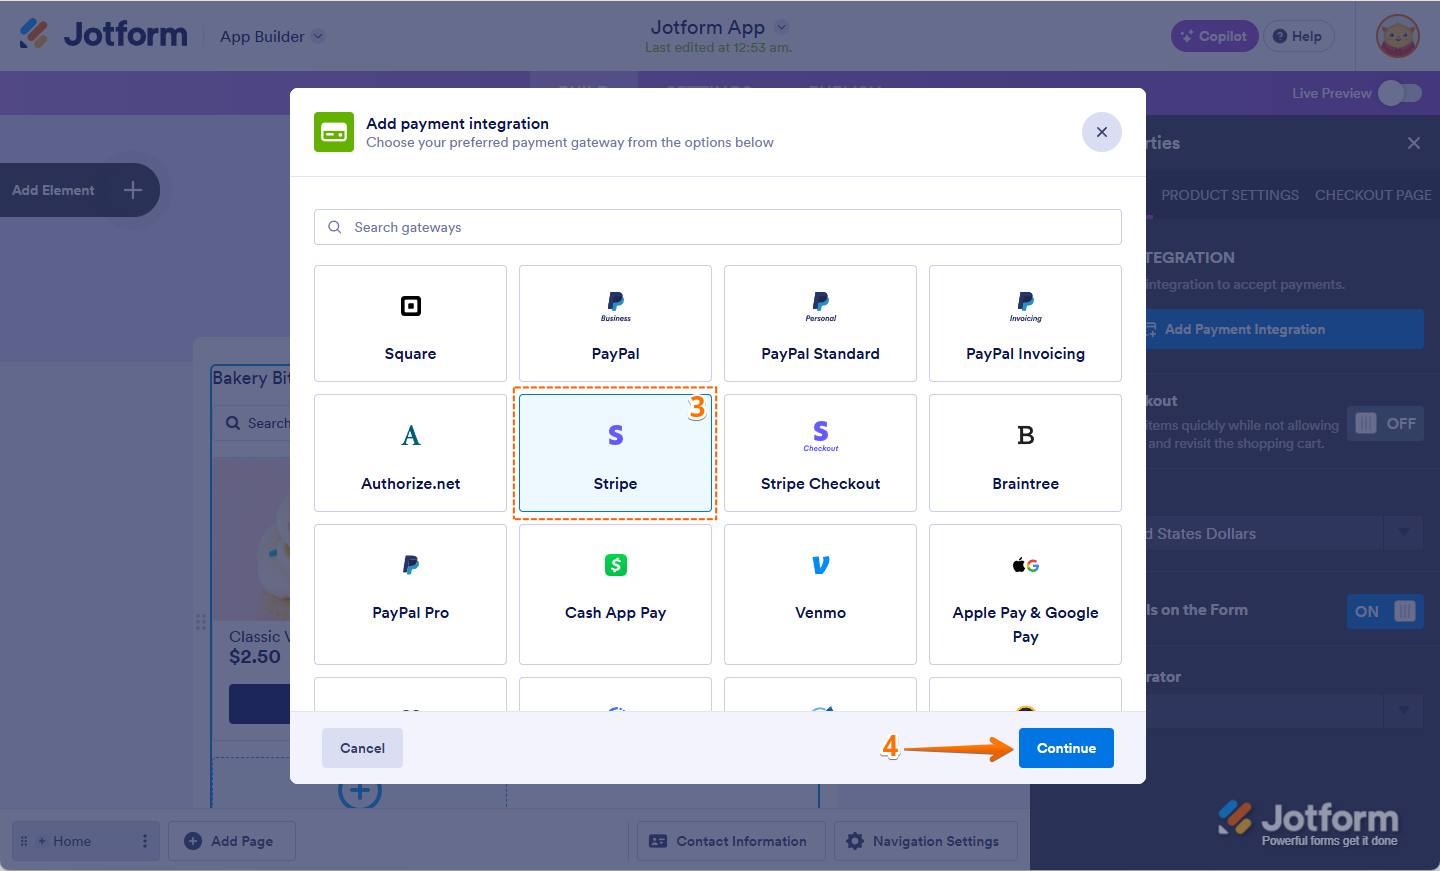
- In the Store Properties window that opens, click on Add Payment Integration.
- Now, in the Add Payment Integration window that opens, search for or click on the payment gateway you want to integrate. For example, Stripe.
- Then, click on Continue.
- Next, click on Connect and login to your Stripe Account.
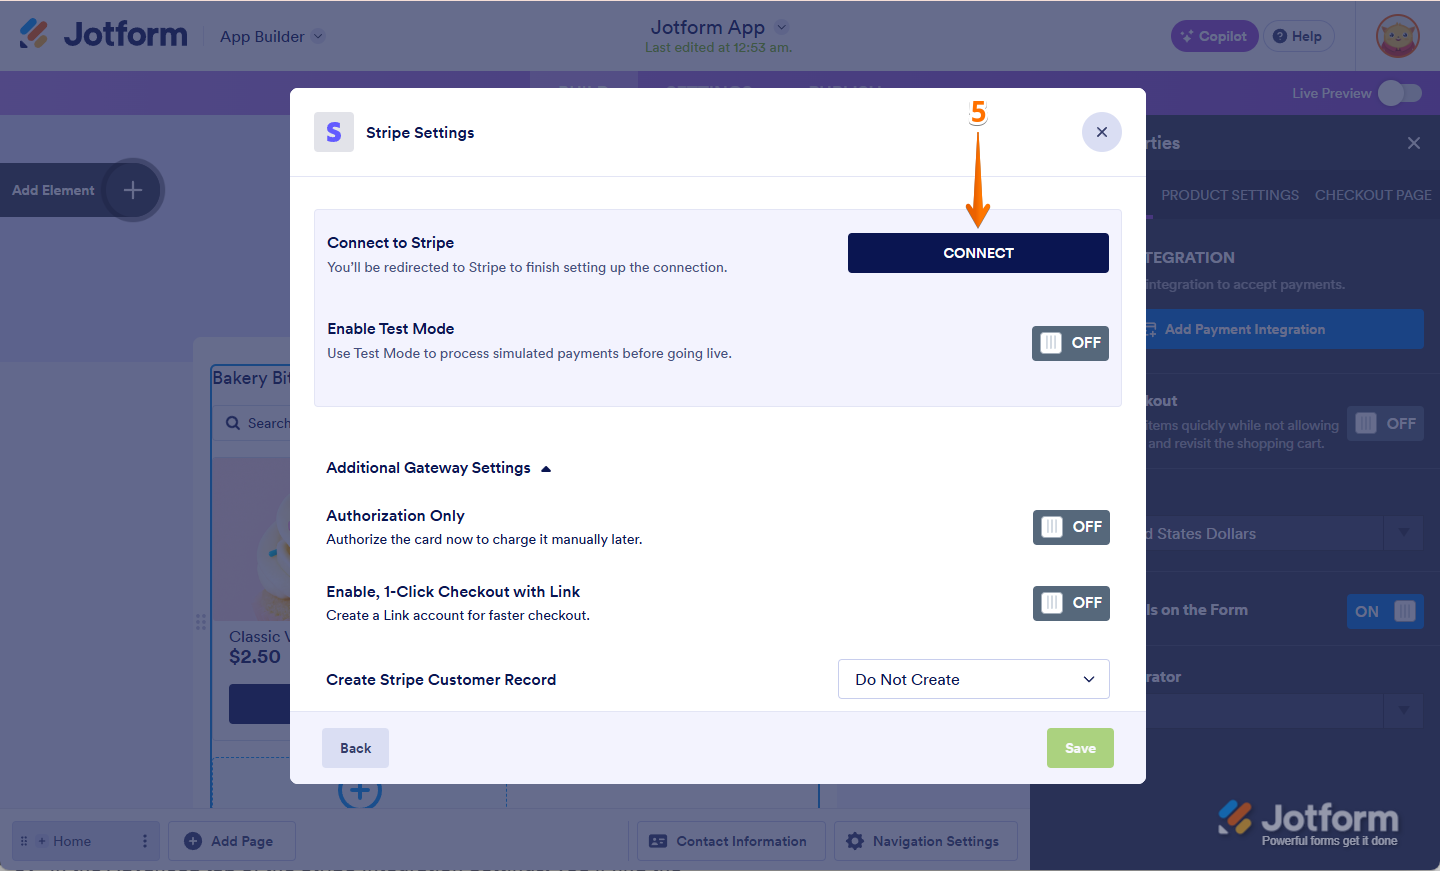
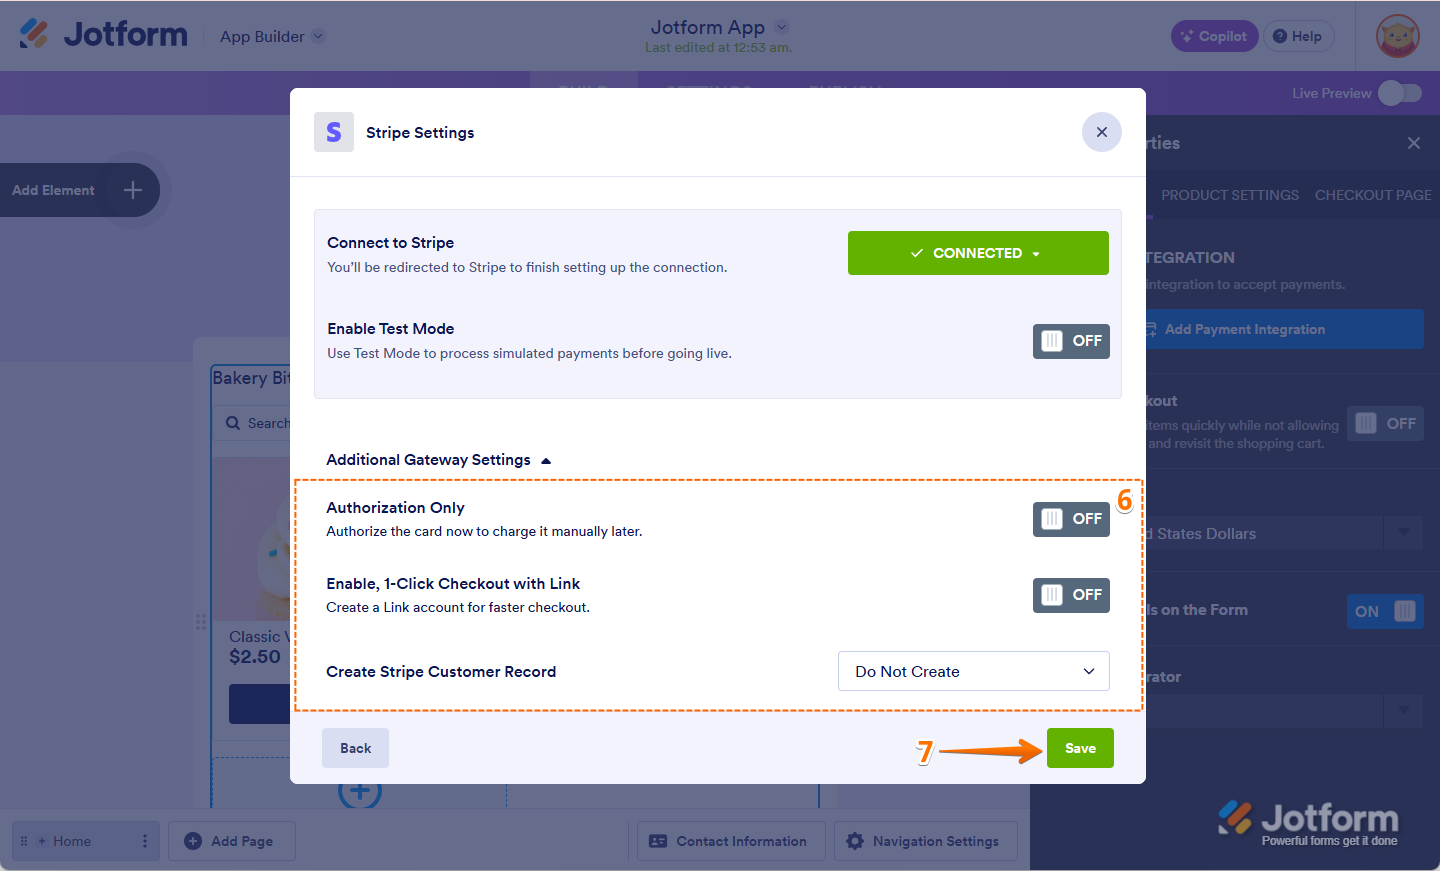
- Once connected, you can configure the following options under the Additional Gateway Settings:
- Authorization Only — Authorize the card now to charge it manually later.
- Enable, 1-Click Checkout with Link — Create a link account for faster checkout.
- Create Stripe Customer Record — Choose one of the following options to create a Stripe customer record: Each Unique Customer, For Each Submission, or Do Not Create.
- Then, click on Save at the bottom of the window.
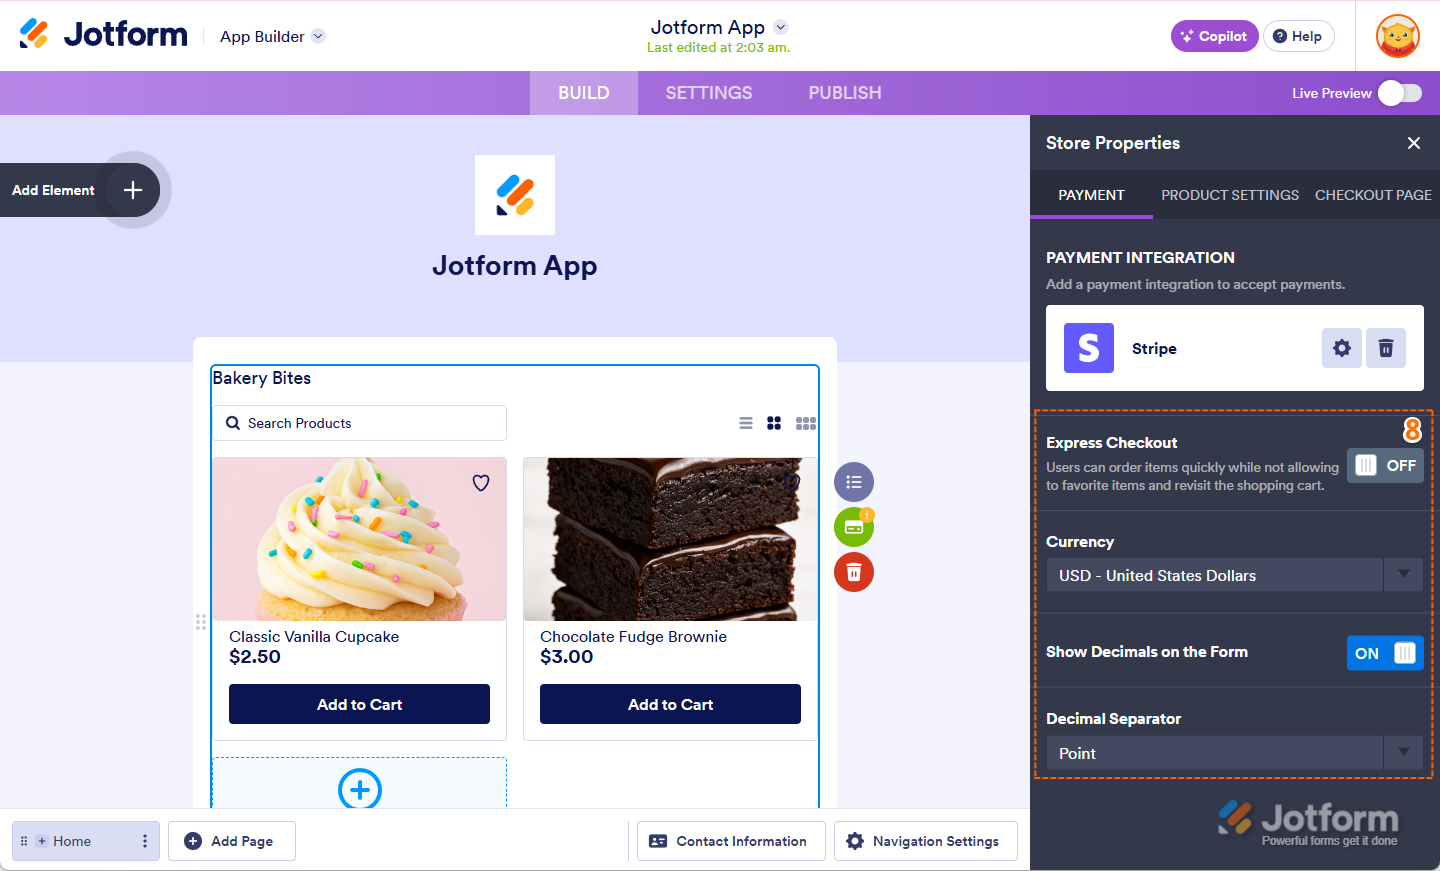
- Now, you can setup the rest of the payment settings:
- Express Checkout — Toggle this On if you want users to quickly order items without allowing them to favorite items or revisit their shopping cart.
- Currency — Select the currency you want to use for transactions. (e.g., USD, EUR)
- Show Decimals on the Form — Enable this if you want to display decimal values for prices (e.g., $10.99)
- Decimal Separator — Choose either a period (.) or comma (,) as the decimal separator.
Customizing the App Header Properties
By default, the Jotform logo is also included as your app’s logo. You can easily replace it, as well as set up the App Title and Description. Here’s how to do it:
- In App Builder, click on the Jotform logo at the top.
- Then, in the App Header Properties window that opens, under the Logo tab, click on Remove Image.
- Once removed, you can now:
- Upload — Upload your own image.
- My Images — Choose from your previously uploaded images.
- Now, click on the General tab and set up the following options:
- Show App Header — Toggle this On to display your app header.
- App Title — Enter a title for your app.
- App Description — Add a brief description of your app.
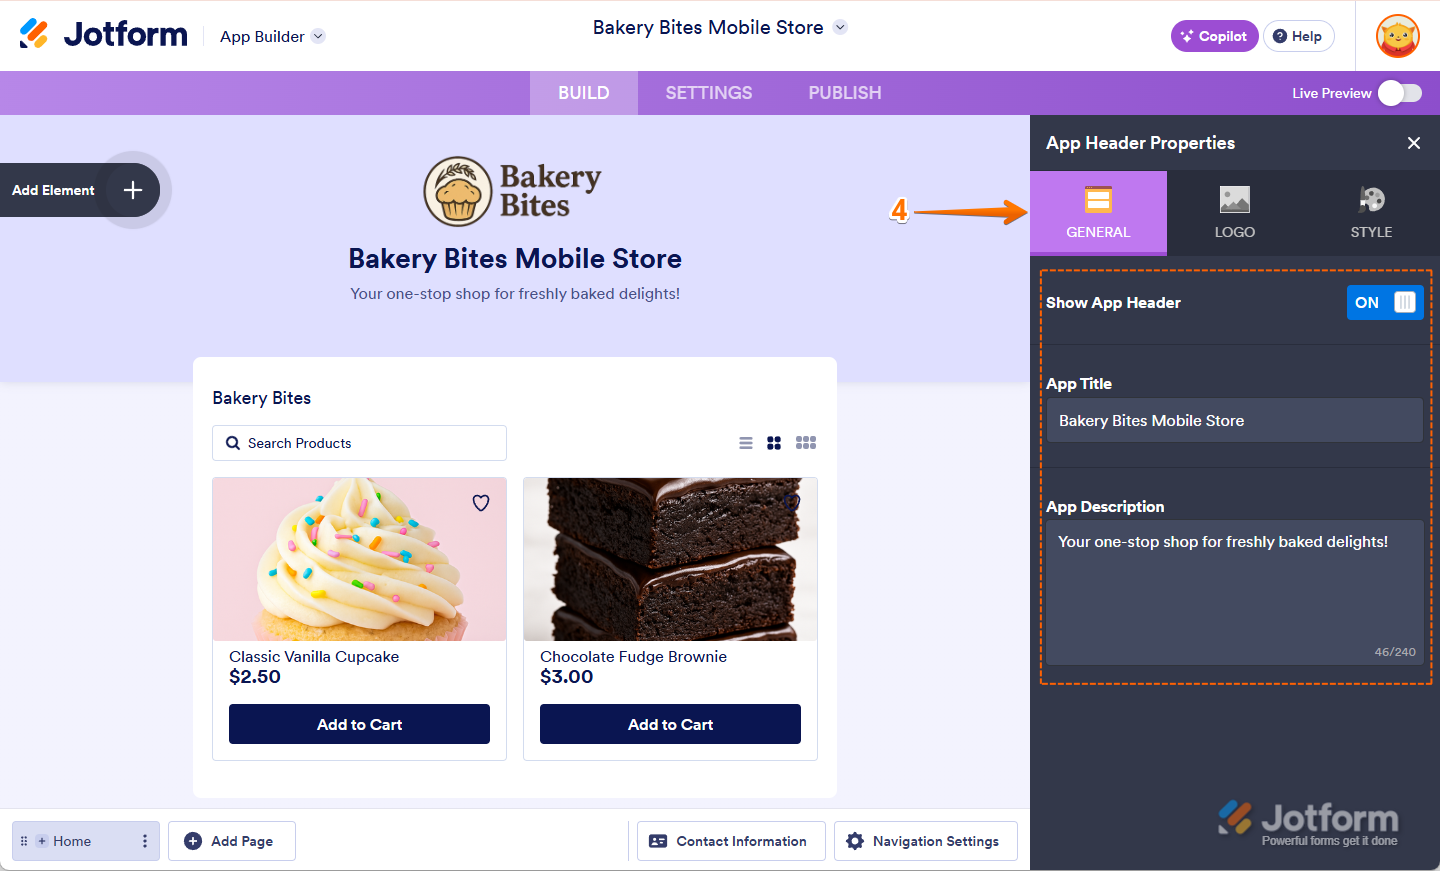
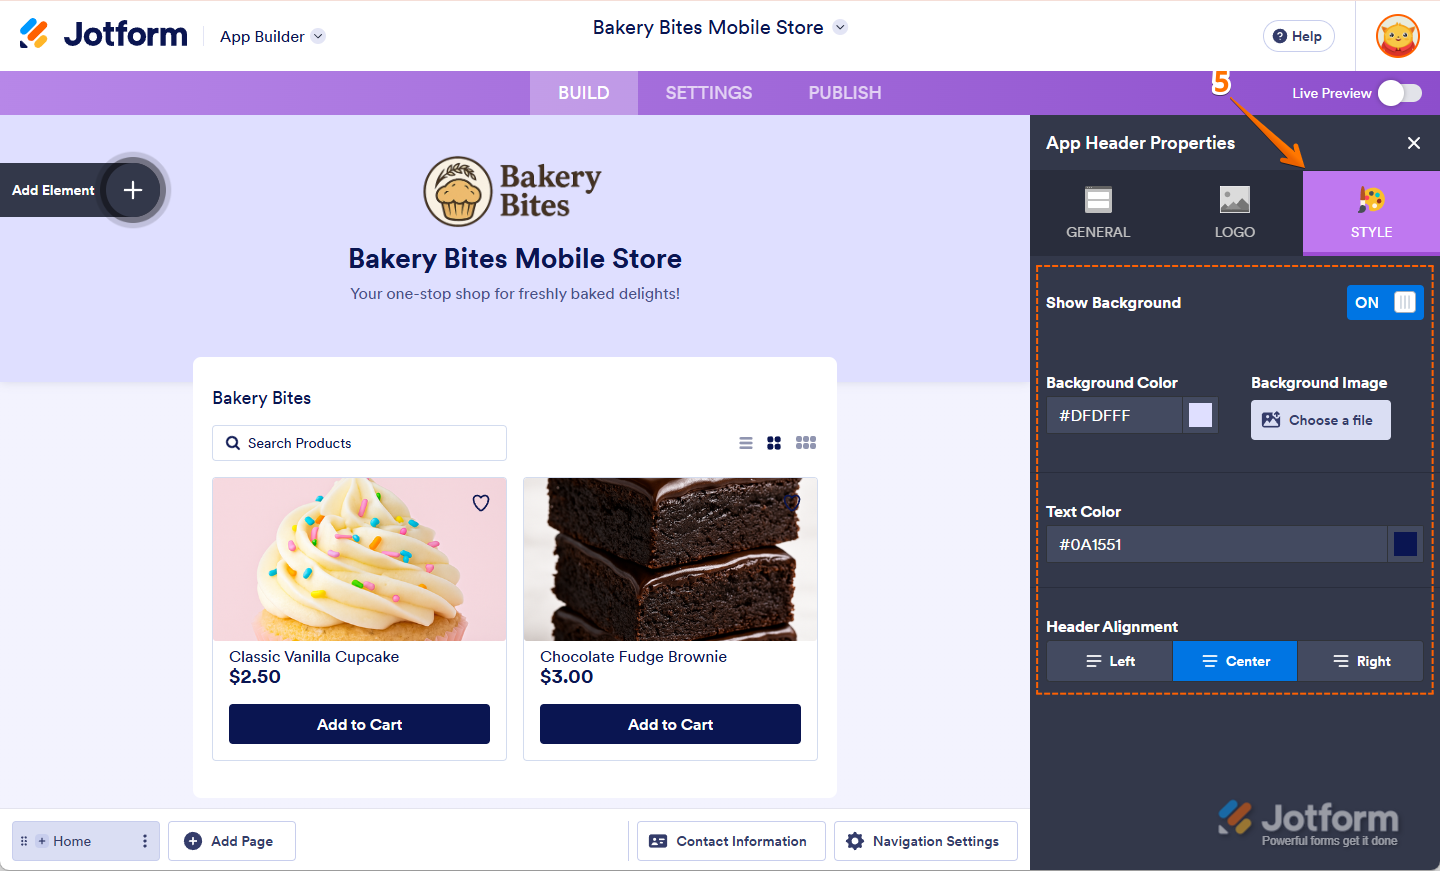
- Lastly, click on Style tab and setup the following options:
- Show Background — Toggle to On or Off the background display for your app.
- Background Color — Choose a color to set as the background for your app.
- Background Image — Upload an image to use as the background for your app.
- Text Color — Set the color for the text in your app.
- Header Alignment — Select the alignment for your app’s header.
Customizing Your Jotform App Using the App Designer
You can also further customize your App using the built-in App Designer within App Builder. Here’s how to do it:
- In App Builder, click on the Paint Roller icon on the right side of the screen.
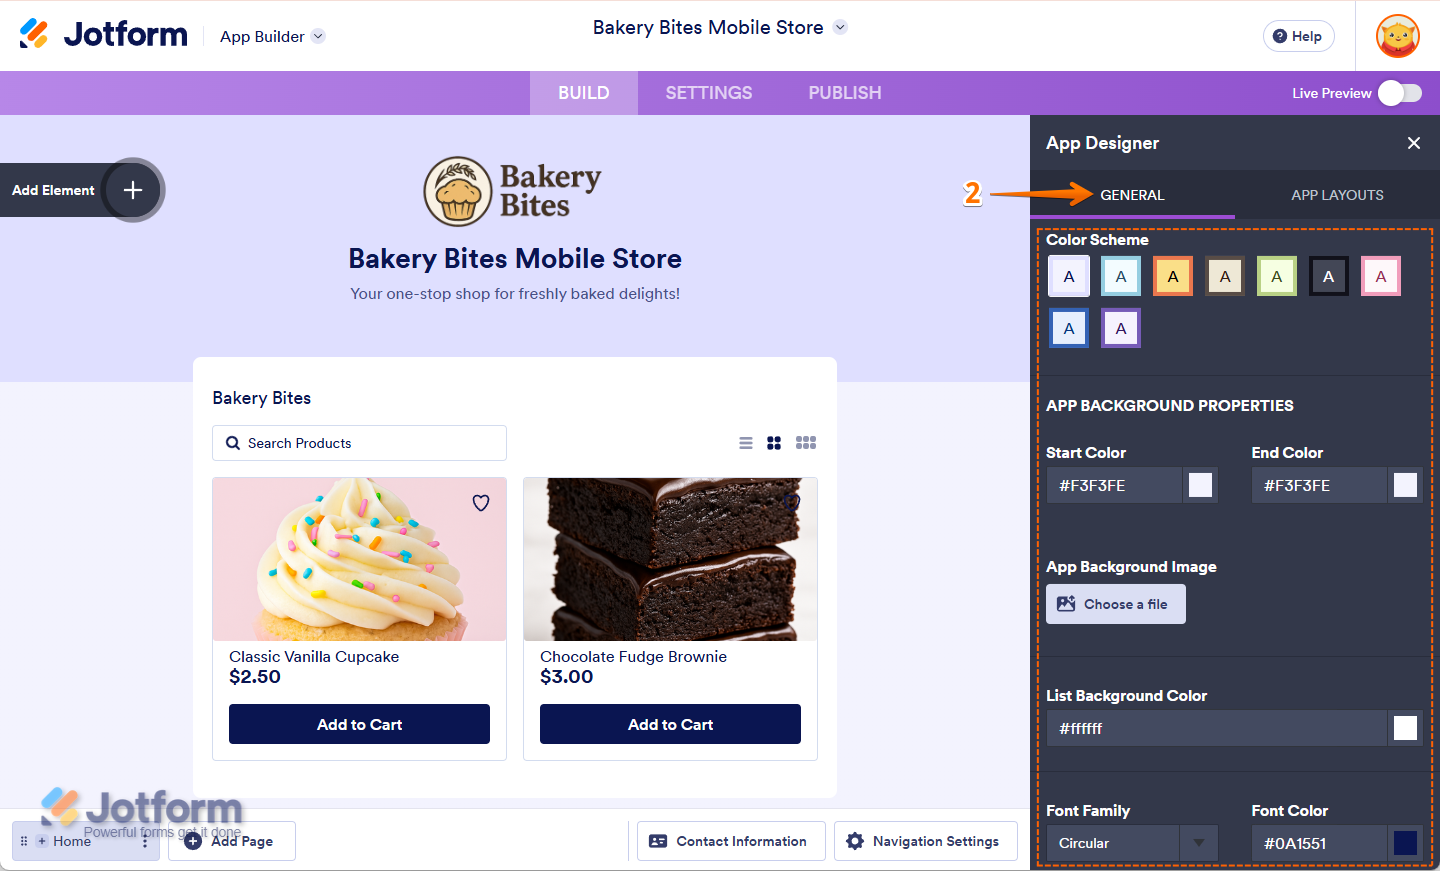
- Now, under the General tab, you can do the following things:
- Color Scheme — Choose a color scheme for your app.
- Start Color — Select the starting color for the gradient background.
- End Color — Select the ending color for the gradient background.
- App Background Image — Upload an image to set as the background of your app.
- List Background Color — Pick a color for the background of your product list.
- Font Family — Choose the font family for your app’s text.
- Font Color — Set the color of the text used in your app.
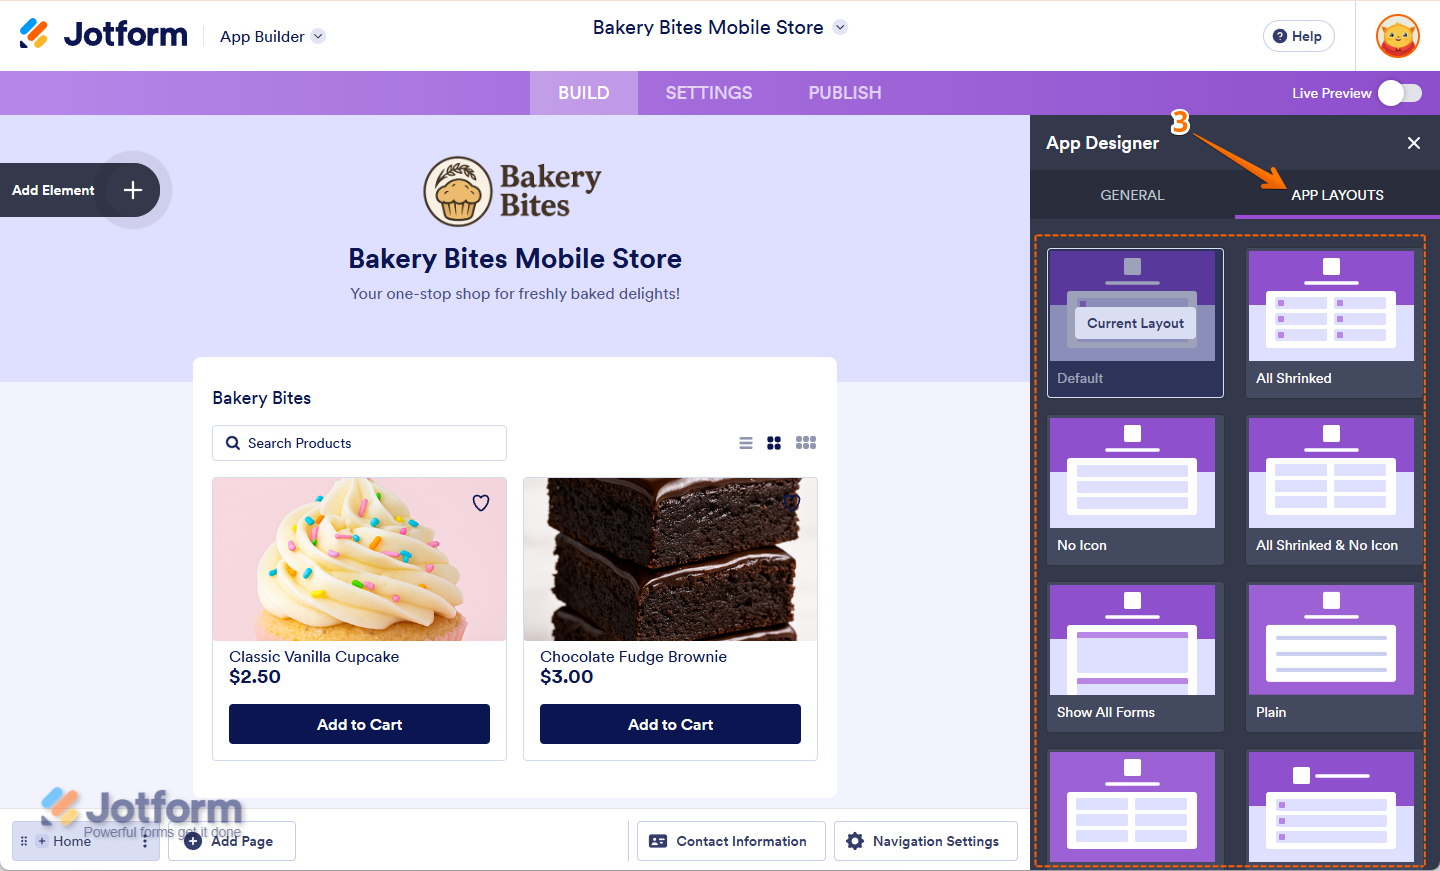
- Then, click on the App Layouts tab to select from the premade layout types:
- Default — Use the default layout for your app.
- All Shrunk — Shrink all the elements in your app for a compact view.
- No Icon — Hide icons from the layout.
- All Shrunk & No Icon — Shrink all the elements and hide icons for a minimal layout.
- Show All Forms — Display all the forms in the layout.
- Plain — Use a simple, clean layout with minimal styling.
- All Shrunk and No Header — Shrink all the elements and hide the header for a more compact design.
- Left Aligned — Align all the elements to the left.
- Right Aligned — Align all the elements to the right.
- Center Aligned — Align all the elements to the center.
- All Large Elements — Display all the elements in a larger size.
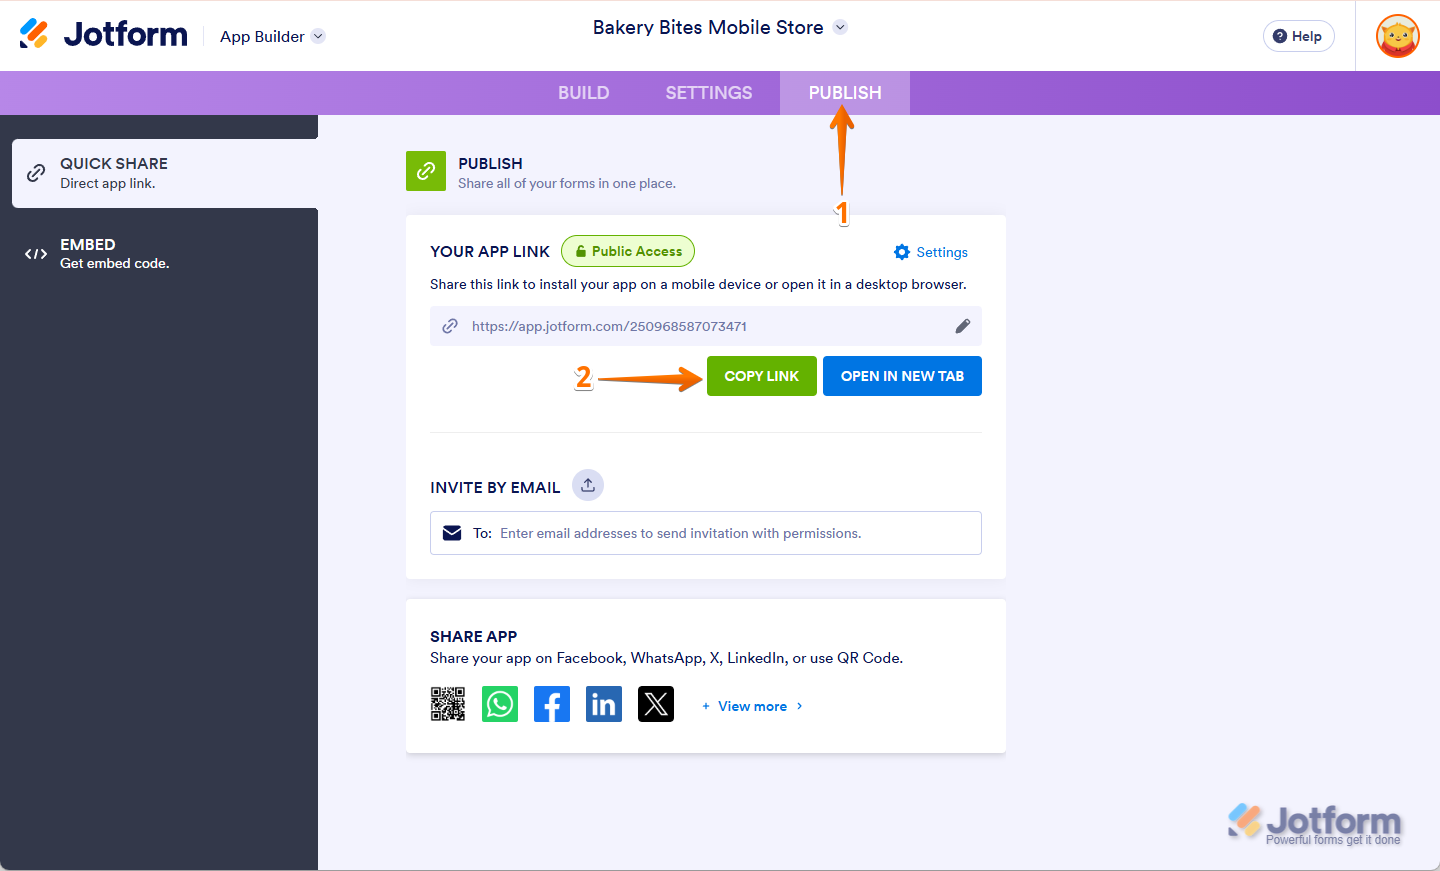
Publishing Your Jotform App Store
Once you set up your store now, you’ll need to share it with your audience. Here’s how:
- In App Builder, in the purple navigation bar at the top of the page, click on Publish.
- Then, click on Copy link and send it directly to your customers via email or social media.
You can also embed your app on your website. Check out our guide about How to Embed Apps to a Website to learn more about it.
And you’re all set! You’ve successfully set up your Jotform Store, added your products, integrated payment methods, and customized your app. Now it’s time to start sharing your store with your customers.


Send Comment:
3 Comments:
285 days ago
Hello is it possible to custmize the email response people recive when placing an order?
More than a year ago
How can I integrate payment to my Hitpay or Paymongo payment gateway?
More than a year ago
No info on sending out receipts or notifications to customers. Nothing about tracking and processing orders. This is a very basic guide