Overview
As an admin, you can manage organization-wide email settings, such as the Default Sender Email, system emails, and adding new sender emails, in the Admin Console.
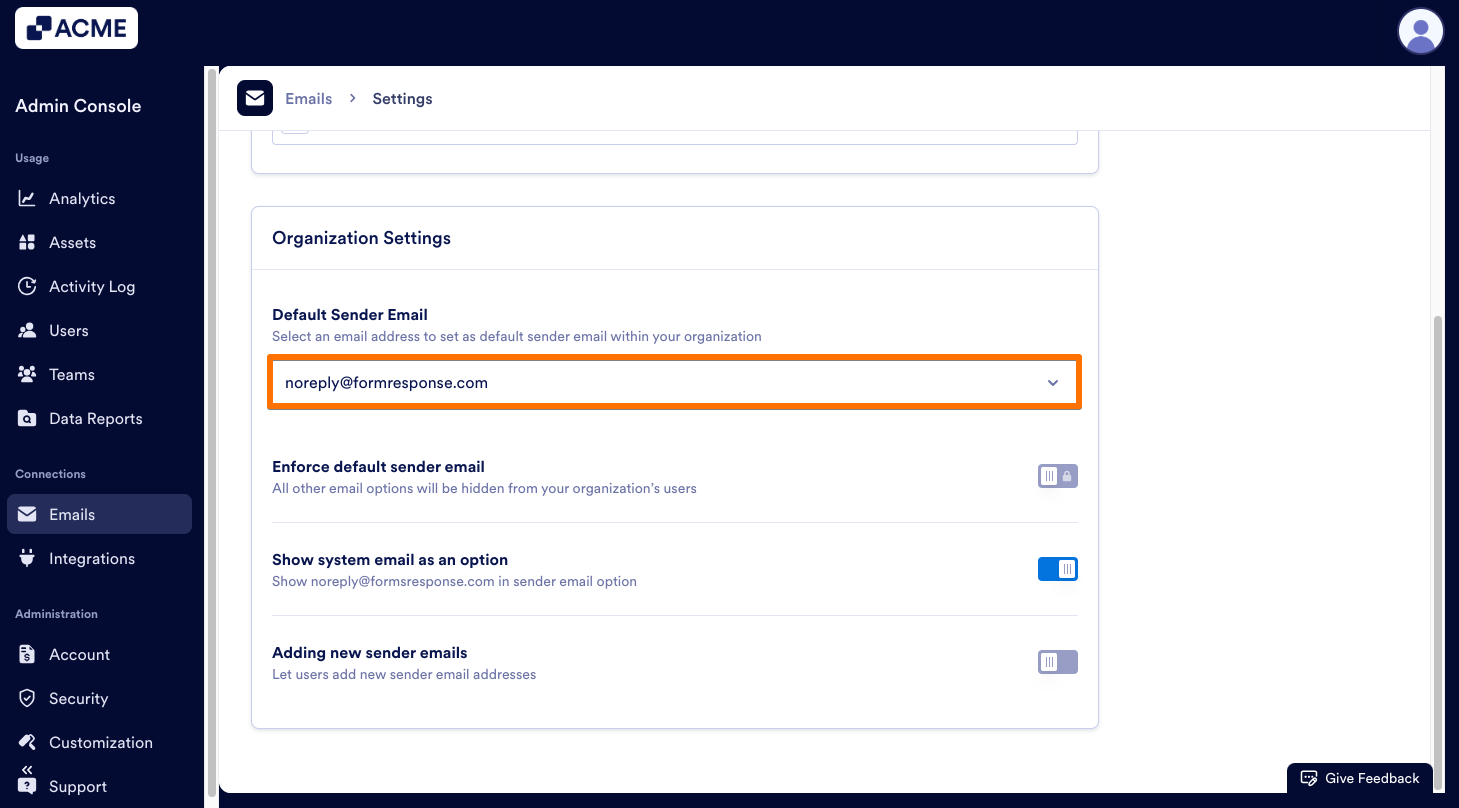
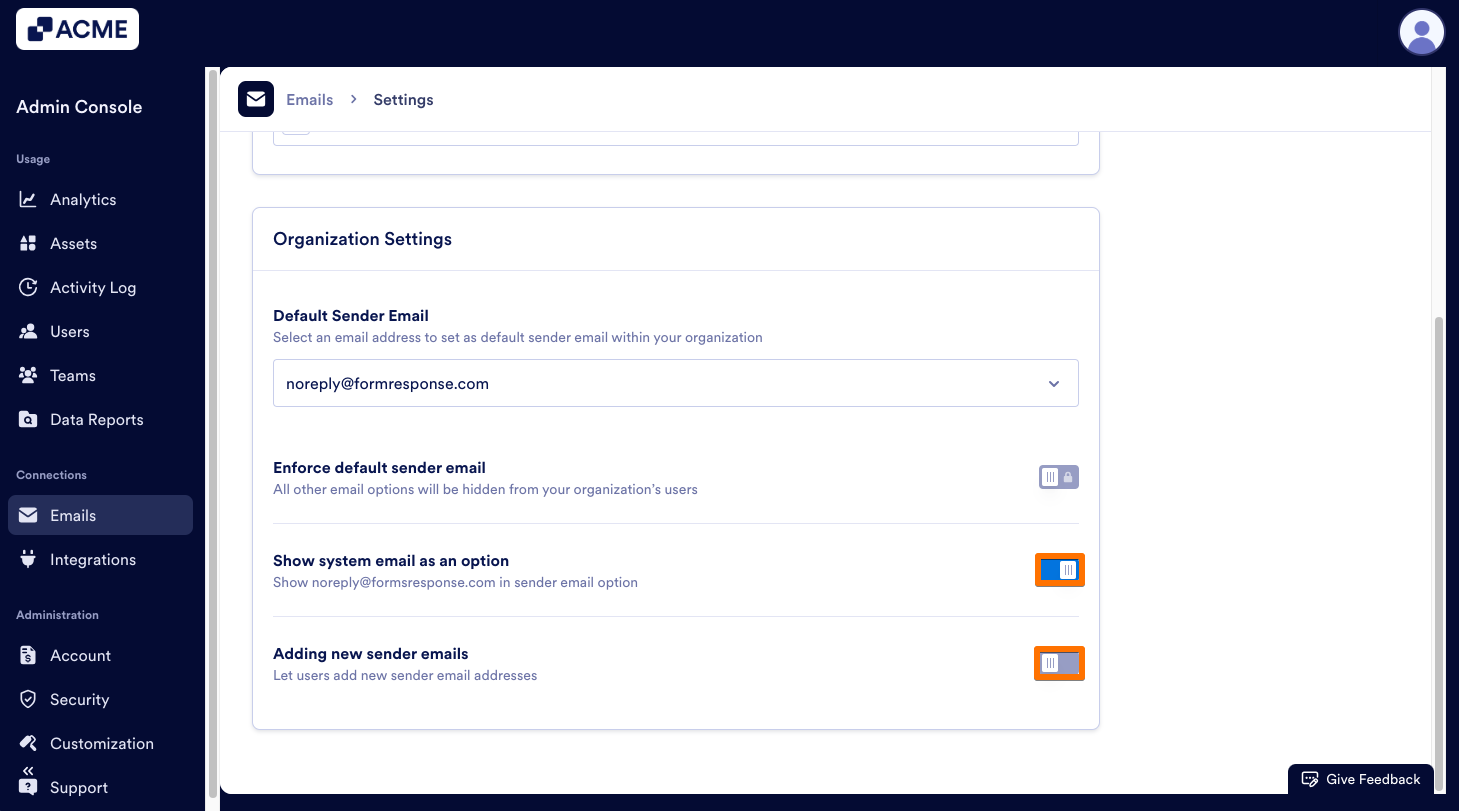
Default Sender Email
This email is the default for all emails on your server – while others can be added and changed, this will be the one used when an email element is created. Let’s walk through the process of updating this together.
- In the Admin Console, select Emails under Connections.

- Click on the gear icon to open the Sender Email Configuration settings.

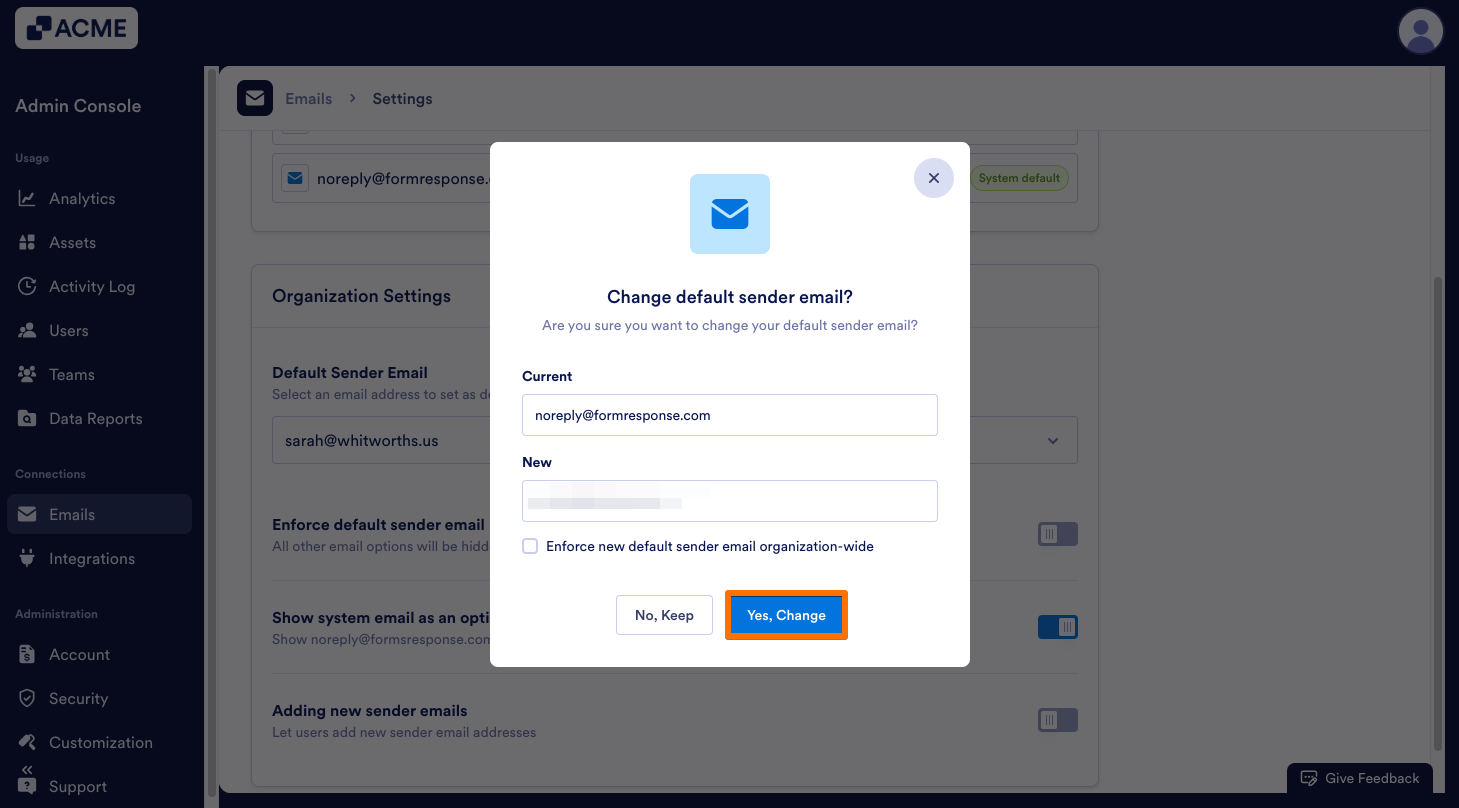
- Then, click on the drop-down menu under Default Sender Email and select the new Default Sender Email.
- In the pop-up, click Yes, Confirm to confirm the change.
Enforce Default Sender Email
You can also restrict the sender email to the Default. It’s important to note that this will change the default sender email on all emails. Let’s walk through enabling this together:
- In the Admin Console, select Emails under Connections.

- Click on the gear icon to open the Sender Email Configuration settings.

- Next to Enforce Default Sender Email, toggle On the switch.
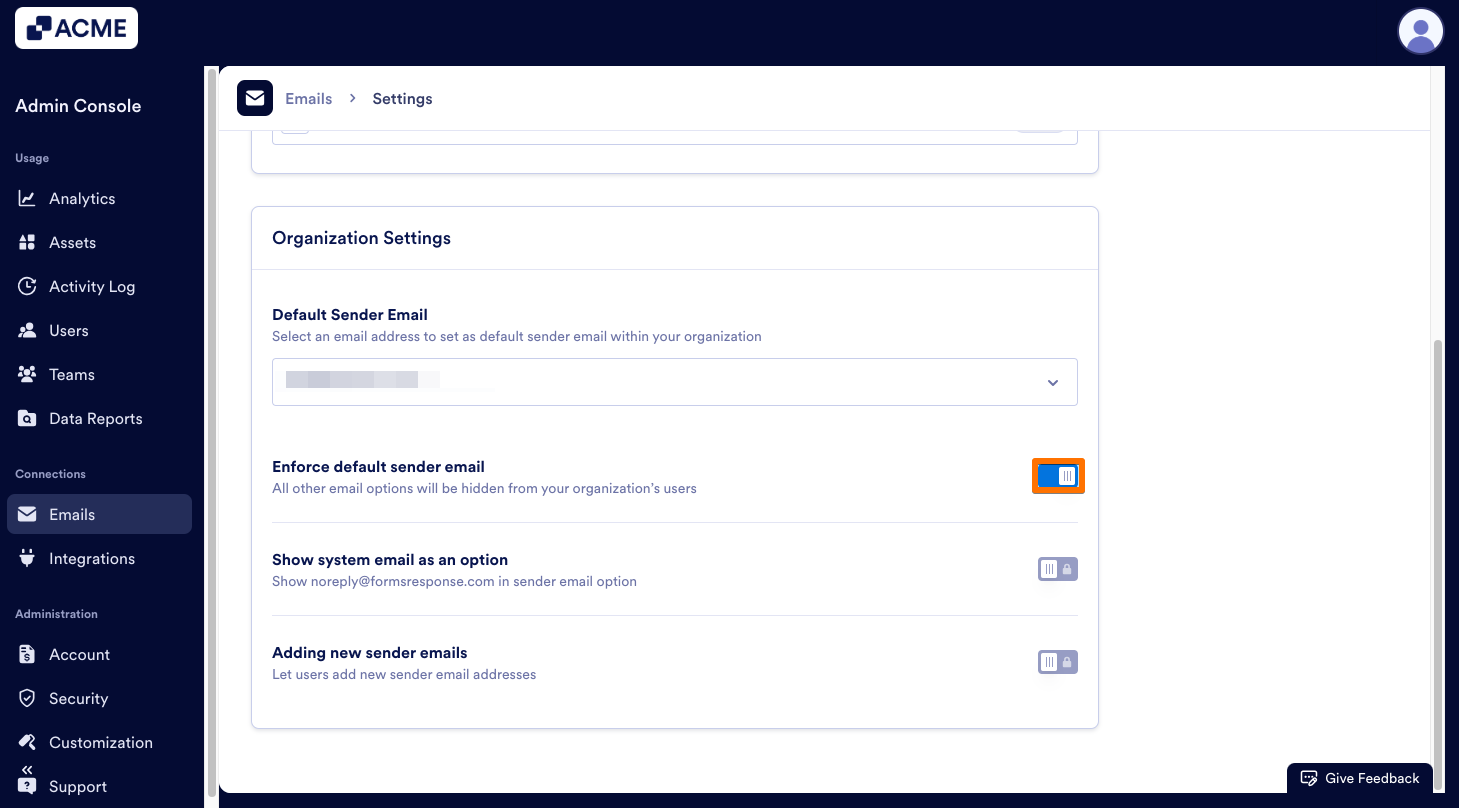
- In the pop-up window, click Enforce Now.

When this is enforced, Show System Email as an Option and Adding new sender emails are both disabled and locked.
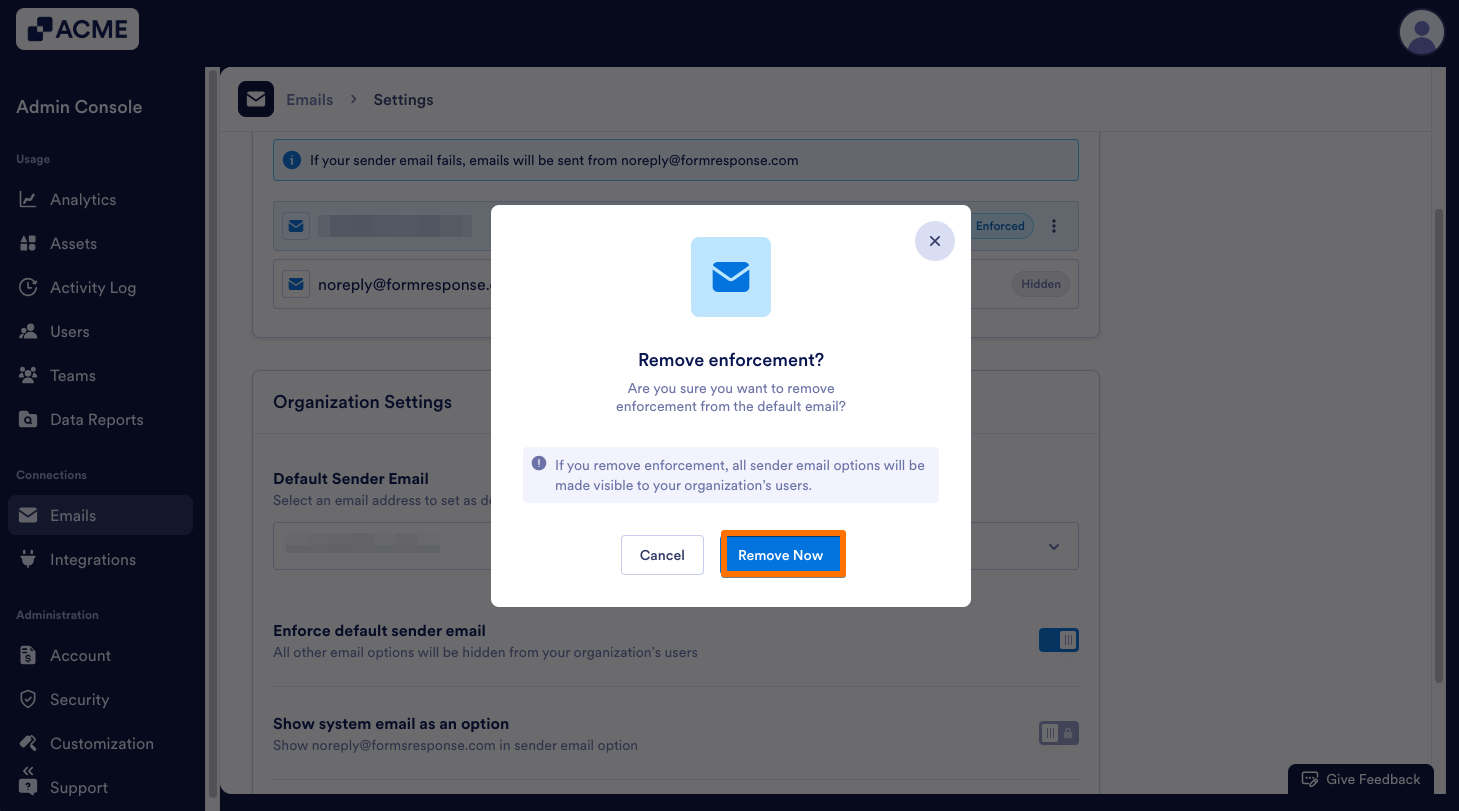
Now, let’s walk through disabling the default sender enforcement:
- In the Admin Console, select Emails under Connections.

- Click on the gear icon to open the Sender Email Configuration settings.
- Next to Enforce Default Sender Email, toggle Off the switch.

- Select Remove Enforcement in the pop-up window.
Other Email Settings
You can also enable or disable the following:
- Show System Email as an Option: This allows noreply@formresponse.com to be used as a sender email.
- Adding New Sender Emails: This option allows both Admins and Users to add additional sender emails.

Send Comment: