Microsoft Entra ID is an Enterprise identity platform that provides Single Sign-On (SSO), multifactor authentication, and conditional access—making it simple to connect with Jotform.
To get started, make sure SSO is enabled on your Jotform Enterprise server and you have a Microsoft Entra account with admin permissions.
Note
Users can log in with either SSO or their email and password. You can also choose to require SSO for guest users.
Creating Your Own Application
Since Jotform isn’t available as a gallery app in Microsoft Entra ID, you’ll need to add a non-gallery application and set it up for SAML-based SSO. To get started, here’s what to do:
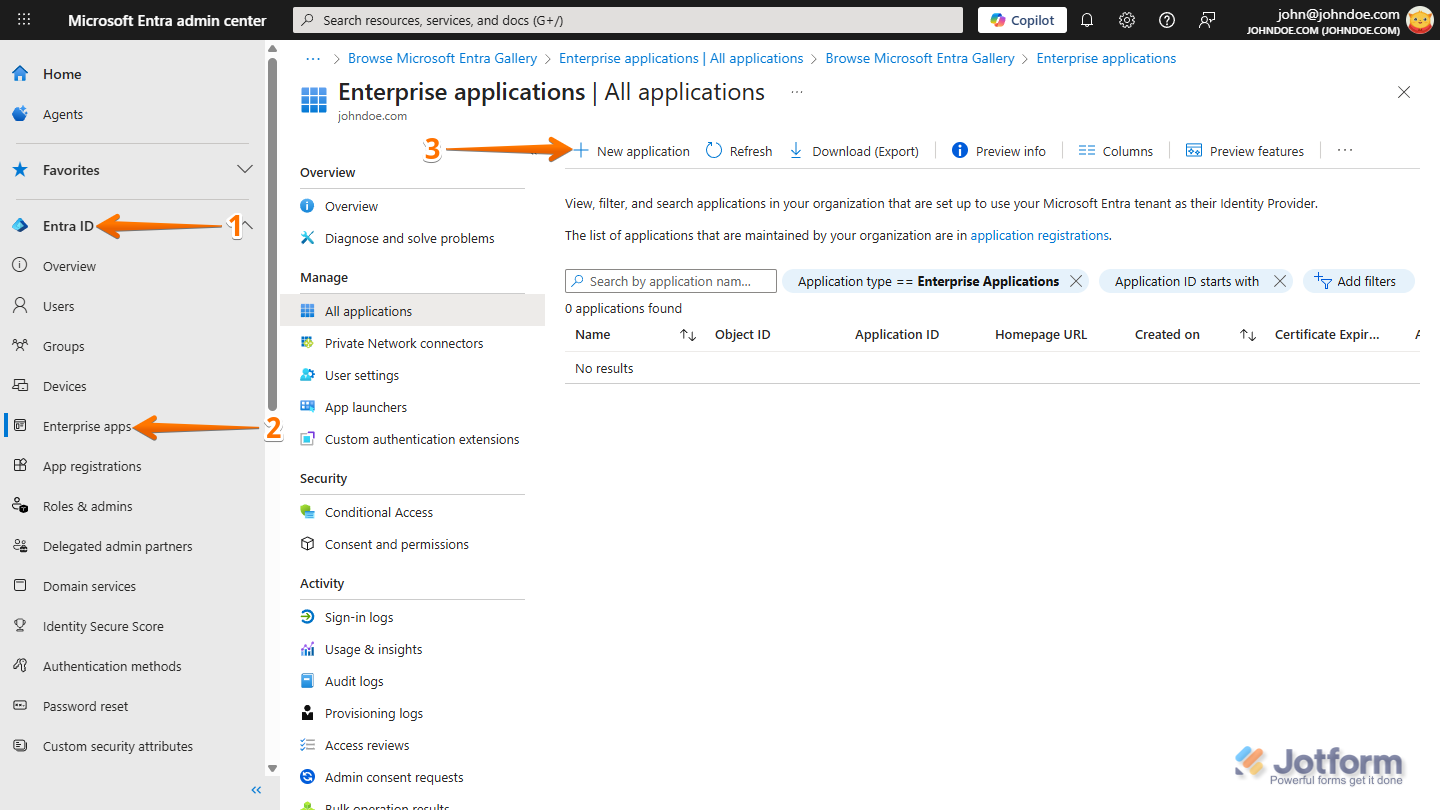
- Log in to your Microsoft Entra ID Admin Center dashboard, and then in the menu on the left side of the page, click on Entra ID.
- In the Submenu that opens, click on Enterprise Apps.
- Then, on the Enterprise Applications | All Applications page, click on New Application.
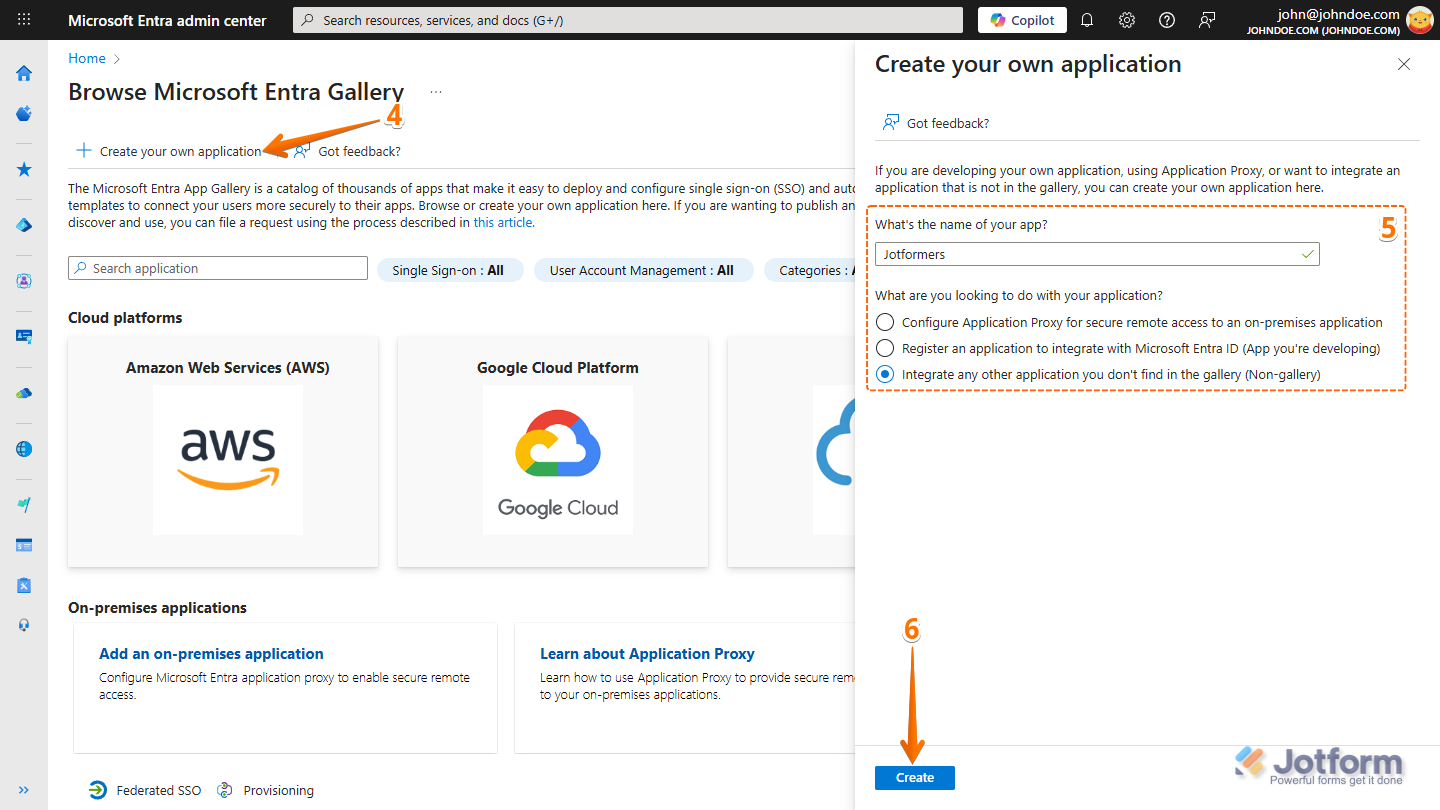
- Next, on the Browse Microsoft Entra Gallery page, click on Create Your Own Application.
- Now, in the Create Your Own Application window that comes up, set up these things:
- What’s the Name of Your App — Enter a name for your application.
- What Are You Looking to Do With Your Application — Select “Integrate Any Other Application You Don’t Find in the Gallery (Non-Gallery)”.
- Finally, click on Create.
Setting up SAML as an SSO Method
After creating your application, the next step is to set up SAML as a Single Sign-on method. Here’s what to do next:
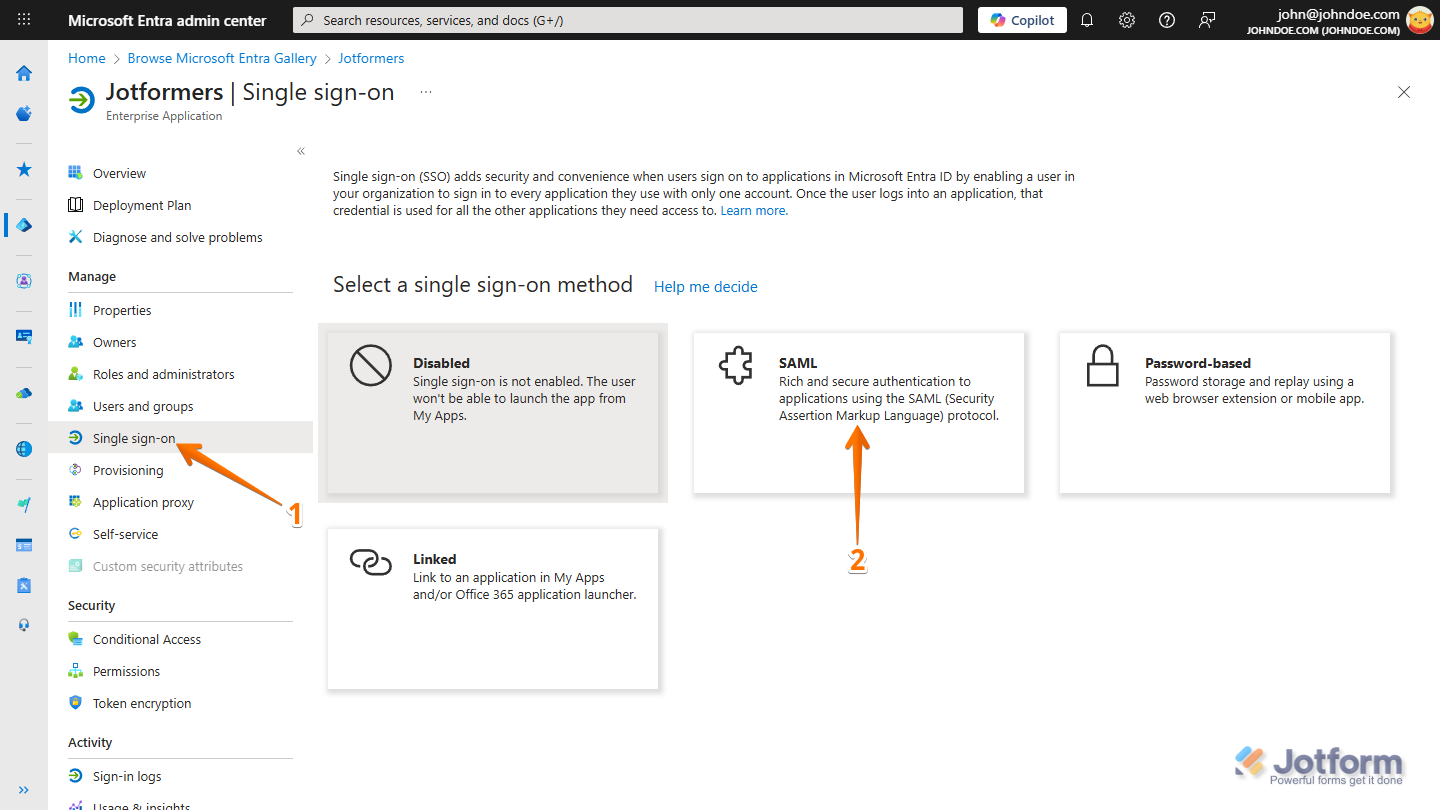
- On the Overview page for your newly created application, under the Manage section on the left, click on Single Sign-on.
- Then, on the Select a Single Sign-on Method page, click on SAML.
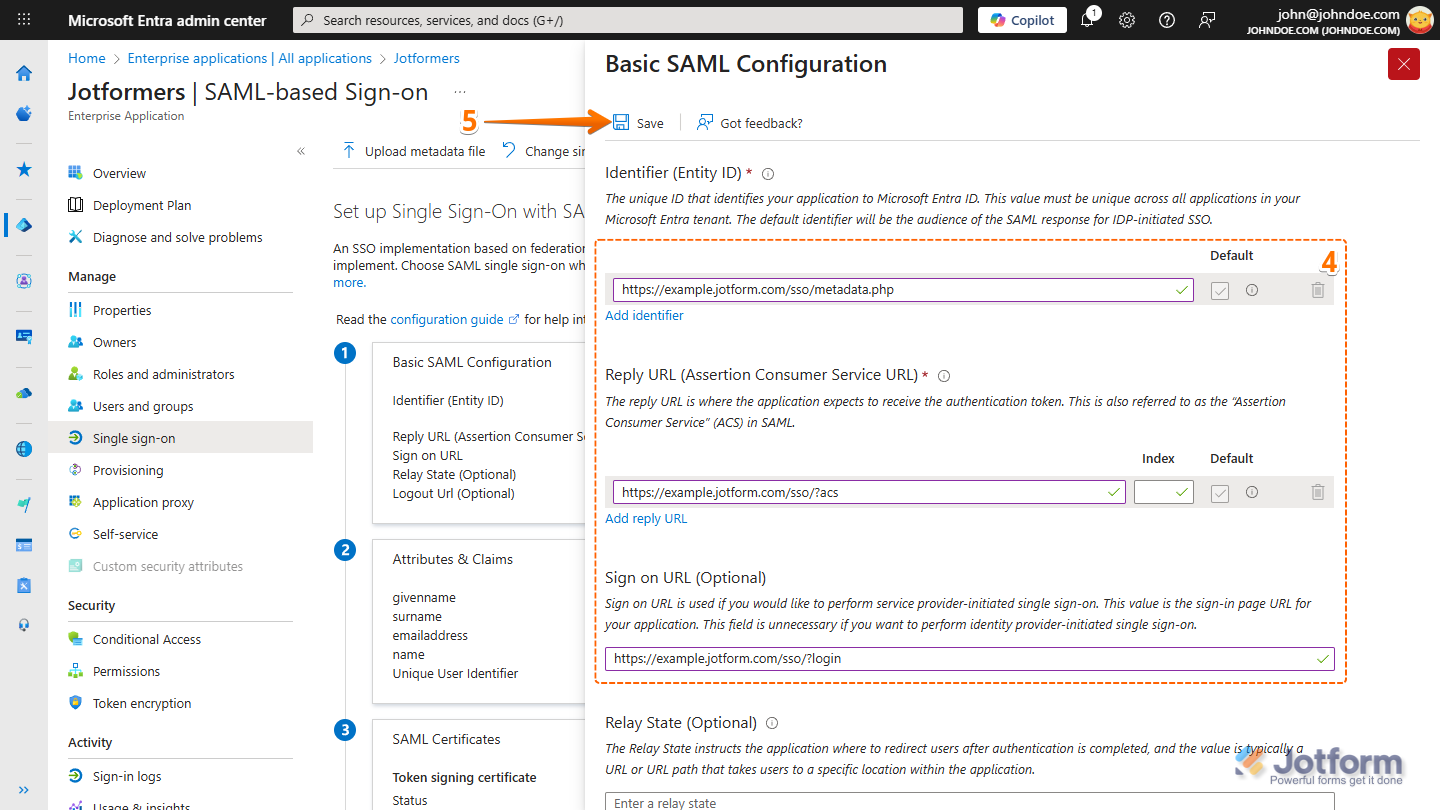
- Now, on the Set up Single Sign-On with SAML page, under the Basic SAML Configuration section, click on Edit.
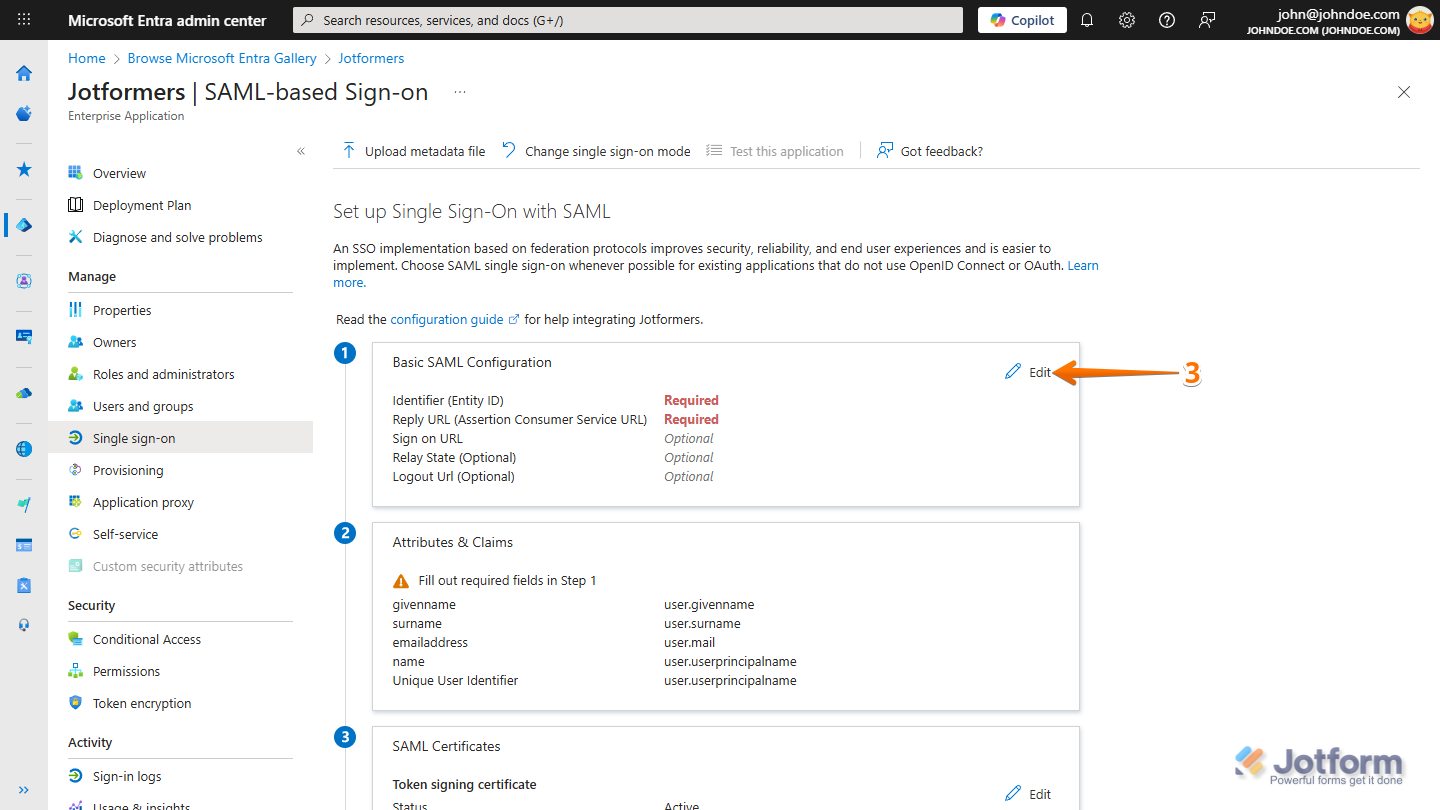
- Next, in the Basic SAML Configuration window that opens, set things up like this:
- Identifier (Entity ID) — Use your Jotform Entity ID (e.g., https://example.jotform.com/sso/metadata.php).
- Reply URL (Assertion Consumer Service URL) — Use your Jotform Service Provider Assertion Consumer Service URL (e.g., https://example.jotform.com/sso/?acs).
- Sign on URL (Optional) — Use your Jotform Service Provider Assertion Consumer Service URL but replace ?acs with ?login (e.g., https://example.jotform.com/sso/?login).
Note
You can access and copy your Jotform Enterprise Service Provider Metadata on the SSO settings page. Our guide on How to Obtain Service Provider Metadata from Jotform Enterprise has more details about that.
- Now, click on Save, and then click on the X icon to close the window.
- While still on the Set up Single Sign-On with SAML page, in the Attributes & Claims section, click on Edit.
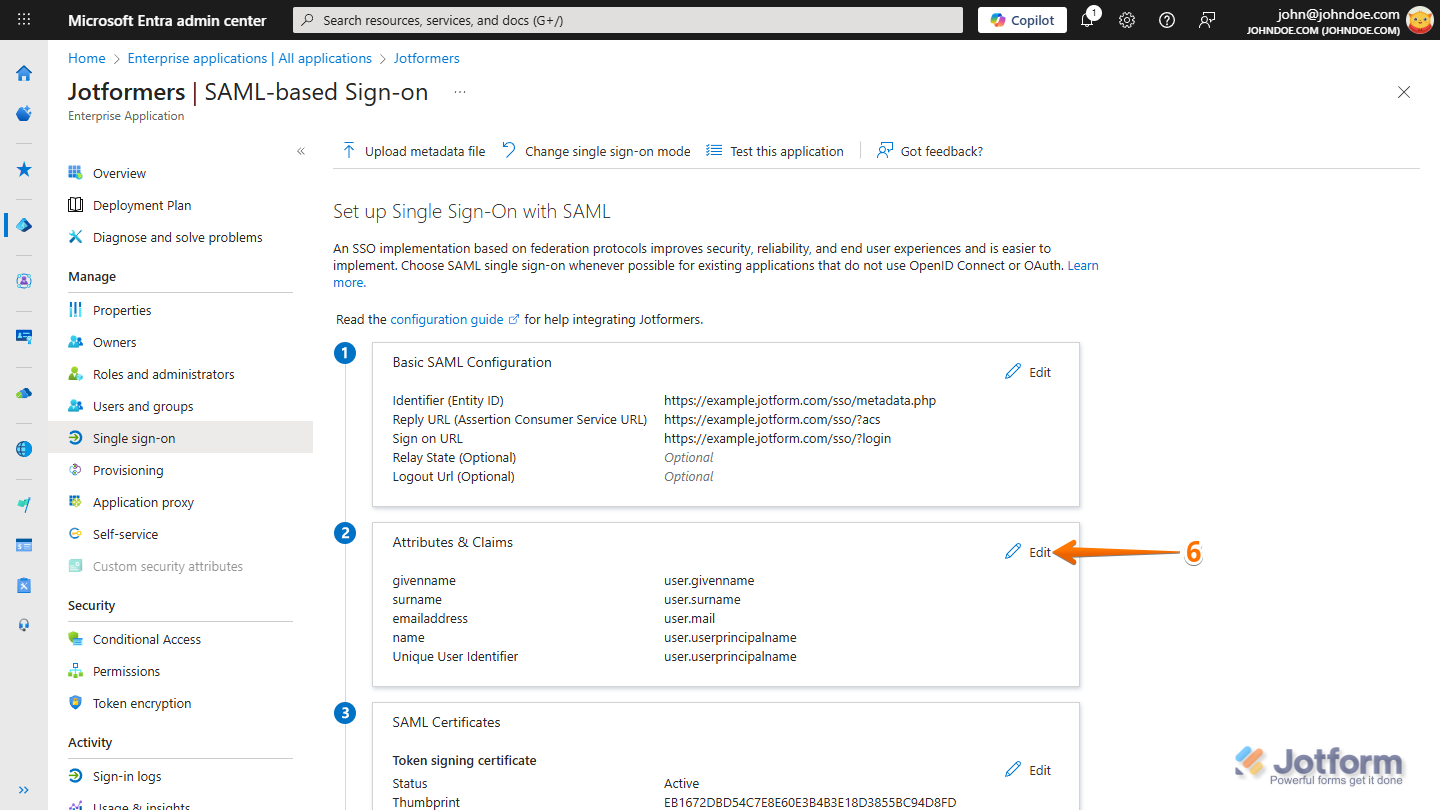
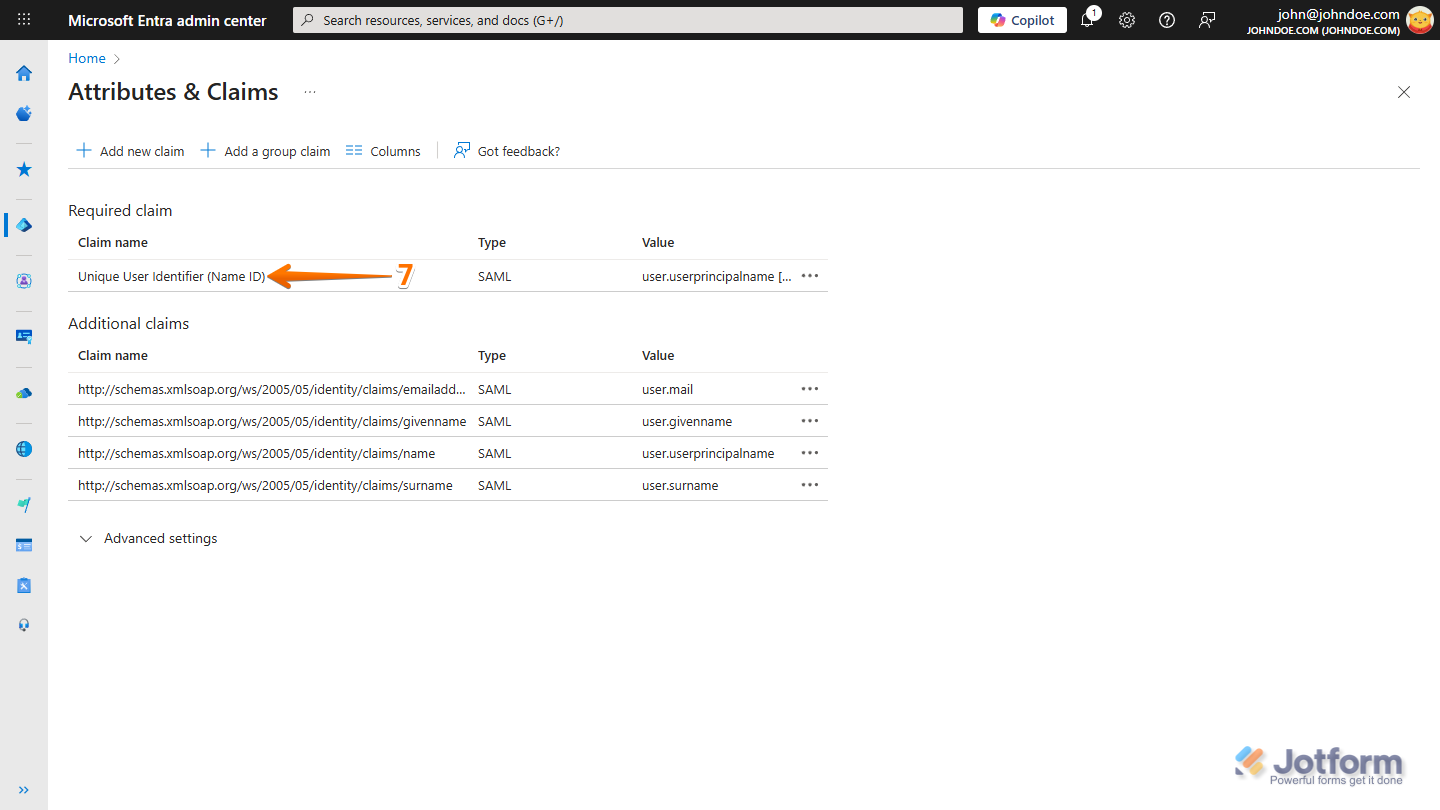
- Then, on the Attributes & Claims page, in the Required Claim section, click on Unique User Identifier (Name ID).
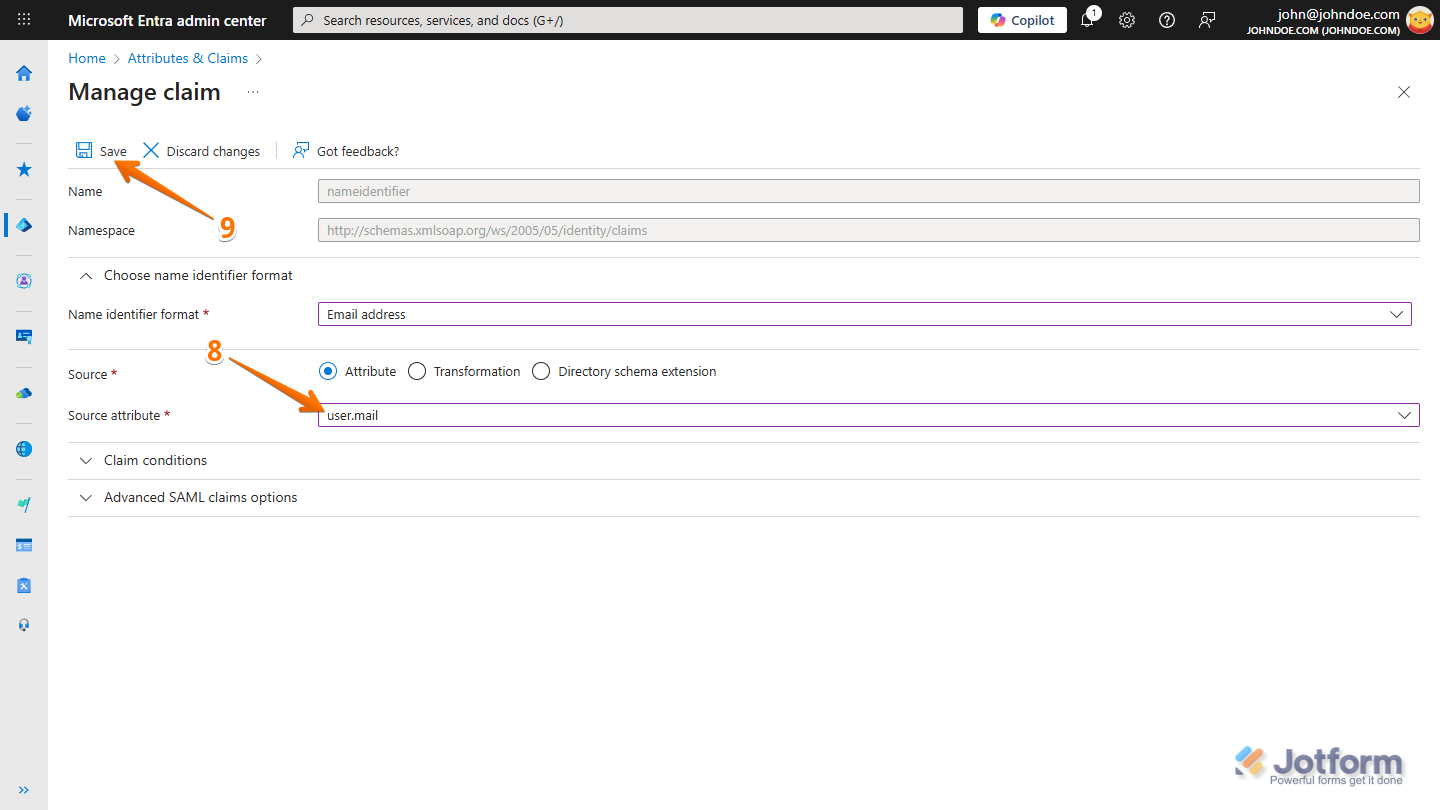
- Next, on the Manage Claim page, in the Source Attribute Dropdown menu, select user.mail.
- Now, click on Save, and that’s it!
Assigning a Custom SAML App to a User or Group
Once you’ve finished setting up SAML SSO, you can now assign the Custom SAML App to a user or group. Here’s how:
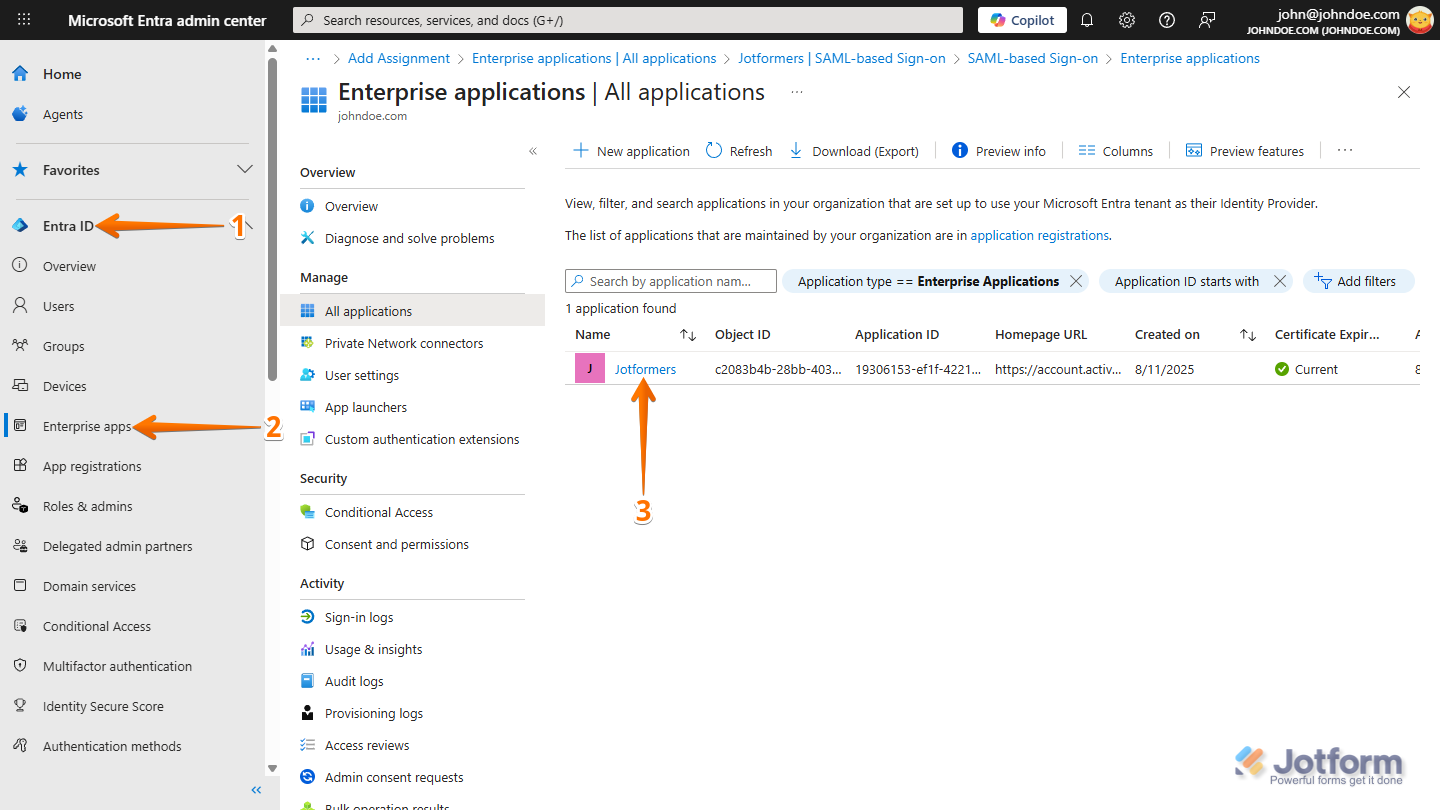
- On your Microsoft Entra ID Admin Center dashboard, in the menu on the left side of the page, click on Entra ID.
- In the Submenu that opens, click on Enterprise Apps.
- Then, on the Enterprise Applications | All Applications page, select the app you created.

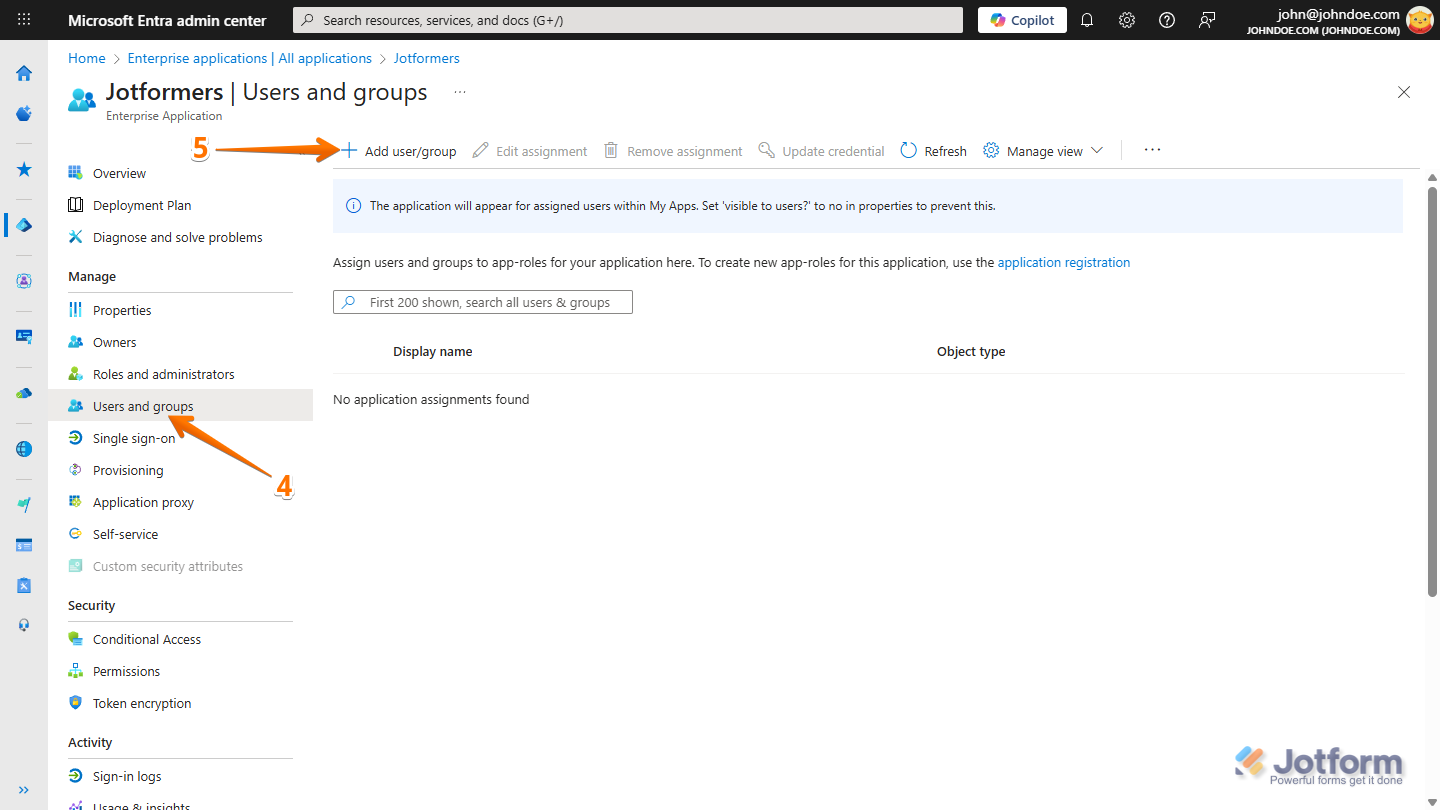
- Next, in the app, under the Manage section, click on Users and Groups.
- Now, on the Users and Groups page, click on Add User/Group.
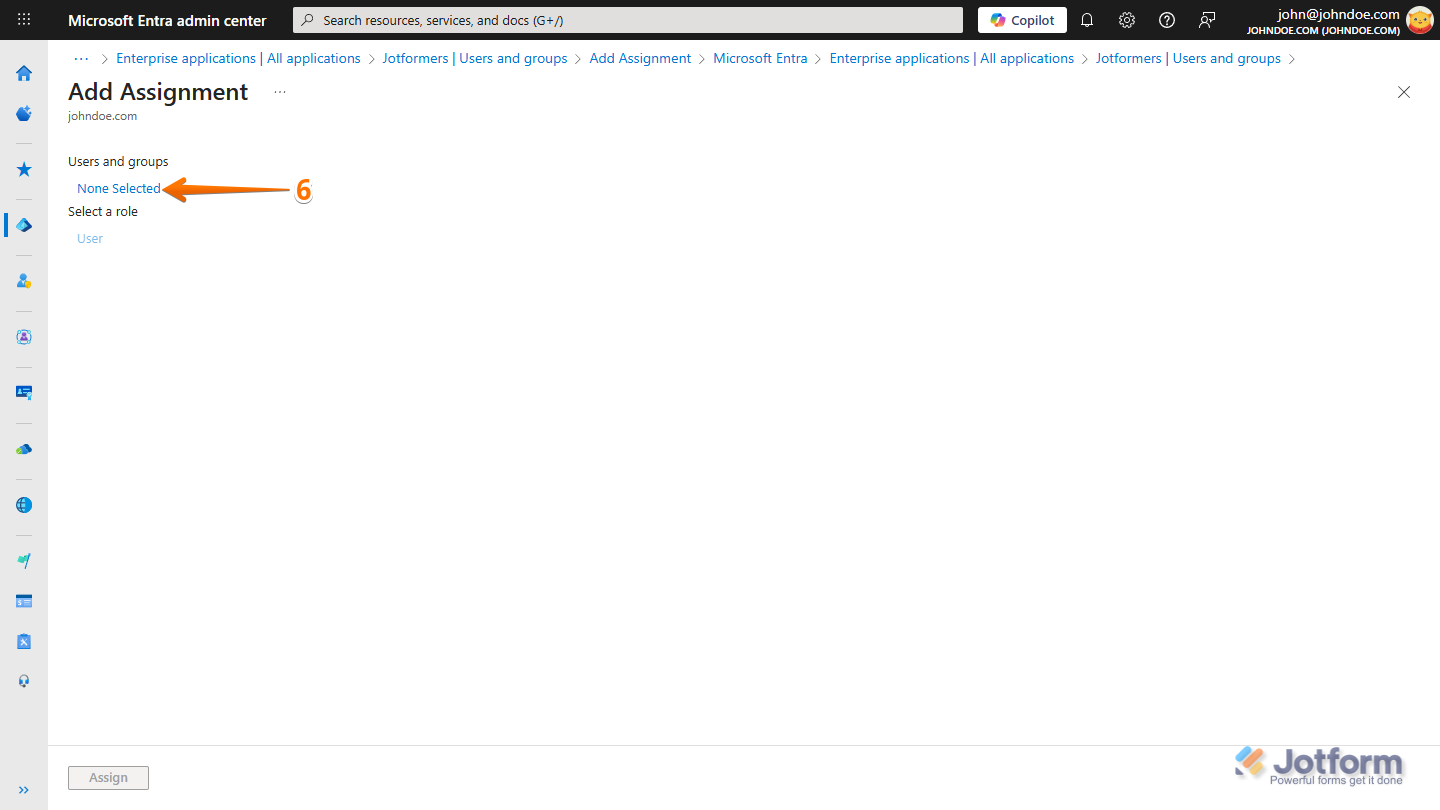
- On the Add Assignment page, in the Users and Groups section, click on None or Selected.
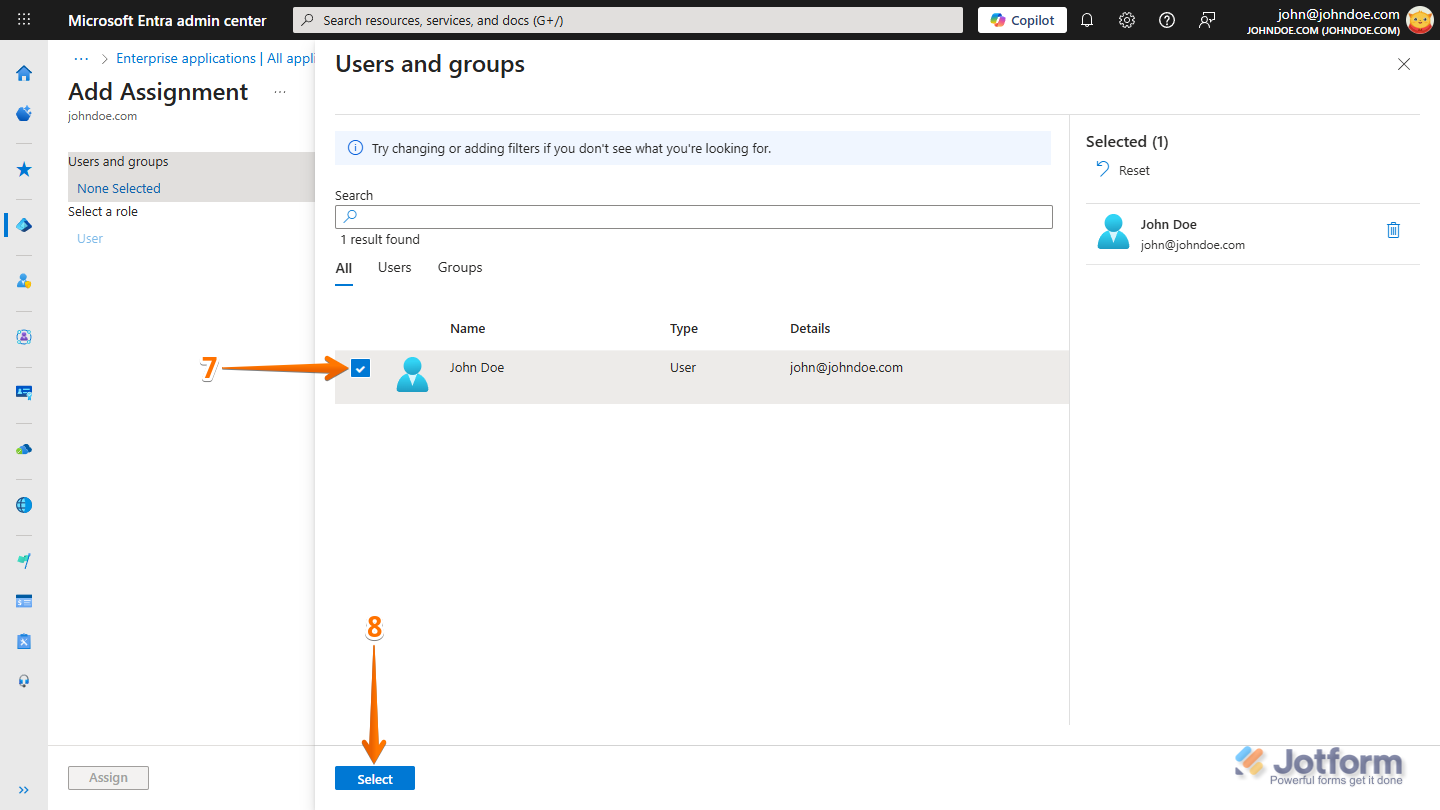
- In the Users and Groups window that opens, under the All tab, select a user or group from the list.
- Then, at the bottom of the window, click on Select.
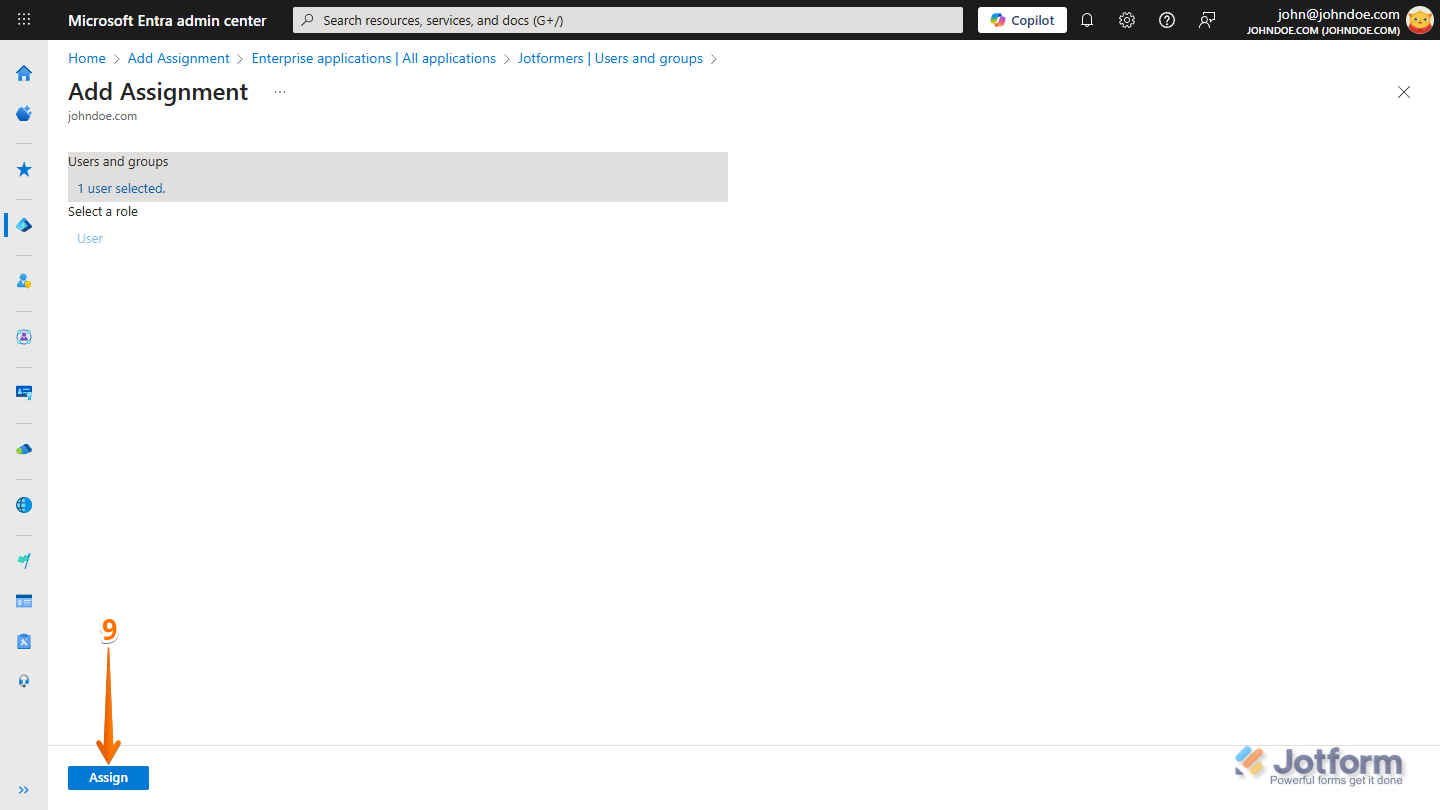
- Now, on the bottom-left side of the Add Assignment page, click on Assign, and you’re done.
Note
The flow above selects users only, but you can also assign a specific group using the same steps.
Copying the Microsoft Entra ID Identity Provider Metadata
To set up Microsoft Entra ID SSO for Jotform Enterprise, we’ll start by copying its Identity Provider Metadata. This is how it’s done:
- On your Microsoft Entra ID Admin Center dashboard, in the menu on the left side of the page, click on Entra ID.
- In the Submenu that opens, click on Enterprise Apps.
- Then, on the Enterprise Applications | All Applications page, select the app you created.
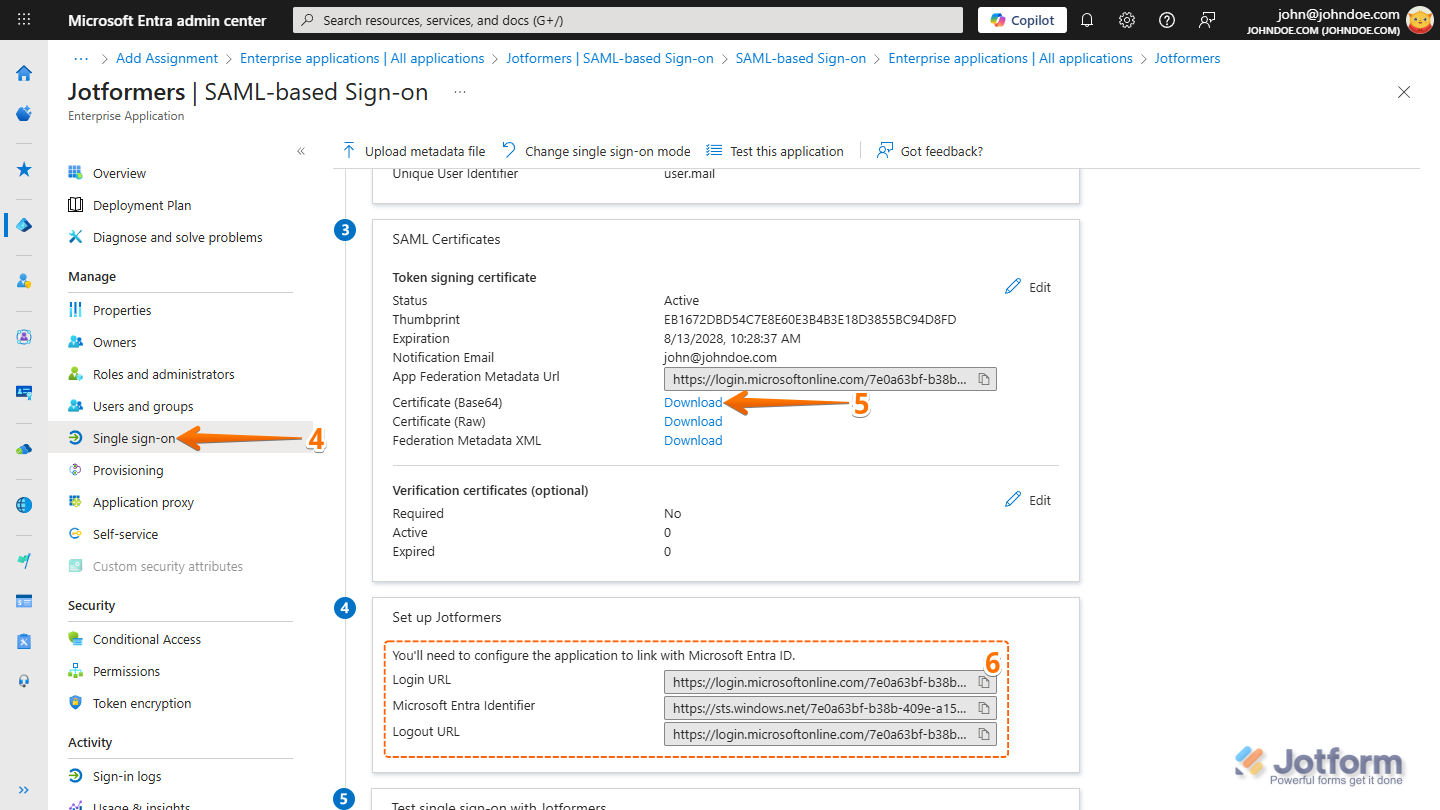
- Next, under the Manage section in the app, click on Single Sign-on.
- Now, on the SAML-Based Sign-on page, in the SAML Certificates section, on the right side of Certificate (Base64), click on Download.
- Then, save the file to your computer.
- Finally, in the Set Up section, copy the Login URL, Microsoft Entra Identifier, and Logout URL.
Note
Open the Certificate (Base64) file in a text editor on your computer to copy the certificate. On Windows, you can use Notepad; on Mac, use TextEdit.
Enabling and Configuring Microsoft Entra ID SSO on Your Jotform Enterprise Server
After you’ve got the Microsoft Entra ID Identity Provider Metadata, you can enable and set up your SSO settings. It only takes a few simple steps:
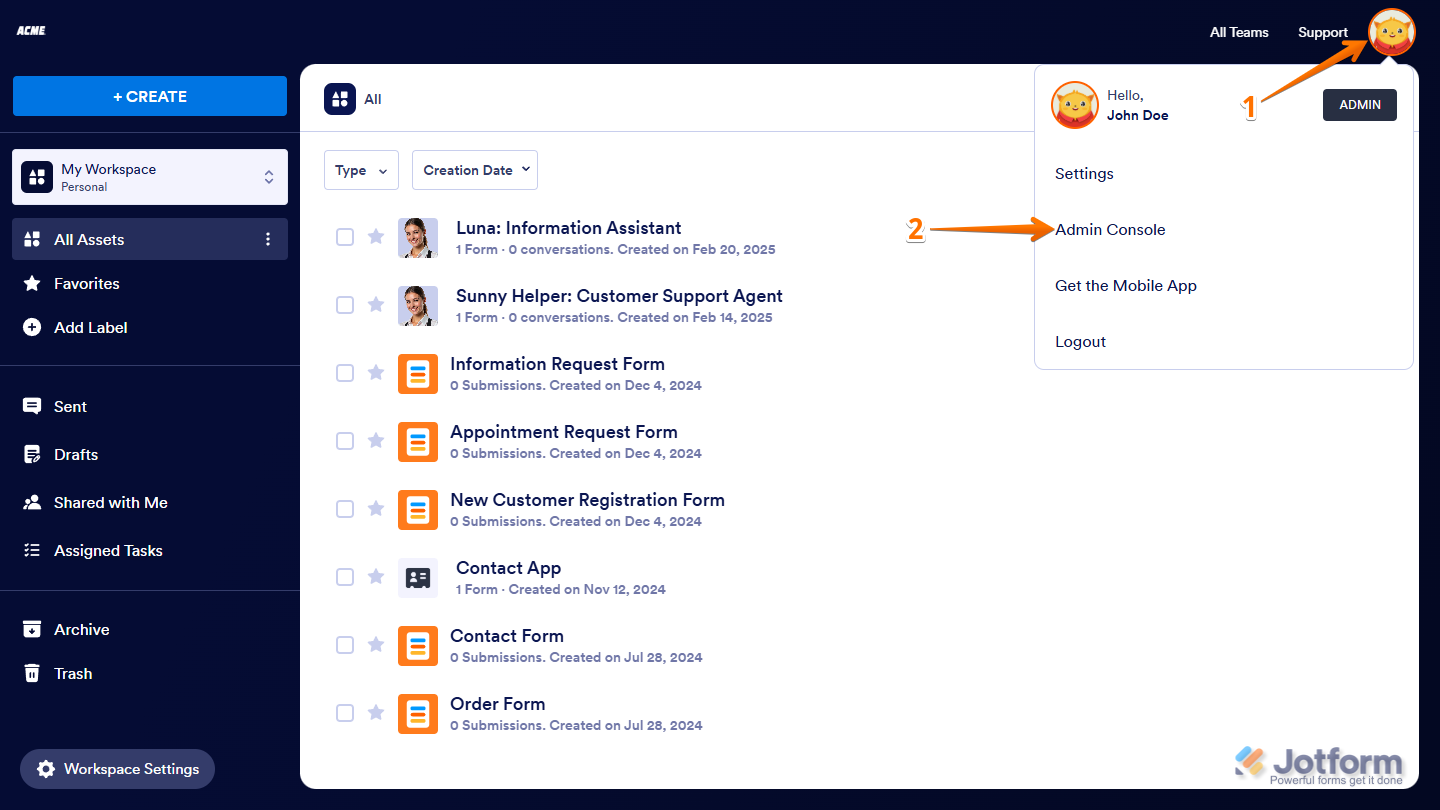
- On your My Workspace page, click on your Avatar/Profile picture in the top-right corner of the screen.
- Then, in the Dropdown menu that comes up, click on Admin Console to open your Admin Dashboard page.
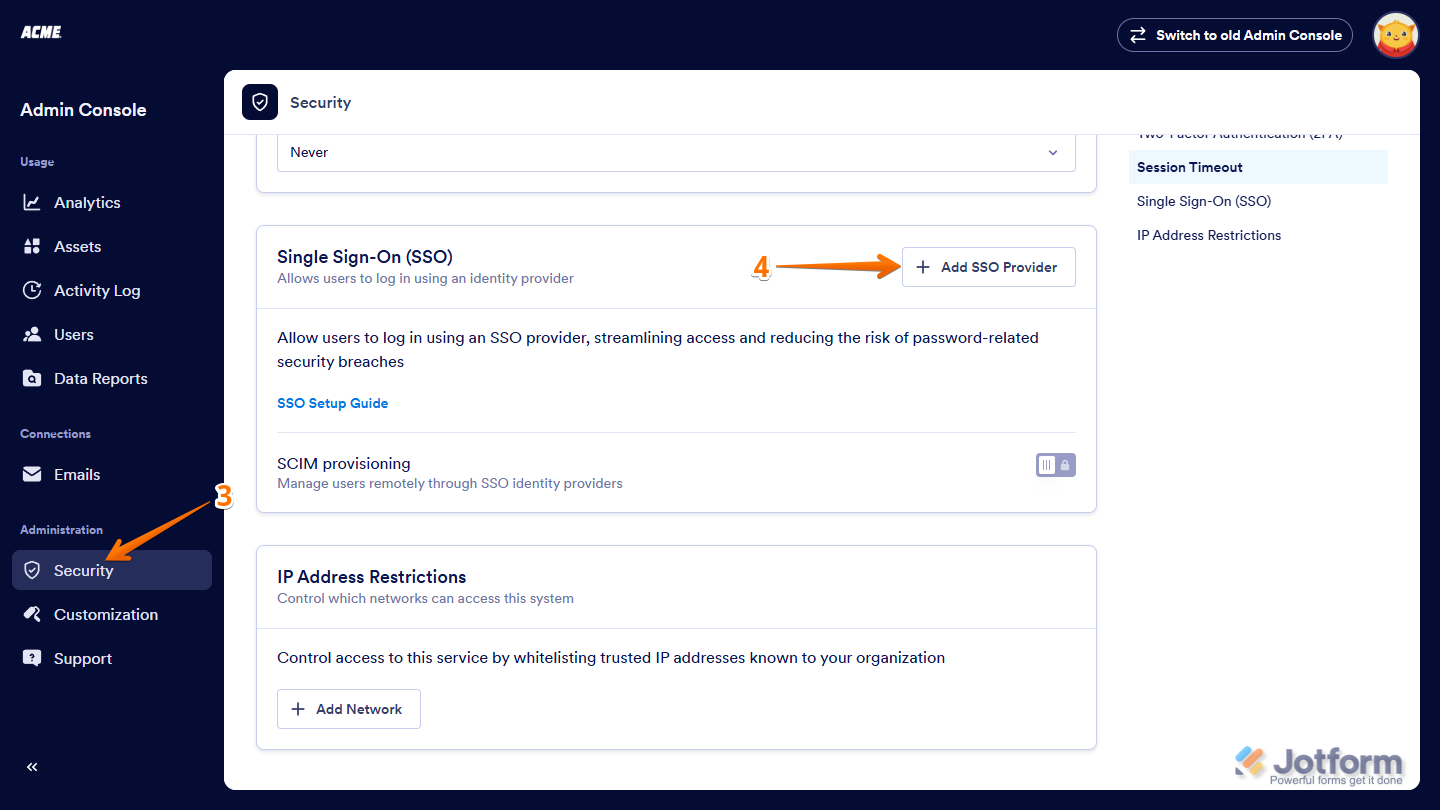
- Next, in the menu on the left, click on Security to open the Security & Authentication Dashboard.
- Scroll down to the Single Sign-On (SSO) section, and on the right, click on Add SSO Provider.
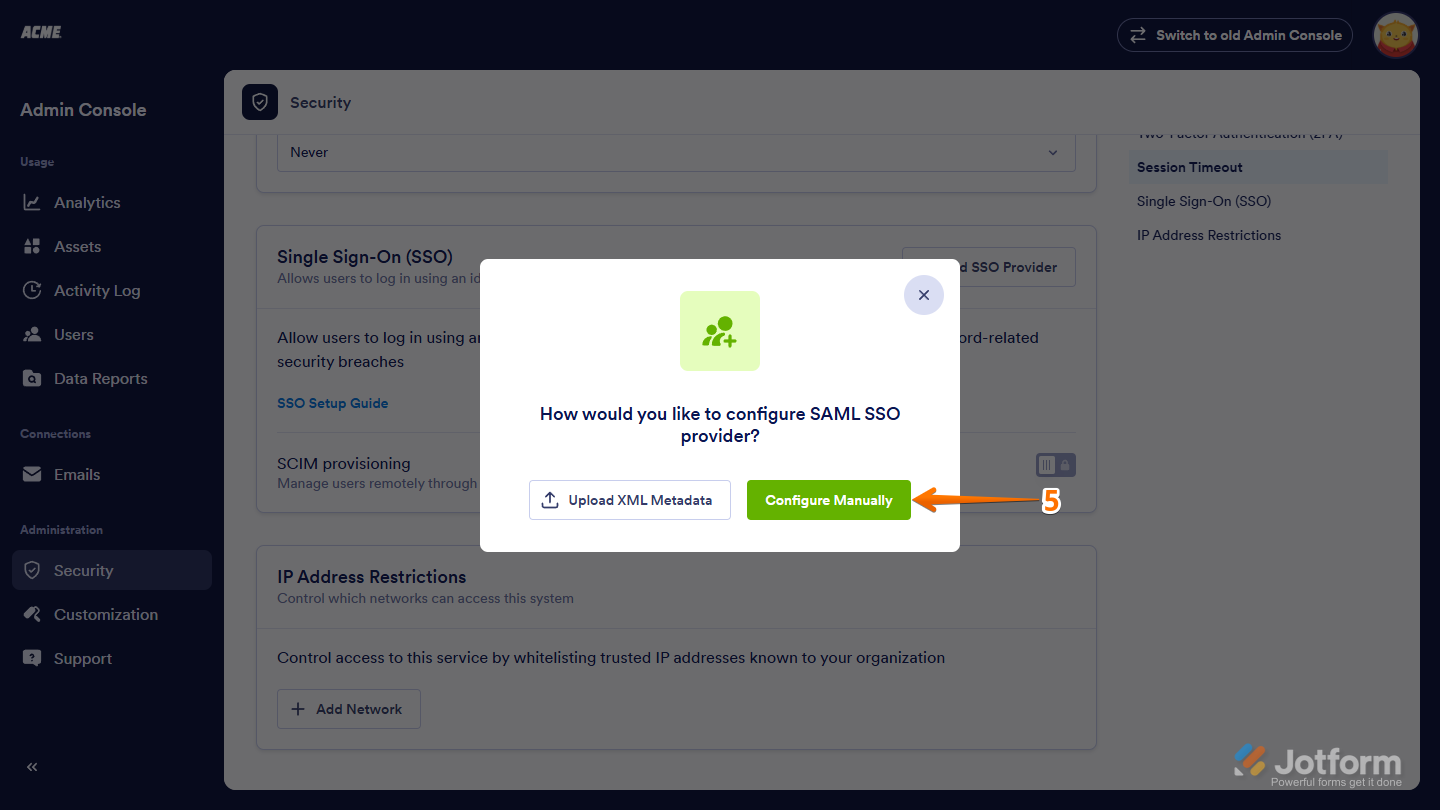
- In the How Would You Like to Configure Saml SSO Provider? window that opens, click on Configure Manually.
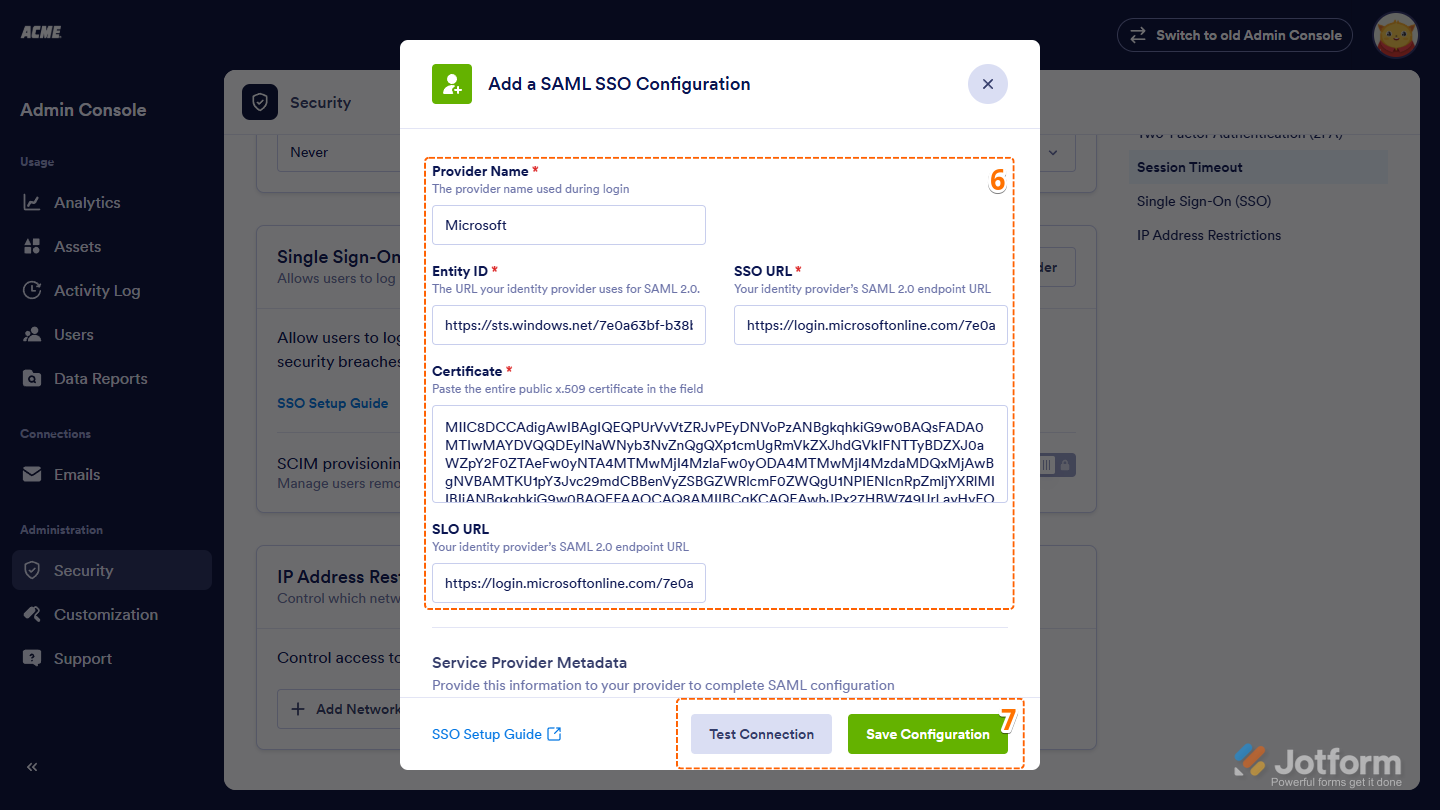
- Now, in the Add a SAML SSO Configuration window, fill in these details:
- Provider Name — Enter the name you want shown on the login page.
- Entity ID — Add your Microsoft Entra Identifier.
- SSO URL — Paste your Microsoft Entra Login URL.
- Certificate — Insert the content from your Microsoft Entra Certificate (Base64) file. Just open it with Notepad or TextEdit and copy only the value.
- SLO URL — Enter your Microsoft Entra Logout URL.
- Finally, click on Test Connection to make sure everything’s working correctly. If it’s successful, click on Save Configuration to apply your SSO settings—and you’re good to go!
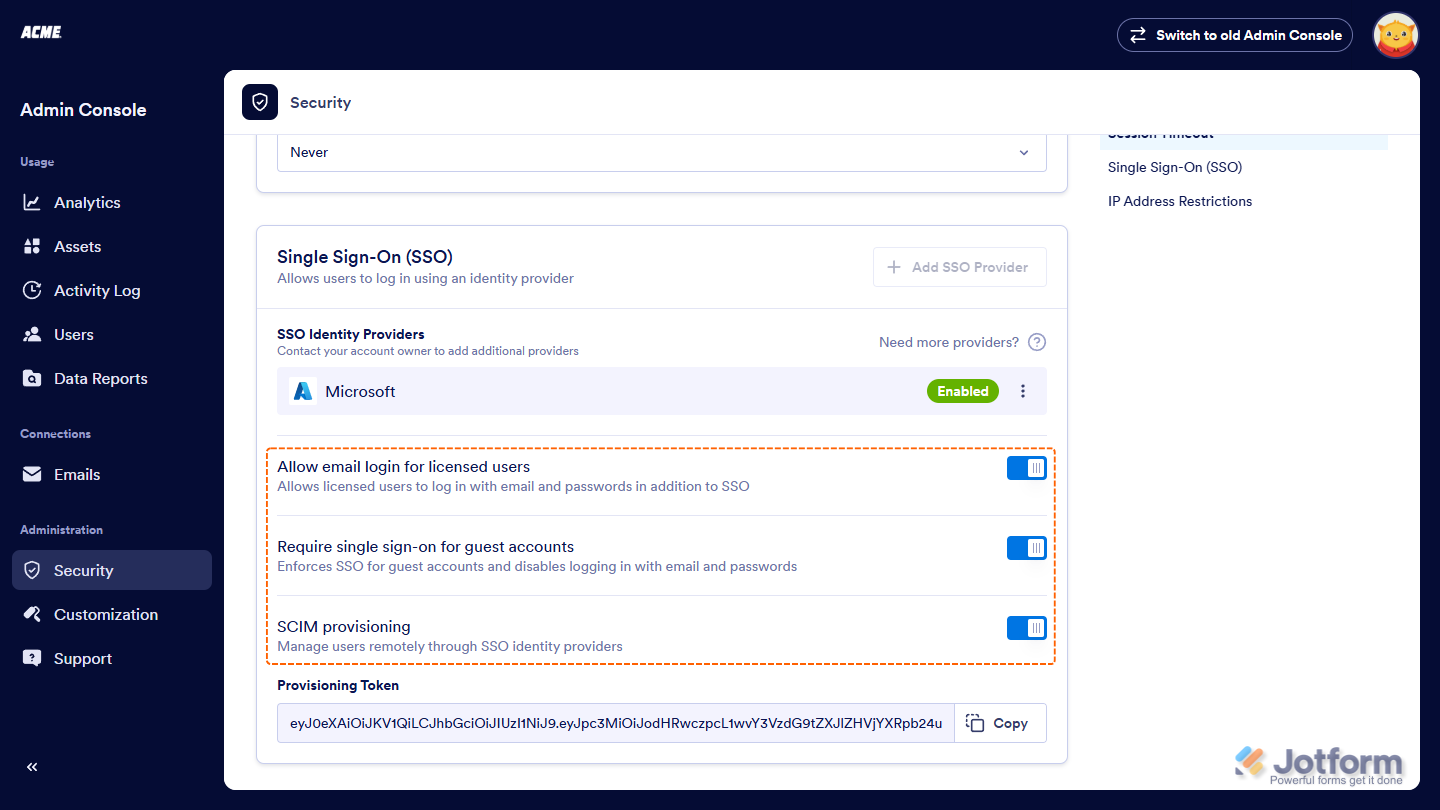
Once you’ve turned on SSO, you’ll see these extra options under the SSO settings:
- Allow Email Login for Licensed Users — This lets licensed users log in with their email and password too, not just through SSO.
- Require Single Sign-On for Guest Accounts — This makes sure guest users can only sign in through SSO, adding a bit more security.
- SSO SCIM Provisioning Settings — This helps you automatically manage users by syncing with your identity provider, so you don’t have to update things manually.

Send Comment: