It’s easy to customize your AI Agent’s name and role, ensuring it aligns with your specific needs. Giving your agent a meaningful name adds a professional touch and makes conversations more engaging. Personalizing these details also helps users quickly understand the AI Agent’s purpose—whether it’s helping with inquiries, guiding users through a process, or providing specific recommendations.

You can update your AI Agent’s name and role in a few easy steps. Here’s how to do it:
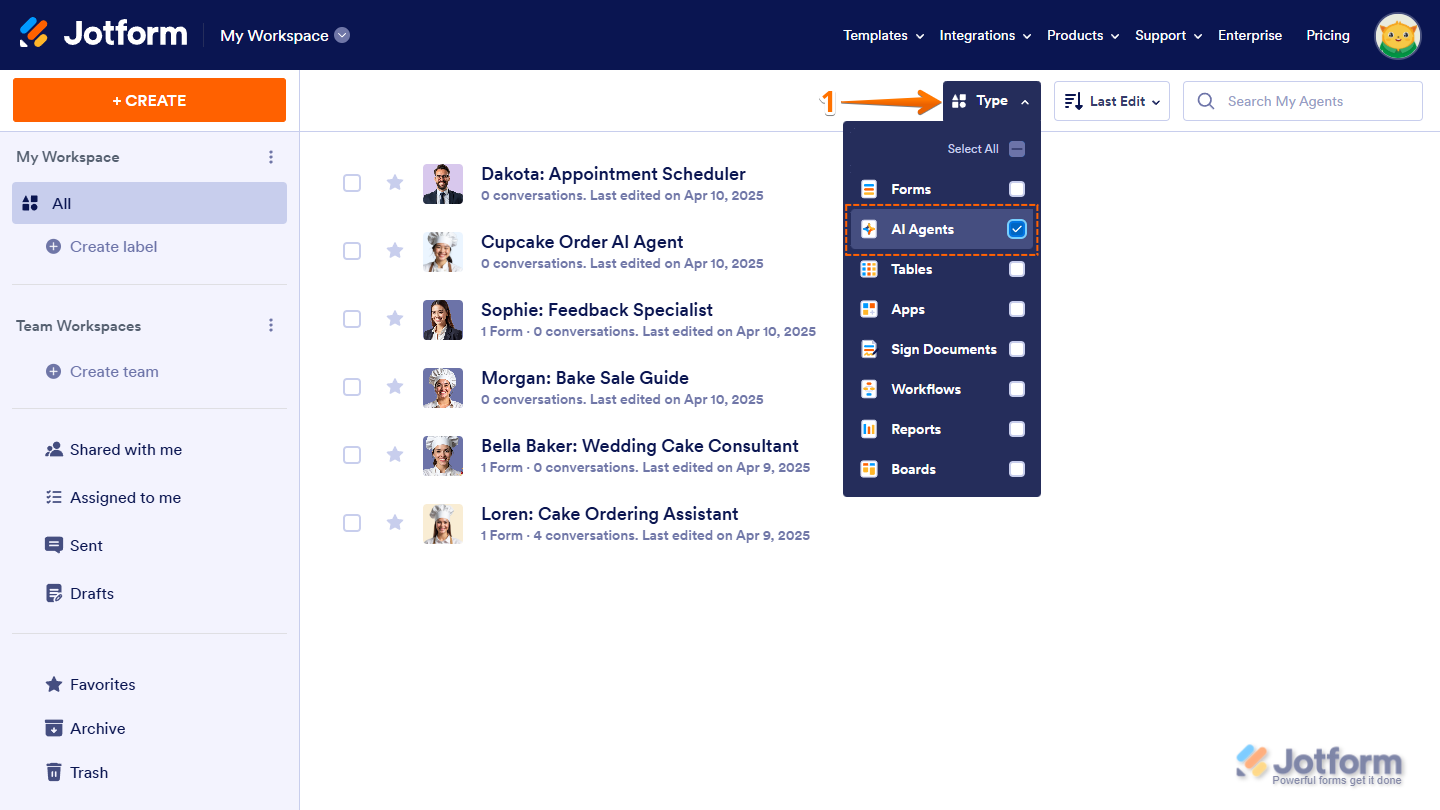
- On your My Workspace page, click on Type at the top and in the Dropdown menu that opens, uncheck the boxes next to all the assets except AI Agents, so only they’ll be shown on the page.
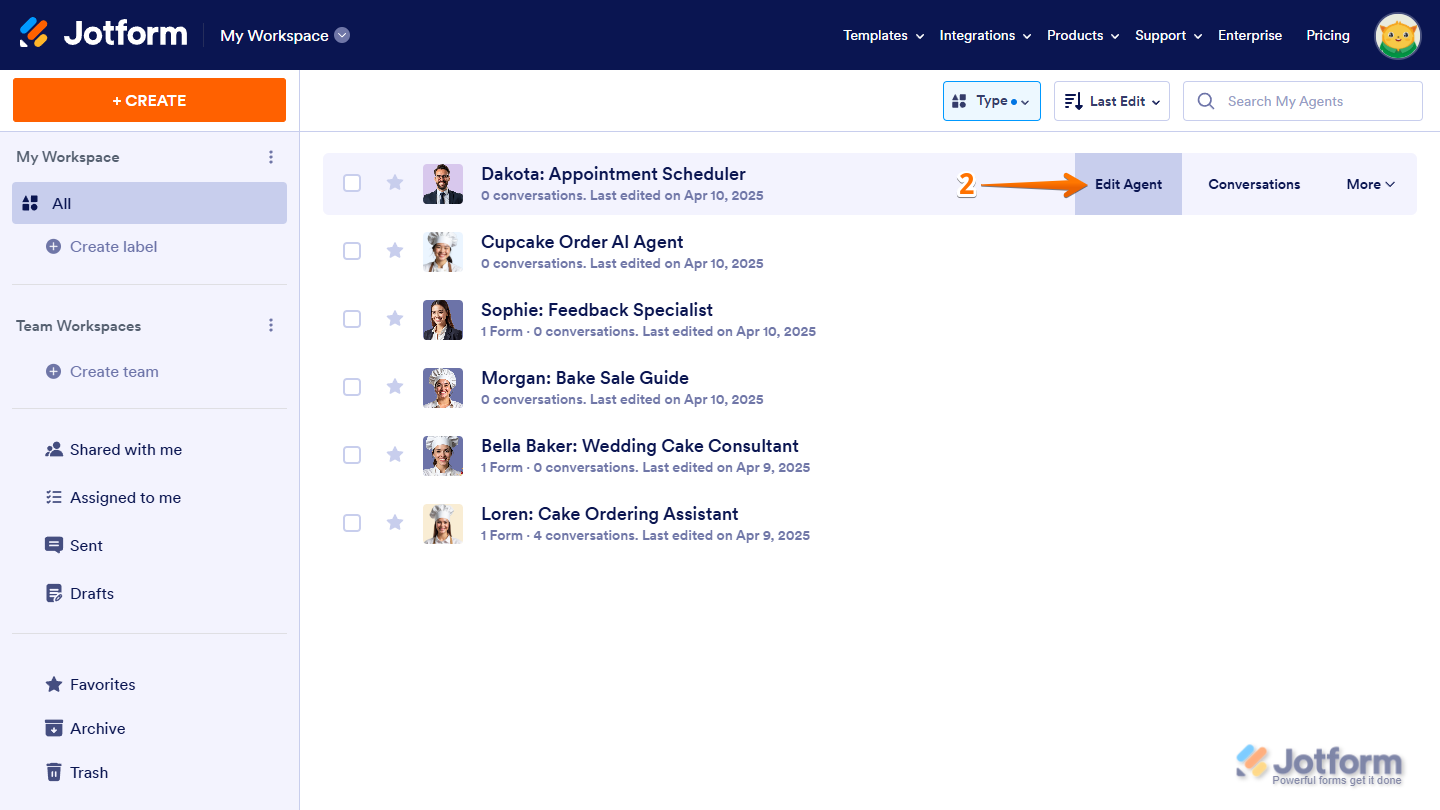
- Hover your mouse over your AI Agent and click on Edit Agent on the right side of the page.
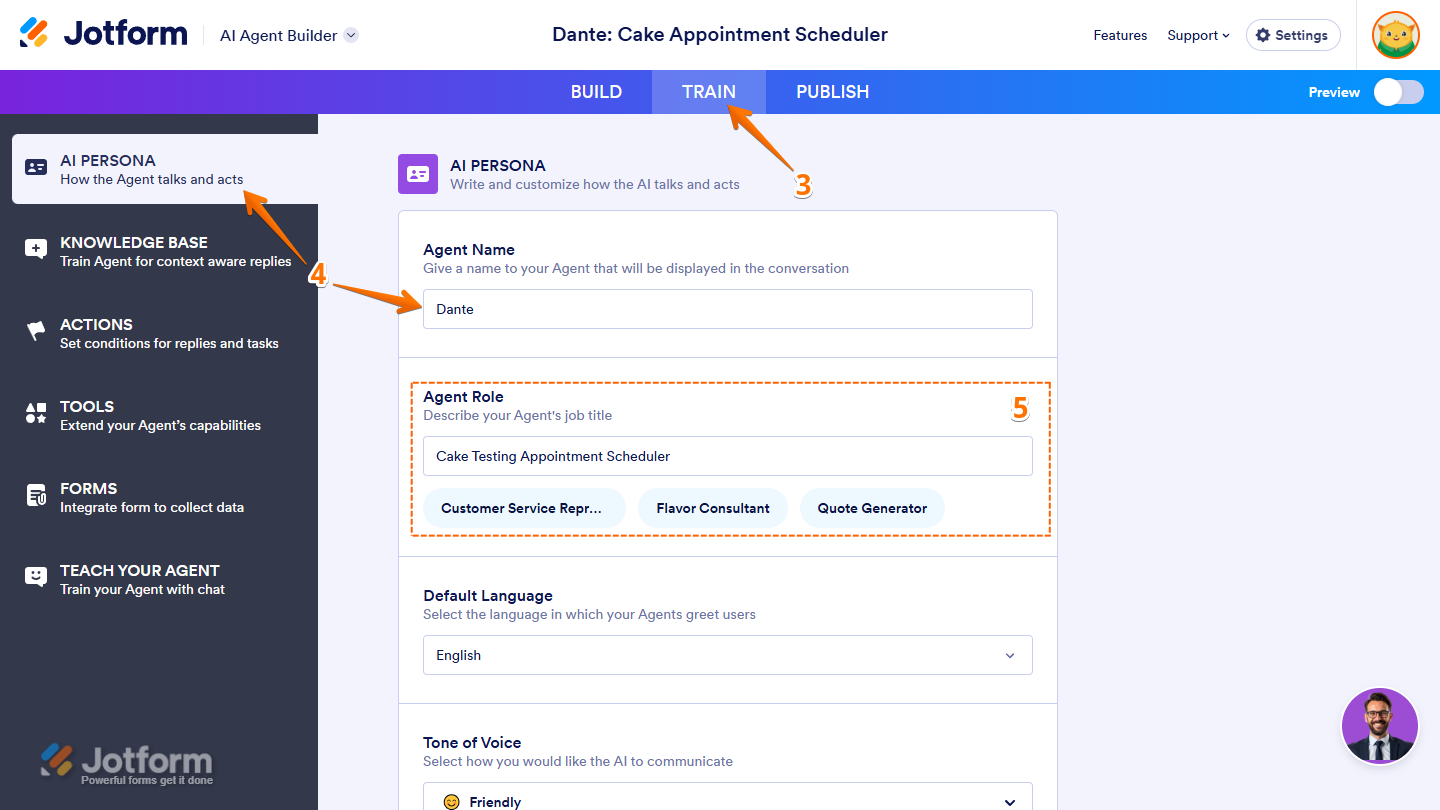
- In Agent AI Builder, in the blue navigation bar at the top, click on Train.
- Now, click on AI Persona in the menu on the left, and then, under the AI Persona section on the right, enter a new name for your AI Agent in the Agent Name section.
- Next, enter a new job title for your AI Agent in the Agent Role section or select one of the predefined agent roles below it.
That’s it. You’ve updated the name and role of your AI Agent.
Note
- The changes you make to your AI Agent’s Name and Role are also saved automatically after you stop typing for a few seconds.
- Any changes made in the AI Persona section of AI Agent Builder are saved automatically and will immediately be reflected in the AI Agent’s behavior and responses.
- Pressing CTRL+Z while in the AI Persona section will undo any changes made to the AI Agent’s name and role. Pressing CTRL+Y will redo them. These shortcuts will no longer work once you move to another section of AI Agent Builder after making changes to your AI Agent’s name and role.


Send Comment: