ButterCMS is a headless content management system and blog engine that you can easily integrate into any new or existing web project in minutes. It allows you to build websites with your preferred scripting language and manage your content through a simple user interface.
With ButterCMS, you can integrate your website into external apps to add custom content to your website pages. The integration includes Jotform, allowing you to add a custom form to a page in a minute.
Enabling Jotform in ButterCMS
To start, you must enable Jotform through ButterCMS to add a form to your CMS page. Below are the steps to do that.
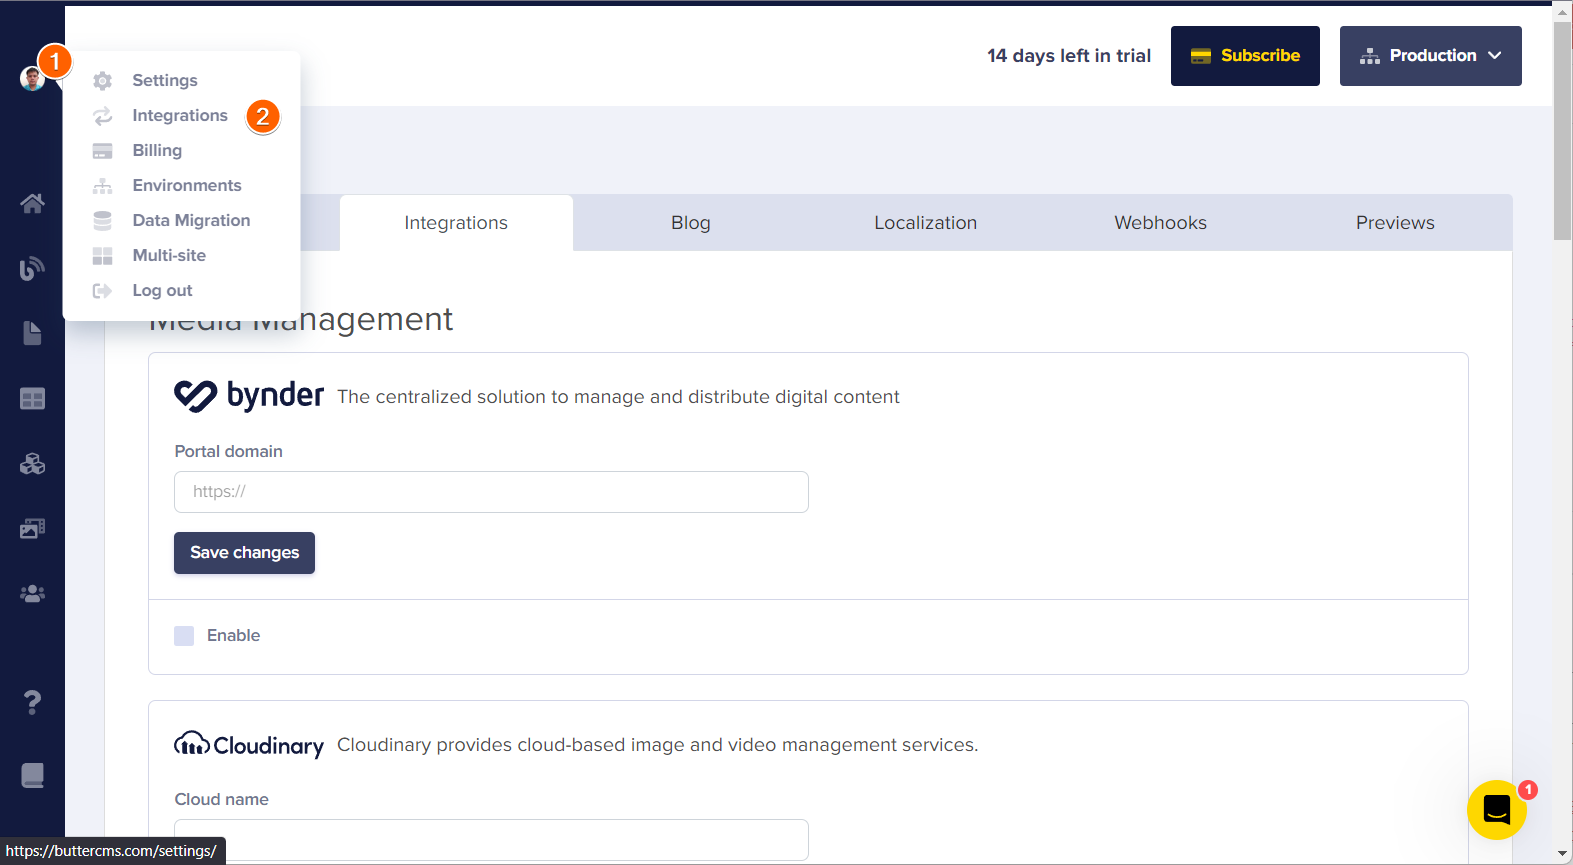
- In your ButterCMS dashboard, hover your mouse over your profile picture on the left side of the screen.
- Click on Integrations.
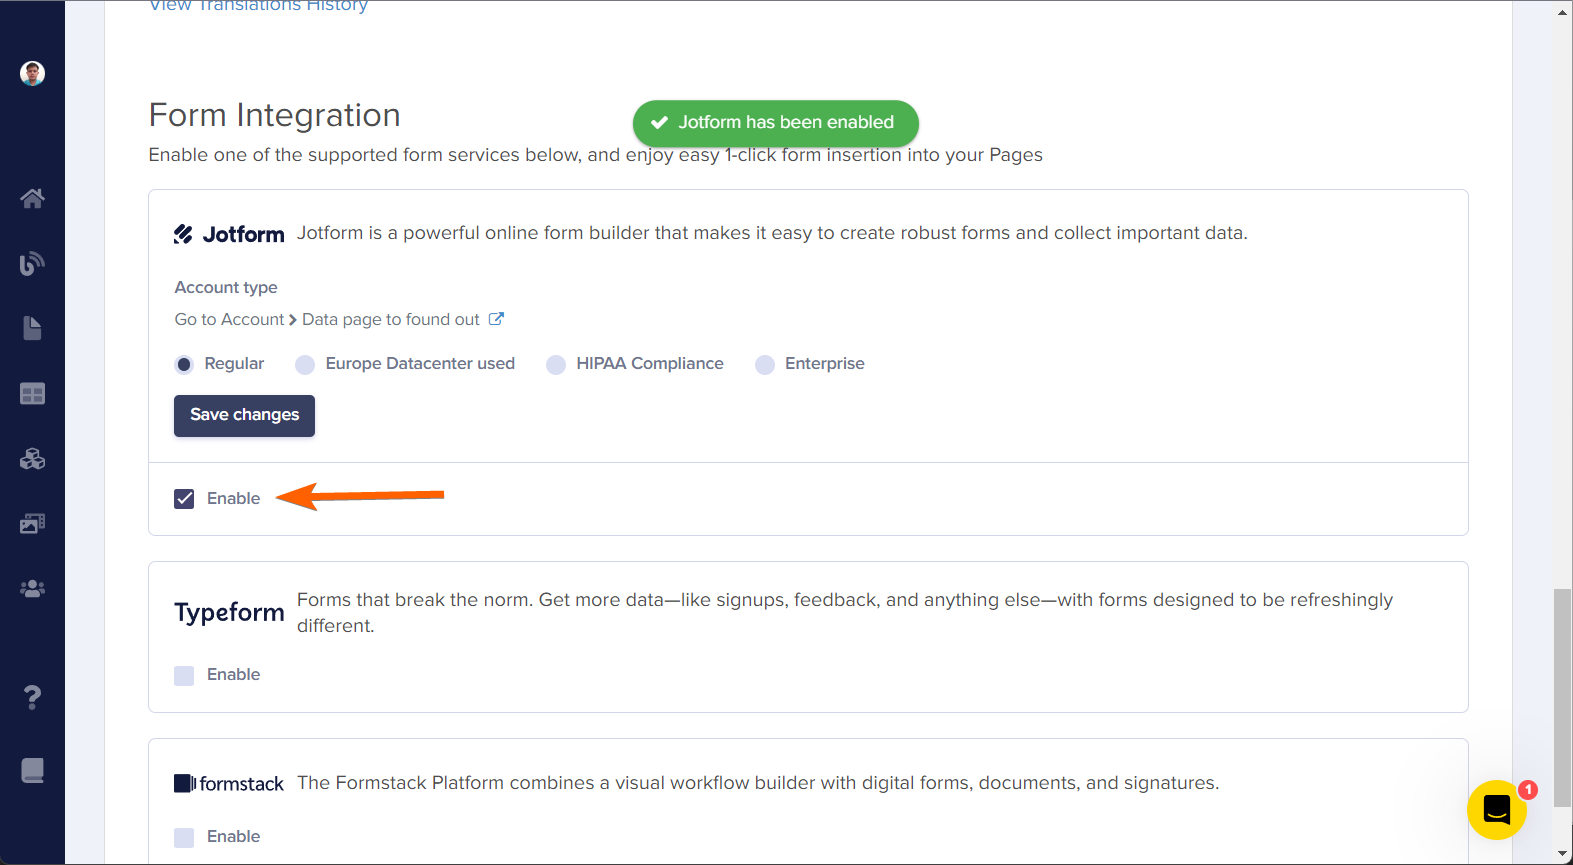
- Scroll to find Jotform and select Enable to enable Jotform on your website. A confirmation message is displayed at the top.
Note
You must select the proper account type. Stay with Regular if you did not opt to store your data in our EU DataCenter or you’re not a HIPAA or Enterprise customer.
Adding Jotform to ButterCMS Page
You must have a ButterCMS page to add Jotform. Here are the steps to add one:
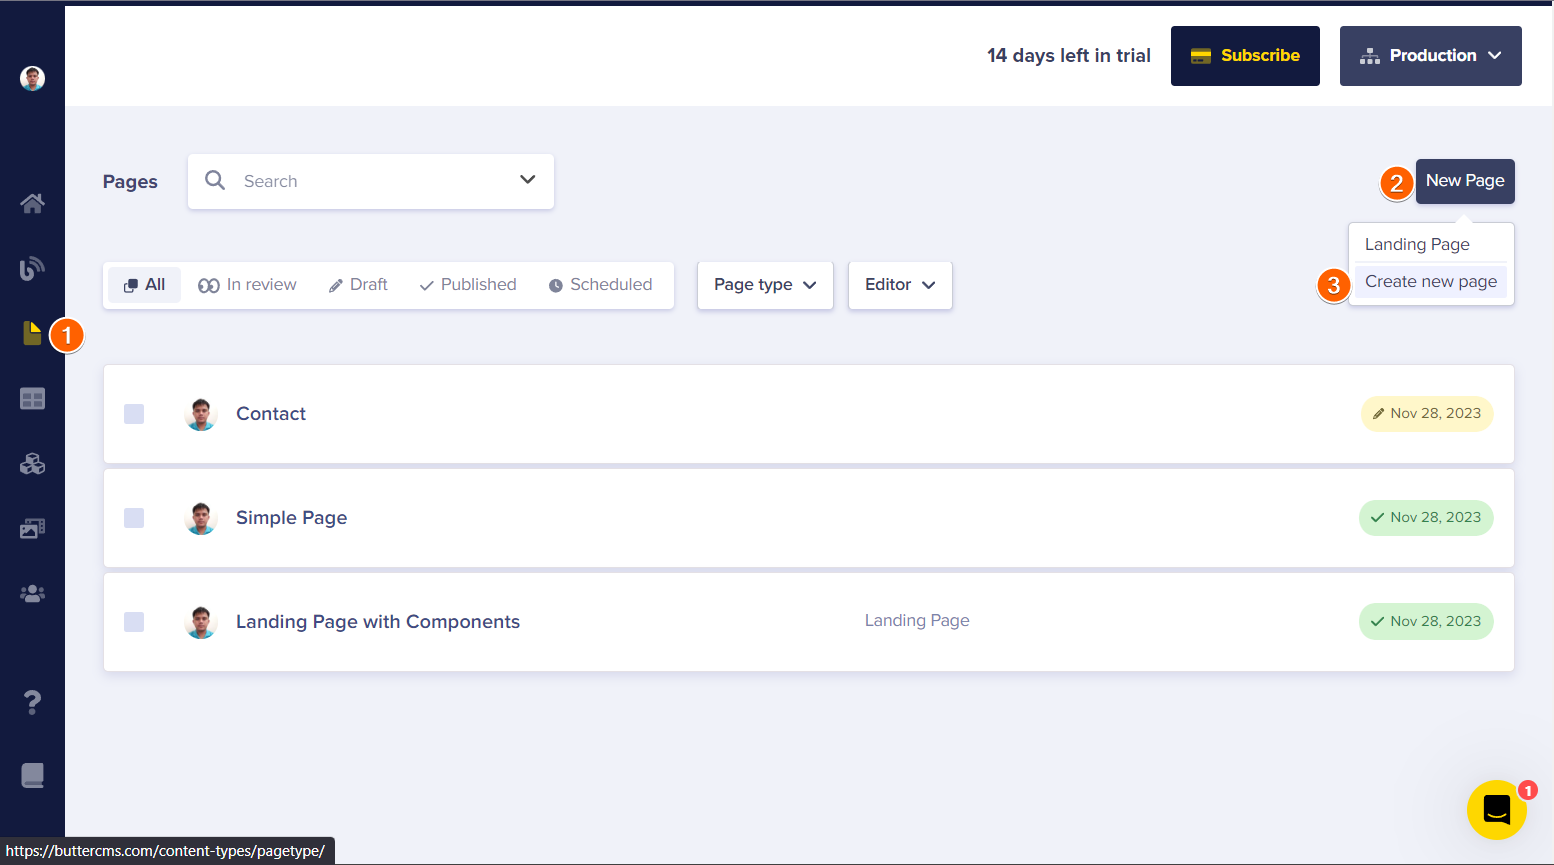
- Go to the Pages section on the left side of your ButterCMS dashboard.
- Click on the New Page button in the upper right corner.
- Choose the Create new page option.
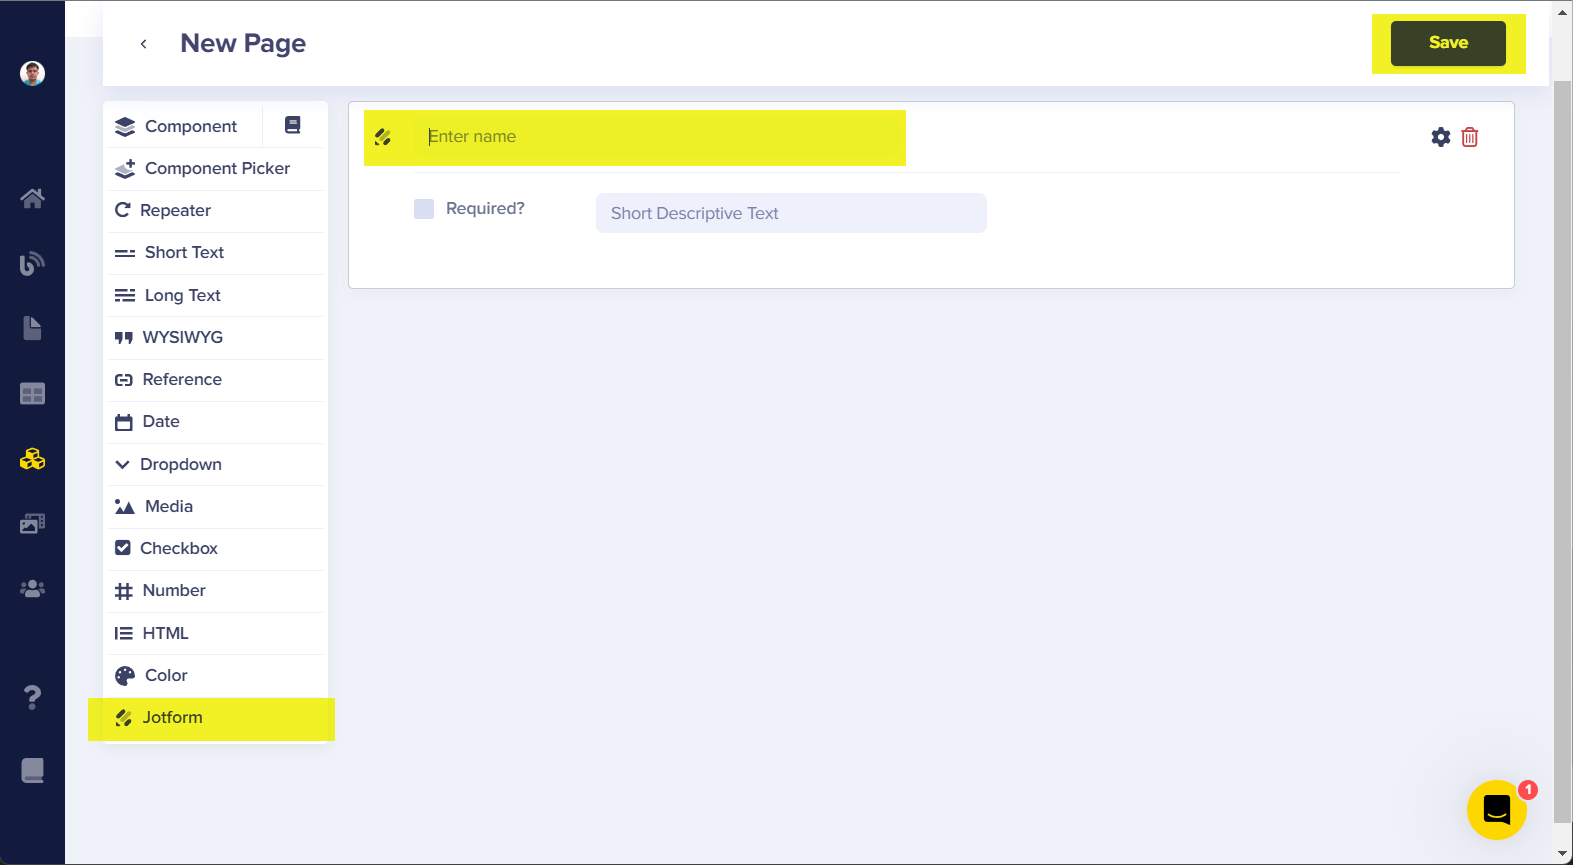
- On the new page editor, click on the Jotform option at the bottom options on the left. Since this is a new page, you can also add the other blocks/elements.
- Give the new page a name. You can also make the block required and provide a short descriptive text.
- Click on the Save button. You will be redirected to the metadata options and then the option to select your Jotform form.
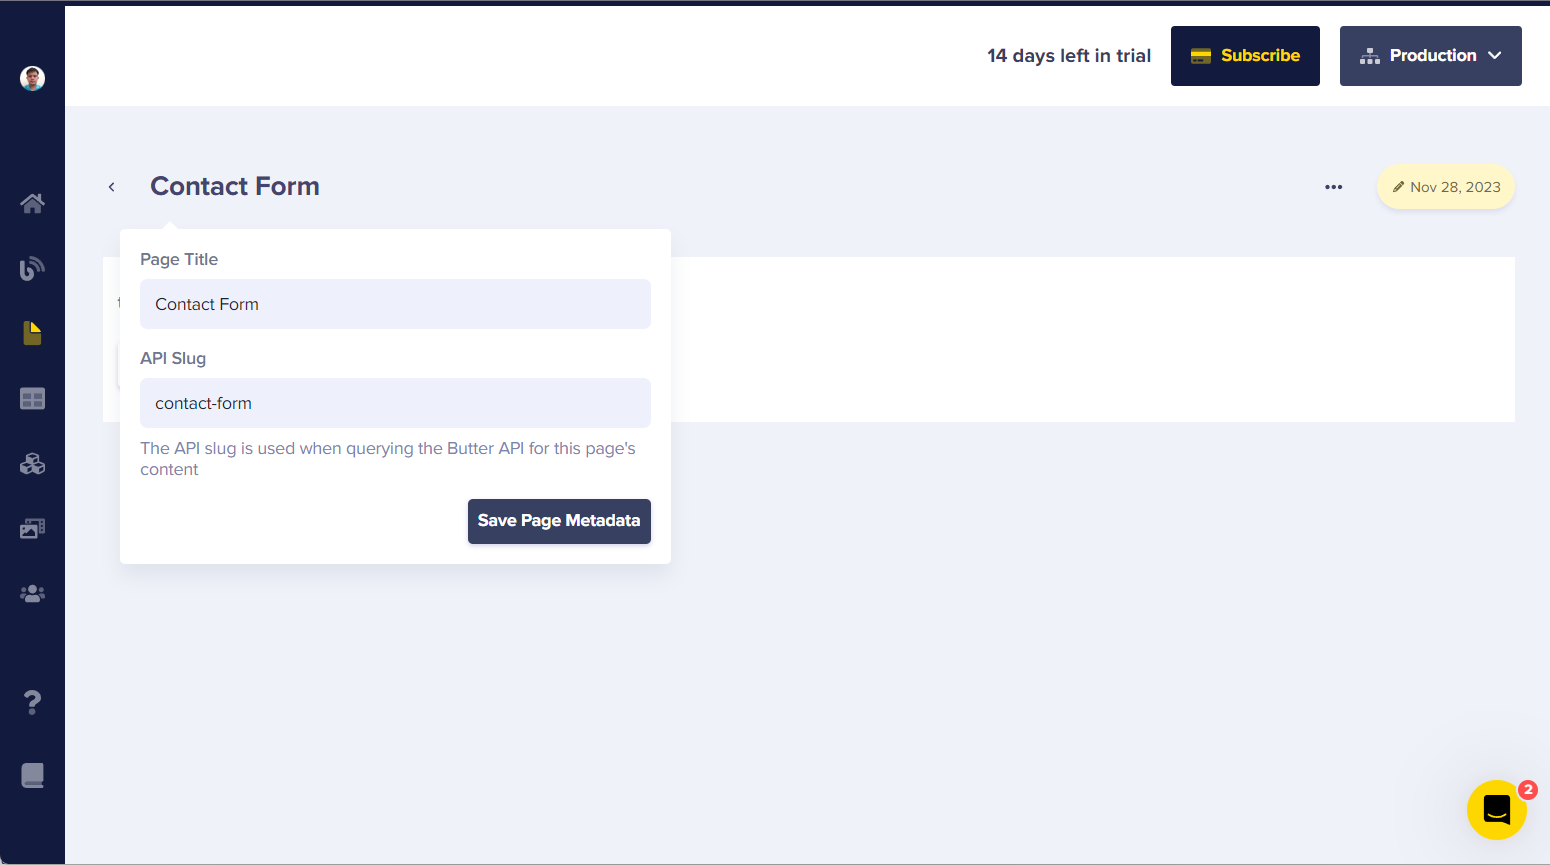
- Now, enter the page metadata. That will be the Page Title. You can also customize the API Slug.
- Click on Save Page Metadata to proceed.
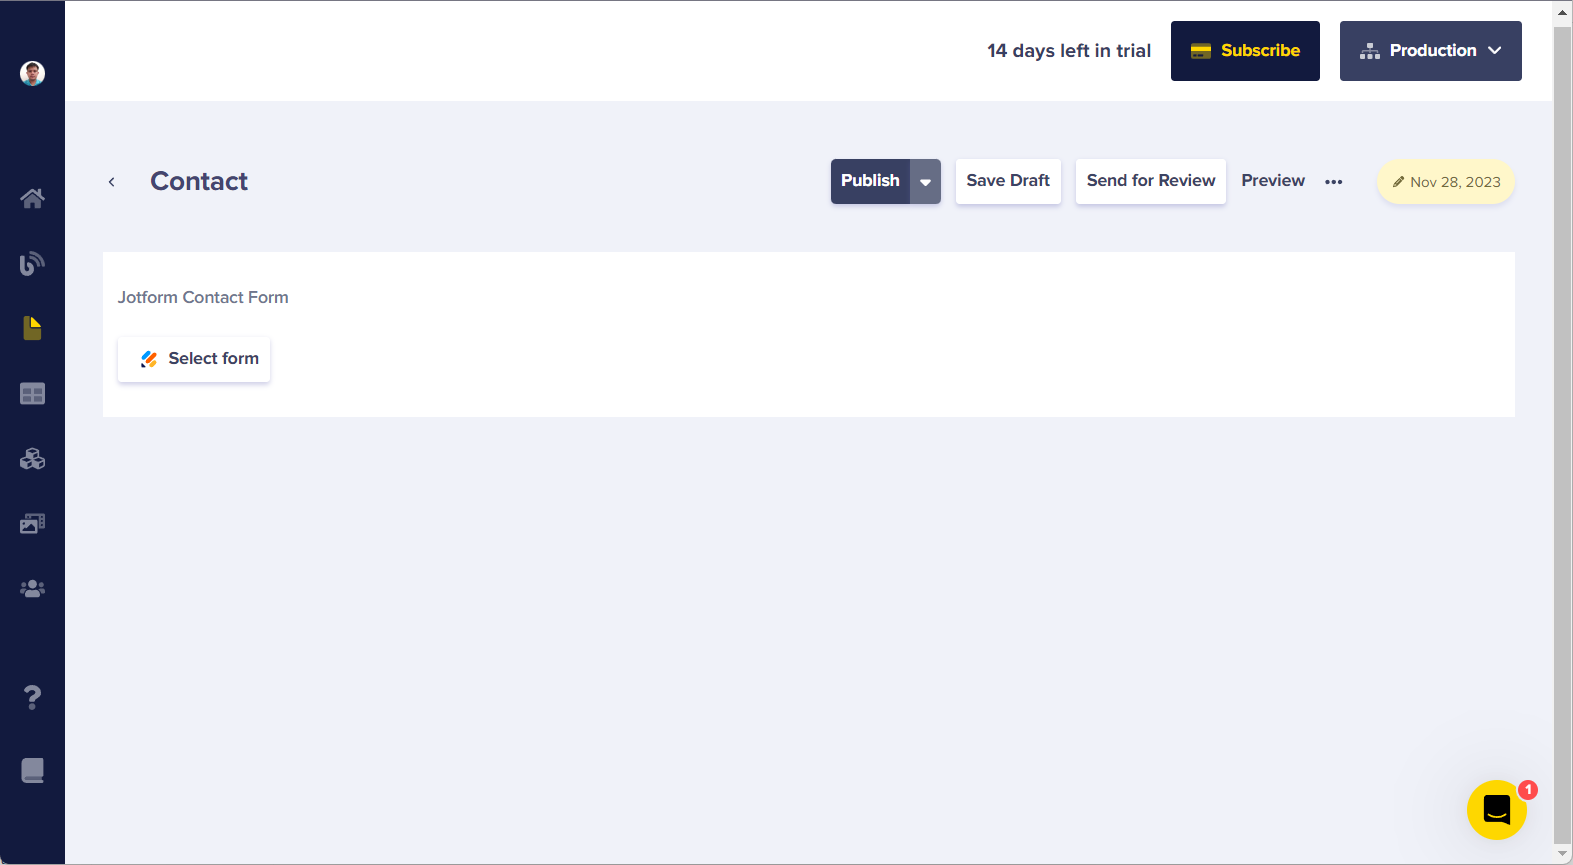
- Click on the Select Form button.
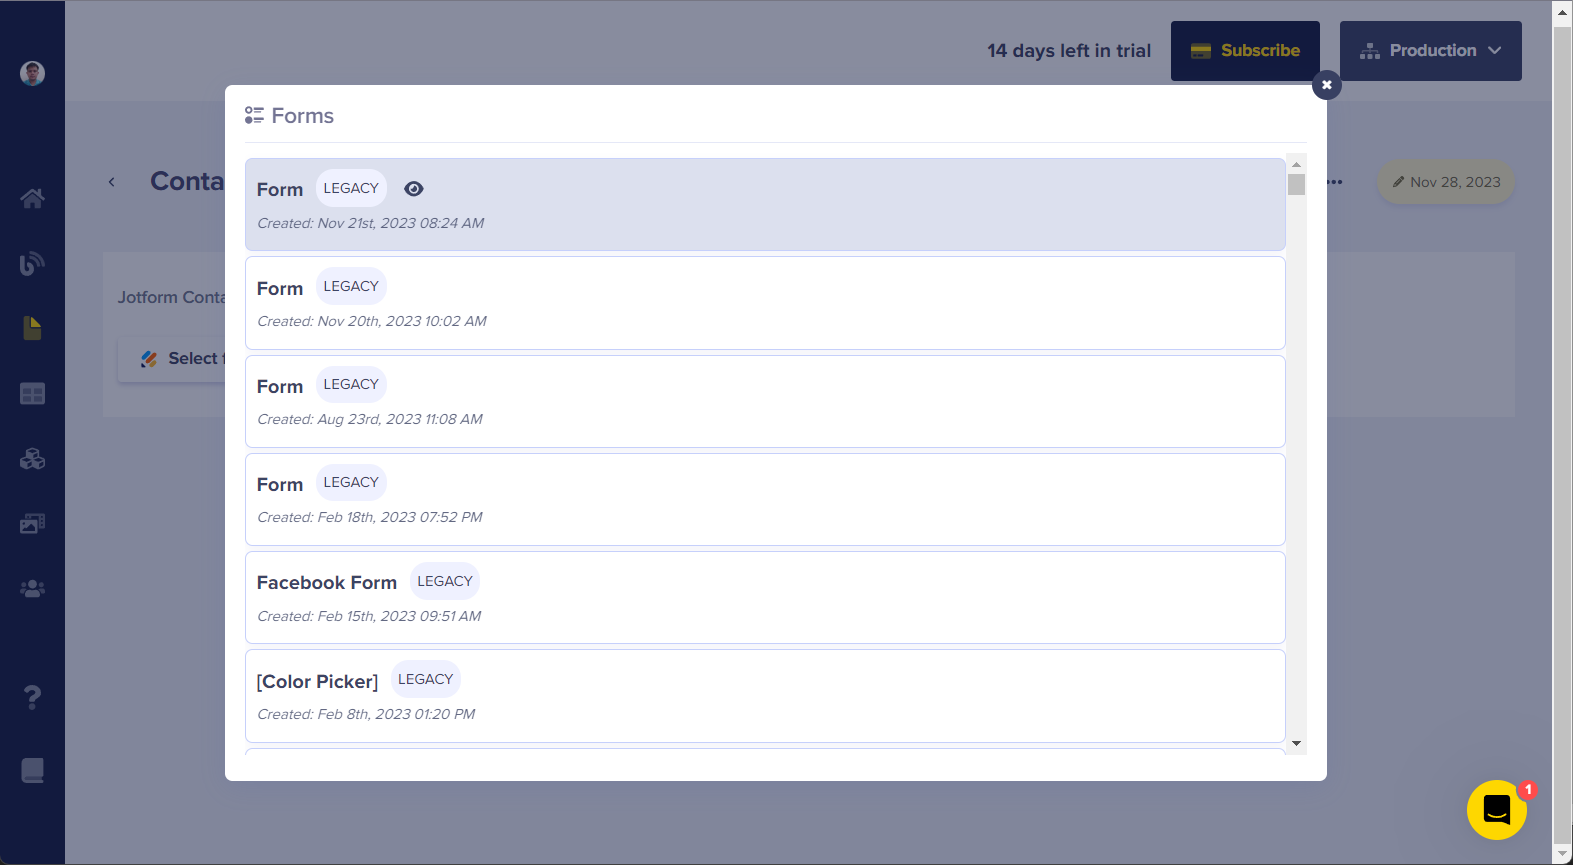
- Choose the form from the list, and that’s it. Click on Publish to make the page live/viewable to the public.
Send Comment: