With Jotform’s Gmail Agent, you can save time and keep your email replies consistent—no more copying and pasting the same text or digging through old threads to write a quick response. Whether you’re handling support tickets, managing client accounts, or following up on sales leads, Gmail Agent helps you reply faster by drafting messages that reflect your brand’s tone and use real examples from your past conversations.
And now, adding a custom signature to those drafts is just as simple. It’s a great way for teams to personalize replies while keeping contact details, disclaimers, or branding consistent in every message. Perfect for anyone who wants a professional finishing touch without slowing down their workflow.

Creating Your Custom Signature from the Publish Tab
As soon as you’ve set up your Gmail Agent, it only takes a second to add your signature—here’s what to do:
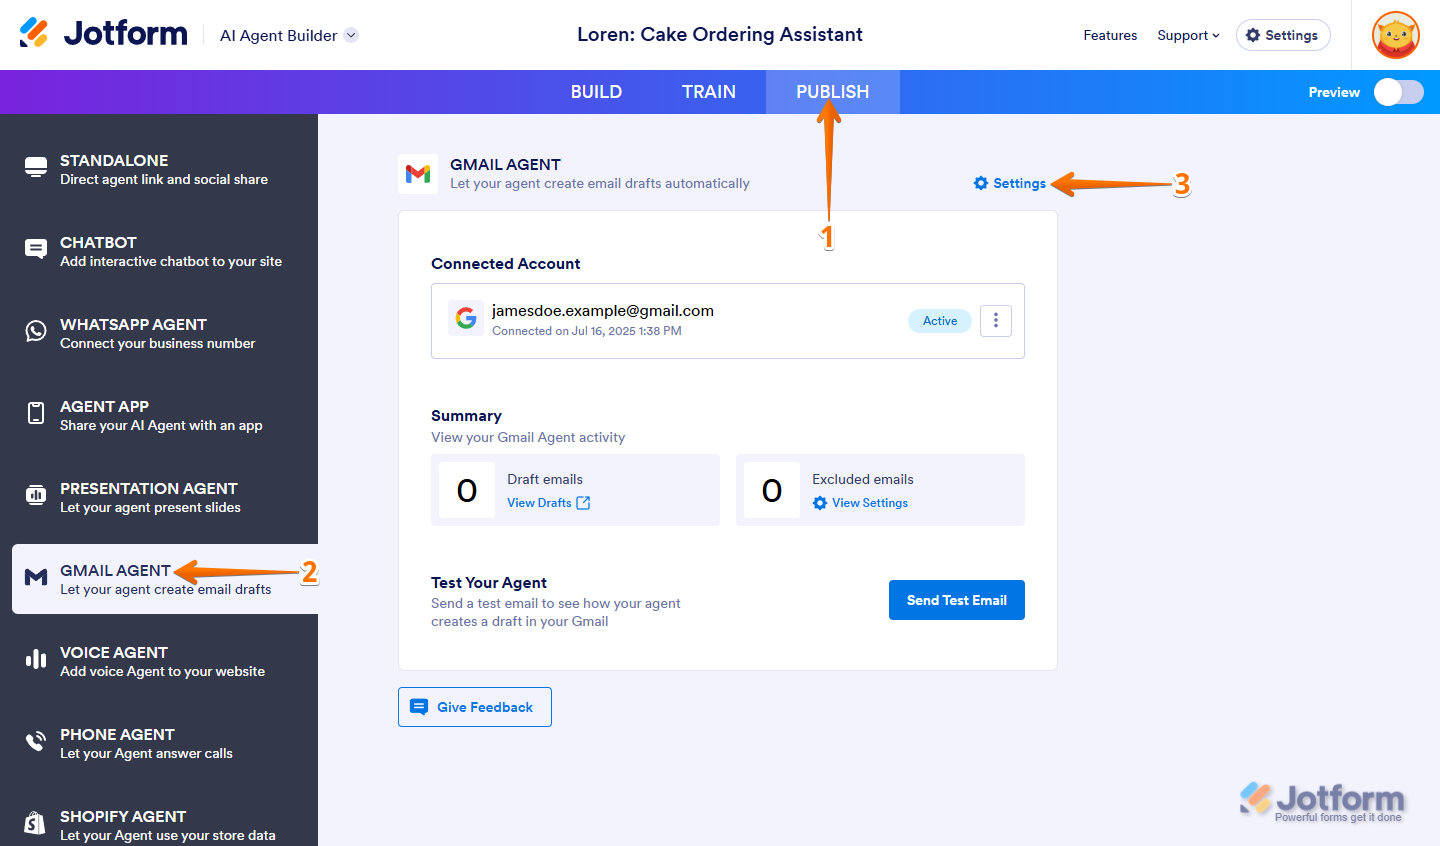
- In AI Agent Builder, in the blue navigation bar at the top of the page, click on Publish.
- Now, click on Gmail Agent in the menu on the left.
- Then, on the top-right side of the Gmail Agent section, click on Settings.
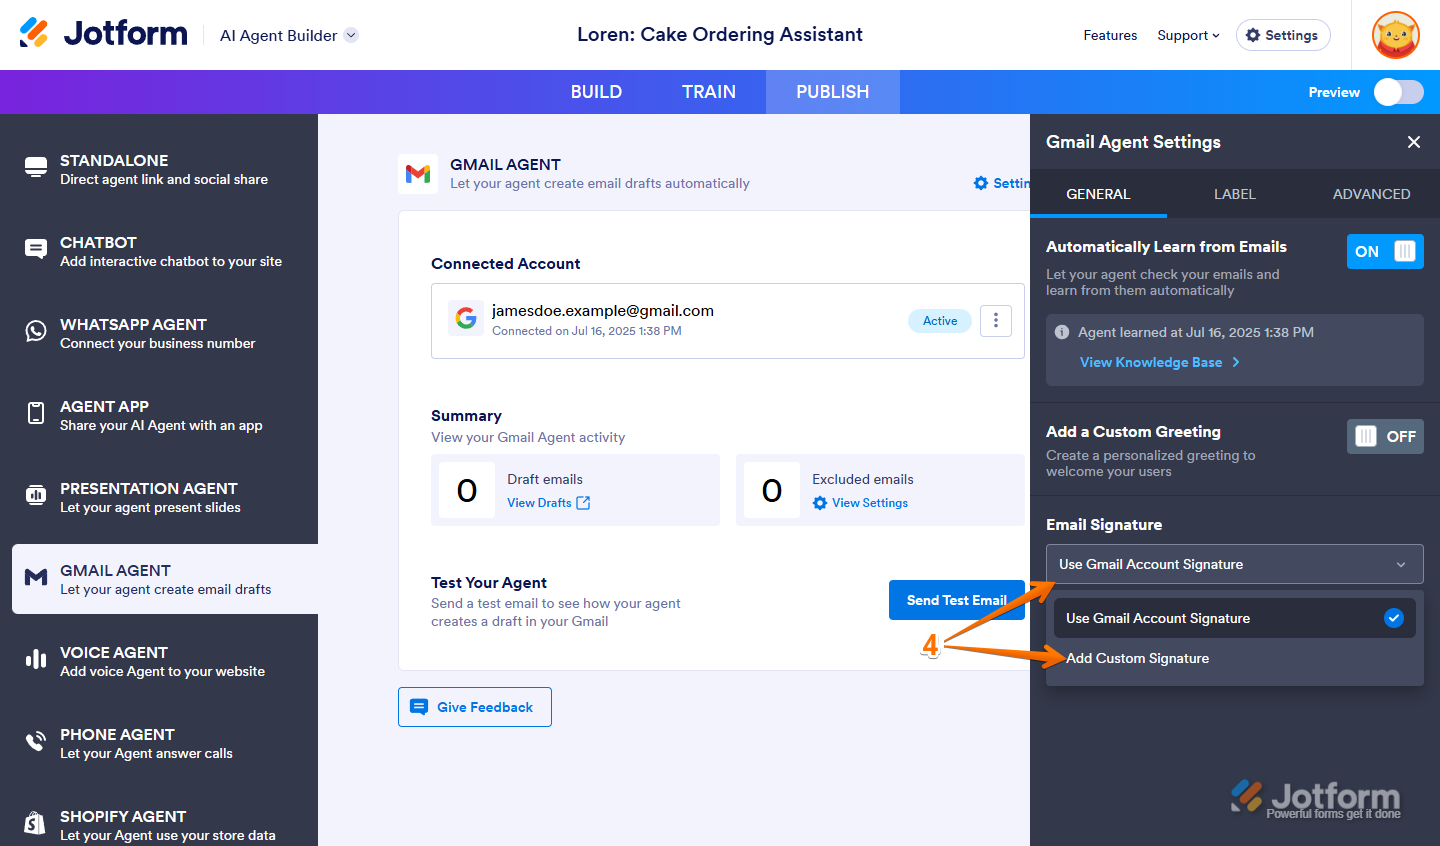
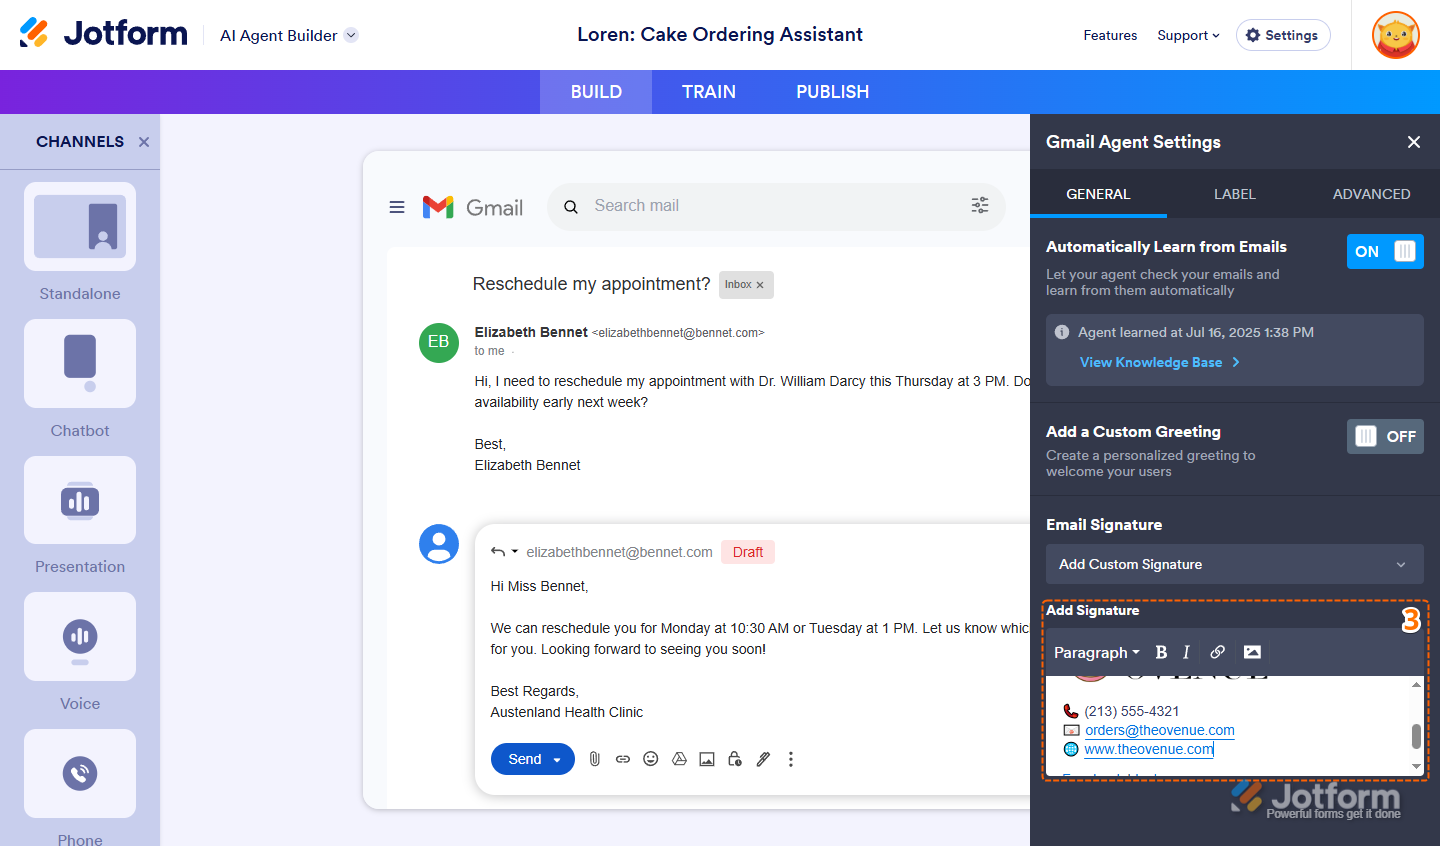
- Next, in the Gmail Agent Settings window that opens on the right side of the page, under the General tab, click on the Email Signature dropdown menu, and select Add Custom Signature.
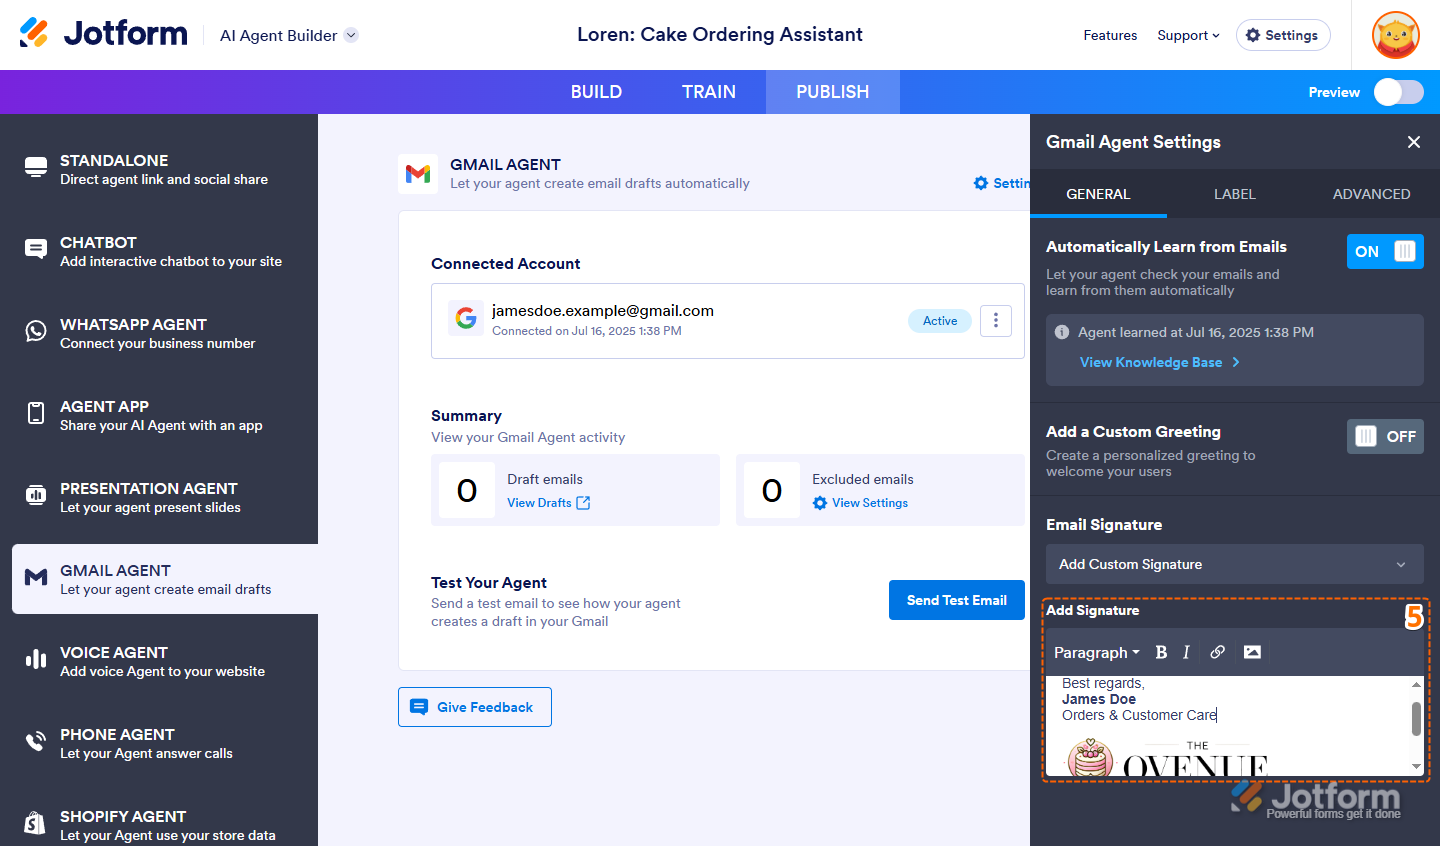
- Then, in the Add Signature section, enter your custom signature in the text editor. Use the toolbar at the top to format the text, add links, or insert images.
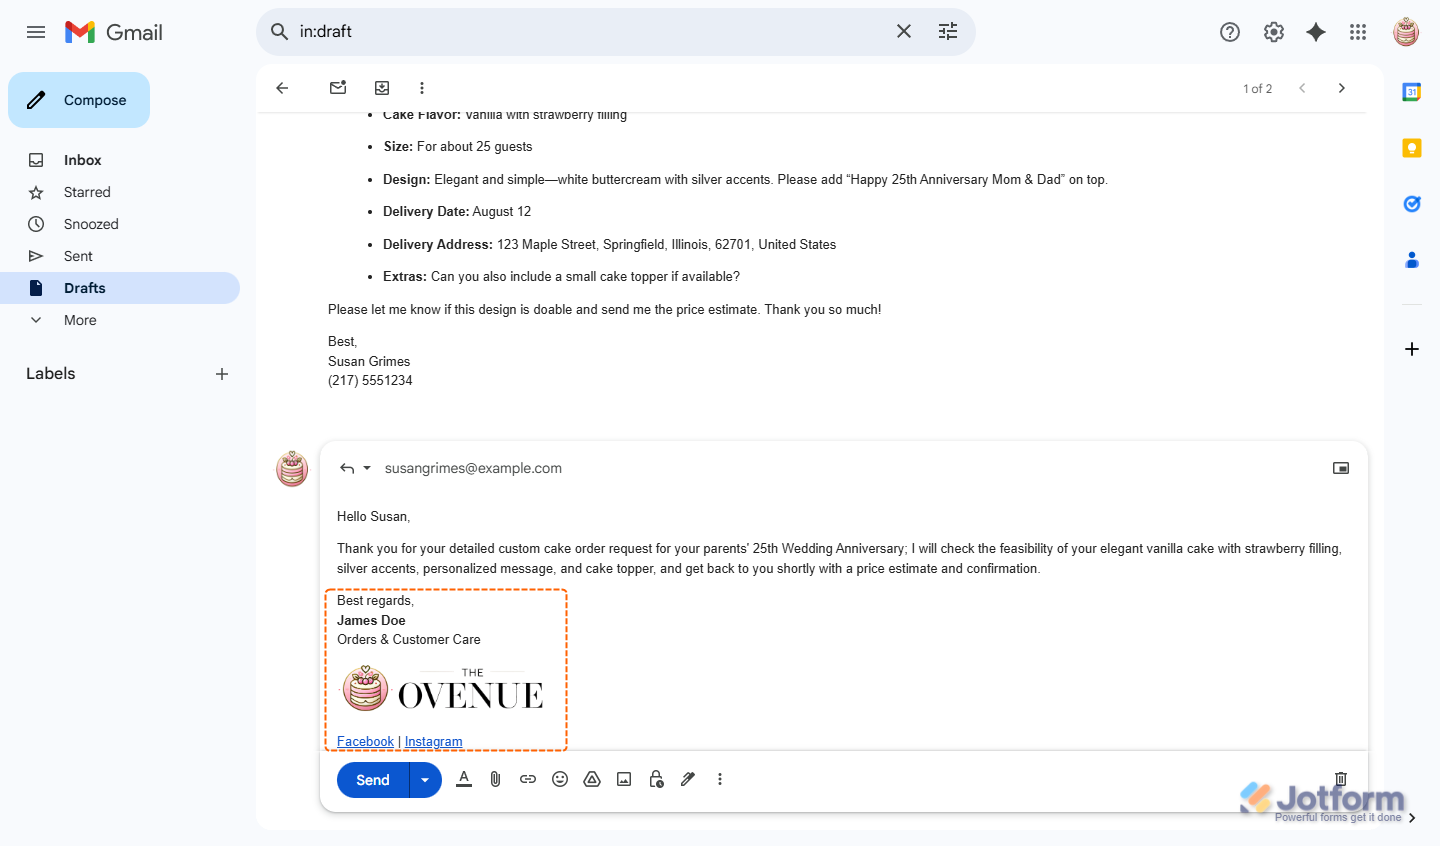
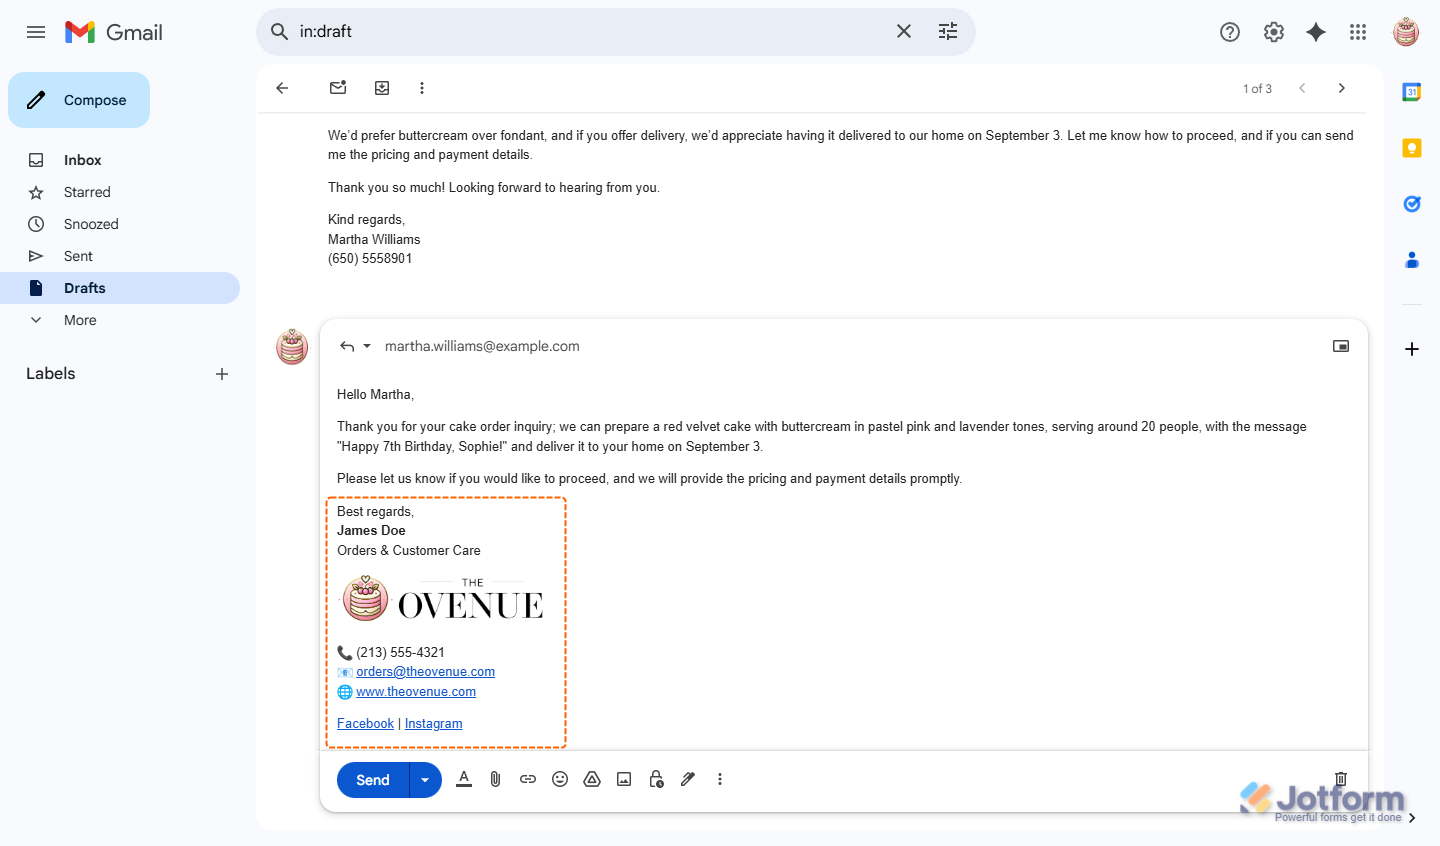
That’s it! Now your custom signature will show up automatically in every draft your Gmail Agent creates—no extra setup required.
Note
Any changes you make in the Gmail Agent Settings window are saved automatically and applied to your email drafts right away.
Updating Your Custom Signature from the Build Tab
Aside from the Publish tab, you can also update your custom signature anytime from the Build tab—here’s how:
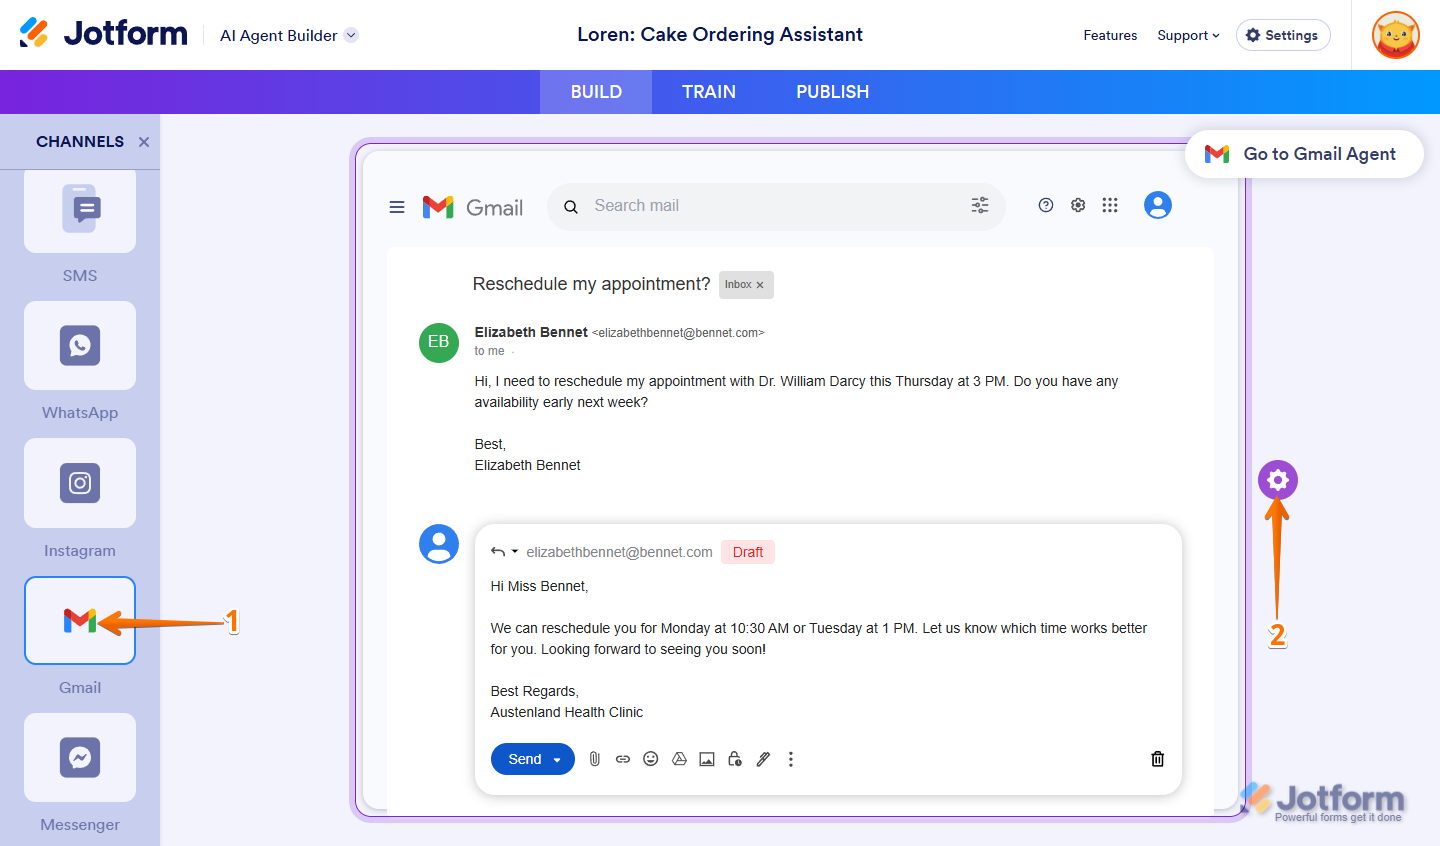
- In AI Agent Builder, in the Channels menu on the left side of the page, click on the Gmail icon.
- Now, on the right side of the Example Email Draft, click on the Gear icon.
- Then, in the Gmail Agent Settings window that opens on the right side of the page, under the General tab, go to the Add Signature section and edit your custom signature in the text editor.
That’s it! You’ve successfully updated your custom signature for Gmail Agent drafts.

Send Comment: