With Jotform’s Gmail Agent, replying to emails is quicker and more efficient—without losing that personal touch. Adding a custom greeting to your drafts helps you kick off each message on the right note, whether you’re welcoming new customers, reconnecting with returning clients, or just setting a warm tone. It’s an easy way to keep your replies consistent and professional while still saving time. Gmail Agent makes it simple by letting you set a greeting that automatically appears at the top of every draft.

Creating Your Custom Greeting Message from the Publish Tab
As soon as you’ve set up your Gmail Agent, it only takes a second to add your greeting—follow these quick steps to get started:
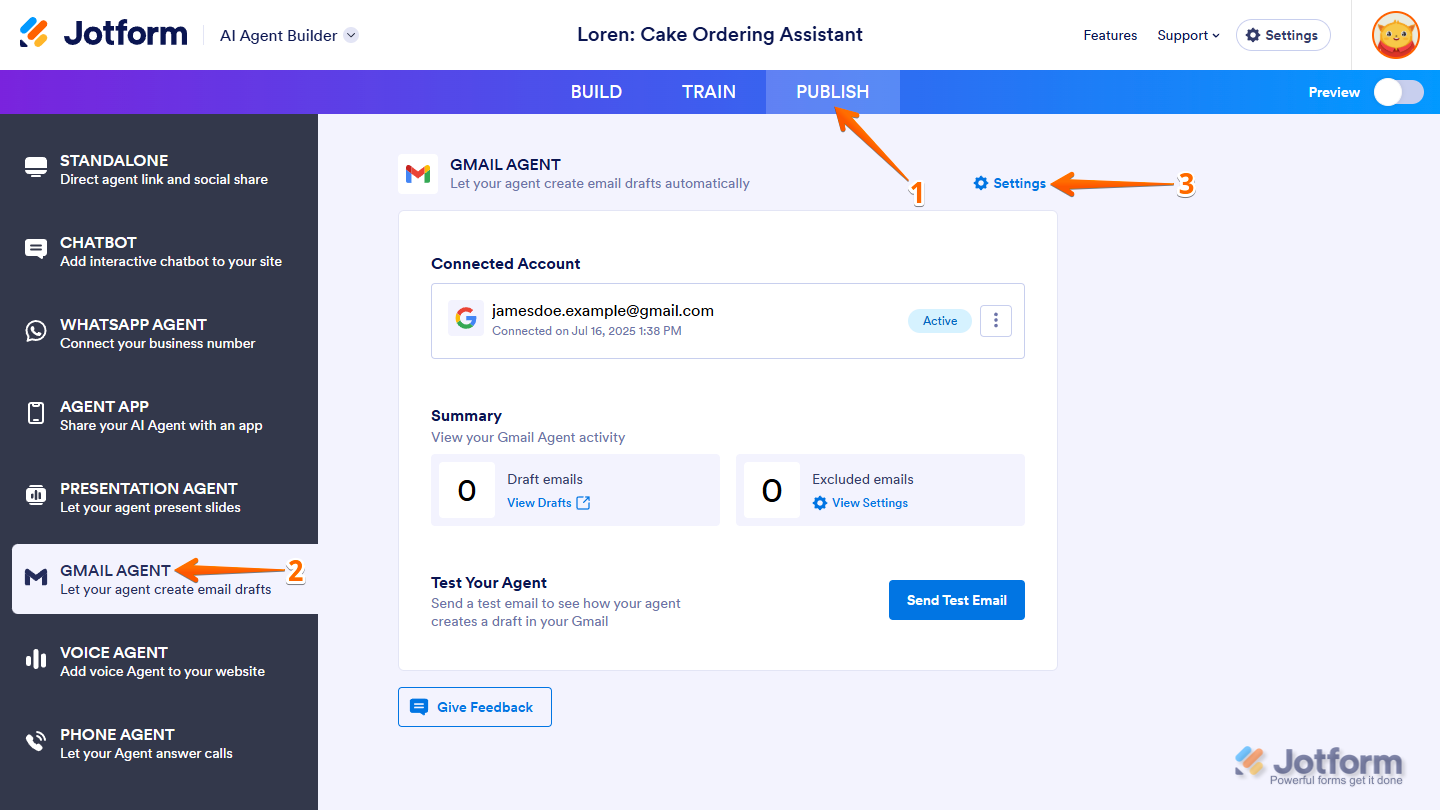
- In AI Agent Builder, in the blue navigation bar at the top of the page, click on Publish.
- Now, click on Gmail Agent in the menu on the left.
- Then, on the top-right side of the Gmail Agent section, click on Settings.
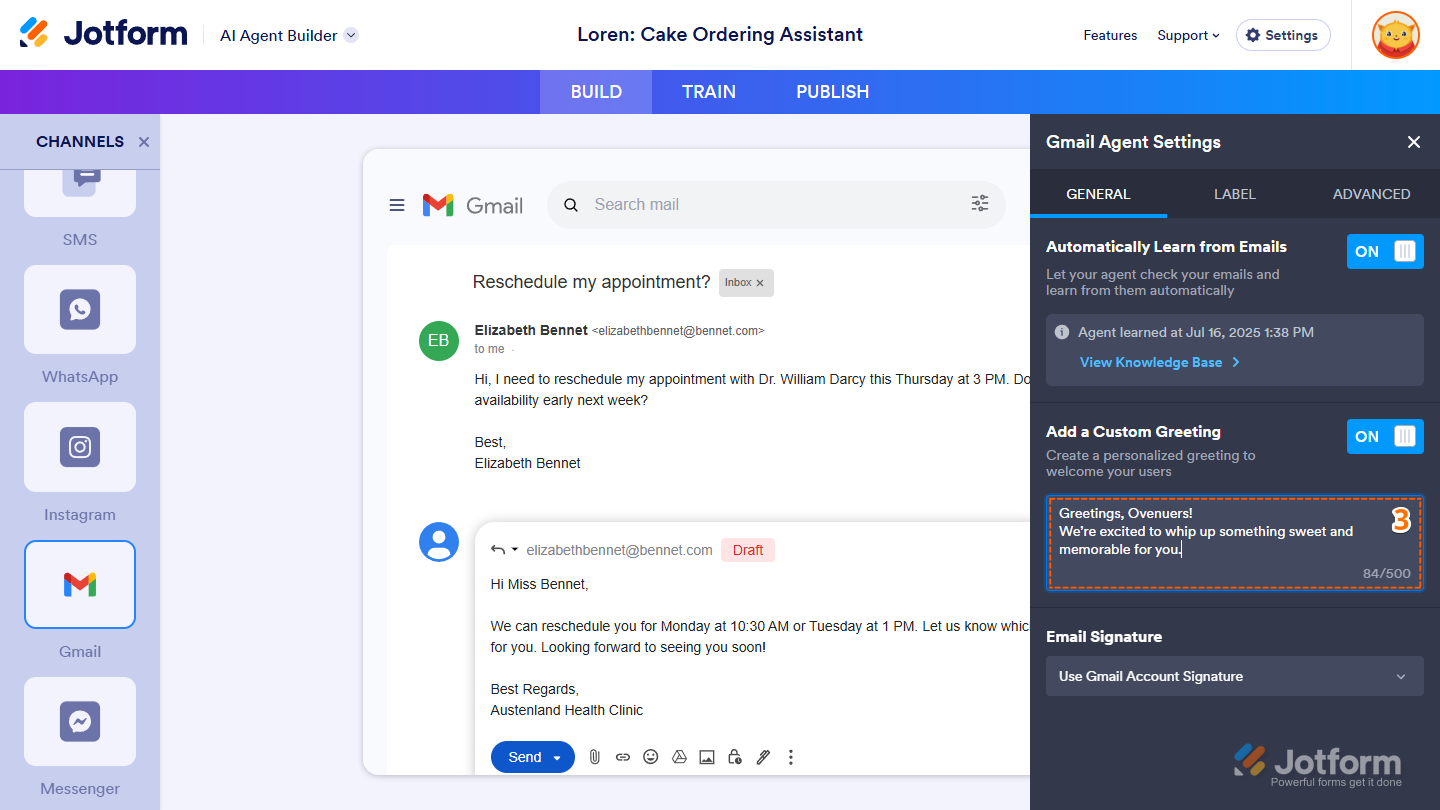
- Next, in the Gmail Agent Settings window that opens on the right side of the page, under the General tab, toggle Add a Custom Greeting to On and enter your custom greeting in the text box below it.
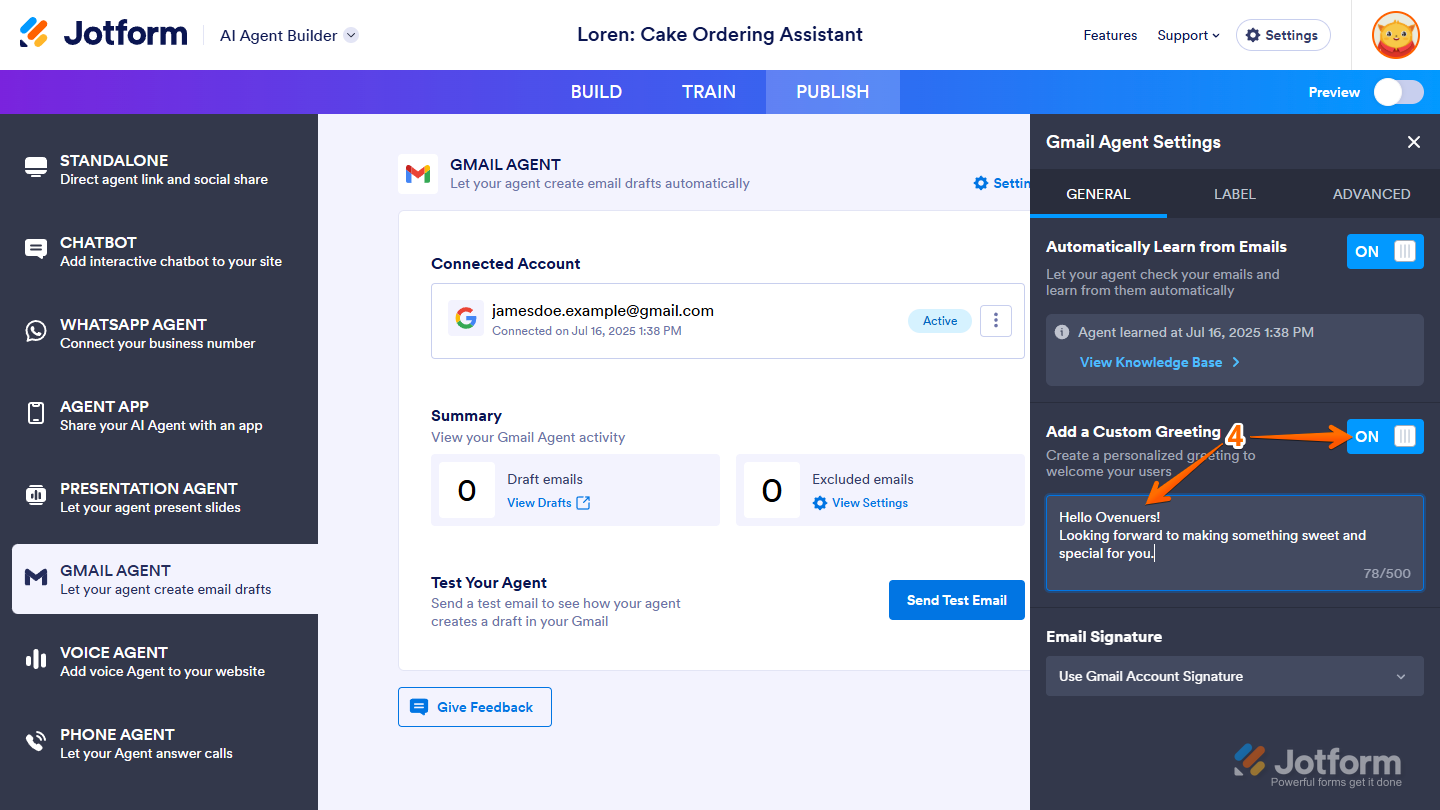
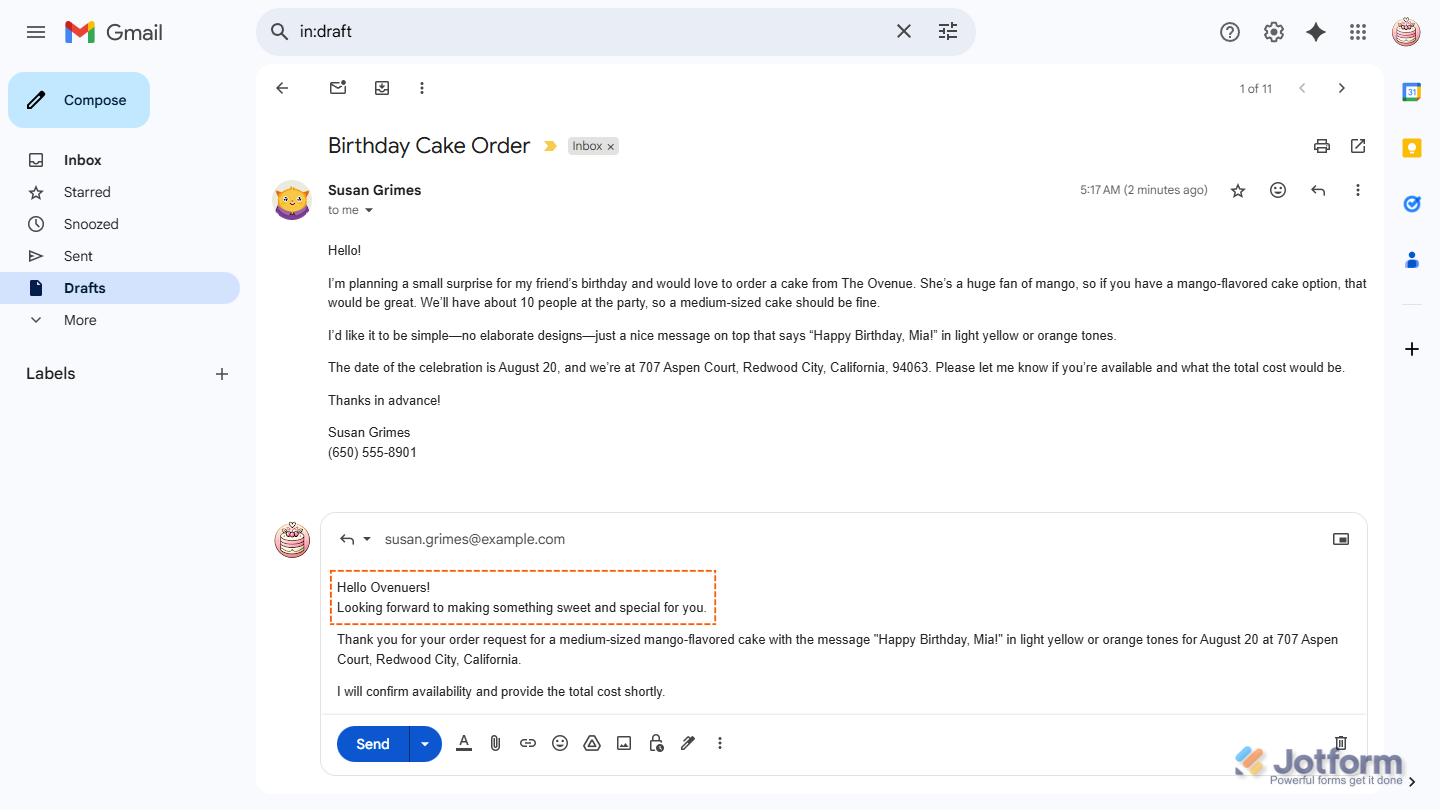
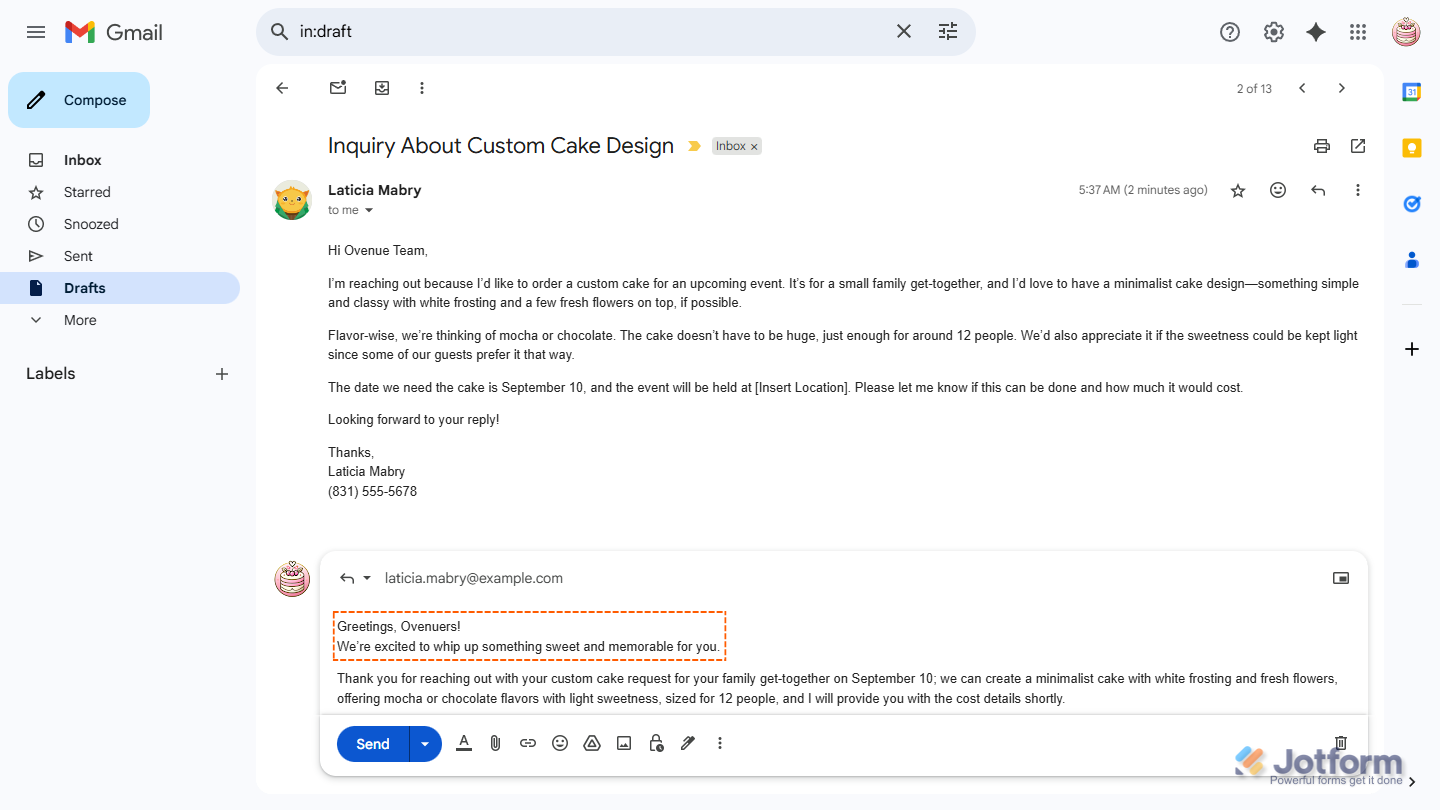
That’s it! Gmail Agent will add your custom greeting to every draft automatically—so you won’t have to.
Note
Any changes you make in the Gmail Agent Settings window are saved automatically and applied to your email drafts right away.
Updating Your Custom Greeting Message from the Build Tab
Aside from the Publish tab, you can also update your custom greeting anytime from the Build tab—here’s the quick way to do it:
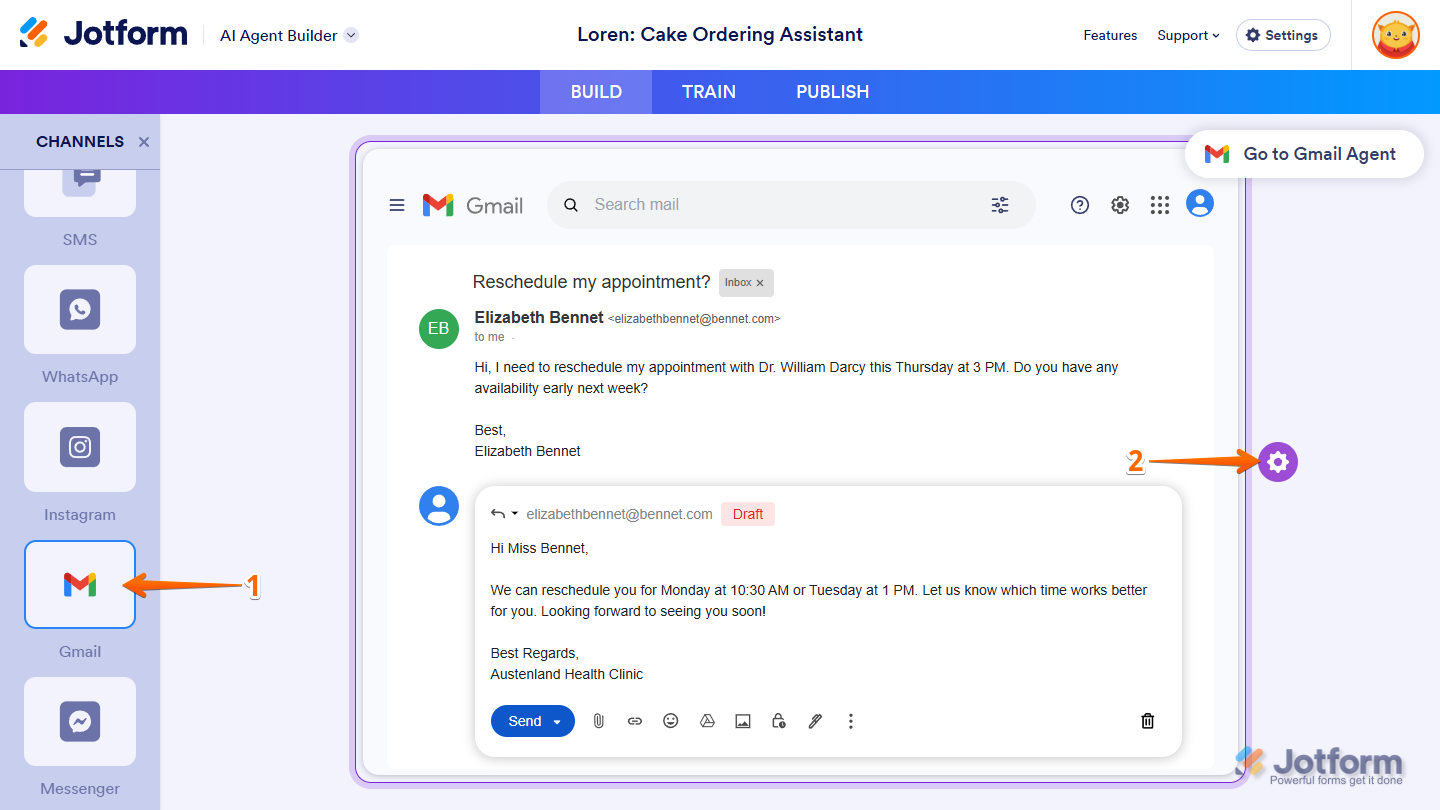
- In AI Agent Builder, in the Channels menu on the left side of the page, click on the Gmail icon.
- Now, on the right side of the Example Email Draft, click on the Gear icon.
- Then, in the Gmail Agent Settings window that opens on the right side of the page, under the General tab, go to the Add Greeting section and edit your custom greeting in the text box.
That’s it! You’ve successfully updated your custom greeting—it’ll be added to every new draft Gmail Agent creates.

Send Comment: