Jotform Smart PDF Forms let you turn your PDF forms into easy-to-fill online forms. When someone submits the online form, the original PDF you uploaded is filled with the submitted information. The online form and your original PDF are connected by default, and you can adjust the settings that come with this connection at any time. Here’s how to do it:
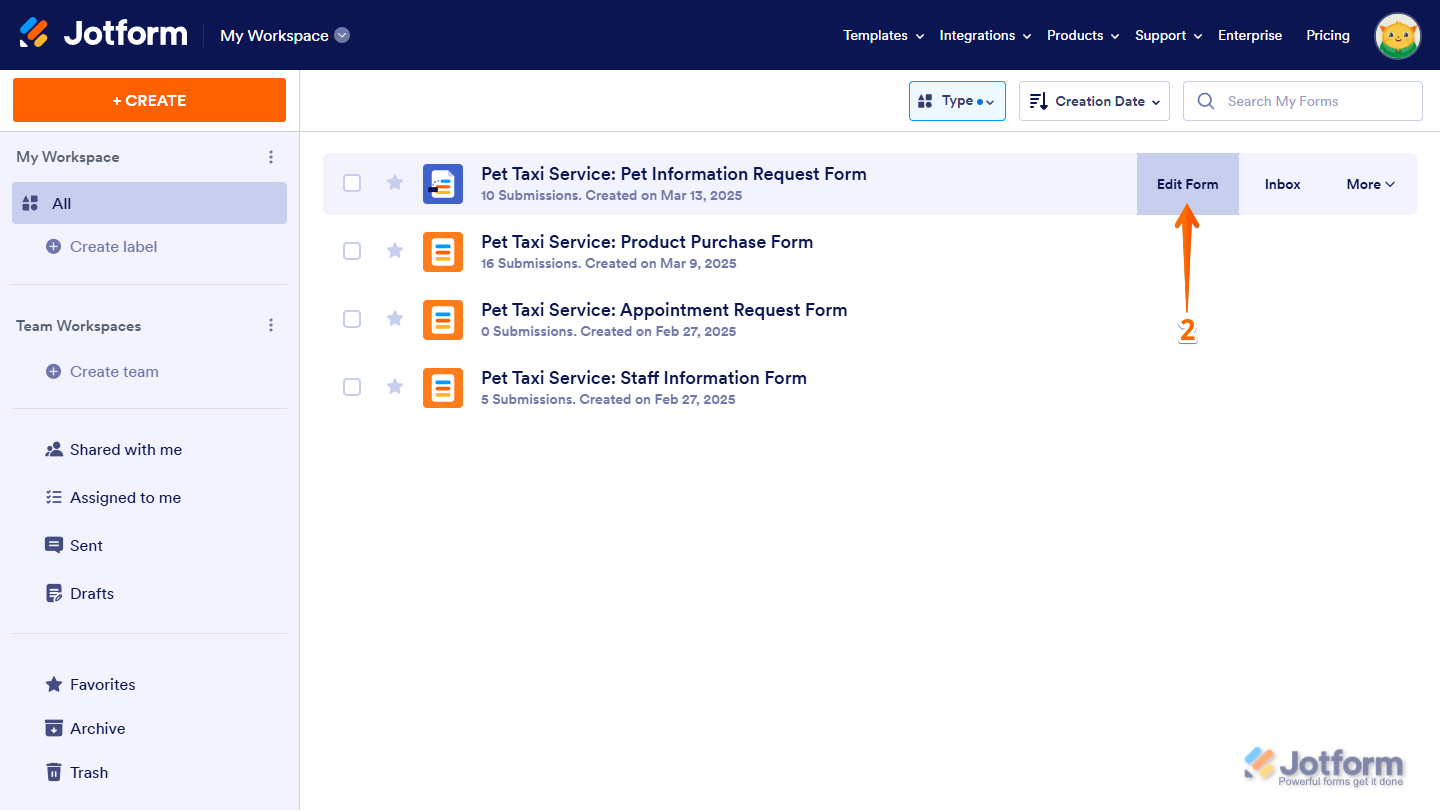
- On your My Workspace page, click on Type at the top and in the Dropdown menu that opens, uncheck the boxes next to all the assets except Forms, so only they’ll be shown on the page.

- Hover your mouse over your Smart PDF Form and click on Edit Form on the right side of the page.
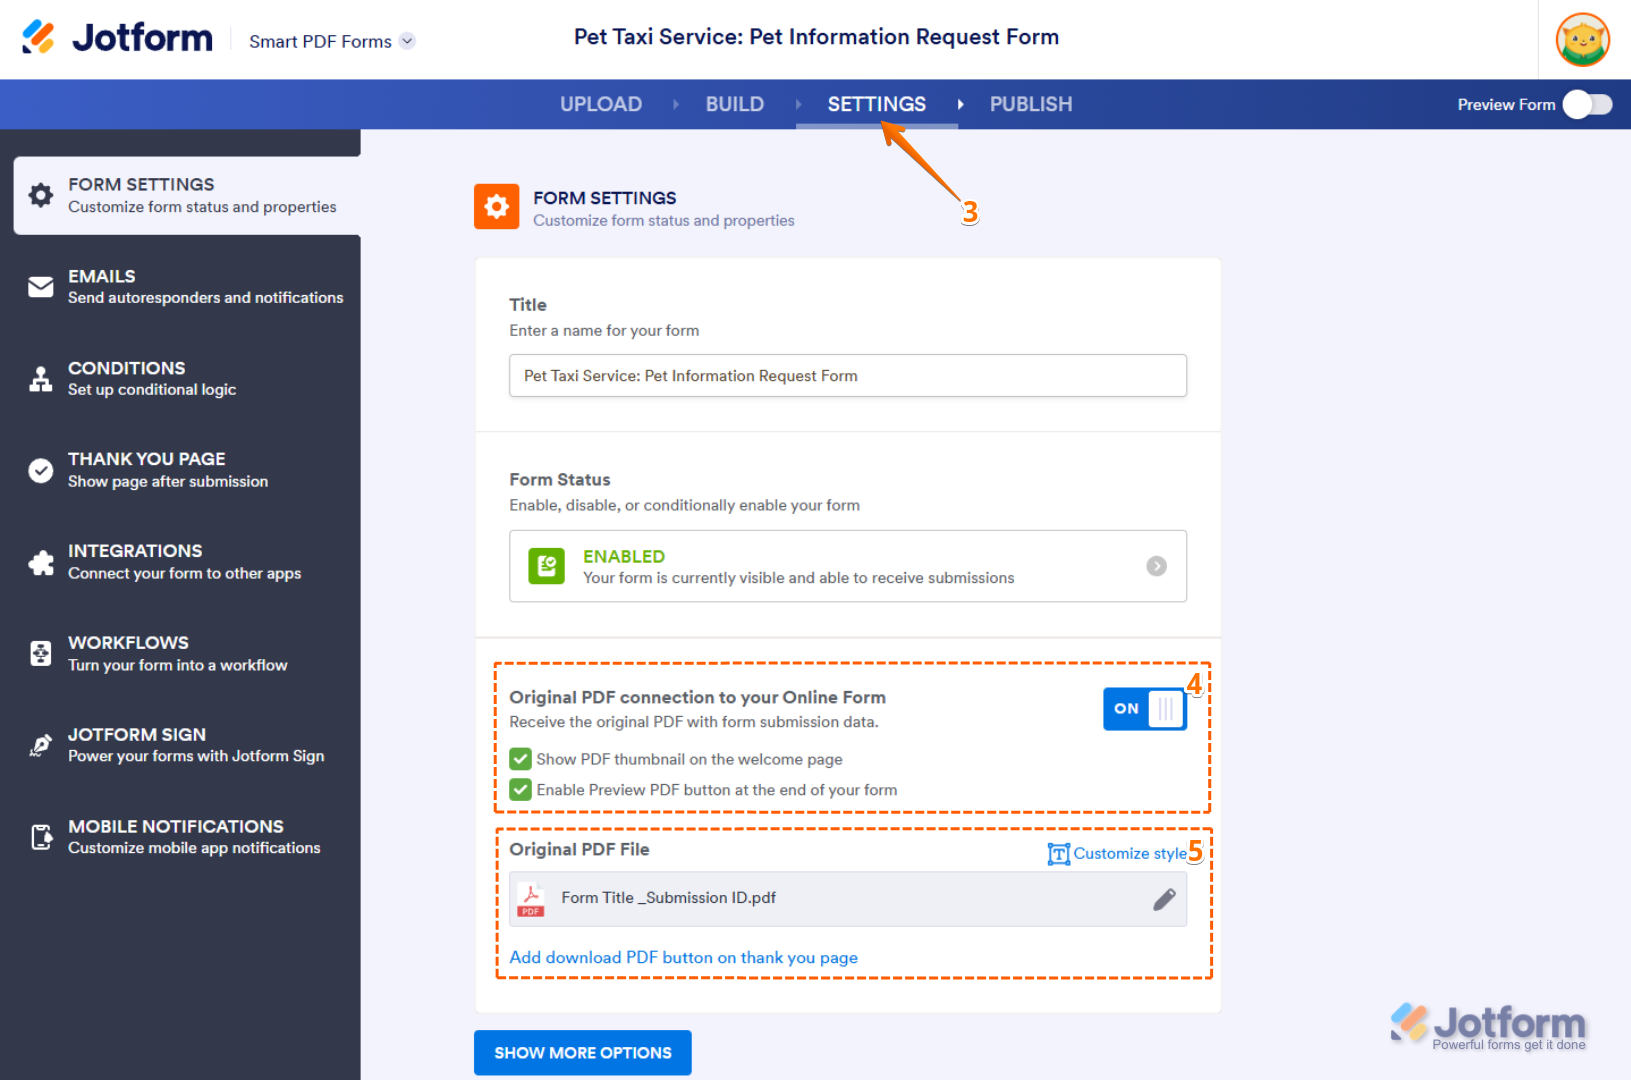
- On the Smart PDF Forms page, click on Settings in the blue navigation bar at the top.
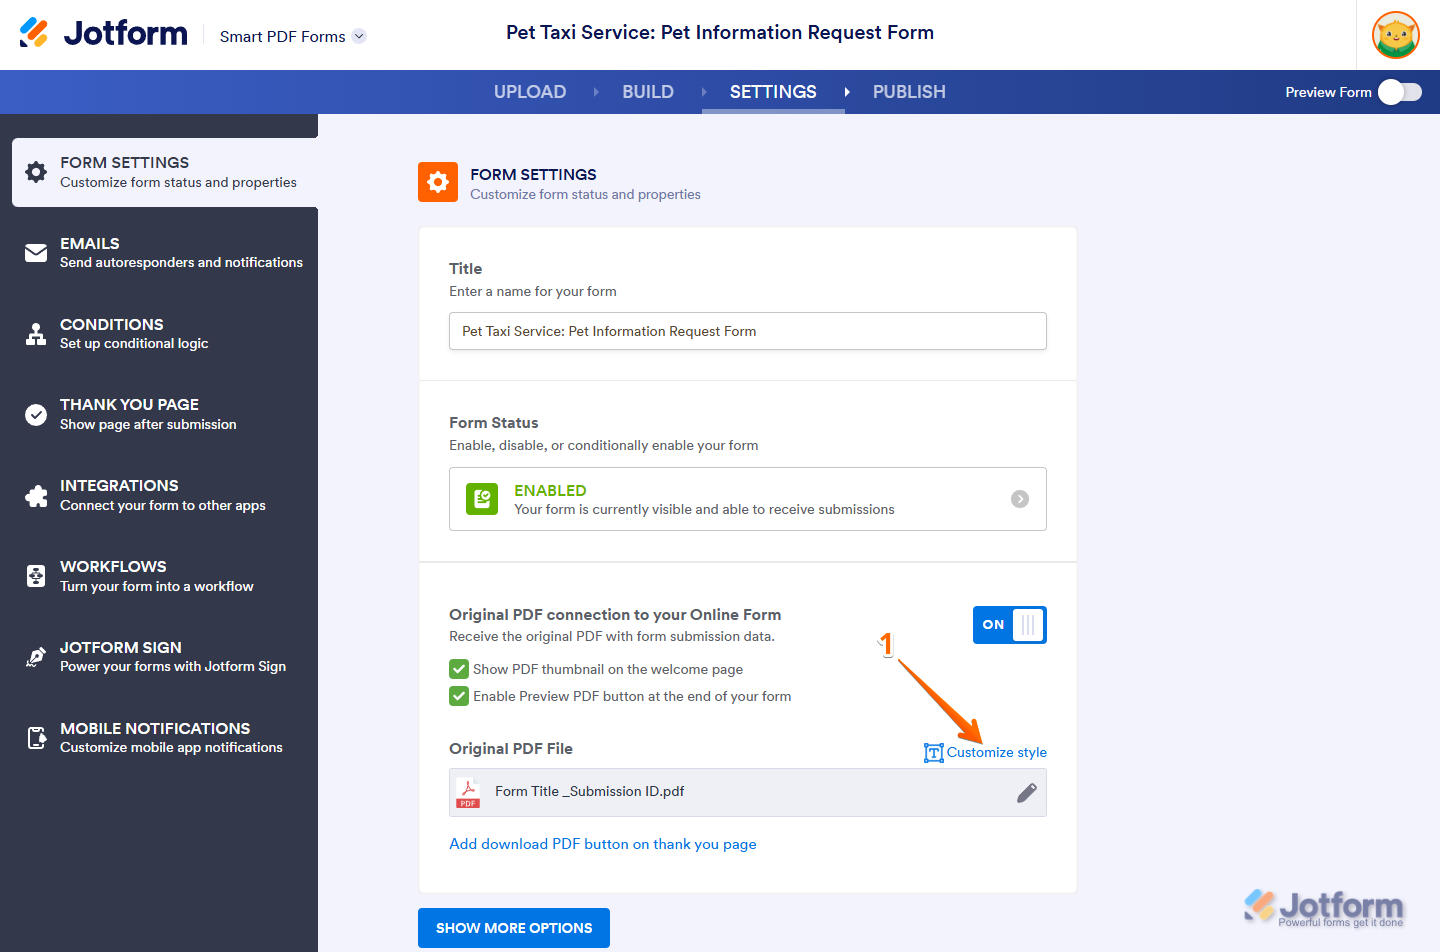
- Now, under the Form Settings tab on the left, you can change the following settings in the Original PDF Connection to Your Online Form section on the right:
- Show PDF Thumbnail on the Welcome Page — This shows a thumbnail of the original PDF form on your form’s Welcome page.
- Enable Preview PDF Button at the End of Your Form — This shows a button that lets form respondents see the original PDF Form filled with the data they submitted on your form.
- Then, in the Original PDF File section, you can also configure the following things:
- Customize the Style of the Original PDF Form — This allows you to change the style and format of the data input on the original PDF Form.
- Change the Name of the Original PDF Form — This allows you to modify the name of the original PDF Form.
- Add Download PDF Button on Thank You Page — This redirects you to the Thank You Page Settings of the Smart PDF Forms page, where you can add a Download PDF button to your form’s Thank You page.
Showing a PDF Thumbnail on the Welcome Page
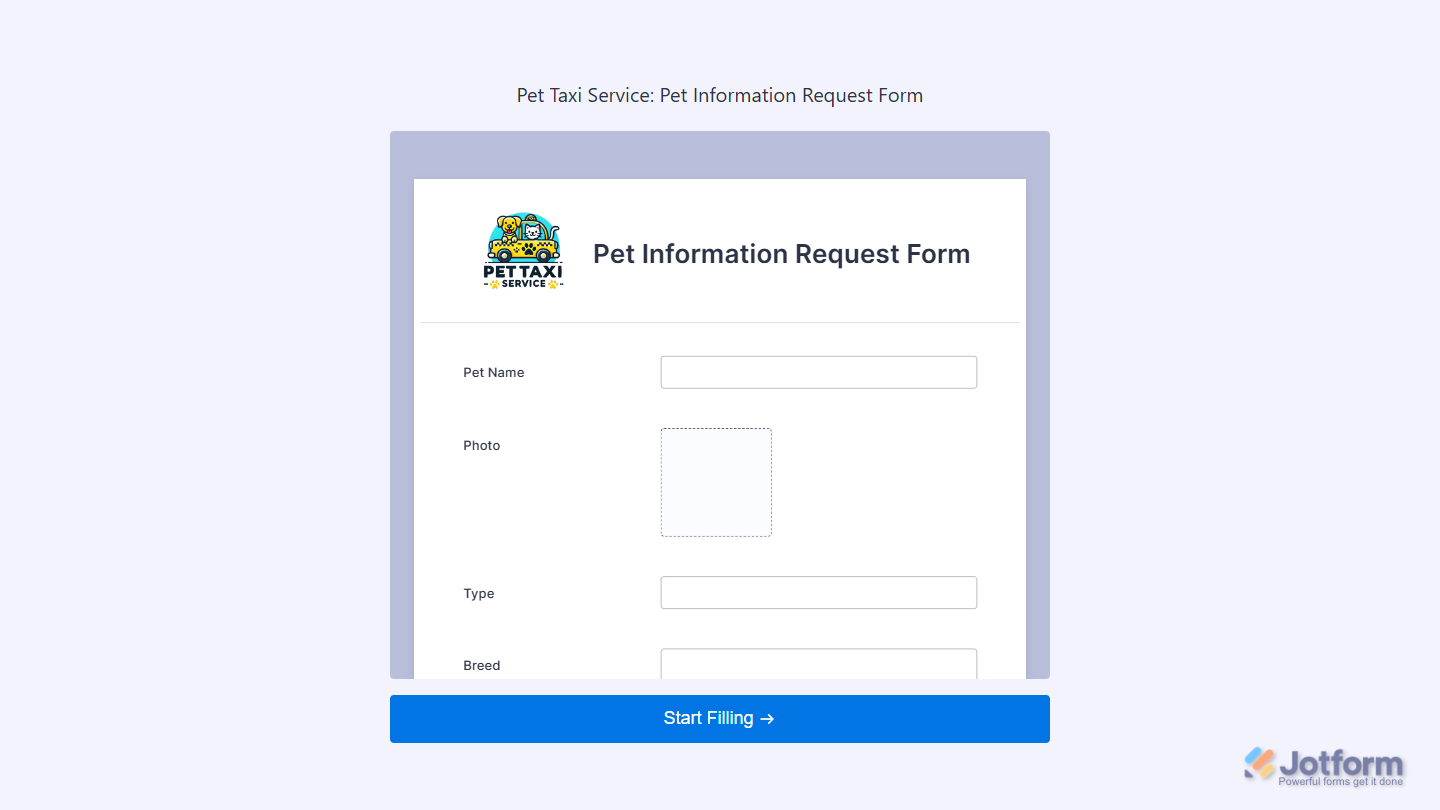
When the Show PDF Thumbnail on the Welcome Page option is checked in Form Settings, a Welcome page that displays the original PDF Form as a thumbnail will be shown initially when your standalone or embedded form loads. Form respondents need to click on the Start Filling button to view your online form.
Note
The style and format of the Welcome page on your Smart PDF Form aren’t customizable.
Enabling Preview PDF Button at the End of Your Form
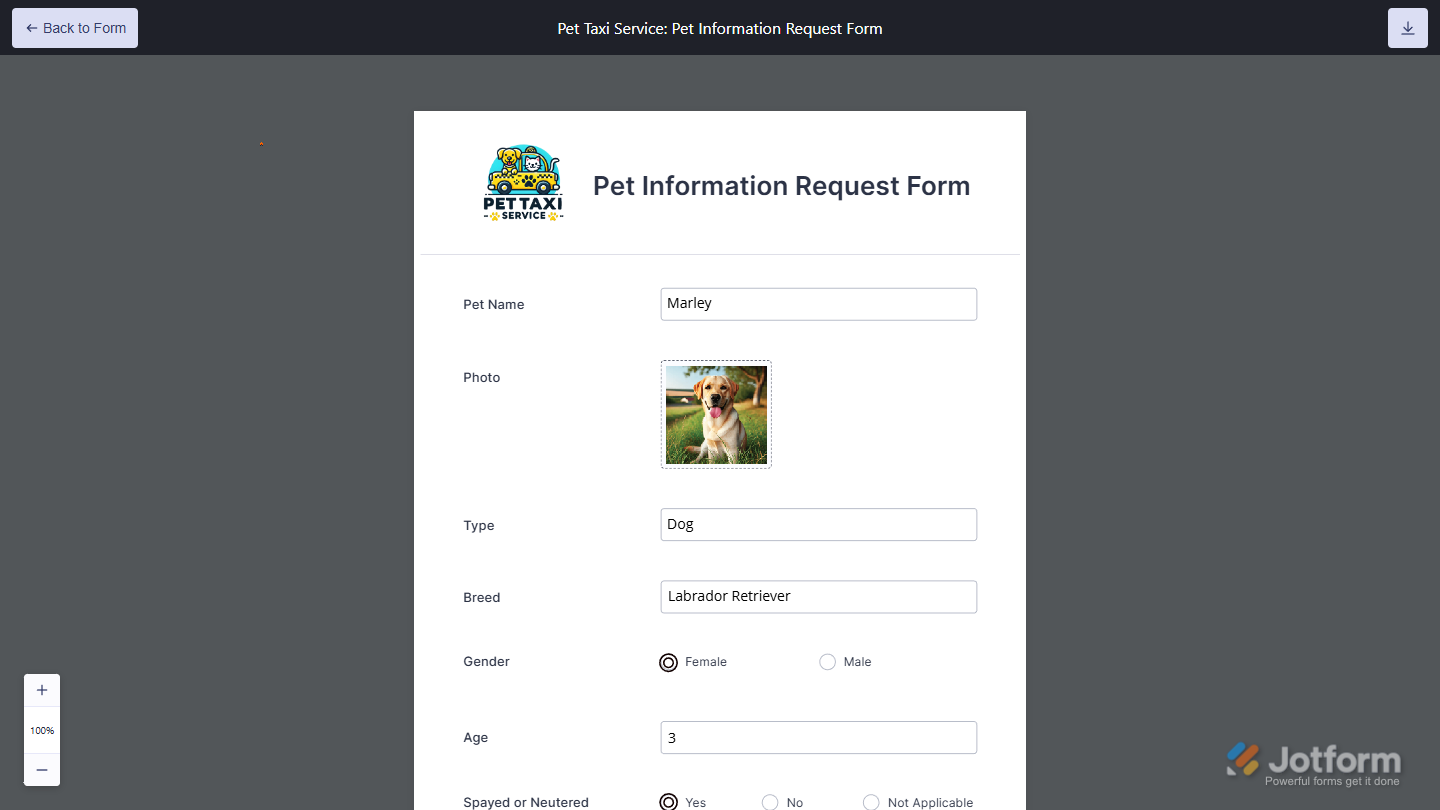
When the Enable Preview PDF Button at the End of Your Form option remains checked in the Form Settings, the Preview PDF button of your form’s Submit button is automatically enabled.

When the button is clicked on, it’ll show a preview of the original PDF Form filled with data that form respondents have selected or entered in the online form fields. They can download the original PDF form with their data in the Preview window.
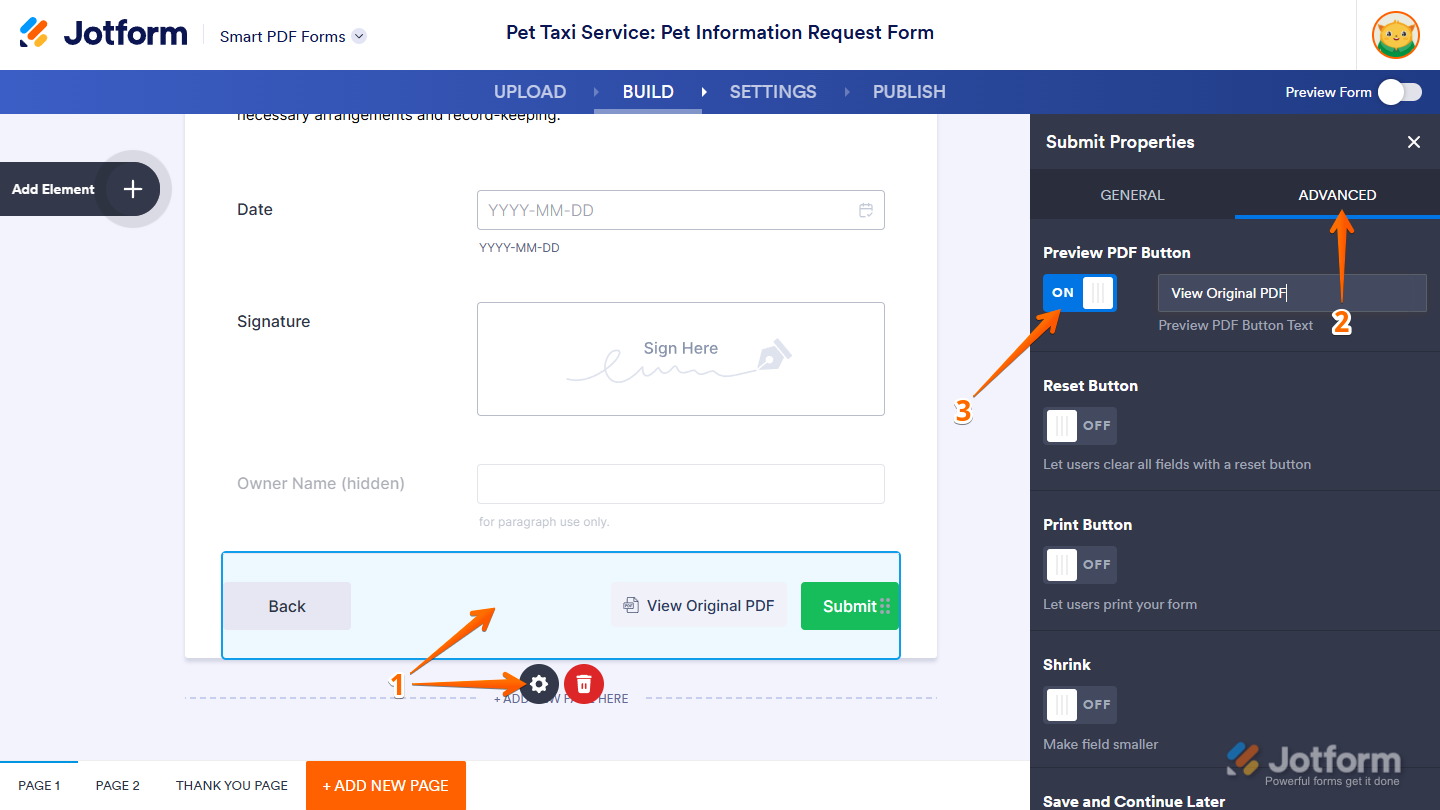
You can also enable or disable and change the text of individual Preview PDF buttons on your form. Here’s how to do it:
- While on the Smart PDF Forms page, click on the Submit button on your online form and then click on the Gear icon.
- In the Submit Properties window on the right side of the page, under the Advanced tab, toggle Preview PDF Button to the ON position to show it on your form.
- Then, in the box next to the Toggle Switch, enter a new button label.
Note
The Enable Preview PDF Button at the End of Your Form option in Form Settings is automatically checked if at least one Submit button on your form has the Preview PDF Button enabled, and will be unchecked if all of them are disabled.
Customizing the Style of the Original PDF File of Your Form
You can change how the entries appear on the original PDF file of your form in a few easy steps. Here’s how to do it:
- While in the Original PDF Connection to Your Online Form section under the Form Settings tab in Smart PDF Forms, click on Customize Style on the right side of the page.
- Now, on the PDF Editor page that loads in a new browser tab, customize the appearance of the answers on the original PDF Form in the Original PDF Settings window on the right side of the page.
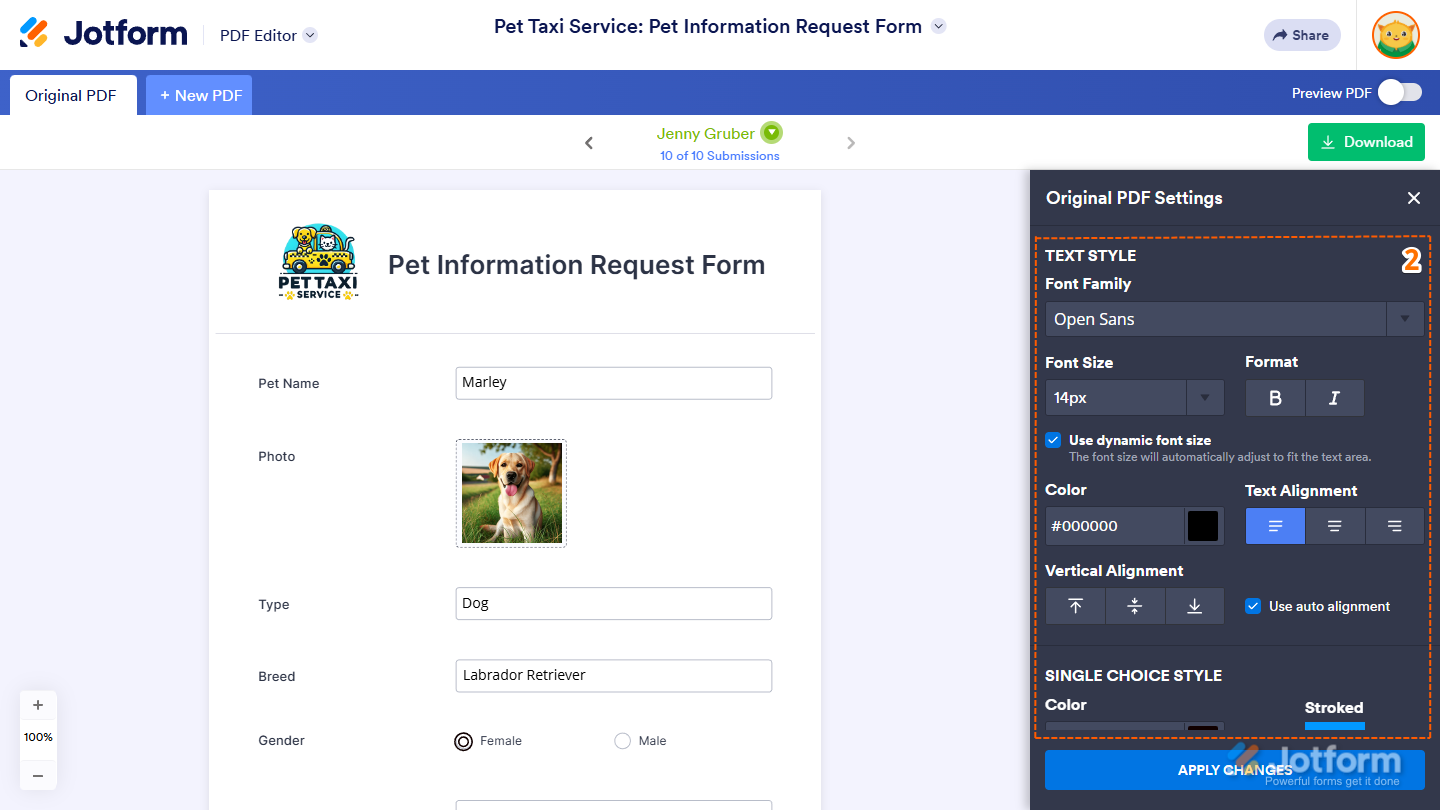
You can also check out our guide on How to Change the Answer Styles in the Original PDF Document to learn more about it.
Change the Name of the Original PDF File of Your Form
You can change the name of the original PDF file of your form and base it on the data submitted on your online form. Here’s how to do it:
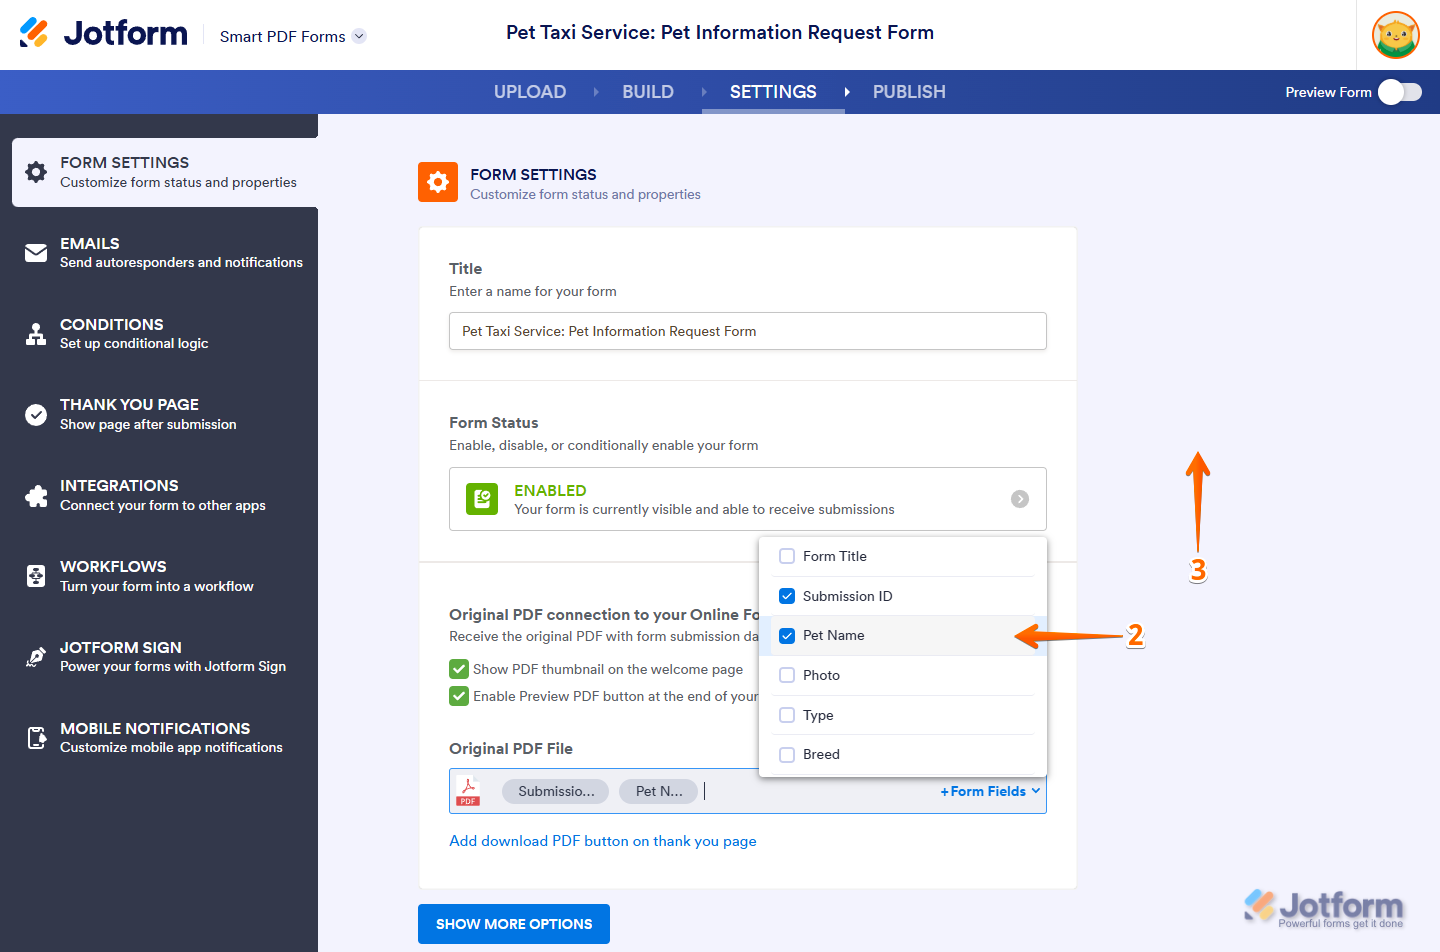
- While in the Original PDF Connection to Your Online Form section under the Form Settings tab in Smart PDF Forms, click on the Pencil icon on the right of the Original PDF File section.
- Now, enter a name or click on the Form Fields Dropdown menu on the right to select a field on your online form.
- Then, click anywhere outside the gray Input box to apply the changes.
Note
Form fields in the file name of the original PDF file always start with an underscore, except when it is placed at the beginning of the name.
Adding a Download PDF Button on the Thank You Page
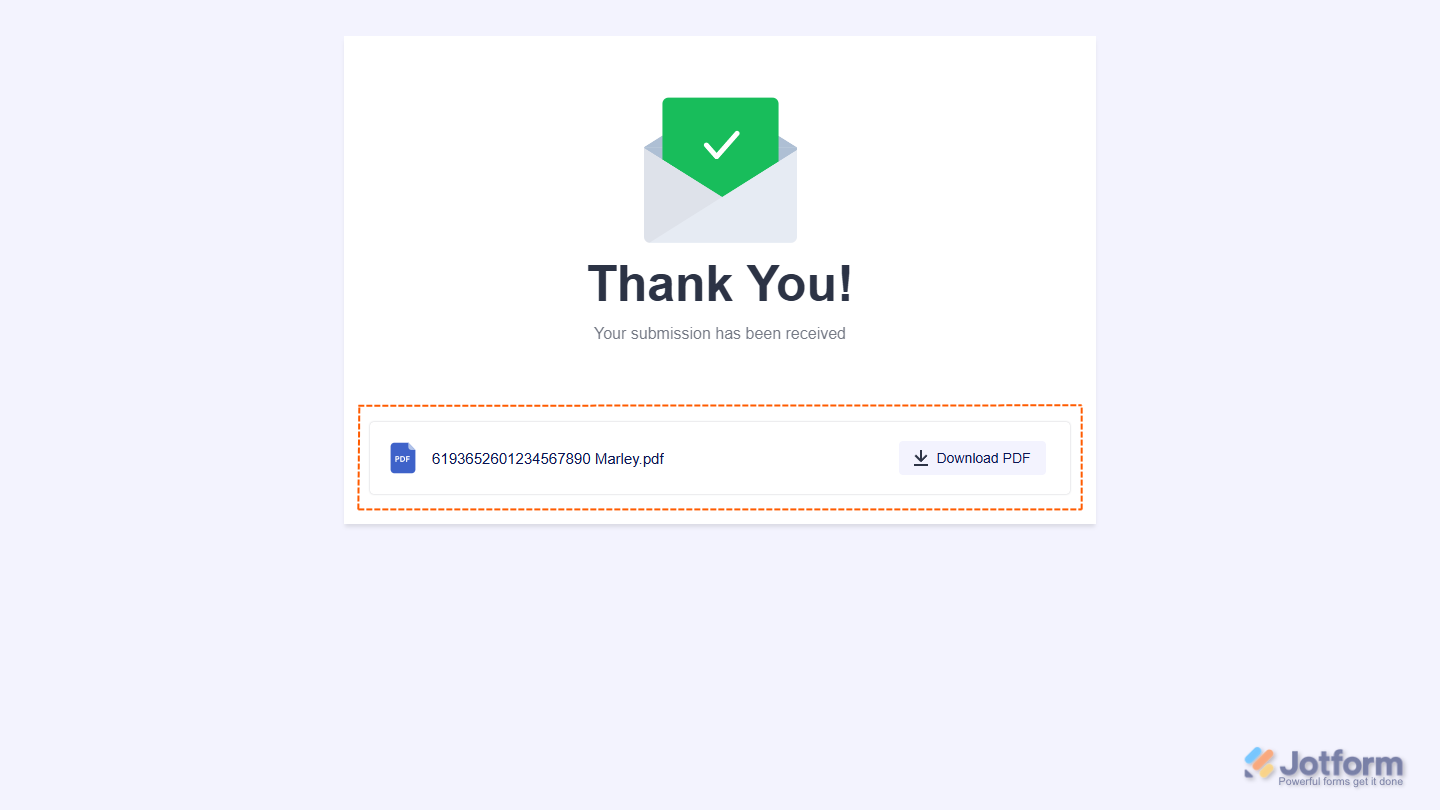
You can add different action buttons to your form’s Thank You page, such as a Download PDF button that lets form respondents get a copy of the original PDF Form filled with the data they submitted in your online form.
You can add the Download PDF button to your form’s Thank You page in a few easy steps. Here’s how to do it:
- While in the Original PDF Connection to Your Online Form section under the Form Settings tab in Smart PDF Forms, click on the Add Download PDF Button on Thank You Page below the Original PDF File name.

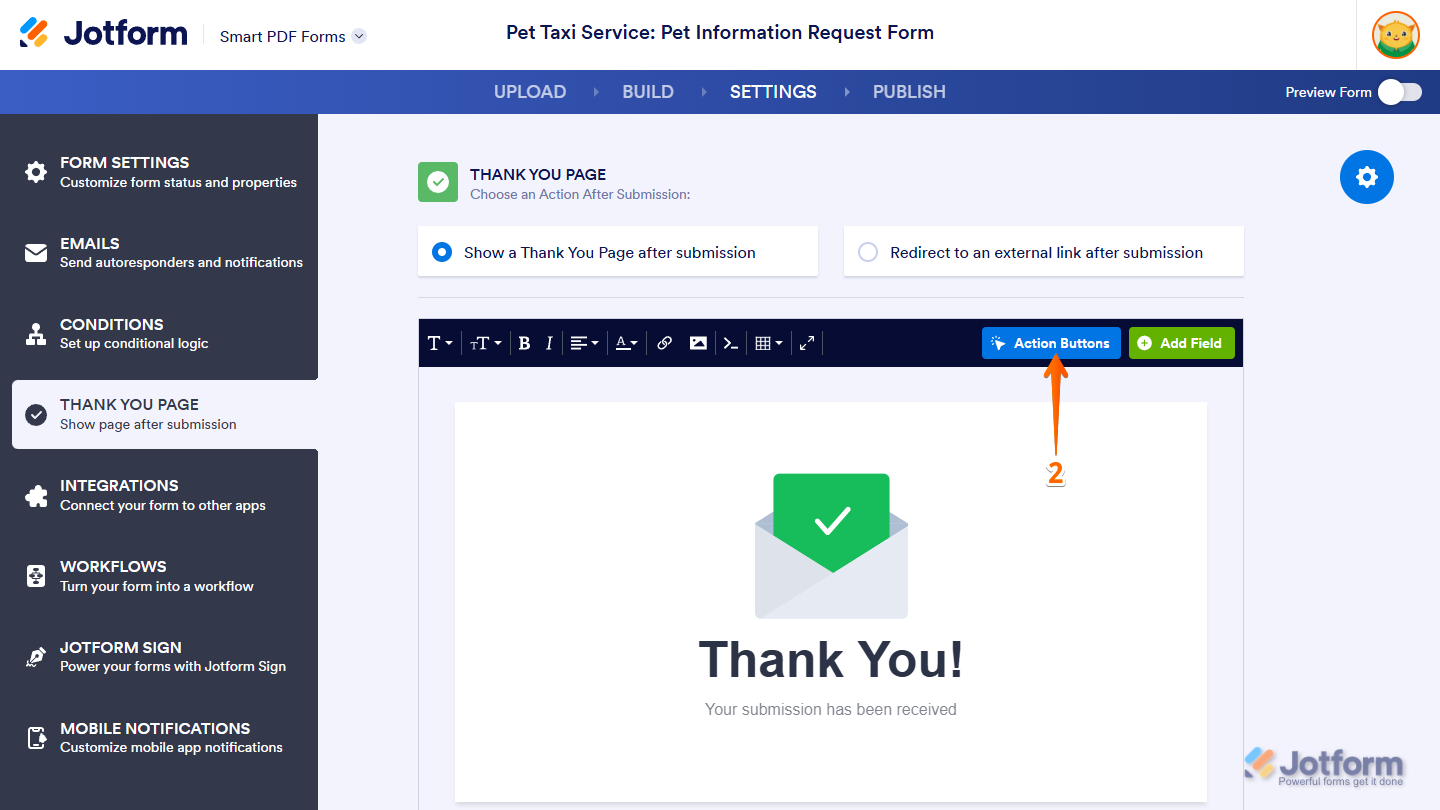
- Now, in the Thank You Page Settings, click on Action Buttons on the top-right side of the Thank You Page editor.
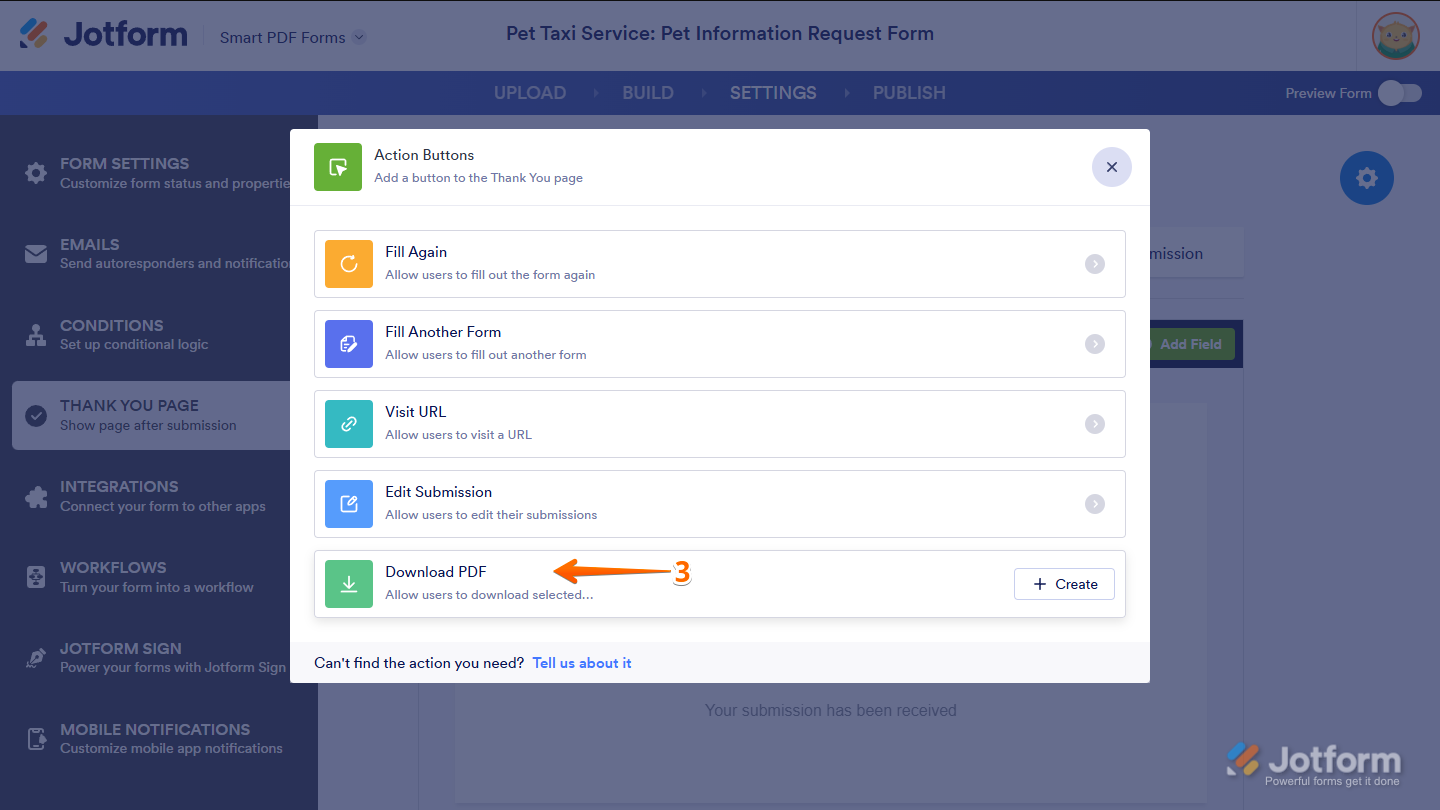
- Then, in the Action Buttons window that comes up, click on Download PDF.
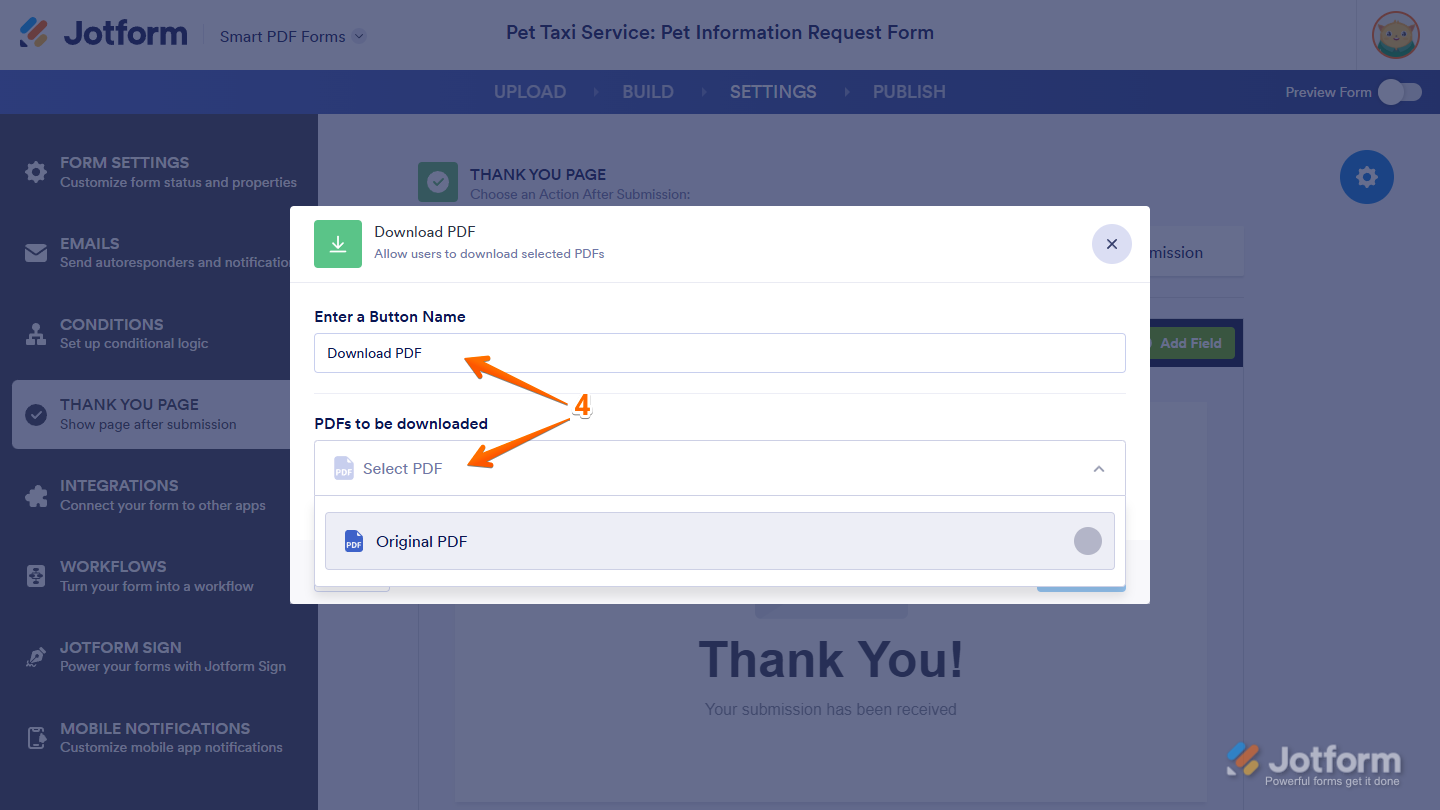
- Next, in the Download PDF window, enter a button name and then in the PDFs to be Downloaded Dropdown menu, select Original PDF.
- After that, click on Create at the bottom of the window to save your changes.
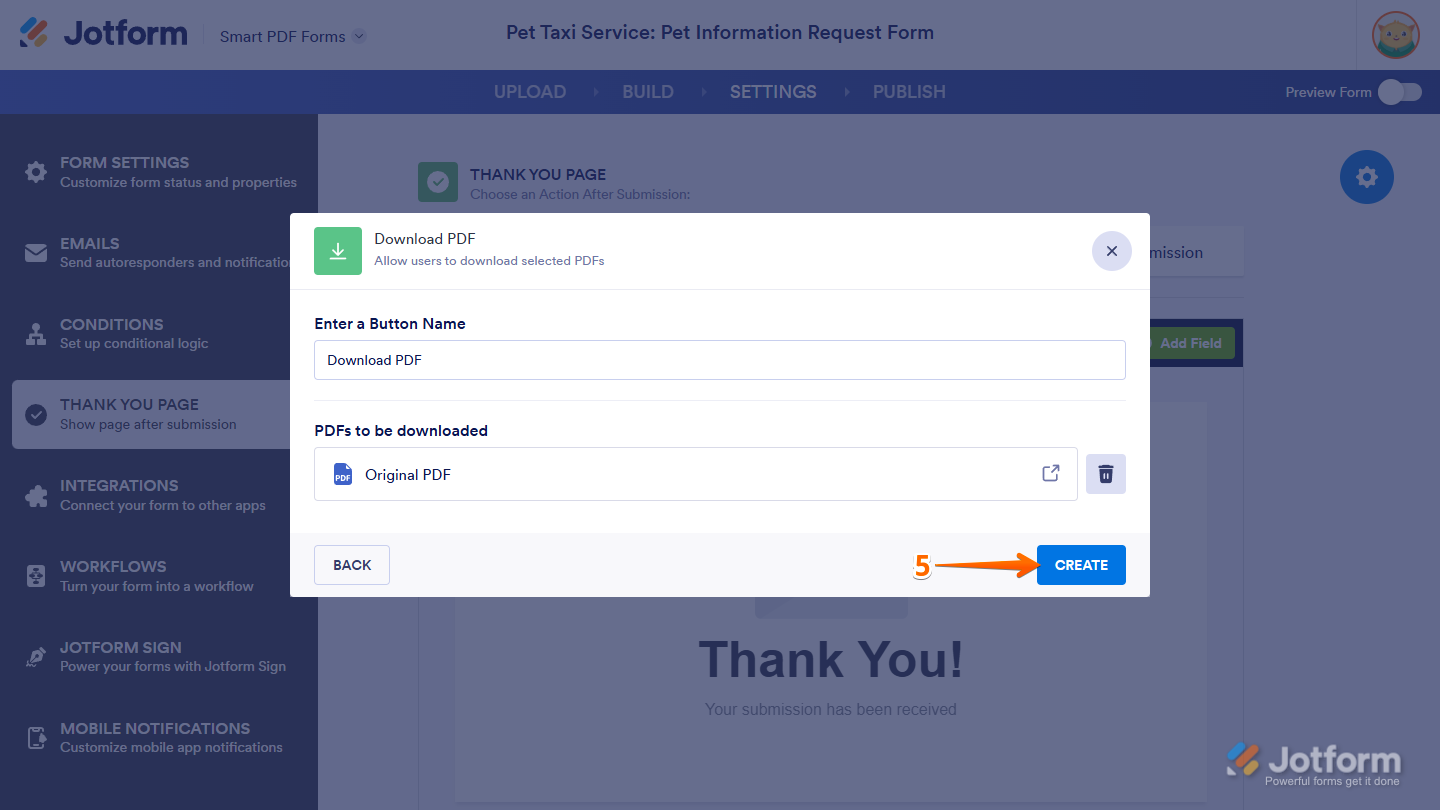
That’s it. Now a Download PDF button will show on the Thank You page of your online form.
Enabling the Original PDF Attachment in Form Email Alerts
You can attach the original PDF Form filled with submitted data to the Notification and Autoresponder Emails for your online form. Here’s how to do it:
- While on the Smart PDF Forms page, click on Settings in the blue navigation bar at the top.
- Now, click on Emails in the menu on the left.
- Then, hover your mouse over the Notification Email or Autoresponder Email element you want to attach the original PDF submission to, and click on the Pencil icon on the right.
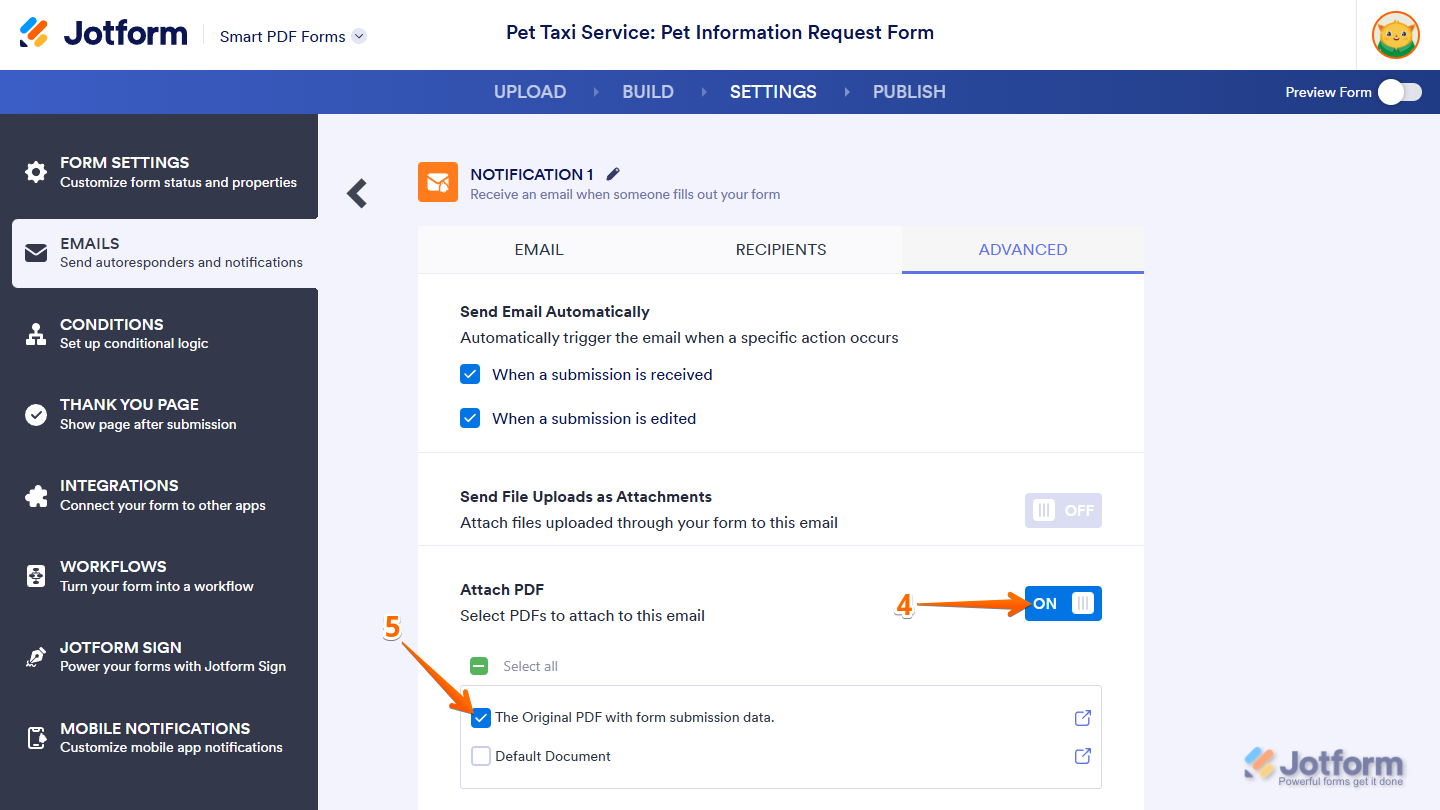
- Next, in the Email Settings window, under the Advanced tab, toggle Attach PDF to the ON position.
- In the menu that comes up below it, put a check in the box next to The Original PDF with Form Submission Data.
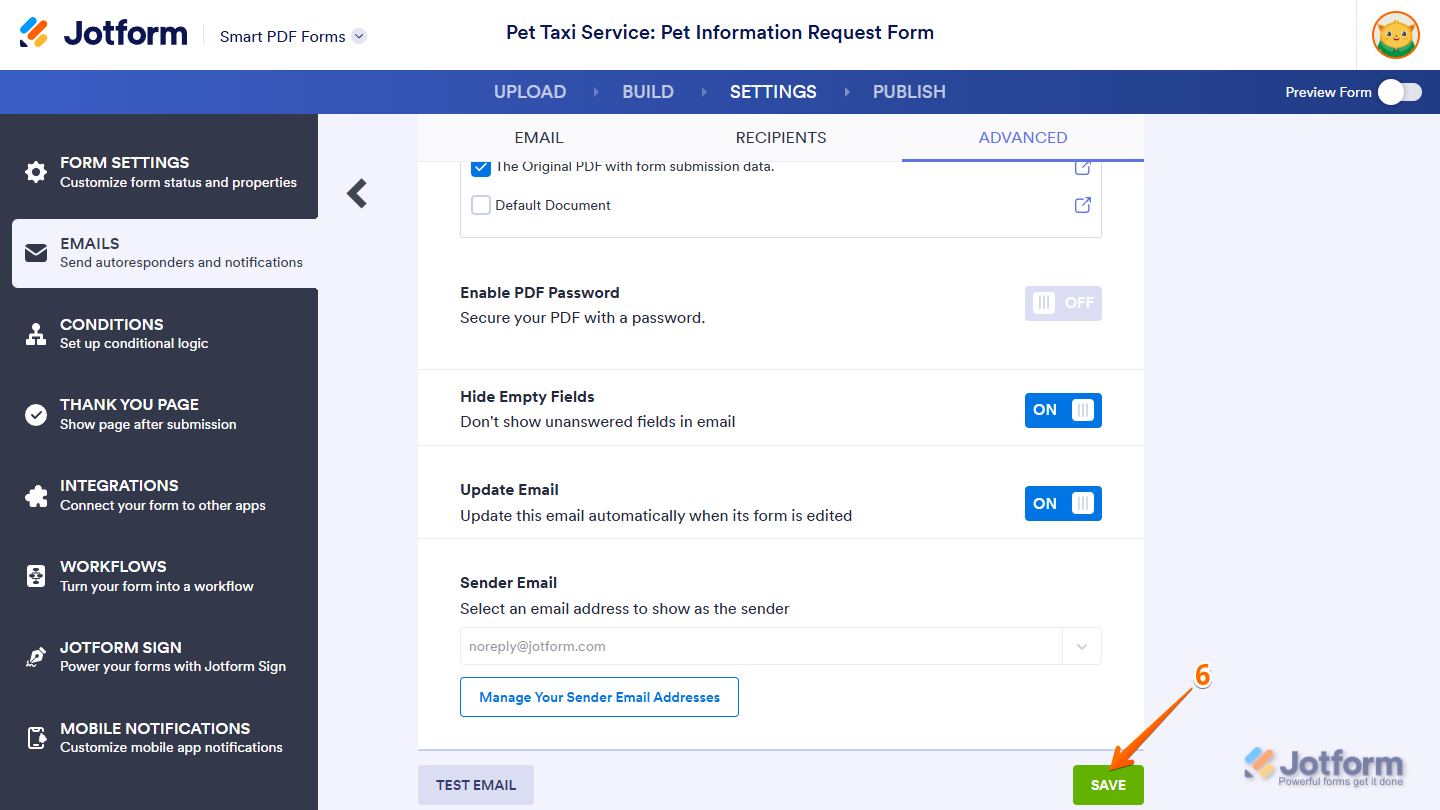
- Then, click on Save at the bottom to apply the changes.
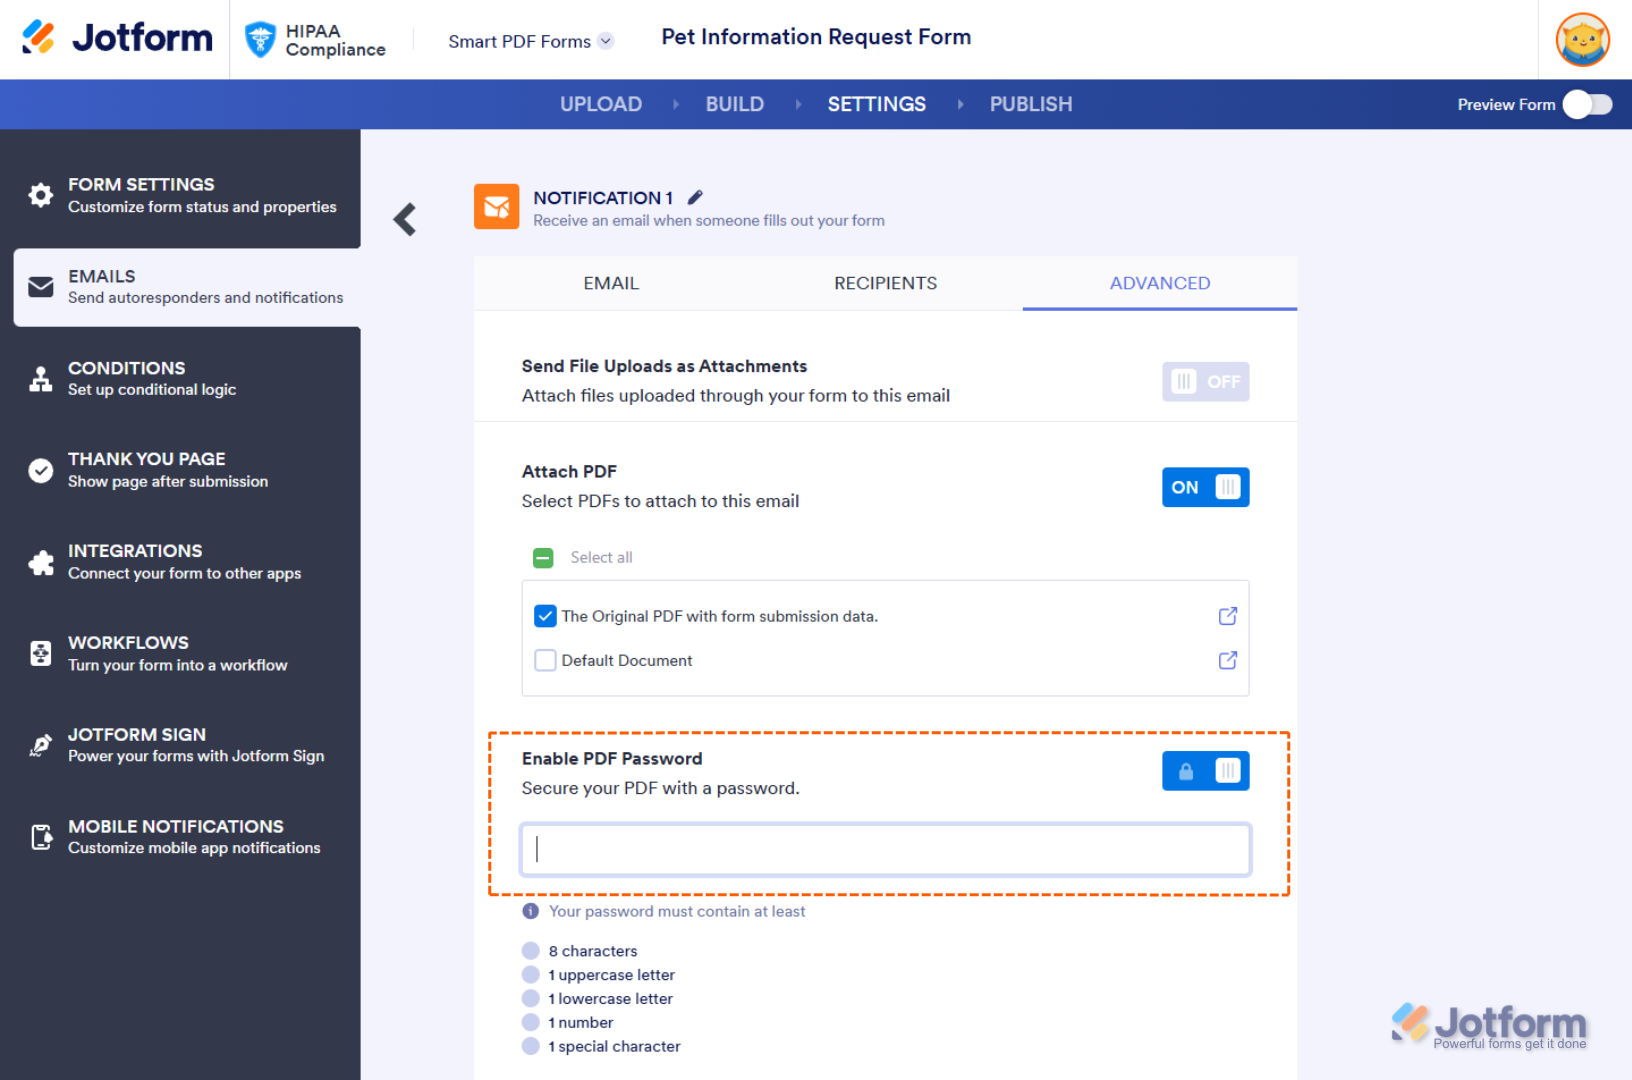
For Smart PDF forms in HIPAA-friendly accounts, you’ll need to set up a password in addition to enabling the Attach PDF setting and selecting The Original PDF with Form Submission Data.

Send Comment:
4 Comments:
54 days ago
Awesome tutorial.
More than a year ago
How do I set up my iMac so I can use autofill to complete simple entries on a Jotform medical questionnaire I have to complete daily like name, address, phone number, etc?
More than a year ago
Can you add pdf connections after a form is built?
More than a year ago
My pdf attachment can't sending with email