Stripe ACH is a payment processing solution offered by Stripe that enables businesses, particularly in the United States, to accept payments directly from customers’ bank accounts using the Automated Clearing House (ACH) network.
While Stripe ACH with Jotform requires Plaid for bank verifications, you can do the ACH integration without it using the Stripe ACH Manual gateway.
With Stripe ACH Manual, you can do the following:
- Sell products online
- Sell subscriptions
- Collect donations online
- Accept custom payment
Note
Stripe ACH Manual doesn’t work well with Jotform Sign as the latter disables the edit submission flow, which is required by the integration’s payment verification flow. We recommend using Stripe ACH integration if you want to keep Jotform Sign.
Adding and Setting up Stripe ACH Manual
You can add and set up Stripe ACH Manual similar to Stripe integration. Here’s how:
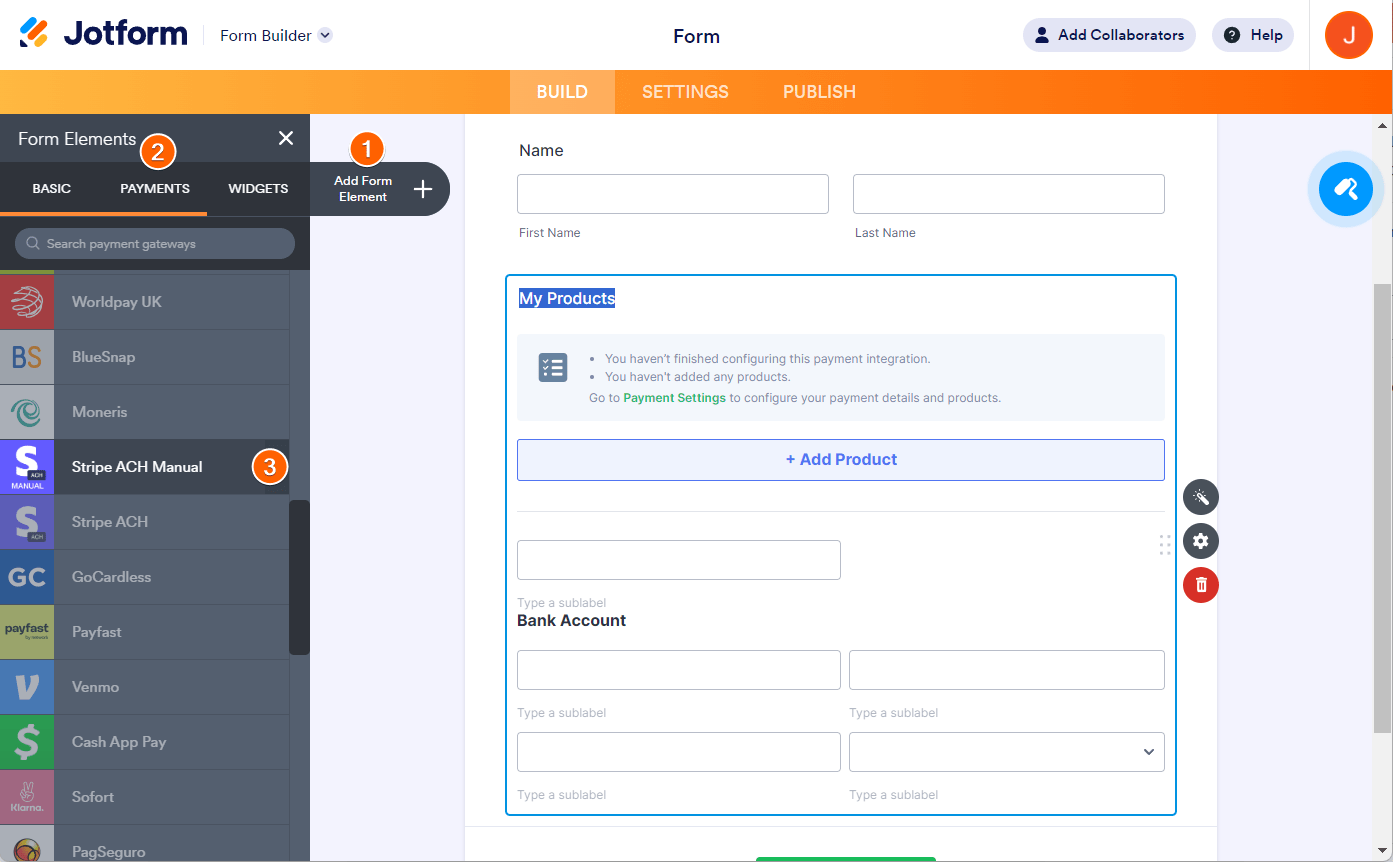
- In the Form Builder, click the Add Form Element button on the upper-left corner of the page.
- Go to the Payments tab.
- Search Stripe ACH Manual, click on it, or drag/drop it to your form to add.
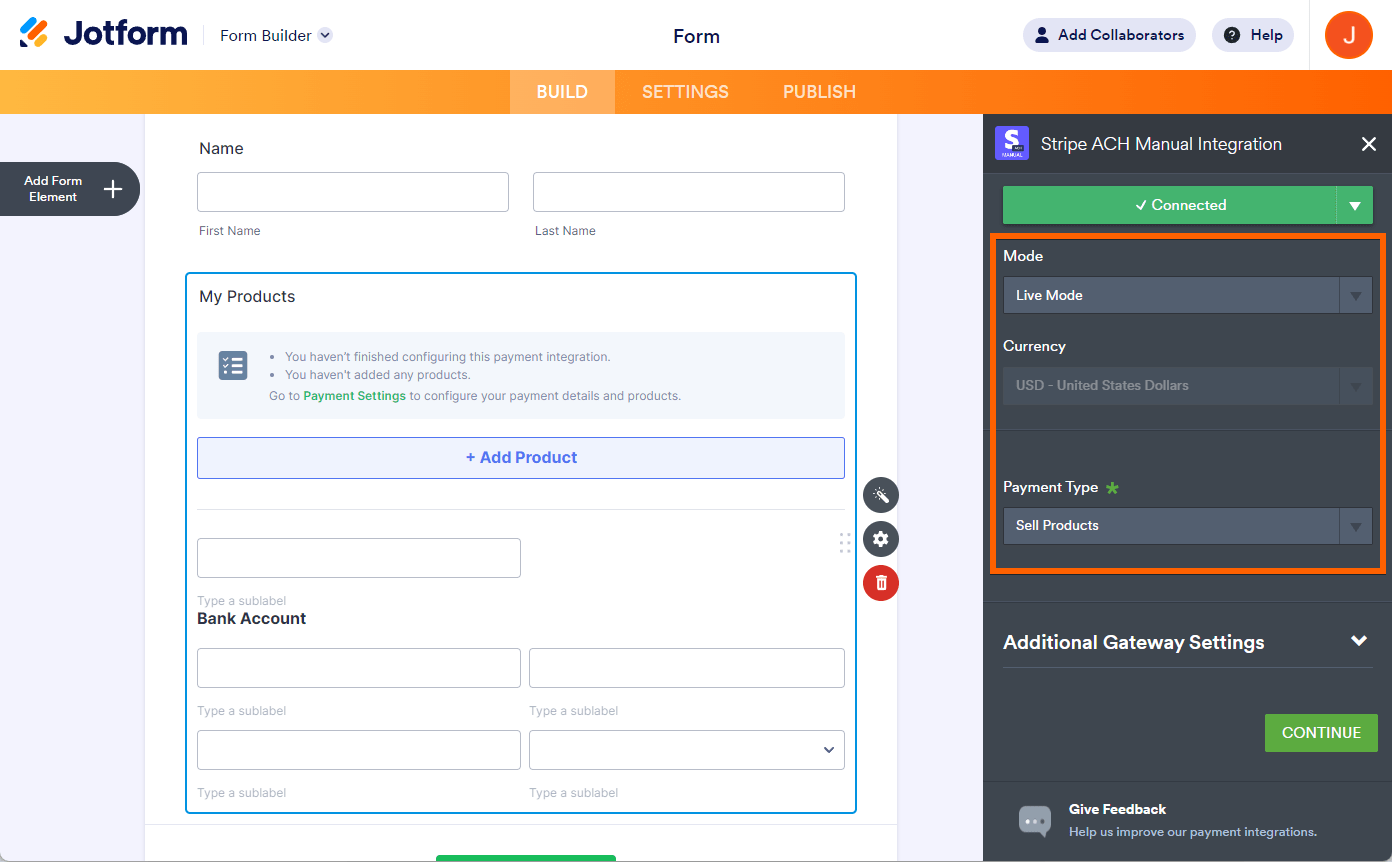
- In the Payment Settings, click the Connect button to link your Stripe account in the form. Once connected, the button changes its color and displays as Connected. The below image is an example of a connected Stripe account:
Notes
- The Mode determines the type of credentials you use in the integration. While this is next to the Connect button, you must decide which credential to use first. Live means you accept actual card payments, and Test means you accept test card payments. You must connect your Stripe account every time you switch modes.
- The Currency is locked to USD as the integration only supports US-based Stripe accounts.
- Skip to the Payment Type. With Stripe ACH Manual integration, you can sell products and subscriptions or collect user-defined amounts or donations.
- Click the Continue button if you’ve chosen to sell products or subscriptions. Otherwise, click the Save button to complete the integration.
See also:
- Setting Up Your First Order Form
- How to Set Up a Recurring Payment Option
- How to Add Options to Payment Forms
- How to Add Coupon Code to Payment Forms
- How to Add Tax to Your Payment Form
- How to Add Shipping Cost to Payment Forms
- How to Generate an Invoice for Your Payment Form
Submitting and Starting the Verification Process
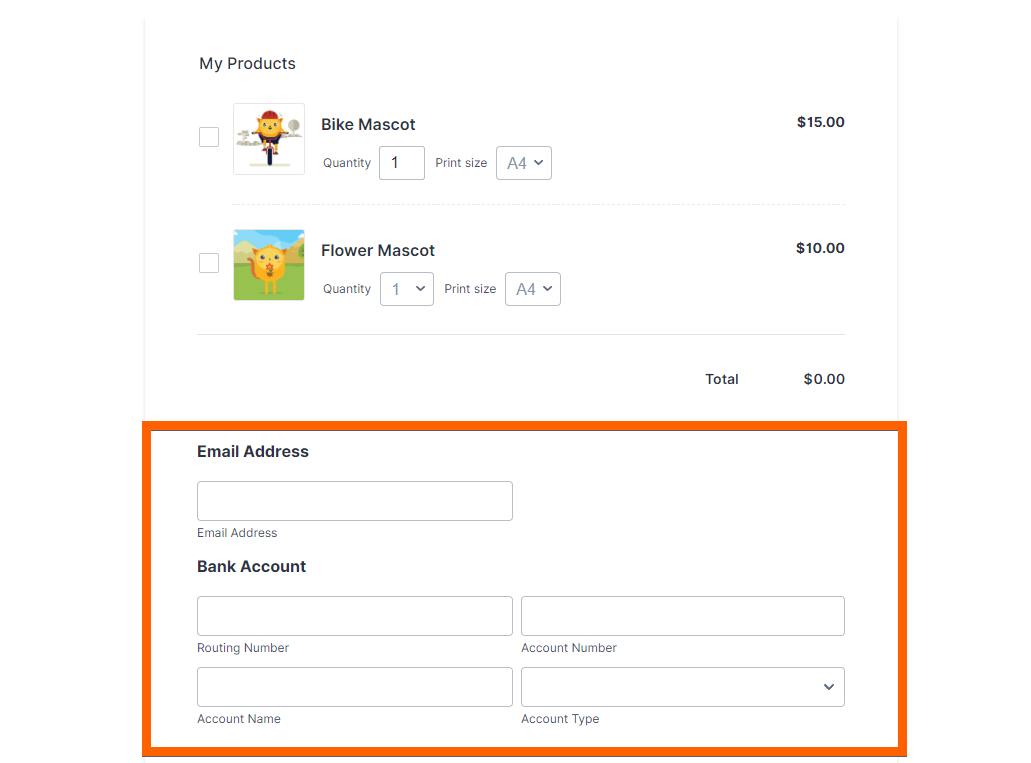
With Stripe ACH Manual, your customers must submit the form with their payment details, such as their Email Address, Routing Number, Account Number, Account Name, and Account Type. The customer submits the form and gets the thank you message. At this stage, the payment is now Pending, and the verification starts.
Stripe sends two small deposits to the customer’s bank account. Your customer will receive the deposit in 1 to 2 days.
Note
You should require your customers to verify their bank account using the link sent by Jotform through email. Jotform requires this to trigger the payment process of verified accounts. If you verify their bank details through your Stripe dashboard, Jotform won’t be able to process the payment, and as a result, it will stay pending on your submissions page.
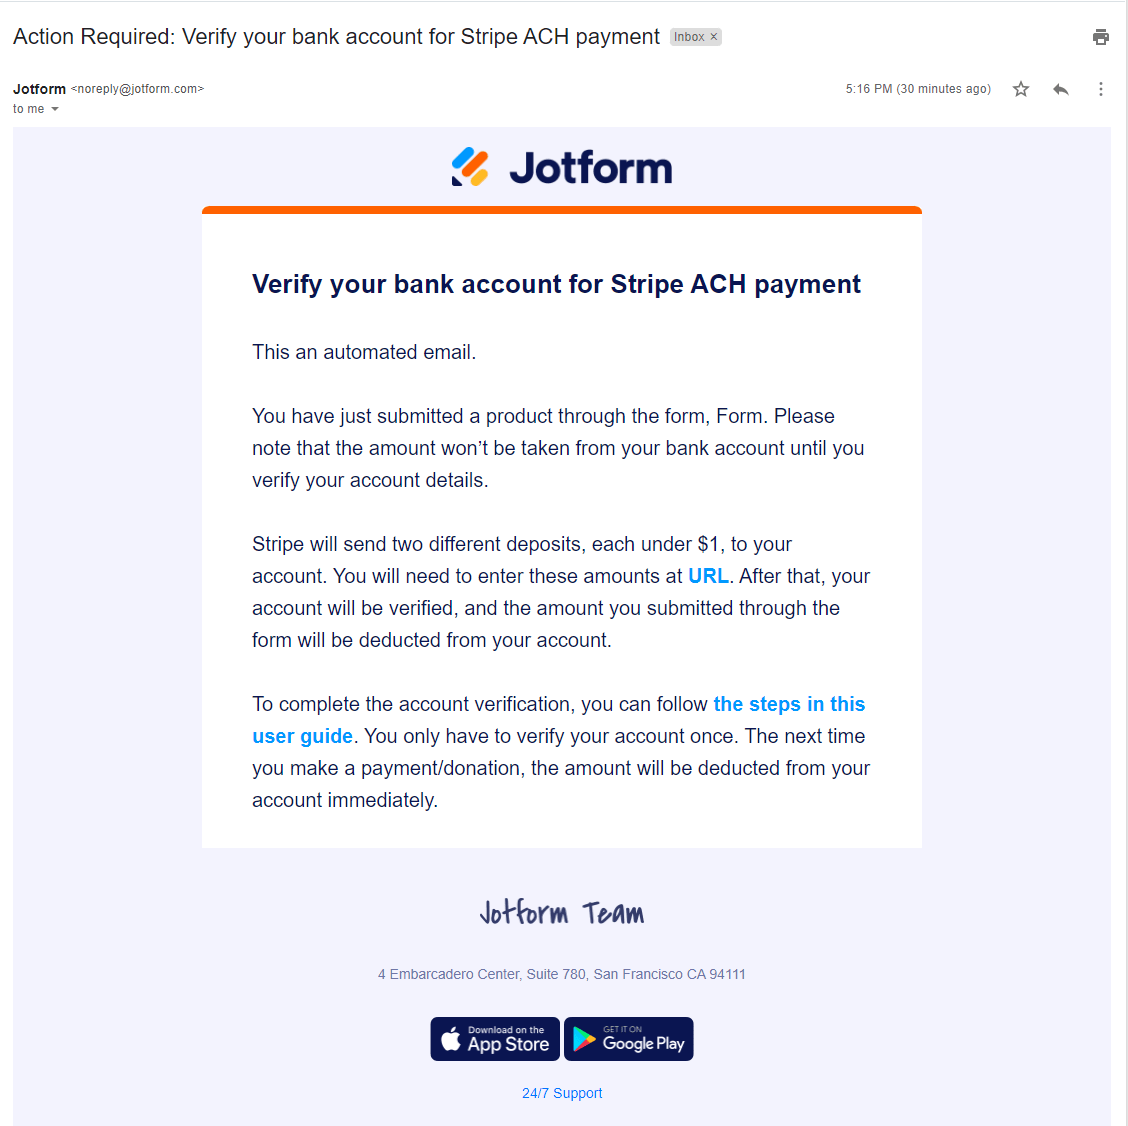
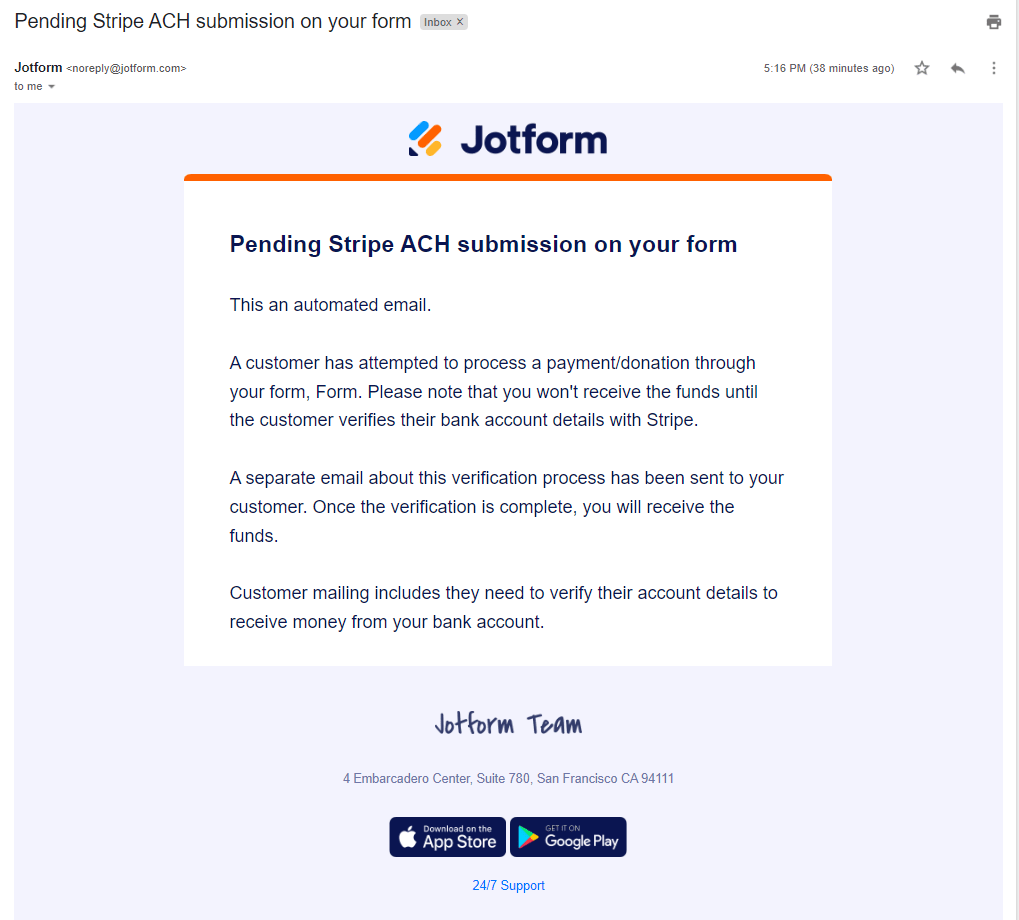
As part of the verification process, Jotform sends the following email to the customer containing the verification instructions and the link to verify the bank.
As the form owner, you will also receive the verification email.
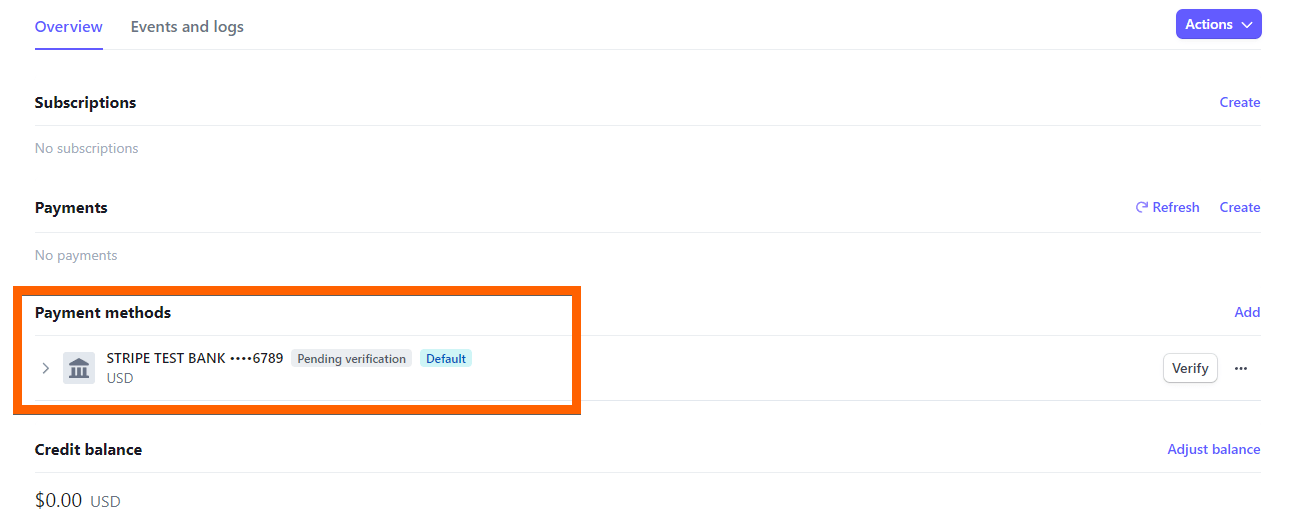
When you view the customer from the Customers dashboard of your Stripe account, you will see that the payment method is marked as Pending Verification.
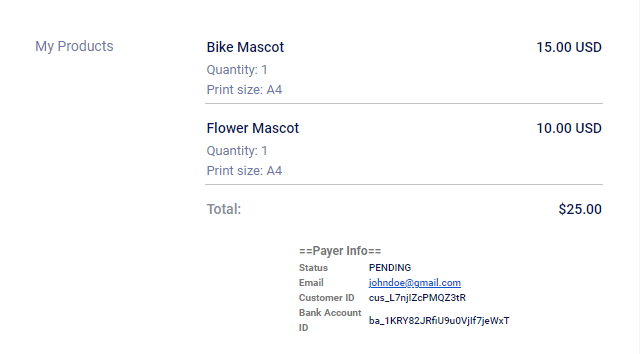
The submission also stays on your form’s submissions page and is pending until the customer account status is verified and payment is captured.
Verifying Bank Account
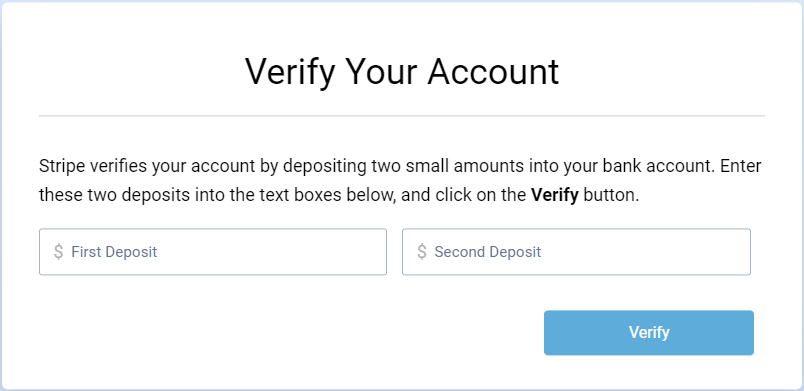
Once the customer receives the deposited amounts, they should click the verification URL from the verification email that Jotform has sent. When the URL is clicked, the following page opens:
If the customer enters the correct deposited amounts and submits the form, the thank you page will be displayed, and Jotform will verify and charge the customer’s bank account.
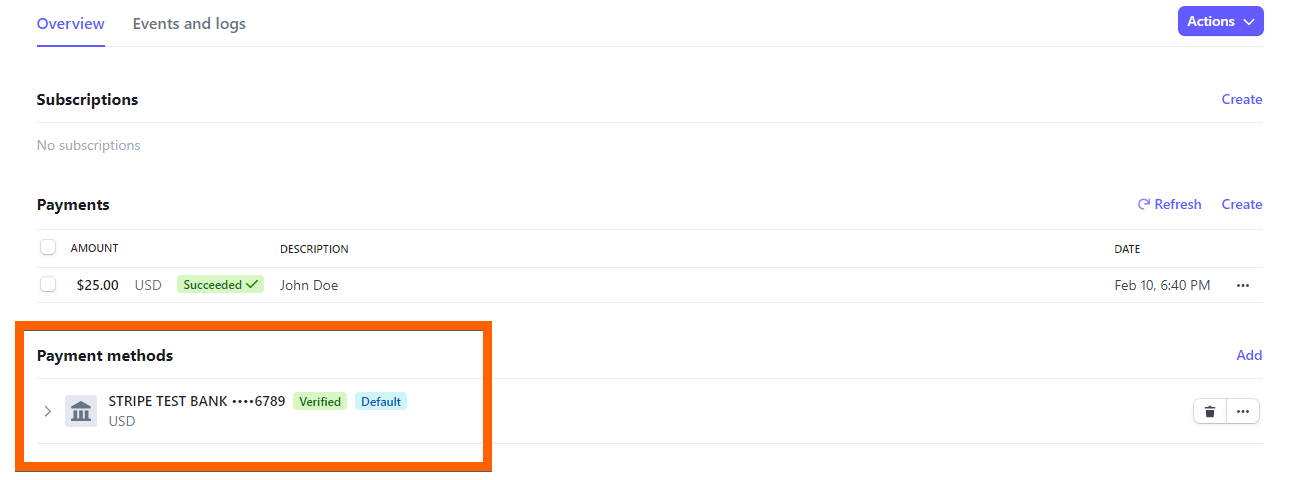
The customer’s payment method through your Stripe dashboard is now marked as verified.
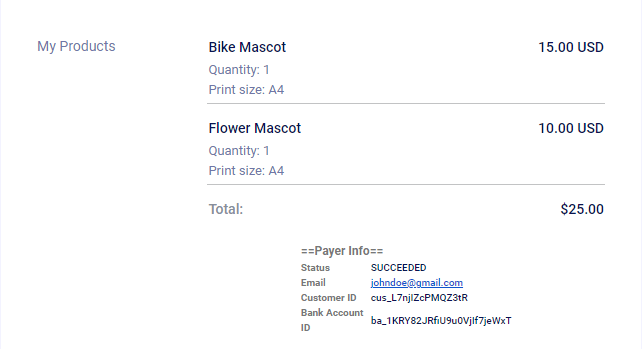
On the submissions page, the payment status is also marked as Succeeded.
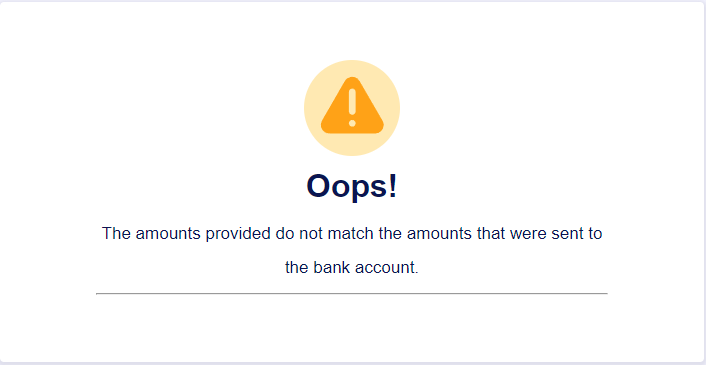
If the customer enters the wrong deposits, Jotform shows the following error page stating that the amount does not match.

Send Comment:
3 Comments:
51 days ago
These instructions don't tell the whole story. I have payments in limbo right now.
337 days ago
Nor is it accurate. Their stripe ACH integration form does not display the email field like that and it's causing issues on our forms
More than a year ago
This is totally confusing