For product items with multiple versions—like various sizes or colors—it’s common to list each one separately. While this works, it can make your form longer and harder to navigate. Instead of adding every version as a standalone item, Jotform gives you a simpler way to handle it—you can turn product options into sub-products.
For example, if you’re selling T-shirts in Red, Green, Blue, and Yellow, you don’t need to list each color separately. By turning these color options into sub-products, your customers can choose the colors and quantities they want—all from a single product item.
Whether you’re setting up a new payment form or updating an existing one, you can easily set up product options for your product items and turn them into sub-products. Here’s how to do it:
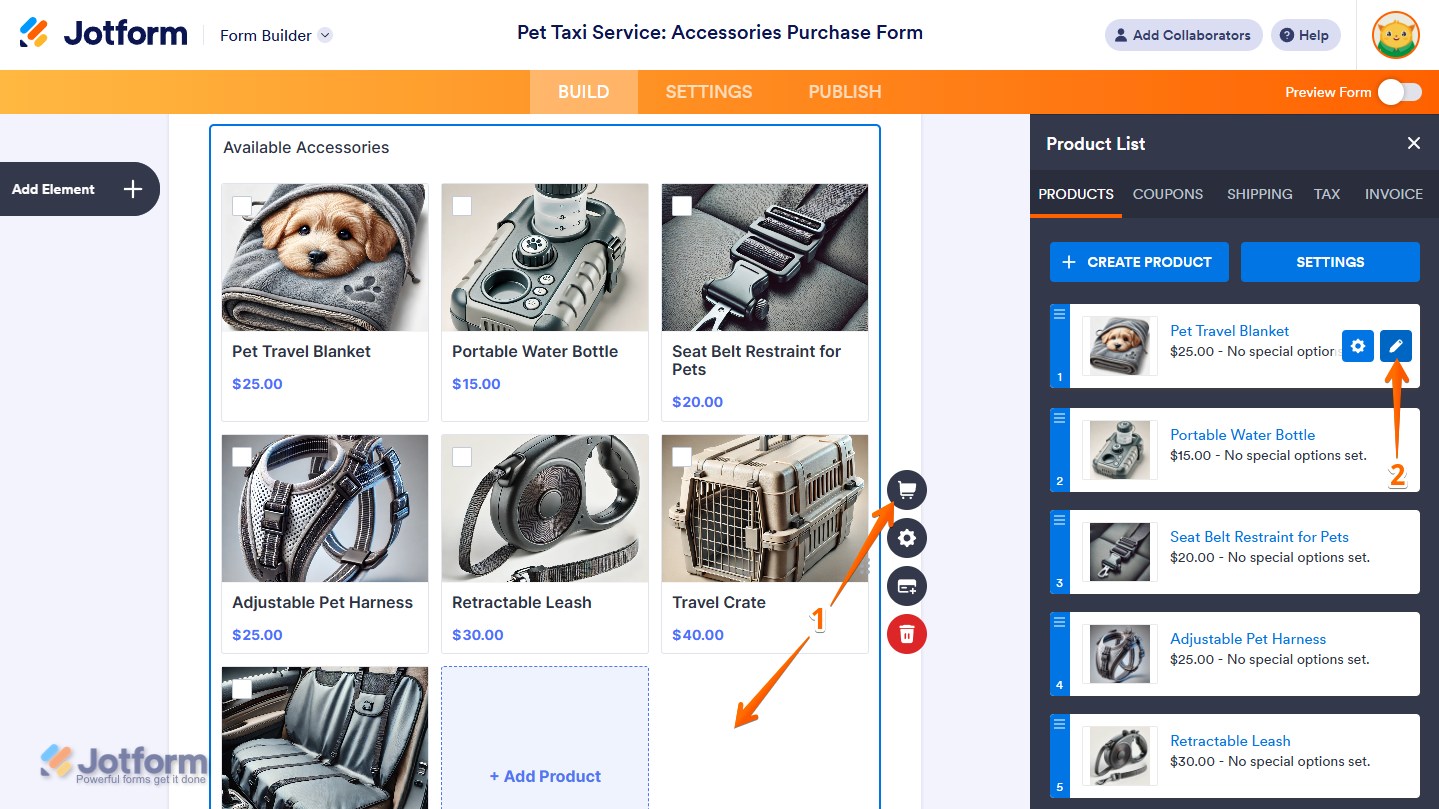
- In Form Builder, click on your Product List field and then click on the Shopping Cart icon on the right side of it.
- Now, in the Product List window on the right side of the page, hover your mouse over the product you want to add sub-products to and then click on the Pencil icon on the right side of it.
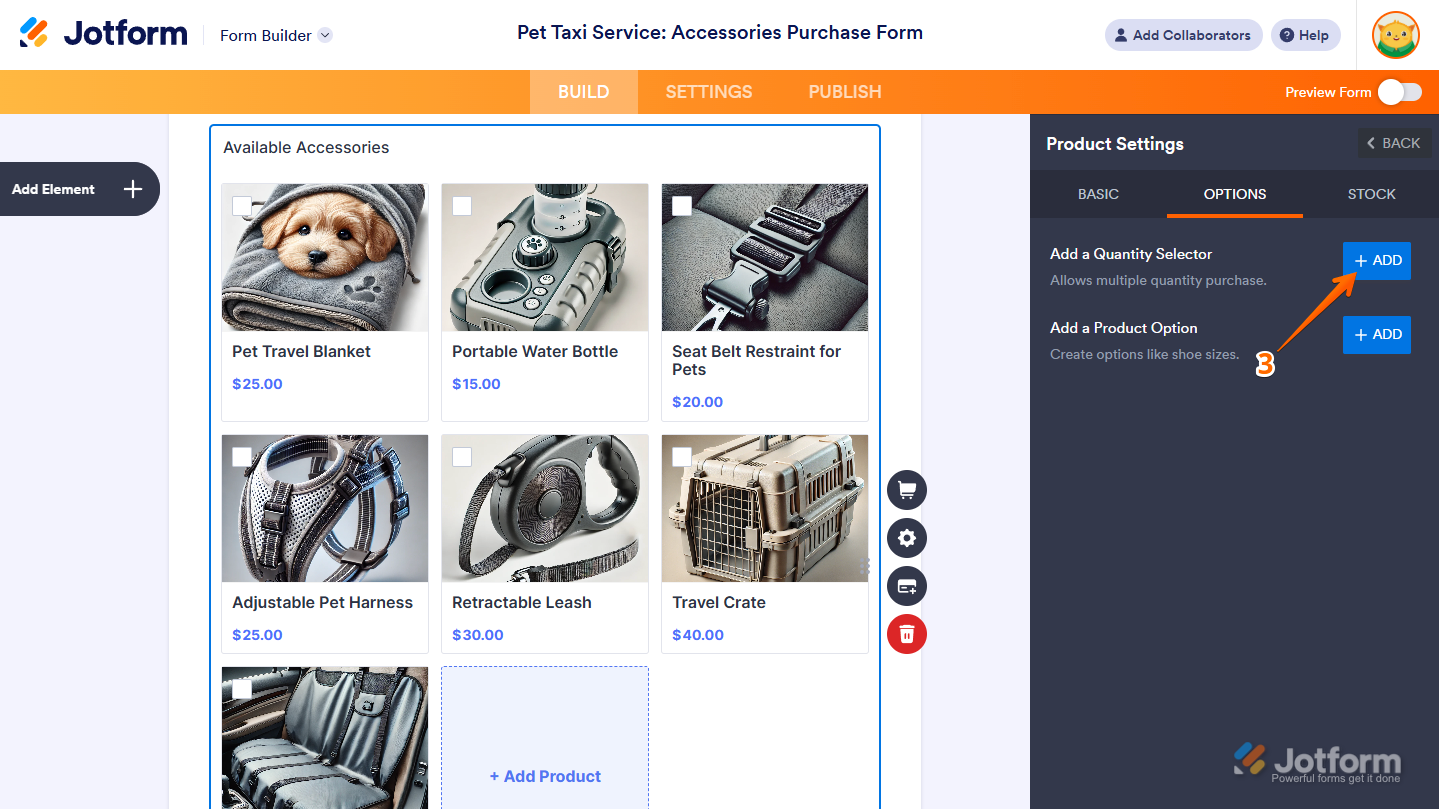
- Then, in the Product Settings window, under the Options tab, click on Add on the right side of Add a Quantity Selector.
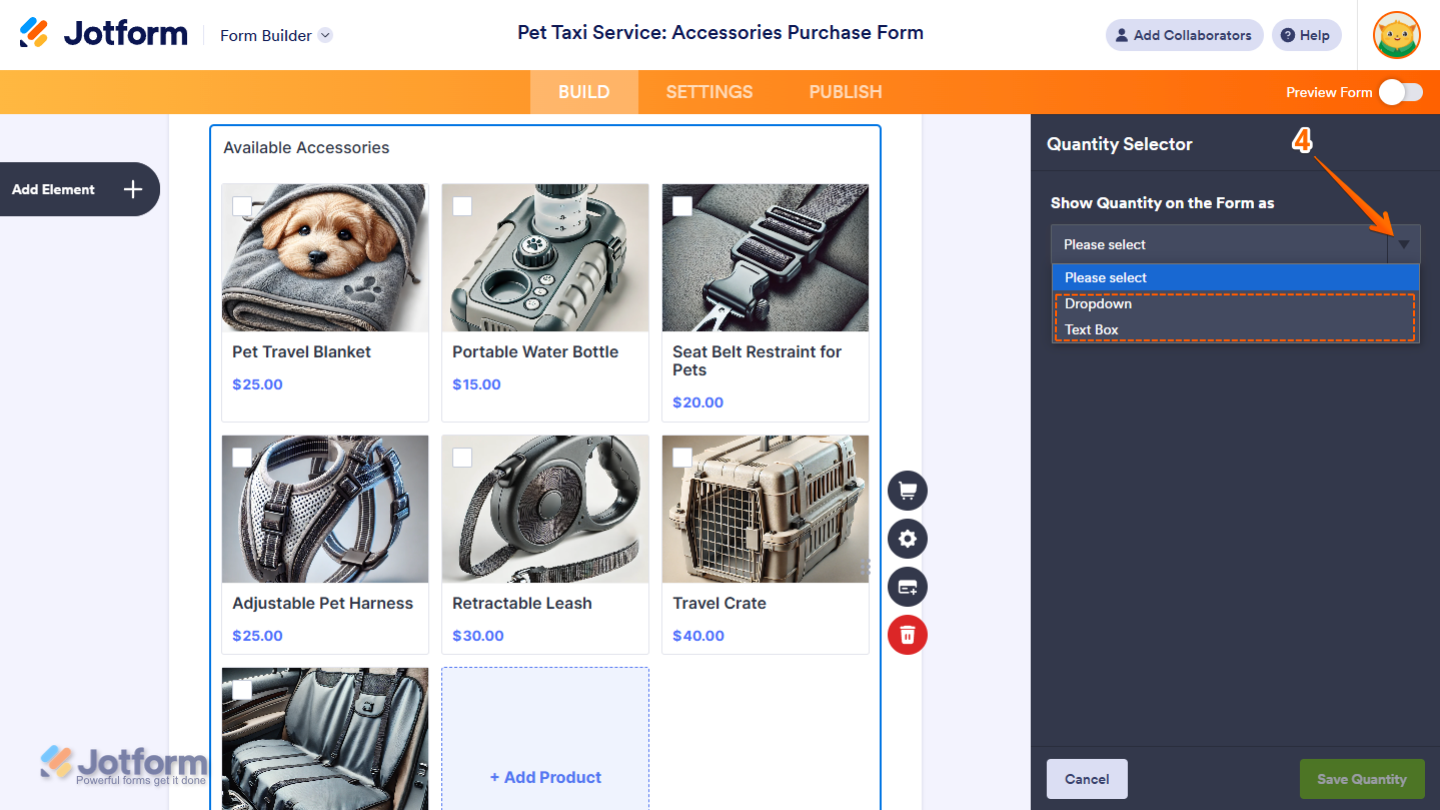
- Next, in the Quantity Selector section, click on the Show Quantity On the Form As Dropdown menu and select Dropdown or Text Box.
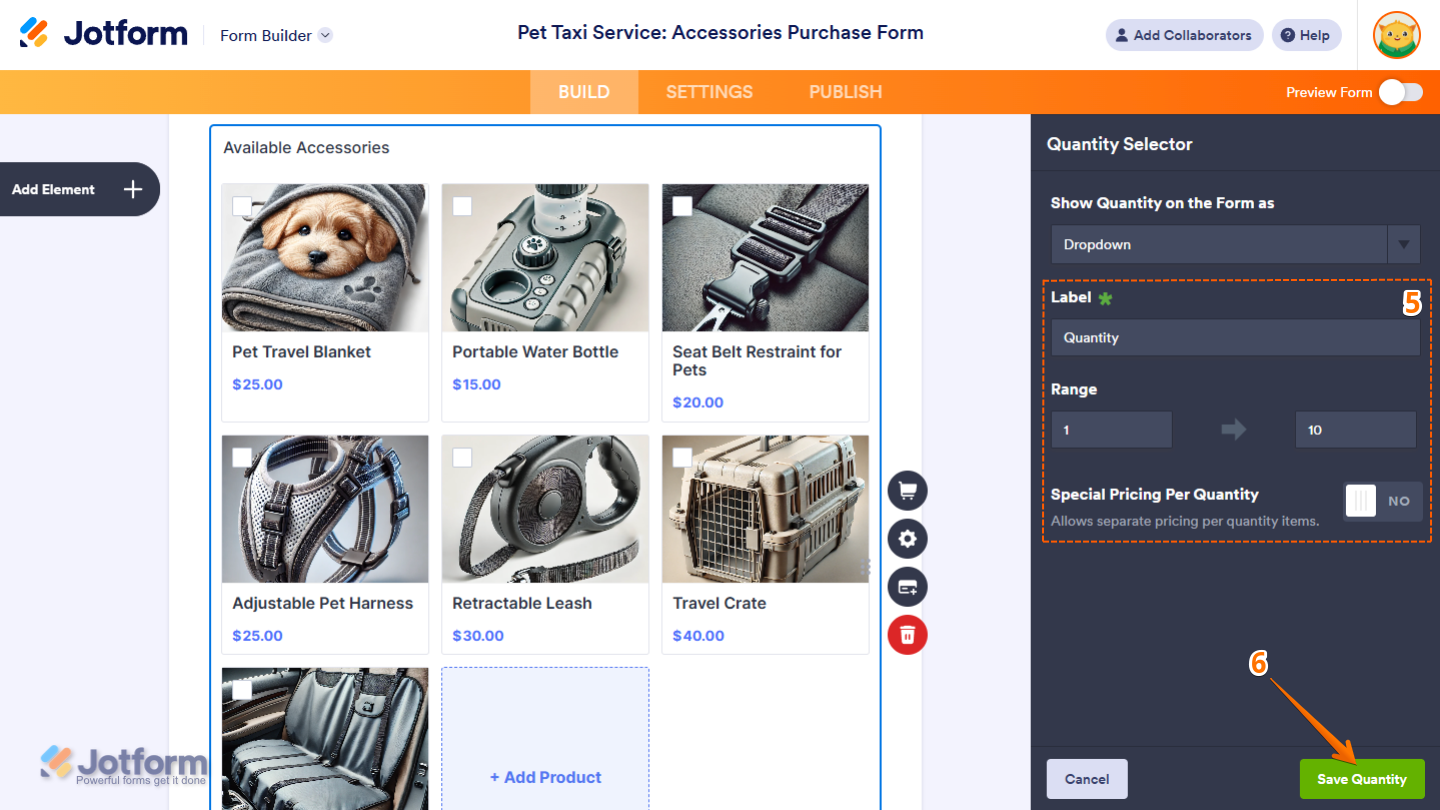
- Now, set or enable the available settings based on the option you chose.
- Then, click on Save Quantity at the bottom.
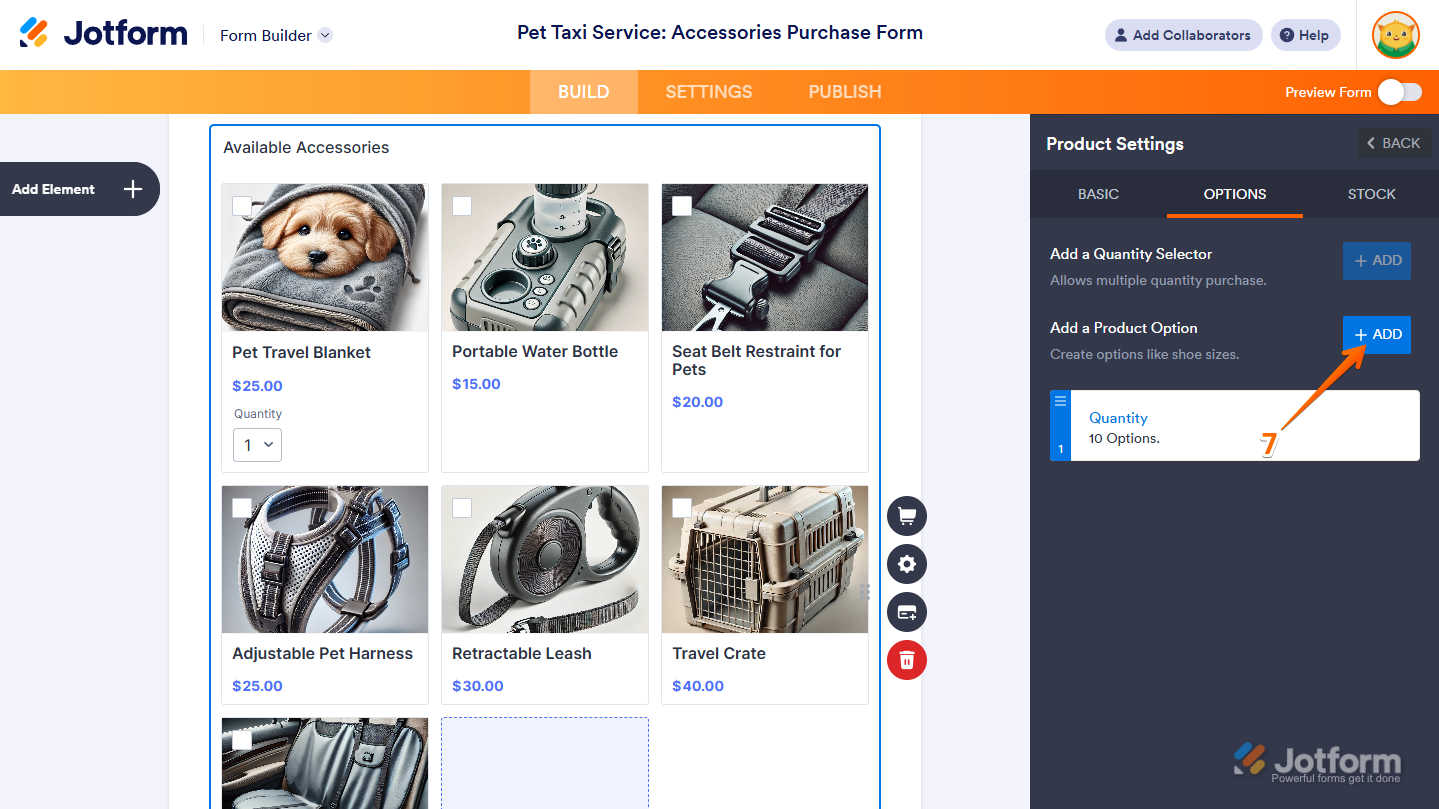
- Next, while under the Options tab in the Product Settings window, click on Add on the right side of Add a Product Option.
- In the Product Option section, enter a product option into each row of the table at the bottom to create and save a Product Option Dropdown for your product.
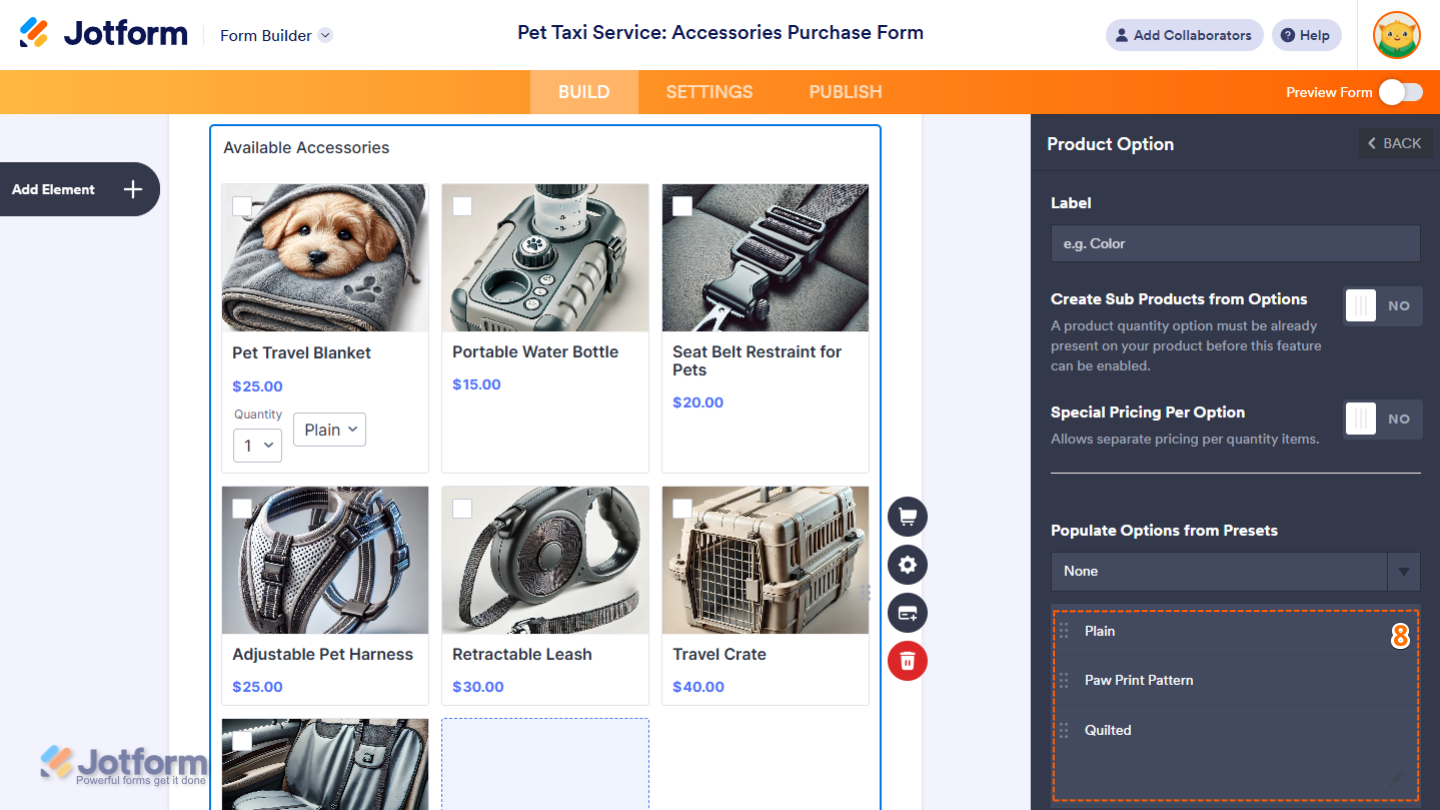
You can also select the Color, T-Shirt Size, Print Size, Screen Resolution, or Shoe Size in the Populate Options from Presets Dropdown menu, which will automatically populate the table with predefined options you can also modify later as needed.

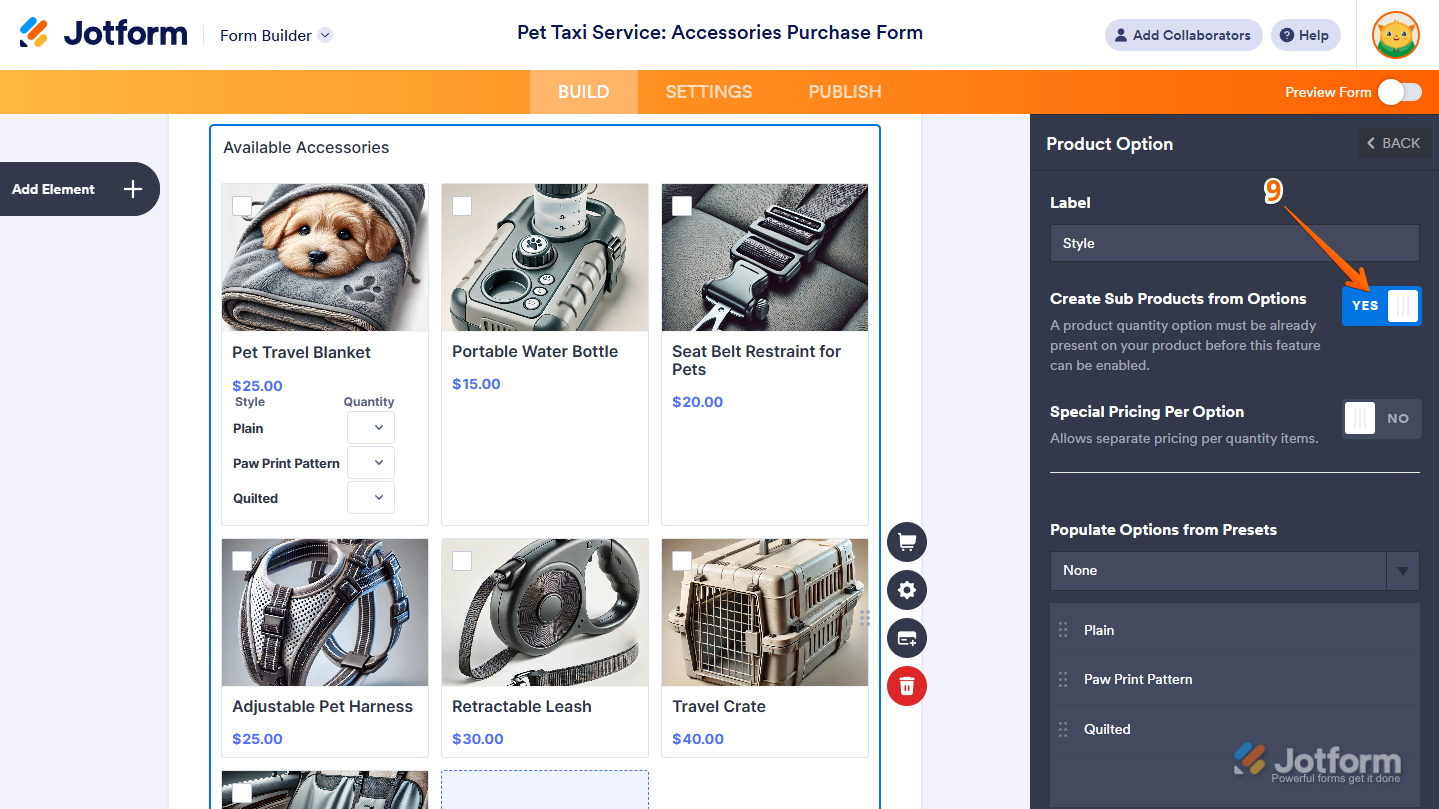
- Once you’ve set up your product options, toggle the Create Sub Products From Options to the On position to turn them into sub-products for your product item.
Note
Unlike the Quantity Selector, you can add multiple Product Options with no limit—but only one can have Create Sub Products from Options enabled.
To learn more about setting up other Quantity Selector and Product Option properties, you can check out our guides on How to Add Options to Payment Forms and How to Set Up Special Pricing for Payment Form Product Options.

Send Comment:
2 Comments:
More than a year ago
Hi,
In your example, once a customer chooses a Red color product in size XS, they cannot add the Red color of the same product in another size, correct? I would like to be able to offer the same product in multiple colors and sizes and allow the customers to choose it in the same color in multiple sizes, or if I switched the order of the product options and size would be the first choice, then the same size in multiple colors. How can I achieve this with Product Lists? Thank you!
More than a year ago
I created the product list in the App Builder not in Forms — I can't see payment settings in the App Builder?