Including an Email element in an approval workflow is crucial for improving communication and efficiency. For processes like expense approvals, leave requests, facility use, volunteer applications, and help desk tickets, automated emails notify requesters and key parties about approvals, denials, or the need for further action. This keeps everyone updated on important decisions, streamlines tasks, and ensures a smooth flow of information, helping manage requests more effectively.
Adding Email Elements
Follow these simple steps to add automated emails to your workflow:
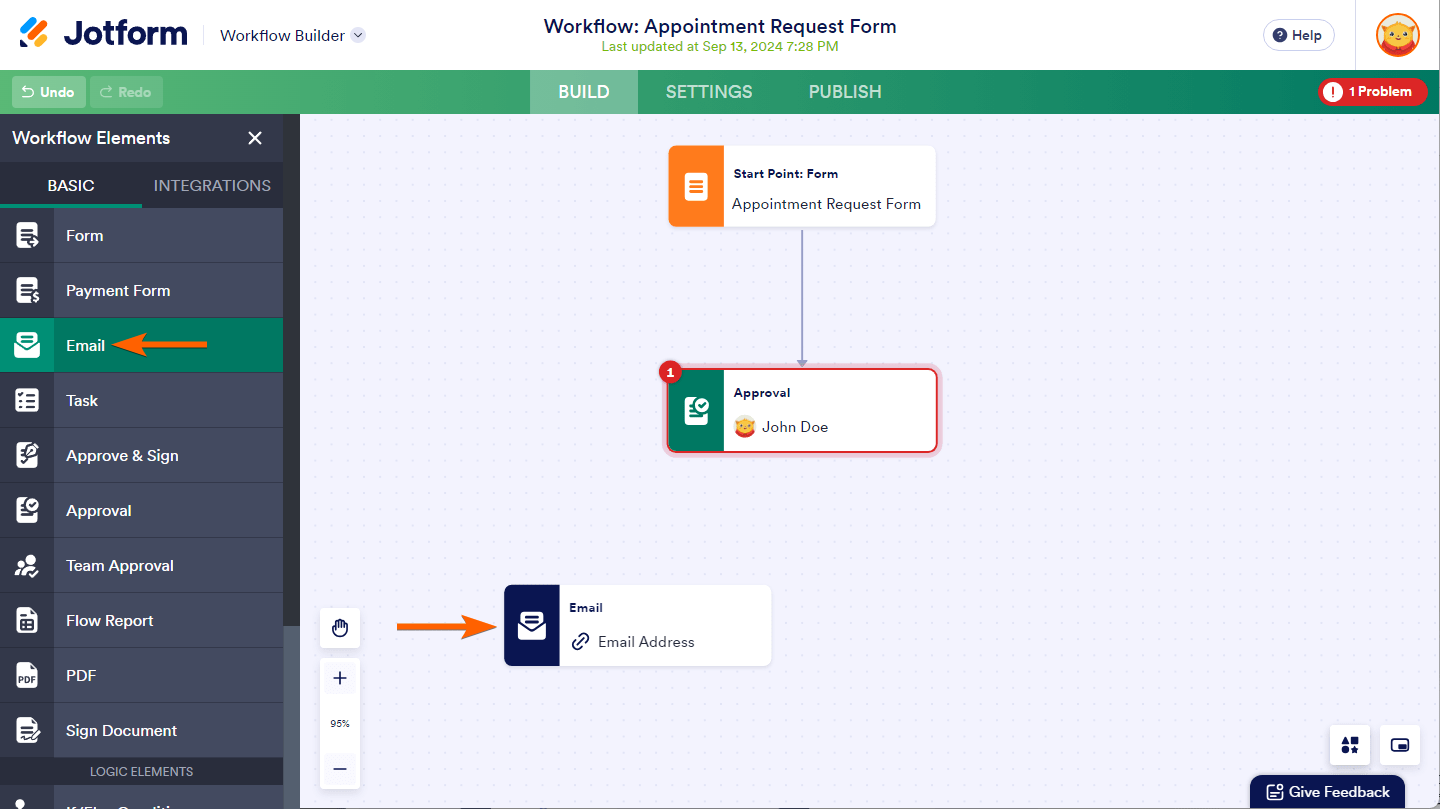
- In Workflow Builder, click on Add Elements on the left side of the screen to open the Workflow Elements menu.
- Under the Basic tab, drag and drop or click the Email element to add it to your workflow.
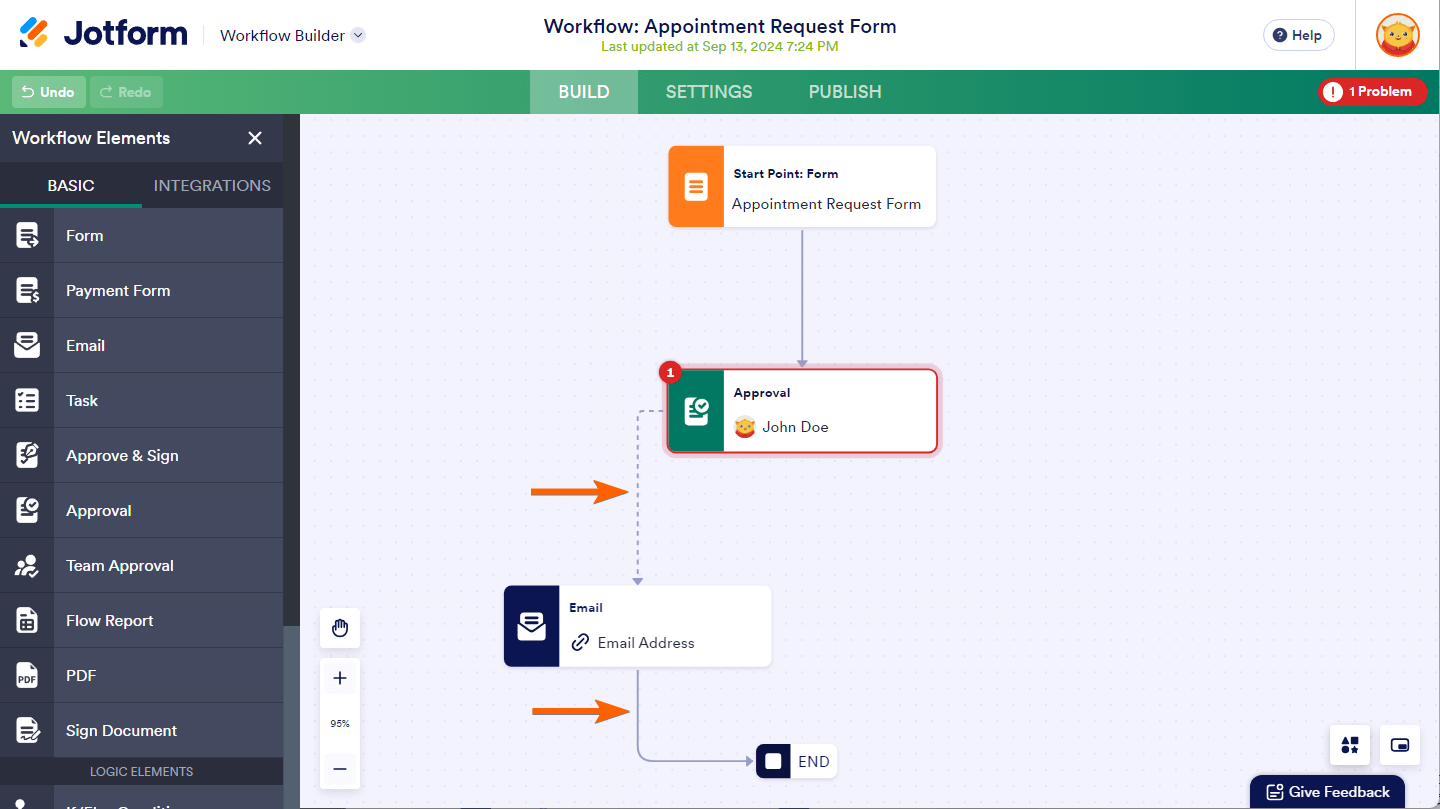
- Next, draw a flow line to and from the Email element to connect it to other elements. See How to Add and Connect Elements in Jotform Workflows to learn more.
Now that you’ve set this up, you can enhance your approval workflow’s efficiency, keep everyone informed, and ensure quick, clear communication at every step.
Notes
An Email element will be automatically added to the workflow when an email field is present in your form.
Workflow Email Properties
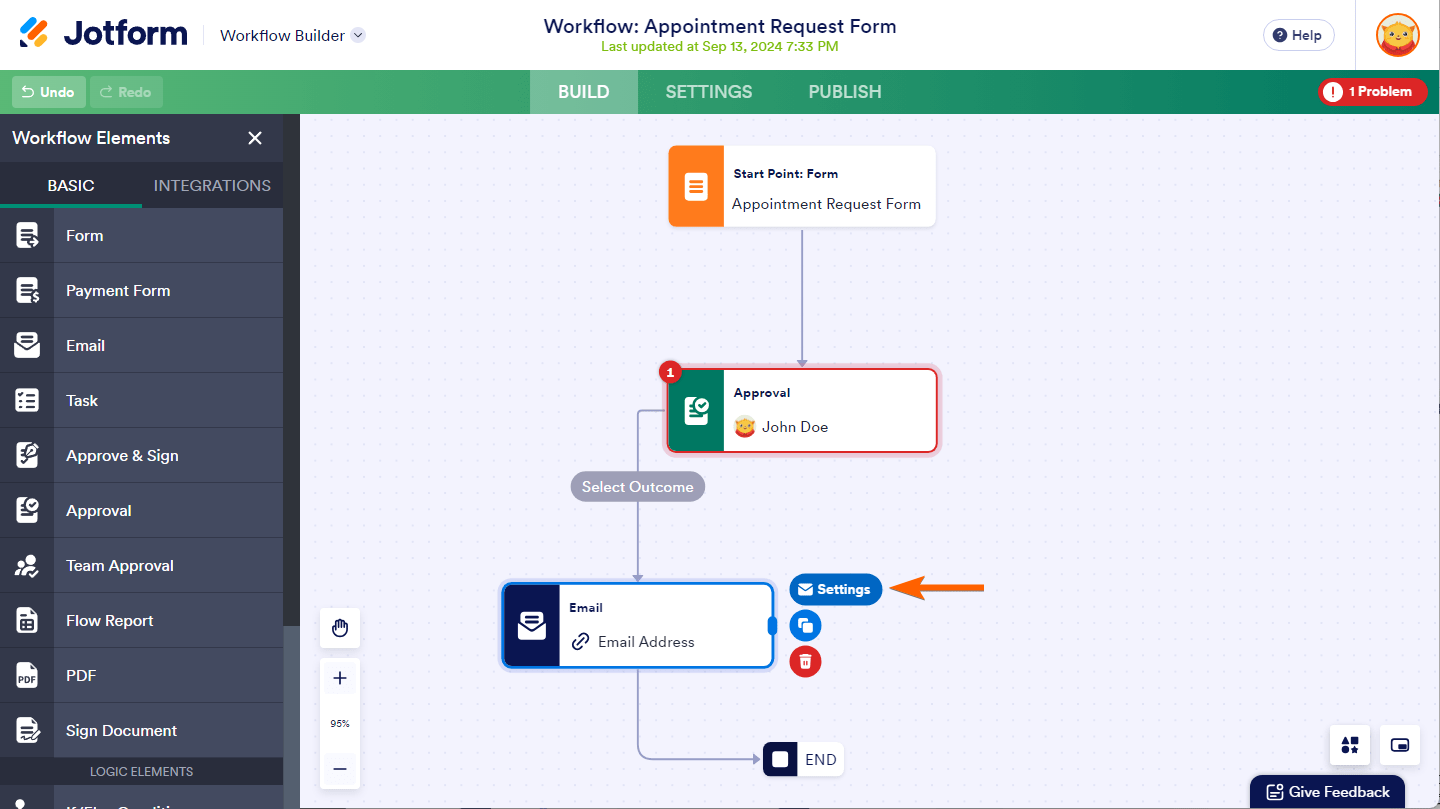
When you click the Email element on the Workflow Builder, then hit the Mail icon beside it, the Email Properties window opens, where you can customize the subject, content, set reply-to and recipient emails, and handle attachments for your workflow emails.
Pro Tip
Double-click on the Email element on your workflow to open the Email Properties window.
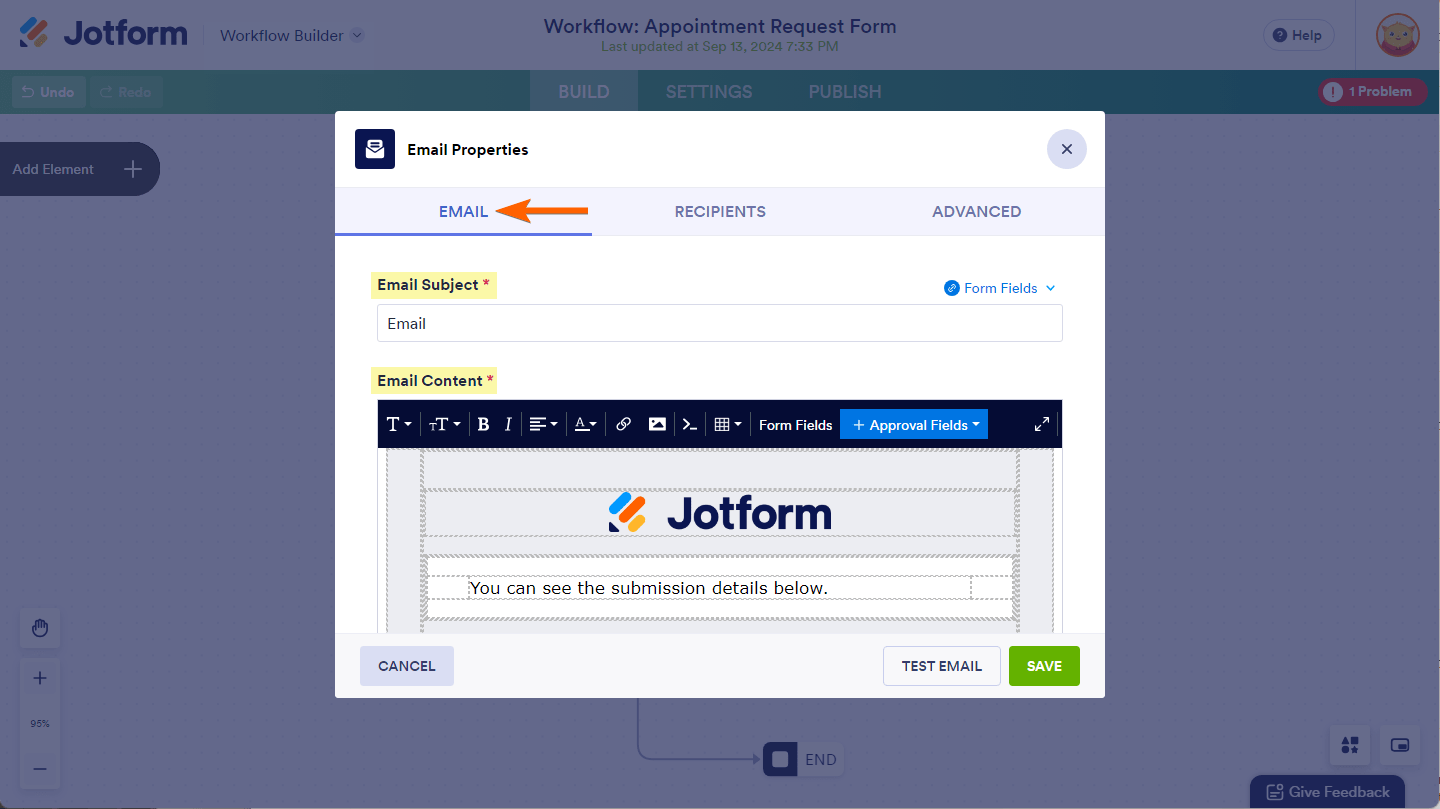
You’ll find three tabs in the Email Properties window: Email, Sender, and Advanced.
On the Email tab, you can personalize the subject and content of the workflow email, since not every email has the same purpose. Use the Form Fields dropdown to include form field values in your message, making it more engaging. You can also add approval comments from the Approval Fields dropdown.
Notes
- You must click on the Save button in the Email Properties window for changes to take effect.
- You can send a preview of your workflow email by clicking the Test Email button. The test email will be sent to the email address linked to your account.
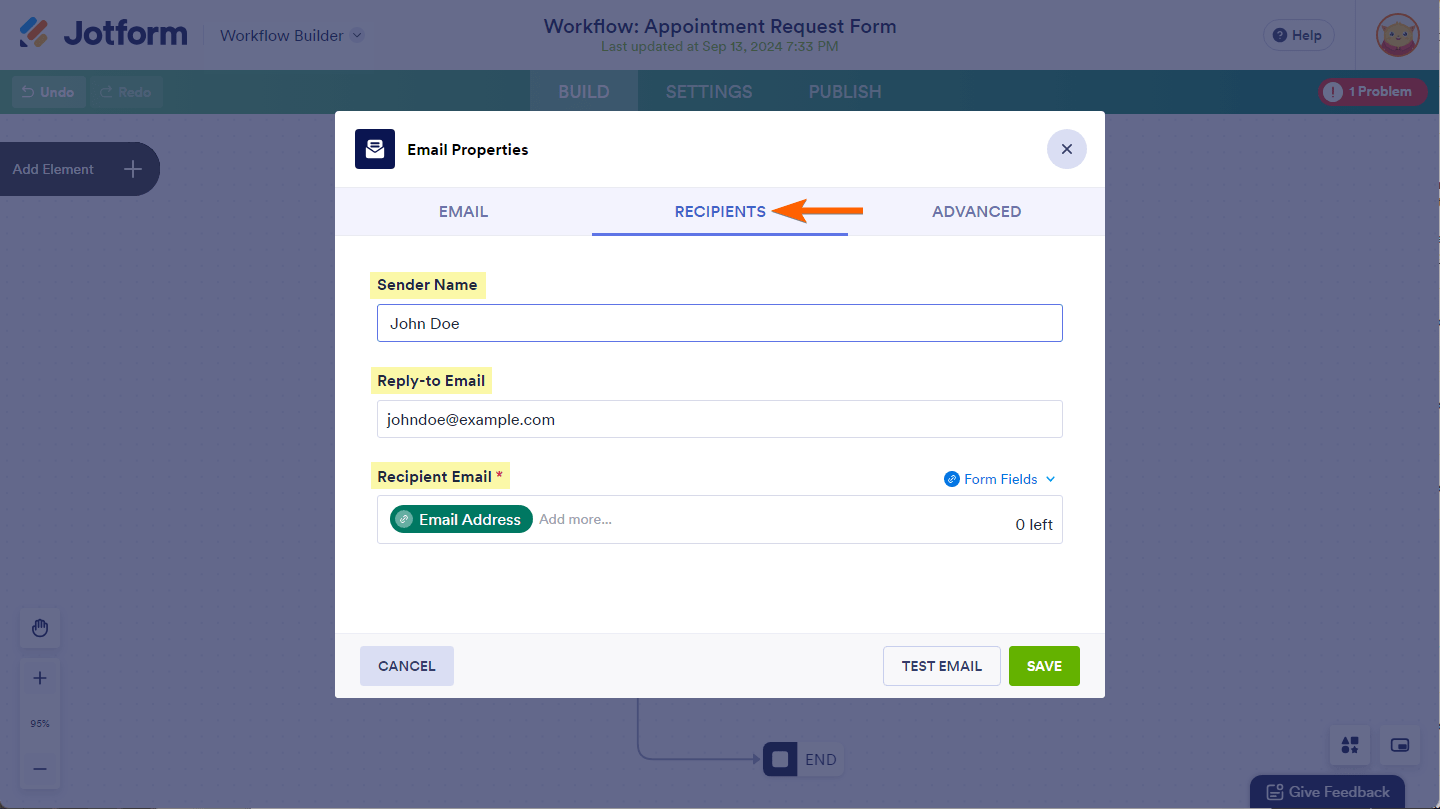
Recipients
On the Recipient tab, you can set the sender name, reply-to email, and recipient email for an Email element. The Reply-to Email should be your address, a colleague’s, or whoever handles responses after approval or denial. To inform requestors about their request status, select the email field from your form for the Recipient Email. If you need to send the email to specific individuals or departments, enter their email addresses directly in the Recipient Email.
Notes
- By default, the first email field on the form is selected as the recipient of the Email elements in your workflow. If your form doesn’t include an email field, the recipient email will be empty, and you’ll receive a warning to fix it to ensure all workflow steps work correctly.
- With a paid account, you can add up to 10 recipients in a single Email element.
Advanced
On the Advanced tab, you can set up file attachment options for the workflow email. You can also automatically hide empty form fields in the email content and set your preferred sender email address.
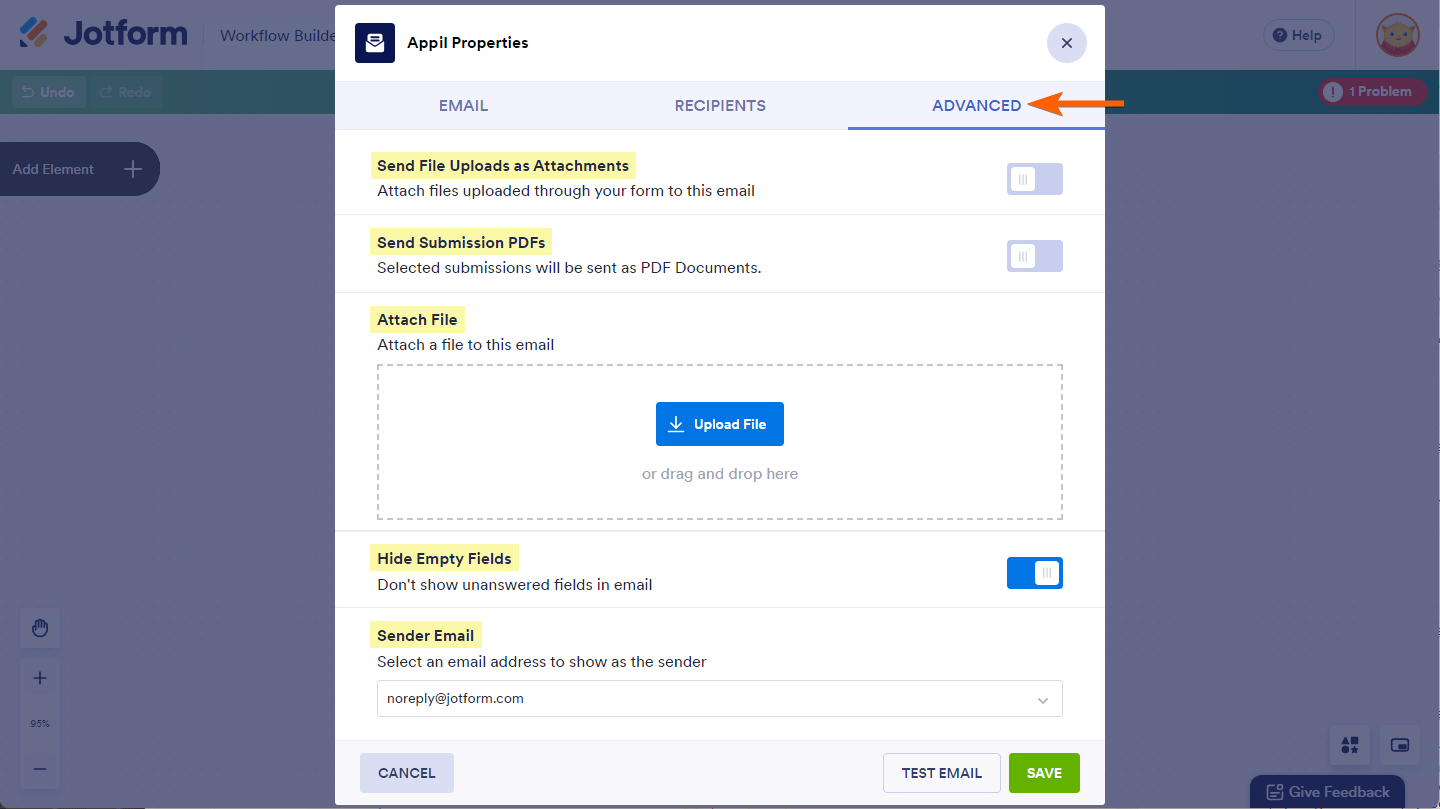
Here’s a summary of what each Advanced setting for the Email element in your workflow does:
- Send File Uploads as Attachments — Enable this to include files uploaded to your form as attachments to the workflow email.
- Attach PDF — Enable this to send the PDF copy of the submission to the workflow email as an attachment.
- Attach File — This allows you to upload and attach external files to the workflow email.
- Hide Empty Fields — Keep this enabled to exclude form fields that were left empty during submission from the workflow email content.
- Sender Email — Initially set to one of Jotform’s default sender email addresses. You can select a custom sender email address for your workflow email by adding it to your account using SMTP. See How to Set up SMTP for a Form for additional information.
Notes
- The Hide Empty Fields option only works for the data table that is part of the default workflow email template. You can still add text, new rows, and additional columns to the table, but remember to keep the original Field Label and Field Tag columns intact.
- There is a 5 MB limit for attachments on emails sent from Jotform’s default sender email address. If the total size of all files exceeds that limit, they won’t be attached to the workflow email.


Send Comment:
14 Comments:
53 days ago
How do I set up an alert to send a manual email, when a submission form is received?
185 days ago
I have set up a form where I have limited the submissions to a specific number. Once that limit has been achieved is there a way that I can receive an email notifying me so that I can put individuals on a "wait list" for our event?
269 days ago
Hi, I’m having trouble with the "Attach File" feature in the workflow email. I’ve uploaded a file, run a test, and submitted a test submission, but the file doesn’t seem to attach. Any suggestions?
More than a year ago
How can I send the original form that is approved without any approval comments?
More than a year ago
I have set up my form and approvals but declined submissions are still receiving and auto generated reminder email? This is the form.
How do I turn this off?
More than a year ago
Hi. Is it possible to edit the approval email and approval report email.
Cheers.
More than a year ago
How to show the 1st approval signature in the email for the 2nd level approval, so 2nd approval will be aware that 1st level approval had been approved the form?
More than a year ago
Are there maximum file sizes that can be sent? I have a PDF and the Submission PDF to be sent and it is not sending? Why would that be?
More than a year ago
I want to setup our approval flow to email the requestor when their form submission has been approved or denied. When I open the Recipients tab and scroll down to the Recipient Email box, there is no option to select the Email form field. In fact, it says "This form doesn't have any appropriate fields to add." Why am I seeing this? Our form does in fact have the Email field within it.
More than a year ago
Can we add another state in the flow
Approved
In progress
Deny
In progress new state can it be added?
More than a year ago
Is it possible to remove the default recipient email that pulls from the form and insert a custom email?
More than a year ago
Hi, is there anyway you can store email addresses so that you do not have to manually type them each time you send a form? Can you add email addresses and then select which address you wish to send the form to?
More than a year ago
Hi,
I want to send two different emails both with PDF attachments using the PDF Editor. 1st email is an approval notification to the person who submitted the form that includes a PDF attachment of an agreement, the other is an internal email that includes a PDF attachment of details from the submitted form. When I tested the approval flow, only the 1st email includes a PDF file, the other email does not and I'm not sure why.
More than a year ago
Hi,
I want to add an email field that advises the initiator their request has been approved (or denied). Given I will have more than one initiator, what is the syntax for the reply email so that the correct person gets the reply? Your notes above are not very clear.
Thanks,