
Adding an upload file button in Google Forms
- Open Google Forms
- Add a new question
- Select “file upload” as the question type
- Customize the upload settings
- Preview your form
Google Forms makes it easy to collect information digitally — whether you’re gathering applications, onboarding new clients, or organizing internal requests. By creating a form, you can streamline your workflow, reduce manual data entry, and minimize errors.
One handy feature is the file upload option, which allows respondents to attach documents, images, videos, or other files directly to their submission. It’s simple to set up and adds a powerful layer of functionality to your form.
Pro Tip
Want to skip the setup? Browse Jotform’s free file upload form templates to start collecting files right away.

Looking for the best alternative to Google Forms?
Jotform’s full-featured form-building solution is mobile-friendly and has the most integrations in the industry. Use it to collect payments, automate workflows, gather leads, and more.
When the file upload button is helpful
The file upload feature in Google Forms is useful in a wide range of scenarios, especially when you need respondents to submit documents or media. Here are some common examples:
- Education: Collect student assignments, permission slips, or project files.
- Hiring and HR: Accept resumes, cover letters, or signed agreements from job applicants.
- Client services: Gather onboarding forms, contracts, or identification documents from new clients or patients.
- Contests and scholarships: Let participants submit portfolios, essays, or supporting materials.
Whether you’re streamlining admin work or simplifying data collection, file uploads can help you keep everything in one place without chasing down emails or attachments.
Why is “file upload” greyed out in Google Forms?
If you’re trying to add a file upload field in Google Forms but the option is greyed out or unavailable, there are a few possible reasons why this might be happening.
The most common reason is that your form is stored in a shared drive (formerly known as a Team Drive). Google Forms currently doesn’t support file uploads for forms created or stored in shared drives. To enable file uploads, you’ll need to move the form to your personal My Drive or create a new form there.
Another potential issue is that your organization has enabled Data Loss Prevention (DLP), which restricts file uploads. If you’re using a Google Workspace account and seeing a message that file upload is disabled, it may be due to admin-level controls. In this case, you’ll need to contact your Google Workspace administrator to adjust the settings or confirm that DLP is turned off for your domain.
Pro Tip
To resolve the “file upload disabled” issue, ensure your form is in your My Drive and check with your Workspace admin about file sharing and data policies.
How to upload a file on Google Forms (step-by-step guide)
Collecting documents, images, and other files from respondents is easy. Just follow the steps below.
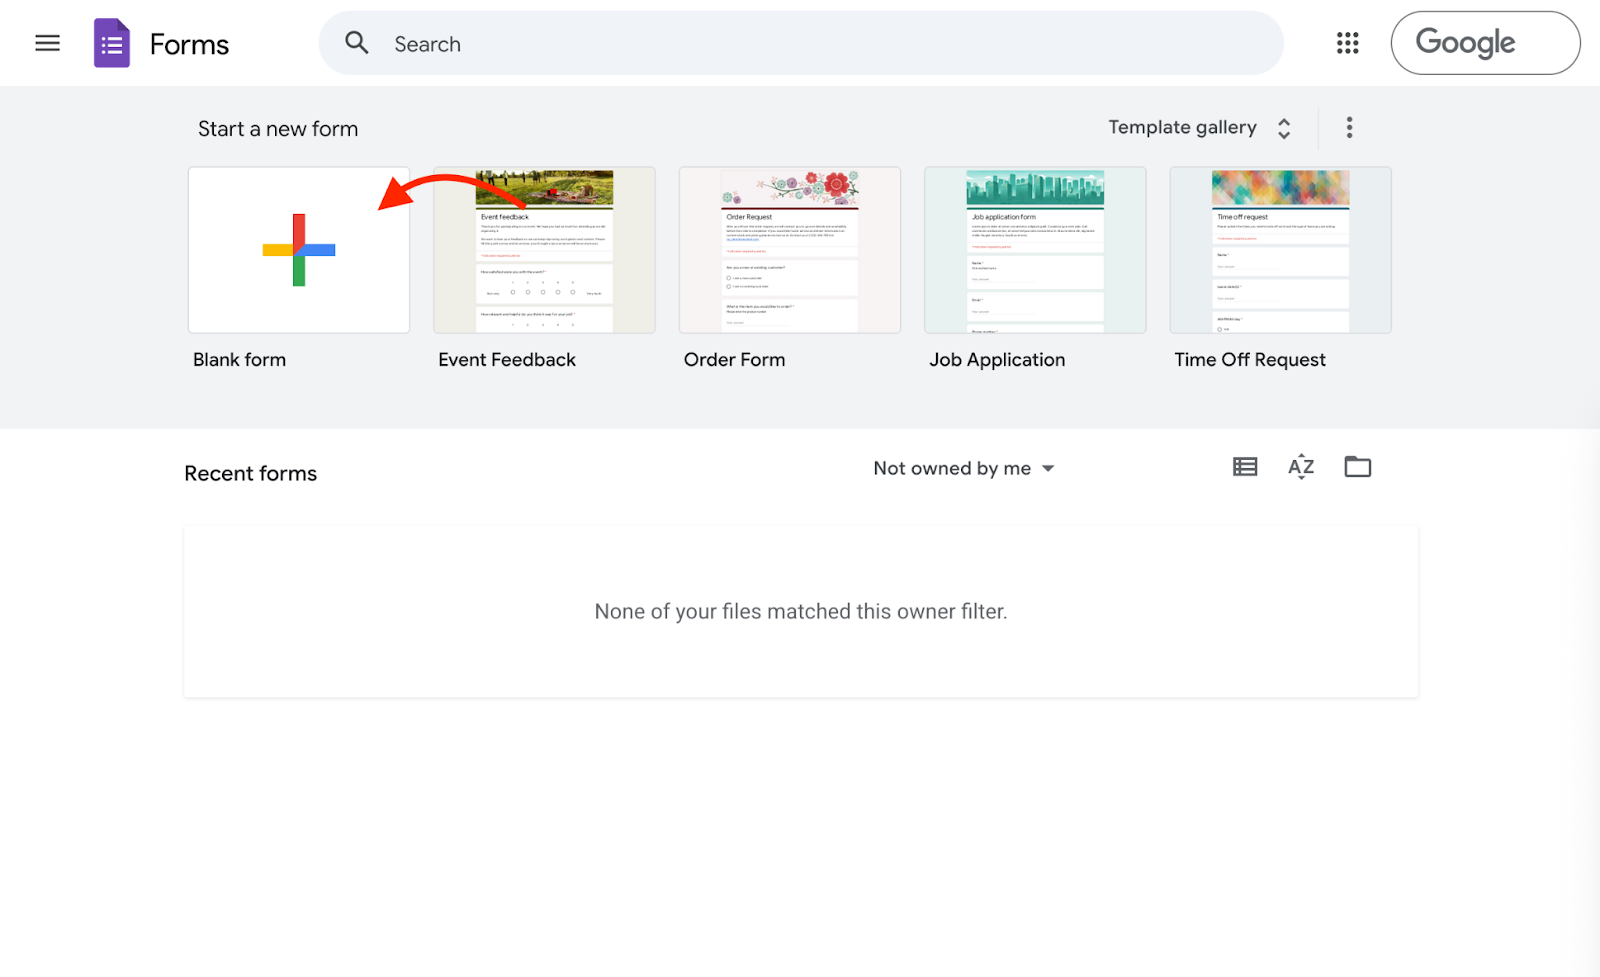
Step 1: Open Google Forms
Go to Google Forms and sign in with your Google account. You can start a form from scratch or choose a template. Give your form a title and a short description if needed.
Step 2: Add a new question
Click the “+” (Add question) button in the right-hand menu.
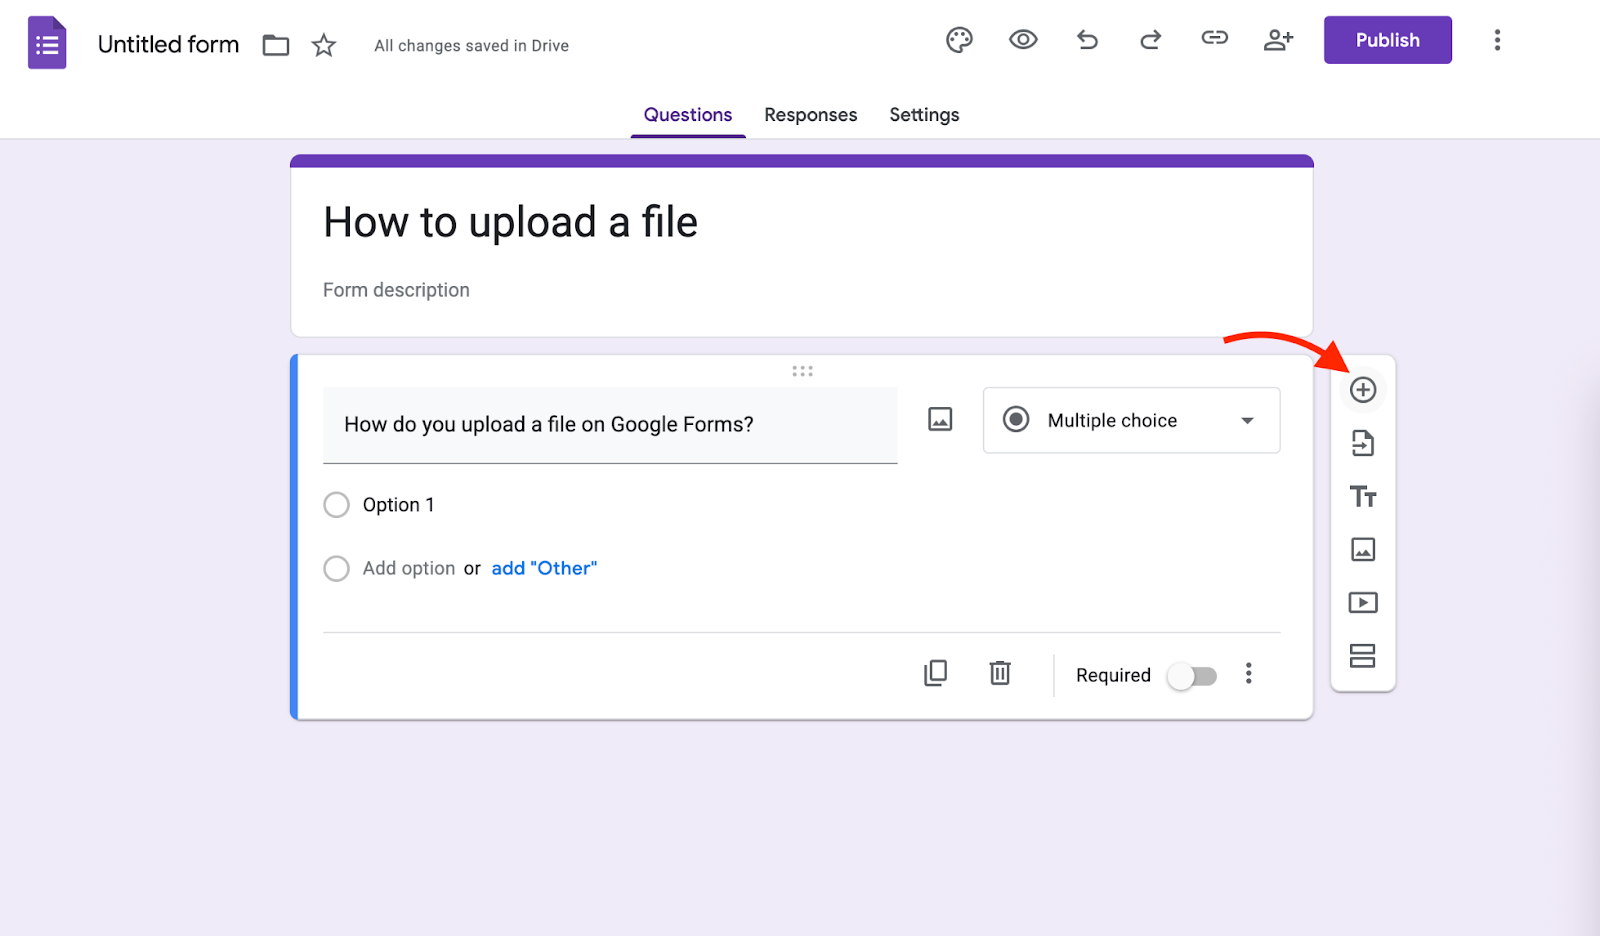
Step 3: Select “file upload” as the question type
Click the dropdown next to the default question type (usually “Multiple choice”) and choose File upload.

A pop-up will appear asking you to allow file uploads. Click Continue.
Step 4: Customize the upload settings
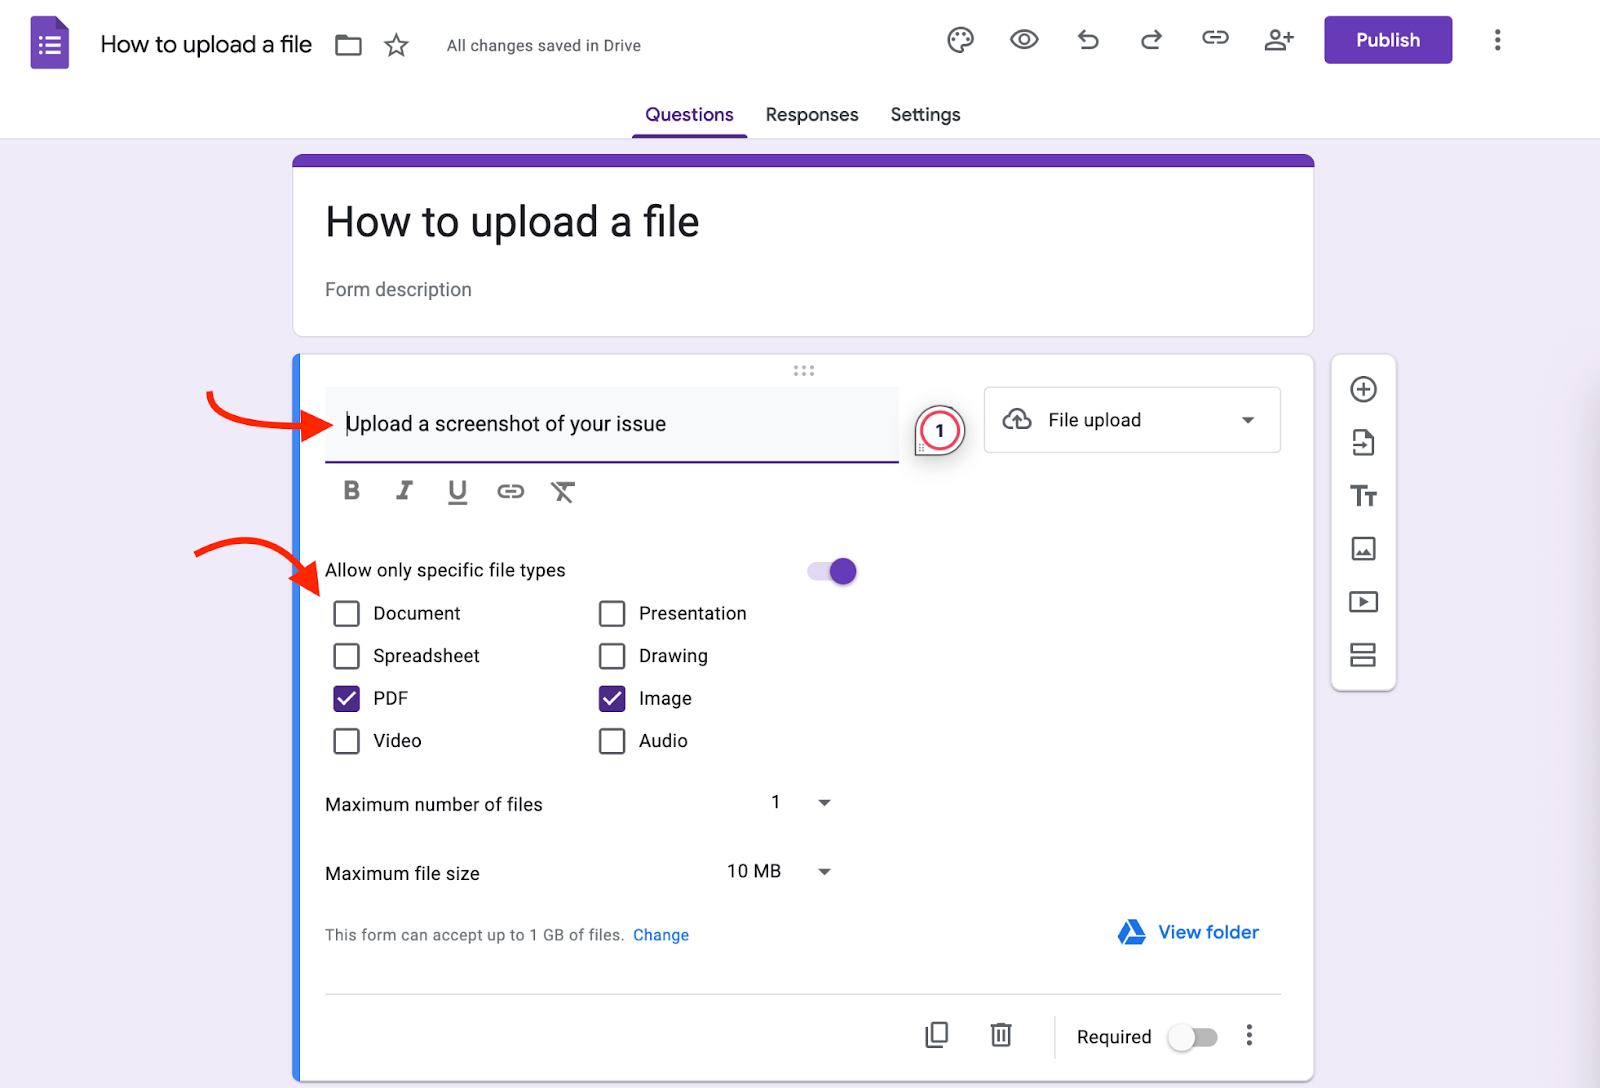
Now you can configure the file upload question:
- Write your prompt (e.g., “Upload your resume” or “Add supporting documents”).
- Choose the file types you want to allow (e.g., documents, PDFs, images, videos).
- Set the maximum number of files (1 to 10).
- Choose a file size limit (up to 10 GB per response).
Step 5: Preview your form
Click the eye icon in the top-right corner to preview your form and make sure everything looks good.

It’s worth noting that file uploads only work for forms created in a Google Workspace (formerly G Suite) account. Respondents must also be signed in with a Google account to upload files.
How to use Jotform for file uploads
Google Forms works well for basic uploads. But if you need more flexibility, storage, or security, Jotform is a smart upgrade.
Jotform offers more than 100 ready-to-use file upload form templates, which you can customize in minutes. Or you can build one from scratch with an intuitive drag-and-drop builder. Just add the File Upload field, adjust your limits (file type, size, quantity), and you’re ready to go.
Below, we show you how to create your own file upload form in just a few steps.
1. Create your form
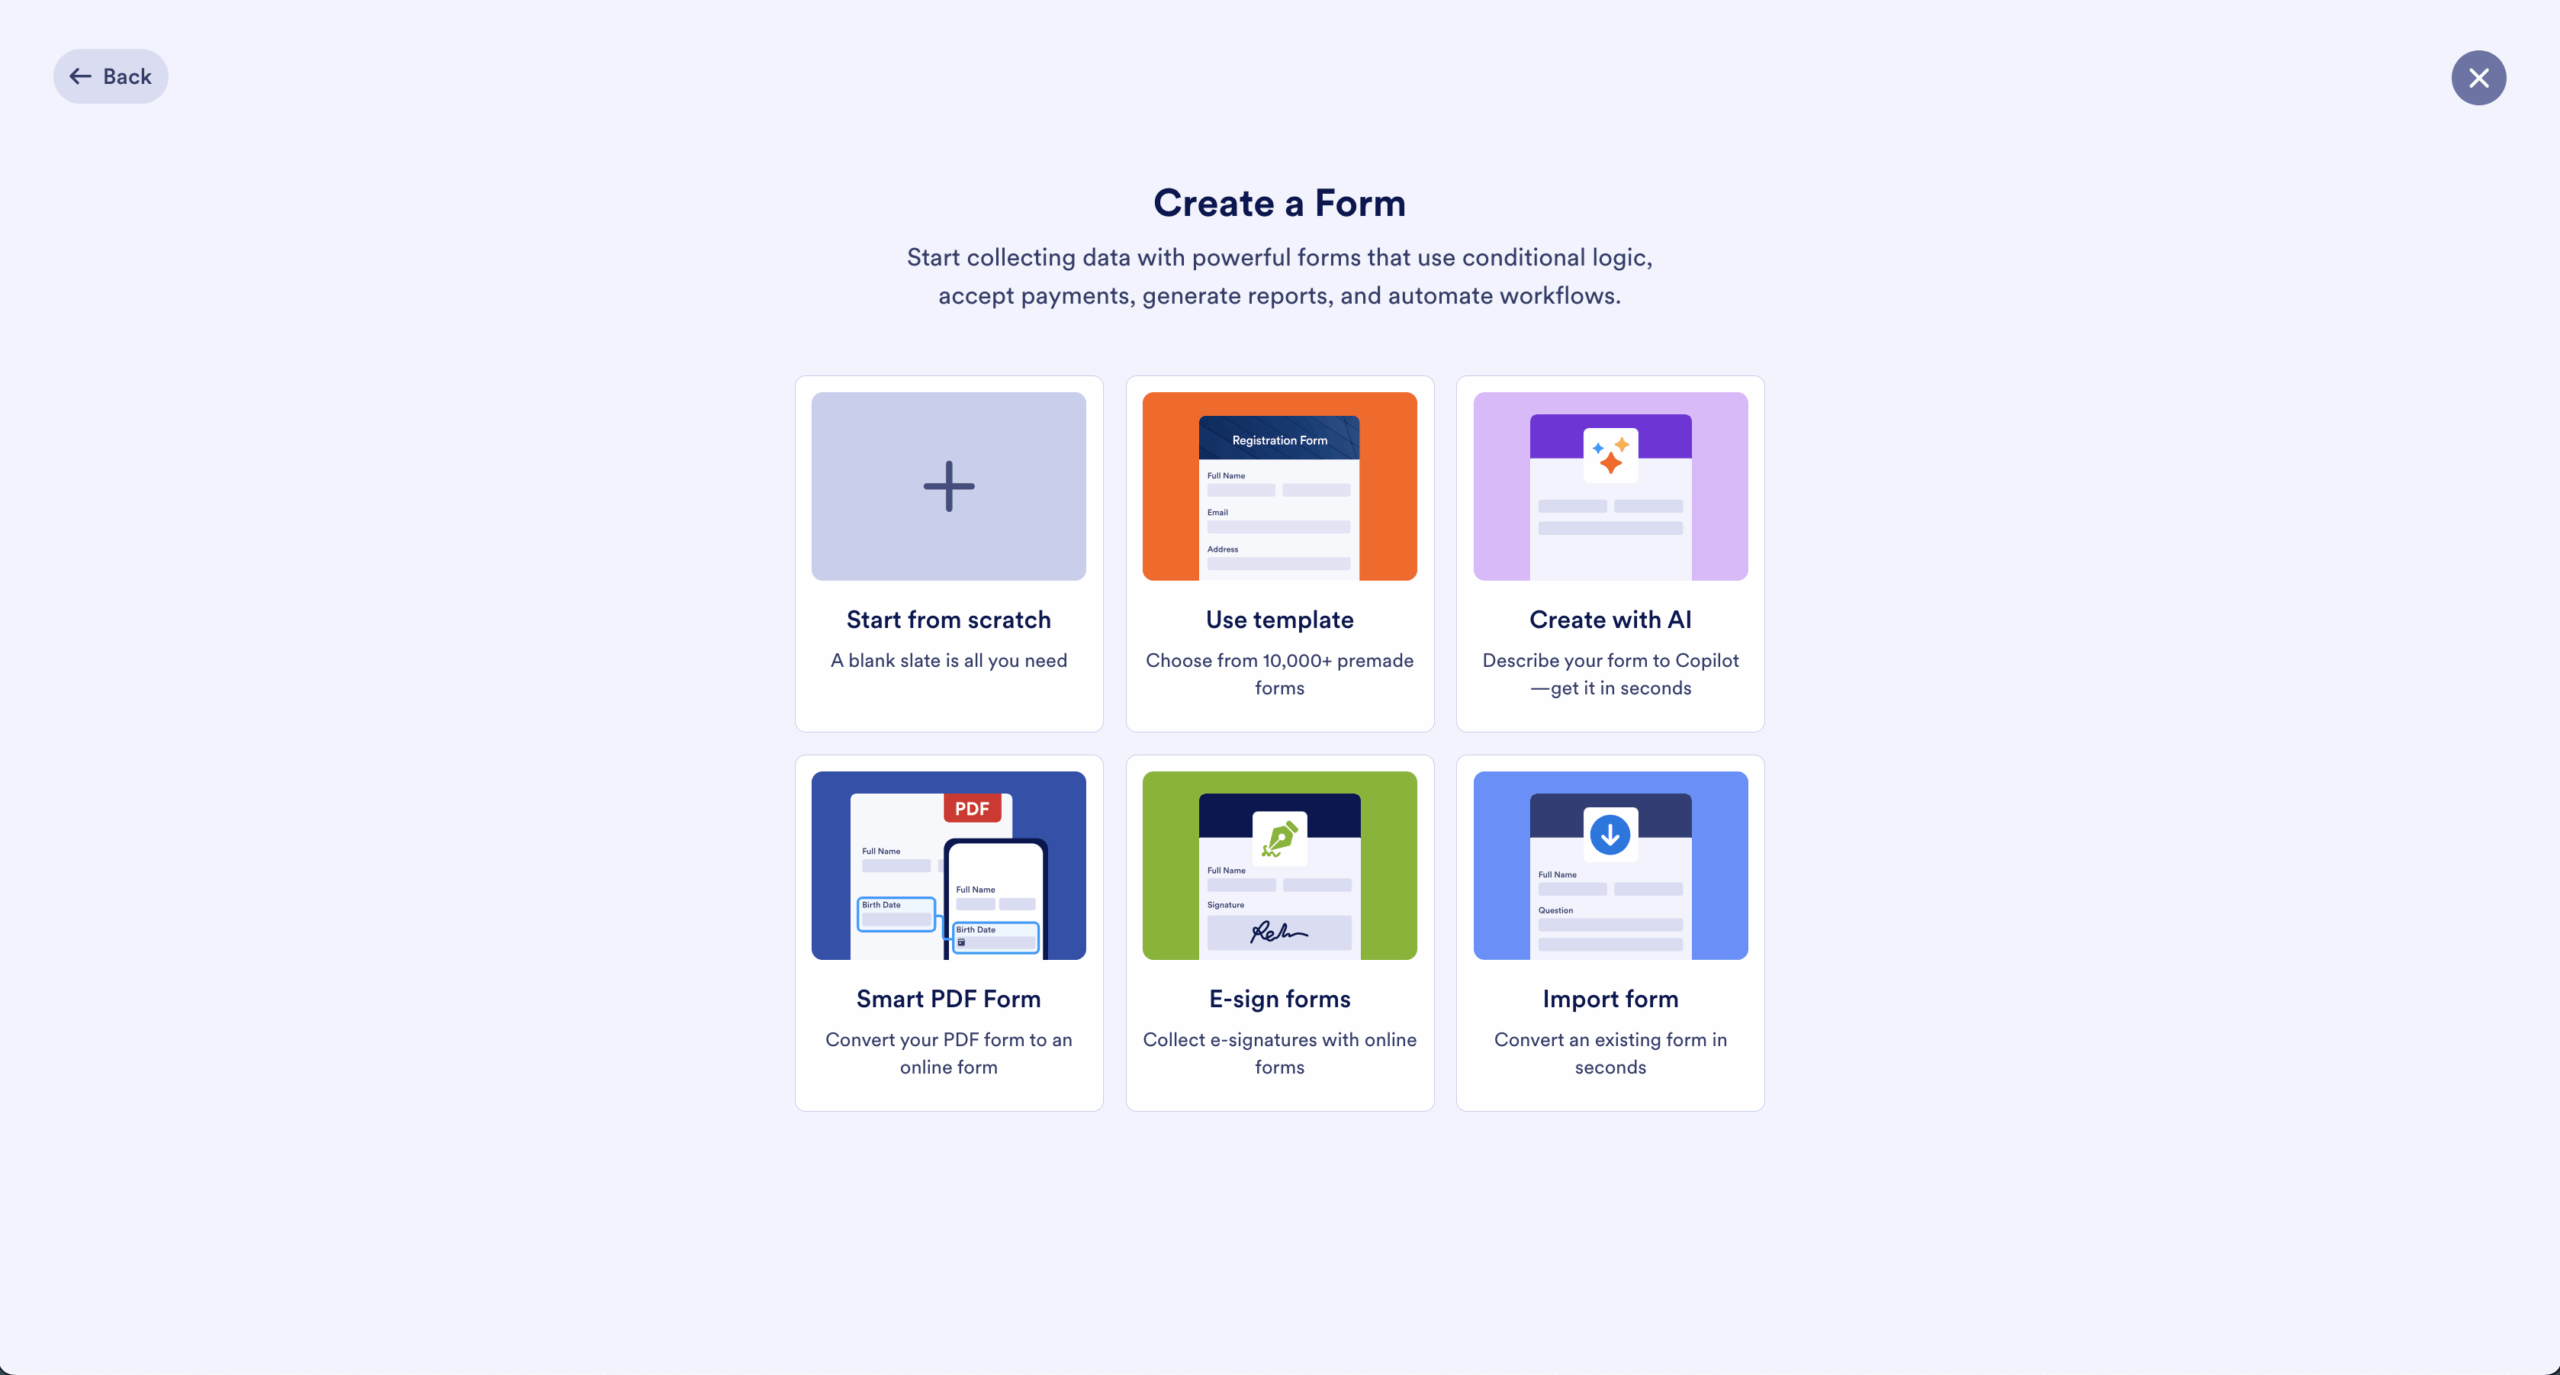
You can start a form from scratch or choose a file upload form template like the ones available for job applications, consent forms, or client intake forms.
2. Add the File Upload element to your form

In the Form Builder, drag and drop the File Upload field into your form. You can label it however you’d like (e.g., “Upload your resume” or “Attach proof of payment”).
3. Set your file upload preferences
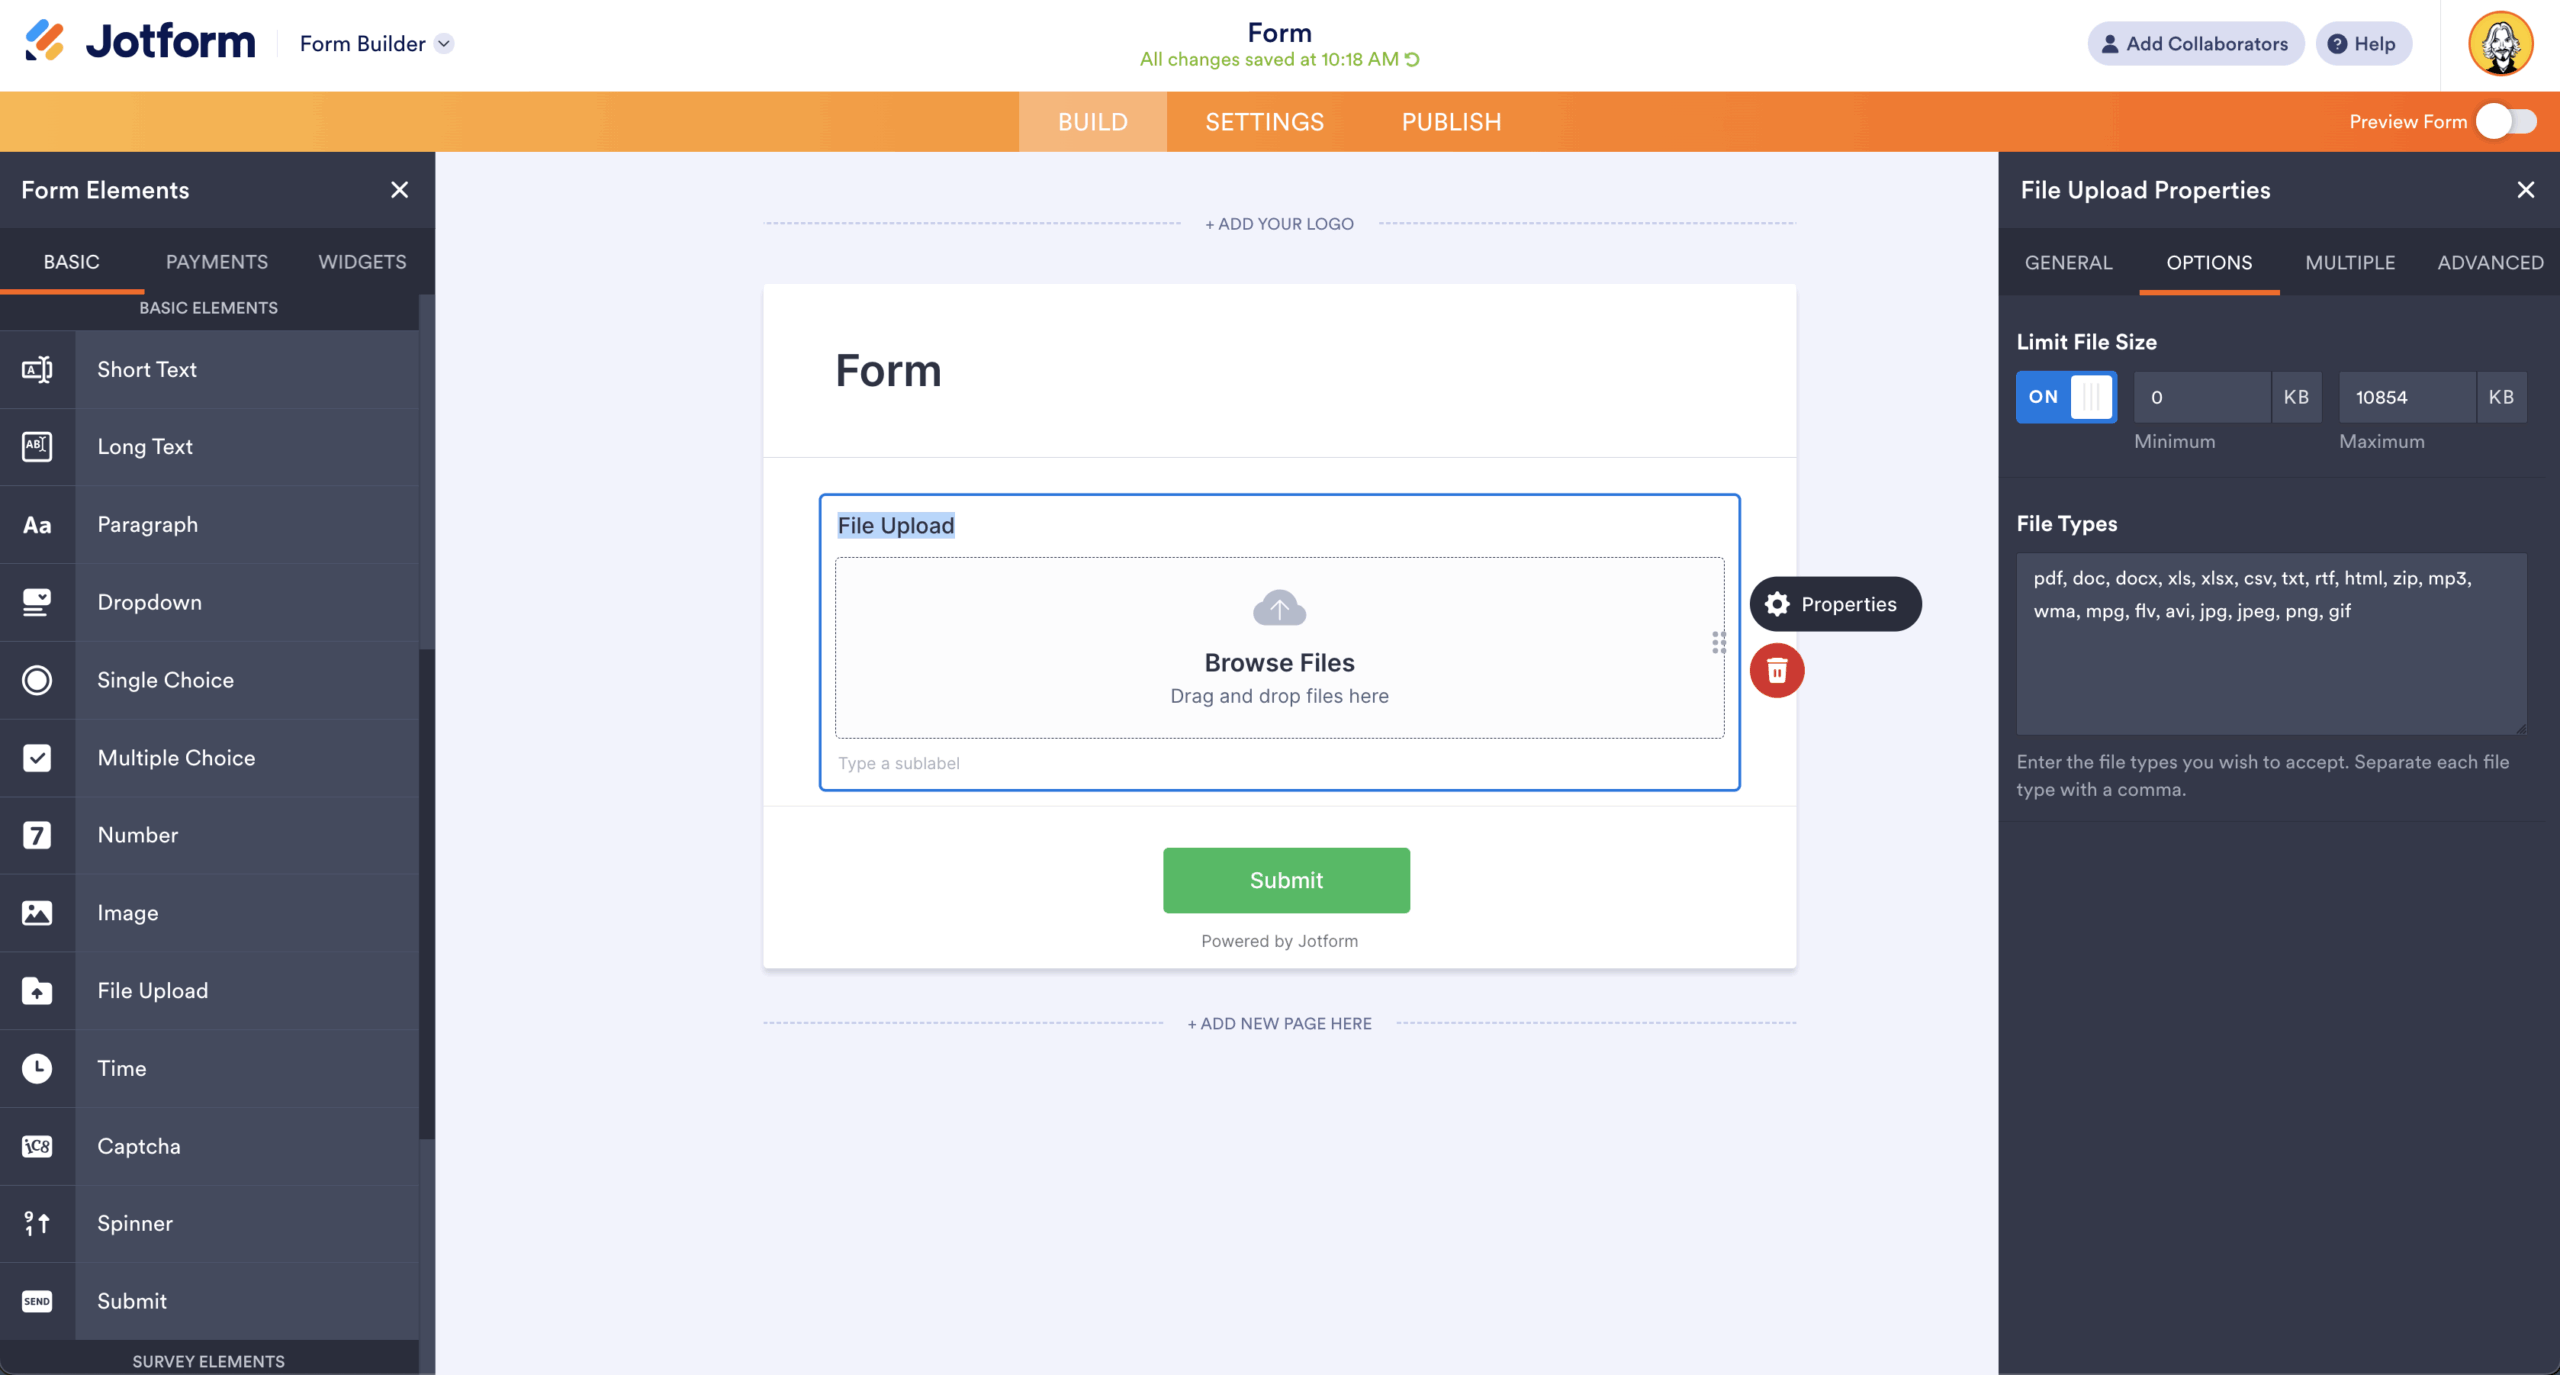
Click the gear icon next to the File Upload field to configure settings like
- File types (e.g., .pdf, .jpg, .docx)
- Maximum file size (up to 1 GB per submission)
- Number of files allowed (single or multiple)
4. Enable cloud integrations (optional)
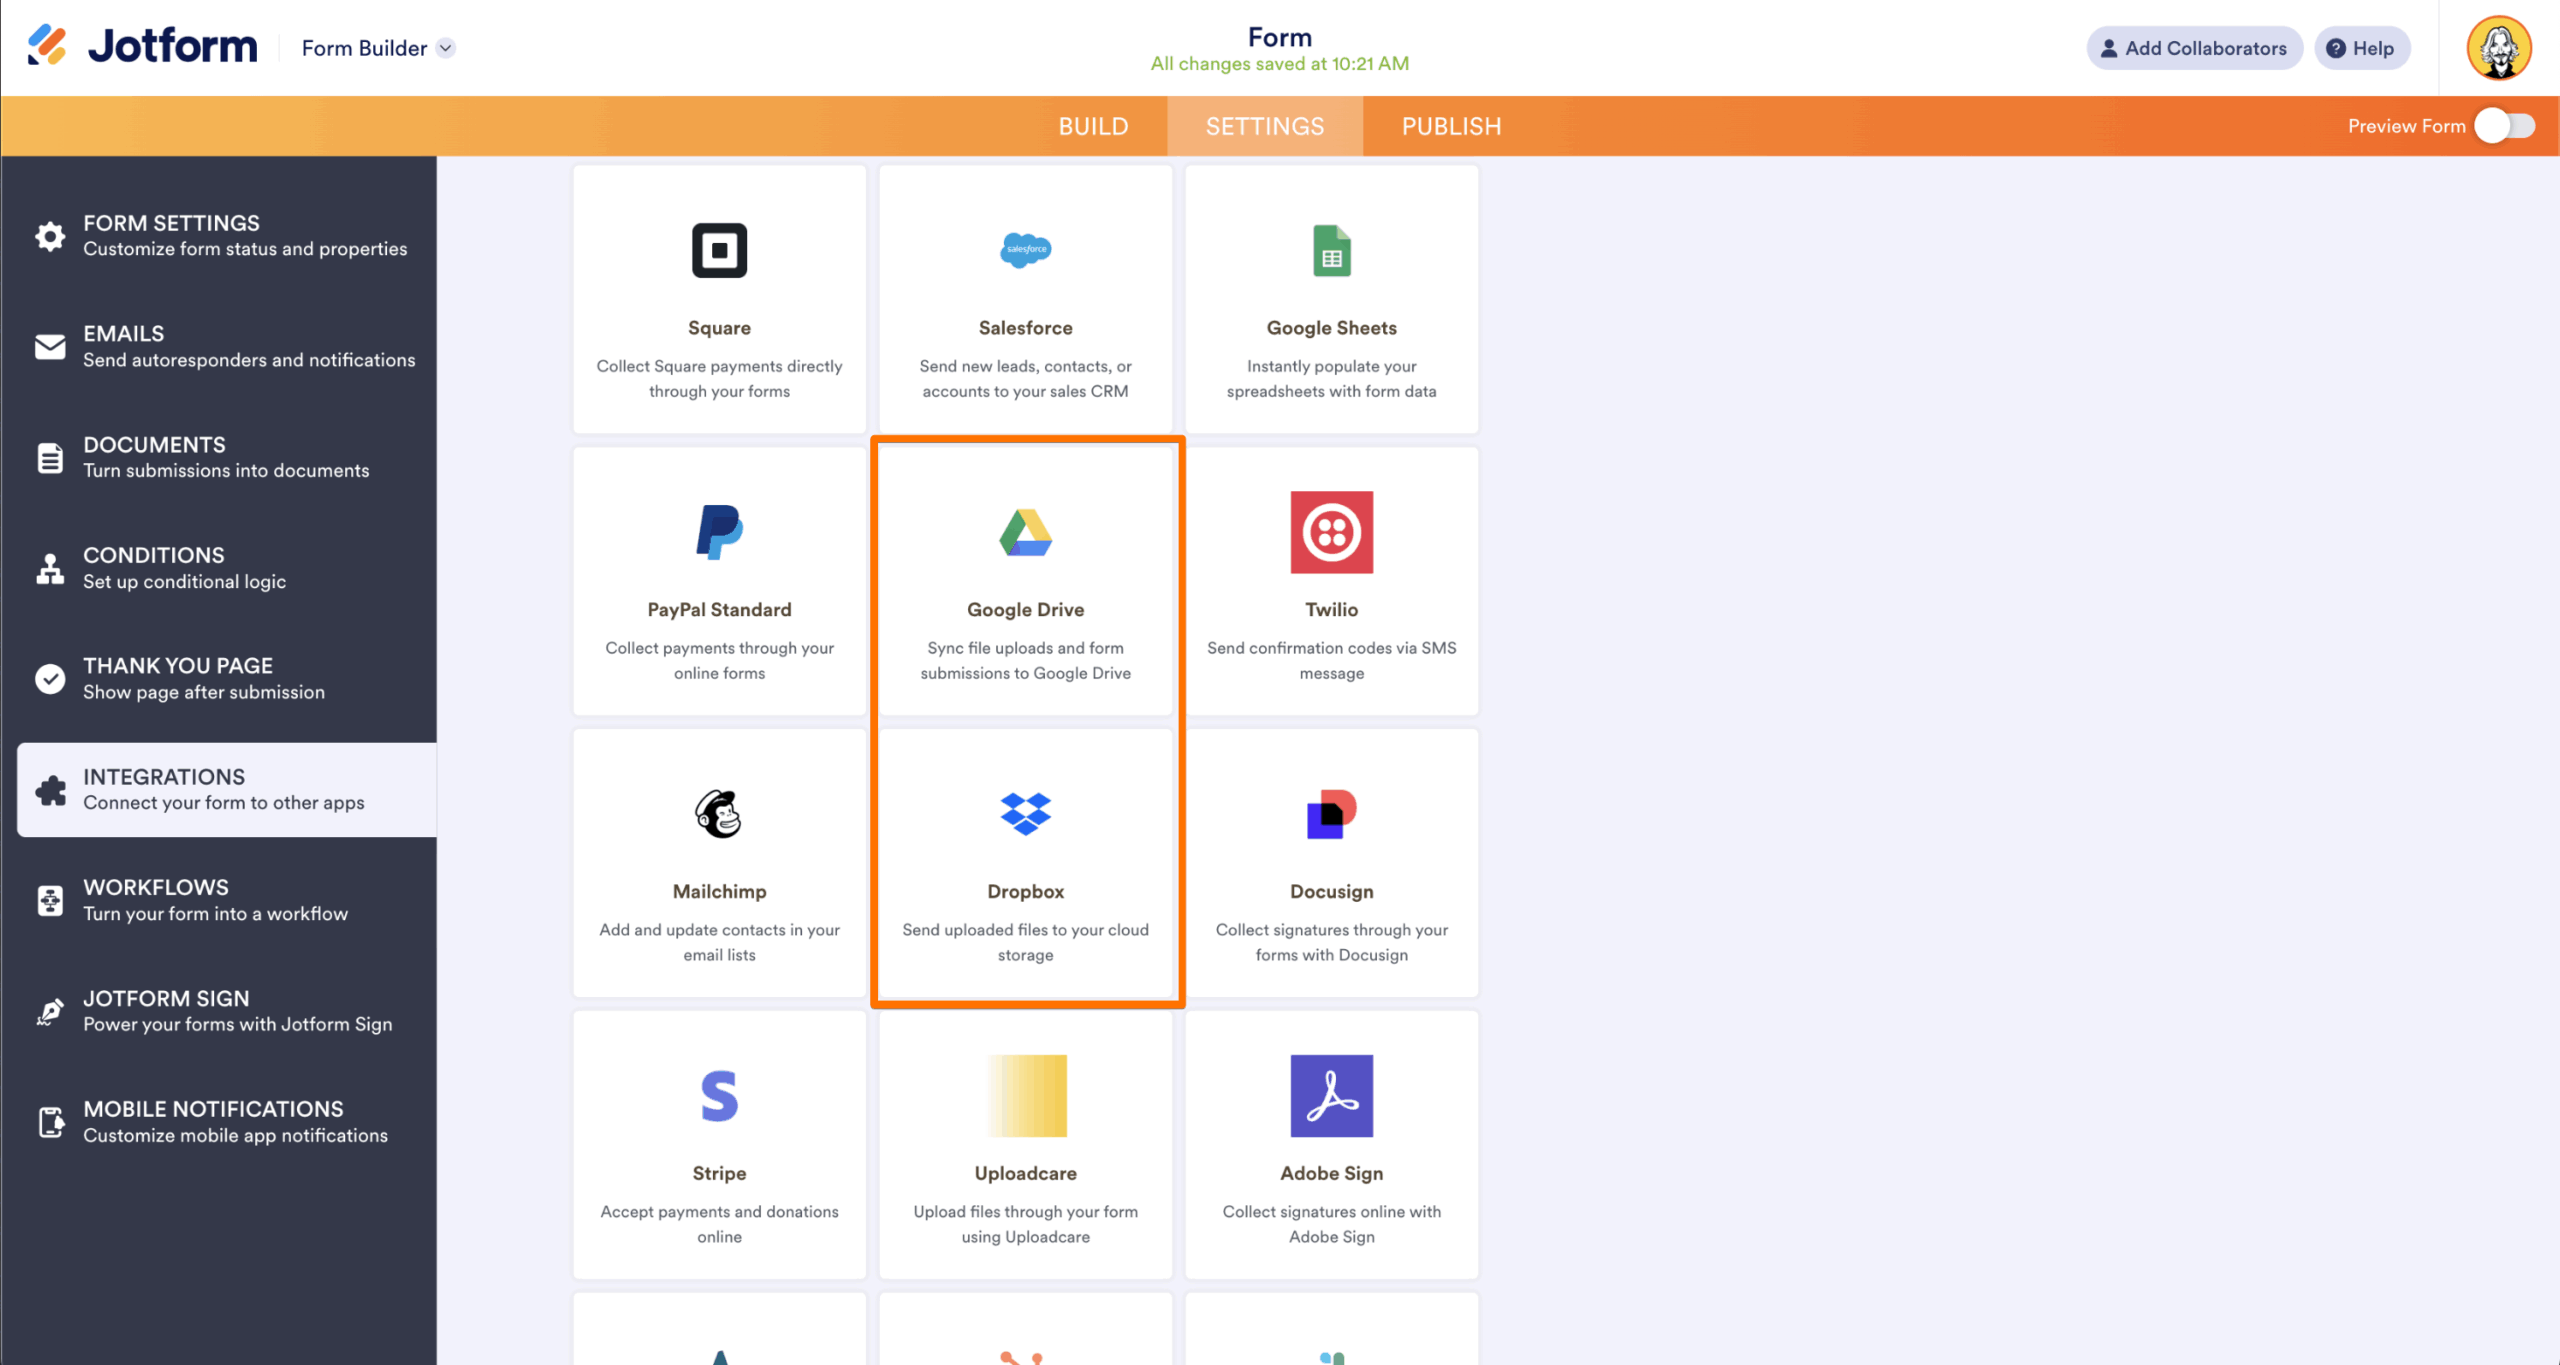
Automatically send uploaded files to your Google Drive, Dropbox, or Box account by setting up an integration under the Settings > Integrations tab.
5. Publish and share your form
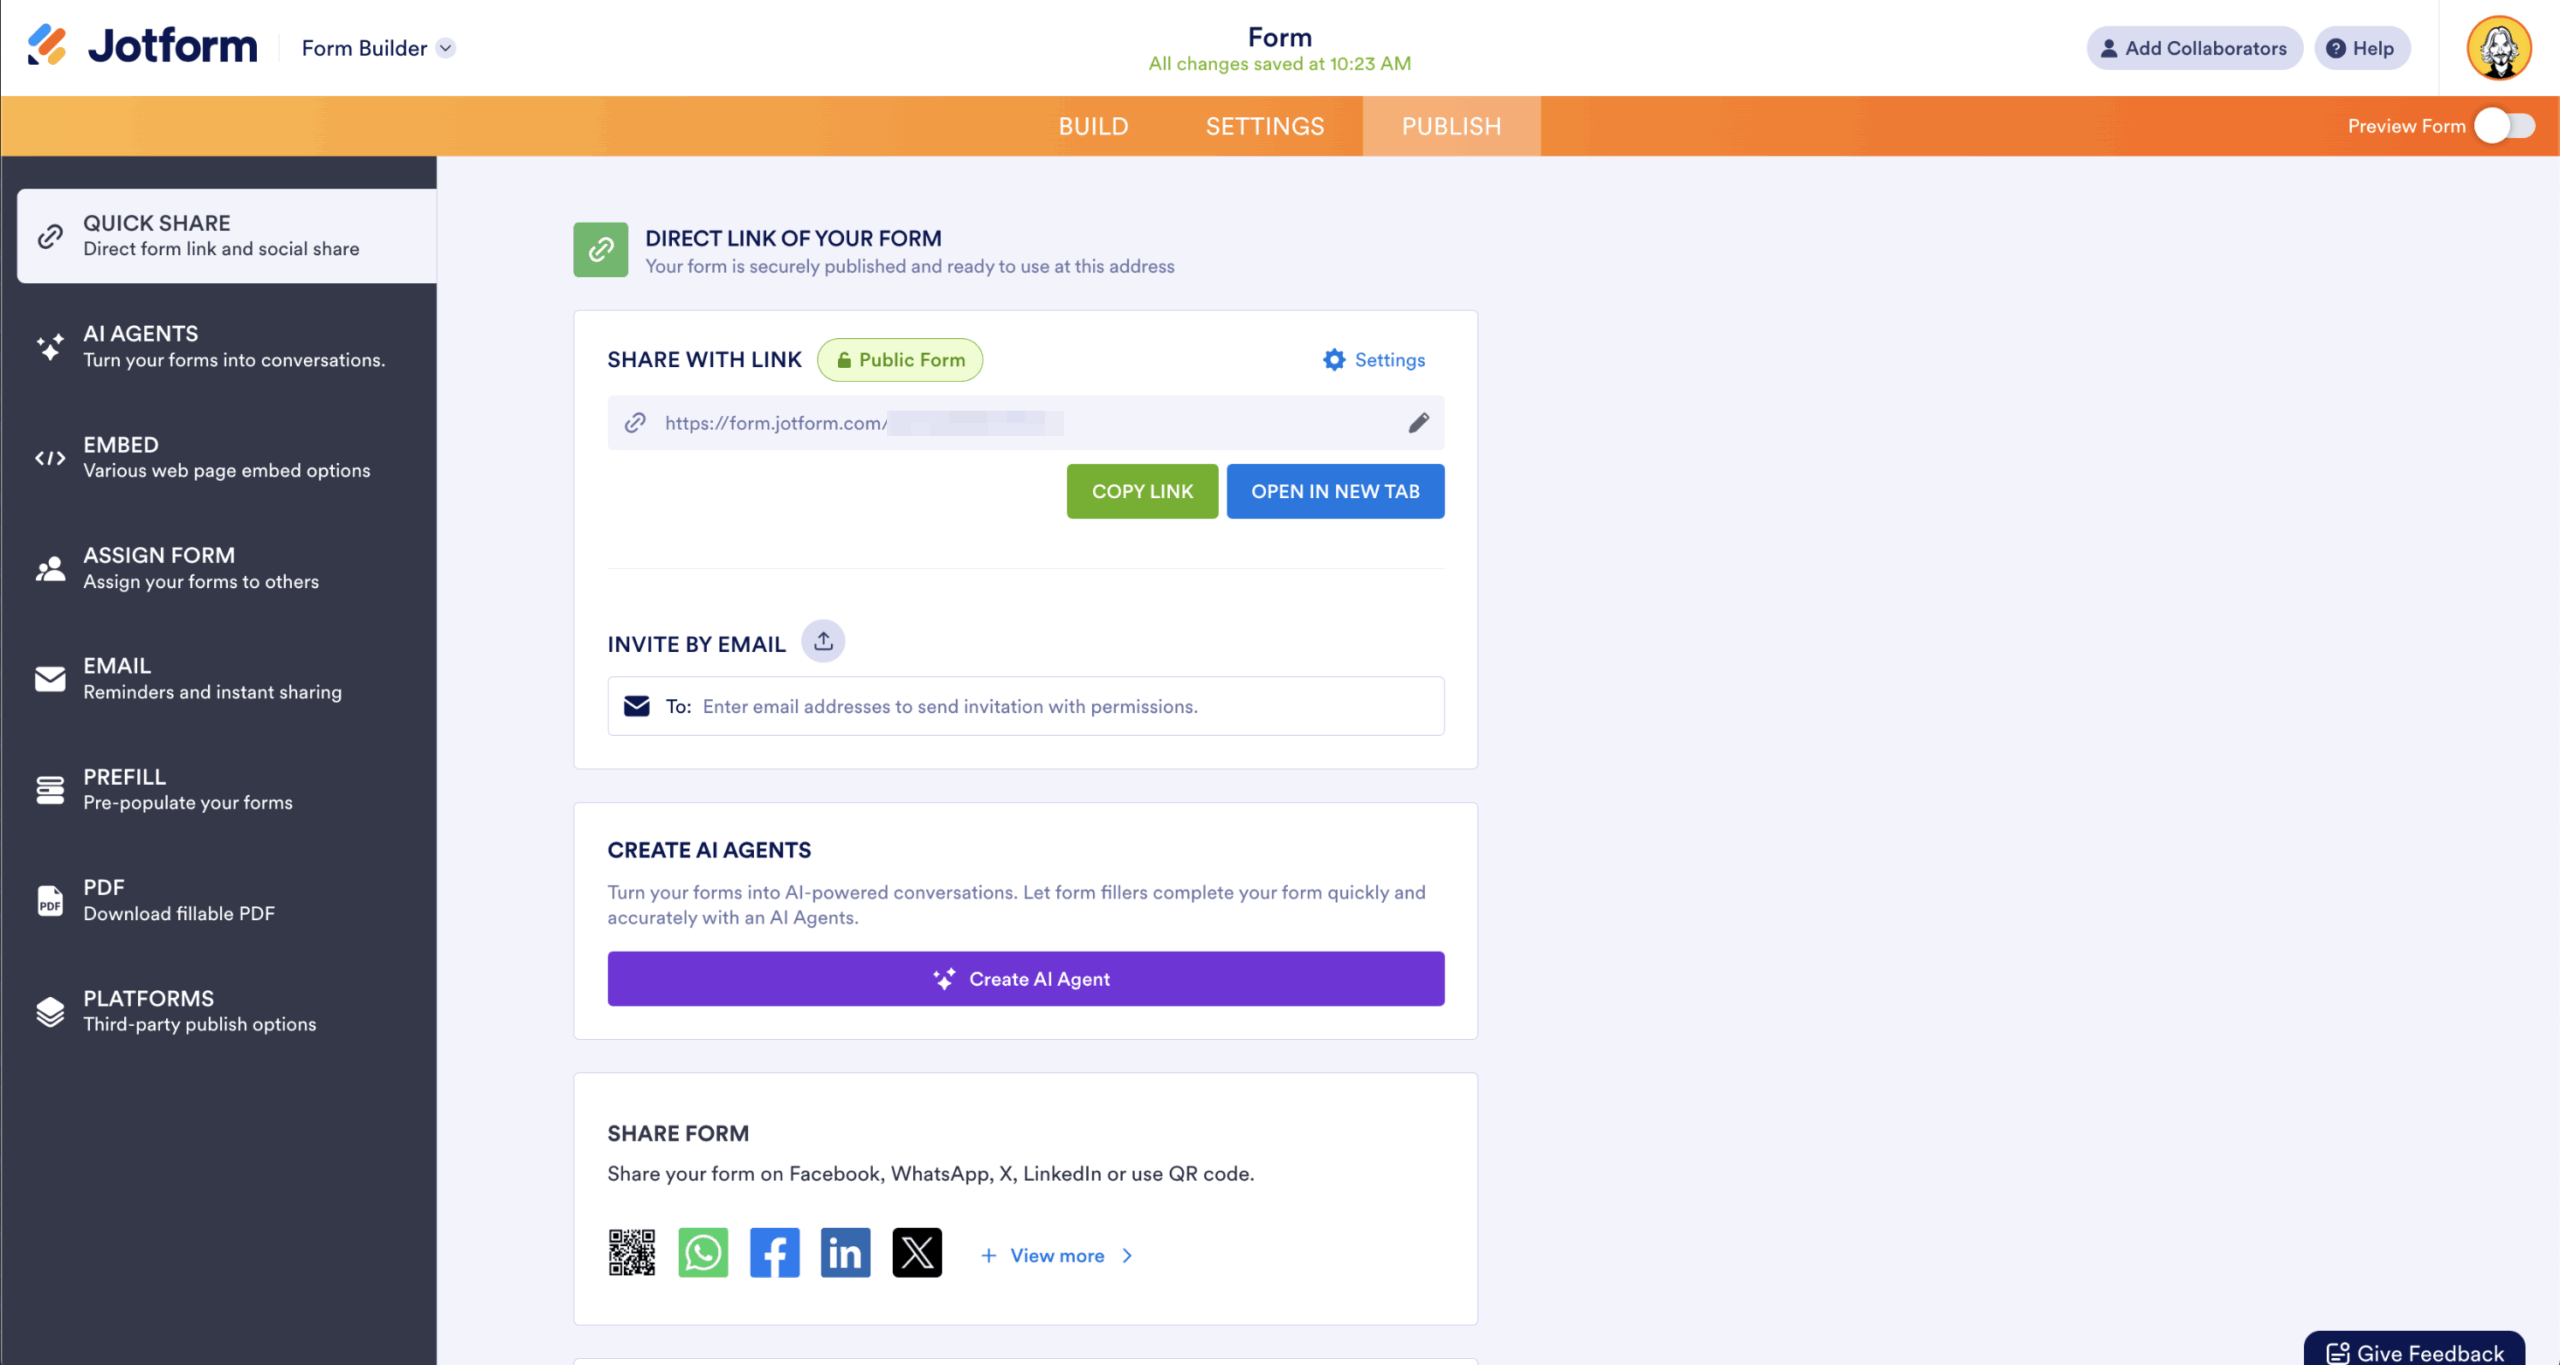
Once your form is ready, click Publish to share it via link, embed it on your website, or email it directly.
Give Jotform a try today
When you create your form in Jotform, respondents can upload everything from resumes and documents to images and videos. Behind the scenes, Jotform can automatically send those files to cloud services like Google Drive, Dropbox, or Box — so nothing gets lost or buried in your inbox.
You’ll also get
- Generous limits: Up to 1 GB per submission, 100 MB of storage, and 500 free submissions on the Starter plan
- Secure storage: 256-bit SSL encryption, GDPR compliance, and optional HIPAA-friendly plans
- Built-in payment options: Accept card payments securely with PCI-compliant forms
Whether you’re managing job applications, event registrations, or client onboarding, Jotform gives you more control and peace of mind. Once your form is ready, just share the link or embed it on your website — no coding required.
Frequently asked questions
Yes. Google Forms requires respondents to sign in with a Google account to upload files. This helps ensure file security and proper storage. If you need to accept files from users without Google accounts, consider using a tool like Jotform, which doesn’t require sign-in by default.
Absolutely. In both Google Forms and Jotform, you can restrict uploads to specific file types, such as images (.jpg, .png), documents (.pdf, .docx), or videos (.mp4). This helps prevent incompatible or unwanted files from being submitted.


Send Comment: