
Setting up a Google Forms ClickUp integration
- Click Create+ and select Zap.
- For your trigger, choose Google Forms.
- Select a trigger event.
- Connect your Google Forms account to Zapier.
- For your action, choose ClickUp.
- Define the action.
- Connect your ClickUp account to Zapier.
- Test the Zap.
- Click Publish Zap.
Many businesses struggle to maintain productivity. From distractions to tech problems to poor task management, there are many reasons employees can’t deliver their work efficiently. How can organizations help ensure their teams can do more in less time? One way is with productivity-enhancing tools. In fact, automation software has the potential to help 72 percent of employees complete 30 percent more work.
ClickUp is an all-in-one work management platform designed to increase productivity, with features for task management, communication, data analysis, and more. While it’s an effective tool on its own, it can be further enhanced with the right integrations. Google Forms, the popular online form creator part of the Google ecosystem, can be connected to ClickUp to further speed up work.
When the two tools are integrated, ClickUp will automatically create a task whenever a specific Google Form is filled out, saving your staff the effort of doing it manually. This automation — one of several available — not only saves time but also reduces the chances of errors and delays in setting up tasks.
In this article, we show you how to set up the Google Forms ClickUp integration. Plus, we explore an excellent Google Forms alternative that may work even better for your needs: Jotform.
Pro Tip
If you’re looking for more guidance on how to use each of these tools individually, take a look at our articles on how to use ClickUp and how to use Google Forms.
How to connect Google Forms with ClickUp
While ClickUp and Google Forms can be connected, there’s no direct native integration between the two solutions. Instead, there are third-party tools you can use to make this connection happen.
Zapier and Make are two popular third-party solutions that support a Google Forms ClickUp integration. These options are considered reliable and safe, and they’re trusted by thousands of users. We’ll show you how to use them below.
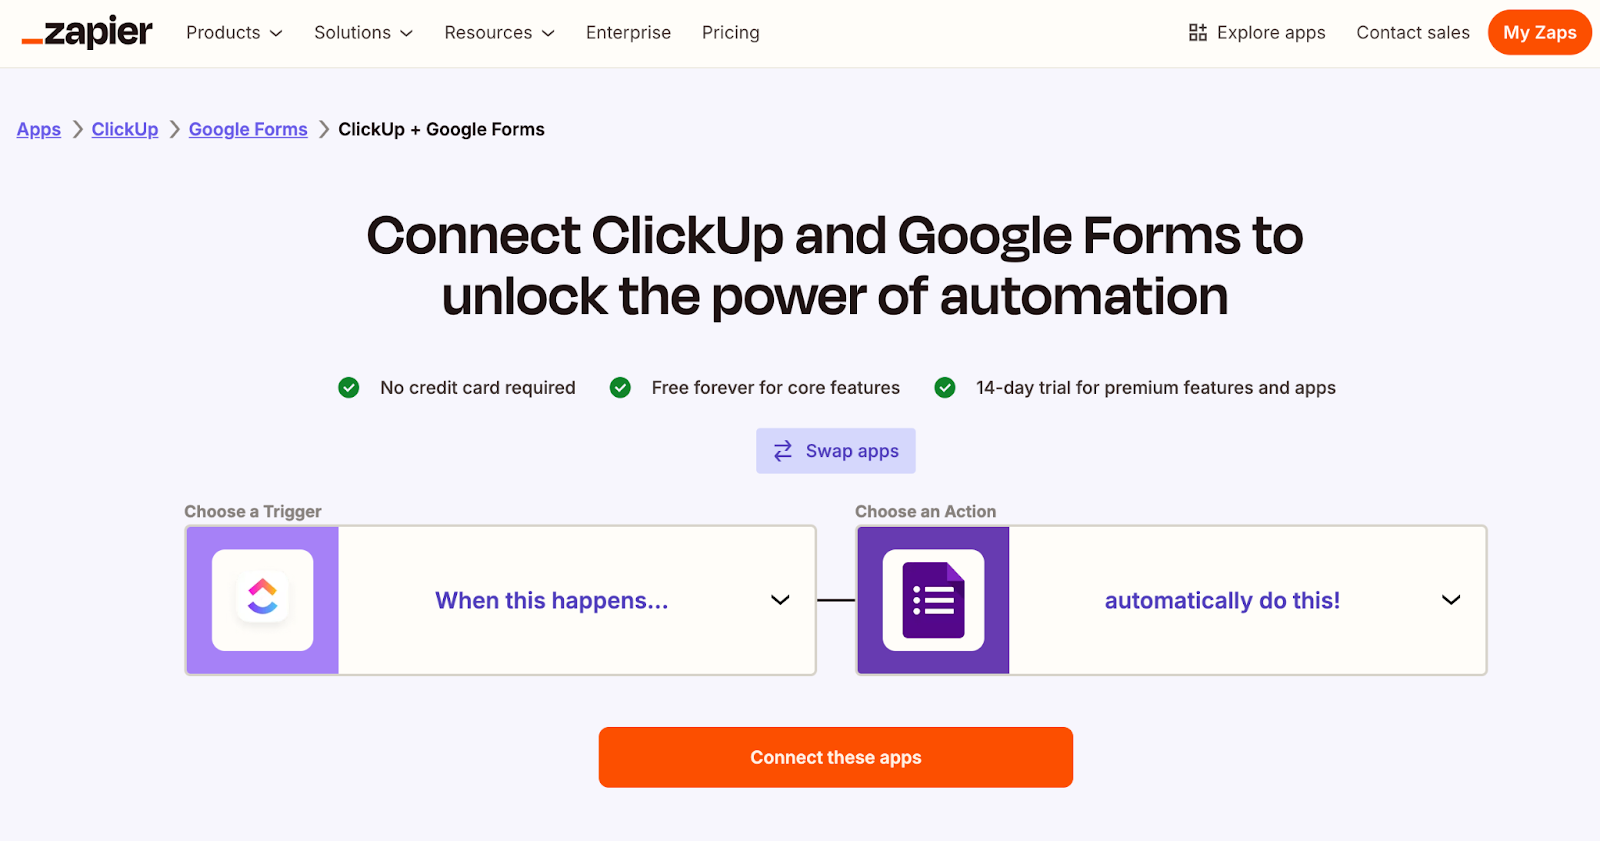
How to connect Google Forms with ClickUp via Zapier
Zapier allows you to link various apps and services for the purpose of automating workflows. It’s easy to use and doesn’t require coding or development knowledge, so it works well for people with any level of technical skill.
Known as “Zaps,” each of Zapier’s integrations contains a trigger as well as an action that takes place after the trigger. In the case of Google Forms and ClickUp, you can use Zapier to create a Zap whenever a new Google Form is filled out (trigger) so that ClickUp automatically creates tasks, subtasks, or lists based on the form (action).
Zapier has several Zap templates between Google Forms and ClickUp, so you don’t have to set up anything from scratch.
Here’s an overview of how to do it:
- Click Create+ and select Zap.
- For your trigger, under App, choose Google Forms.
- Select a trigger event, like “New Response in Spreadsheet.”
- Connect your Google Forms account to Zapier.

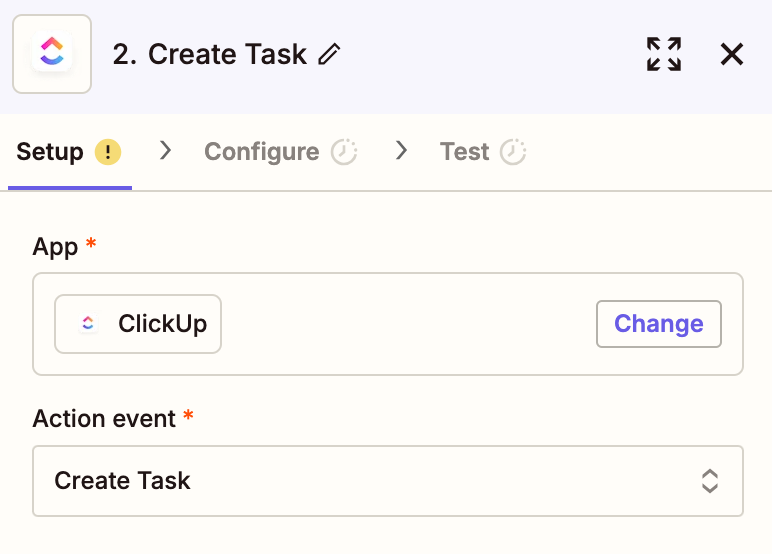
- For your action, under App, choose ClickUp.
- Define the action, like “Create Task.”
- Connect your ClickUp account to Zapier.
- Test the Zap to make sure it works properly.
- Click Publish Zap.
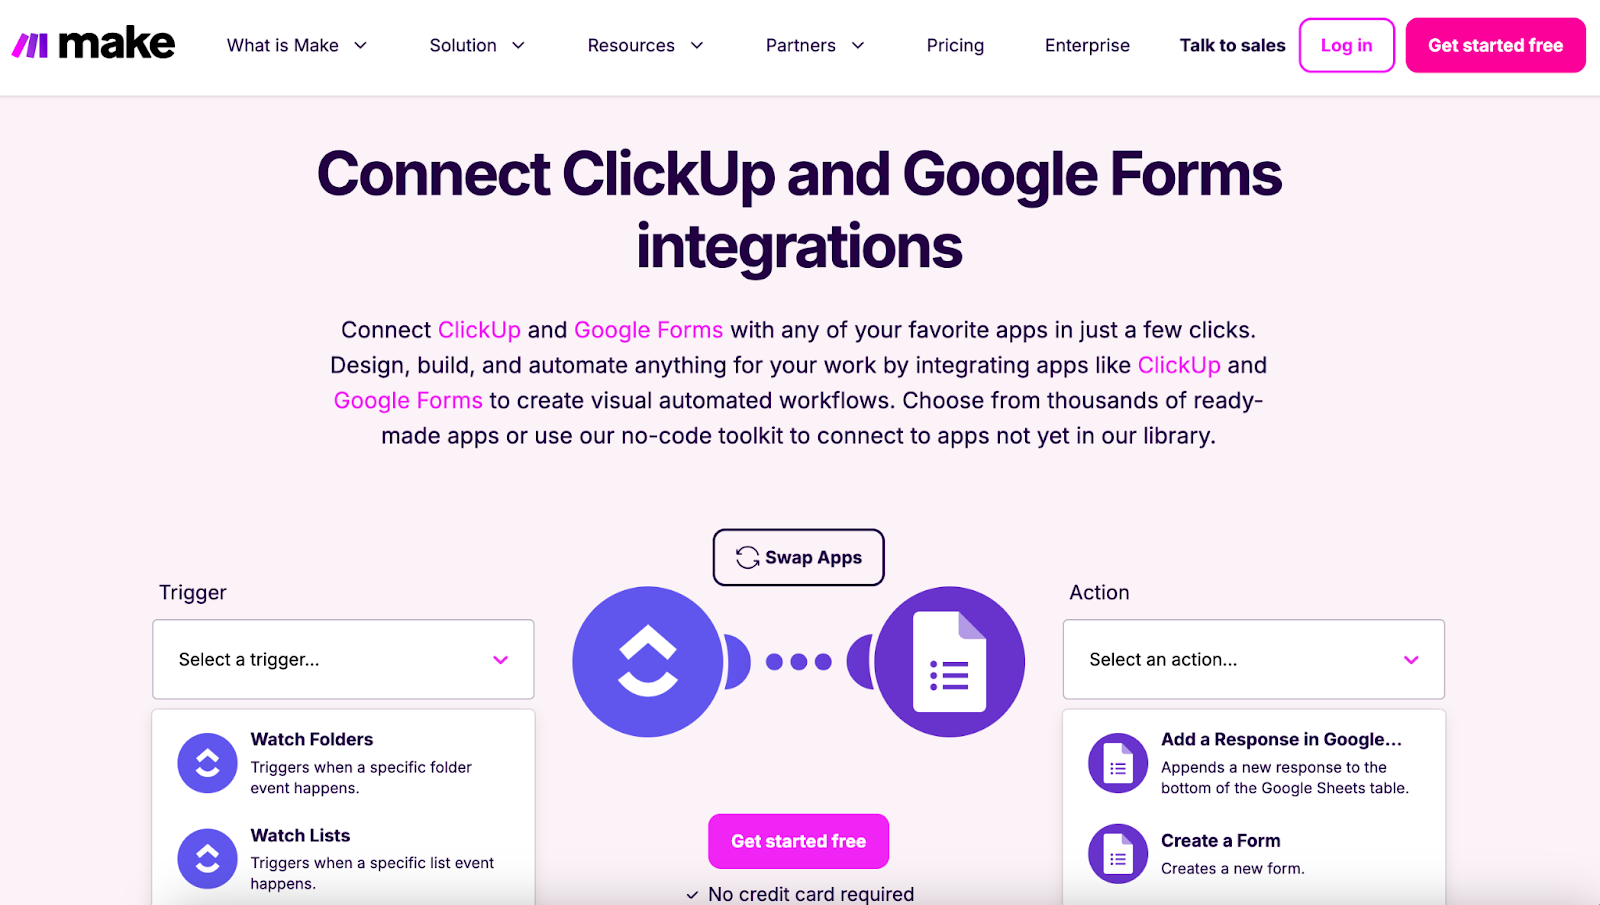
How to connect Google Forms with ClickUp via Make
Another way to set up the Google Forms ClickUp integration is with Make.
Like Zapier, Make is an integration and automation platform that doesn’t require any coding. It also uses visually animated workflows to make it easier to create connections between platforms.
The process in Make is similar to the one in Zapier, too — you’ll need to specify a trigger and an action in order to set up the integration. Make has several templated connections between Google Forms and ClickUp for you to choose from.
Here’s how to link ClickUp and Google Forms in Make:
- Select the ClickUp and Google Forms integration in Make.
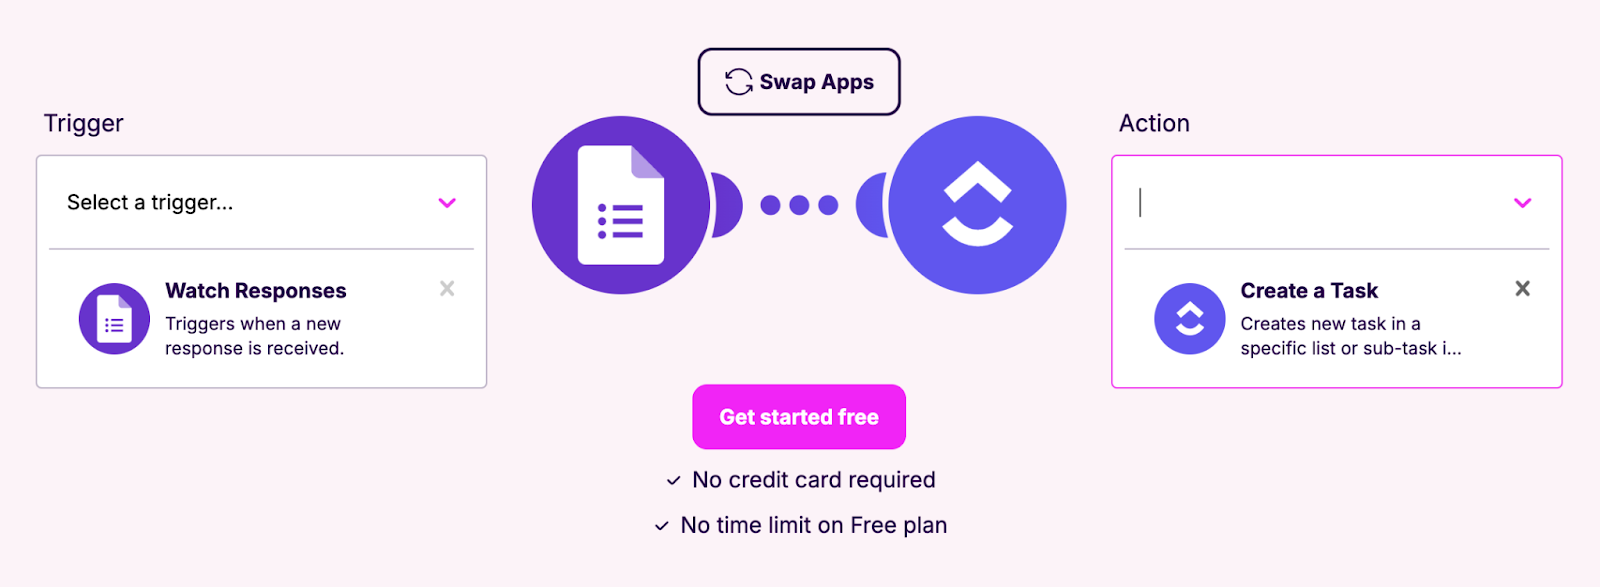
- Select a trigger, such as “Watch Responses.”
- Select an action, such as “Create a Task.”
- Click Get started free and fill in the account information.
- Configure each module by connecting it to your Google Forms and ClickUp.
- From the bottom task bar, select the schedule for this scenario to run, such as every 15 minutes.
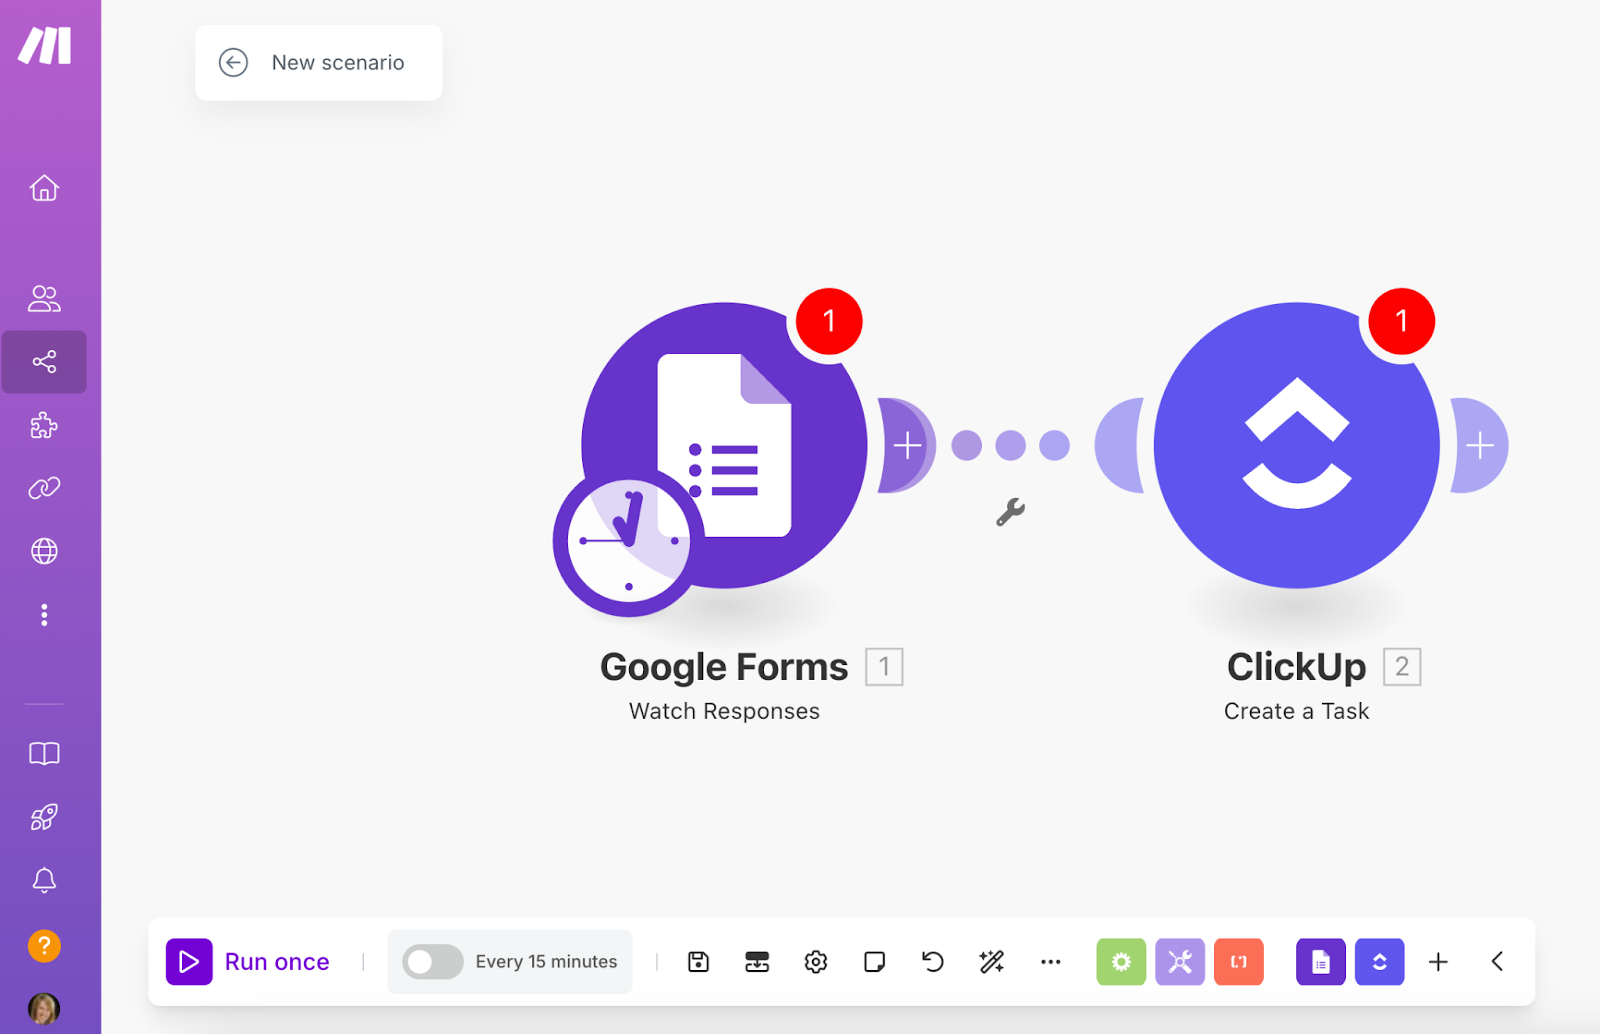
- Run the scenario.
An alternative way to turn form submissions into ClickUp tasks: Jotform
Google Forms is an online form builder that works well for simple forms. But if you’re looking to create anything beyond the basics, you’ll need to use a Google Forms alternative.
Jotform is a great way to turn form submissions into ClickUp tasks without using Google Forms. Even better, Jotform has a native ClickUp integration, so connecting the two is a breeze.
Below are just a few reasons why Jotform makes the perfect Google Forms alternative.
- No-code native integration: You don’t need to be a tech wizard to figure out how to connect Jotform with ClickUp. Unlike Google Forms, Jotform has a native integration, so setup is simple and takes just a few minutes.
- 10,000-plus form templates: Need ClickUp forms to gather task requests and project details to set up tasks within ClickUp? Jotform offers form templates for a huge range of business scenarios, so you don’t need to create any forms from scratch. Just choose a template, customize it using the intuitive drag-and-drop Form Builder, and sync it with ClickUp.
- Advanced form features: Jotform is a powerful form builder ideal for creating any kind of form, from the most simple to the most complex. It offers a number of advanced form features, such as conditional logic, online payments, electronic signatures, and so much more.
- Automated form workflows: Use advanced conditional logic within Jotform’s forms to set up autoresponder emails and notifications based on actions taken within the forms. For example, you can get it to send a thank-you email after a user completes all form fields. You can also set up conditional logic to show or hide form fields based on users’ previous responses.
- Easy task management: Got a project with a lot of complicated tasks and subtasks? You can manage them all effectively in Jotform Tables. It provides a comprehensive way to collect, organize, and manage data all in one place. Plus, you can send data from Jotform Tables to ClickUp with just one click.
So, if you’re wondering how to create a form in ClickUp or how to automate creating tasks in ClickUp from forms, Jotform is the way to go. It not only has more advanced functionality than Google Forms, but it’s much easier to integrate with ClickUp as well.
How to integrate Jotform with ClickUp
Connecting Jotform and ClickUp only takes a few steps. Follow these instructions once you’ve created the form in Jotform:
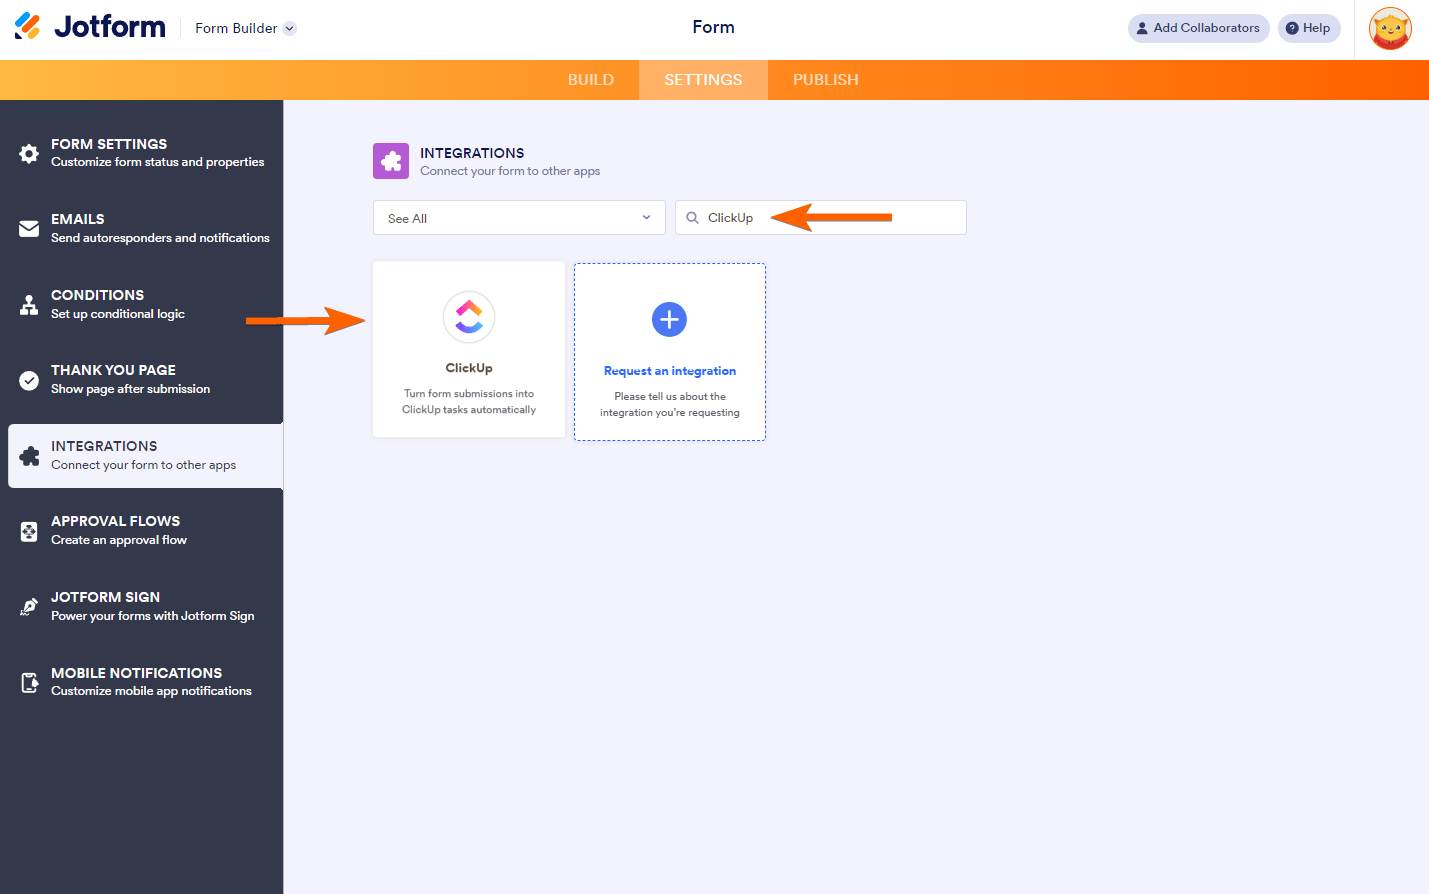
- In Jotform’s Form Builder, click Settings.
- Select Integrations.
- Search for ClickUp.
- Select ClickUp.
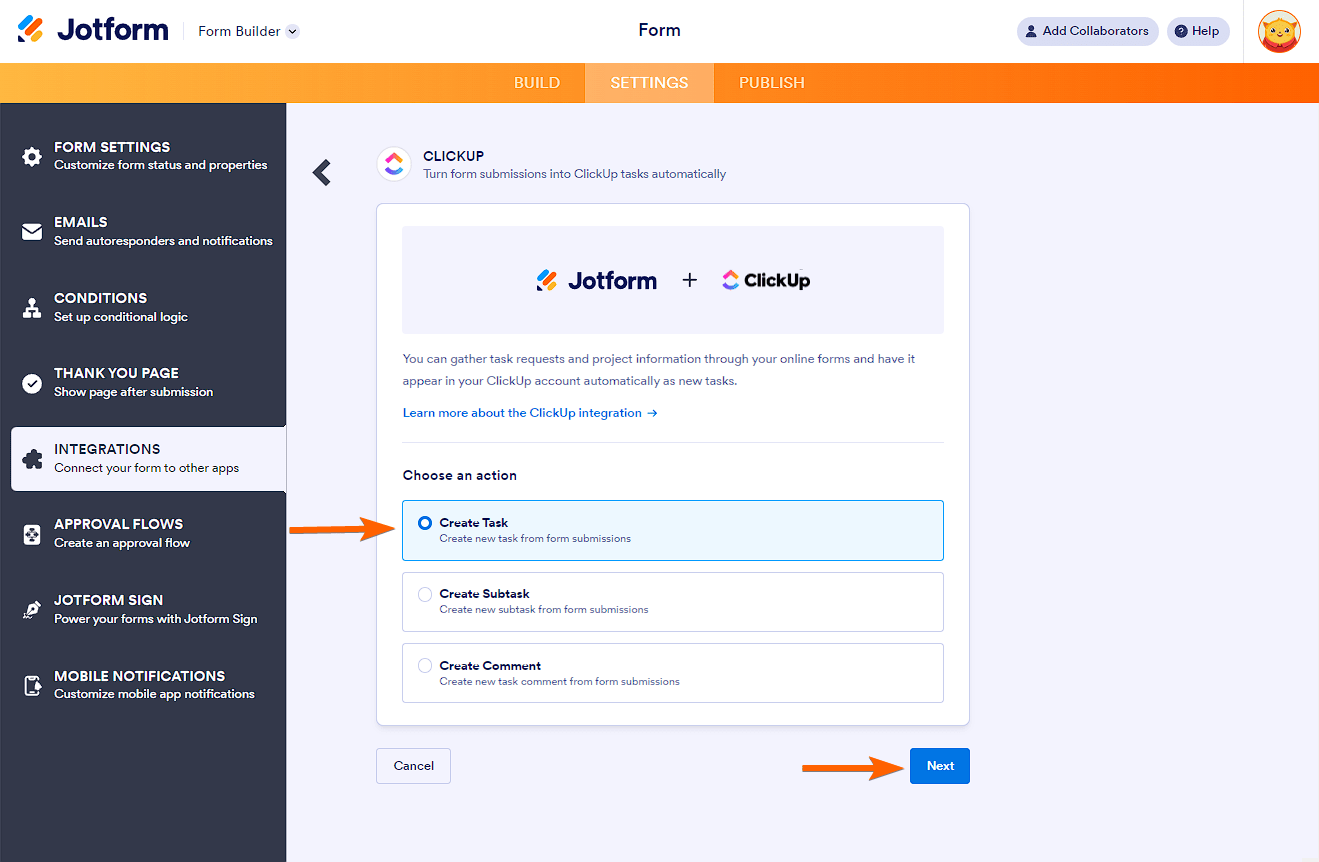
- Choose an action. Your options include Create Task, Create Subtask, and Create Comment. Click Next.
- Click Authenticate. When prompted, grant Jotform access to your ClickUp account.
- Set up the following dropdowns within the Form Builder: Select a workspace, Select a space, Select a folder, and Select a list.
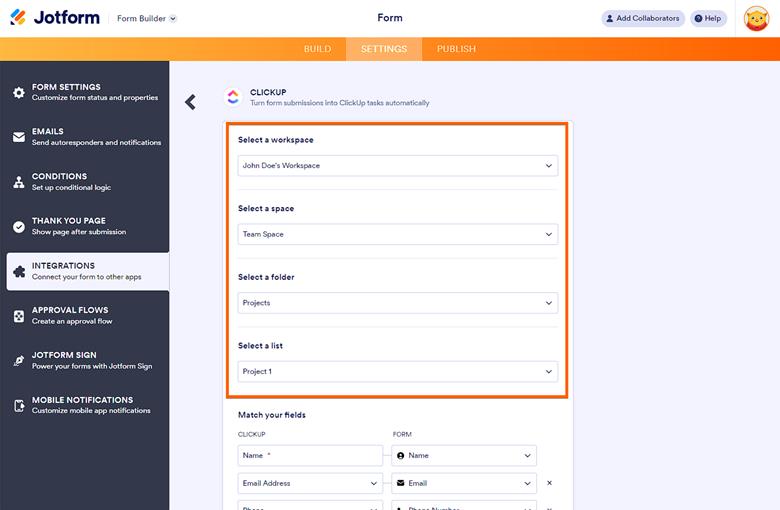
- Match your form fields from ClickUp and the form.

- Click Save.
Enhance ClickUp’s functionality with Jotform
Whether you’re collecting task requests, project information, or file uploads, you can do it all with Jotform and sync it with ClickUp. Our integration empowers you to automatically create new tasks, subtasks, and comments in ClickUp with Jotform forms, ensuring your project details are organized and ready to tackle anytime.
With Jotform’s thousands of form templates, you don’t have to devote hours of your day creating forms from scratch. Simply choose a template, tailor it to your needs in the Form Builder, and connect it to ClickUp within minutes.
Increase your organization’s productivity with ease when you use Jotform and ClickUp together. Give it a try for free today.


")


Send Comment: