-
ActuelburoDemandé le 31 décembre 2024 à 11:20
Bonjour,
Je sollicite votre aide concernant la mise en place d’un flux spécifique pour un formulaire de demande de prêt de véhicule. Voici les étapes que je souhaiterais automatiser :
- Étape utilisateur :
- L'utilisateur remplit un formulaire pour demander un véhicule de prêt.
- Une fois le formulaire validé par l'utilisateur, je dois recevoir une notification par e-mail pour en être informé.
- Étape de gestion :
- Après avoir reçu la notification, il devrait m’être demandé de renseigner l’affectation du véhicule de prêt en reprenant automatiquement les informations saisies par le demandeur dans son formulaire.
- Confirmation au demandeur :
- Une fois que j’ai validé l’affectation, le demandeur doit recevoir une confirmation par e-mail accompagnée du formulaire de départ de prise en charge du véhicule de prêt.
- Signature finale :
- Lorsque le demandeur signe le formulaire, je dois à nouveau être notifié par e-mail pour m’assurer qu’il a bien pris en charge le véhicule.
Je rencontre des difficultés pour mettre en place ce processus en cascade et j'aurais besoin de votre support pour automatiser et organiser ces étapes de manière optimale.
Merci d’avance pour votre aide et votre retour.
Cordialement,
-
Gaud Jotform SupportRépondu le 31 décembre 2024 à 14:20
Hi Actuelburo,
Thanks for reaching out to Jotform Support. Our French Support agents are busy helping other Jotform users right now, so I'll try to help you in English using Google Translate, but you can reply in whichever language you feel comfortable using. Or, if you'd rather have support in French, let us know and we can have them do that. But, it might take a while until they're available again.
Now, coming back to your question, you will need to use the workflow to achieve the results. Here is a guide on how to use the workflow on Jotform. This link to the guide to the workflow automation you should go through. You can add three different forms and join all together in the workflow with the task element, and approve and sign with the prefill feature. Allow me some time to check on this, and I'll get back to you with an update.
Thanks for your patience and understanding, we appreciate it.
-
Gaud Jotform SupportRépondu le 1 janvier 2025 à 18:49
Hi Actuelburo,
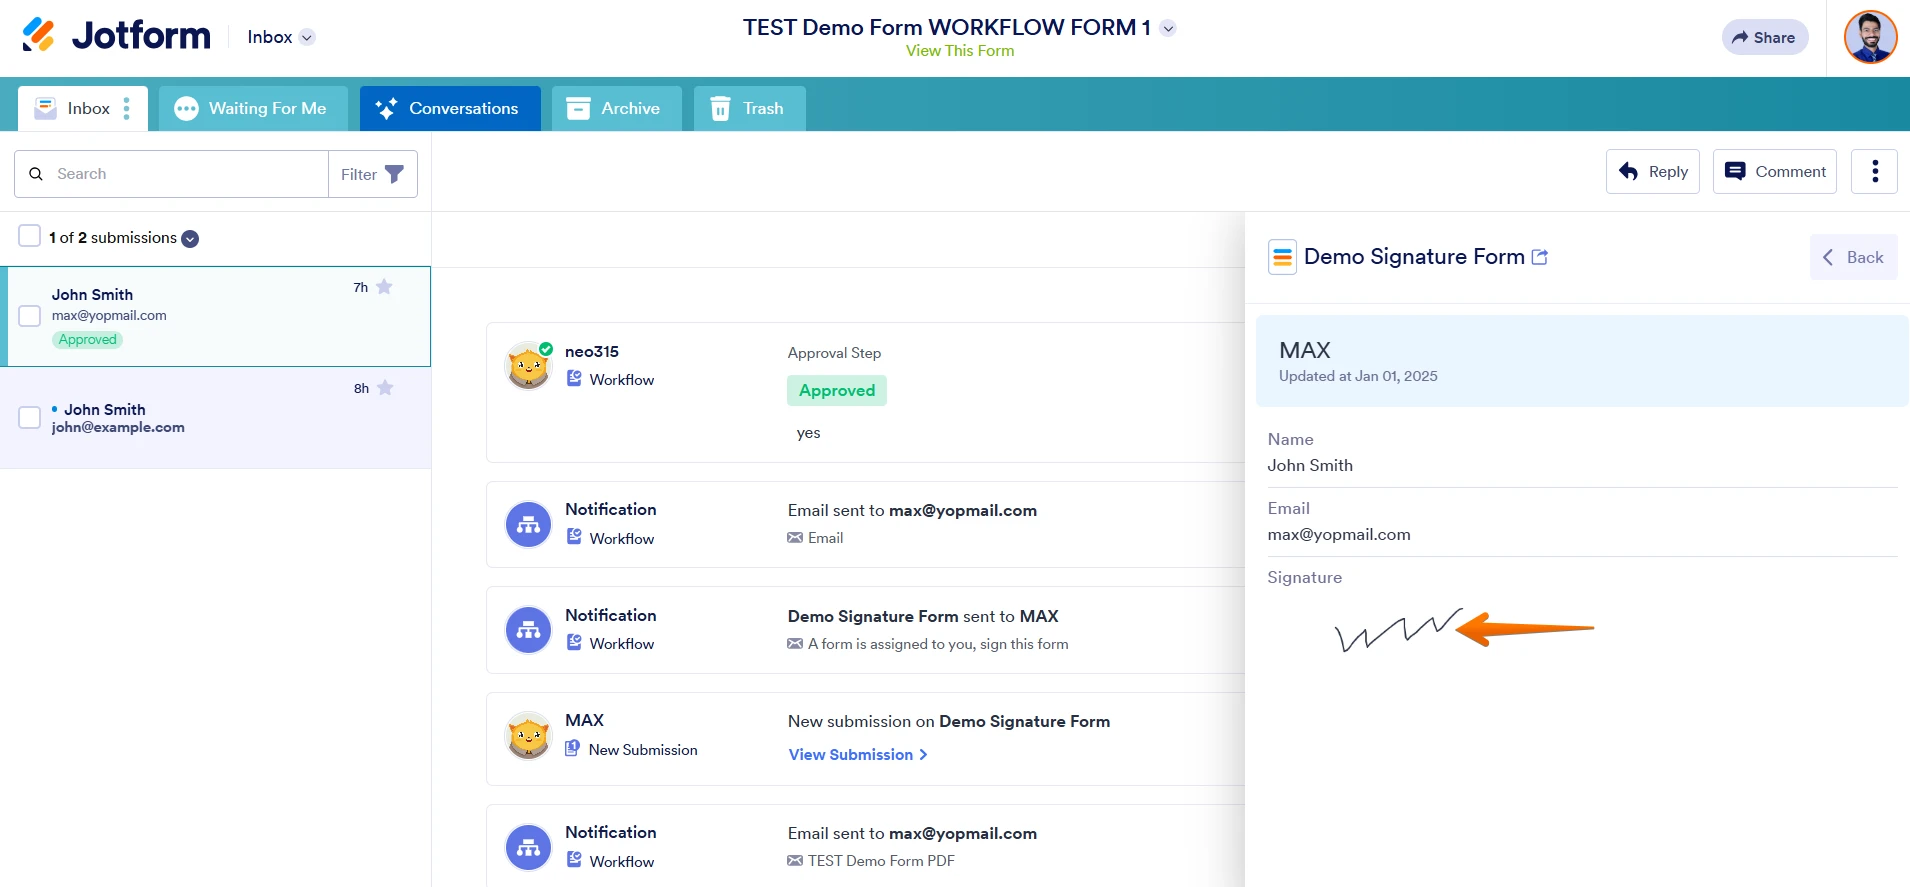
I've got an update on your request. While I was checking, I noted that you can't add the signature field to the task element in the workflow builder. So, I suggest you to create 2 forms, the first one will be basic one where you will receive the all the details from your form filler and the second one will be getting their signatures. You can use to prefill the form from the first form to the second one so, you won't have to manually fill all the data. Let me share the screenshot how it should look link:
 For the first stage, you can set up the Notification Email. So, once your form filled out, you will be notified. You can easily Set Up a Notification Email, so that you'll get an email after someone fills out your form. Let me show you how:
1. In Form Builder, in the orange navigation bar at the top of the page, click on Settings.
2. In the menu on the left side of the page, click on Emails.
3. Now, click on Add Email.
4. In the list that comes up, select Notification Email.
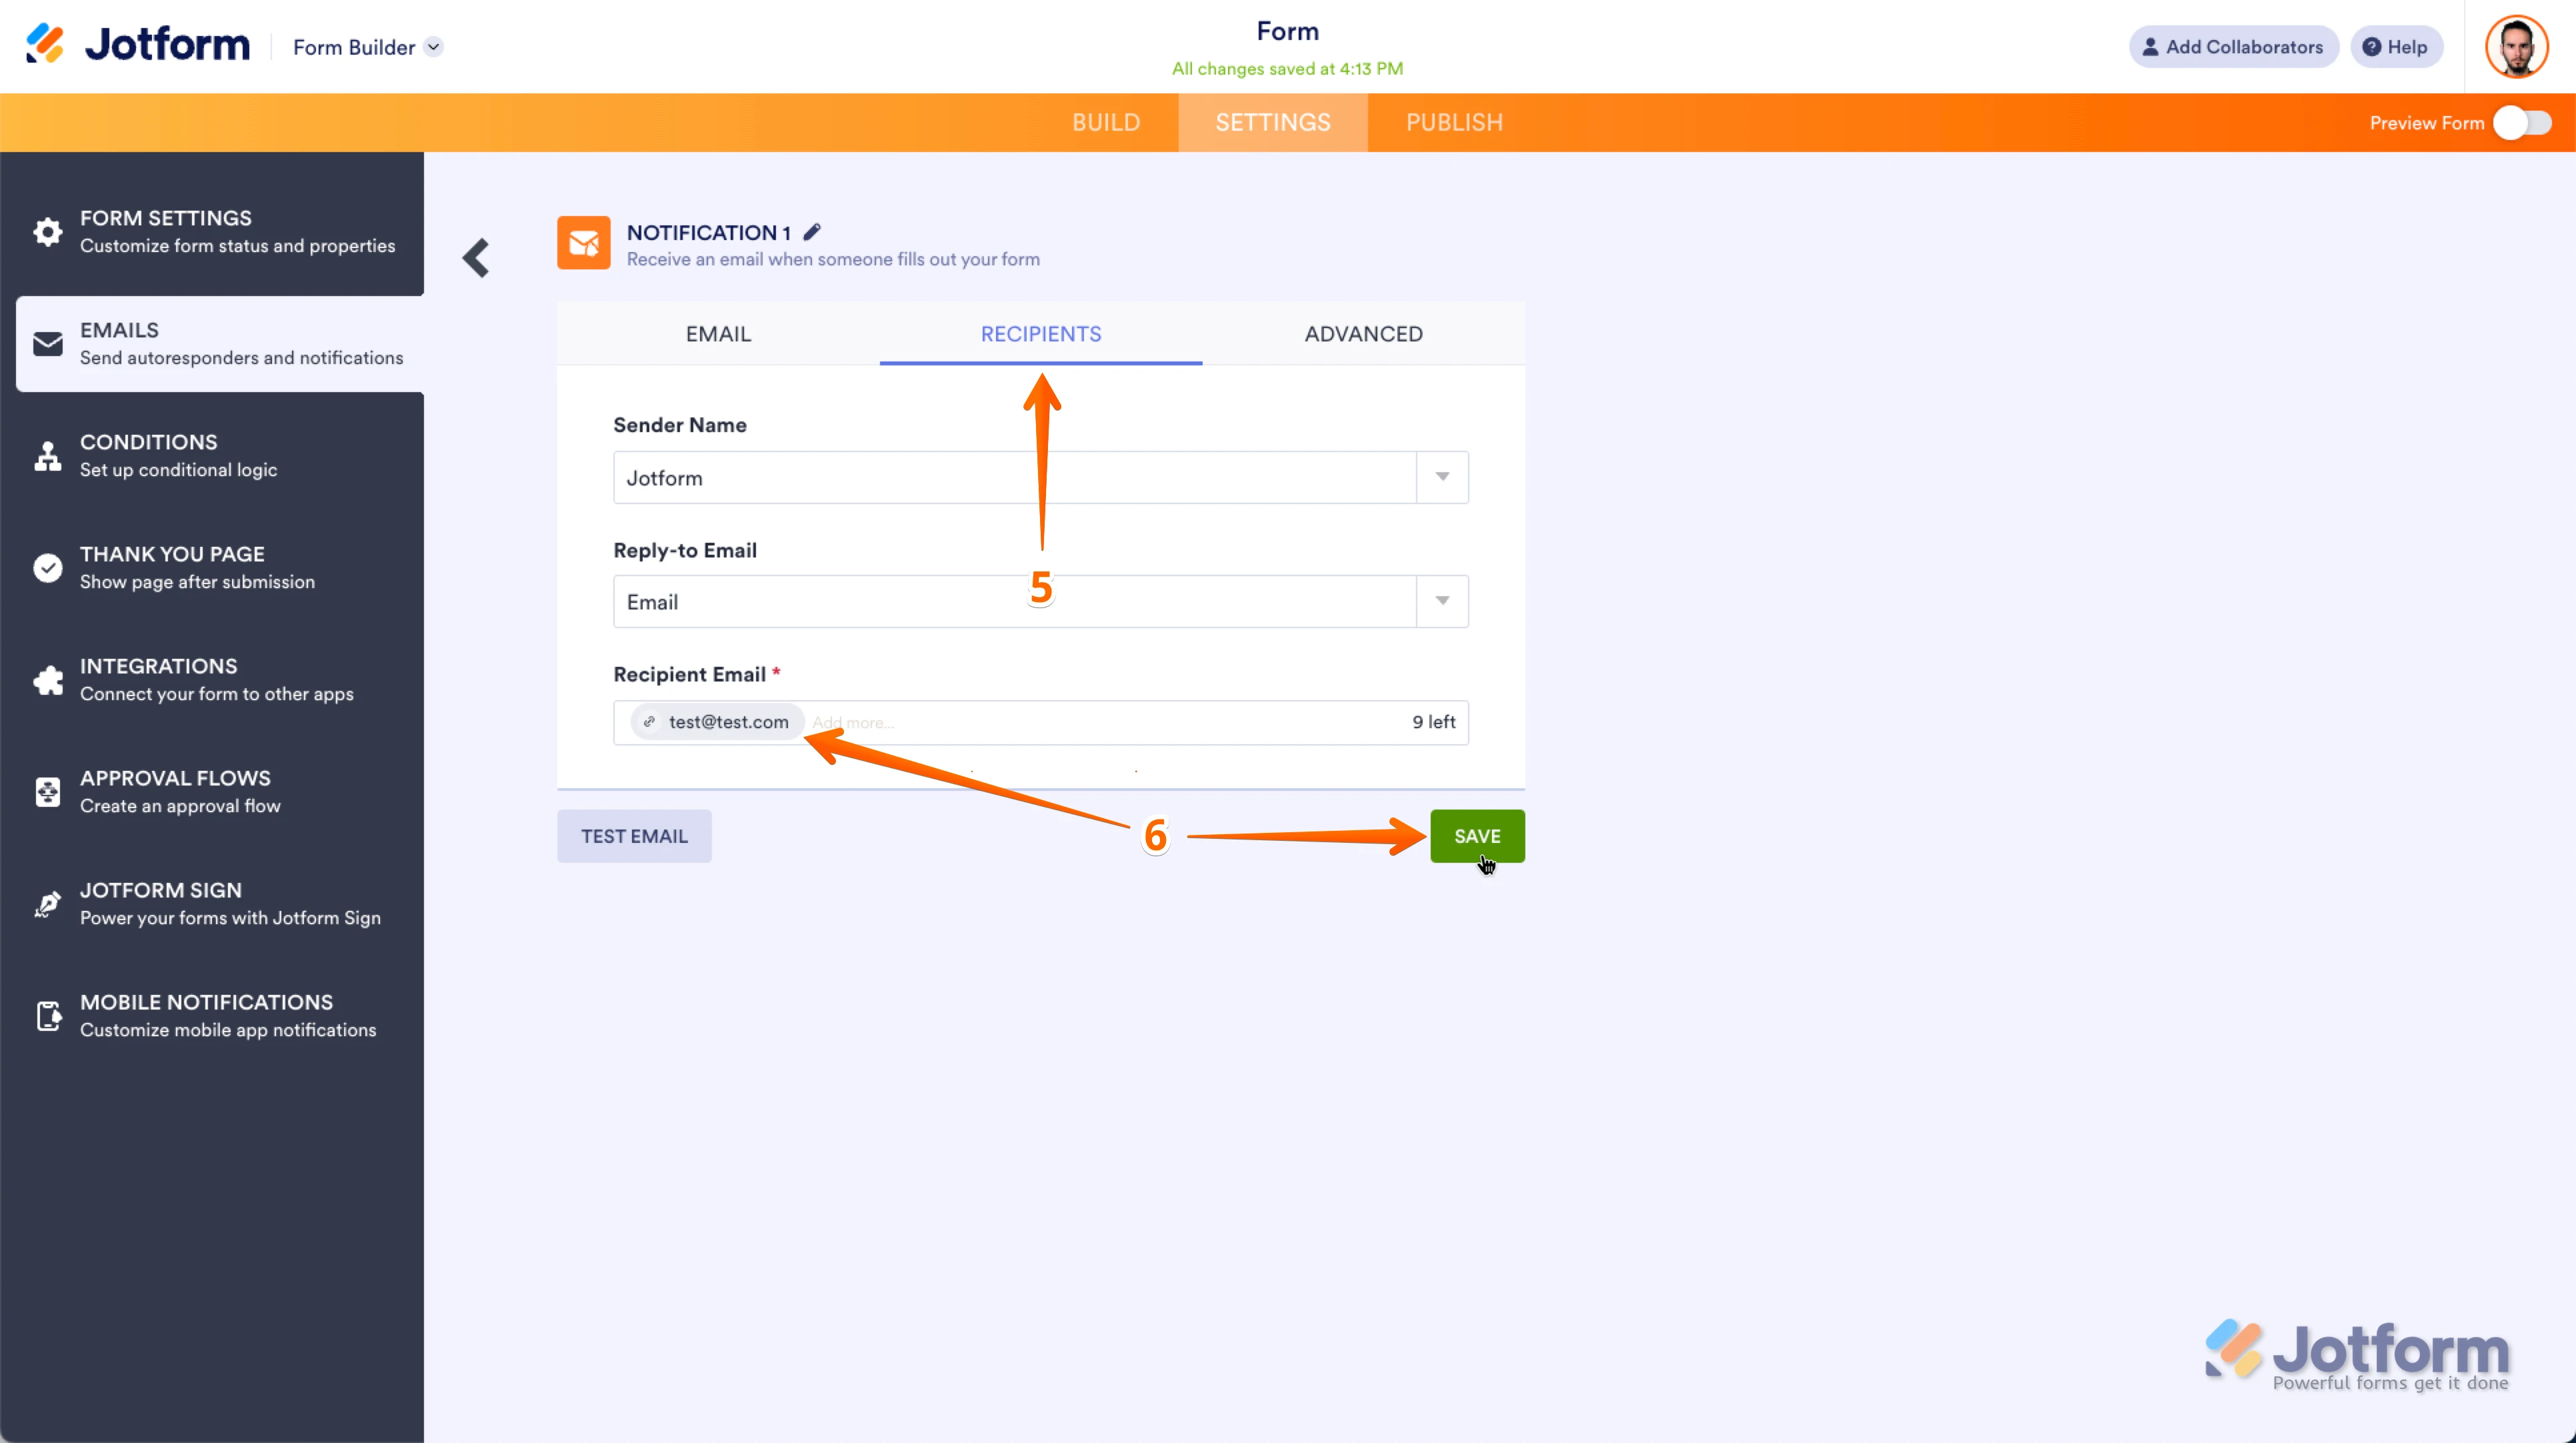
5. In the center of the next window, click on the Recipients tab.
6. Now, just enter your email address into the Recipient Email field, and click on Save. That's it, you're done.
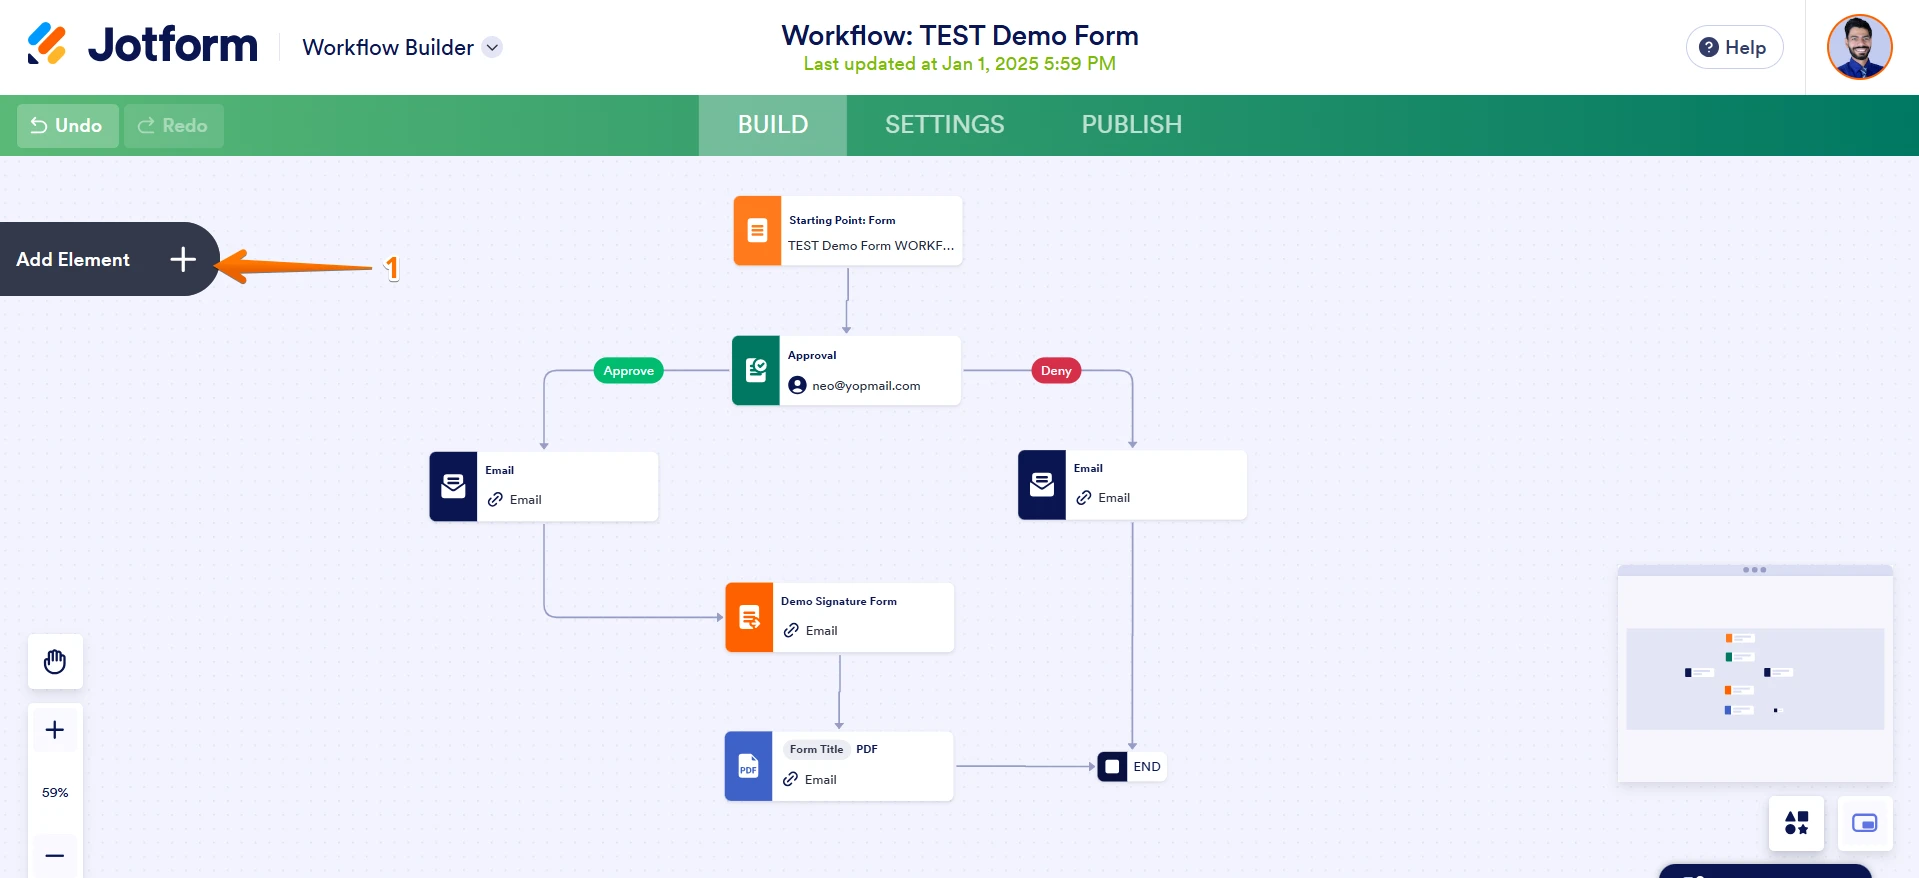
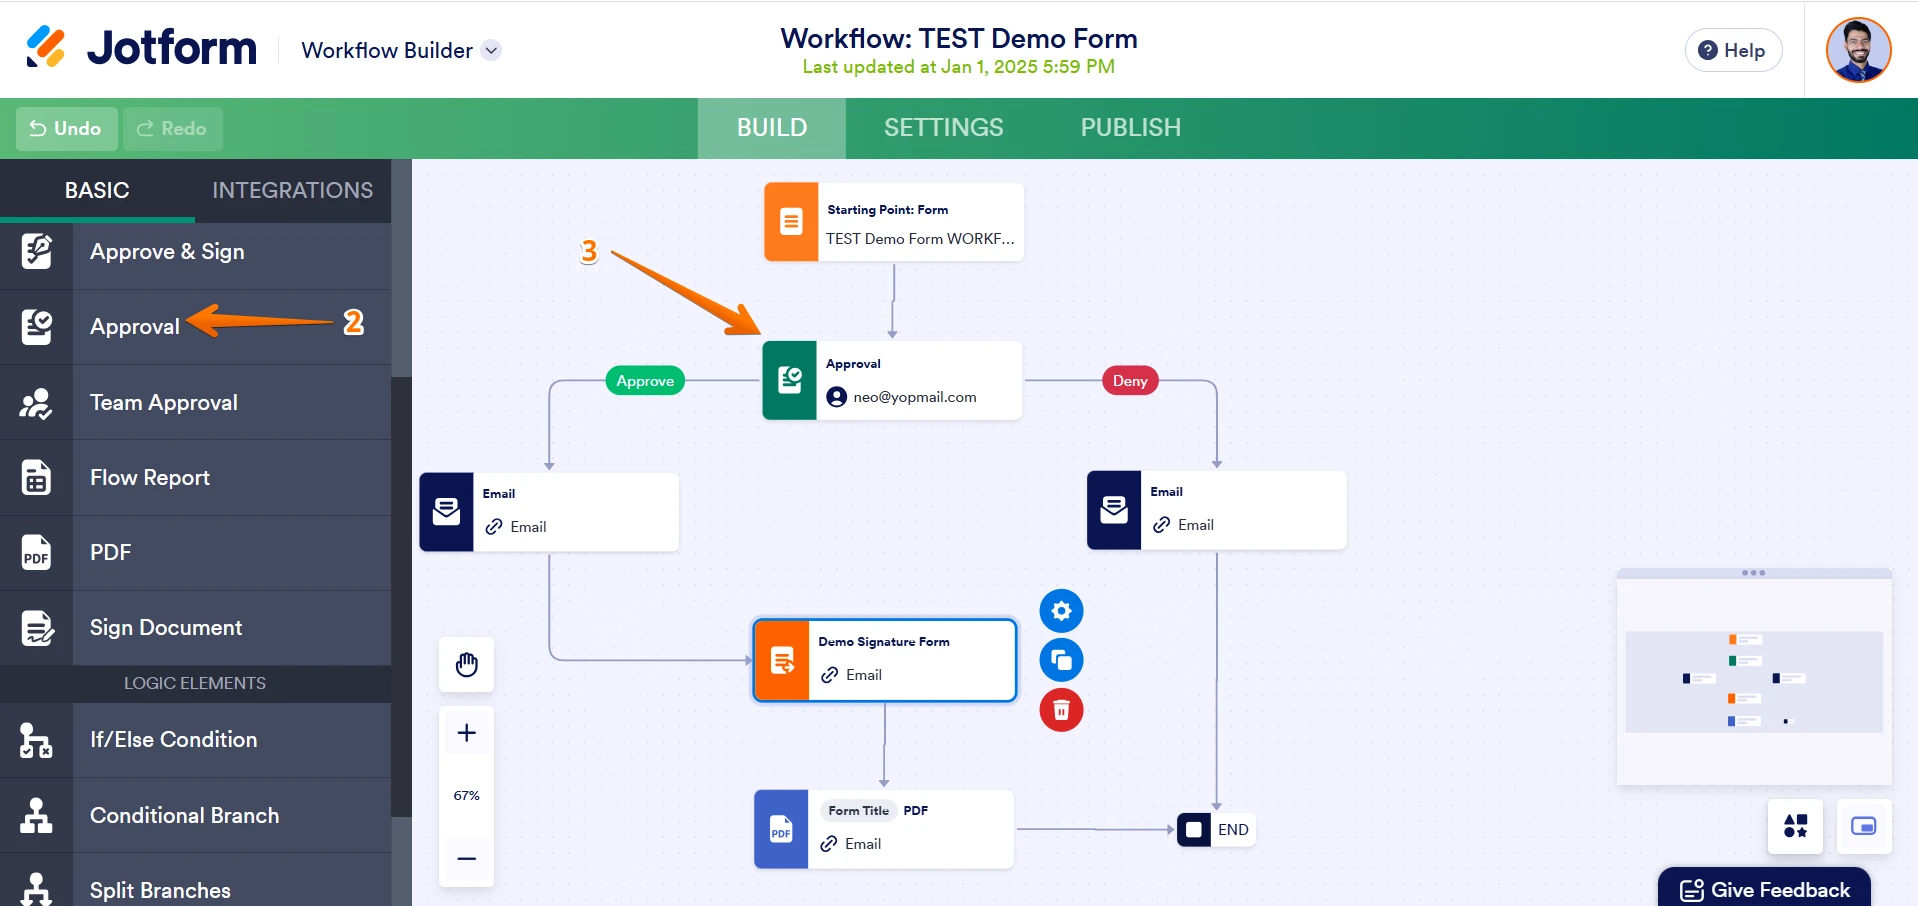
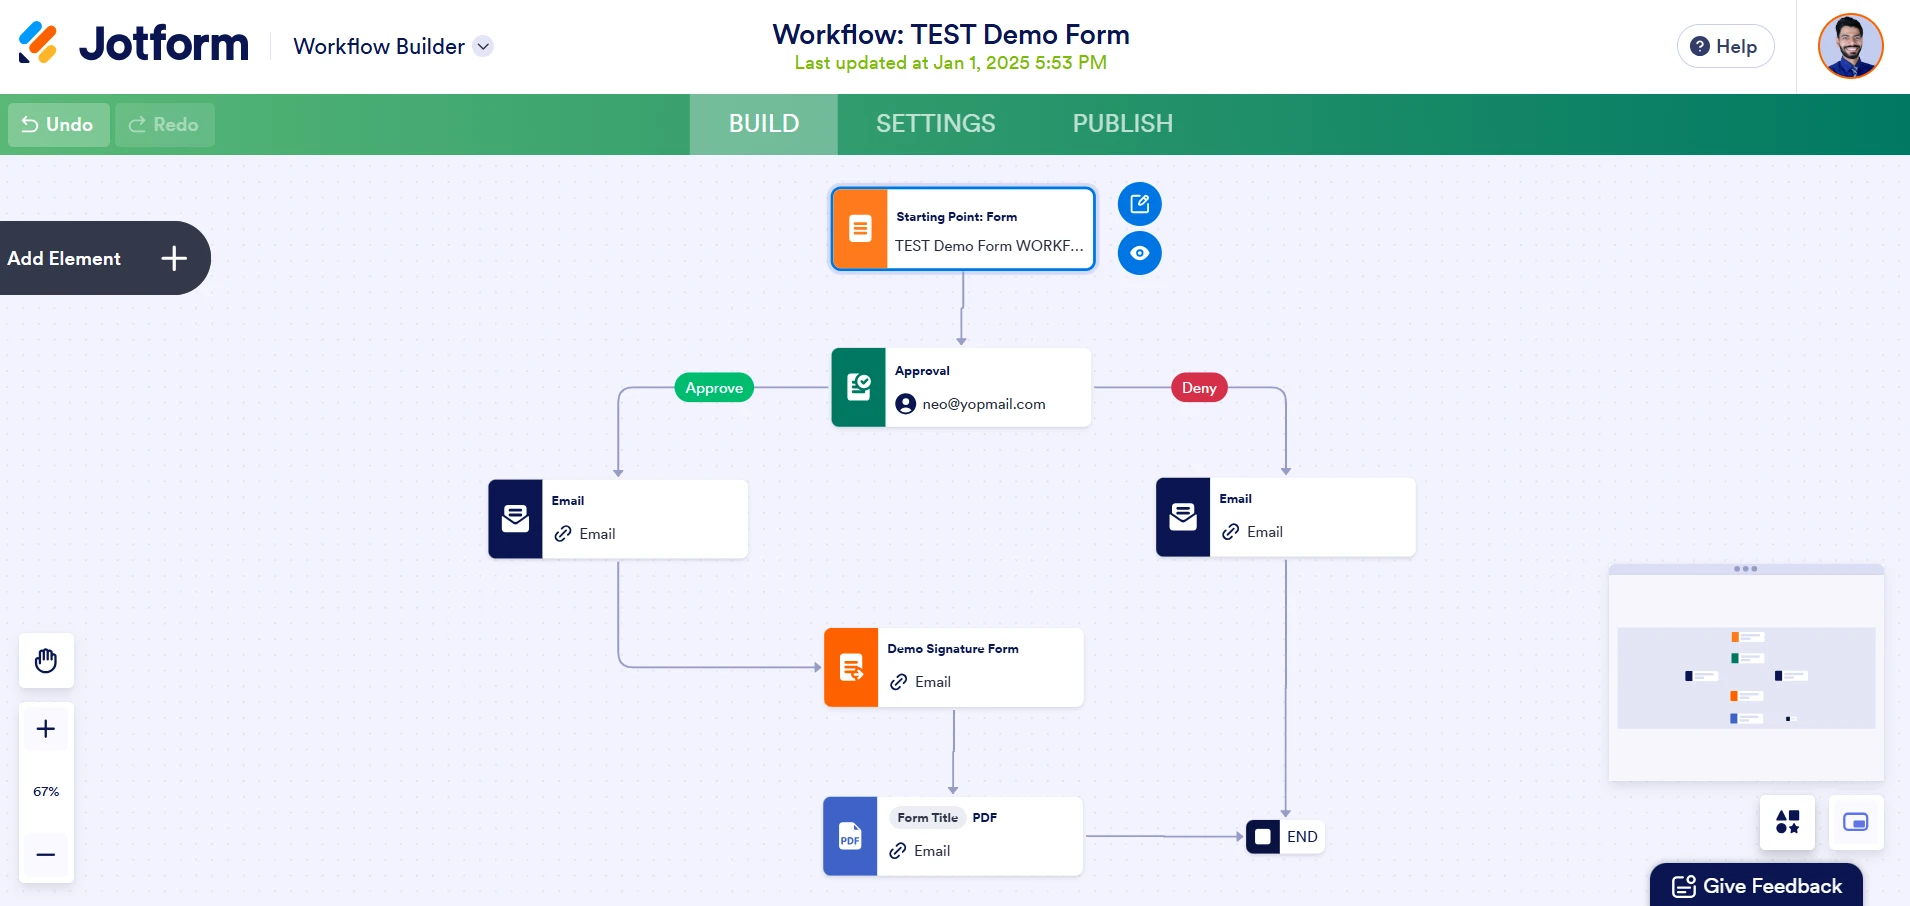
For the second stage, the approval element will help you to decide if you want to approve or deny the application. - On the Workflow builder, in the green navigation bar at the top of the screen, click on the Add Elements under the Build section.
- Select Approve element to approve or deny the application.
- Drag and drop in on your Workflow Builder.
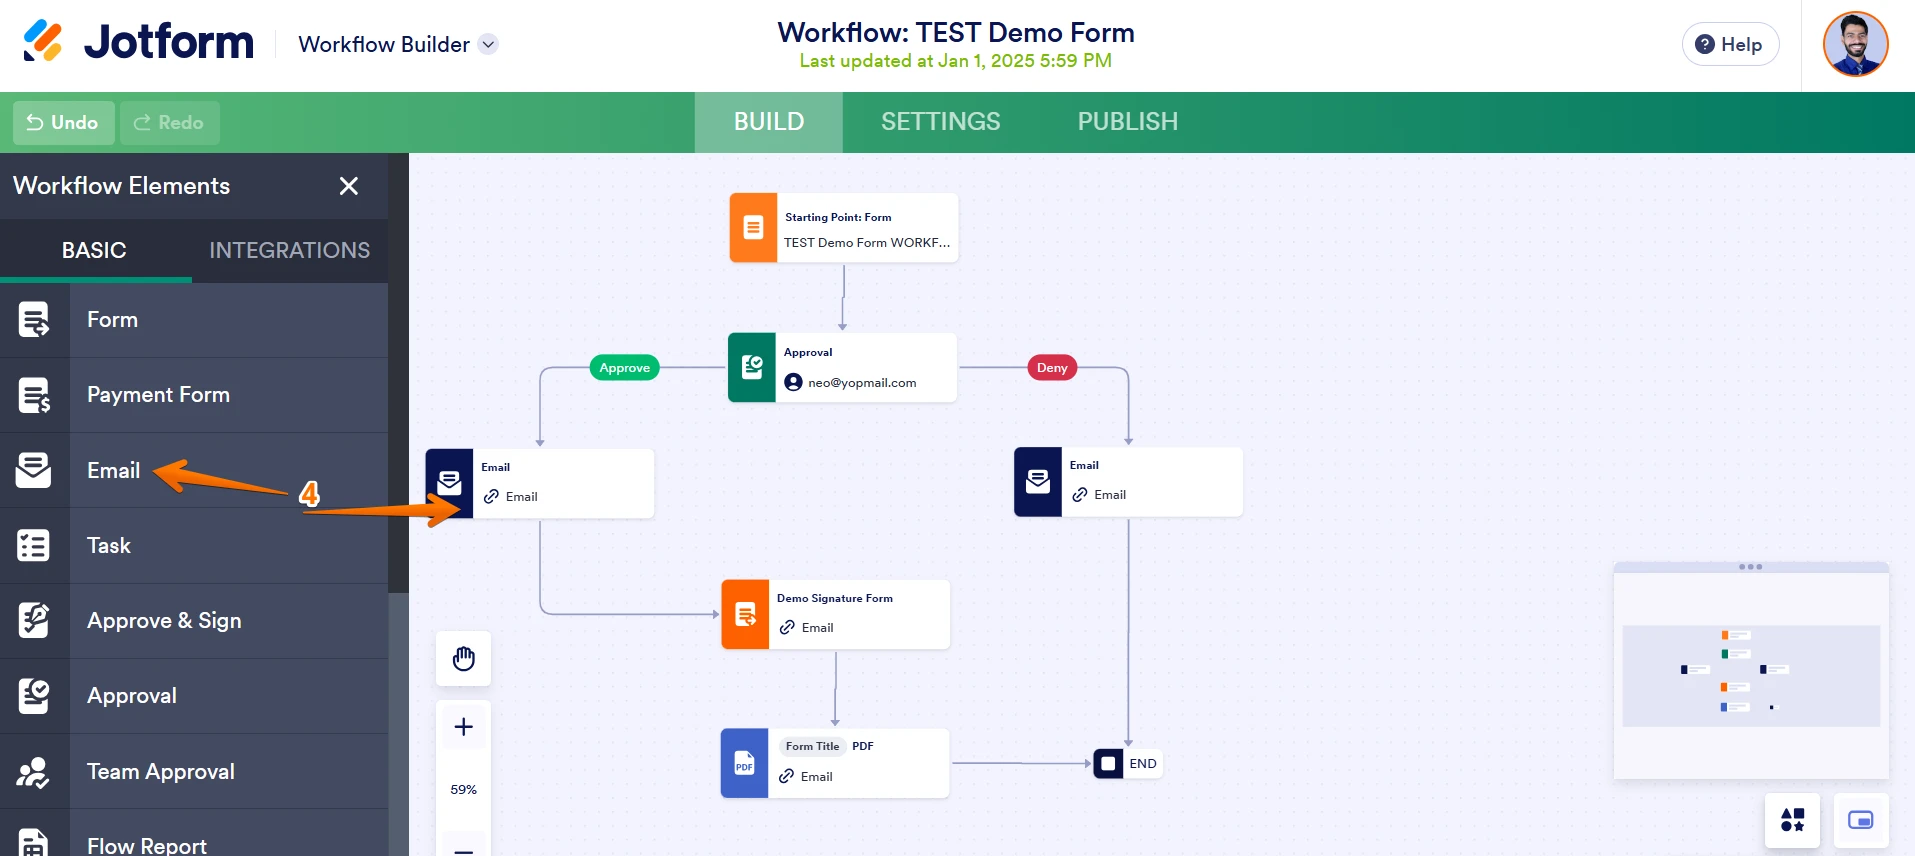
- Add the Email element so, the form filler can receive the confirmation email.
In the last stage you will add the second form which will contain the signature element on the form, so, your form filler to validate it and this element should enable the prefill feature, and you can also add the PDF element where you can choose which form you want to send to your form fillers once you have approved and they signed. Let me show you how;
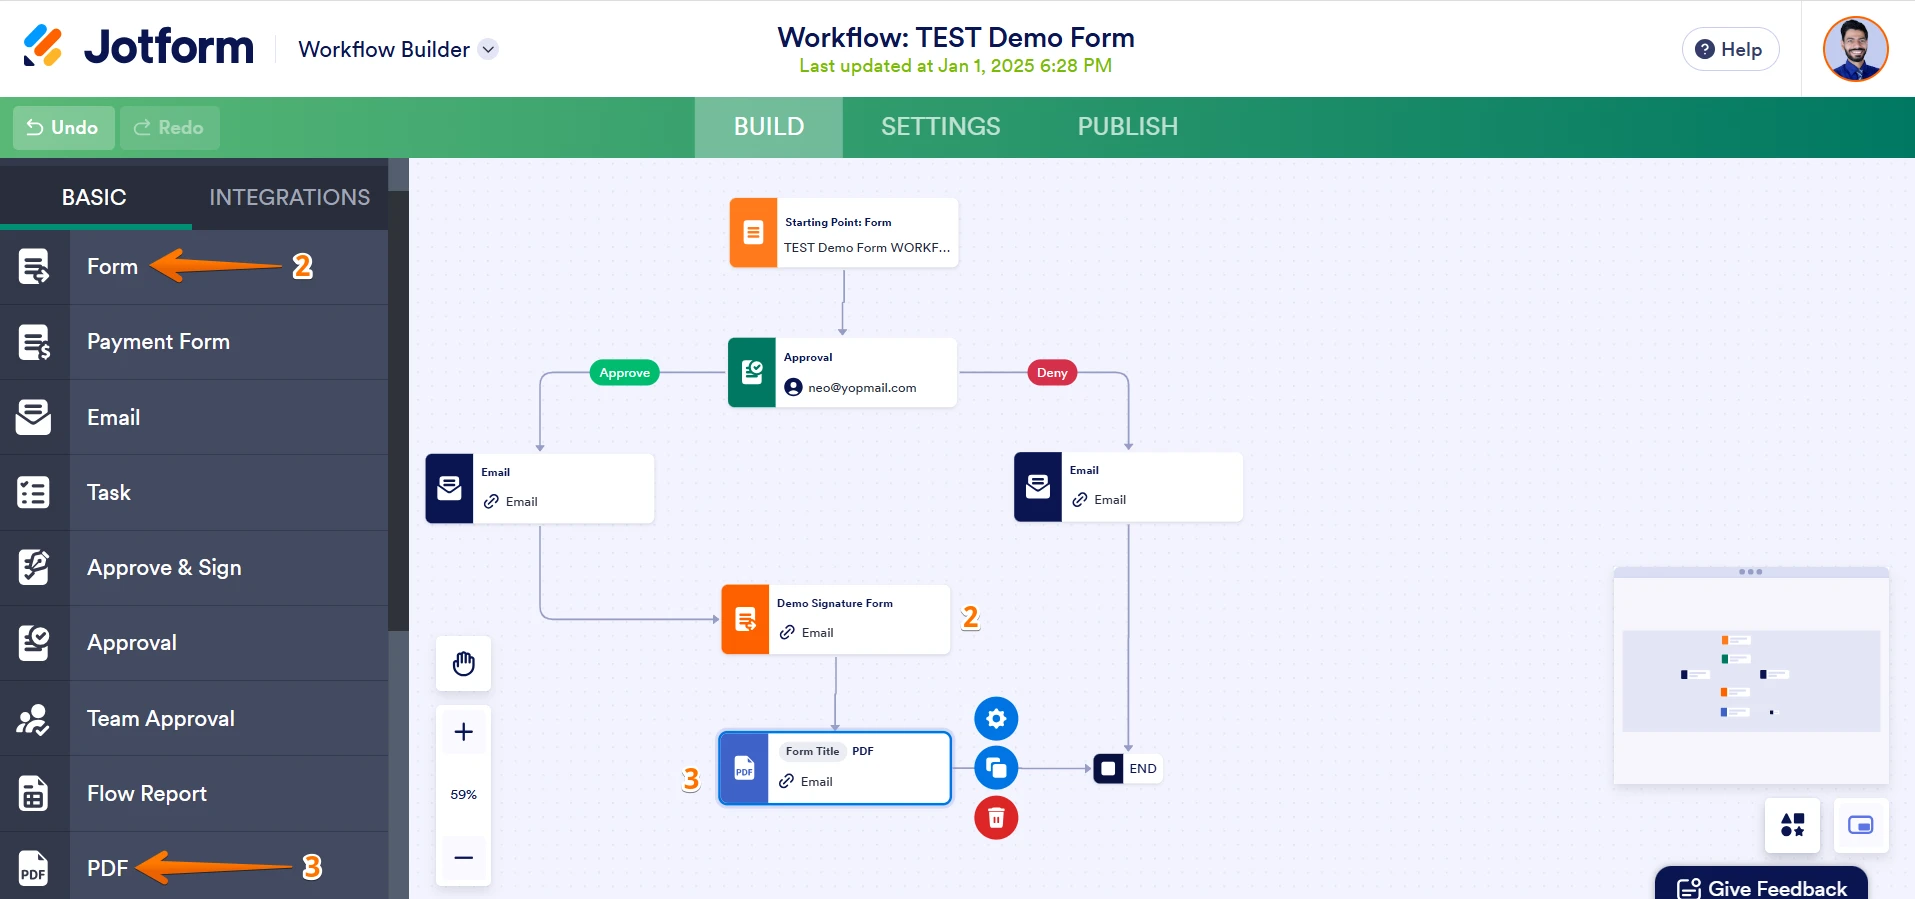
- On the Workflow builder, in the green navigation bar at the top of the screen, click on the Add Elements under the Build section.
- Choose Form element and then PDF element.
- Click on the Blue gear icon of the Form Element to open the settings. Choose Email in the Assignee field.
- Select the Prefill option, Turn the toggle On, select the First form.
- Match the fields. Click on the Save button. That's it.
Here is my demo form first form, you can check it out. This link is for the workflow, and here is a link of my second form that asks for the signature. This guide will show you how you can clone a form using its URL.
Give it a try and let us know if you need any help.
- On the Workflow builder, in the green navigation bar at the top of the screen, click on the Add Elements under the Build section.


 For the first stage, you can set up the
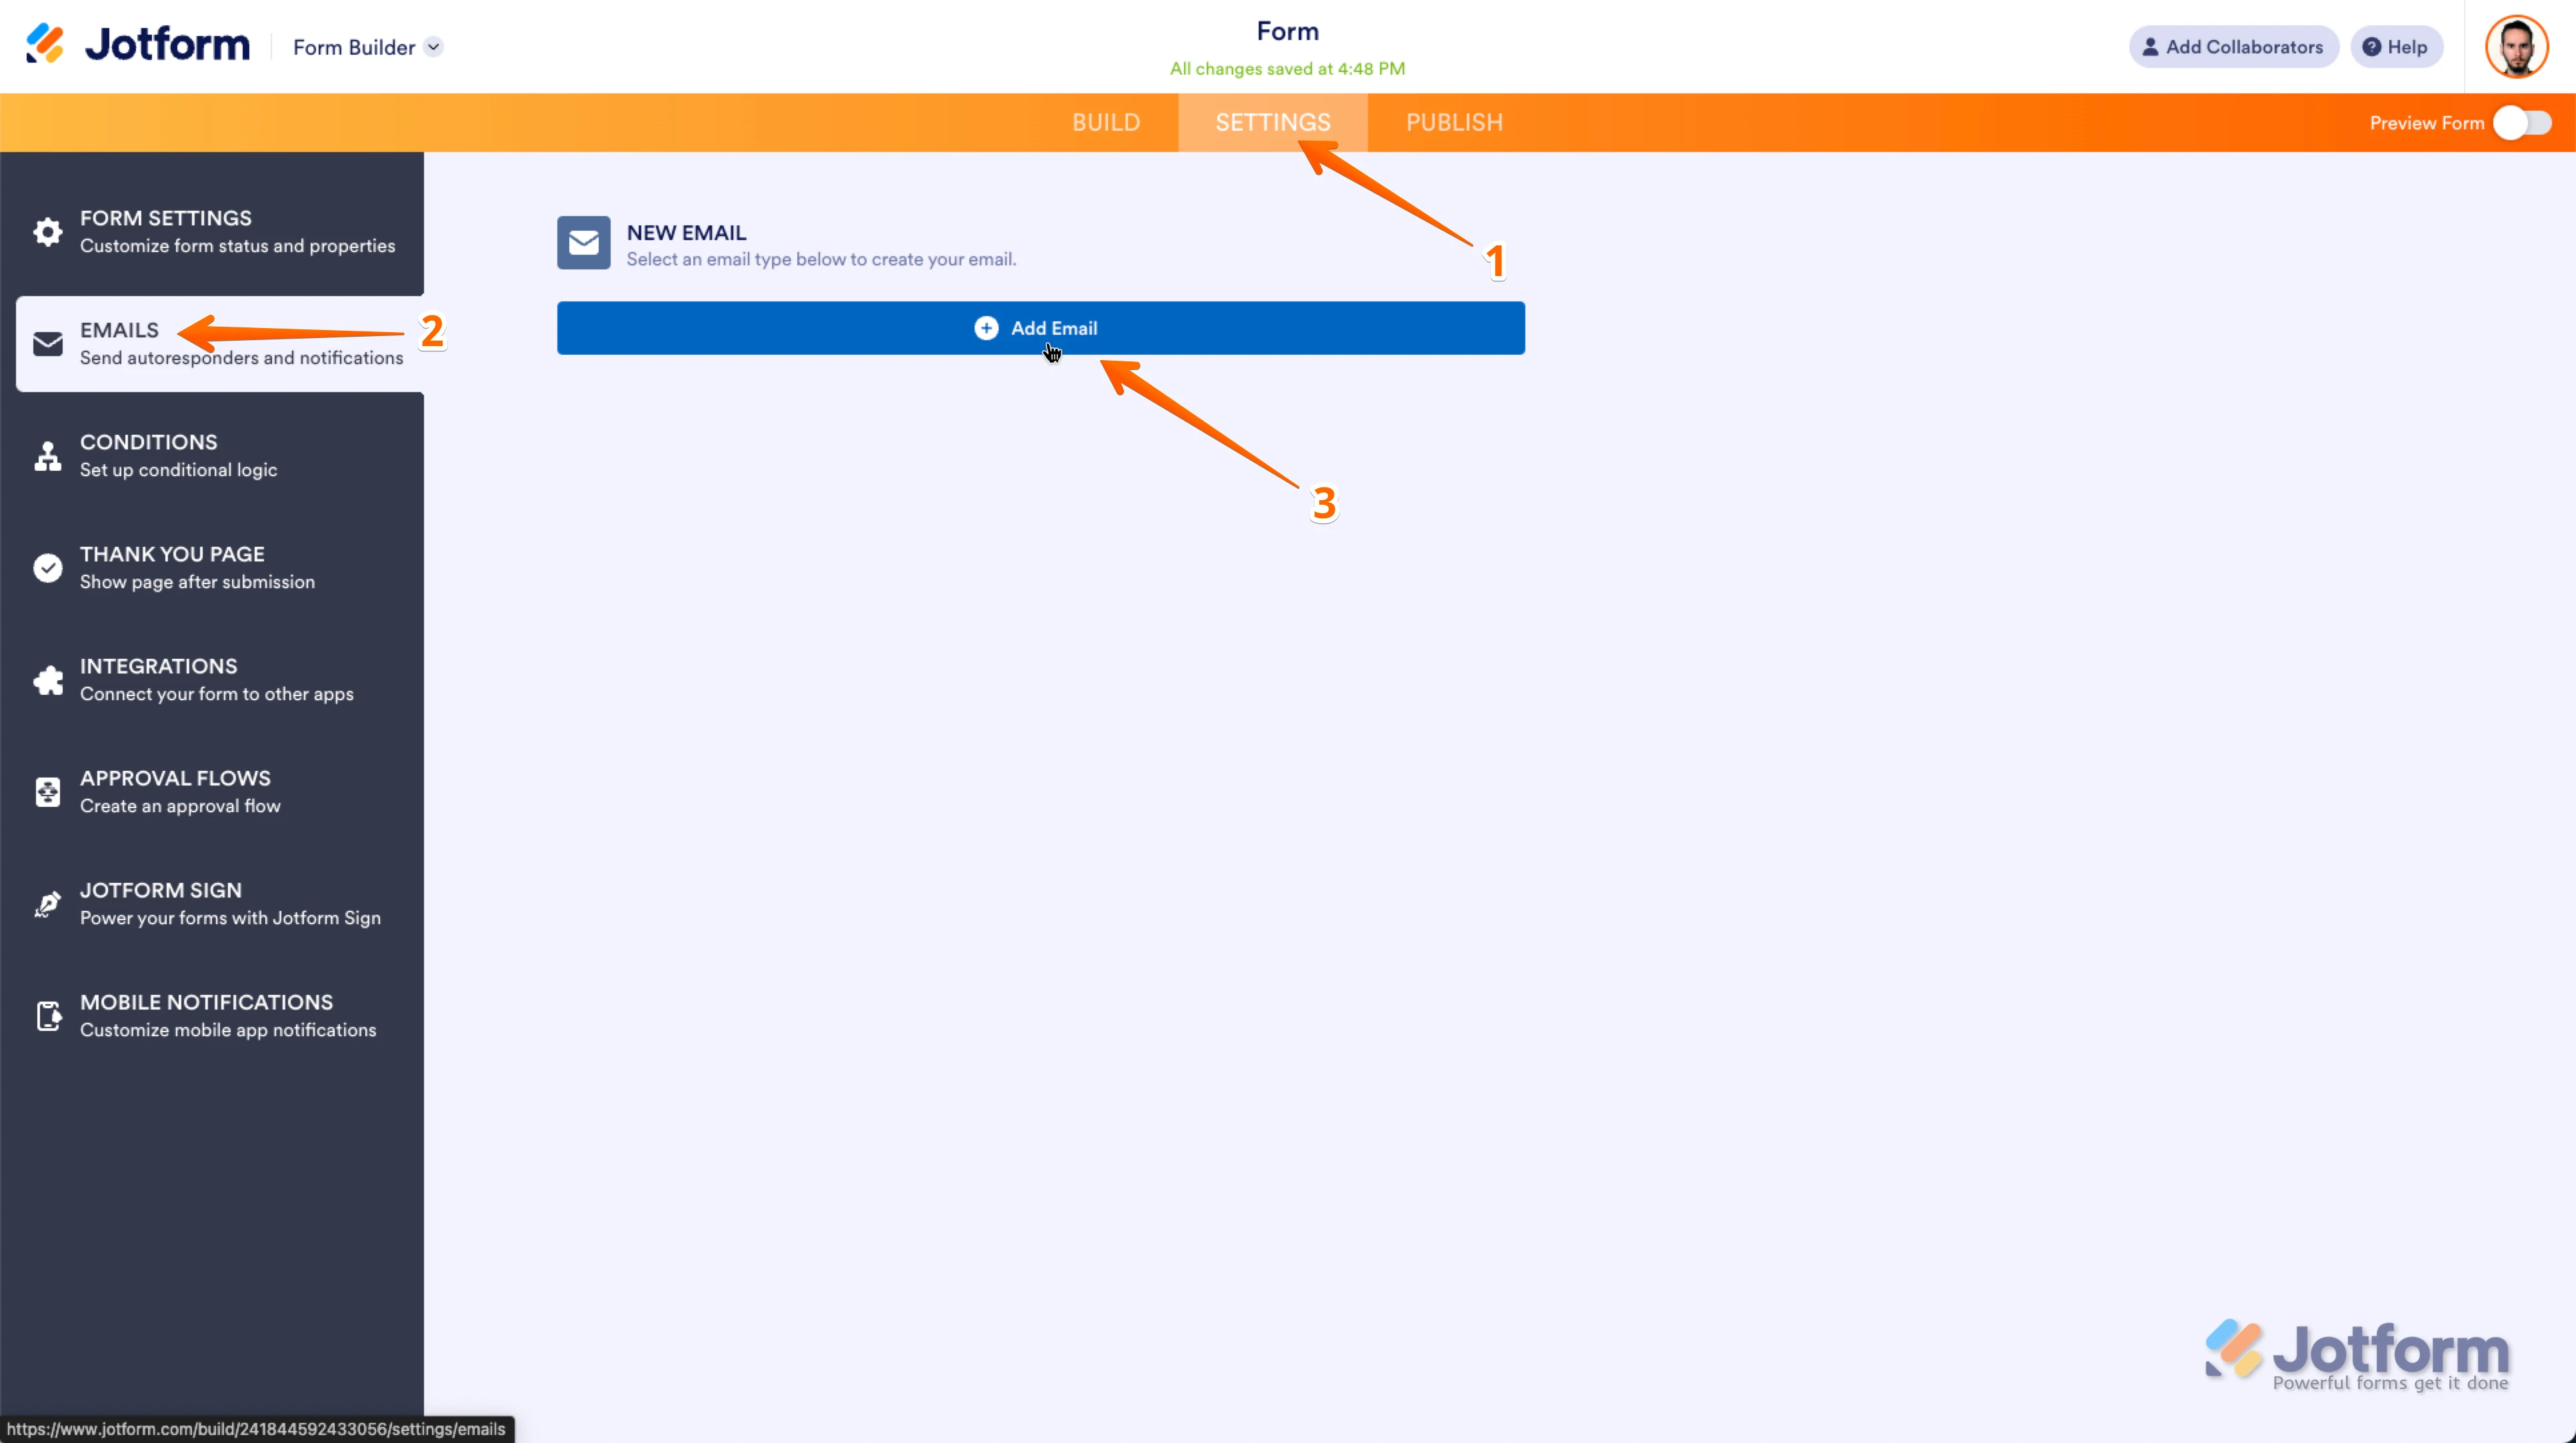

 For the second stage, the approval element will help you to decide if you want to approve or deny the application.