Jotform makes it easy to connect your forms with Freshdesk so you can turn submissions into support tickets automatically. Whether you’re managing customer inquiries or internal requests, this integration helps you stay organized and respond faster—all without switching between platforms.
Whether you’re creating a new form or updating an existing one, integrating it with Freshdesk only takes a second—here’s what to do:
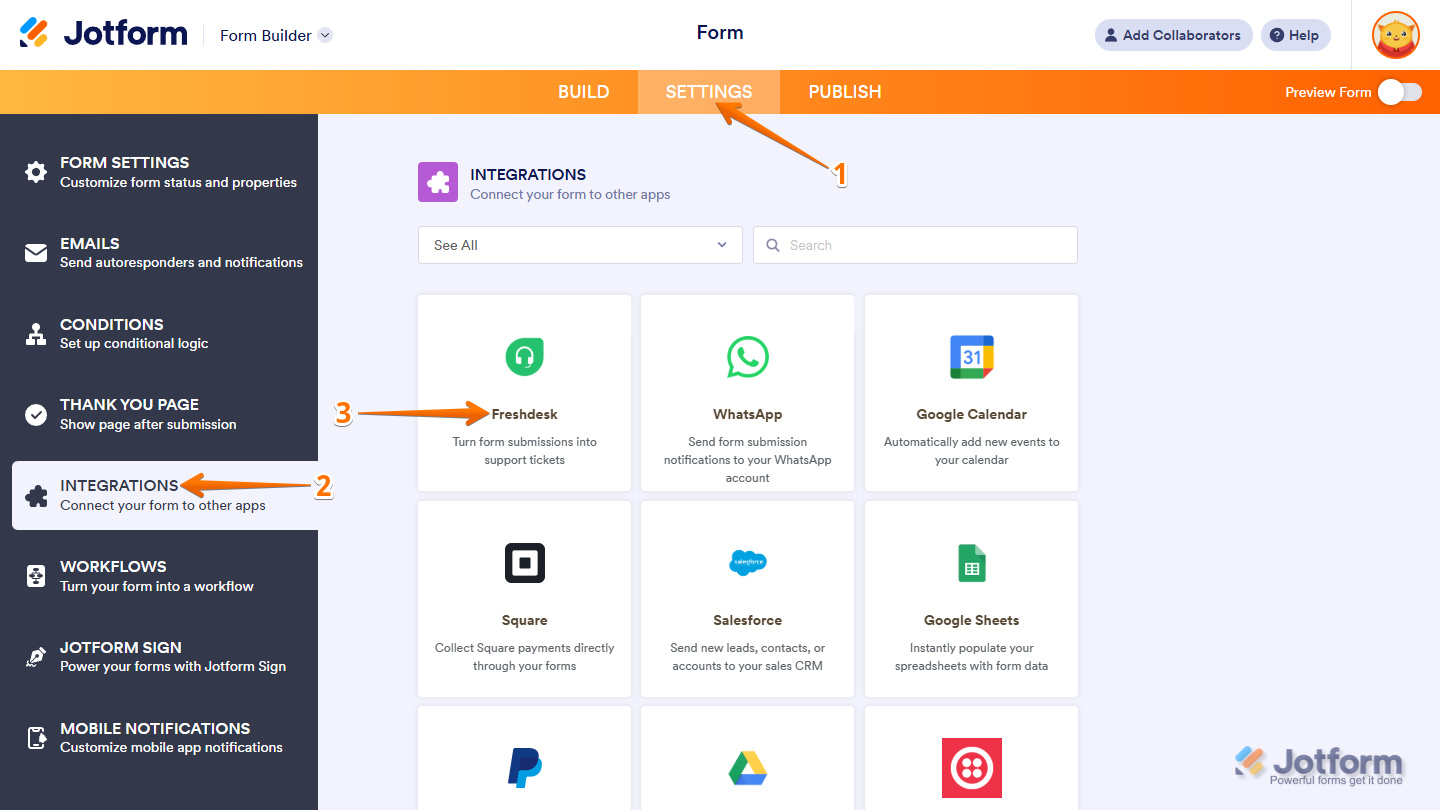
- In Form Builder, in the orange navigation bar at the top of the page, click on Settings.
- In the menu on the left side of the page, click on Integrations.
- Then, click on FreshDesk.
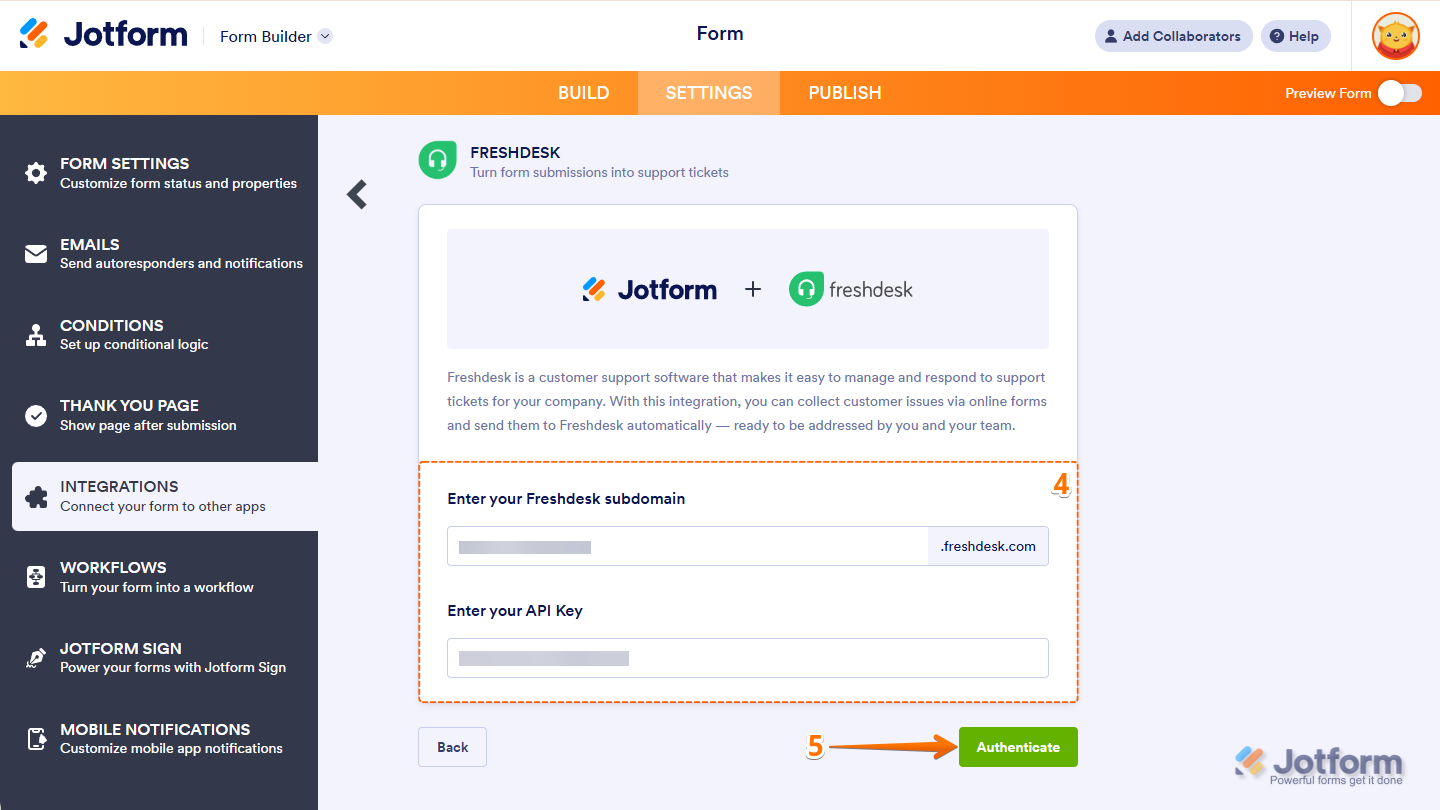
- Next, fill in these details:
- Enter Your Freshdesk Subdomain — This is the beginning of your Freshdesk URL (like acme if your URL is acme.freshdesk.com).
- Enter Your API Key — This is used to authenticate your Freshdesk account. Take a peek at our guide on How to Find Your API Key in Freshdesk to learn more.
- Then, click on Authenticate.
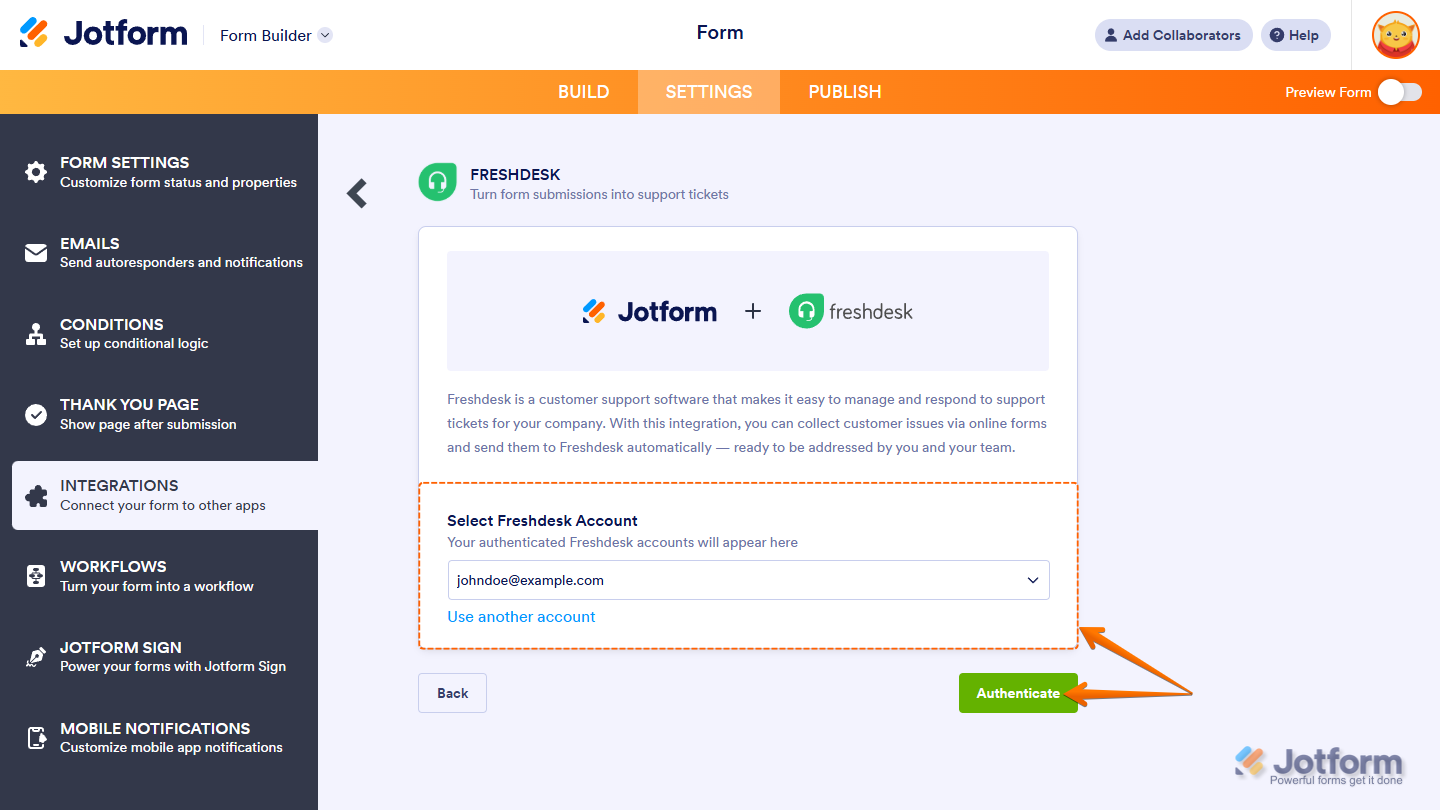
If you’ve logged in before, just select your Freshdesk account in the Dropdown menu. To use a different one, click on Use another account.
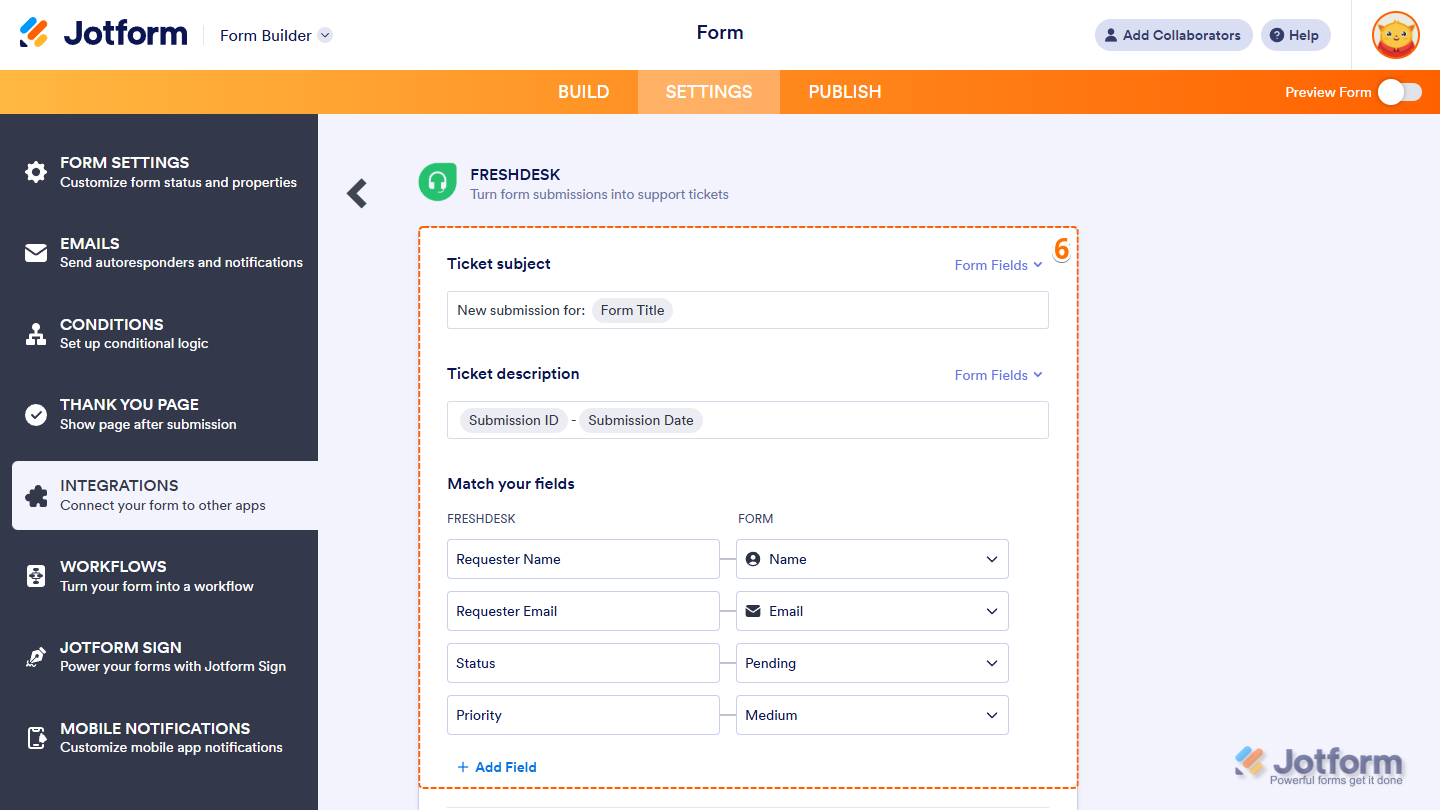
- Now, set up these things:
- Ticket Subject — Select a form field to use as the subject line of the Freshdesk ticket.
- Ticket Description — Choose a form field that will be used for the main message or details of the ticket.
- Match Your Fields — Link your form fields to the appropriate ticket fields in Freshdesk. To add more, click on Add Field.
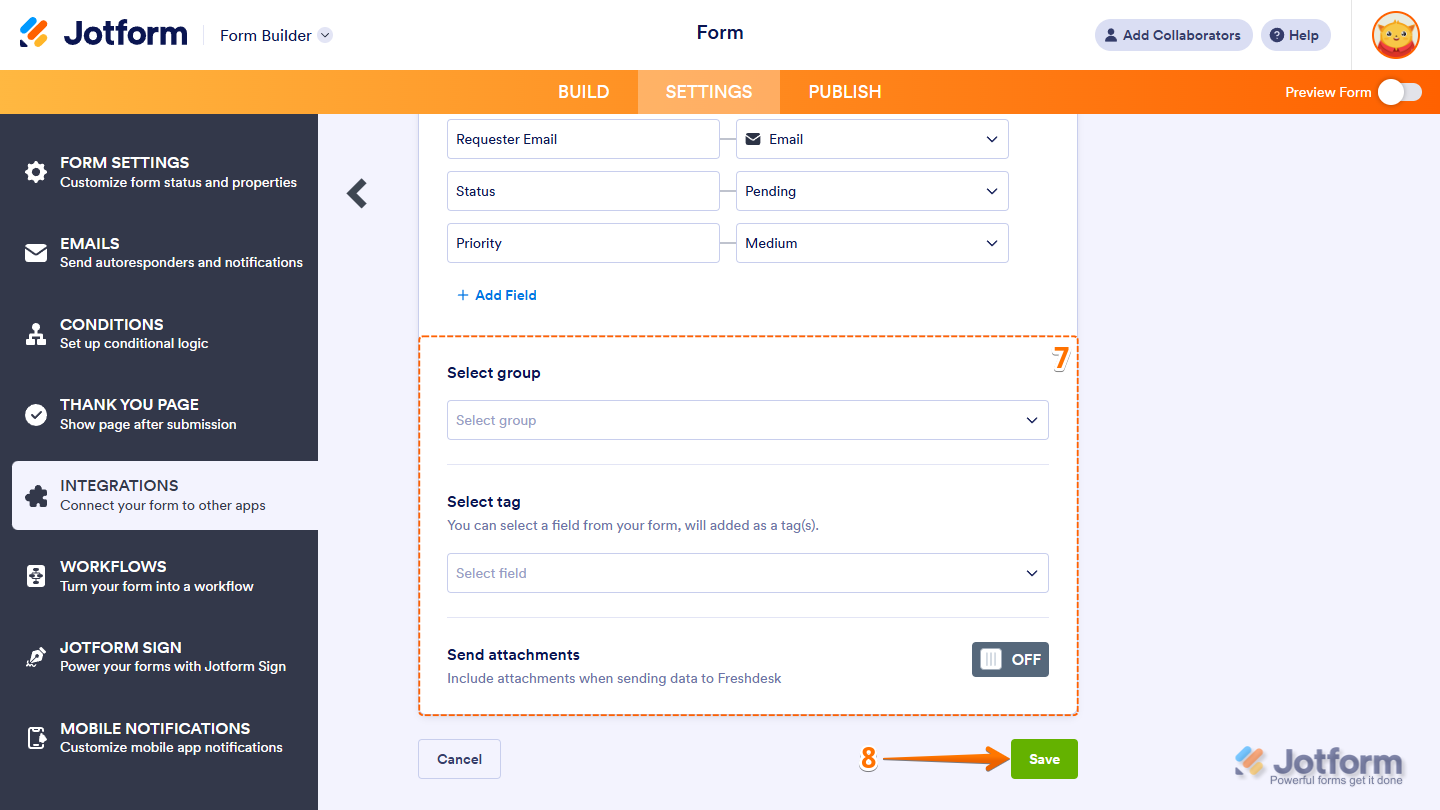
- Then, scroll down to the bottom and continue to set up these options:
- Select Group — Pick the support group you want the ticket assigned to.
- Select Tag — Add a tag to help organize or filter your tickets.
- Send Attachments — Turn this on if you want to include file uploads from your form in the ticket.
- Now, click on Save and you’re all set.
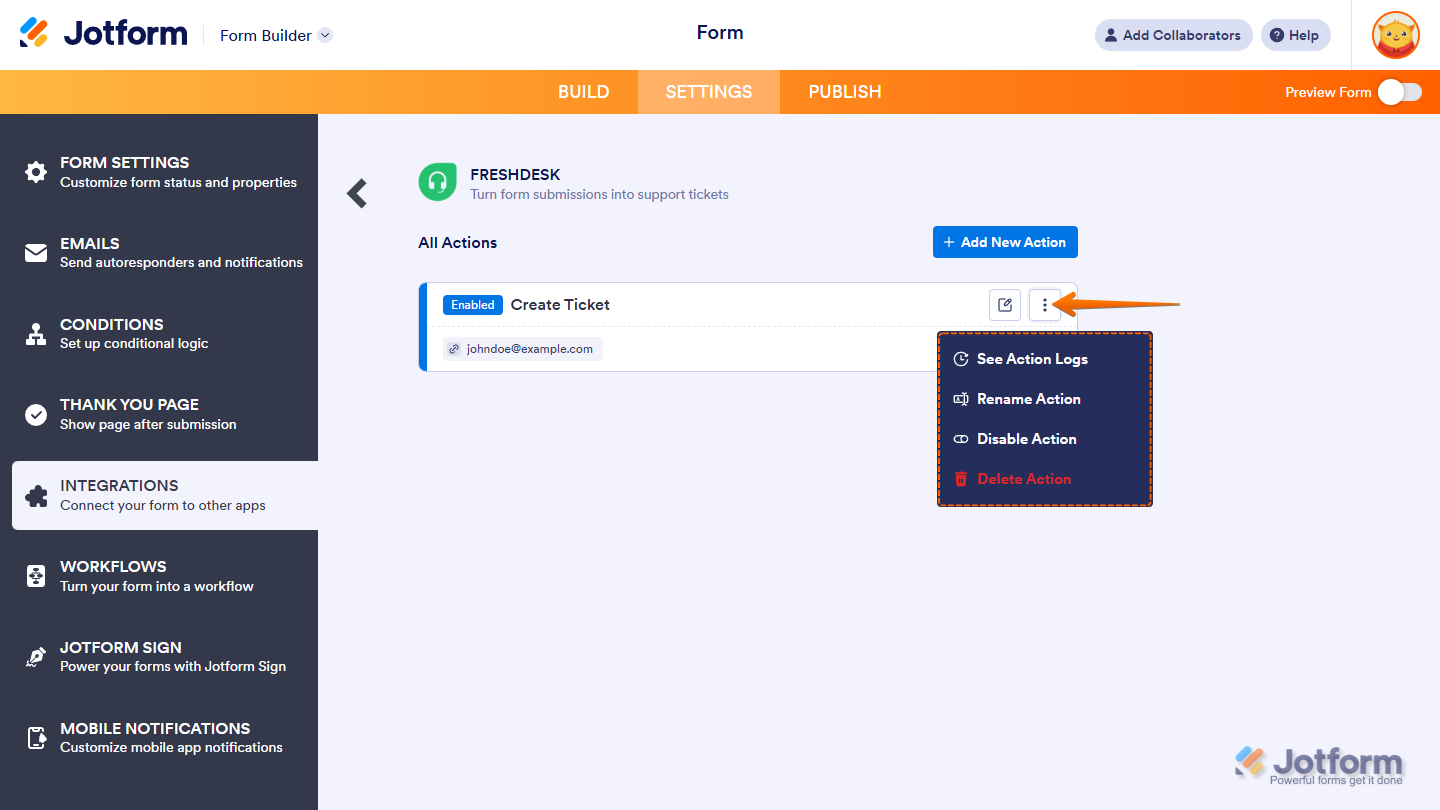
And that’s it! Your form’s now successfully connected to Freshdesk. After saving the integration, you’ll see the list of actions you’ve set up and the Add New Action button on the main page. Hover your mouse over an action and click on the Three Dots icon on the right side of it to access these other options:
- See Action Logs — View successful and failed runs, helpful for troubleshooting.
- Rename Action — Change the action’s title.
- Disable Action — Temporarily stop the integration from sending data.
- Delete Action — Remove the action from your form.

Send Comment: