Afterpay is a buy now, pay later (BNPL) solution that lets your customers split their payments into easy, interest-free installments, with no extra fees for them. It’s available in Australia, Canada, New Zealand, the US, and the UK (as Clearpay). Whether you’re selling products or services, adding Afterpay to your form is quick, simple, and helps make checkout smoother for everyone.
Note
To use Afterpay on your form, simply connect it through the Square Payment Gateway.
Adding and Setting Up Afterpay
Giving your customers the freedom to buy now and pay later with Jotform’s Afterpay integration is smooth and simple. Here’s how to get going:
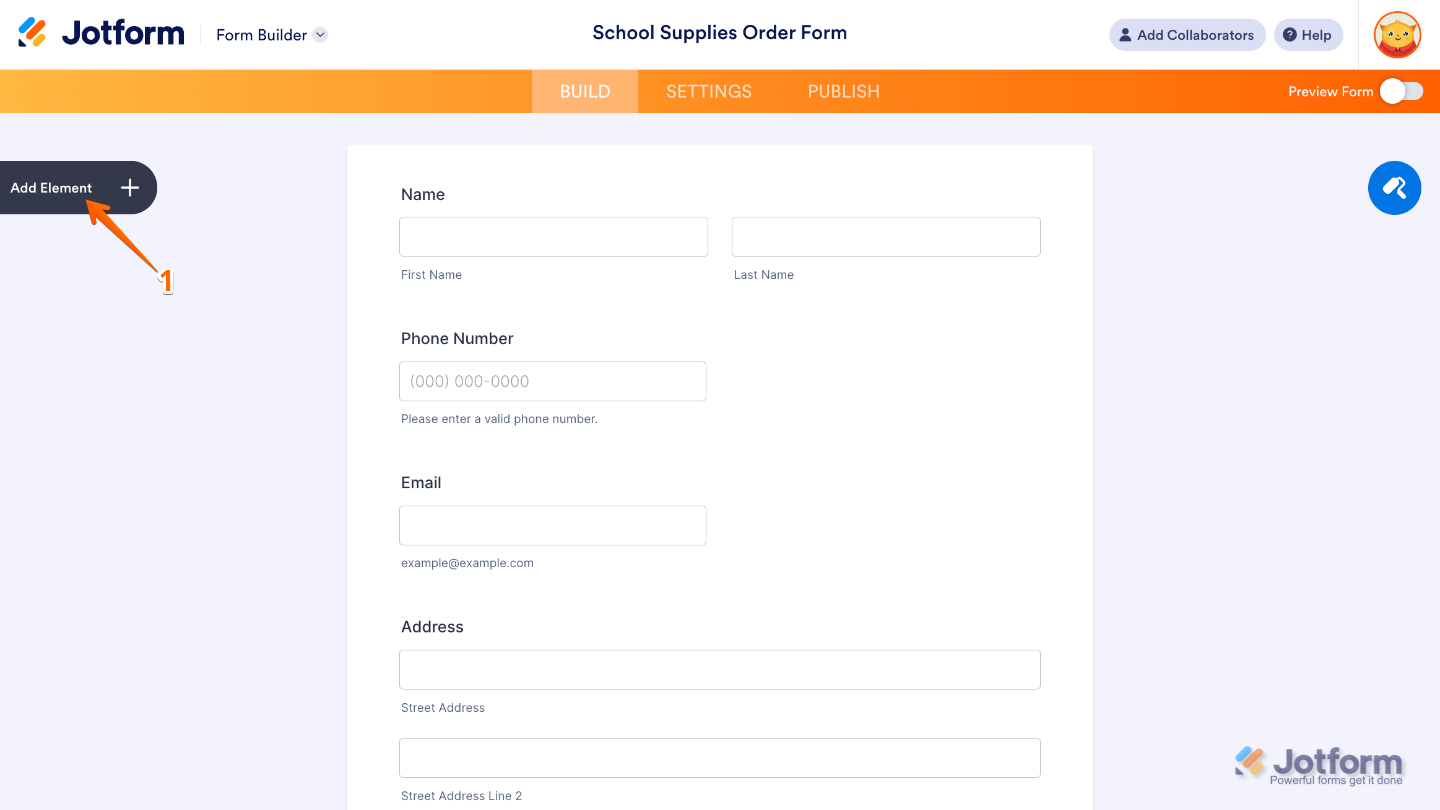
- In Form Builder, click on Add Element on the left side of the page.
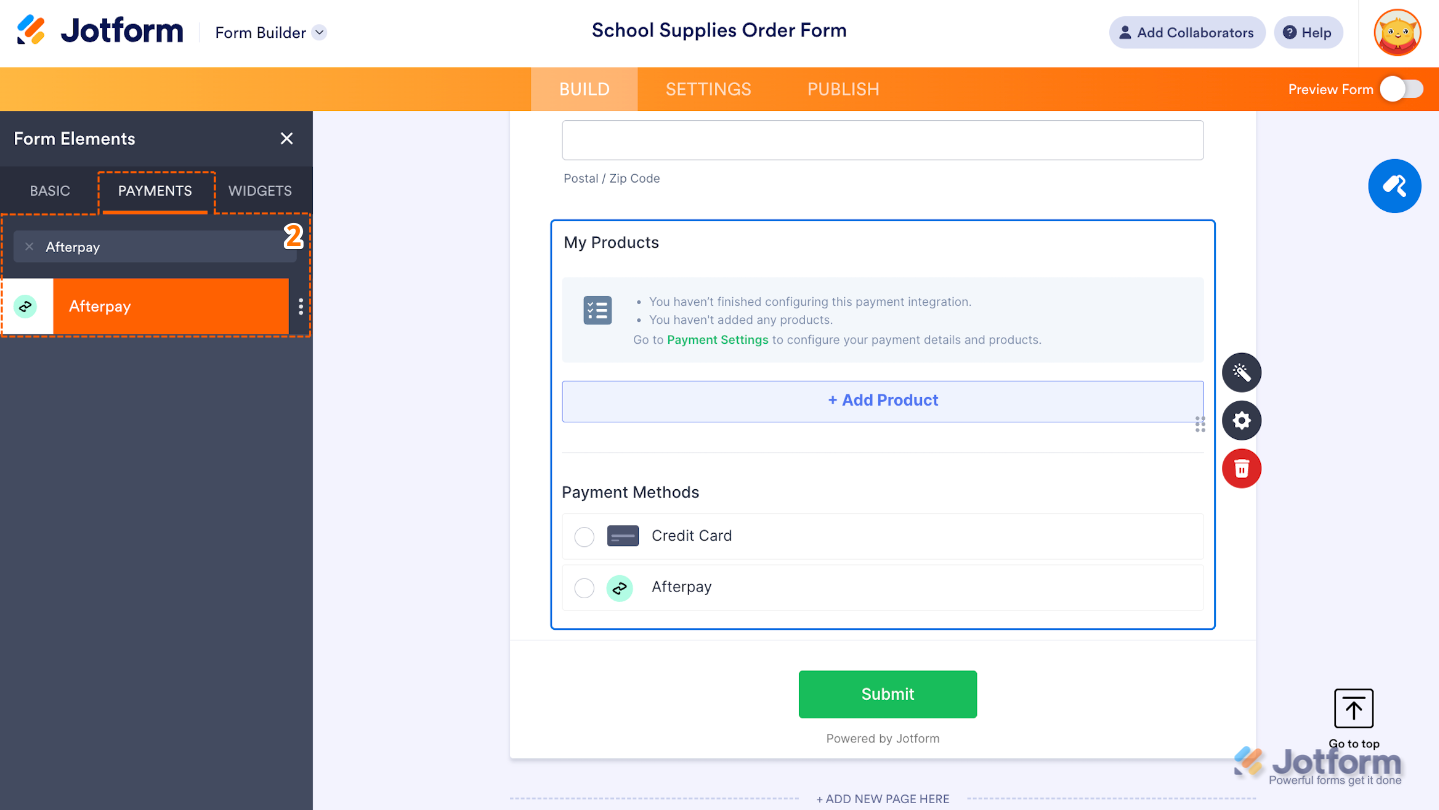
- Now, in the Form Elements menu, under the Payments tab, search for Afterpay and then click on it. Or, just drag and drop it to where you want it to be on your form.
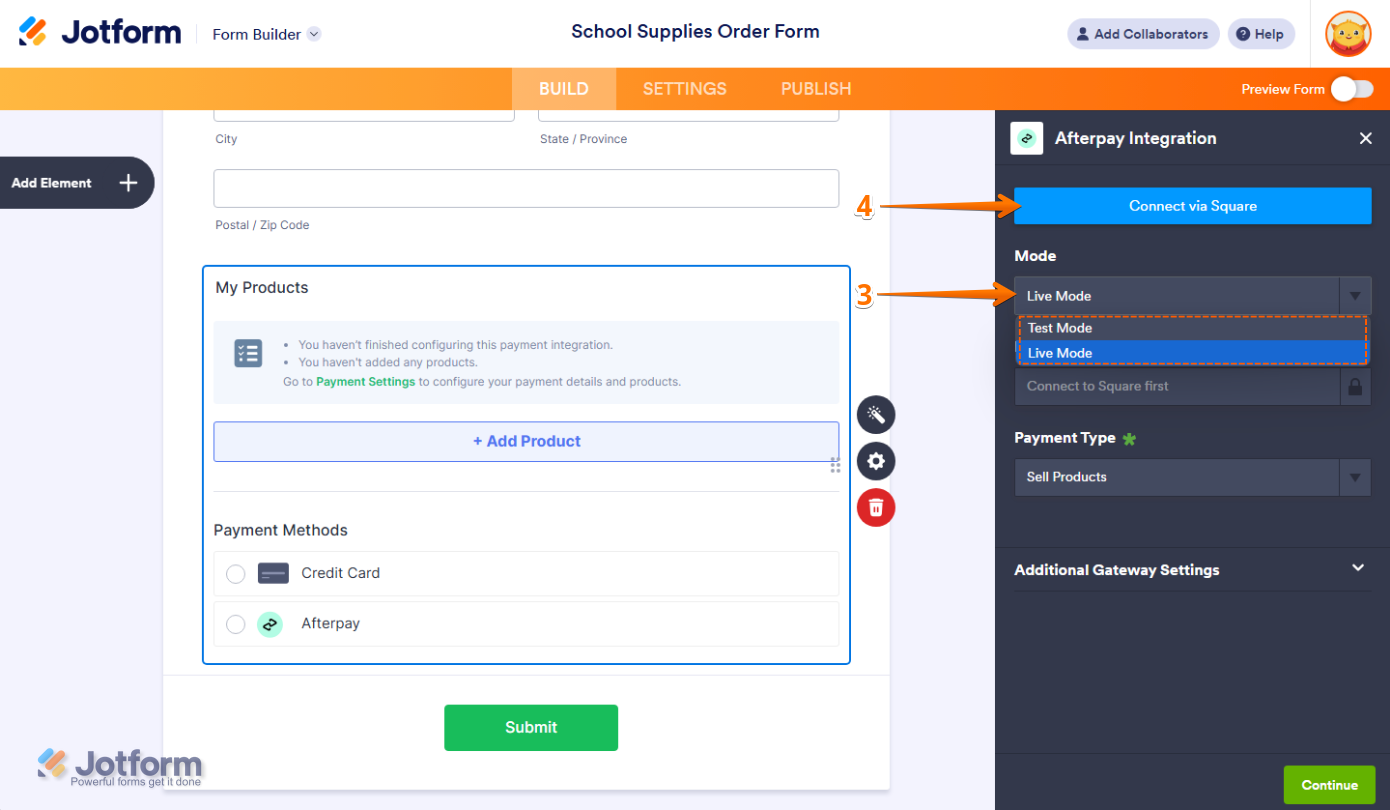
- Then, in the Afterpay Integration menu that opens on the right side of the page, select a mode from the Mode Dropdown menu:
- Live Mode – Connects to your registered Afterpay account via Square.
- Test Mode – Uses your Square Sandbox account for testing transactions.
- Once you’re done, click on Connect via Square.
- In the Square Sign In window that pops up, enter your email address and click on Continue to log in to your Square account, and then follow the steps to authenticate it.

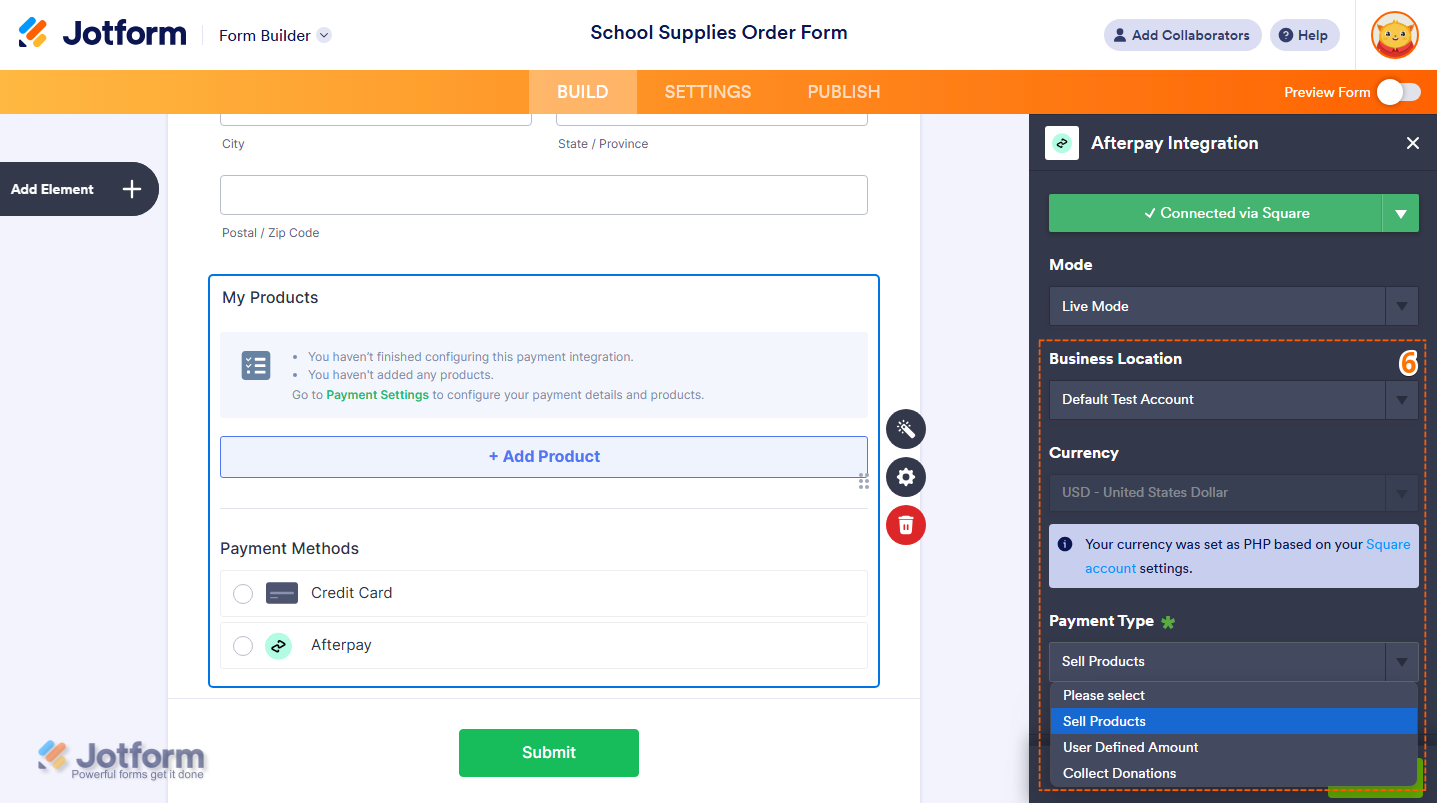
- Once connected, set up these other Square options:
- Business Location — If you have multiple businesses registered with Square, you’ll need to select one in this Dropdown menu.
- Payment Type — Select what you’ll use the integration for: sell products, collect donations, and accept user-defined amounts.
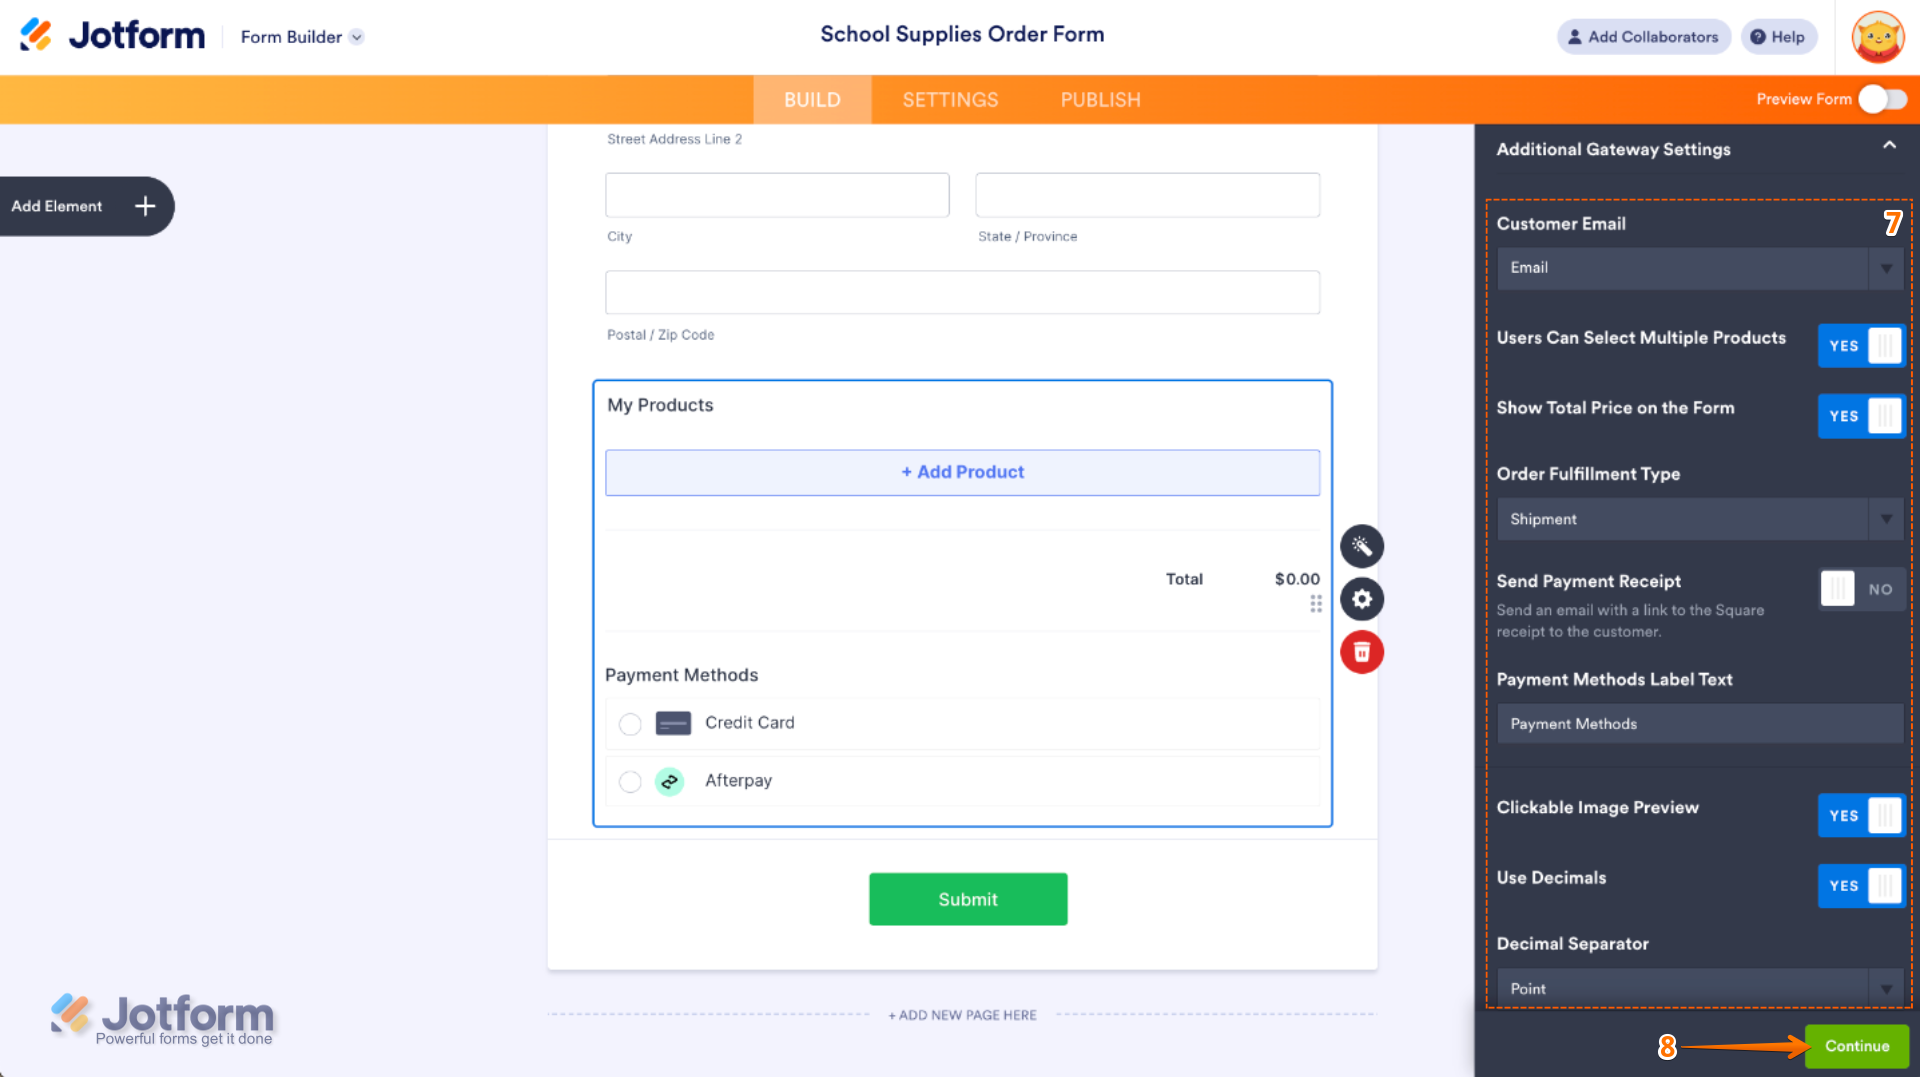
- Next, click on the Additional Gateway Settings to set up these options:
- Customer Email — This maps an email address from your form and sends it to the Square Dashboard, particularly to the customer’s record.
- Users Can Select Multiple Products — This is only available with the Sell Products payment type and is enabled by default. You can toggle this Off if you want customers to select only one (1) product per submission.
- Show Total Price on the Form — This is only available with the Sell Products payment type and is enabled by default. You can toggle this Off if you want to hide the total price of selected products on your form.
- Order Fulfillment type — Specify whether orders from your form are for Pickup or Shipment. Pickup is the default method for orders made through your Square form.
- Send Payment Receipt — Choose whether to send the Square-generated receipt to your customers.
- Payment Methods Label Text — This lets you update the heading of your Payment Options field to better match your form’s style.
- Clickable Image Preview — This is only available with the Sell Products payment type and is enabled by default. You can toggle this Off to prevent customers from enlarging product images.
- Use Decimal
- Decimal Separator — When decimals are shown on your payment field, you can select between a period, which is used in English-speaking countries, or a comma, which is used in many European countries.
- If you’ve selected Sell Products as the Payment Type, click on Continue to add your products. Otherwise, click on Save to complete the integration.
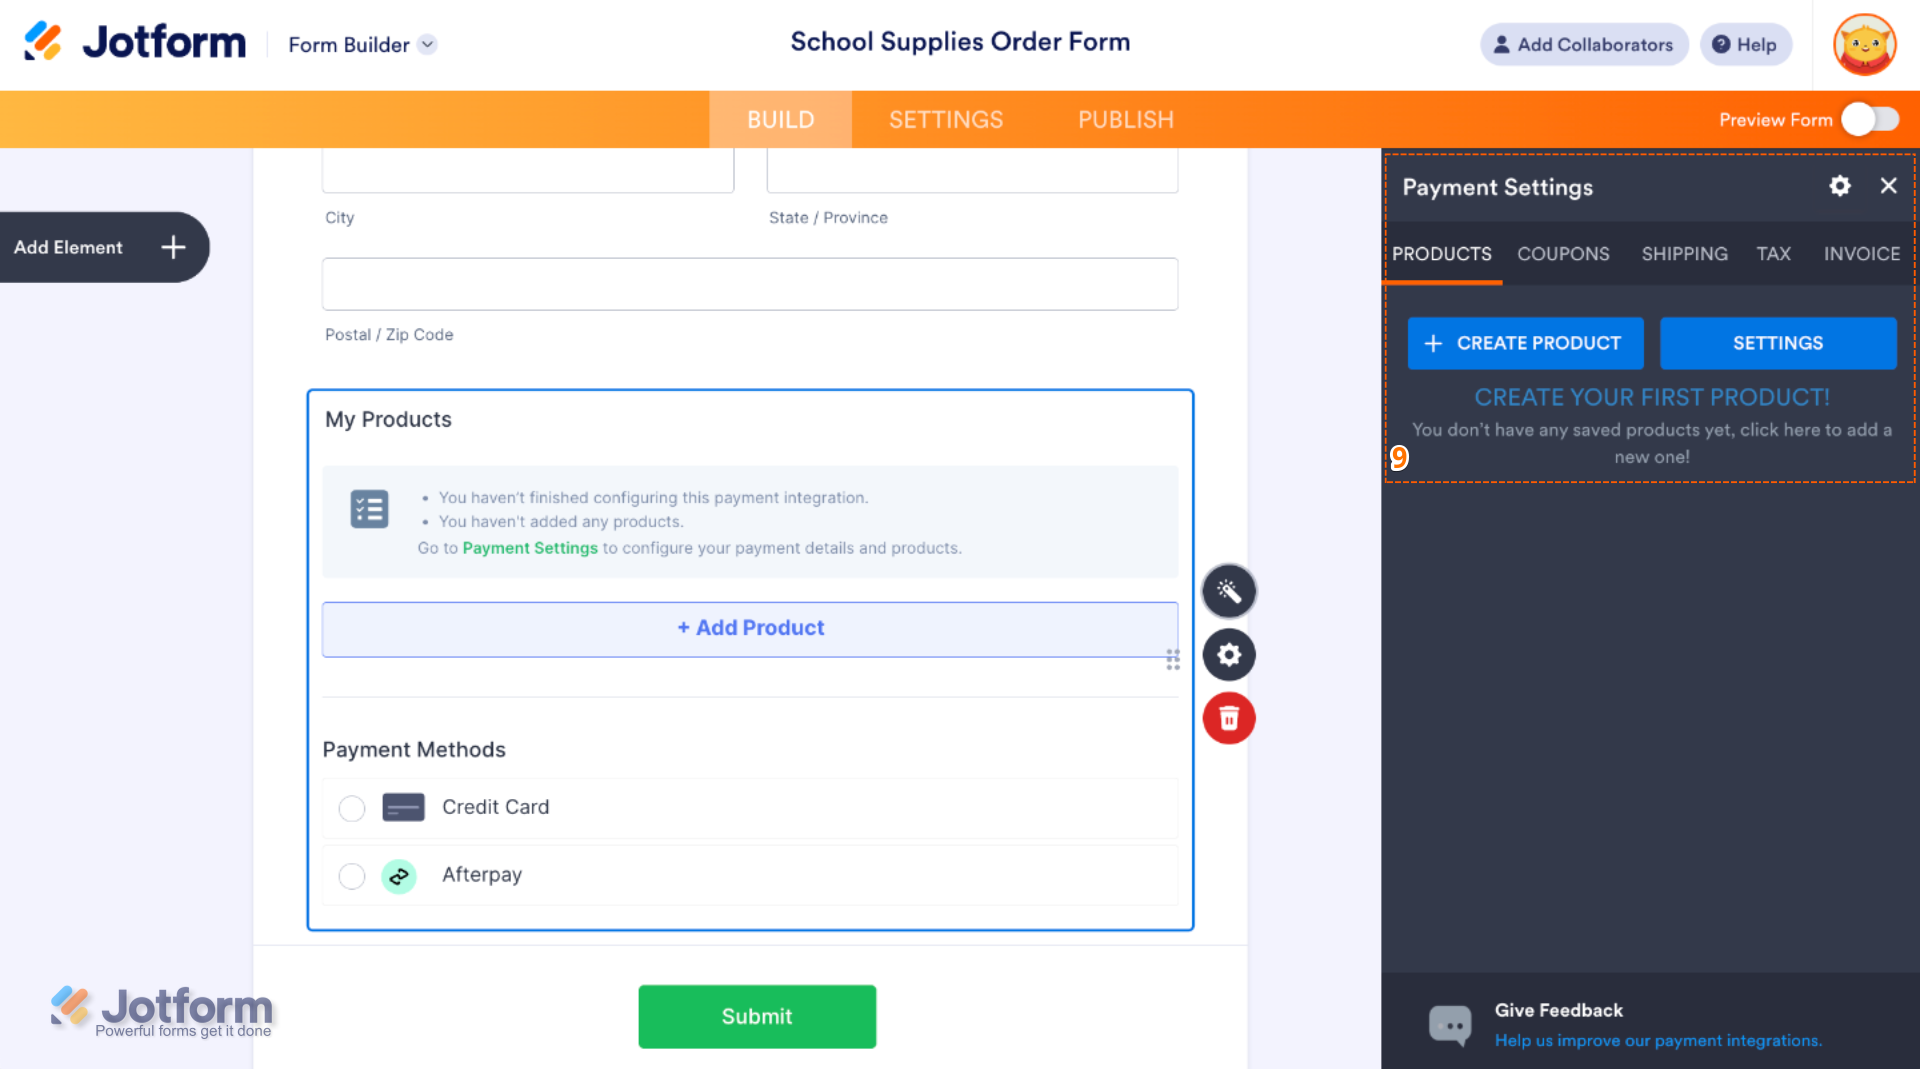
After that, you’ll be directed to the Payment Settings menu, where you can set up the following things:
- Products — This is where you add and manage the items or services you’re selling on your form. You can include product names, descriptions, prices, images, quantity options, and more. Our guide on Setting Up Your First Order Form walks you through everything.
- Coupons — Here, you can create discount codes for your products. You can set percentage-based or fixed-amount discounts, usage limits, and expiration dates. For a quick how-to, check out our guide on How to Add a Coupon Code to Payment Forms.
- Shipping — This allows you to set up shipping fees based on your needs. You can offer flat-rate shipping, location-based rates, or set shipping costs per product. To learn how it’s done, see our guide on How to Add Shipping Costs to Payment Forms.
- Tax — Add sales tax rules for your products here. You can set tax percentages and apply them to all or specific products depending on your location or business needs. Take a look at our guide on How to Apply Sales Tax to Products on Your Payment Form for more details.
- Invoices — Enable this to automatically generate invoices for each submission. You can customize the layout, add your logo, and send a copy to the customer and yourself. You’ll find more info in our guide on How to Generate an Invoice for Your Payment Form.
That’s it. To explore more features for your payment form, check out our helpful guides in the Payment Forms section of Jotform’s User Guides. They’re a great resource to have on hand.
Adding and Setting Up Afterpay Using Reusable Payment Connection
Integrating your form with Jotform’s Reusable Payment Connections lets you streamline your Afterpay setup. Once connected, you can use the same configuration across other forms or apps—no need to do it again from scratch. Setting it up takes no time at all—here’s how:
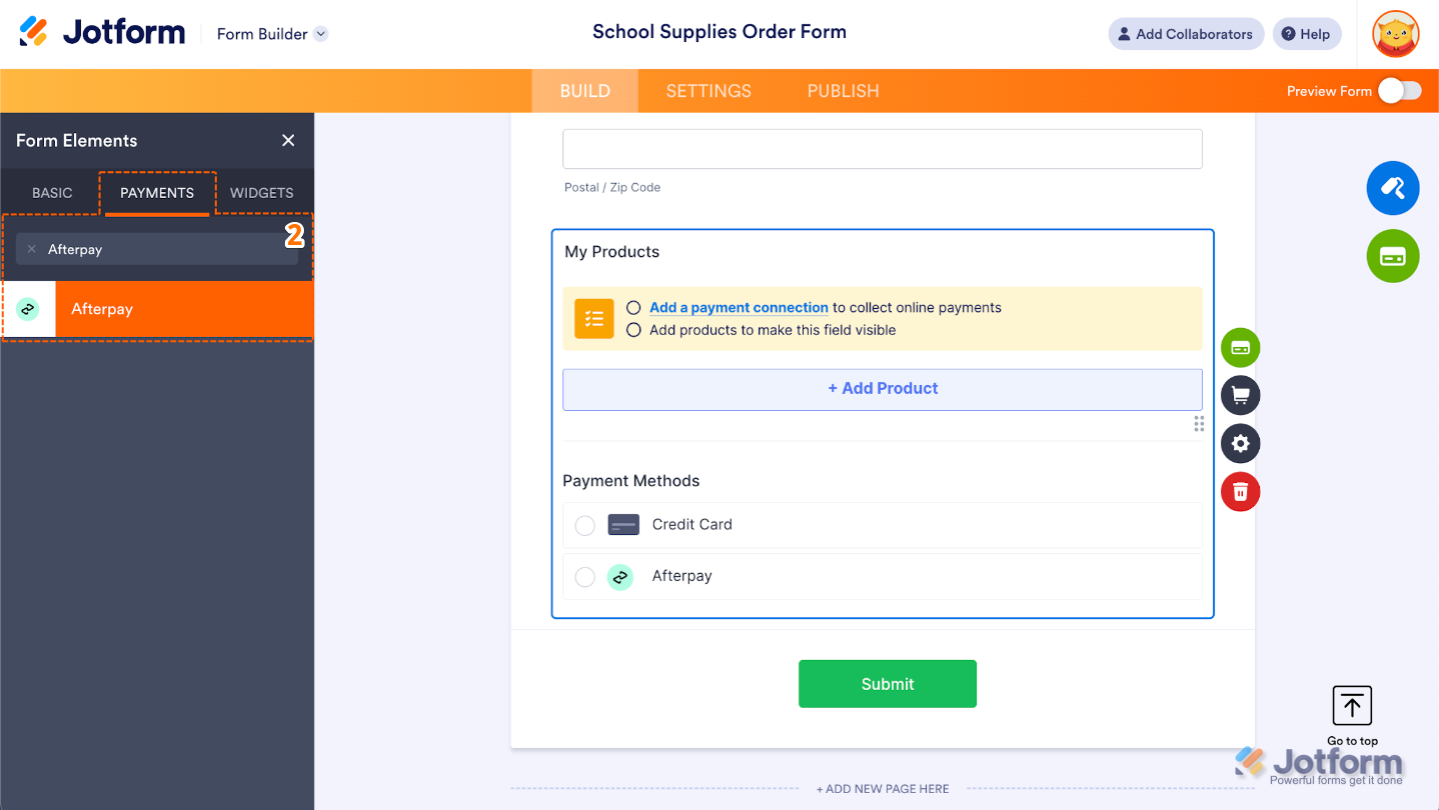
- In Form Builder, click on Add Element on the left side of the page.

- Now, in the Form Elements menu, under the Payments tab, search for Afterpay and then click on it. Or, just drag and drop it to where you want it to be on your form.
- Then, in the Payment Properties menu on the left side of the page, click on the Plug icon.
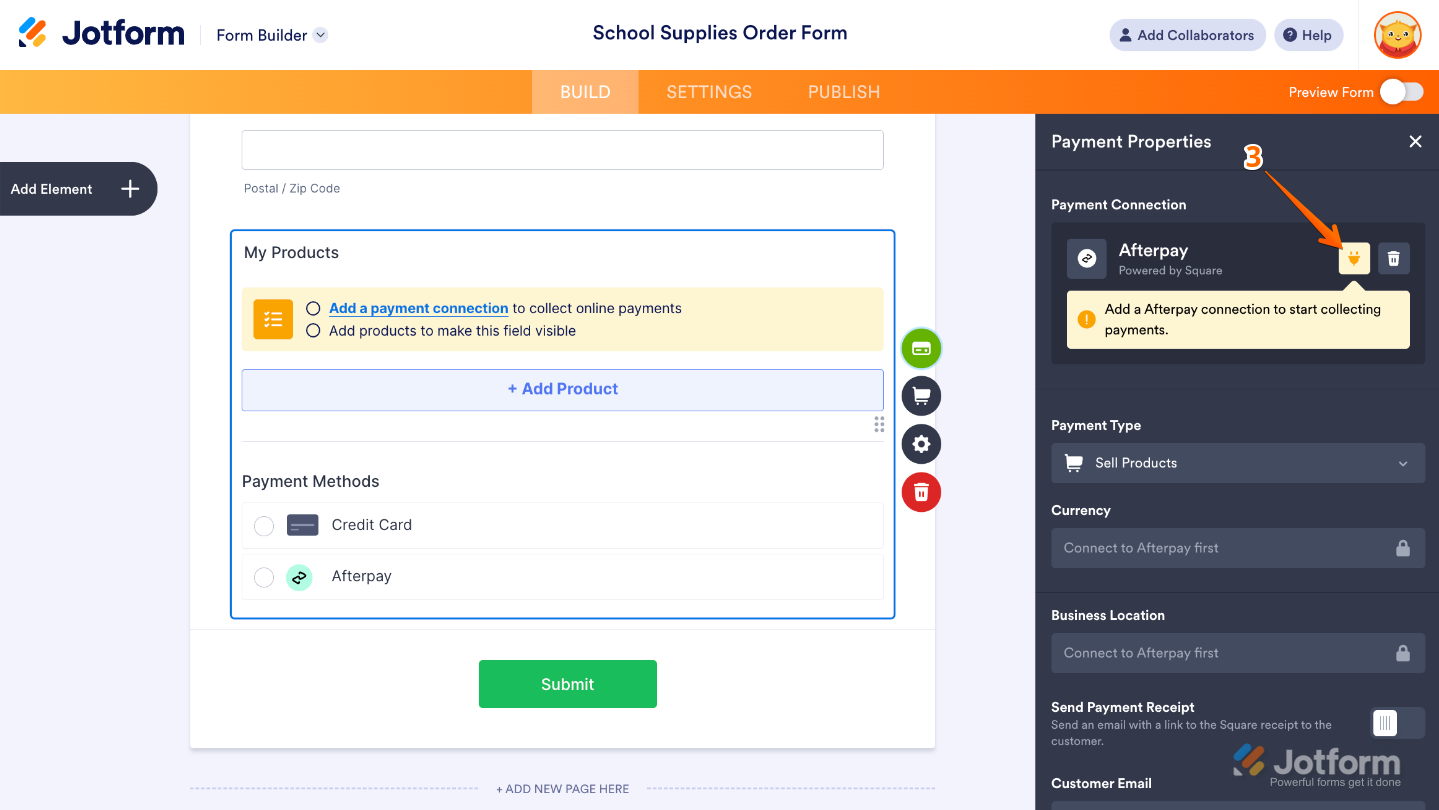
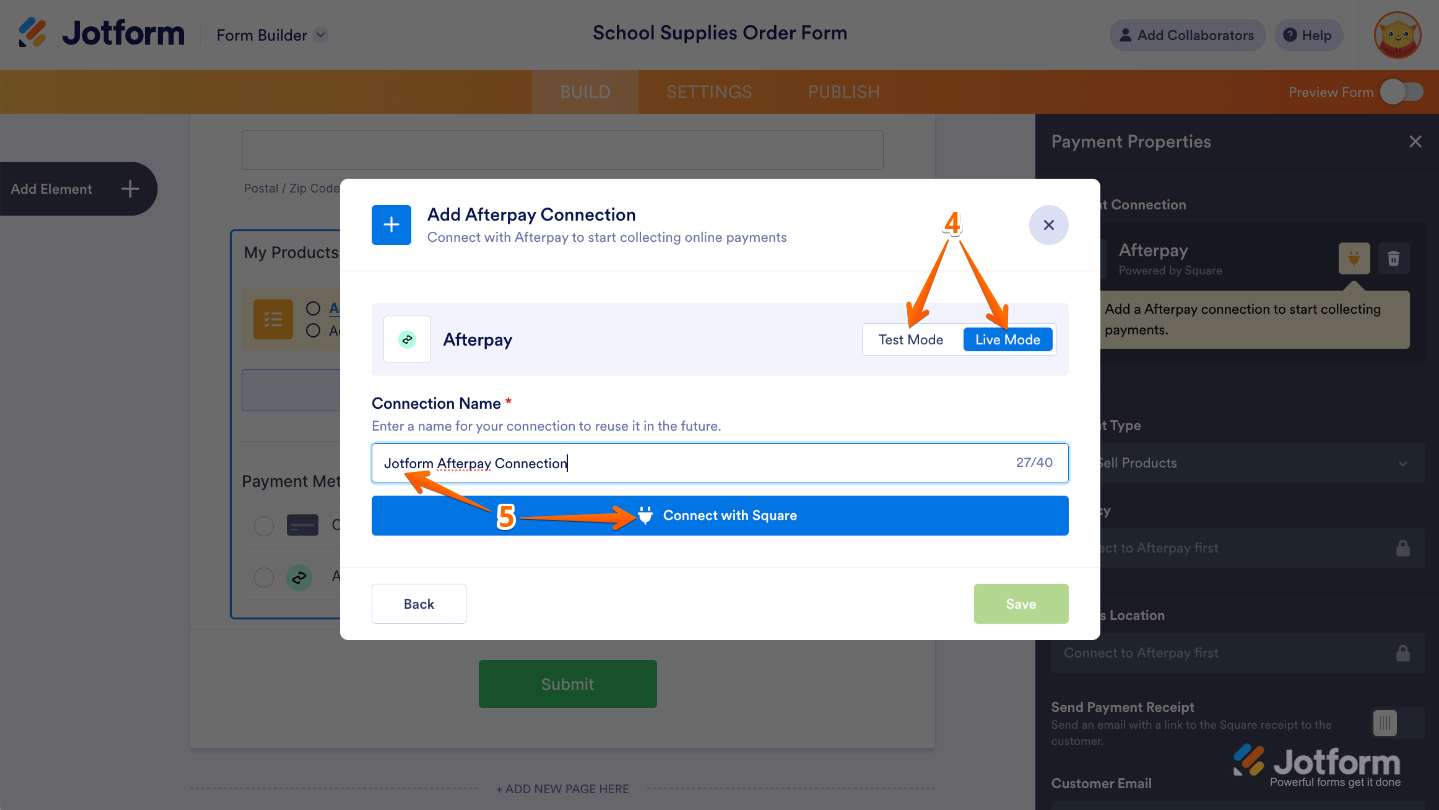
- In the Add Afterpay Connection window, click on either Test Mode or Live Mode at the top to select the environment for your payment connection.
- Next, set up the Connection Name and then click on Connect with Square.
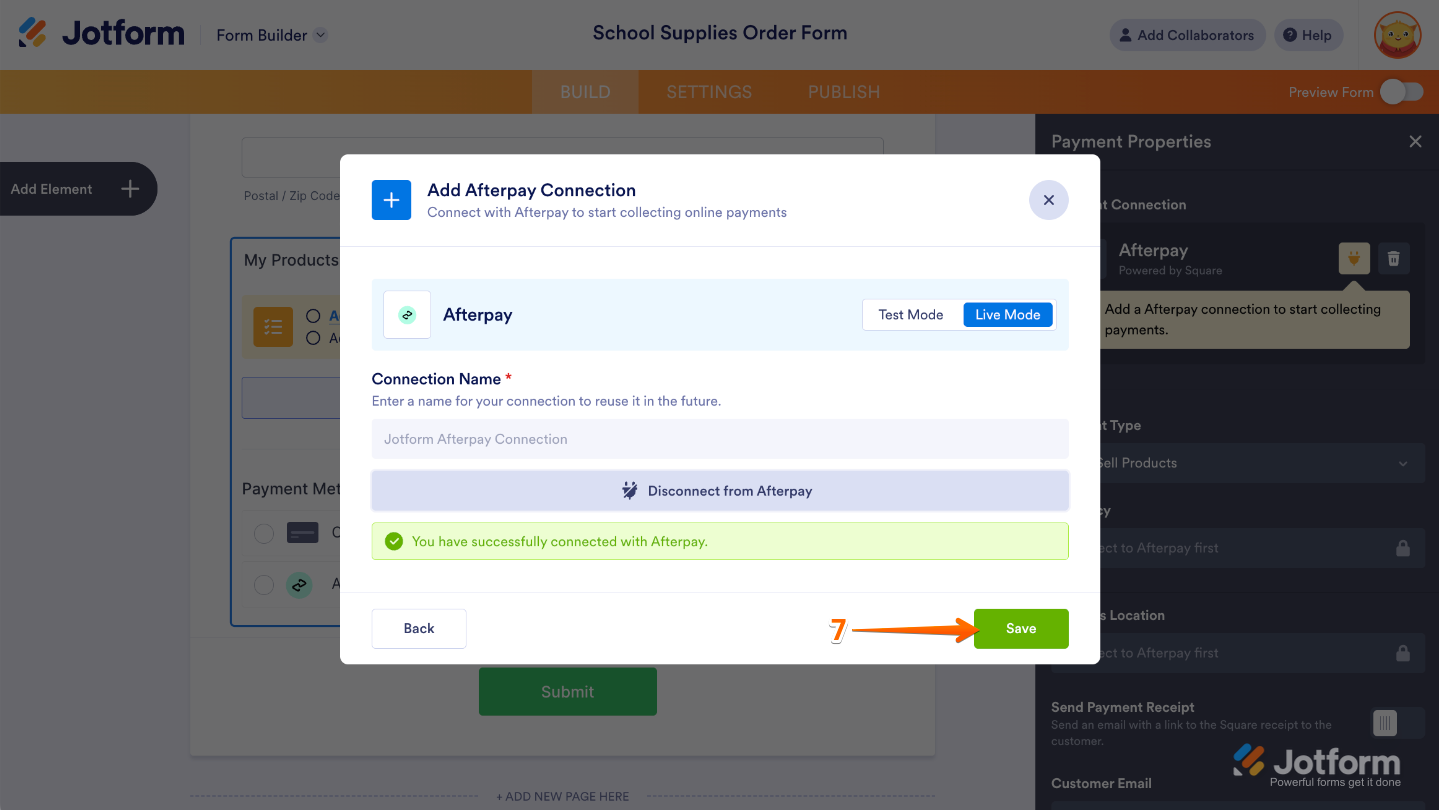
- In the Square Sign In window that pops up, enter your email address, click on Continue to log in to your Square account, and follow the steps to authenticate it.

- Once you’re connected, click on Save.
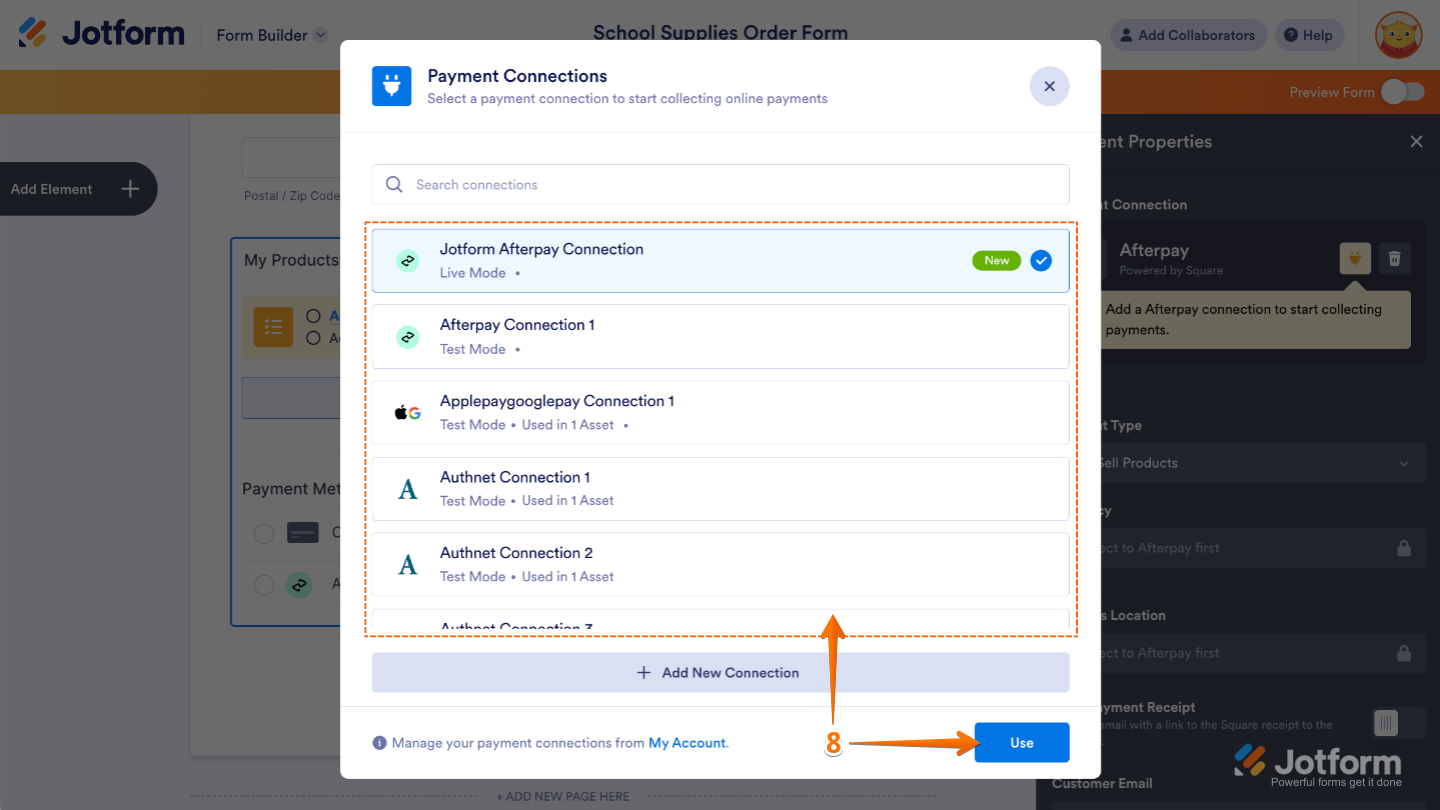
- In the Payment Connections window that pops up, select a connection and then click on Use.
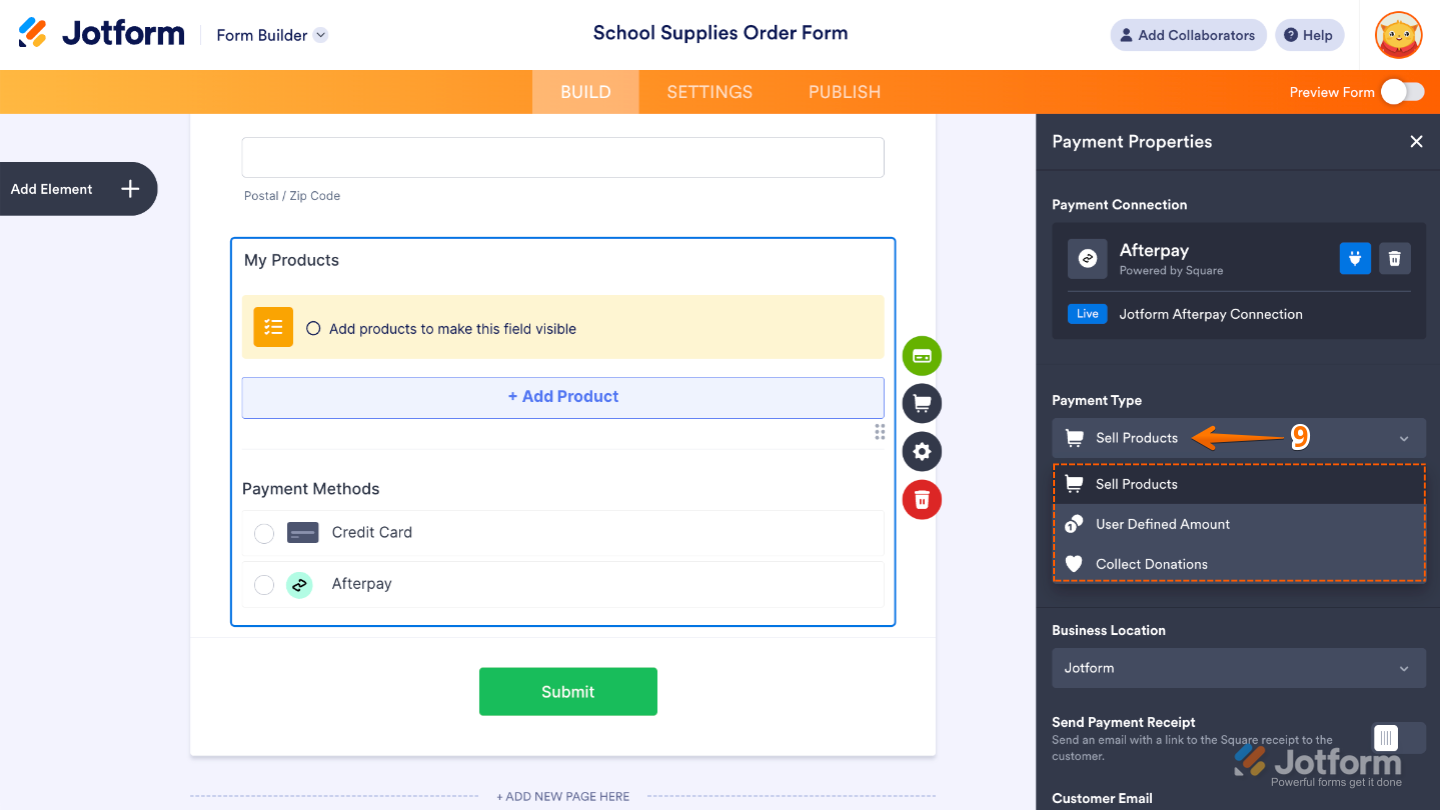
- Now, in the Payment Type Dropdown menu, select what you’d like the payment to be processed for:
- Sell Products — This is selected by default. Use this to sell physical or digital goods at a fixed price, allowing customers to make a one-time purchase.
- User-Defined Amount — This lets customers enter the amount they want to pay. It’s useful for tipping, custom amount pricing, or flexible payments.
- Collect Donations — Select this to accept voluntary contributions. It’s commonly used for fundraising, nonprofit support, or charitable causes.
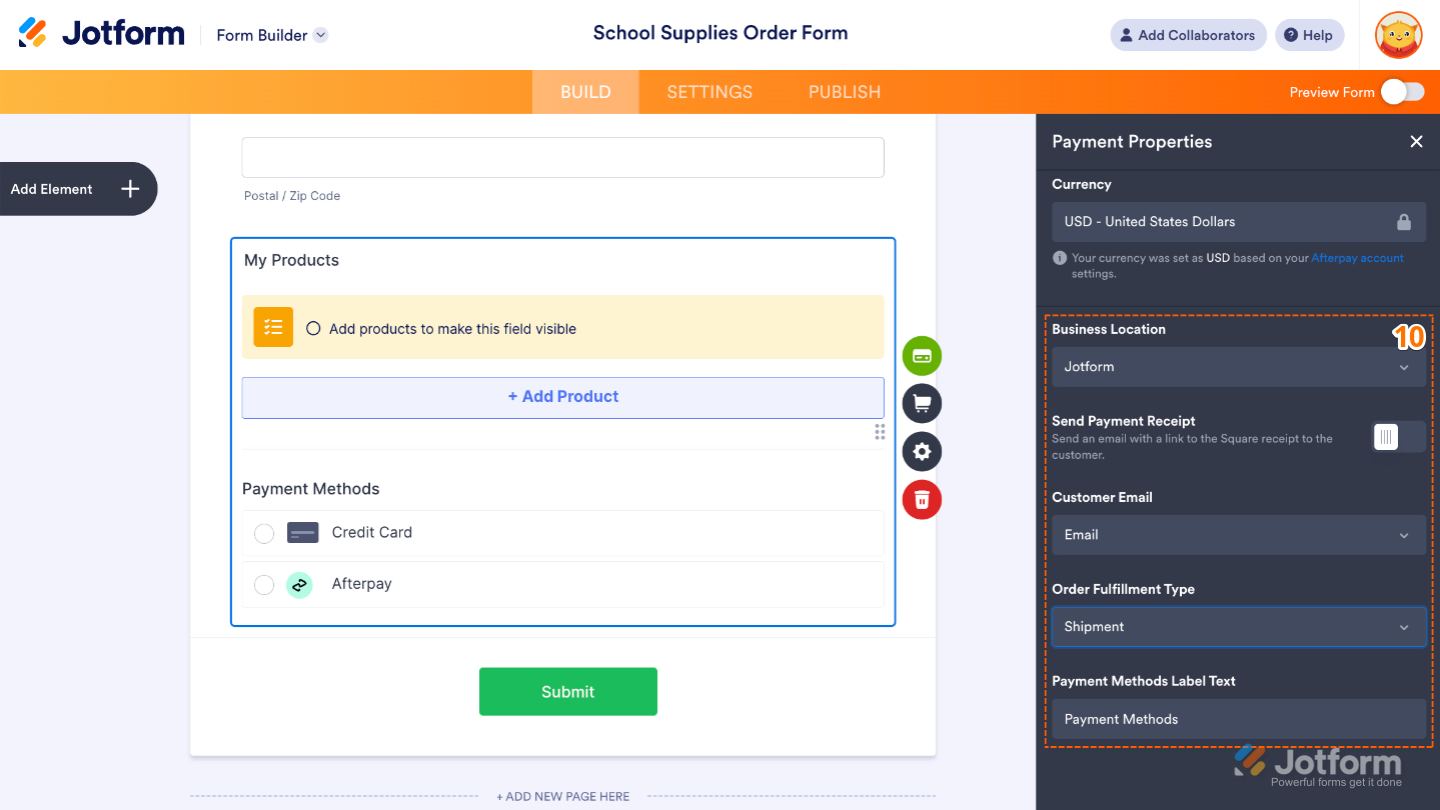
- The Currency is automatically set based on your Afterpay account settings and can only be changed through your integrated Afterpay account, so you can go ahead and move on to setting up these options:
- Business Location Dropdown menu — If you have multiple businesses registered with Square, you’ll need to select one in this Dropdown menu.
- Send Payment Receipt — Turn this On to send your customers a link to their Square receipt after each successful payment.
- Customer Email — If you have multiple email elements in the form, select the customer email sent to Square from this dropdown.
- Order Fulfillment Type — You can choose from these two options: Pick Up or Shipment
- Payment Methods Label Text — Set this up to customize the Payment Method text shown on your product field.
Once everything’s set, on the right side of the field, and depending on the type of payment you selected in the Payment Properties window above:
- Click on the Shopping Cart icon to set up your Products.
- Click on the Money Token icon to set up User-Defined Amounts.
- Click on the Heart icon to set up Donations.
How Afterpay Works For Your Customers
When you connect Afterpay to your form, your customers get a smooth and easy checkout experience. All they have to do is choose Afterpay, follow a few simple steps, and they’re all set to pay in flexible installments, quick and hassle-free.

Send Comment:
1 Comments:
More than a year ago
hello, I keep seeing an error message on my form's payment section. please help!
"PaymentMethodUnsupportedError: Method unsupported: Your merchant account has not yet been onboarded for this payment method. Please visit the Seller Dashboard to enable the payment method"