Jotform makes it easy to add multiple products to your form using the Product List. Instead of entering items one by one, you can quickly import them from different sources:
- Import from a CSV/Excel file — Upload a standard CSV or Excel file with your product details.
- Import from a PDF — Convert your product catalog into form-ready items in seconds.
- Import from Images — Import product photos or images with products in them, like menus or catalogs, directly into your product list.
- Import from Shopify — Use your Shopify product export to instantly bring in your store catalog.
- Import from WooCommerce — Import products using API credentials or by uploading a WooCommerce CSV export.
This saves time and effort, letting you set up online order forms, donation forms, or event registrations with many products in just a few clicks. Whether you’re managing a small store or a large inventory, importing products this way makes it faster and easier to get your forms ready for customers or attendees.

Importing Products from a CSV/Excel file
Adding products to the Product List field from a CSV or Excel file helps you save time and makes sure all your items are added correctly. Follow these quick steps to get started:
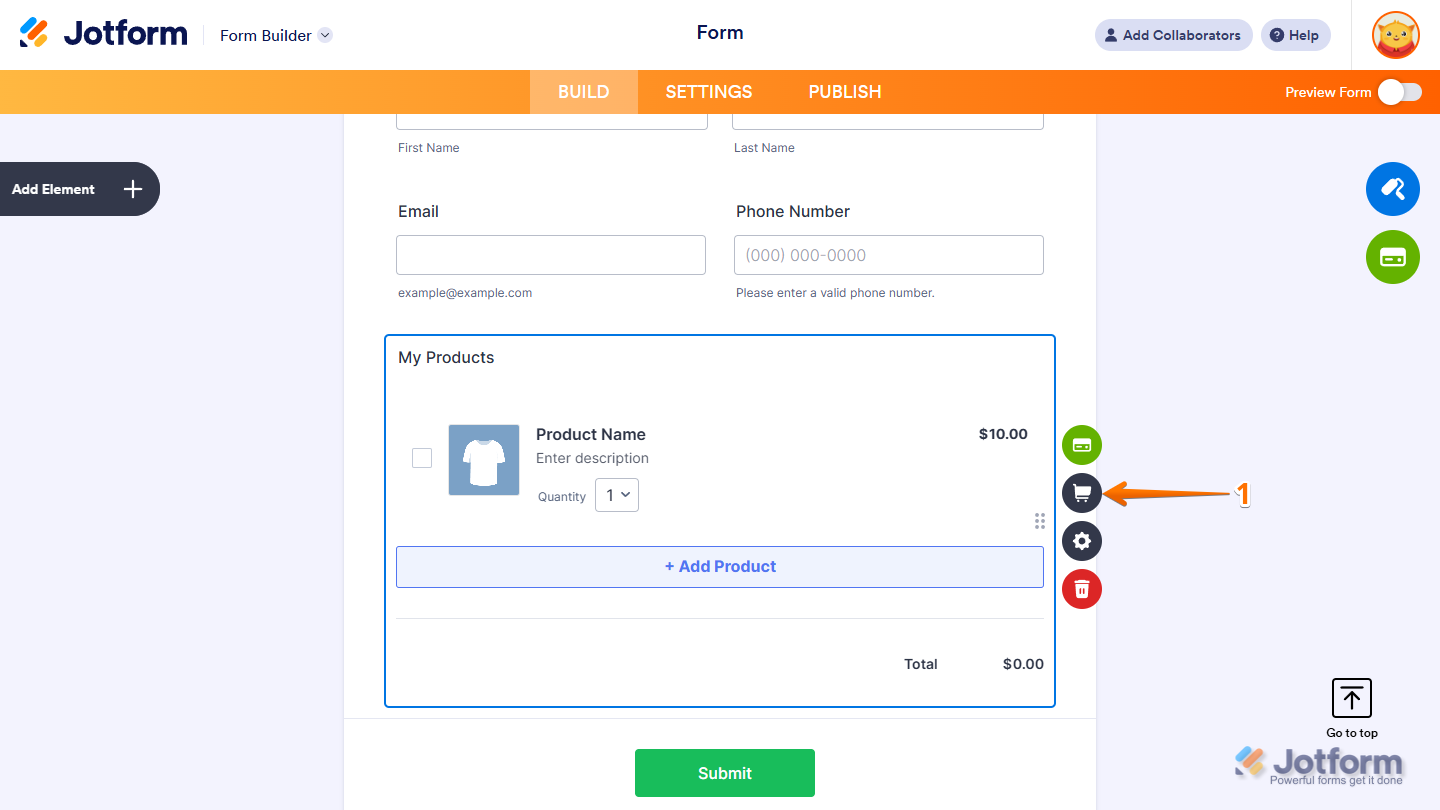
- In Form Builder, select the Product List field, and then click on the Shopping Cart icon on the right side of it.

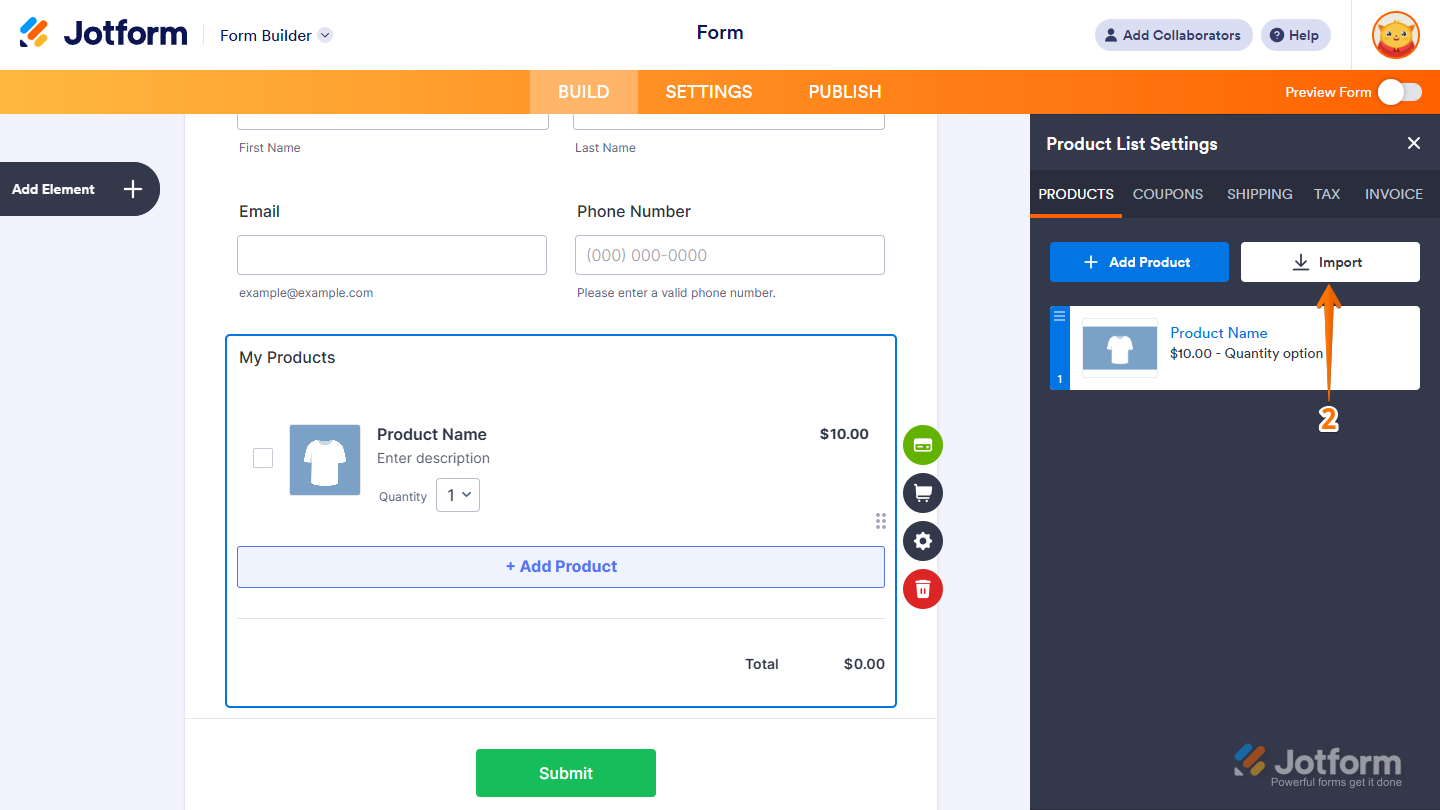
- Next, in the Product List Settings menu that opens on the right side of the page, under the Products tab, click on Import.

- Then, in the Import Products window that opens, click on CSV/Excel.

- Now, click on Drop your Product files here and upload your CSV or Excel file. Or, just drag and drop the file into the box.

- Once uploaded, your CSV or Excel file will automatically map the fields to your Product fields, like you see below.
- Then, click on Review and Import.

- Now, review the imported products, uncheck any items you don’t want to import, and then click on Import.

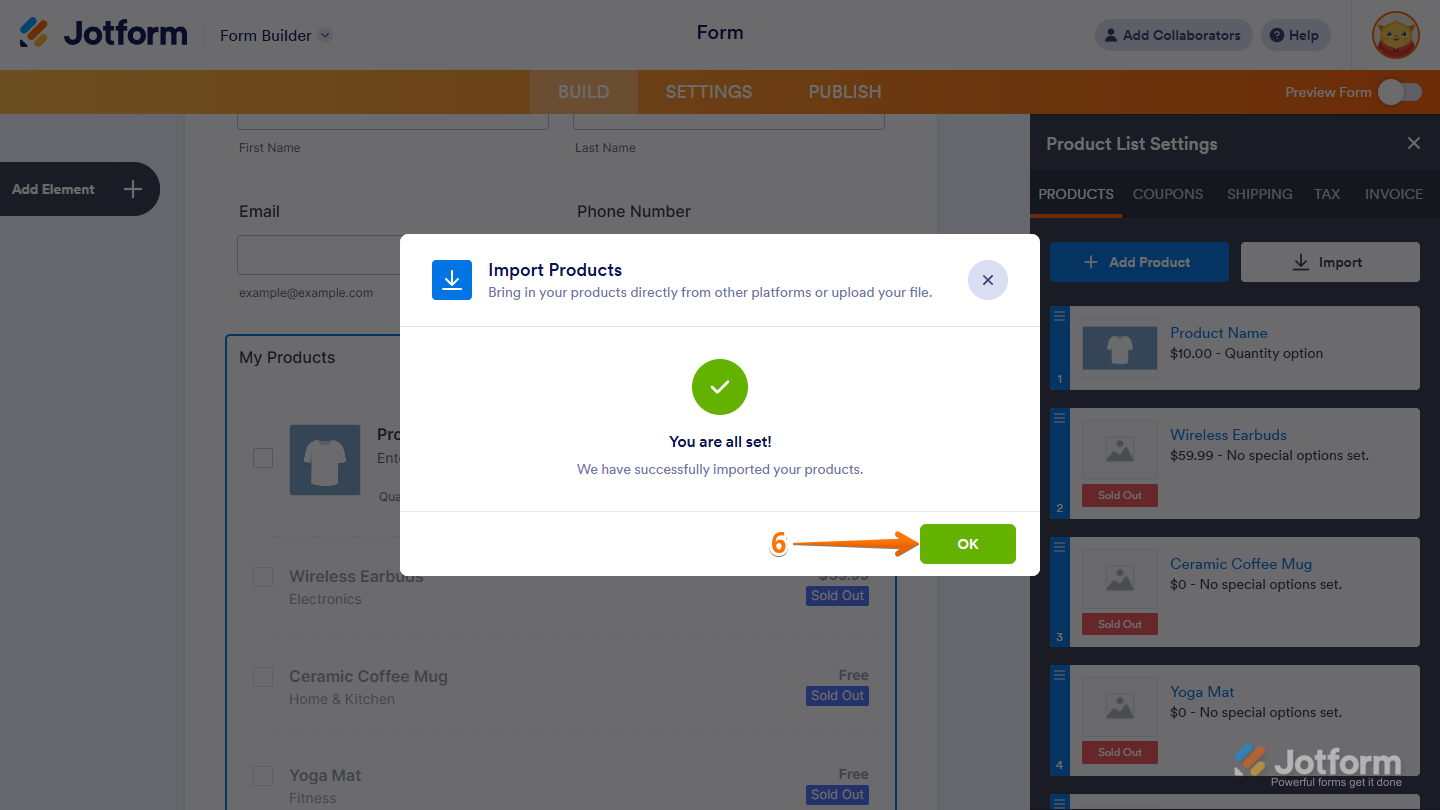
- Finally, once the products are successfully imported, click on OK, and you’re all set.

Importing Products from a PDF file
If you have a product catalog in PDF format, you can turn it into a ready-to-use product list on your form. You’ll just need to follow these simple steps:
- In Form Builder, select the Product List field, and then click on the Shopping Cart icon on the right side of it.

- Next, in the Product List Settings menu that opens on the right side of the page, under the Products tab, click on Import.

- Then, in the Import Products window that opens, click on PDF.

- Now, click on Drop your Product files here to upload your PDF file. Or, just drag and drop the file into the box.

- Once uploaded, review the imported products, and uncheck any items you don’t want to import, and then click on Import.

- Then, once the products are successfully imported, click on OK, and you’re good to go.

Importing from Images
You can also build your Product List by uploading images that have products in them, such as menus or catalogs. This lets you add multiple items visually without having to enter all the details yourself. And it’s easier than you think:
- In Form Builder, select the Product List field, and then click on the Shopping Cart icon on the right side of it.
- Next, in the Product List Settings menu that opens on the right side of the page, under the Products tab, click on Import.
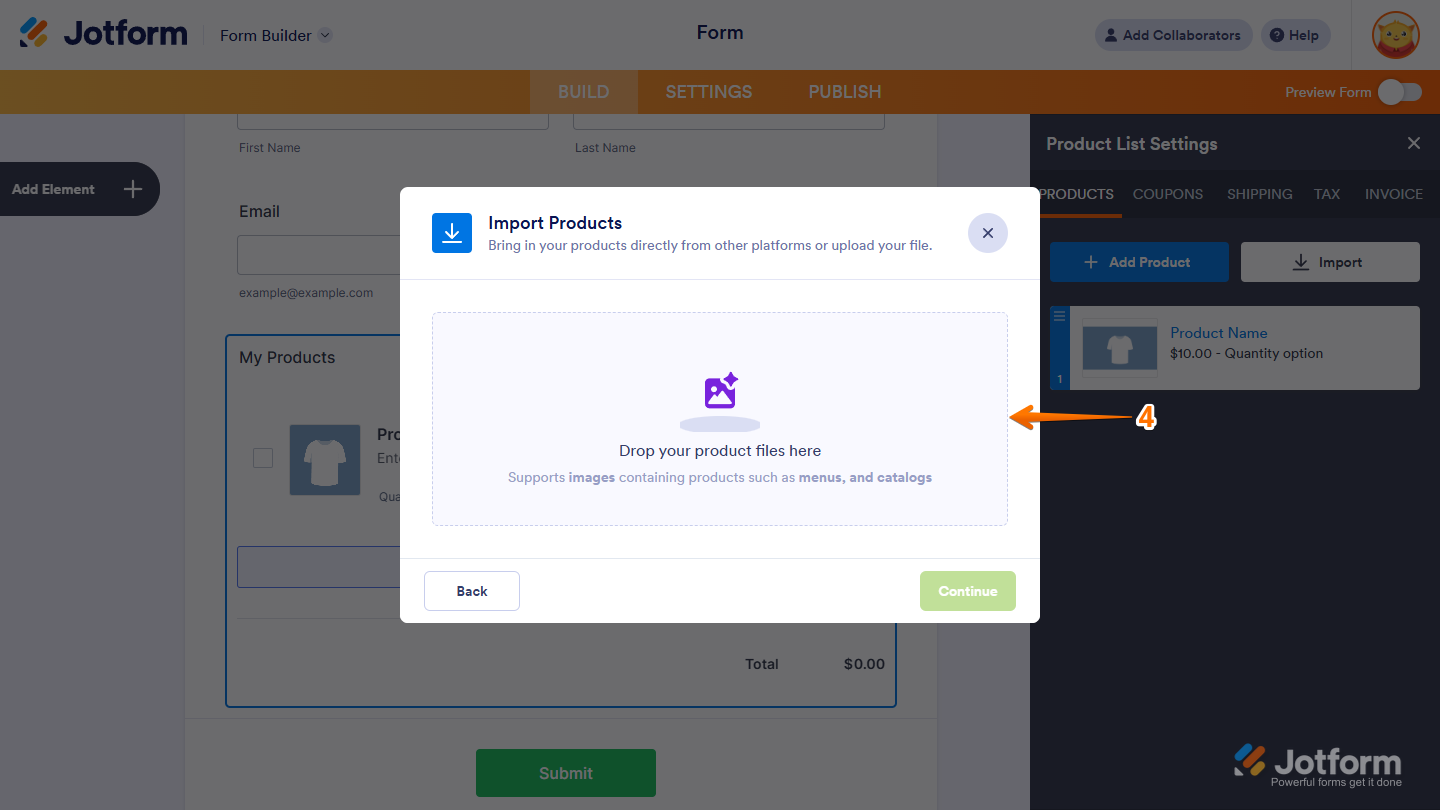
- Then, in the Import Products window that opens, click on Image.

- Now, click on Drop your Product files here to upload your Image. Or, just drag and drop the image file into the box.
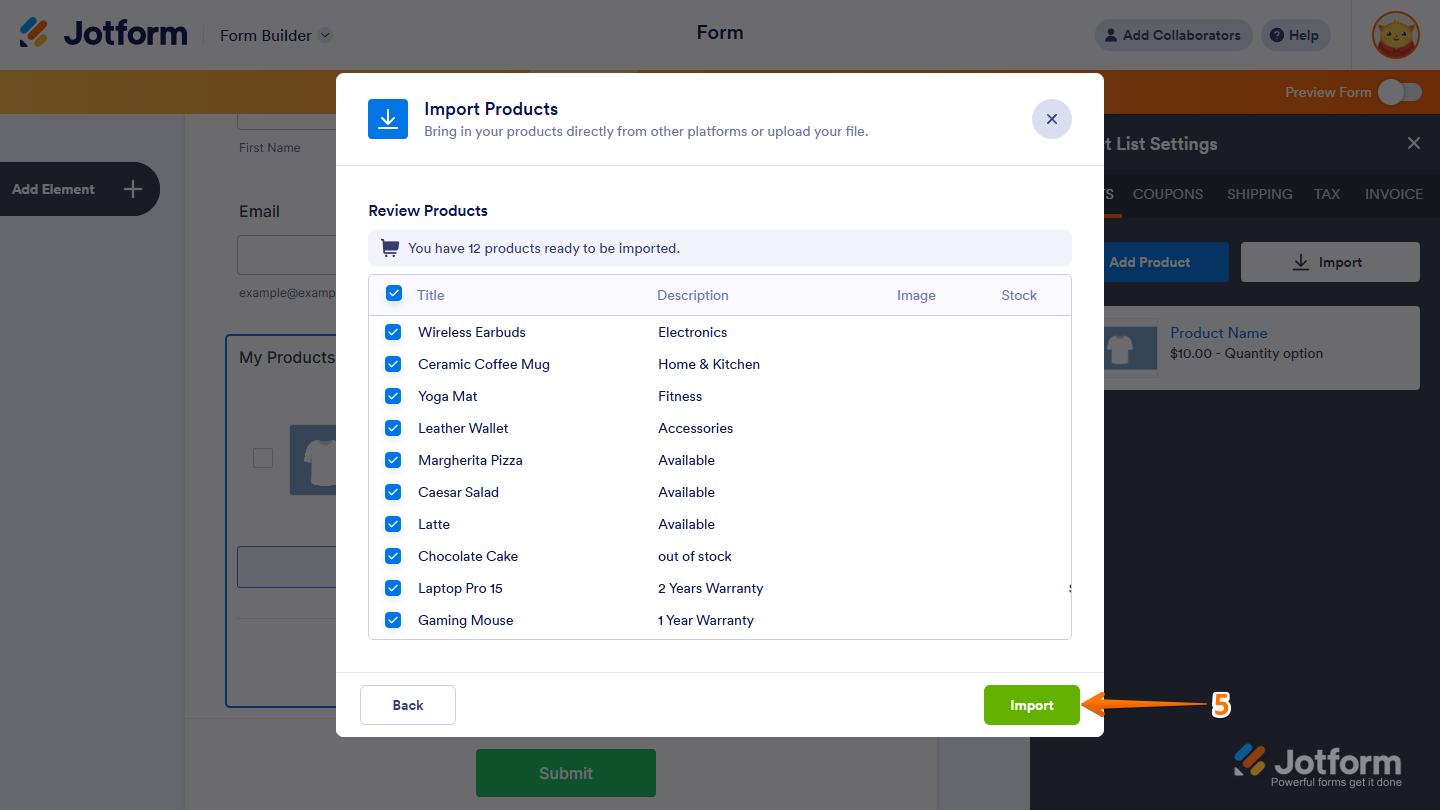
- Once uploaded, review the imported products, uncheck any items you don’t want to import, and then click on Import.
- Now, once the products are successfully imported, click on OK, and you’re all ready.
Importing Products from Shopify
Quickly bring your store’s products into the Product List field using a Shopify CSV file, saving time and adding items directly from the online store. This is how it’s done:
- In Form Builder, select the Product List field, and then click on the Shopping Cart icon on the right side of the field.

- Next, in the Product List Settings menu that opens on the right side of the page, under the Products tab, click on Import.

- Then, in the Import Products window that opens, click on Shopify.

- Now, click on Drop your Shopify CSV here and upload your Shopify CSV file. Or, just drag and drop the file into the box.

- Once uploaded, your Shopify CSV file will automatically map the fields to your Product fields, like you see below.
- Then, click on Review and Import.

- Now, review the imported products, uncheck any items you don’t want to import, and then click on Import.

- Finally, once the products are successfully imported, click on OK, and you’re done.

Importing Products from WooCommerce
Bring your WooCommerce store products into the Product List using either a WooCommerce CSV file or the WooCommerce API. This lets you import your catalog quickly and manage items without having to do it manually. Here’s how to get started:
- In Form Builder, select the Product List field, and then click on the Shopping Cart icon on the right side of it.

- Next, in the Product List Settings menu that opens on the right side of the page, under the Products tab, click on Import.

- Then, in the Import Products window that opens, click on WooCommerce.

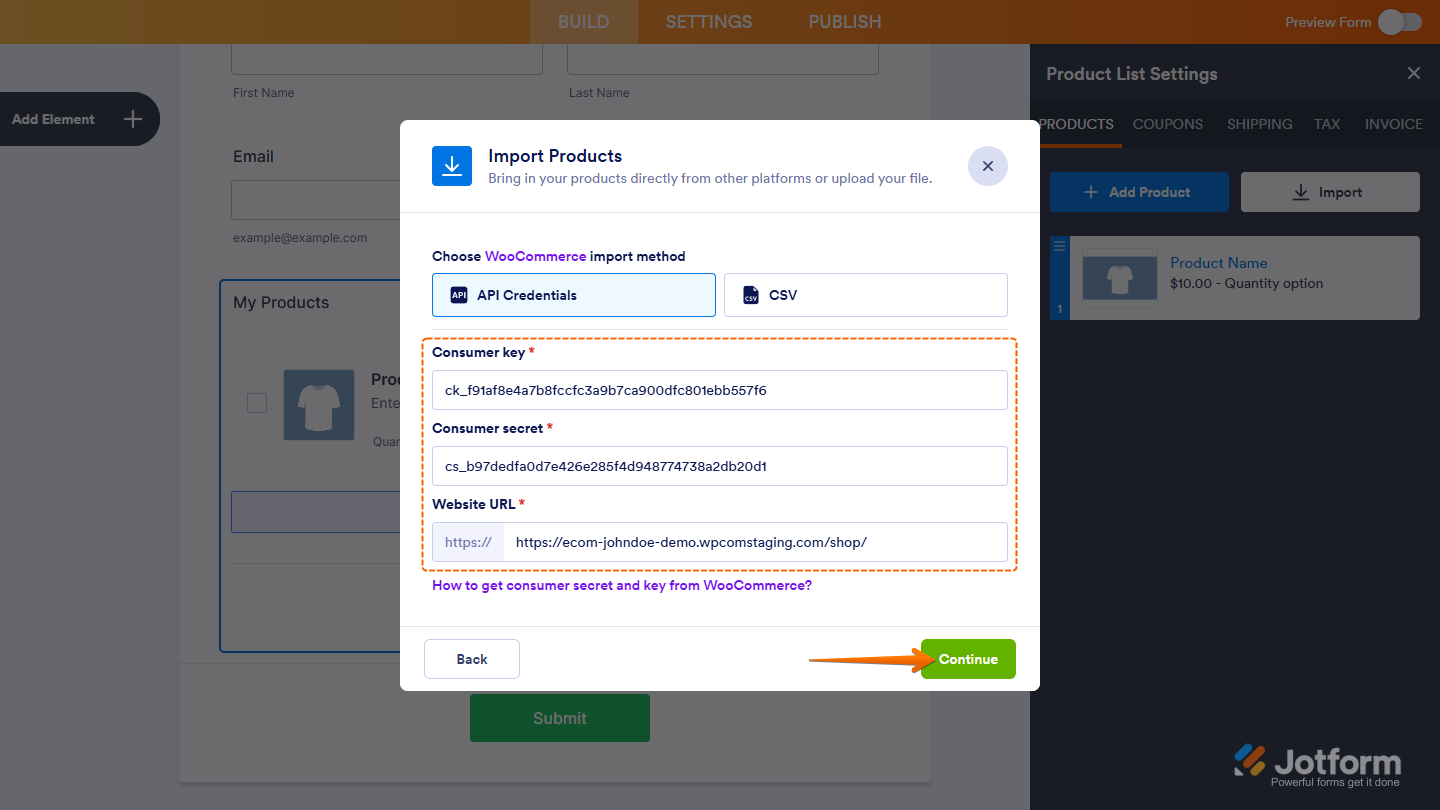
- Now, choose how you’d like to import your WooCommerce products:
- API Credentials — Connect directly to your WooCommerce store.
- CSV — Upload a CSV file with your product data.

If you selected API Credentials, you’ll need to set up the WooCommerce Consumer Key, Consumer Secret, and Website URL, then click on Continue. You can check out our guide on How to Get Consumer Secret and Key from WooCommerce? to learn more about it.
If you selected the CSV, click on Drop your WooCommerce CSV here and upload your WooCommerce CSV file. Or, just drag and drop the file into the box. Need a hand? This guide on How to Export Products from WooCommerce? is a great place to start.

- Now, WooCommerce will automatically map the fields to your Product fields, like you see below.
- Then, click on Review and Import.

- Now, review the imported products, uncheck any items you don’t want to import, and then click on Import.

- Finally, once the products are successfully imported, click on OK, and you’re done.

And that’s it! Your Product List is ready with the imported items. Now, you can manage your products, add more if needed, or start sharing your form with customers right away.
We’ve also got some other helpful guides that you might want to take a look at:
- Setting Up Your First Order Form
- How to Set Up a Recurring Payment Option
- How to Add Options to Payment Forms
- How to Add Coupon Code to Payment Forms
- How to Add Tax to Your Payment Form
- How to Add Shipping Cost to Payment Forms
- How to Generate an Invoice for Your Payment Form
- How to Enable and Manage Product Stocks in Payment Fields

Send Comment: