Overview
Within the Admin Console, managing AI Agents is straightforward. As an admin, you decide whether users can create them or keep that option turned off. This keeps things flexible letting users build agents when it makes sense or restricting access when you need more control.
Enabling AI Agent Creation Organization Wide
From the Admin Console, you can manage AI Agent creation settings across your entire server, including whether users can build their own and what types are allowed—ensuring the feature stays aligned with your team’s needs and policies.
Tweak this setting to match your organization’s needs and keep everything in your workspace running smoothly. Here’s a quick how-to:
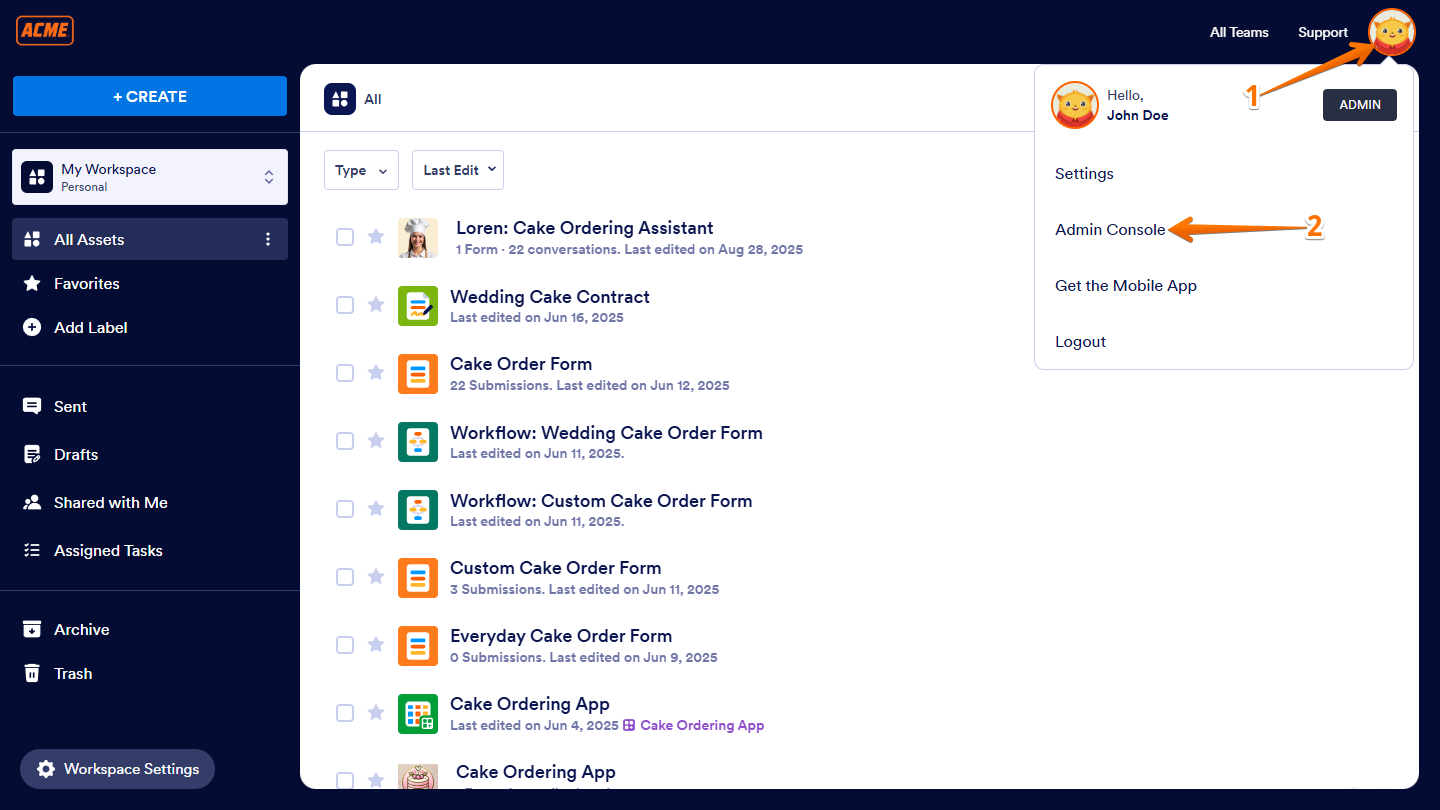
- In the top-right corner of your My Workspace page, click on your Avatar/Profile picture.
- Then, in the menu that opens, click on Admin Console.
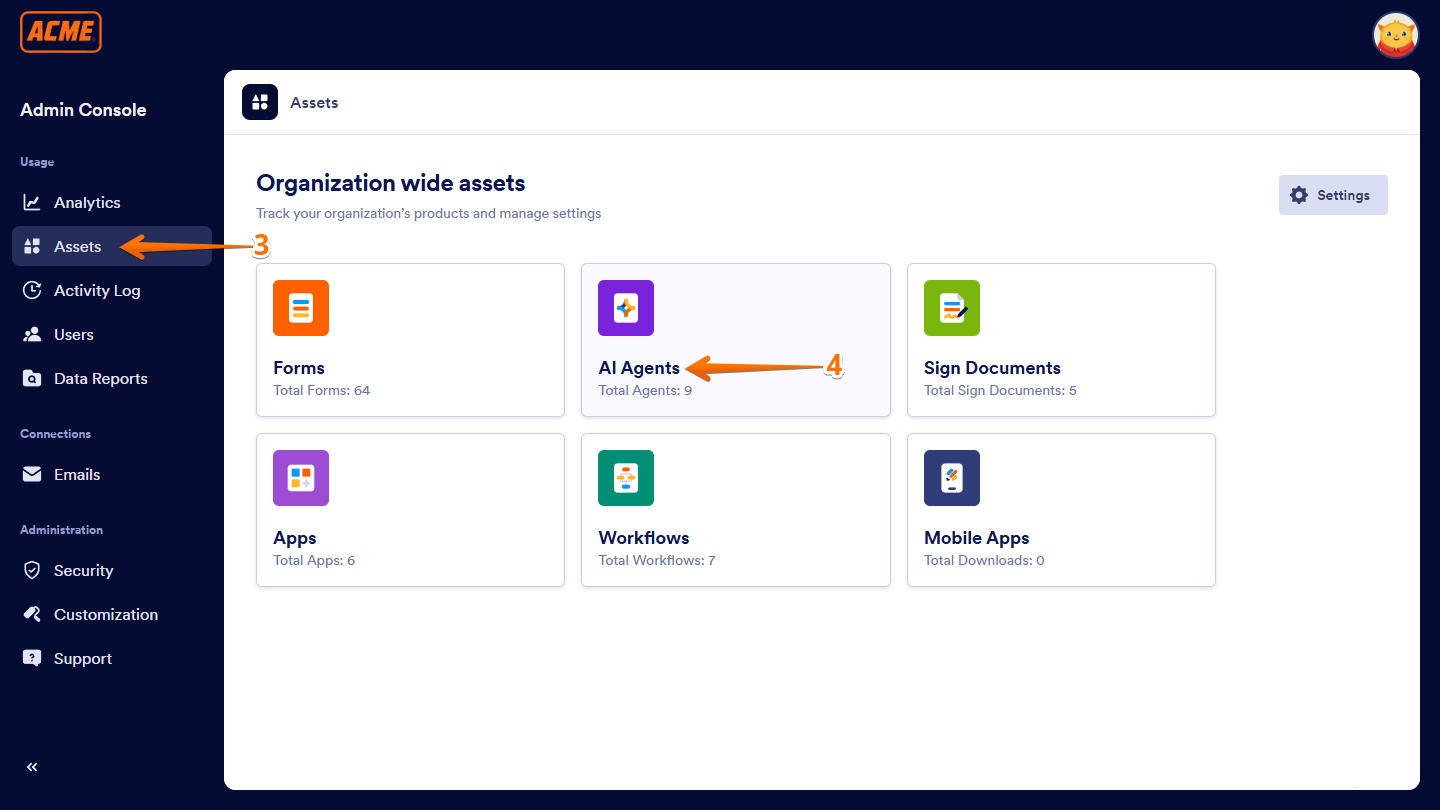
- Now, in the menu on the left side of the Admin Console page, click on Assets.
- Then, in the Organization Wide Assets section on the right, click on AI Agents.
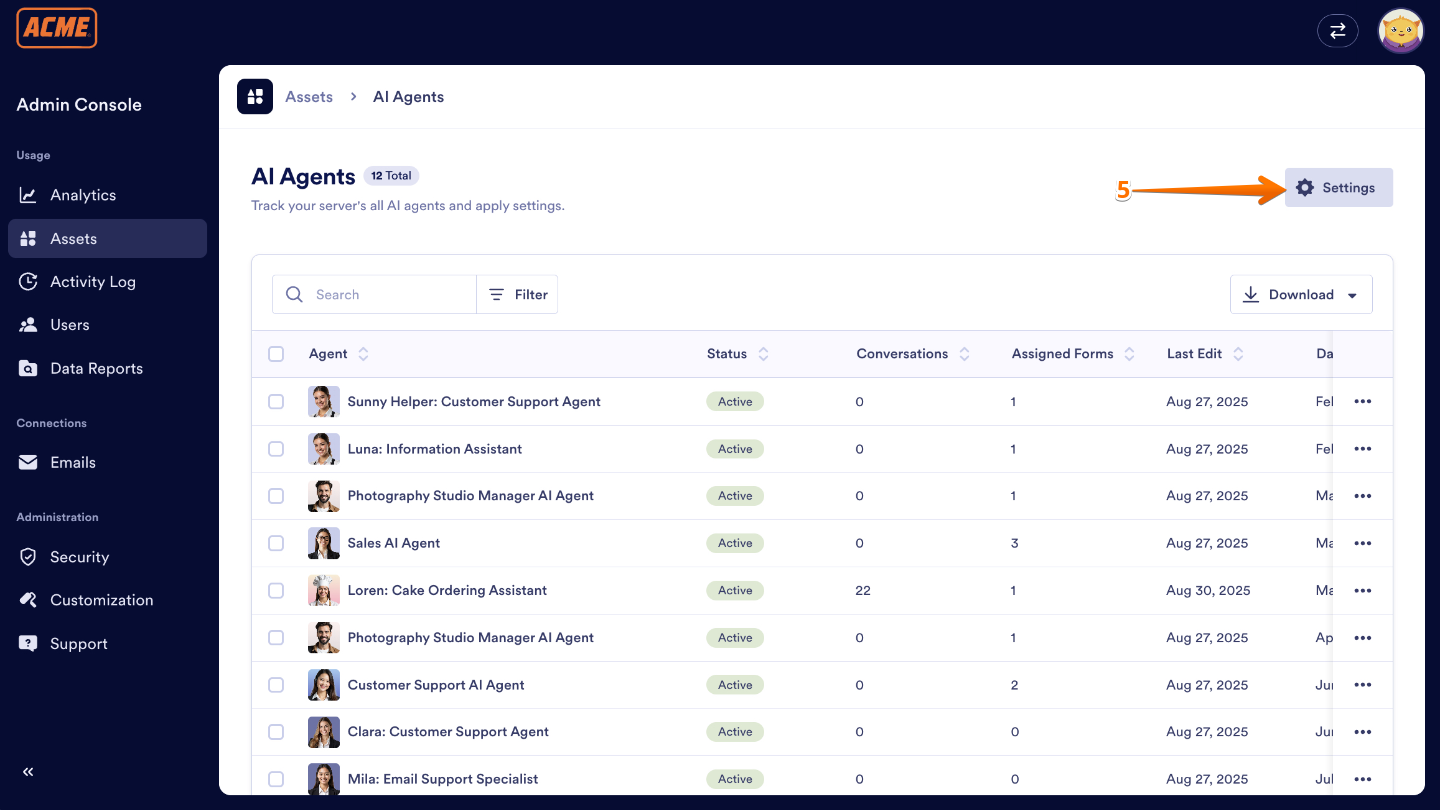
- Next, on the right side of the AI Agents section, click on Settings.
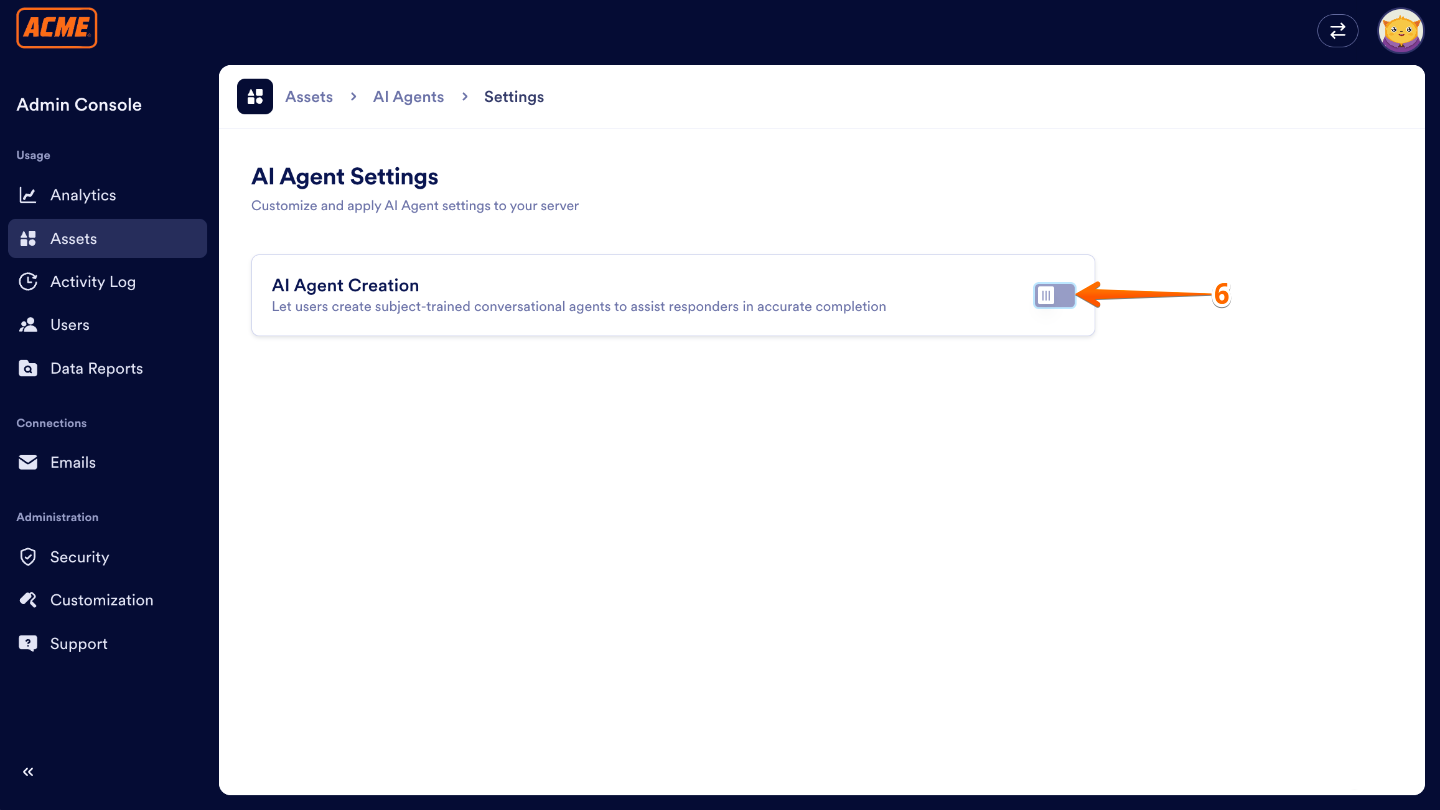
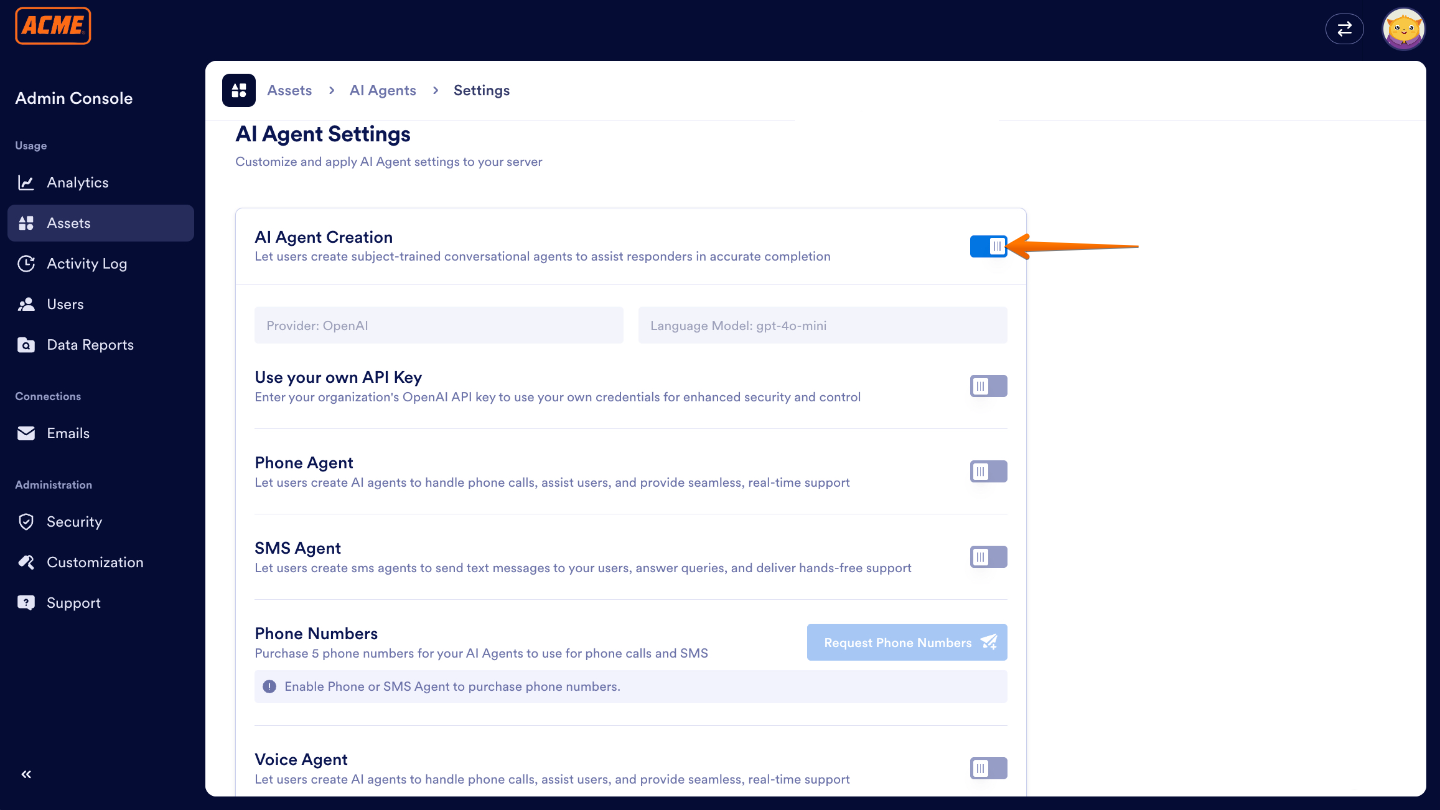
- Now, under the AI Agent Settings section, on the right side of AI Agent Creation, toggle it on.
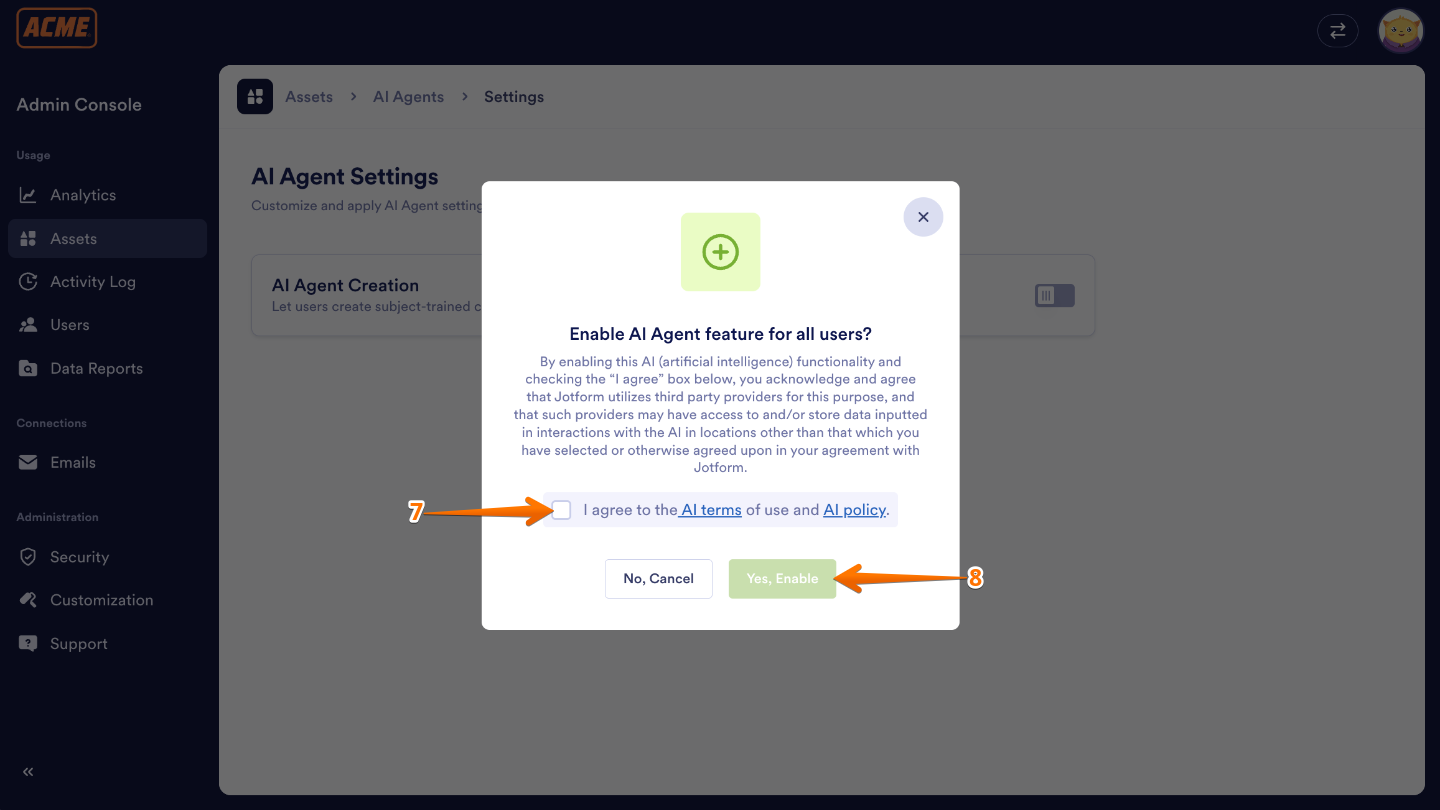
- Then, in the Enable AI Agent Feature for All Users window that pops up, check the box next to I Agree to the AI Terms of Use and AI Policy.
- Once you’re done, click on Yes, Enable.
That’s it. You’ve successfully enabled AI Agent Creation. Now, your users can start building and exploring AI Agents to make their workflows smarter and more efficient.
Note: If you turn off AI Agent creation, the AI agents will also disappear from the Assets filter on your Workspace page. Don’t worry—they’re not gone forever; your users just won’t be able to see or access them until you switch the setting back on.

Send Comment: