With Jotform’s AI Chatbot for WordPress, you can connect directly to your WooCommerce store and give shoppers a smarter, more personal way to browse and buy. Instead of scrolling through endless product pages, customers can ask questions, get instant recommendations, and even compare options—just like talking to a real shopping assistant. It’s a faster, friendlier way to help people discover products, feel confident in their choices, and move smoothly through checkout.
This is especially valuable for online store owners who want to reduce abandoned carts, answer product and order questions 24/7, and keep customers engaged after a purchase. From personalized recommendations and coupon reminders to real-time order updates, the chatbot keeps conversations flowing while supporting sales and customer satisfaction. Whether you’re running a small shop or managing a large catalog, it makes shopping more interactive, efficient, and enjoyable.
What You Need for This Setup
- Consumer Key and Consumer Secret — Copy these from your WooCommerce Plugin Settings in WordPress. If you’re not sure where to find them, check out the section below about Getting Your WooCommerce API Keys.
- Jotform AI Chatbot for WordPress Plugin — Install and set it up from your WordPress Account Dashboard. Check out our guide on How to Set Up and Use Jotform AI Chatbot for WordPress to learn more.
Connecting Your Jotform AI Chatbot to Your WooCommerce Store
Once you’ve installed and activated your WooCommerce Plugin and created your Jotform AI Chatbot, connecting the two is simple. You can do it in just a few steps:
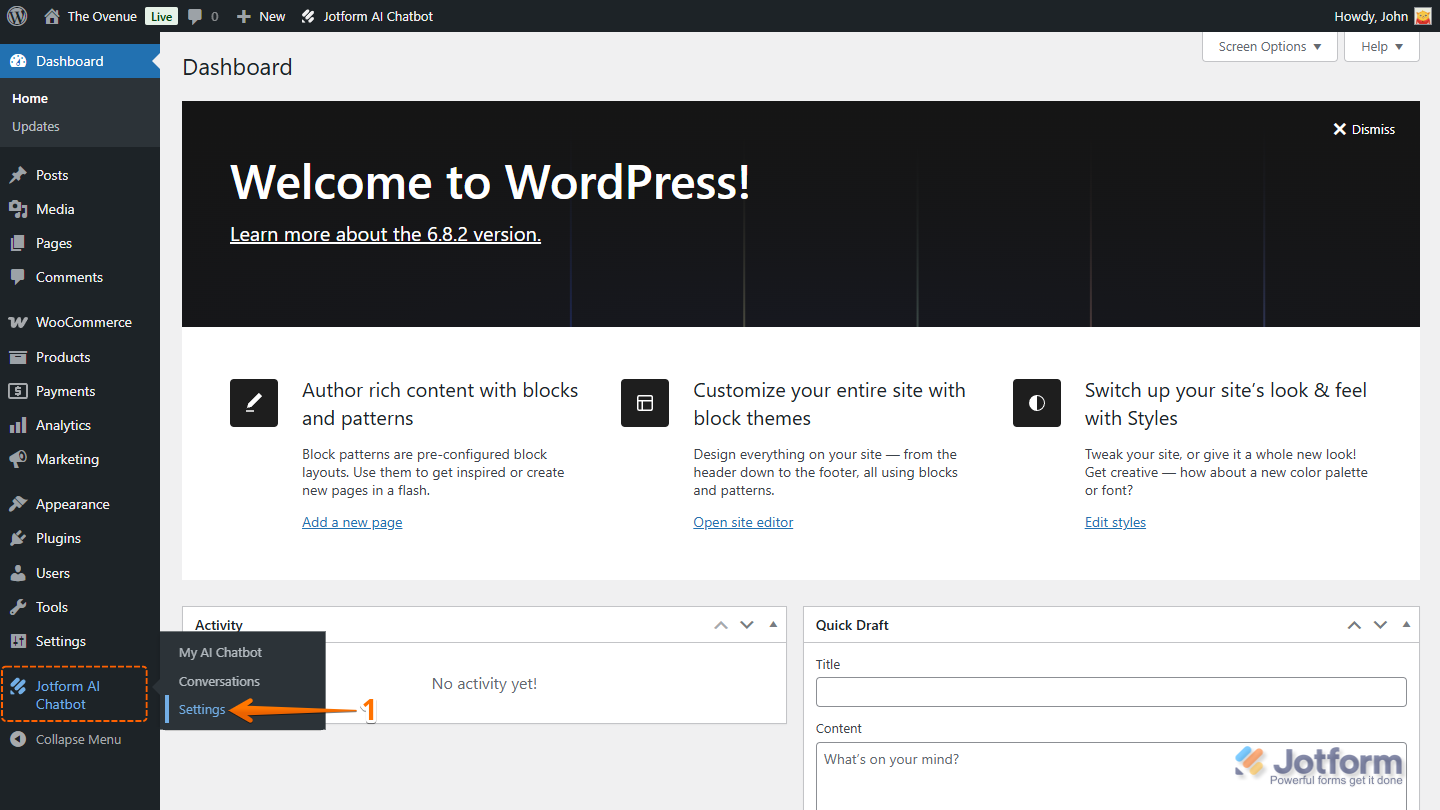
- Log in to your WordPress Admin Dashboard page, and in the menu on the left, hover your mouse over Jotform AI Chatbot, then click on Settings in the submenu that comes up.
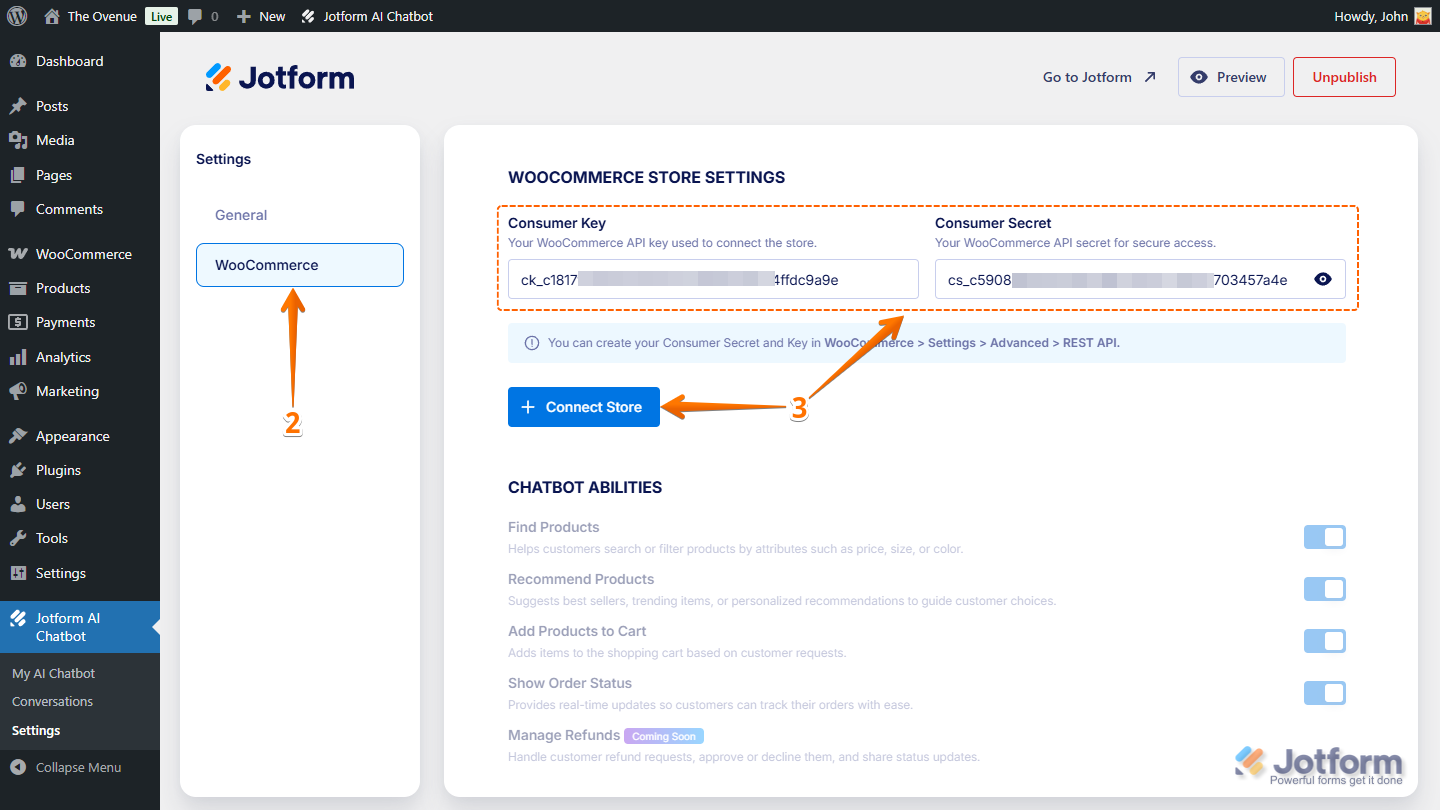
- Now, in the Settings menu on the right, click on WooCommerce.
- Then, in the WooCommerce Store Settings section, paste your API Keys into the Consumer Key and Consumer Secret boxes, and click on Connect Store.
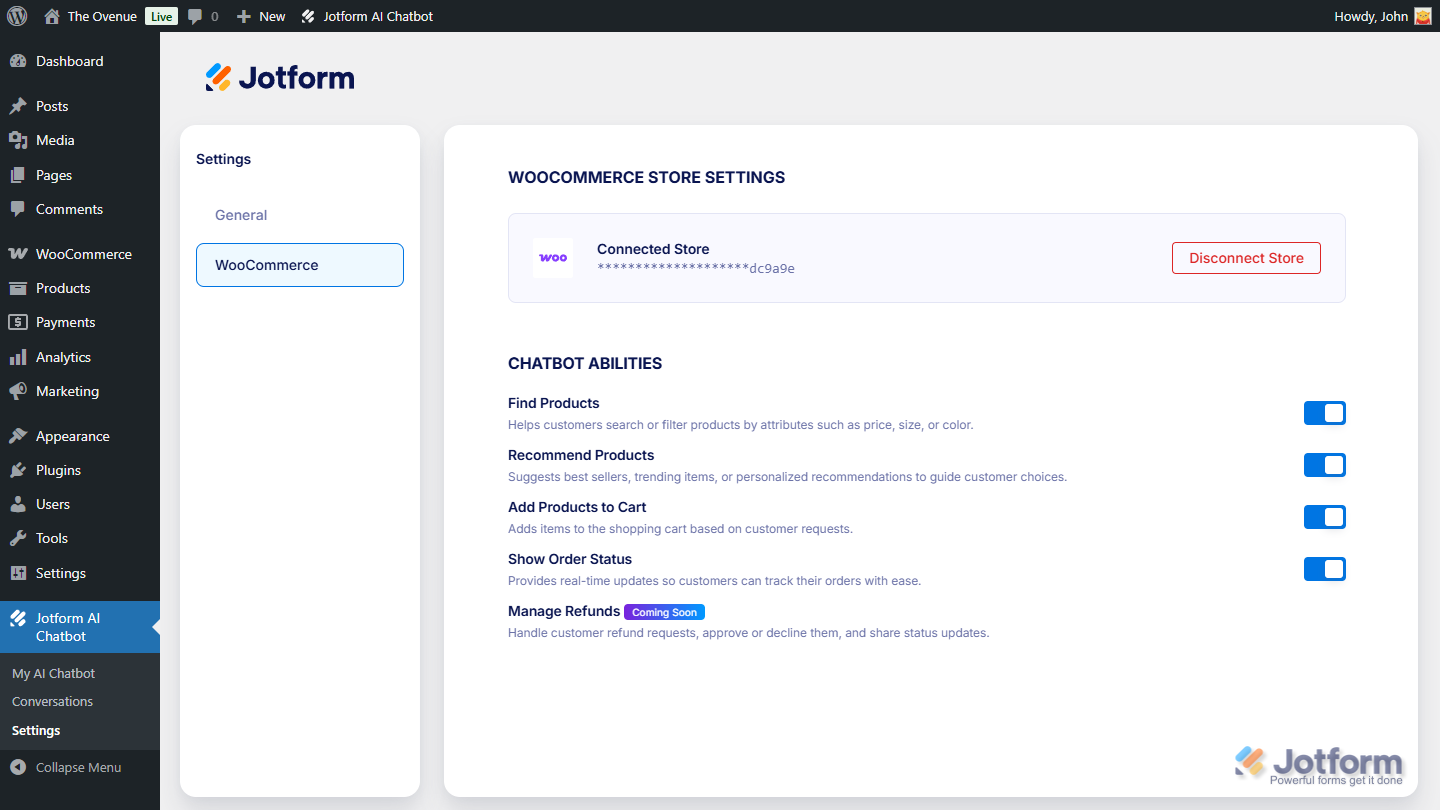
That’s it. You’ve successfully linked your Jotform AI Chatbot to your WooCommerce store, and with its help, your customers can find and filter products, get personalized recommendations, add items to their cart, and track their orders—all in one smooth experience.
Getting Your WooCommerce API Keys
After setting up your WooCommerce store, the next thing you’ll need is your API keys. You can get them in just a few steps—here’s how:
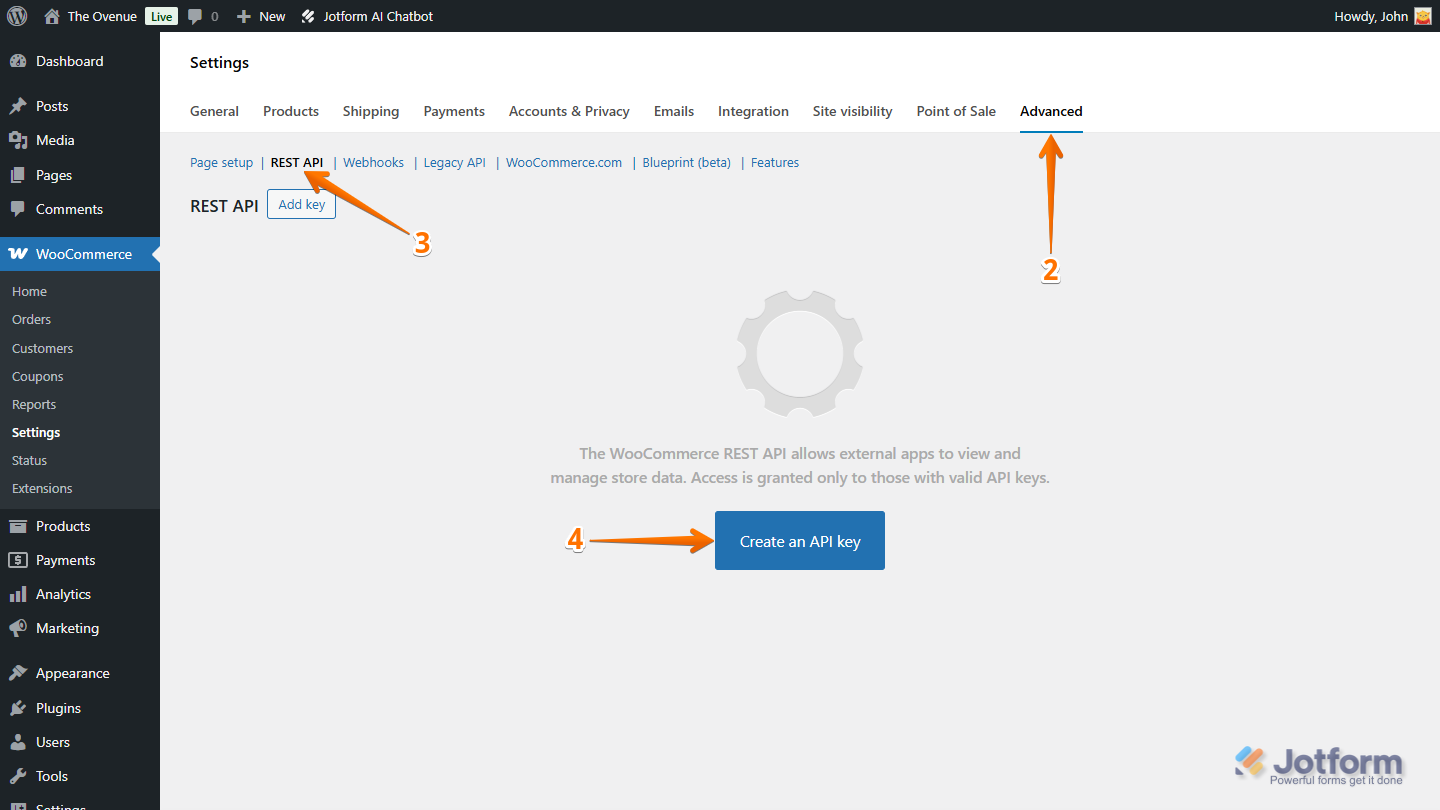
- Log in to your WordPress Admin Dashboard page, and in the menu on the left, hover your mouse over WooCommerce, and then click on Settings in the submenu that comes up.

- Now, in the navigation bar at the top of the Settings section on the right, click on Advanced.
- Then, under the Advanced tab, click on Rest API.
- Next, in the middle of the page, click on Create an API Key, or if you’ve already created one before, click Add Key on the right side of Rest API.
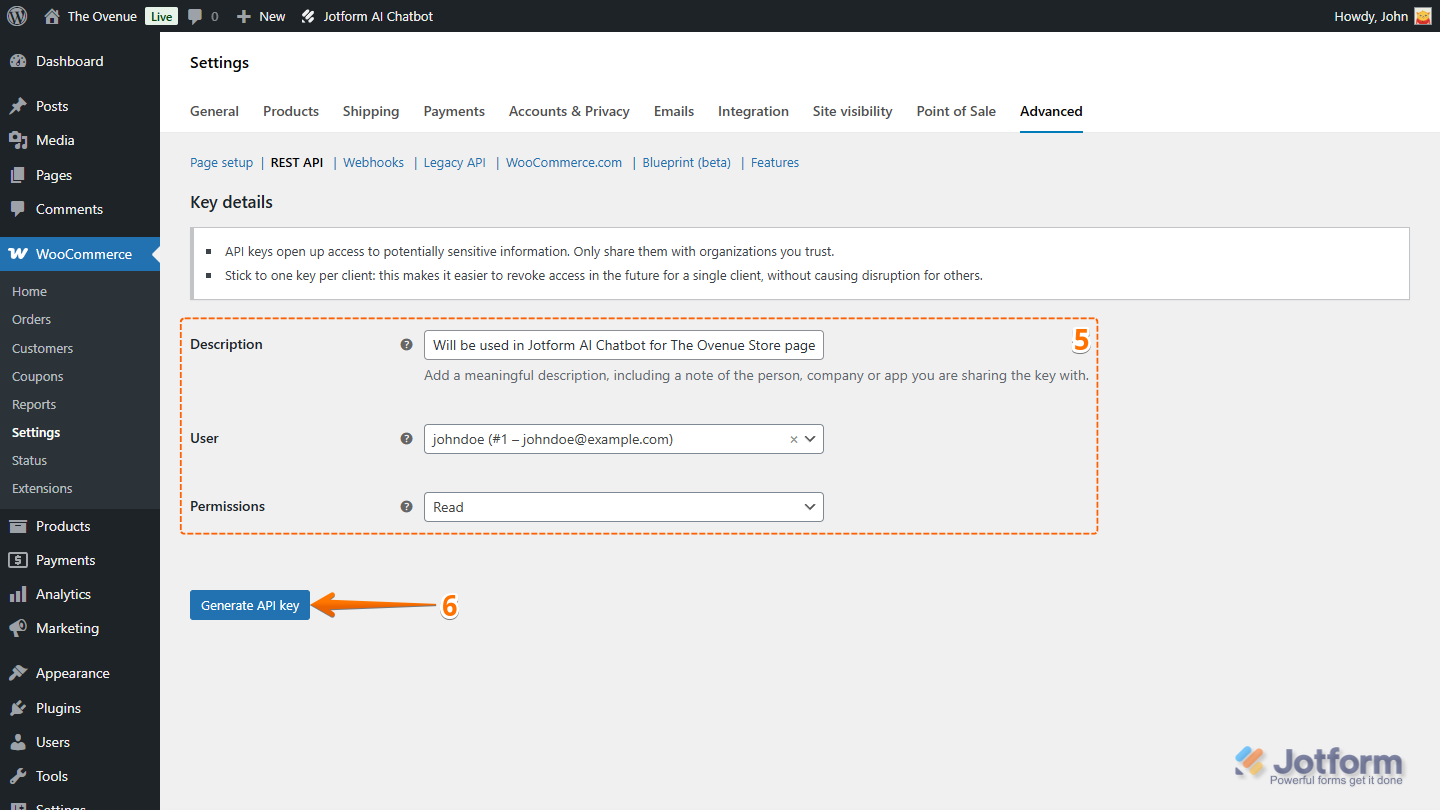
- Now, you’ll see a list of settings you can configure:
- Description — Enter a short, meaningful description, such as the name of the person, company, or app you’re sharing the key with.
- User — Select the user’s account you want to generate the API key for.
- Permission — Keep the Read option selected here.
- After that, click on Generate API Key.
- Once everything looks good, click on Copy on the right side of the generated Consumer Key and Consumer Secret. You’ll need them to connect your Jotform AI Chatbot to your WooCommerce store, so keep them somewhere safe and easy to find.
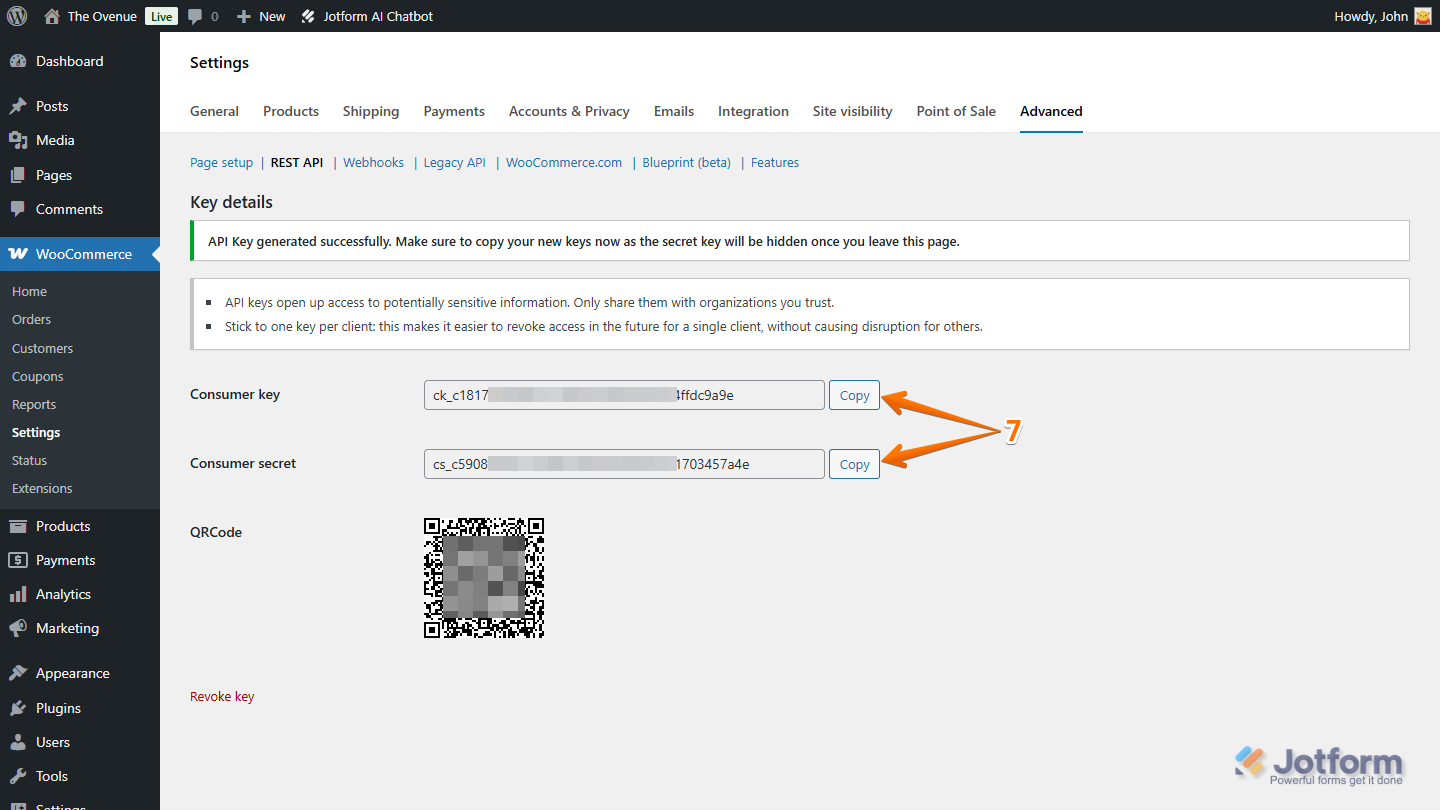
That’s it. You’ve successfully copied your WooCommerce API keys, and now you’re ready to use them to connect your Jotform AI Chatbot to your store.

Send Comment: