With Jotform Enterprise, admins can choose which payment processors and widgets users can access when building forms. This helps keep things organized, makes form building easier, and helps teams follow company rules. It’s an easy way to make sure everyone uses the right tools without extra steps.
Note
Only Enterprise Admins with access to the Admin Console can control which payment methods and widgets are allowed.
Enabling or Disabling Payment Integrations
To manage which payment options your team can use, you can enable or disable specific payment integrations directly from the Admin Console. This gives you full control over the processors available in Form Builder. And it only takes a few steps to set up:
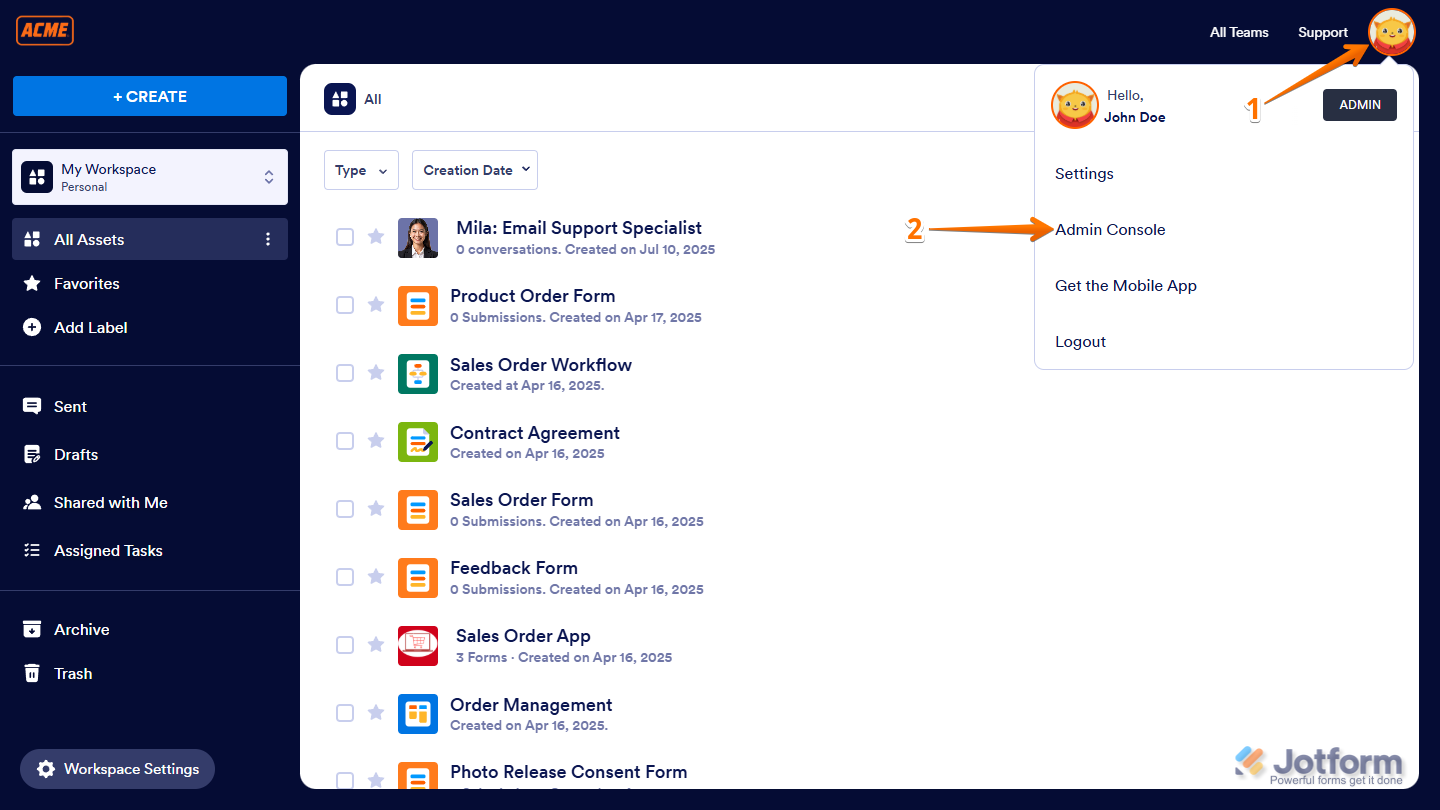
- On your My Workspace page, click on your Avatar/Profile picture on the top-right side of the screen.
- Then, in the menu that comes up, click on Admin Console.
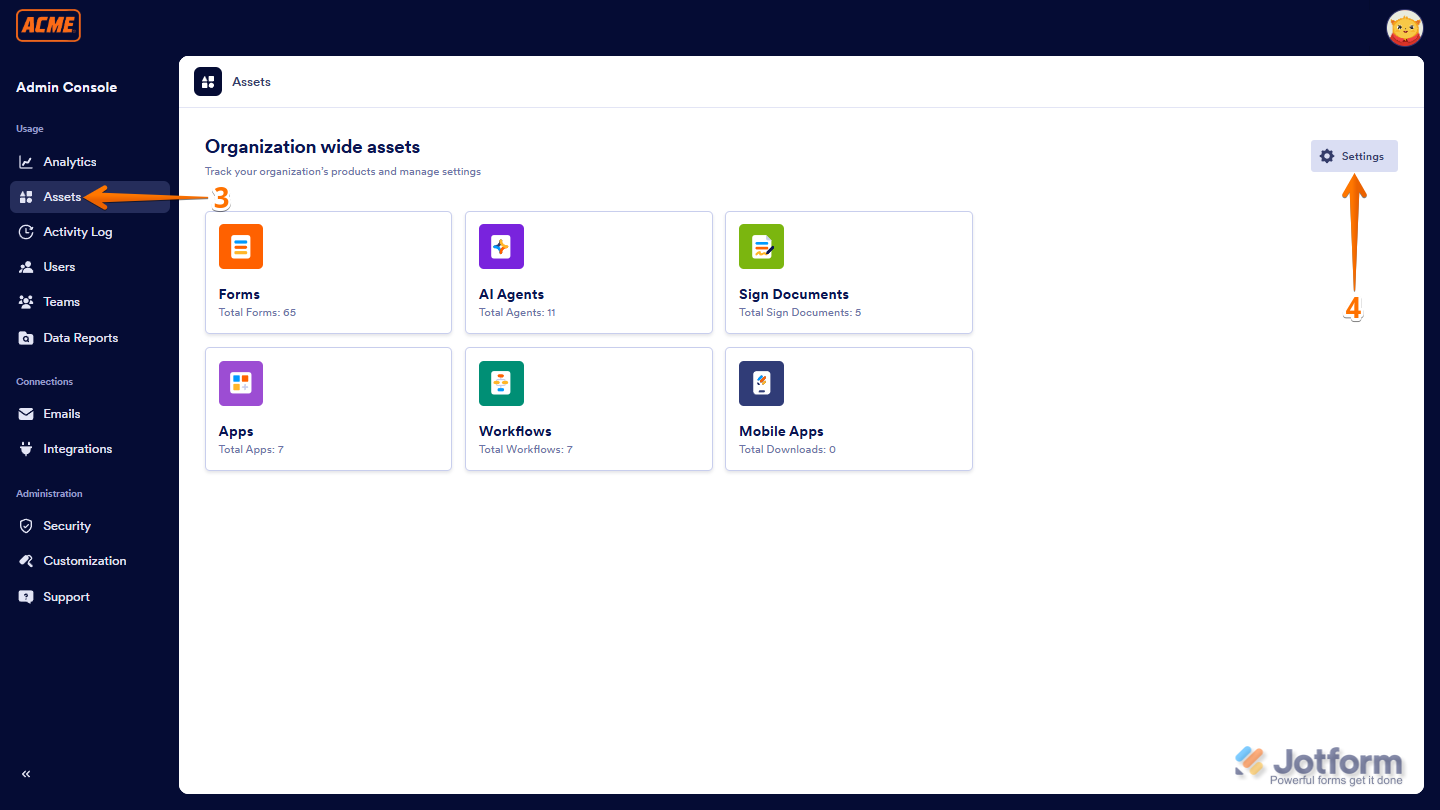
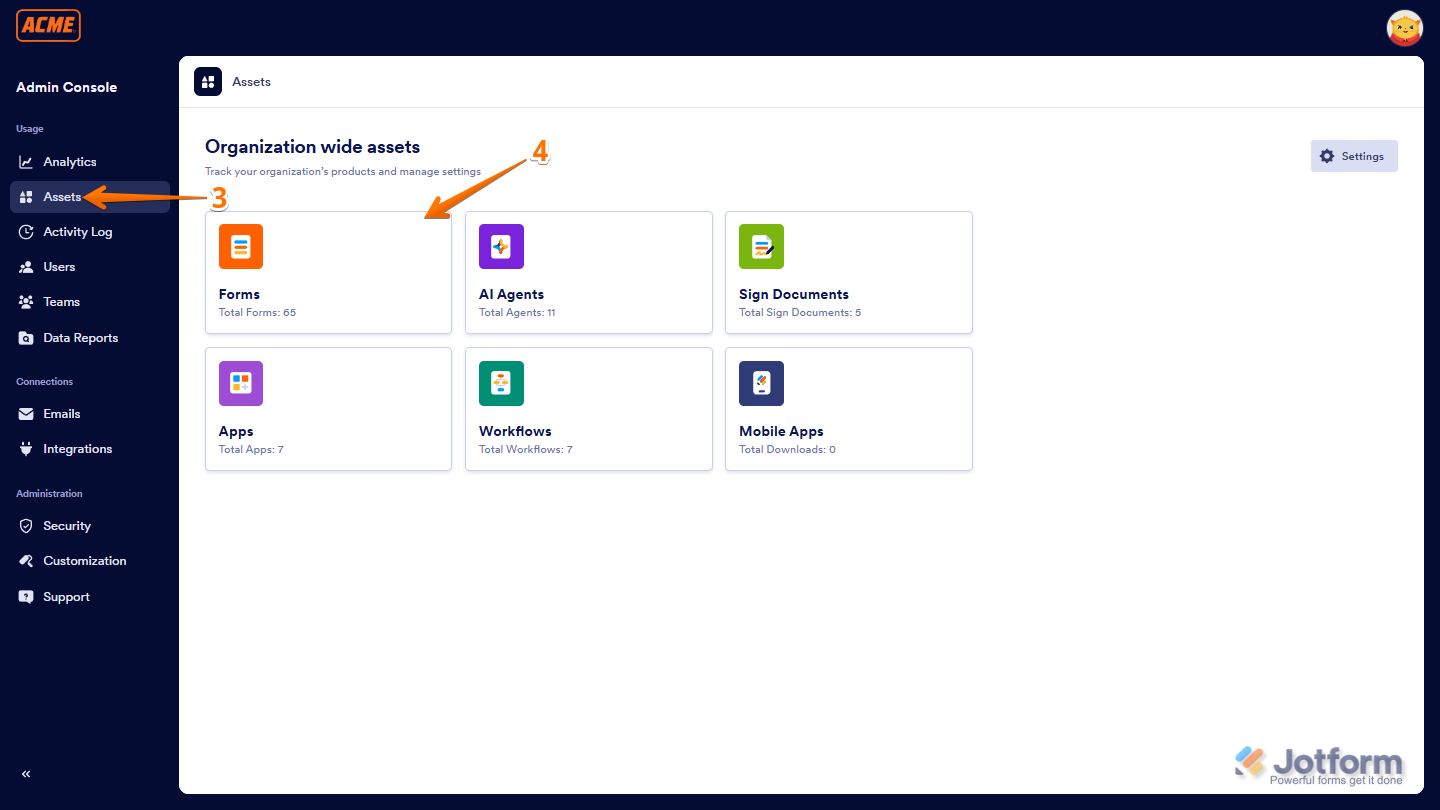
- Next, in the menu on the left side of the Admin Console page, click on Assets.
- Then, on the right side of the Organization Wide Assets page, click on Settings.
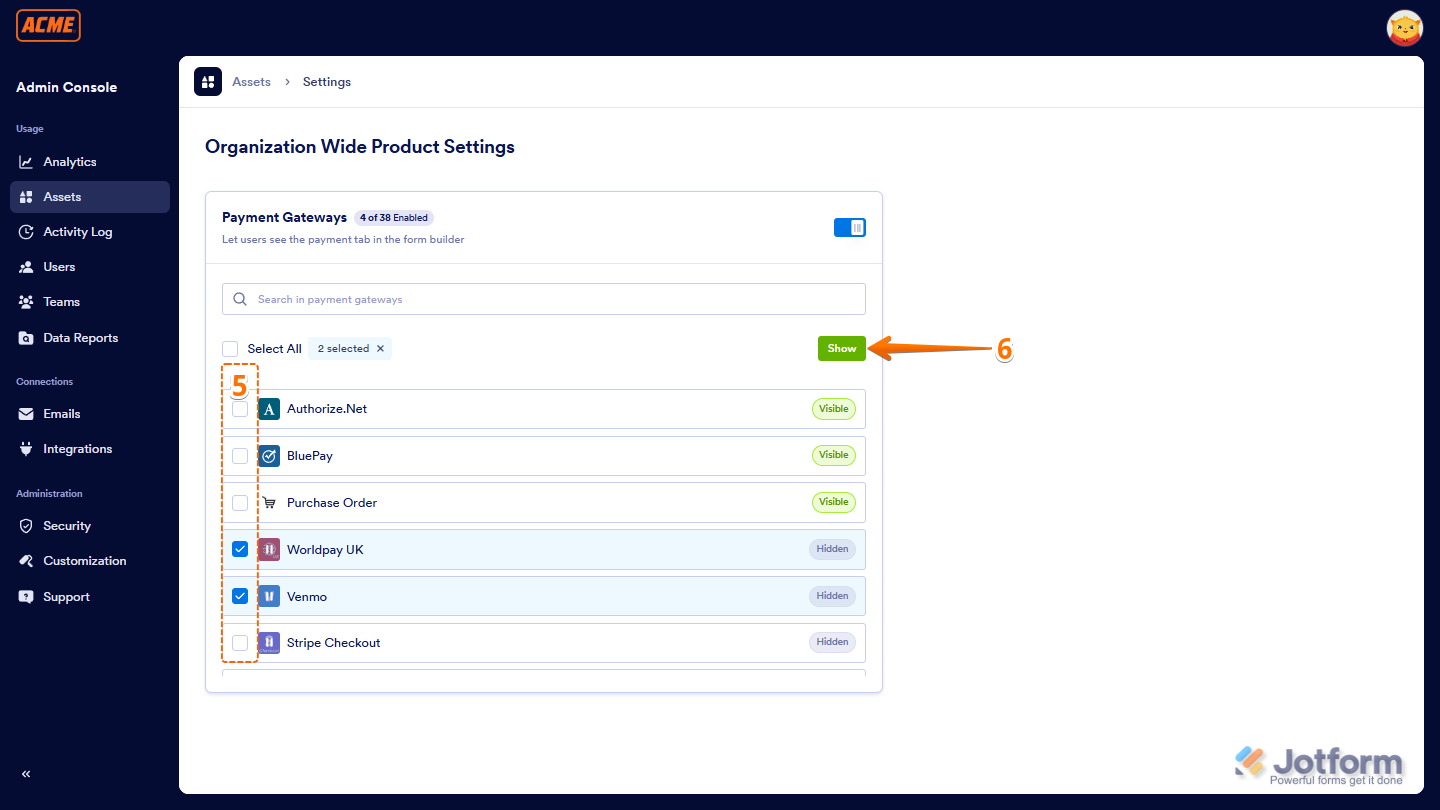
- Now, under the Payment Gateways section, check or uncheck the boxes to control which payment options appear in the Payments tab of Form Builder.
- Then, click on Show.
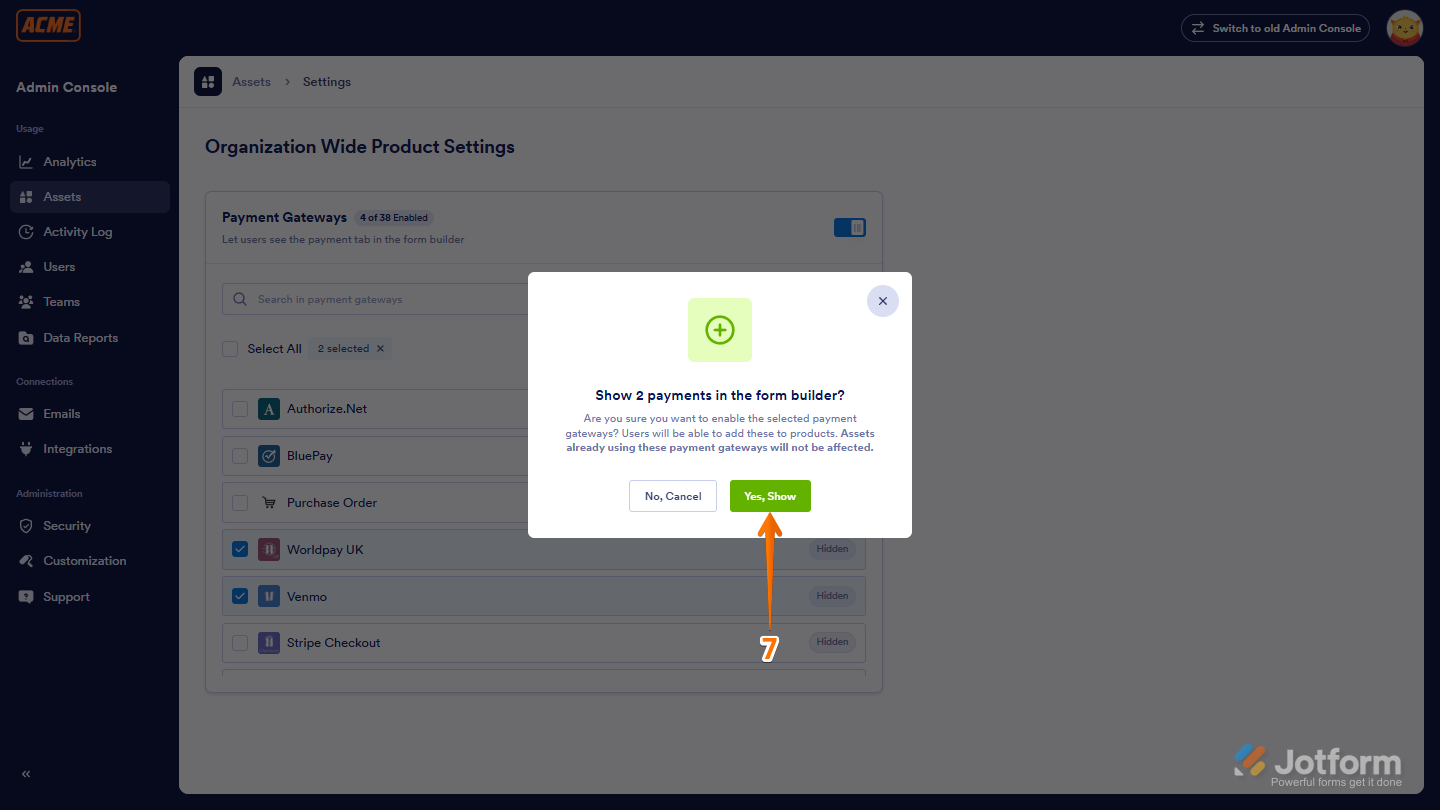
- Now, in the window that comes up, click on Yes, Show, and you’re all set.
That’s it! Now, only the selected payment integrations will appear in the Form Elements menu under the Payments tab in Form Builder.
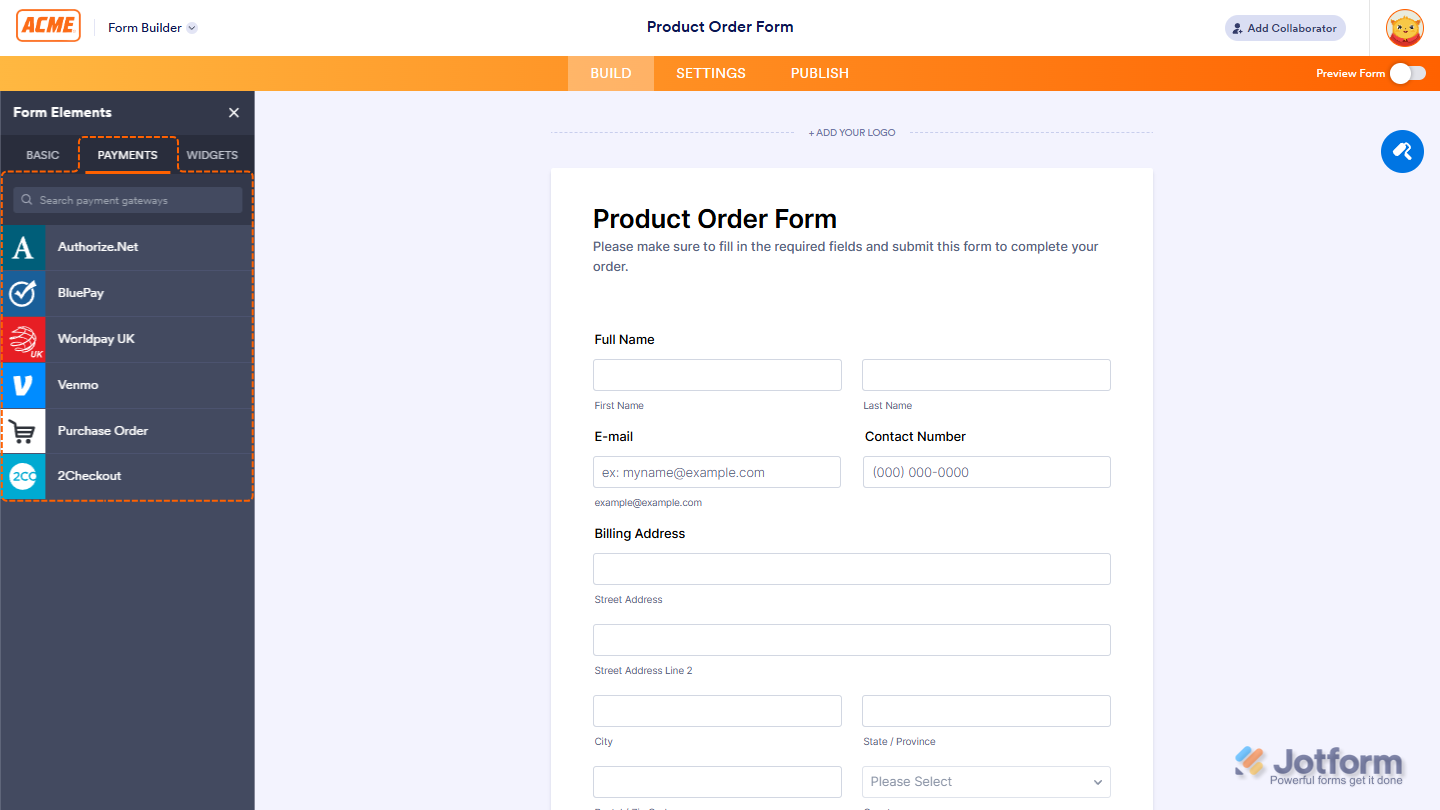
You can also turn off the Payment Gateways to completely hide the Payments tab from the Form Elements menu in Form Builder.

If you turn off the Payment Integrations section, it’ll be completely hidden and won’t appear in the Form Elements menu.

Enabling or Disabling Widgets
You can also manage which widgets are available to your team by enabling or disabling them from the Admin Console. This helps ensure that only the right tools are accessible in Form Builder. Here’s what to do:
- On your My Workspace page, click on your Avatar/Profile picture on the top-right side of the screen.
- Then, in the menu that comes up, click on Admin Console.

- Next, in the menu on the left side of the Admin Console page, click on Assets.
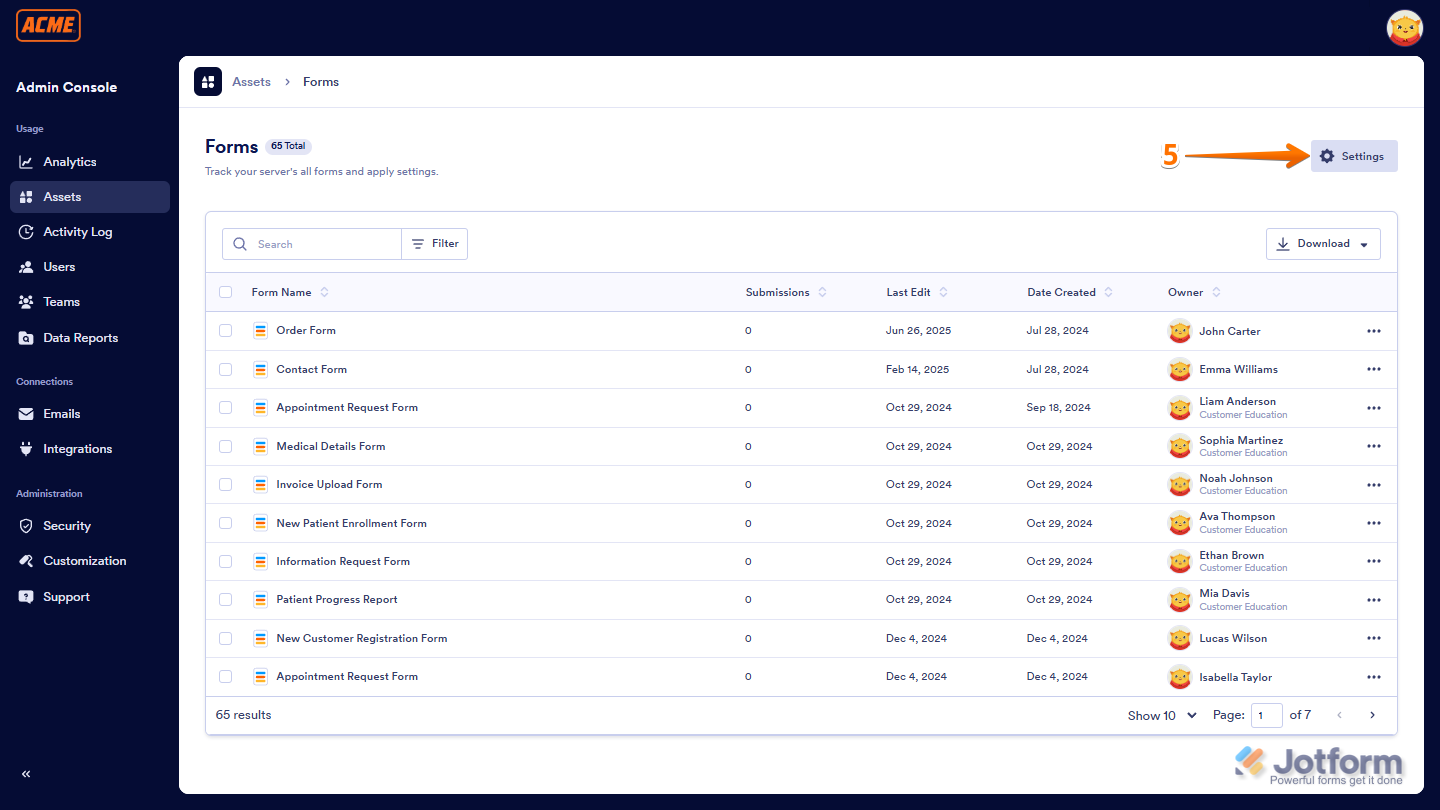
- Then, in the Organization Wide Assets section on the right, click on Forms.
- Next, on the right side of the Forms section, click on Settings.
- Now, under the Form Settings section, check or uncheck the boxes to control which payment options appear under the Widgets tab of Form Builder.
- Then, click on Show.
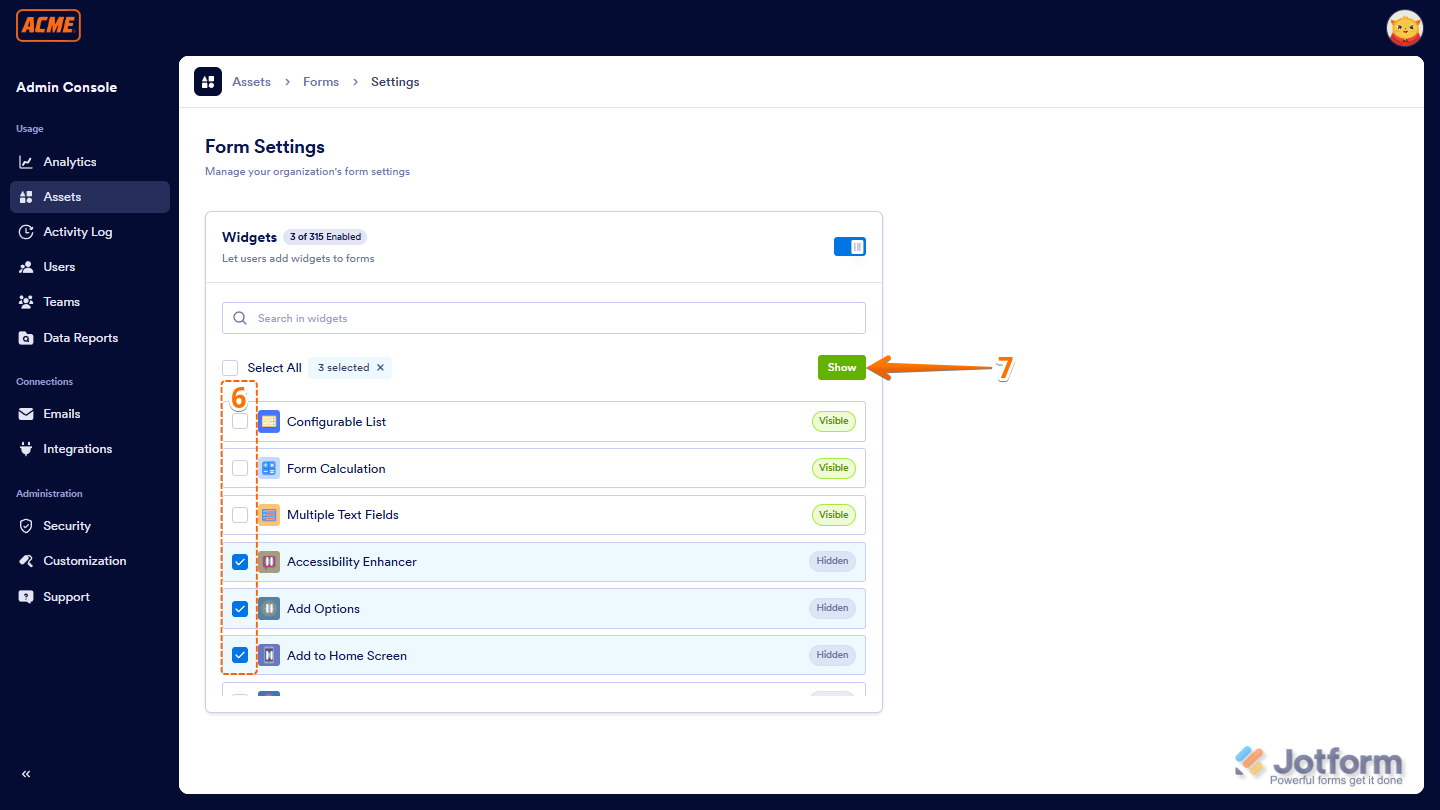
- Now, in the window that comes up, click on Yes, Show, and you’re all set.
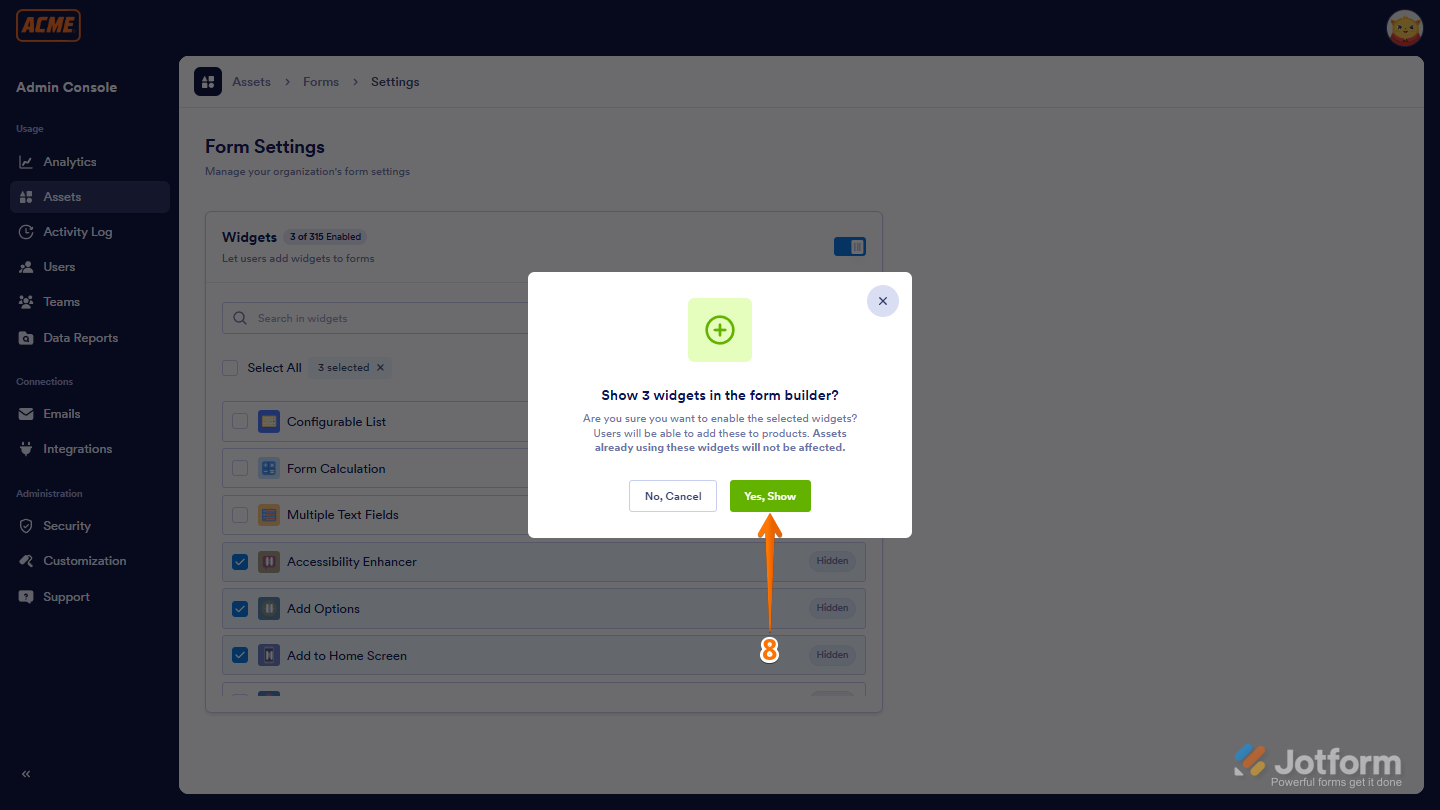
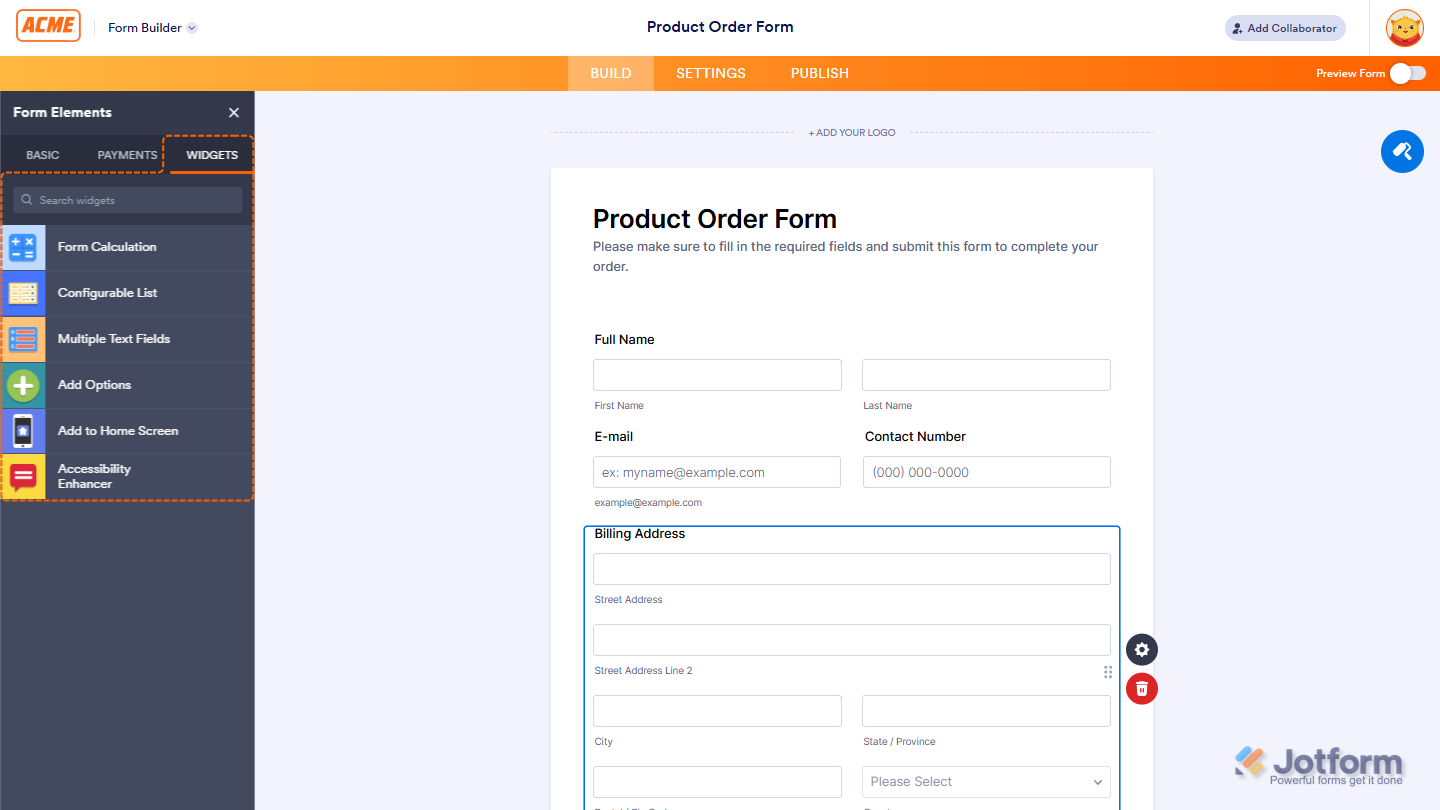
That’s it! Now, only the selected widgets will be shown in the Form Elements menu under the Widgets tab in Form Builder.
You can also turn off the Widgets to completely hide the Payments tab from the Form Elements menu in Form Builder.
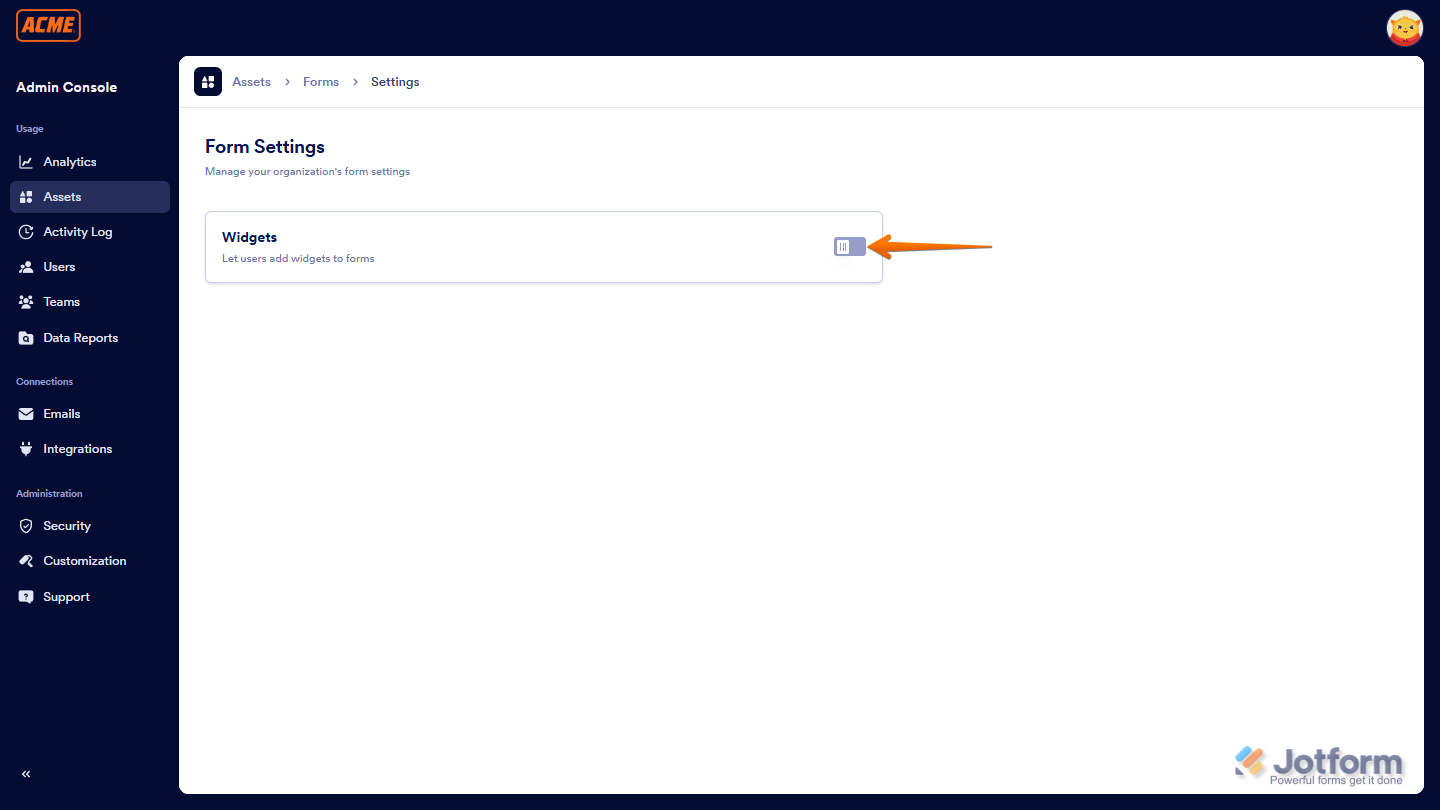
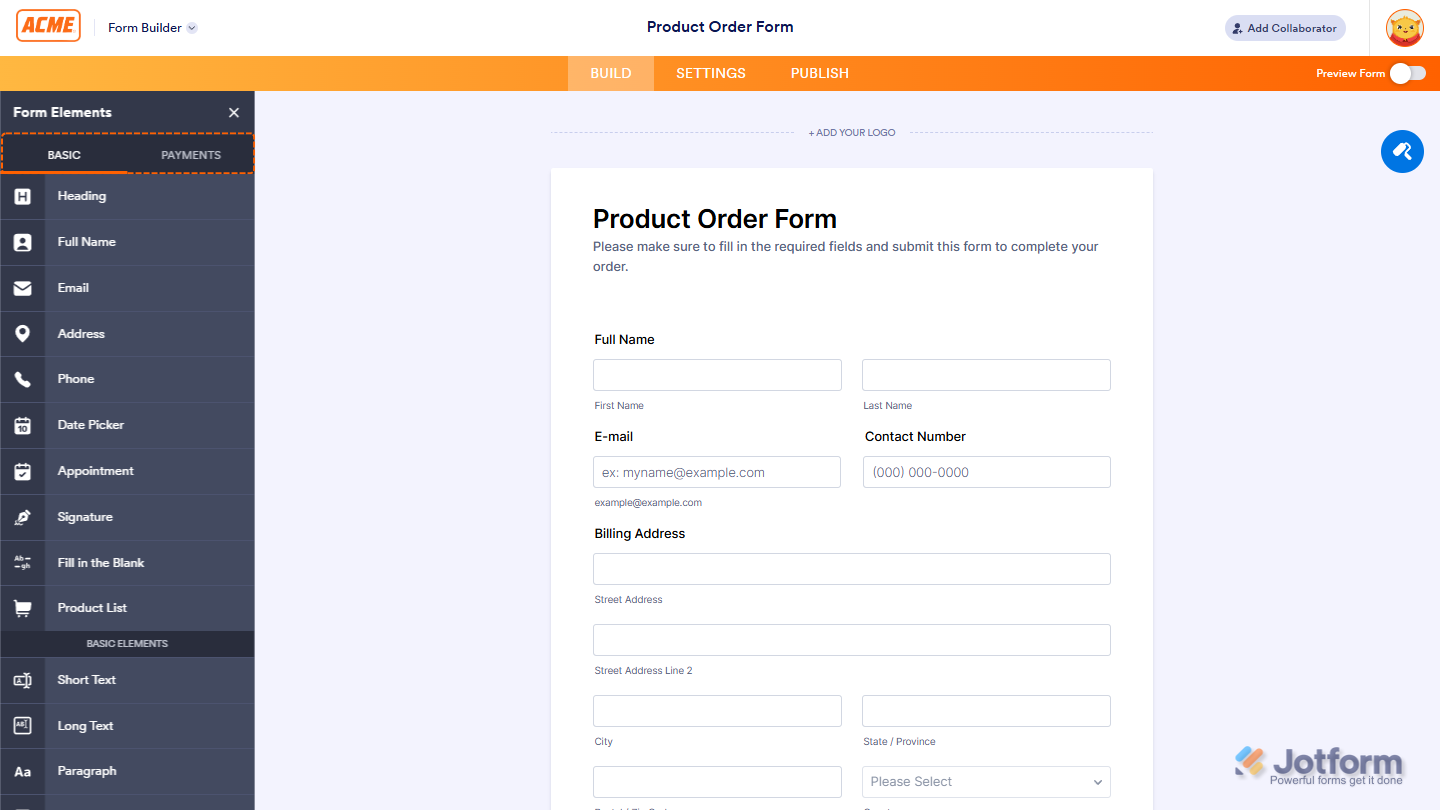
If you turn off the Widgets section, it will be completely hidden and won’t be shown in the Form Elements menu.

Send Comment: