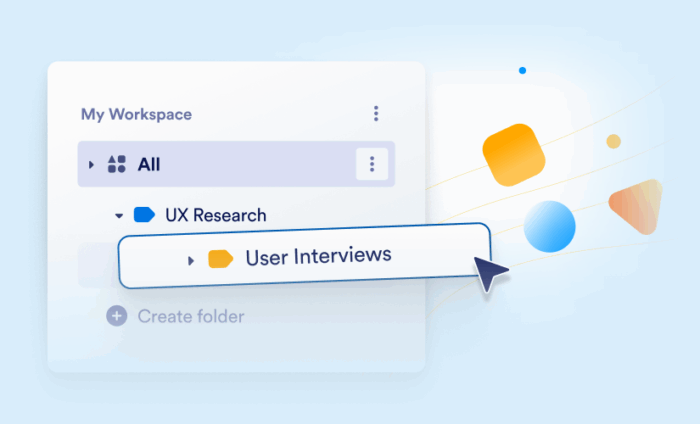
We recently debuted My Workspace, a new homepage for our users that provides better product discoverability. Now all of your Jotform assets (forms, workflows, AI Agents, apps, and more) are listed together in a single view.
While listing everything you create with Jotform in one place is handy, it also means organization options are important so you can quickly find exactly what you need. So to help you keep your assets organized, we’ve added a labels feature, which allows for easy and flexible categorization of any asset you create.
The new labels feature lets you
- Filter and view forms, AI Agents, workflows, apps, Sign documents, tables, and reports based on assigned labels
- Assign multiple labels to a single asset, giving you flexibility in how you filter and group assets
- Create sublabels for more detailed organization
How to create labels and add them to your assets
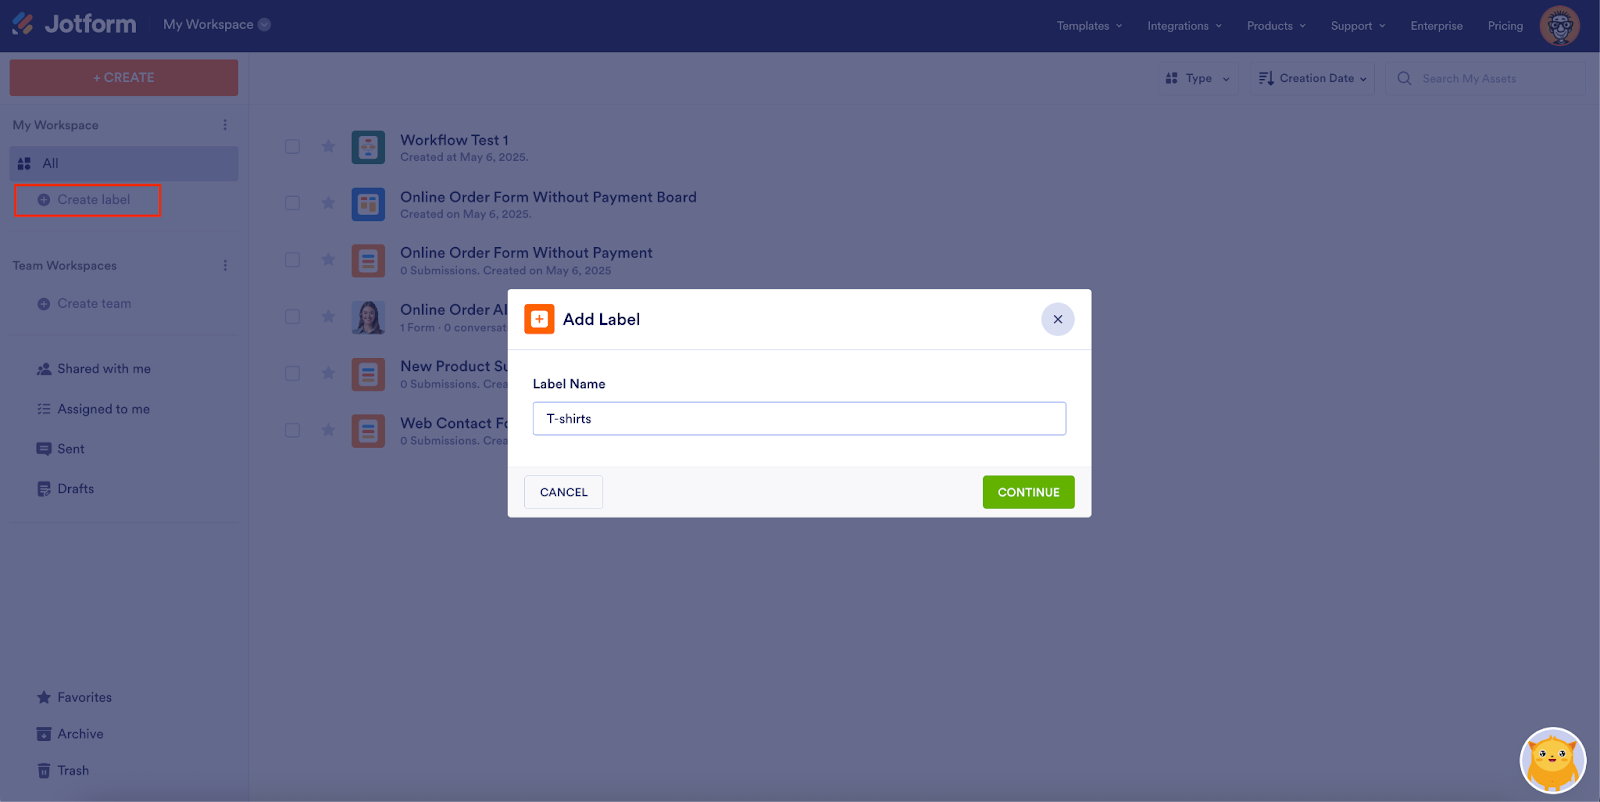
Adding labels is easy. From the sidebar of your My Workspace page, select Create label. In the Add Label window that opens, enter the label name and select Continue.
Now you’ll see the new label in the My Workspace sidebar. To apply the label to any of your assets, select an asset, select Label as from the toolbar, choose one or more labels, and select Apply. You can also select multiple assets at once and label them together.
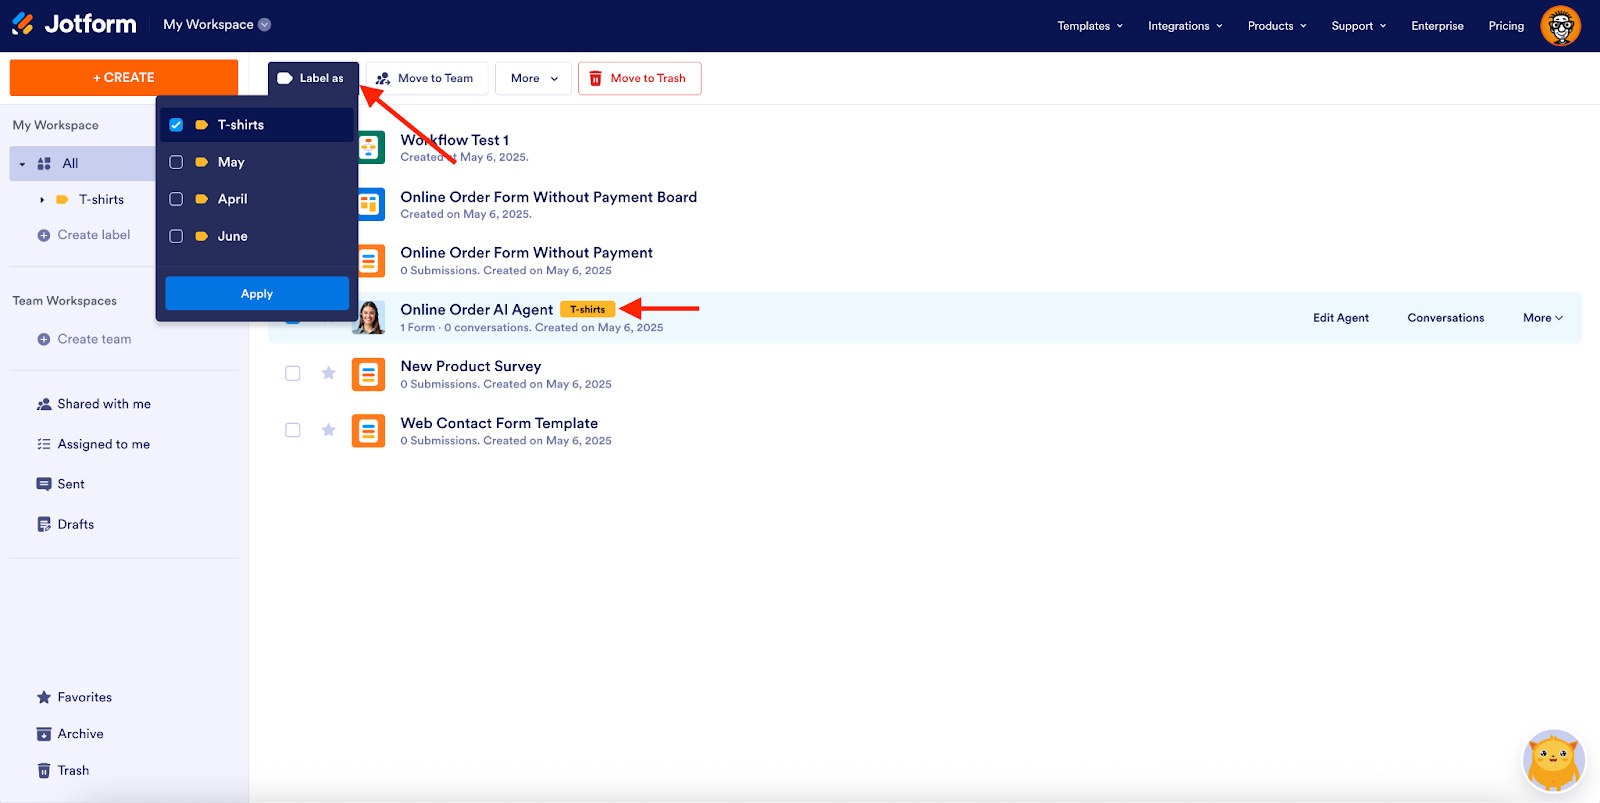
You can create as many labels as you’d like and apply as many labels to an asset as you’d like — useful, since one asset may need to be categorized in multiple ways or used across multiple projects.
How to create sublabels
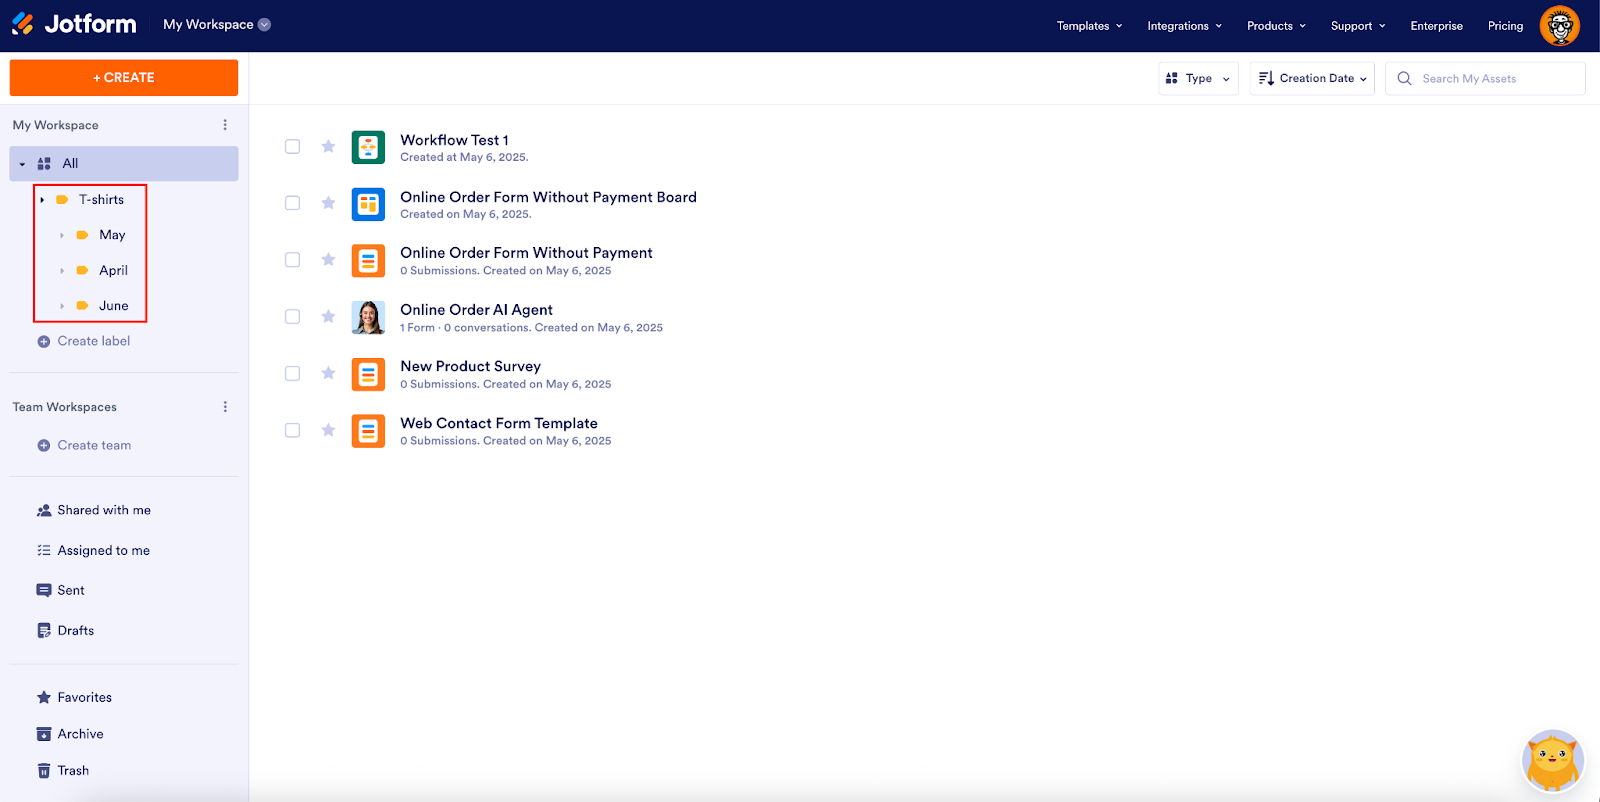
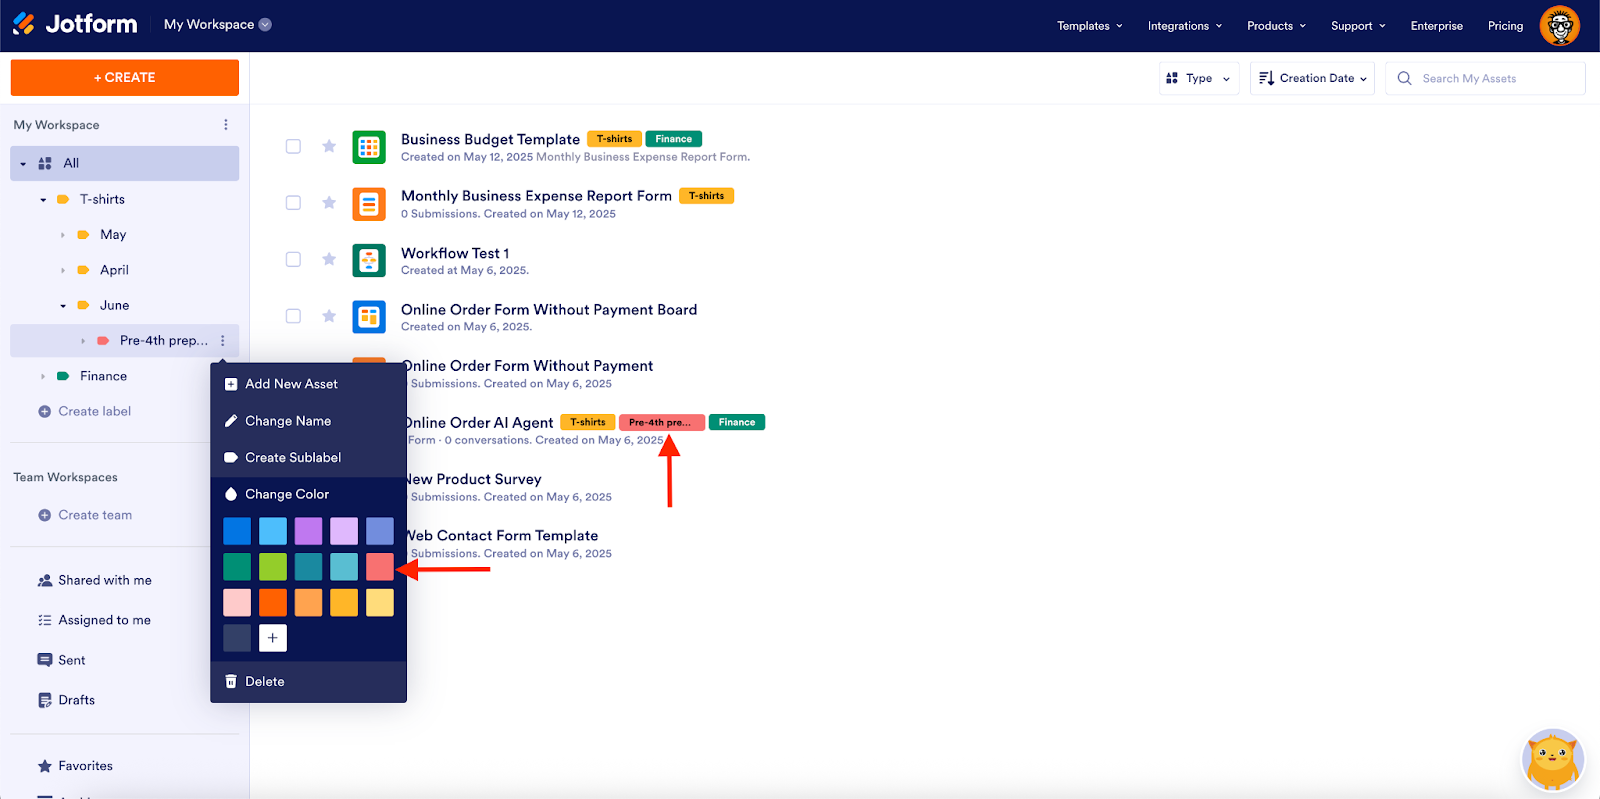
When you want to add even more levels of organization to your assets, you can create sublabels. For example, if I have monthly campaigns for T-shirt sales, I can create a sublabel for each month.
To create a sublabel, hover over a label in the My Workspace sidebar, select the three-dot icon, and select Create Sublabel.
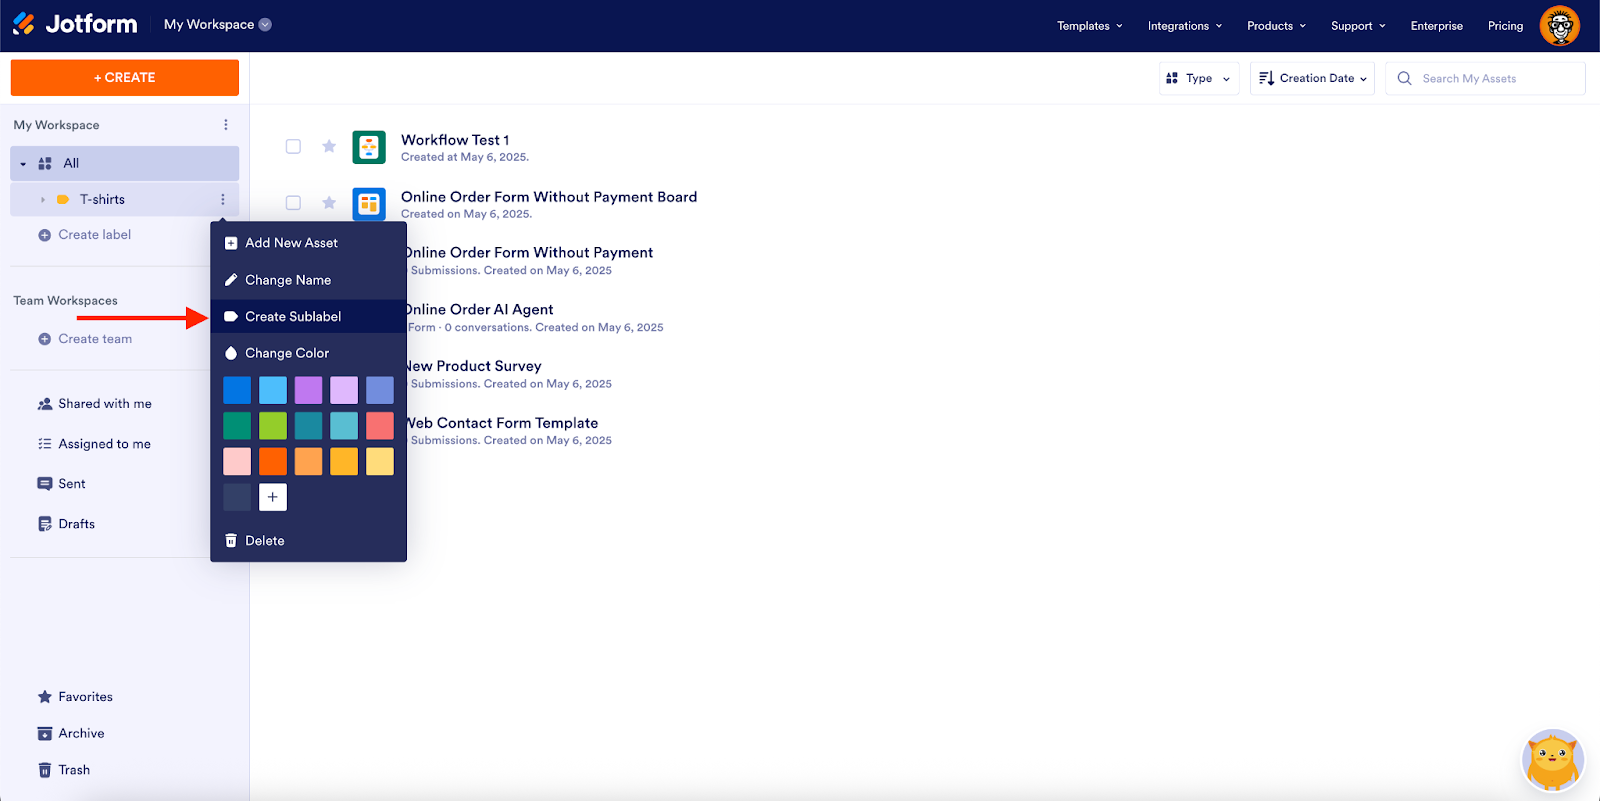
Enter your sublabel name and select Continue. Your new sublabel will be nested under the original label in the My Workspace sidebar.
Did you know…
You can create as many labels as you need, but you can only make four levels of sublabels.
Some additional tips for labeling your assets
If you’d like to label your assets on the fly as you create them, there’s a way you can do so automatically. Hover over a label in the My Workspace sidebar, select the three-dot icon, and select Add New Asset.
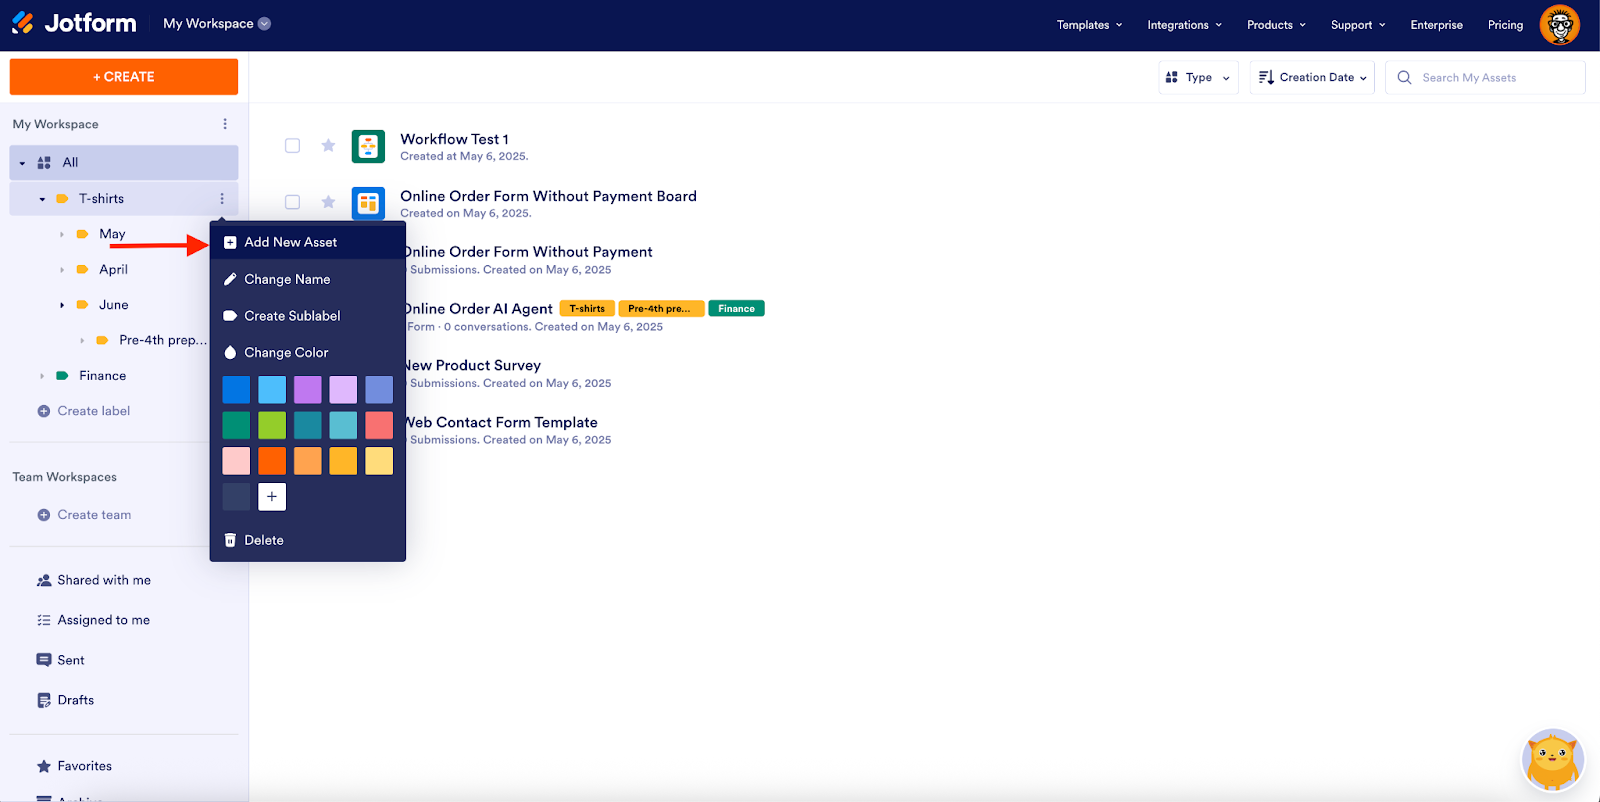
The product creation page will open. Choose the asset you want to automatically add to the label. You’ll be redirected to the asset’s builder page. Now, whenever you create that type of asset, it’ll automatically carry the label you chose.
How to customize labels
To change a label name, hover over the label in the My Workspace sidebar, select the three-dot icon, and select Change Name.
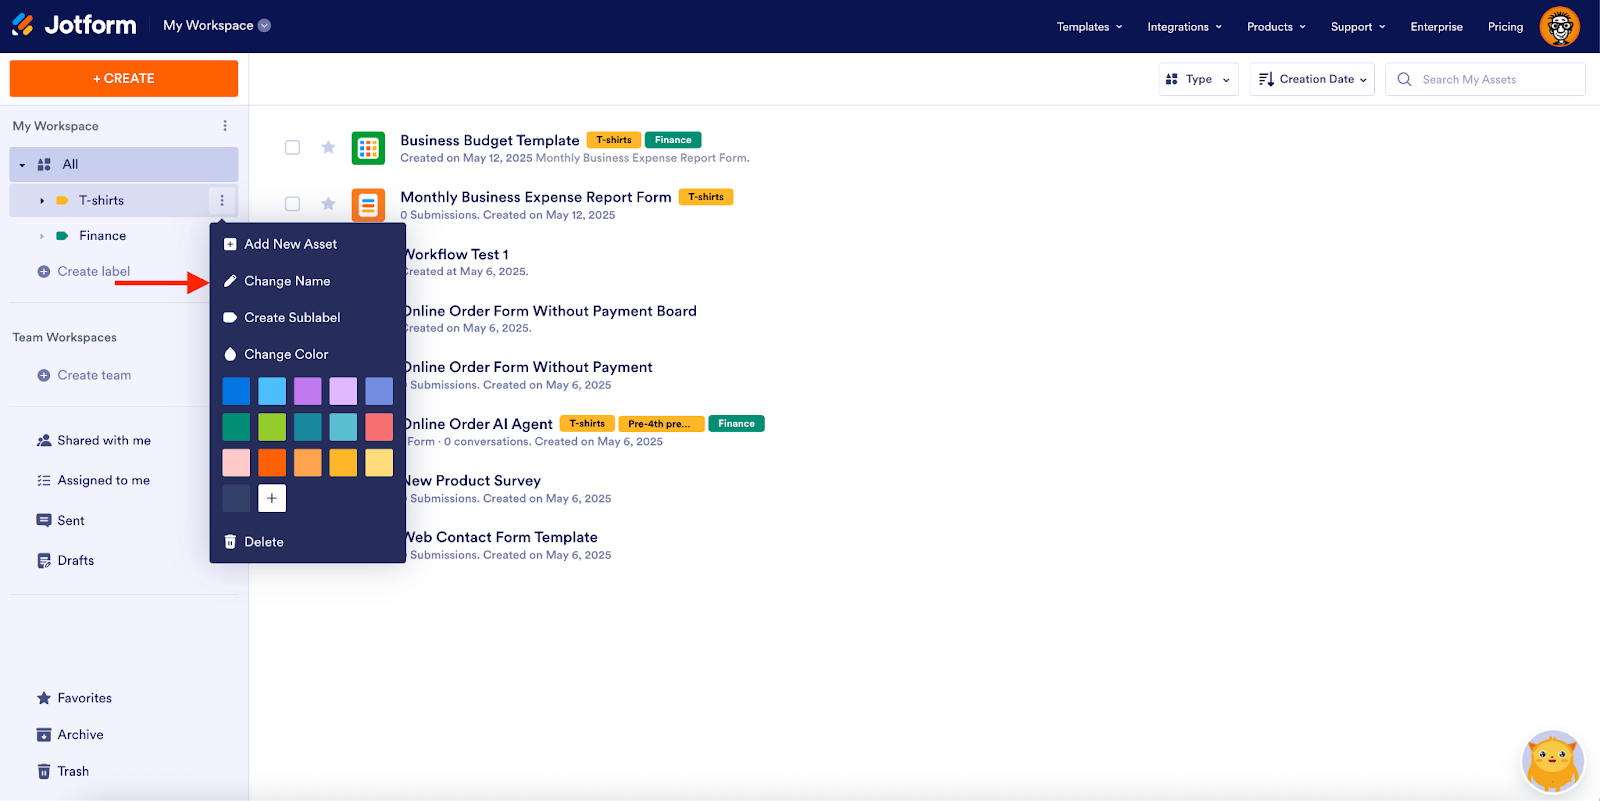
For our synesthetes out there 🎨, you can color-code your labels as well, which can help you quickly identify particular project assets.
Pro Tip
To remove a label from one of your assets, hover over the label name within the asset listing and select the X button that appears. You can also select the asset, select the Label as button from the toolbar, uncheck the label, and select Apply.

Navigating labels
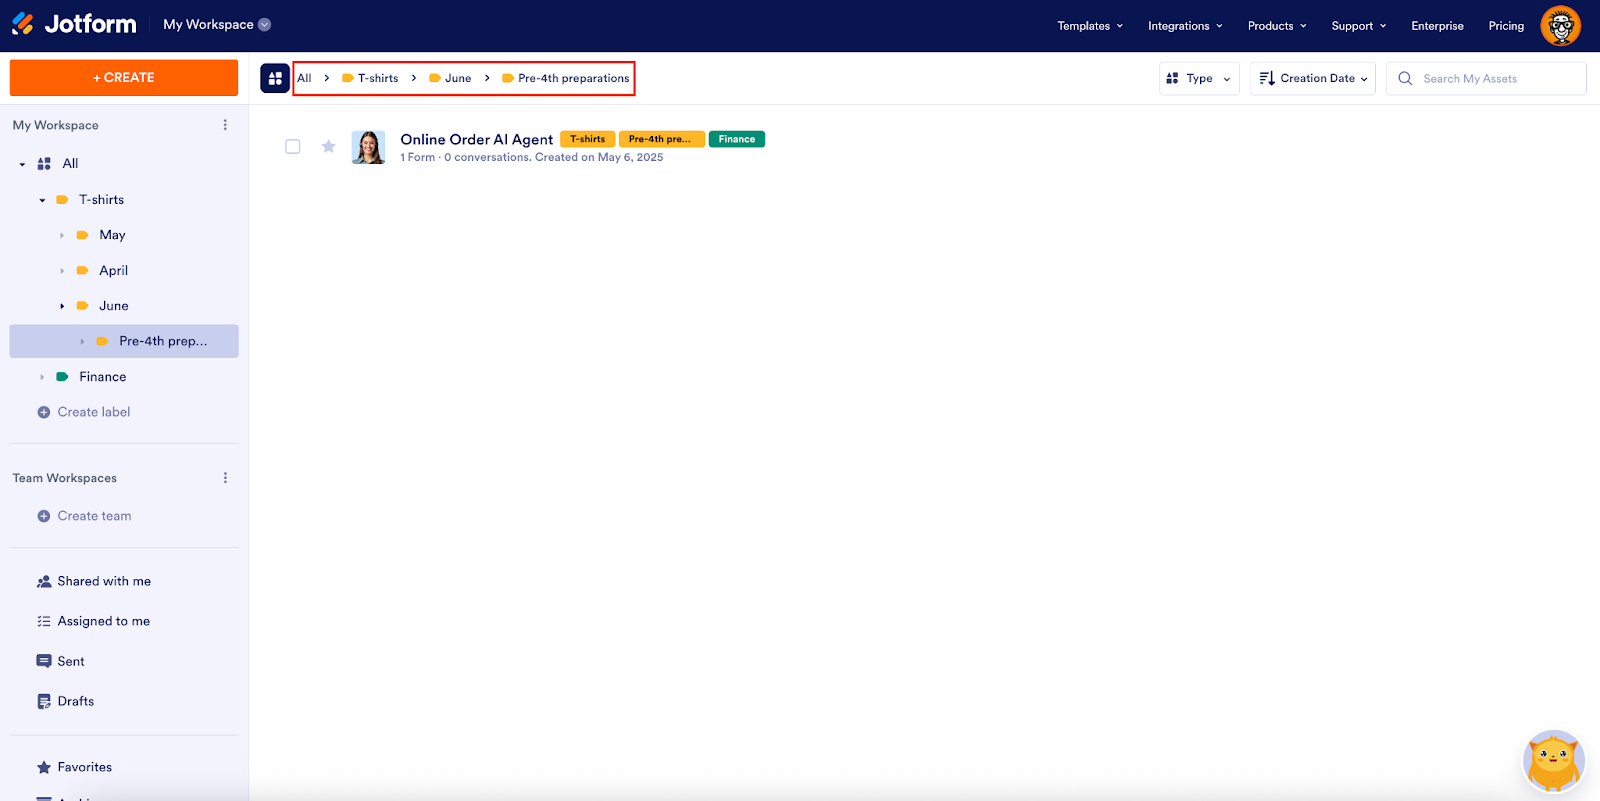
When you select a label from the My Workspace sidebar, its associated assets will appear. To navigate out of the labeled assets view, select All from the sidebar.
The breadcrumb at the top of the page shows the level of the label applied to the assets you’re viewing. If you select a label in the breadcrumb you will return to that label’s level.
***
With My Workspace labels, it’s never been easier for you to quickly find what you need and manage your assets based on how you work and what you want to get done today.
Check out our help guide for more information about adding labels to your assets and keeping your workspace as organized and efficient as possible!


 increases productivity for your small business")


 can boost your productivity")


")


Send Comment:
1 Comments:
113 days ago
Quel sont les articles qui sont recommandés