
When you think of word processors, what’s the first one that comes to mind? Microsoft Word, the longtime standby that’s been around decades, is probably what pops into your head. Word is the old guard, the place where papers, projects, and outlines are written, and the model on which other word processors like Google Docs have been based.
But if you’re running a dynamic business, sometimes word processing alone isn’t enough — especially if you want to create fillable forms to conduct surveys or safely collect personal information from your users.
If you’re wondering how to create a fillable form in Word, look no further. We’ll discuss the options, plus cover the capabilities these forms unlock and how they can help speed up your workflow.
Why use fillable forms in Word?
Using fillable forms in Word offers efficient automation and consistent data collection, making tasks quicker and reducing human error. They’re ideal for repetitive tasks like onboarding employees, gathering survey responses, or standardizing requests.
Compared to static PDF forms or online form builders, Word fillable forms provide an accessible, offline-friendly alternative—perfect for teams working in environments with limited internet access or when quick offline edits are essential. However, if your forms require real-time data integration or advanced conditional logic, online form builders like Jotform might be more suitable. Word is best when straightforward form, functionality and familiarity are top priorities.
Step-by-step: How to create a fillable form in Word
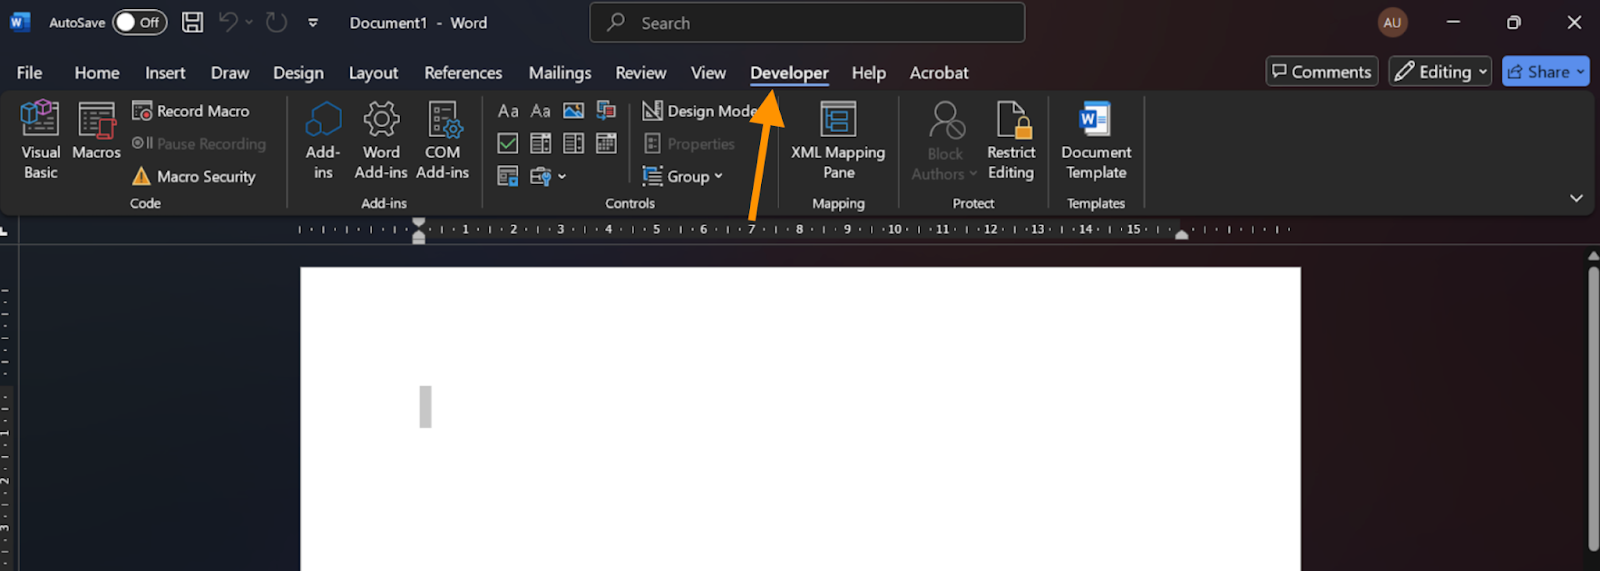
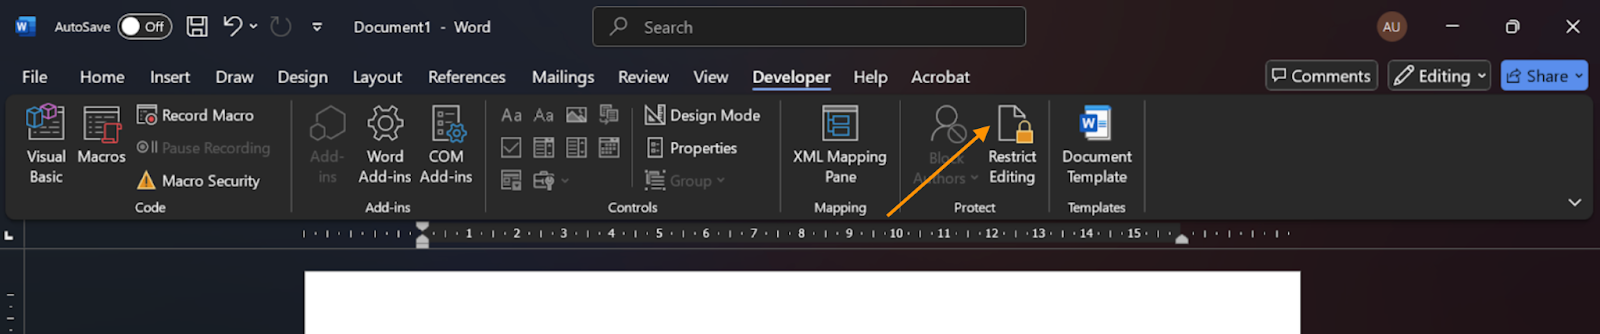
Step 1: Enable the developer tab
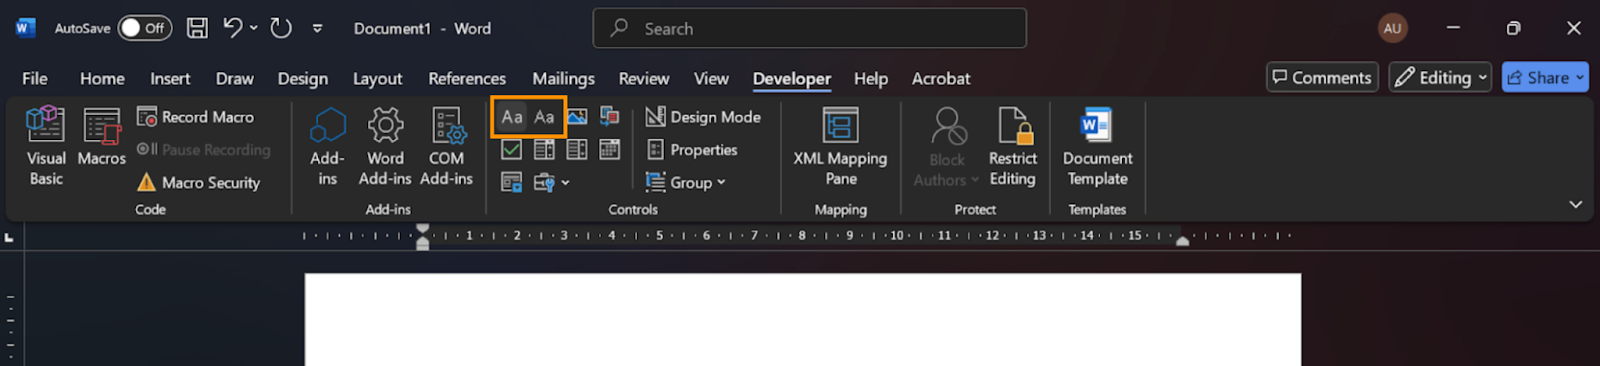
If you work with more complex forms, you might want to take advantage of Word’s developer tools. To do this, make sure Word’s developer menu is enabled. When building a form with developer tools, you’ll insert checkboxes or dropdown menus for individual users to fill out.
- Click File, then select Options.
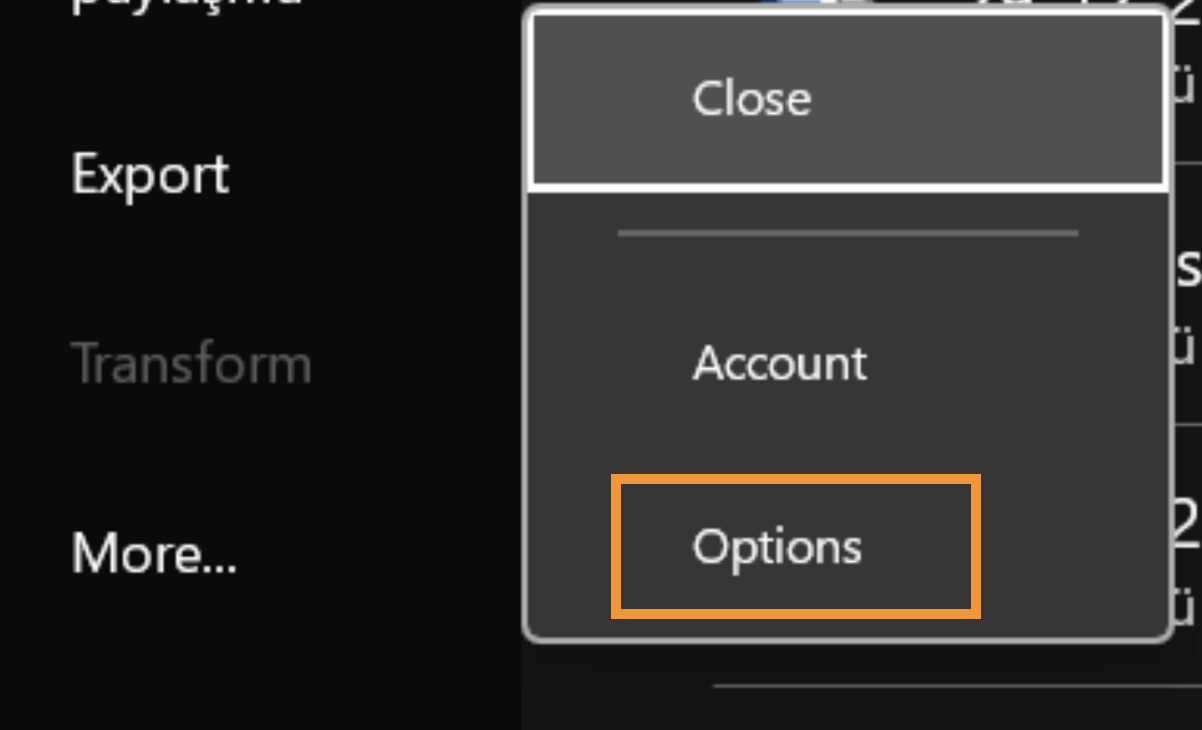
- In the Word Options dialog box, click Customize Ribbon.
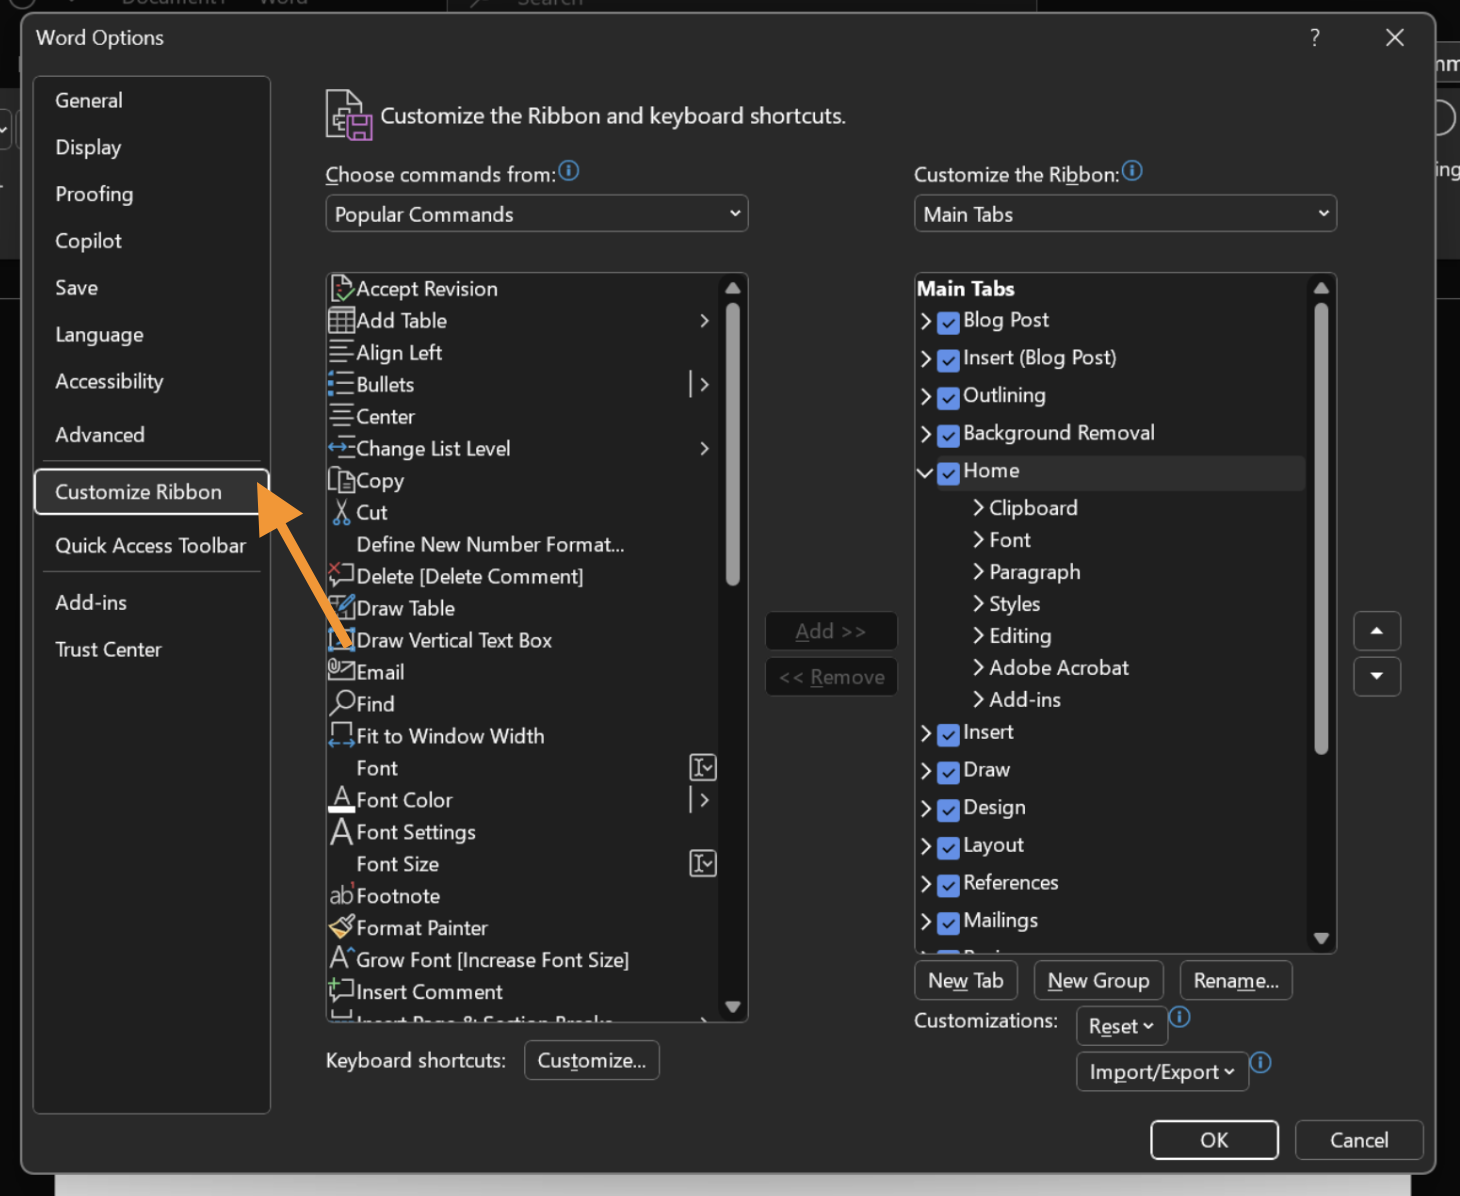
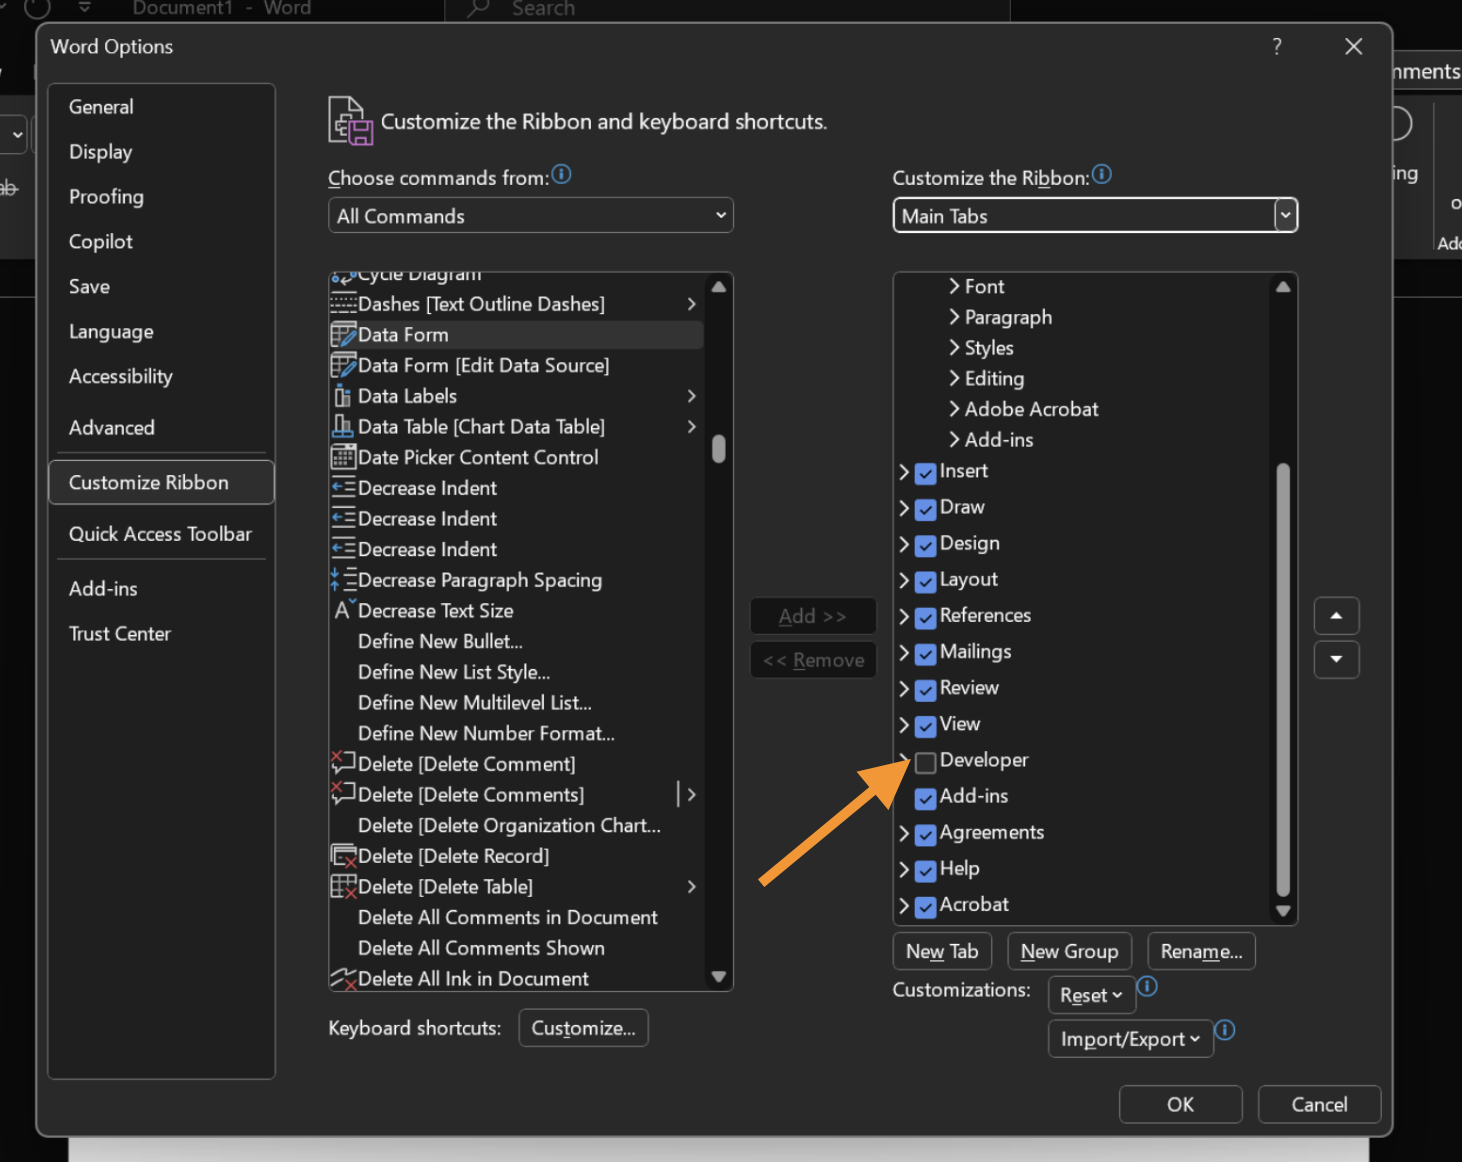
- Check the box next to Developer and click OK.
Step 2: Insert text fields
- Go to the Developer tab.
- Click Rich Text Content Control or Plain Text Content Control in the Controls section.
- Place the cursor where you want the text field to appear.
Step 3: Add checkboxes and dropdown lists
- On the Developer tab, choose Checkbox Content Control or Dropdown List Content Control.
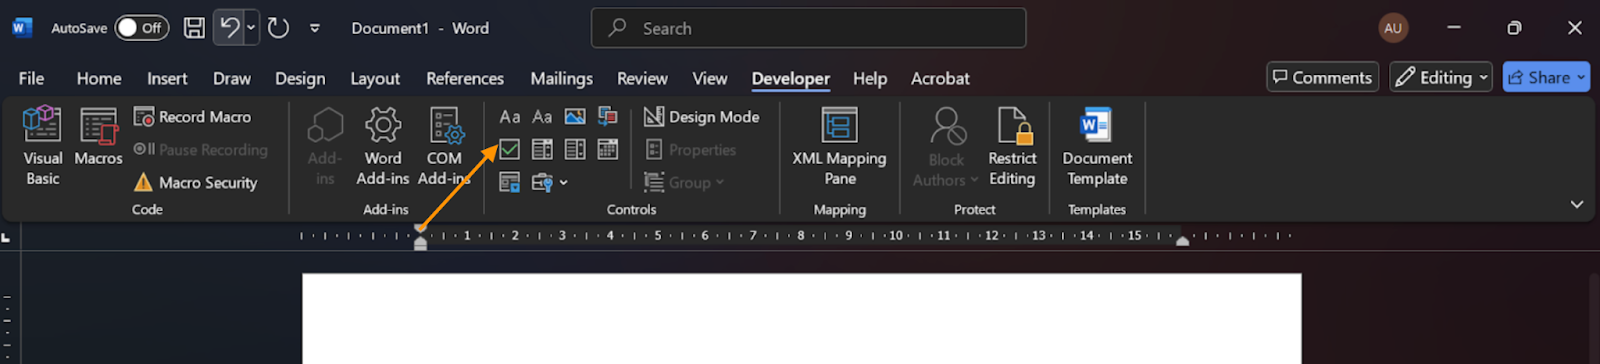
- Click where you want these elements to appear, and customize list items through the Properties menu.
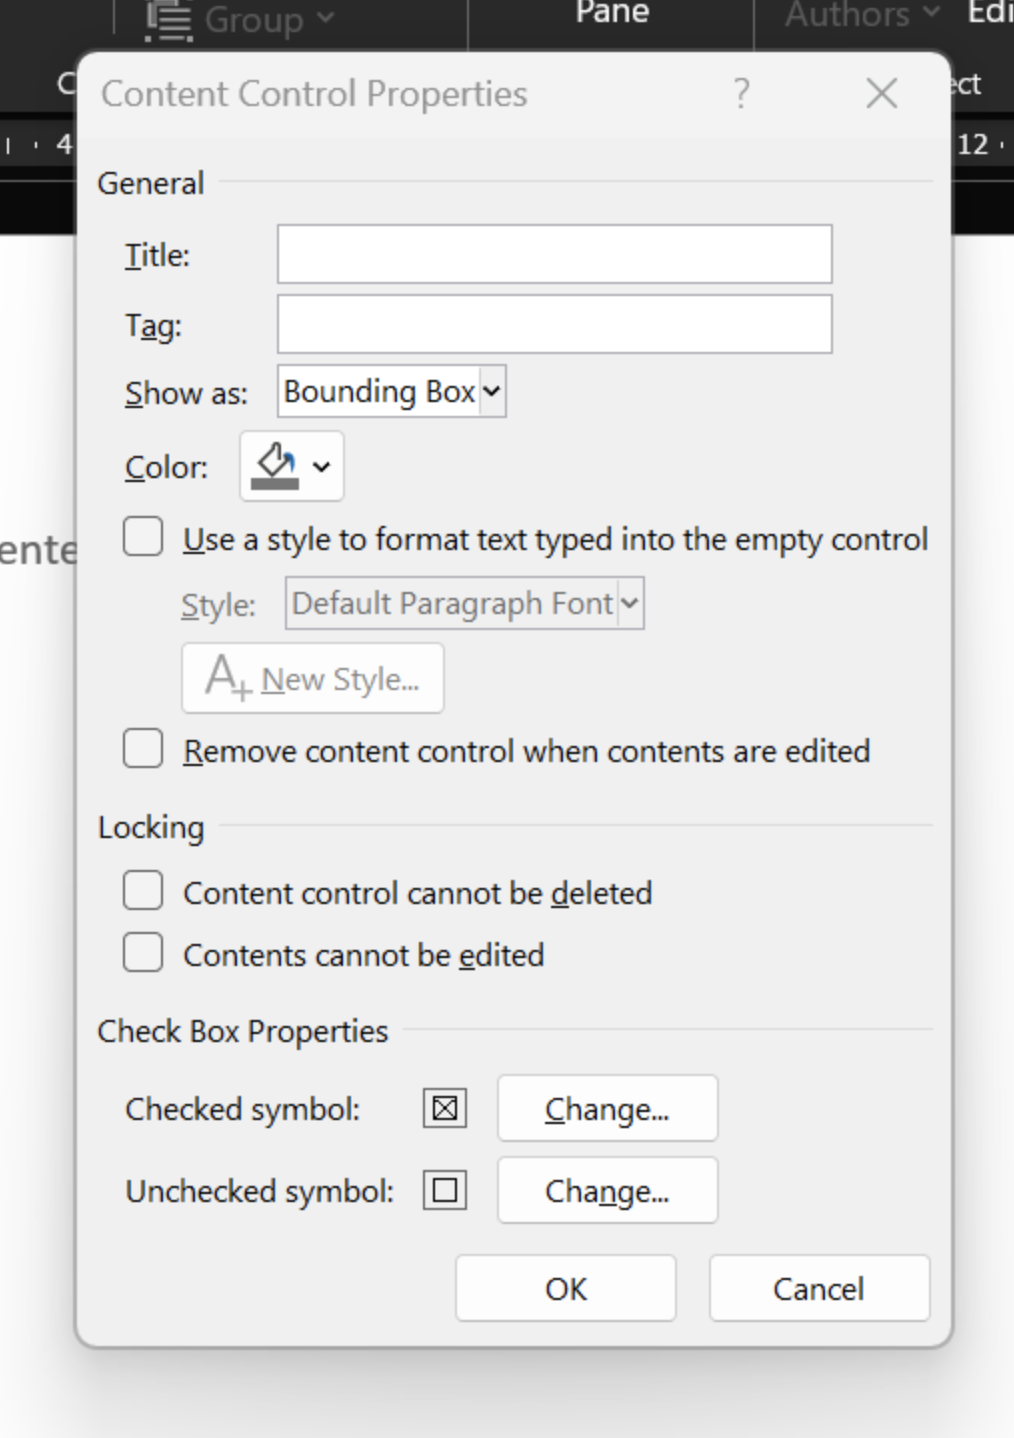
Step 4: Customize field properties
- Select the inserted field, then click Properties under the Developer tab.
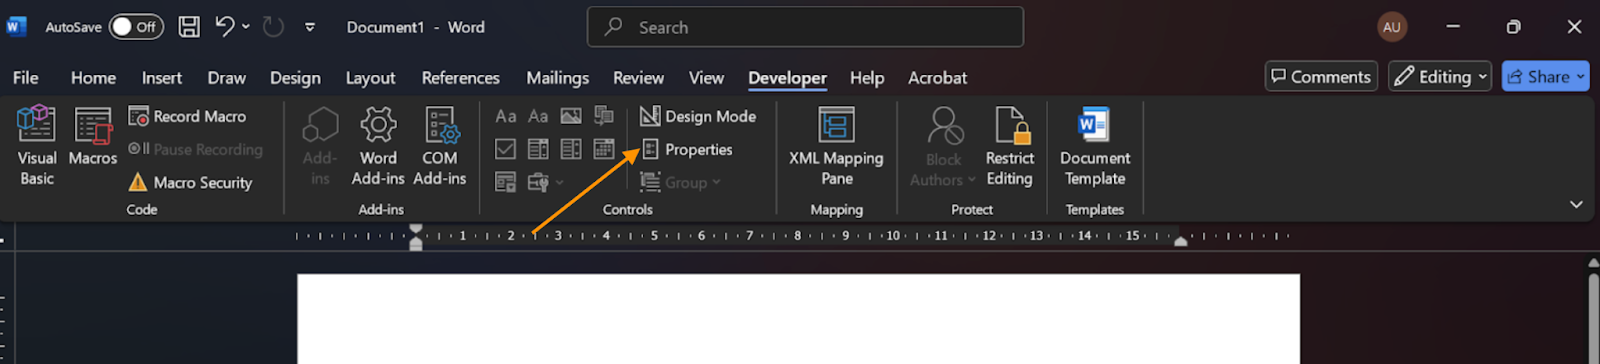
- Here, you can add titles, placeholder text, and limit user editing.
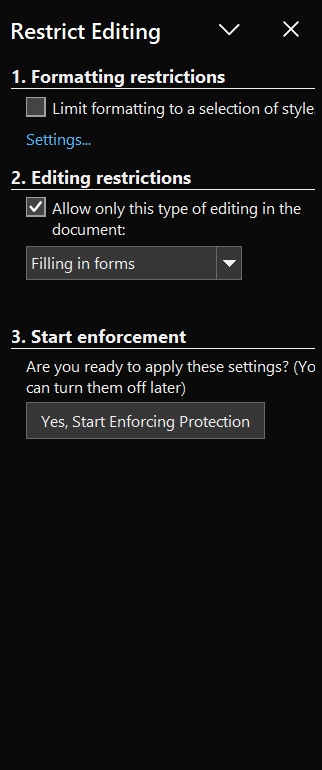
Step 5: Protect your form
- Click Restrict Editing under the Developer tab.
- Check the Allow only this type of editing in the document box and select Filling in forms.
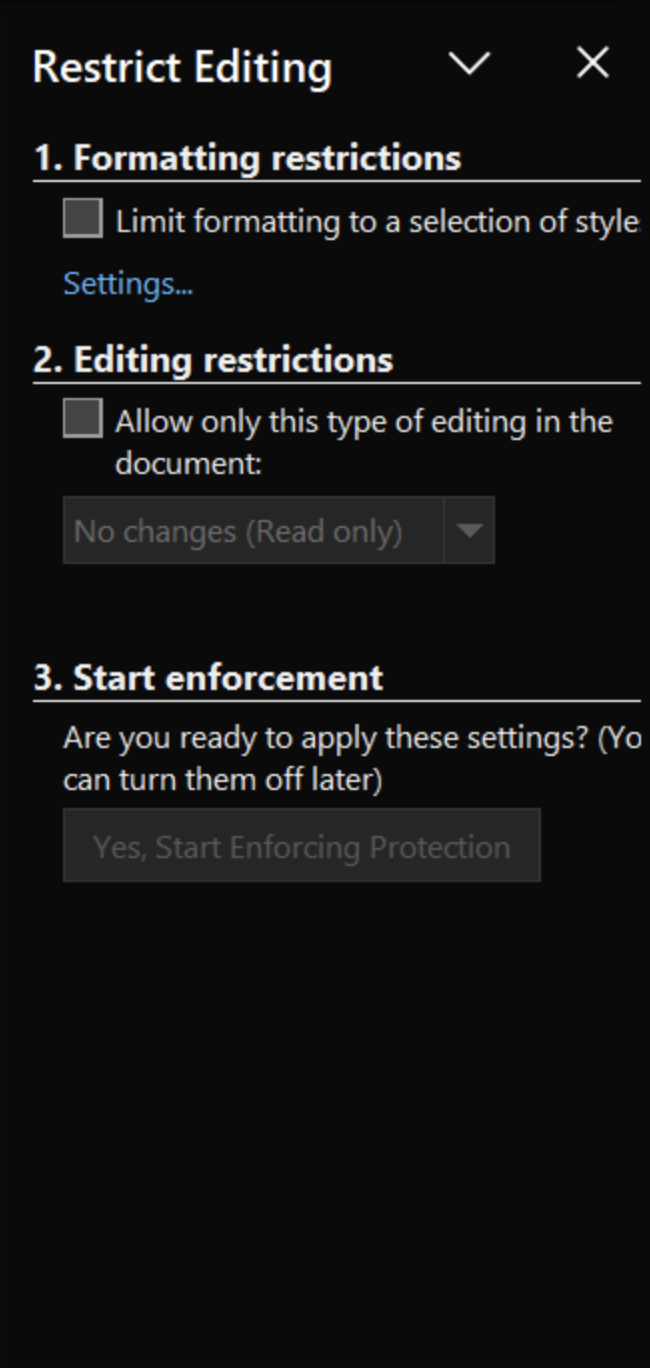
- Click Yes, Start Enforcing Protection, set a password (optional), and click OK.
Step 6: Test and distribute the form
- Fill out the form yourself to test functionality.
- Save and distribute the document via email, shared drives, or cloud services.
Train your team
Operating an adaptive and innovative business includes admitting what you don’t know. Learning how to create fillable forms in Word — and training everyone on your team — is a healthy exercise for your business. Turning a once difficult task into one everyone is comfortable with is an important part of your business’s growth and development.
With more streamlined processes, you can collect more user research responses or gather event registration signups with ease. Plus, putting these systems into place and training everyone on your team means that the next time you need to go through the process, you’ll already have the tools you need to hit the ground running.
A Word alternative
Though there’s a lot you can do with Word, there’s a lot you can’t. With Jotform, you can not only build forms but also manage and analyze all of the data you collect from them in one place. Jotform’s intuitive form builder makes it easy to build forms and embed them on your website. You’ll receive an email each time you receive a submission, and you can set up an autoresponder email to go to your users once they’ve completed the form. You won’t have to waste valuable time working through cumbersome steps or instructing your audience how to complete your forms.
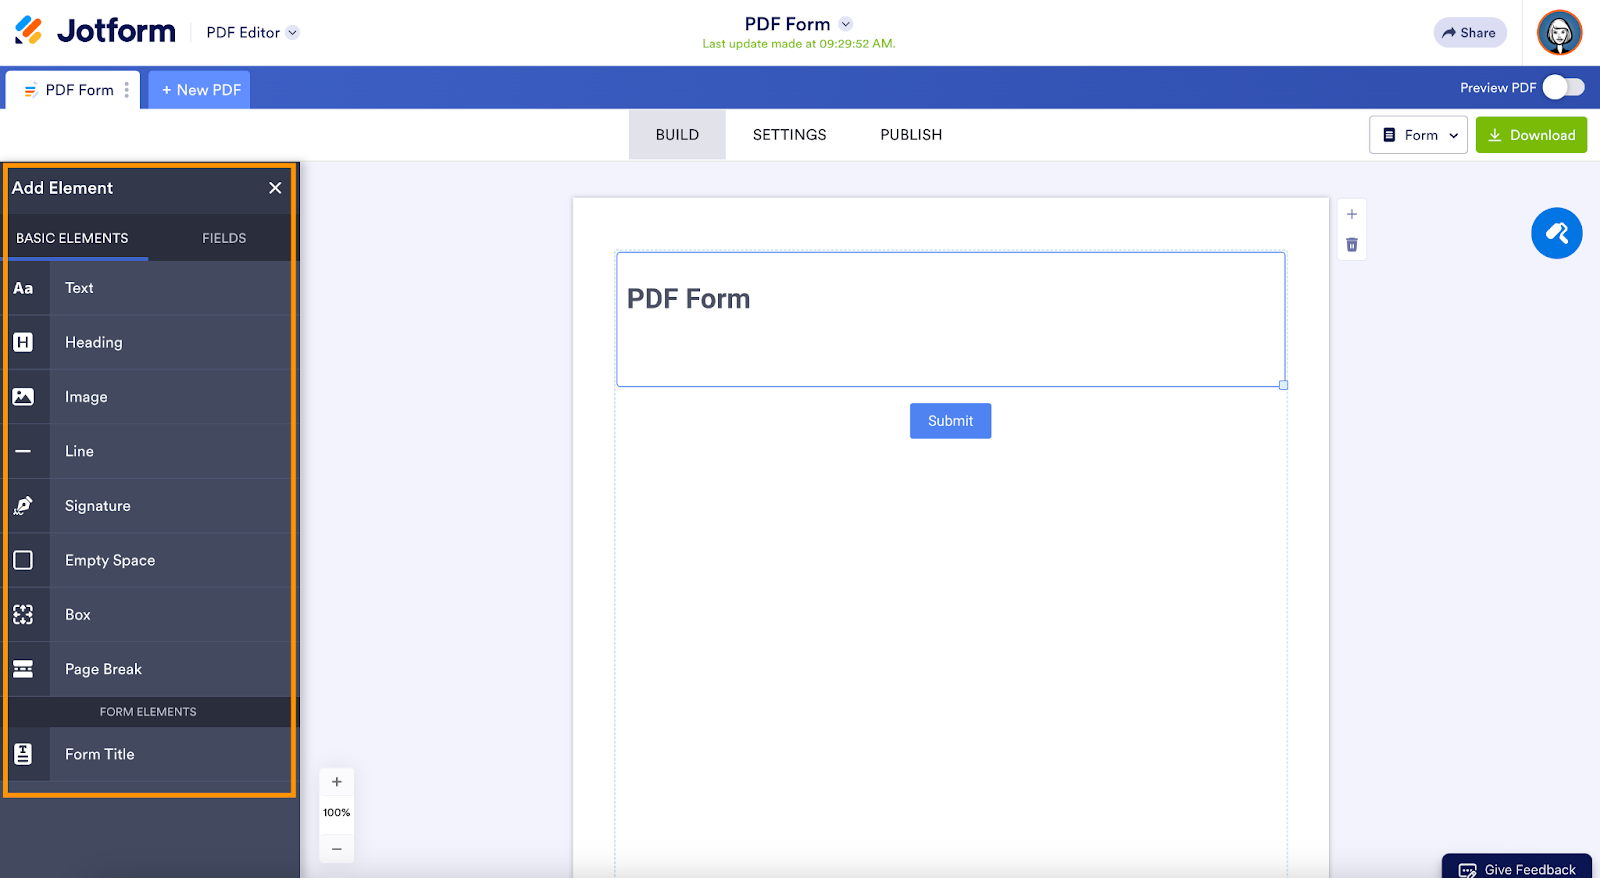
Step-by-step: How to create a fillable form in Jotform
Step 1: Make a PDF fillable
Open Jotform’s fillable PDF creator. Either create a new fillable PDF form from scratch or upload an existing PDF to transform it into a fillable format instantly.

Step 2: Customize your form
Easily personalize your form by adding page numbers, your business logo, or other brand-specific images, enhancing the professional look of your document.
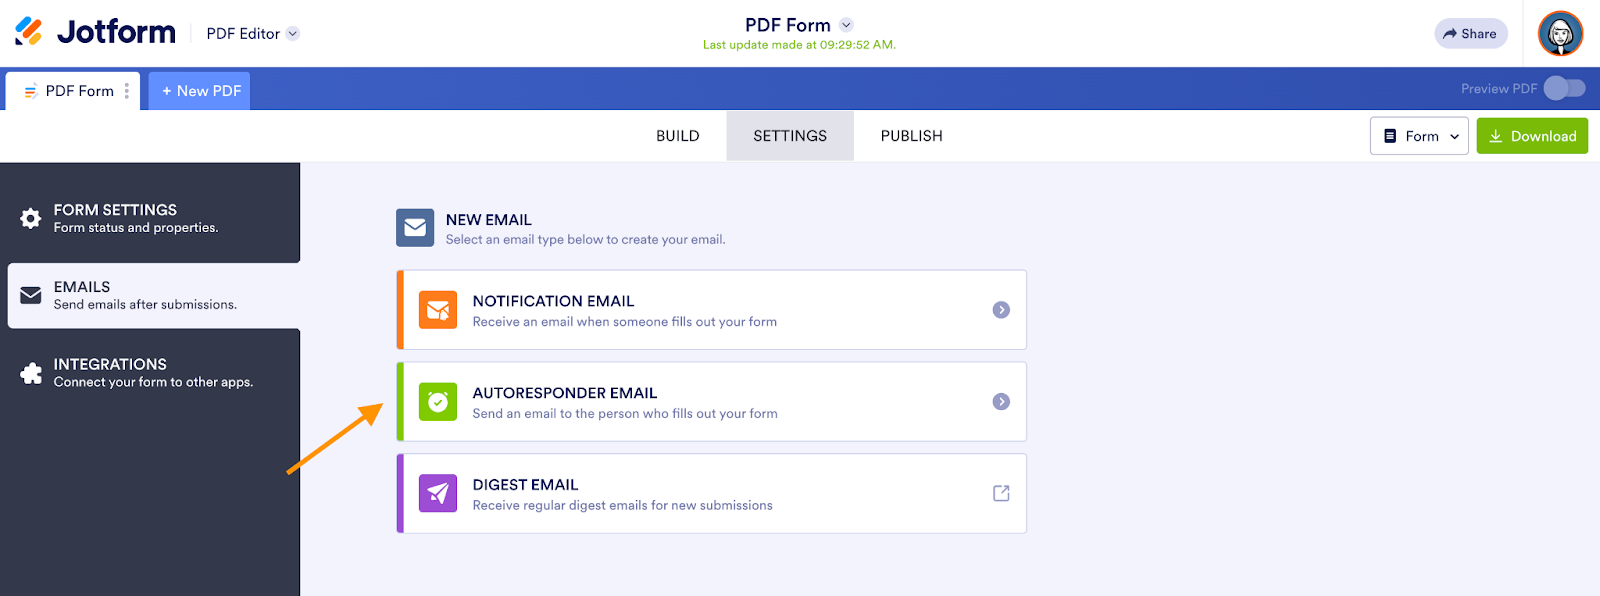
Step 3: Automate email responses
Configure your form to automatically email respondents a copy of their filled-out form, simplifying follow-ups and record-keeping.
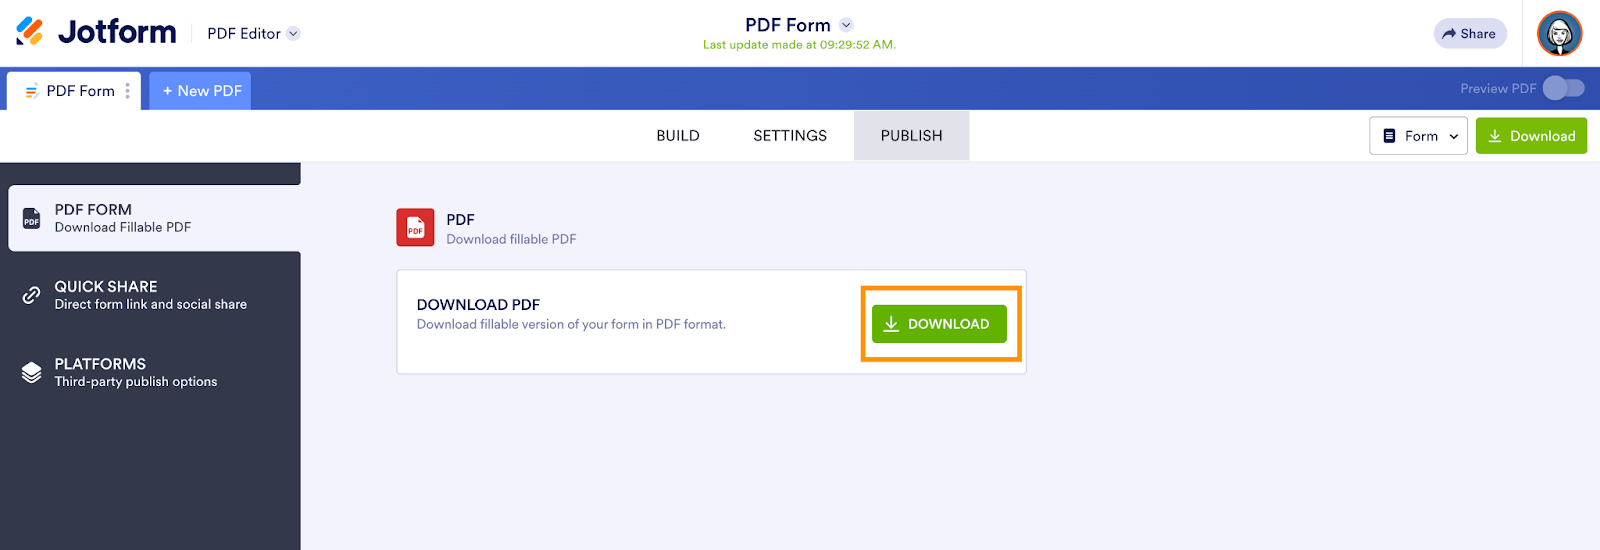
Step 4: Download and share
Download your fillable PDF form to your device or share it directly via email, ensuring effortless and professional distribution to users.
Fillable forms, whether created in Word or using Jotform, offer powerful and flexible ways to streamline data collection and enhance productivity. Choosing the right tool depends on your specific needs—Word excels in offline simplicity and ease of use, while Jotform delivers advanced online functionality with seamless PDF integration. By mastering fillable forms, you’ll simplify data gathering, improve accuracy, and create professional-looking documents effortlessly.


Send Comment: