Steps to create a client portal
- Open My Apps
- From My Workspace, choose My Apps
- Create your app
- Add your forms
- Arrange and label
- Group by need
- Style and brand
- Set access control
- Publish and share
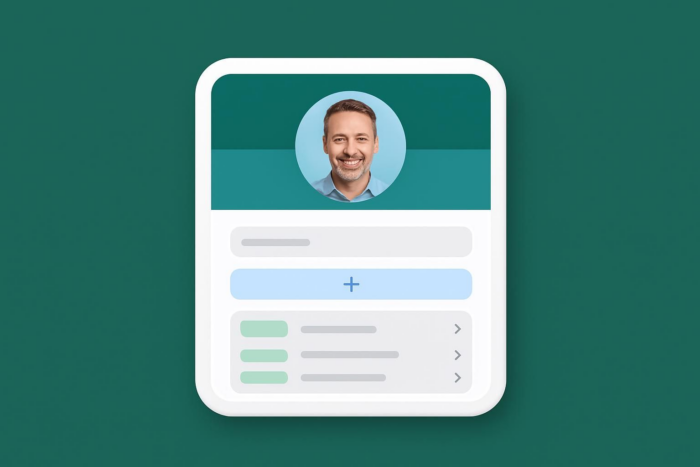
A client portal is the fastest way to give clients a secure, branded place to share files, track progress, and communicate without email chaos. If you work with clients and juggle approvals, documents, or deadlines, a portal can help. We’ll show you how to build one step by step with no coding required.
Client work is smoother when everything is organized in one space. A modern portal centralizes updates, documents, forms, and messages in a mobile-friendly experience. Instead of spreading details across inboxes and drive folders, you’ll give each client a personalized home base that’s easy to use and manage.
You’ll know when to use a portal, which features to include, and how to build one using Jotform Apps. You’ll get practical client portal examples, templates by use case, and tips for scaling with portal integrations as your services grow.
What is a client portal?
A client portal is a secure, self-service workspace where clients access information, submit requests, and collaborate with your team. It brings forms, files, messages, tasks, and status updates together so clients can help themselves 24-7. You can work faster with fewer inbox ping-pongs.
Think of it as a private, branded website built for your clients. Unlike a public site, it is protected by authentication and displays different data for each client. Typical use cases include agencies sharing briefs and deliverables, consultancies managing engagements, legal firms exchanging documents, finance teams collecting receipts, healthcare groups handling intake, and schools distributing assignments.
How is a client portal different from a customer portal or an intranet? A customer portal is used for product support and billing. A client portal focuses on delivering services and fostering collaboration. An intranet is internal and employee-only. All three may overlap, but a client portal is designed for external stakeholders with fine-grained access control.
Deployment options vary. Cloud client portal software is fast to launch and maintenance-light. On-premises deployments trade convenience for deeper control and custom compliance. Hybrid setups keep sensitive data local while using cloud layers for user experience. Whatever you choose, prioritize portal security, single sign-on (SSO), encryption in transit and at rest, and regular reviews.
Finally, permissioning matters. Role-based permissions let you define what each person can see and do, such as client, client admin, project manager, and billing specialist. Granular access control ensures each portal page, folder, or form is visible only to the right people, keeping data separation clean across accounts.
Benefits and limitations of client portals
A client portal can transform how you collaborate with clients, but it’s essential to understand the entire picture: the advantages and potential drawbacks.
Key benefits
1. Improved efficiency and organization
Instead of juggling email threads, shared drives, and chat apps, a client portal consolidates information into a single, centralized workspace. It means contracts, deliverables, forms, and updates are in the same place, making it easier for clients to find what they need without asking.
2. Greater transparency
When clients can log in and see their project’s progress, upcoming deadlines, or pending approvals, it builds trust. Agencies can use a client dashboard to display project milestones and due dates, so clients can stay informed.
3. Faster approvals and turnaround
Integrated forms, e-signatures, and automated workflows mean no more waiting days for a sign-off. A legal team could share a contract through the portal, get a secure e-signature, and move forward within hours.
4. Enhanced security and compliance
Unlike unsecured email attachments, a client portal software platform offers encryption, role-based permissions, and audit trails. It is especially important in industries like healthcare or finance, where data protection and compliance (e.g., HIPAA, GDPR) are nonnegotiable.
5. Reduced communication clutter
Self-service features, such as a knowledge base or FAQ section, help clients answer common questions themselves, cutting down on repetitive inquiries and freeing up your team’s time.
Limitations to consider
1. Client adoption challenges
Not every client is comfortable using new tools. Some may resist logging into another platform, especially if they’ve worked without one in the past.
💡 Tip: Offer a quick onboarding guide or short video to help clients get familiar with the portal.
2. Ongoing content governance
Portals need fresh, accurate information to be useful. If updates are inconsistent, clients may stop using it. Assigning responsibility for portal content is essential, whether it’s uploading files, updating timelines, or adding FAQ entries.
3. Maintenance and updates
Cloud-based portals require occasional maintenance, like reorganizing file structures, reviewing permissions, or integrating new features.
4. Not always necessary for smaller projects
If you’re running a short-term or low-complexity engagement, a simple secure file-sharing link or email thread might be more practical. Portals shine when there’s ongoing collaboration, multiple deliverables, or compliance requirements.
How to create a client portal (step-by-step)
Here’s the fastest path: Build an app in Jotform Apps, add buttons that open each form your clients need, set access, and share one secure link. In minutes, you’ll publish a branded client dashboard for requests, file uploads, approvals, and status checks. There’s no coding required.
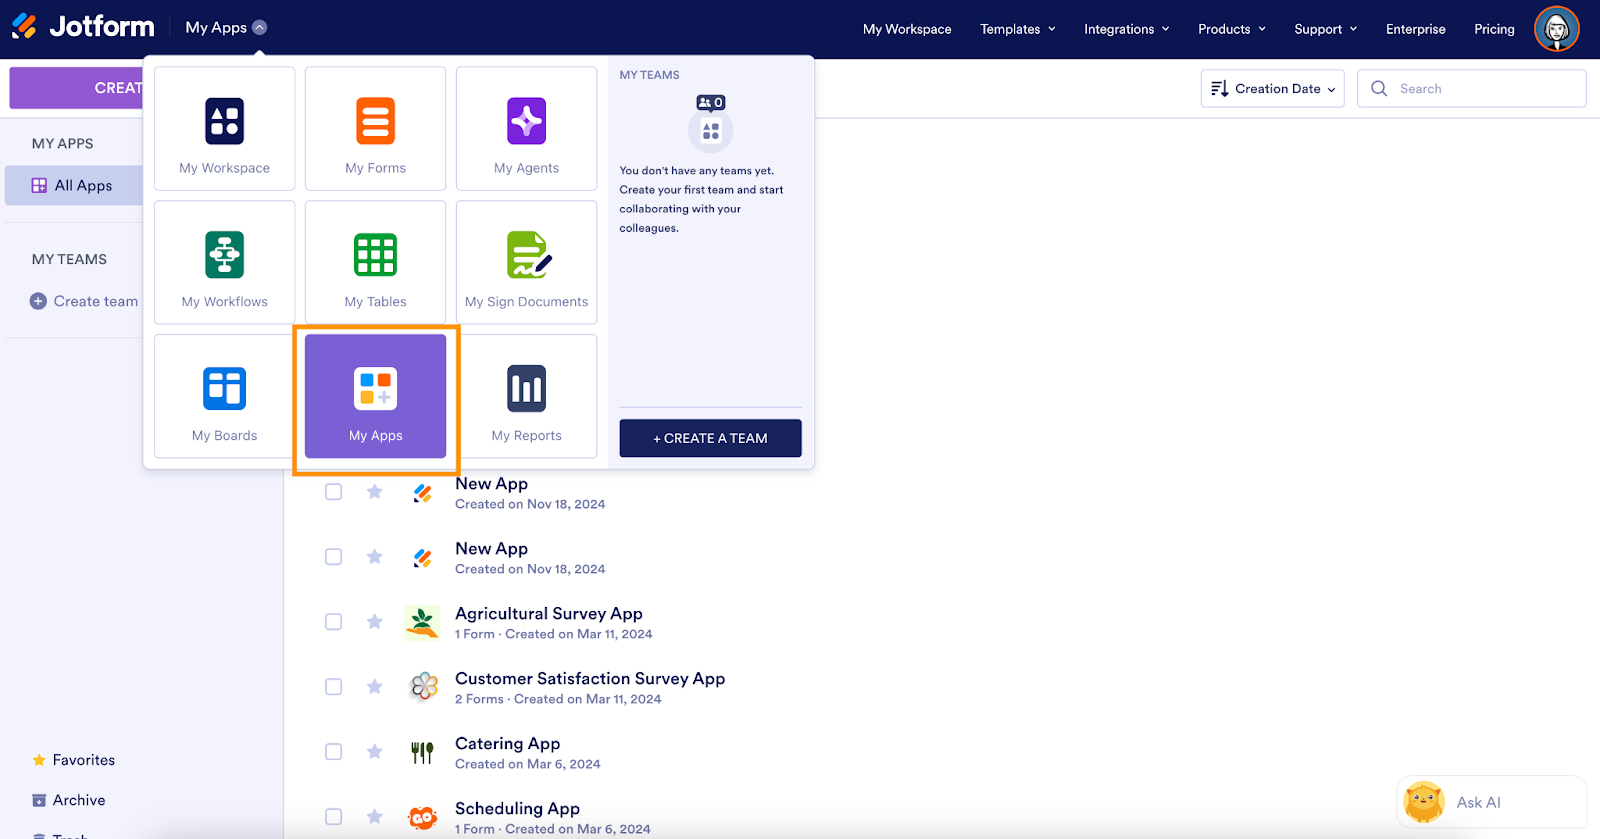
- Open My Apps.
From My Workspace, click the dropdown next to the Jotform logo and choose My Apps.
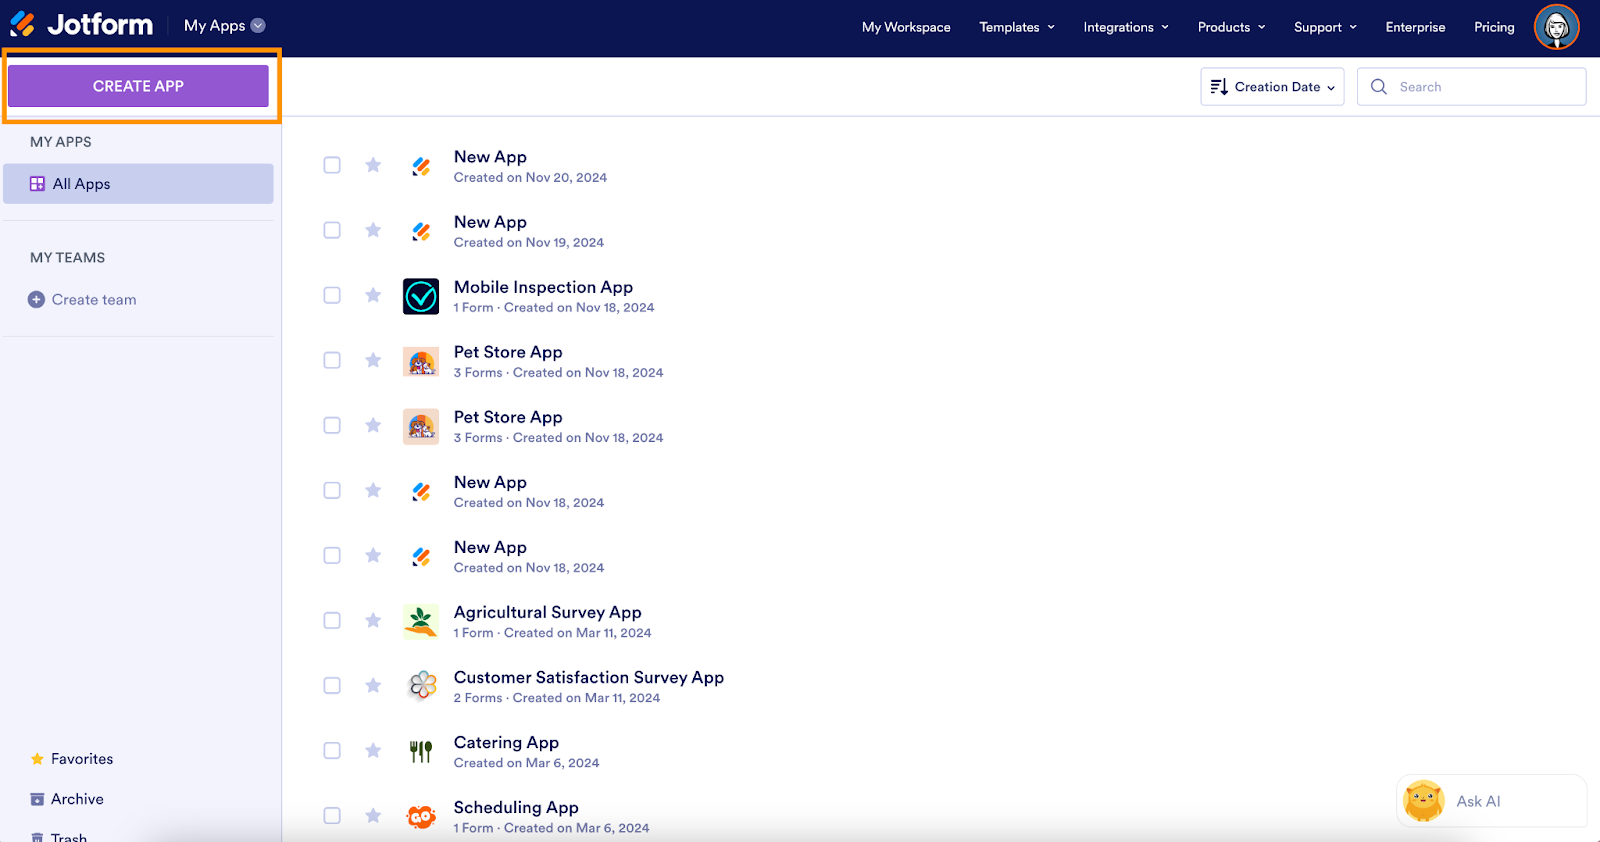
- Create your app.
Click Create App (top left) → choose Start from Scratch. Starting clean keeps the first version focused. You can add pages, sections, and integrations later.
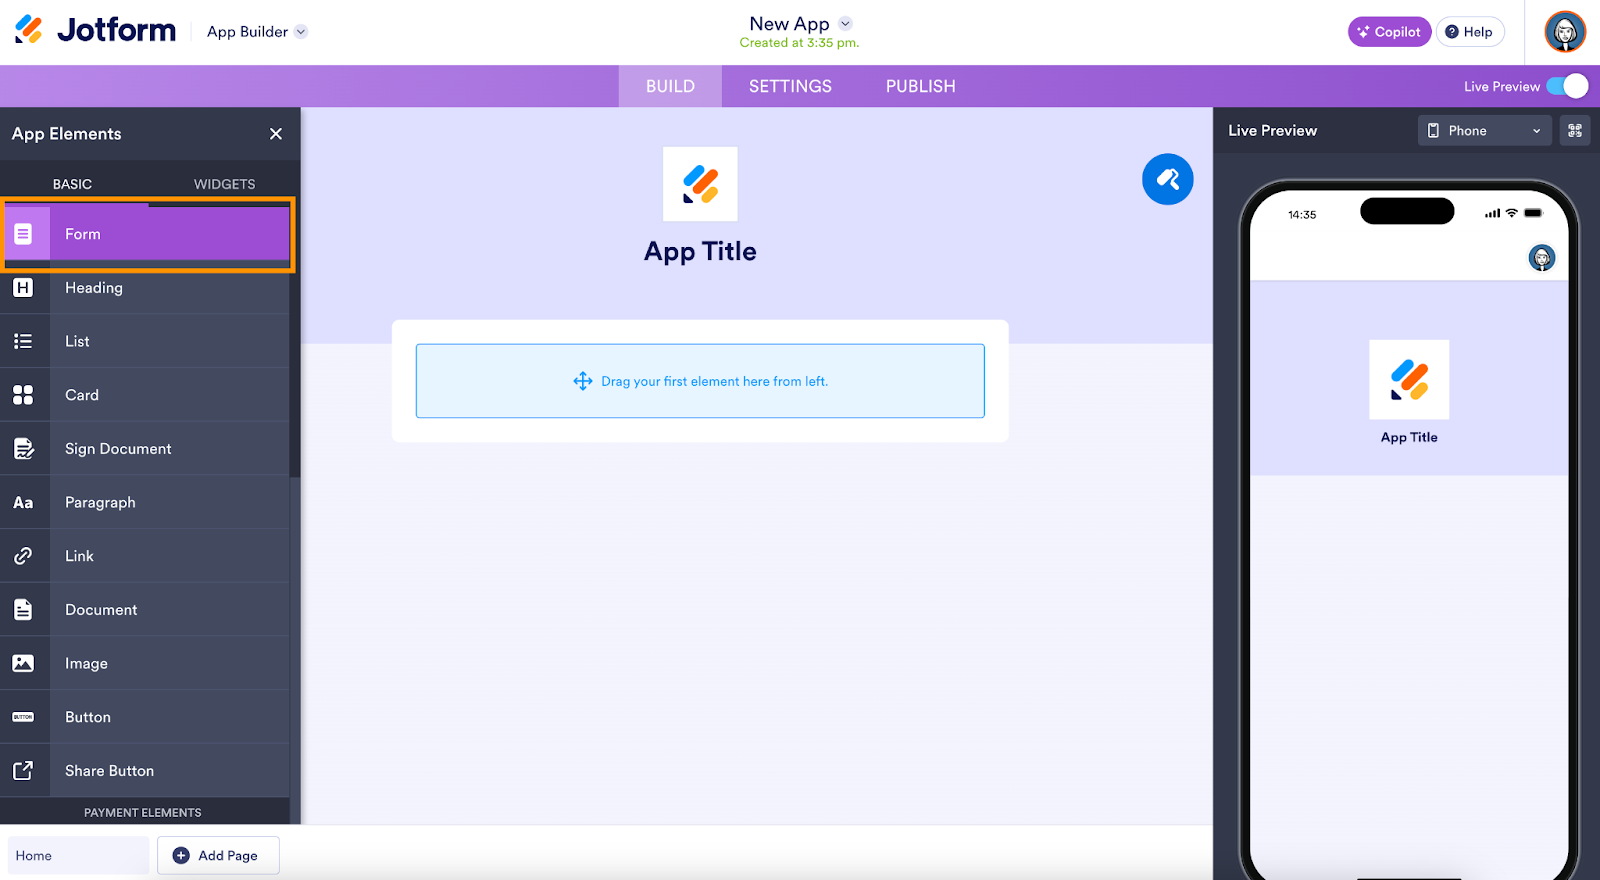
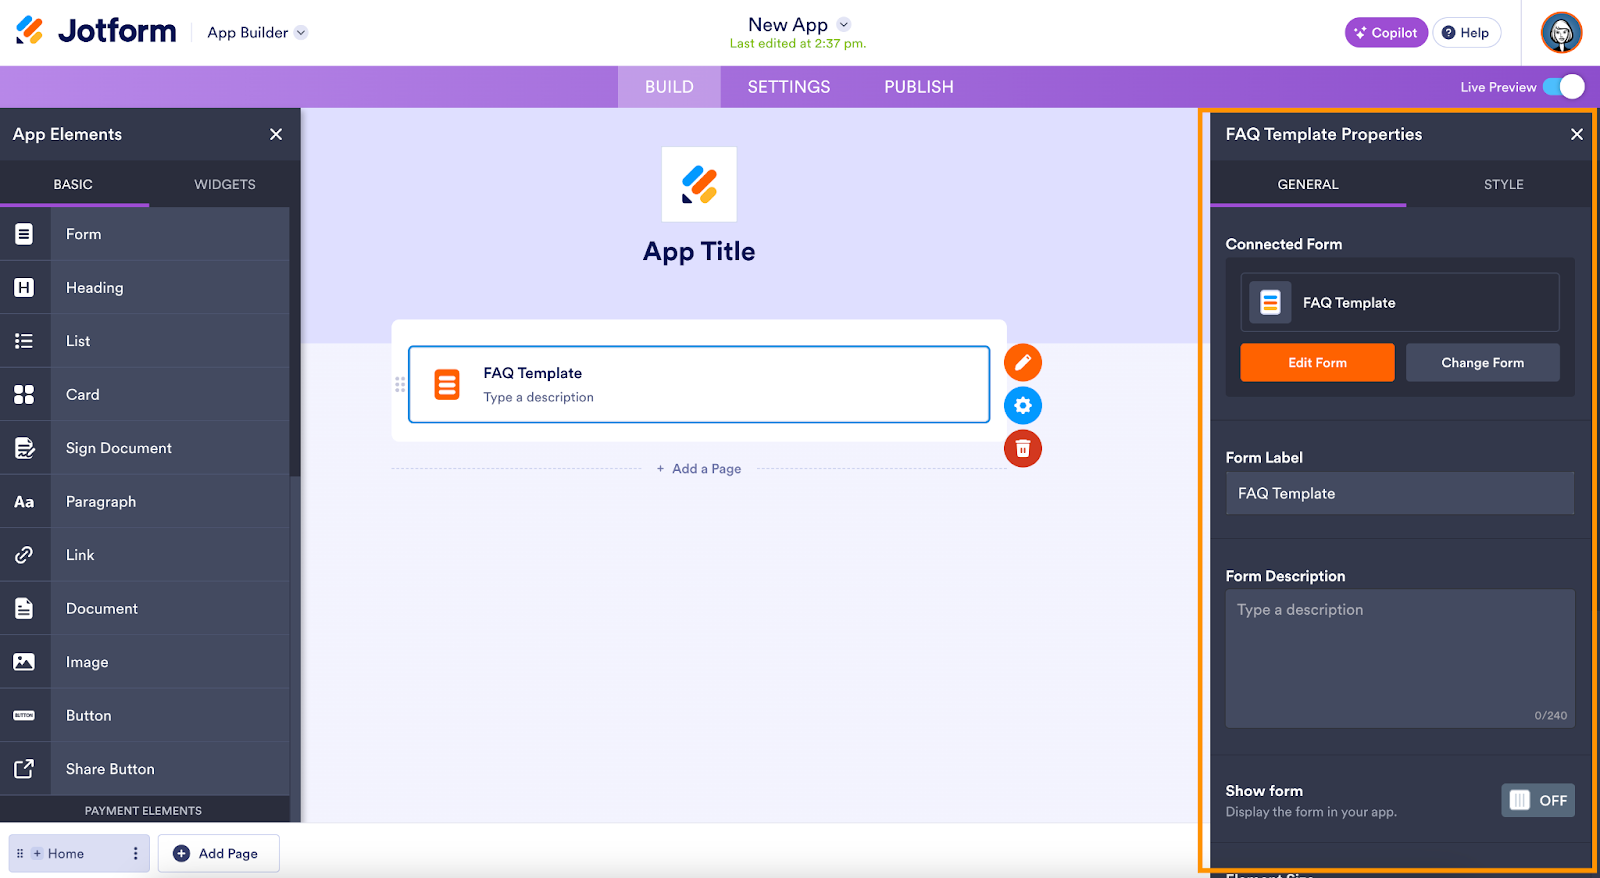
- Add your forms.
In the builder, click Add Element → select Form, then drag and drop it into the canvas. Check the boxes next to the forms you want (e.g., Project Brief, Change Request, File Upload, Invoice Approval) and click Add Forms. Each one appears as a tile/button in your app.
If you collect assets, open each form’s File Upload settings to allow large files, set size limits, and restrict file types as needed. Add e-signature fields where approvals require sign-off.
- Arrange and label.
Rename each tile with client-friendly labels (“Submit a Brief,” “Upload Files,” “Approve Proofs”). Add short descriptions so clients know what each button does. Drag to reorder, keeping the most common actions at the top.
- Group by need.
Use Headers, Dividers, and Sections to cluster actions: Start Here, Requests & Forms, Files & Approvals, Billing. Clear groupings reduce clicks and support adoption.

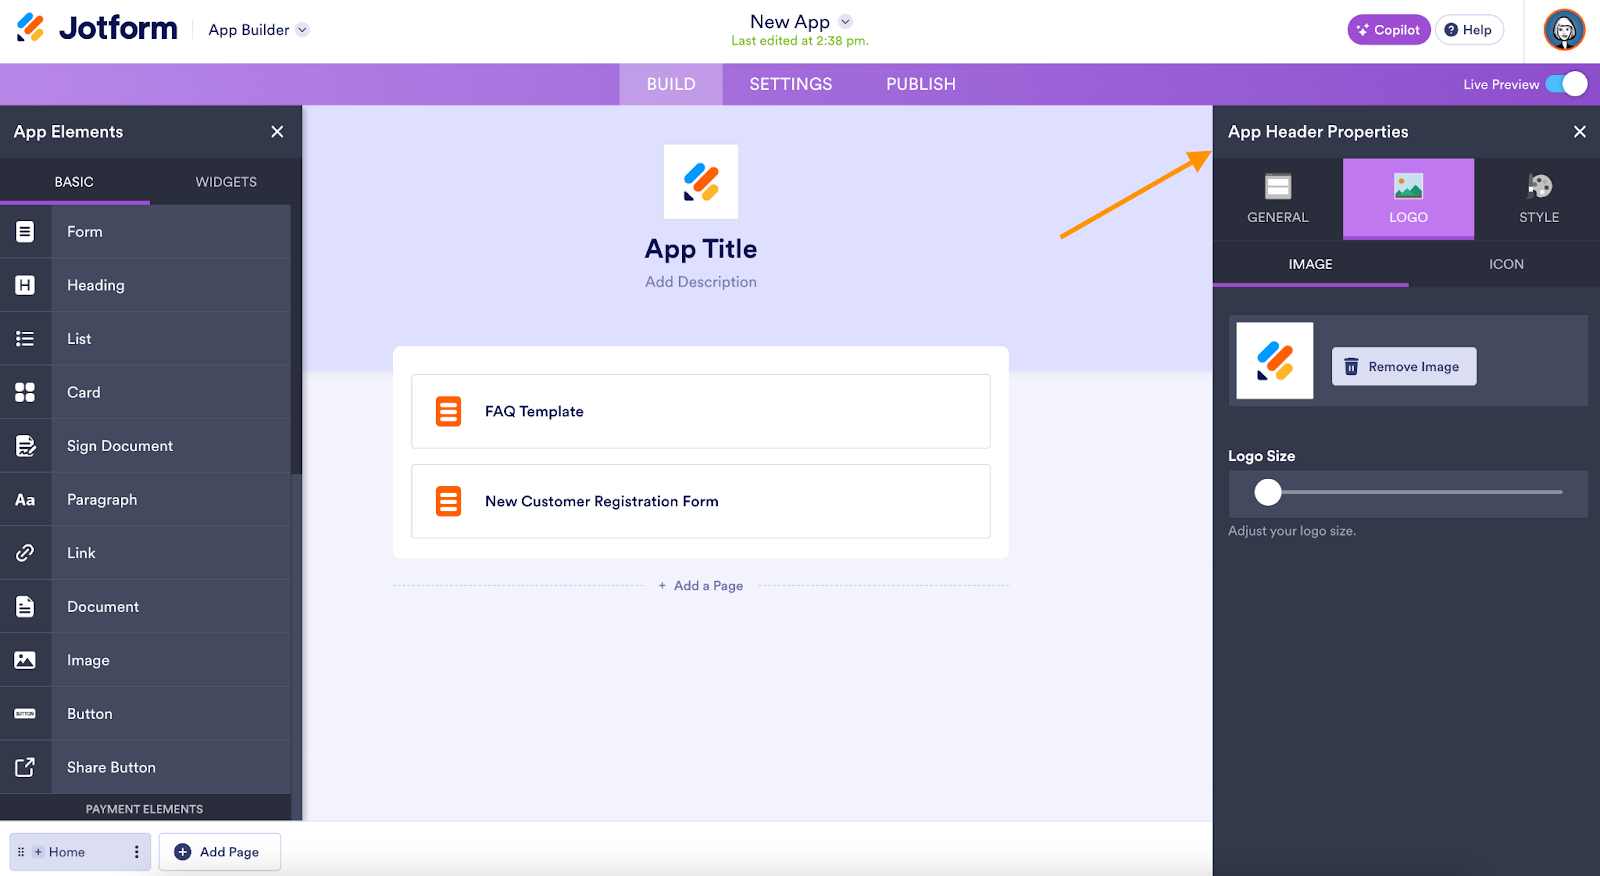
- Style and brand.
Apply your logo, colors, and app icon for a simple white-label portal. Keep contrast and font sizes accessible (WCAG basics). A clean, branded look builds trust and makes repeat use more likely.
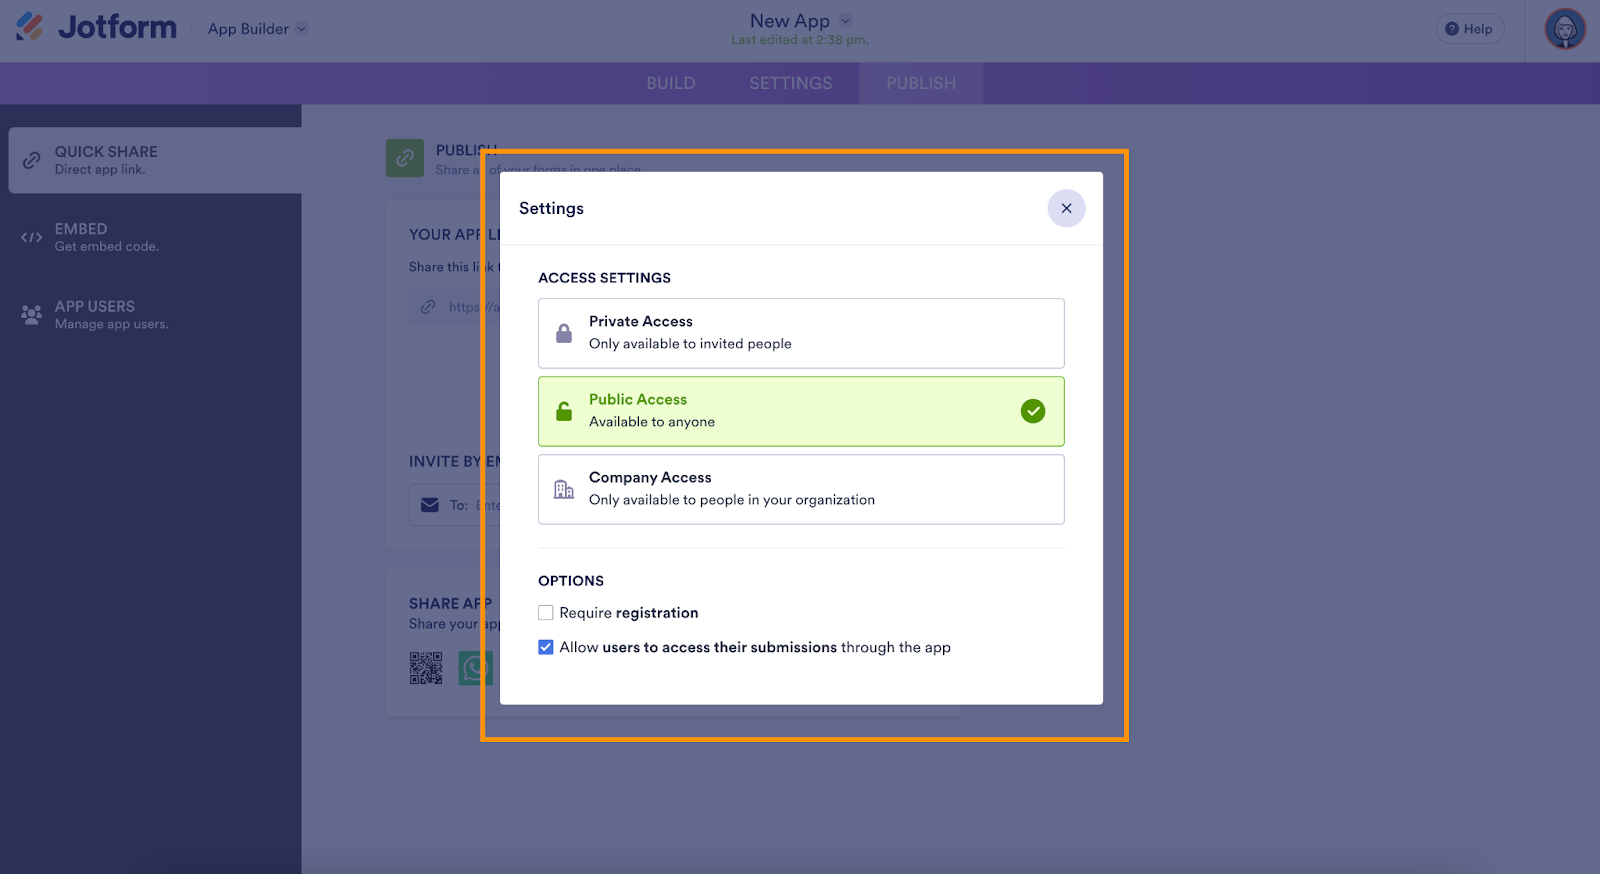
- Set access control.
Click Publish → Settings and choose who can open the portal: Private (invite-only), Public (anyone with the link), or Company Access (email domain). For stricter portal security, require login.
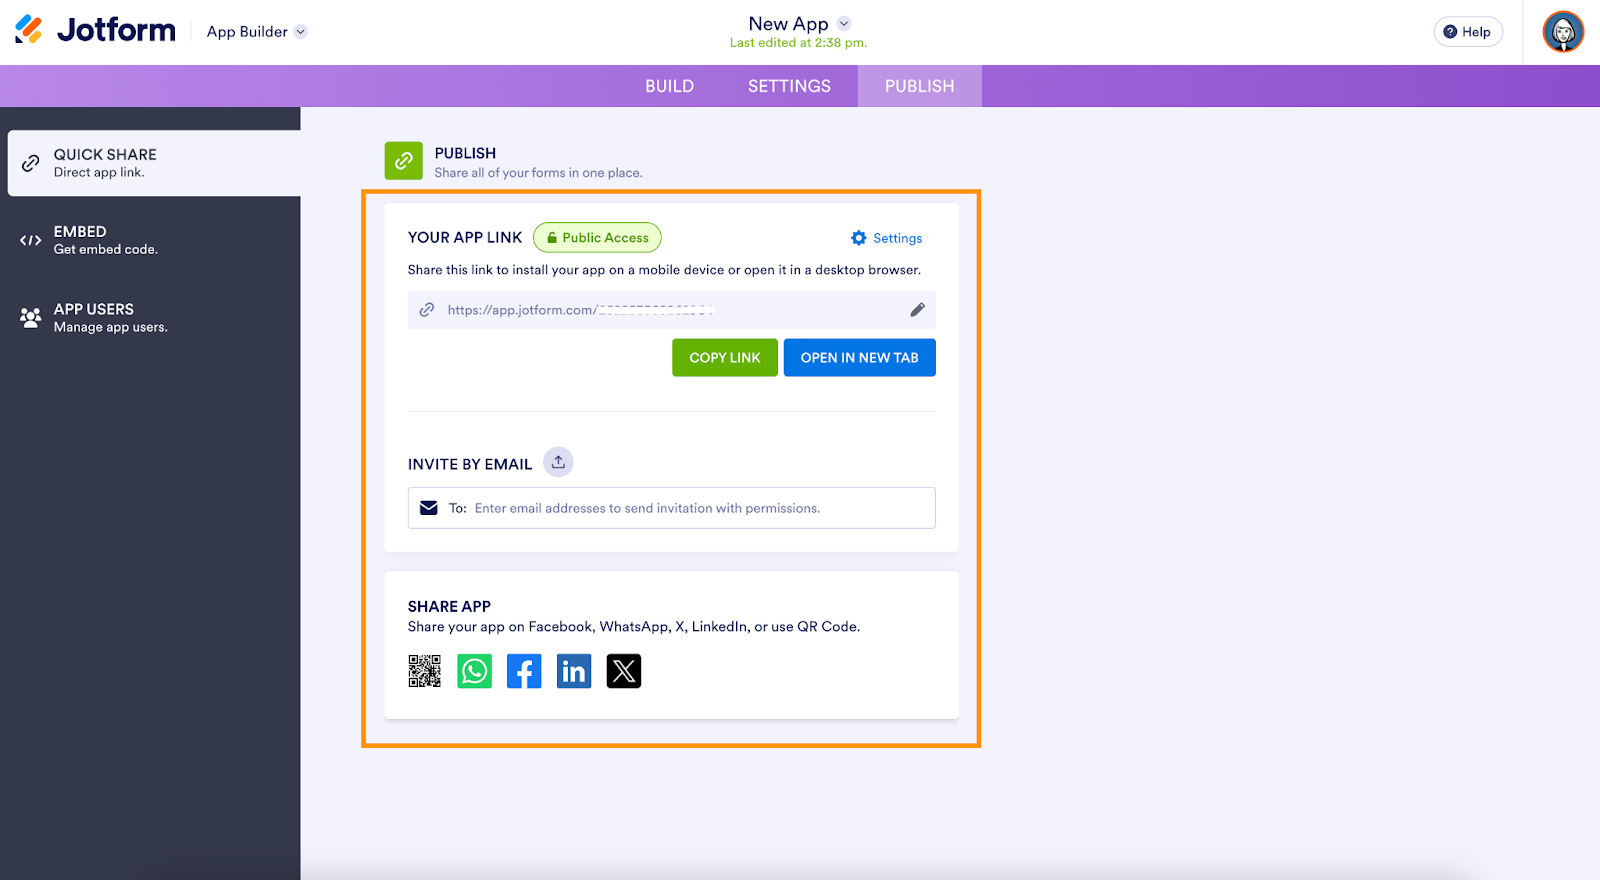
- Publish and share.
Click Publish on the purple banner and copy the app link. Share it in your kickoff email and pin it in your signature. If you serve many accounts, create one portal per client (allowing for easier data separation and branding) or one template you duplicate for each new client.
Must-have features for an effective client portal
The best client portals blend simplicity and control. Prioritize these features before you add anything flashy.
Secure messaging and threaded discussions
Keep conversations attached to the relevant request or file. Threaded comments reduce context switching and make history easier to follow. Private notes let your team discuss details without exposing internal chatter.
File sharing with version control
Uploads should capture who sent what and when. Require naming conventions and add approval steps for final versions. Granular permissions ensure each folder or document is only visible to the right roles, preventing cross-client exposure.
Forms, requests, and approvals with automation
Recurring client requests should be through forms with logic, routing, and SLAs. Automations can assign tasks, generate documents, and notify stakeholders. Approvers should see a clean queue with clear due dates and one-click decision options.
Dashboards for status and KPIs
Give clients a dashboard that summarizes open requests, deadlines, and key performance metrics. For teams, add workload and SLA views so managers can spot bottlenecks and rebalance quickly.
Knowledge base and search
Embed help documents, how-to videos, and a self-service portal FAQ. Strong search reduces tickets and trains clients to help themselves. Link to your public knowledge base where relevant, but host client-specific guidance inside the portal.
Notifications and digests
Instant alerts should be actionable and concise. Give users control over frequency and channels (e.g., email, Slack, push). Weekly digest emails summarize activity, keeping busy stakeholders informed without requiring daily logins.
Auditing, logs, and activity feeds
Track sign-ins, downloads, changes, and approvals. Expose a read-only audit report to client admins. Logs support compliance reviews and help you answer “who changed this?” within seconds.
Mobile access and accessibility
Ensure the portal is responsive, keyboard-navigable, and screen-reader friendly (WCAG). Many clients will approve items from their phone. Performance, contrast, and touch targets matter as much as features.
FAQ: Practical answers for first-time builders
Yes. Enable secure file sharing on your forms, set size limits appropriate to your workflow, and restrict who can view or download submissions. Use expiring links for external reviewers and keep other content behind login.
Turn recurring decisions into routed approval workflows. Combine forms, assignments, and e-signature so approvers receive a clear request with context and a single button to approve or decline. Store signed PDFs in the client’s Files page automatically.
Use role-based permissions. Create groups (e.g., Client, Client Admin, Finance) and map each page or folder to the minimum necessary role. For extra sensitivity, limit downloads, require MFA, and enable session timeouts.
Track logins, completion rates, average approval time, and reduction in email volume. For finance or legal, add time-to-invoice and time-to-collect. Tie these to revenue or cycle time to quantify the portal’s impact.
If you provide product support, invoices, and knowledge base access to multiple end-users, a customer portal is suitable. If you deliver services to a smaller number of accounts with tailored processes, choose a client portal that offers tighter access control and enhanced collaboration features.
Conclusion
You can quickly create a client portal by focusing on outcomes, starting small, and using a no-code tool like Jotform Apps. With a clear structure, role-based permissions, and simple automations, you’ll replace scattered email threads with a secure, self-service workspace that clients enjoy.
Start today by listing your top three outcomes, choosing a client portal template in Jotform Apps, and piloting with one client. Keep the first version simple: a Home page, two request forms, and a Files page. Within a week, you’ll have measurable wins in response time and transparency.As adoption grows, expand in phases: Add dashboards, digest emails, and a knowledge base; integrate your customer relationship management system; enable SSO; and formalize auditing and logs. When you’re ready to go deeper, explore how to create an app without coding to extend your portal with mini apps for intake, onboarding, and renewals.
This article is aimed at agencies, consultancies, legal and financial firms, healthcare providers, schools, and other service-based organizations that manage ongoing client relationships and complex workflows.


Send Comment: