You put a lot of effort into your spreadsheets — from formatting cells to organizing formulas — but sharing Excel files doesn’t always go as planned. Different versions of Excel or conflicting settings can cause formatting issues. That’s why converting your Excel file to a PDF is a smart move.
When you export your spreadsheet as a PDF, you ensure that anyone — even those without Excel — can view your data exactly as you intended. PDFs preserve your layout, are easy to share, and print consistently across devices and platforms.
In this guide, we’ll show you how to convert your Excel file into a PDF using two common tools: Microsoft Office and Adobe Acrobat PDF Maker.
Why convert Excel to PDF?
There are several key benefits to saving your Excel file as a PDF:
- Preserved formatting: Your spreadsheet looks the same no matter the device or software used to open it.
- Universal compatibility: Anyone can view a PDF without needing Excel installed.
- Easy printing and sharing: PDFs are printer-friendly and simple to send via email or upload online.
- Professional appearance: A clean, locked-in layout ensures your data looks polished and presentation-ready.
Convert Excel to PDF using Microsoft Office
If you’re using Excel 2010 or later, the conversion process is straightforward:
1. Open Microsoft Excel and load your Excel file.
If you’re done working with your Excel document, or if you have exported your Jotform submissions data to Excel format, simply load it in the Microsoft Excel application.
2. Go to File menu > Export > Create PDF/XPS.
In Microsoft Office Excel, click on the File menu, select Export, and then Create PDF /XPS. In the Publish window, you can customize which part of the sheet you want to save as a PDF by clicking the Options button.
3. Click the Publish button once you’re all done with that.
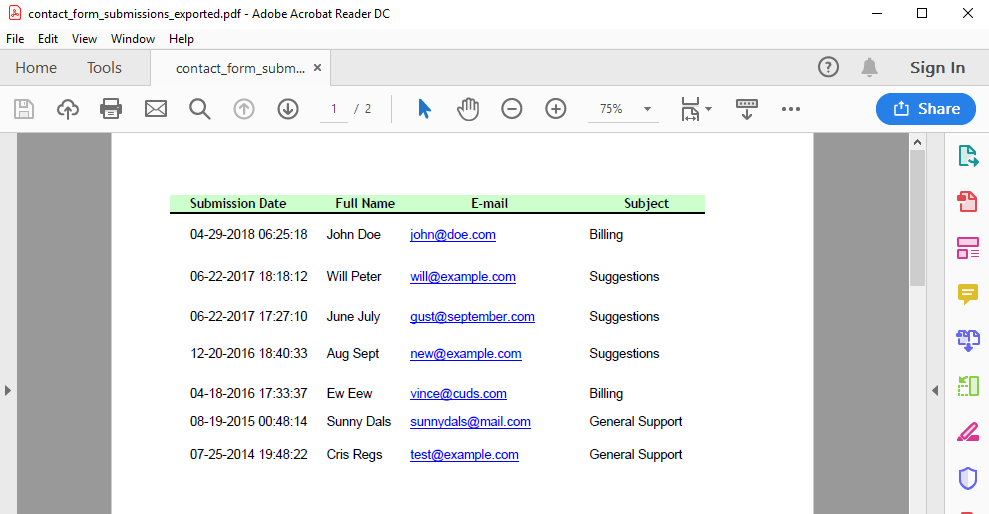
4. Open the exported PDF in your preferred PDF viewer.
After exporting the Excel file to PDF, you can use any PDF viewer, such as Adobe Reader, Foxit PDF Reader, or even updated browsers like Chrome or Firefox (these browsers have built-in PDF readers).
Now that you know how to convert an Excel spreadsheet to a PDF, you’ll be able to easily share your Excel spreadsheets without disturbing the formatting. This will make your spreadsheets easily viewable, shareable, and printable for yourself and the recipients of your PDF.
Convert Excel to PDF using Adobe PDF Maker (Acrobat Add-In)
If you have Adobe Acrobat installed, you can use the PDF Maker add-in integrated with Microsoft Office to generate a PDF directly from Excel.
1. Open your Excel file.
Launch Microsoft Excel and open the spreadsheet you want to convert into a PDF.
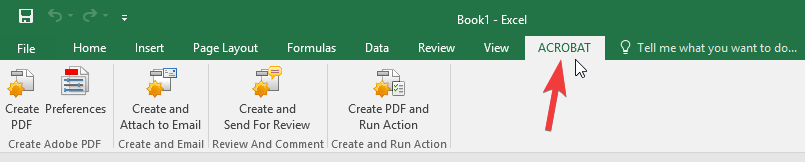
2. Navigate to the ACROBAT tab in the toolbar.
If Adobe Acrobat is installed on your computer, you’ll see an ACROBAT tab at the top of the Excel window. Click on it to access PDF-related options. (If you don’t see this tab, make sure Adobe Acrobat is properly installed and the add-in is enabled.)
3. Click Create PDF.
Within the Acrobat tab, click the Create PDF button. This will open a dialog box prompting you to choose where to save the new PDF file.
4. Choose your save location and confirm.
Select the folder where you want to save the PDF version of your spreadsheet, give the file a name if needed, and click Save. Adobe Acrobat will convert your Excel file into a PDF while preserving its formatting.
If you want to convert a PDF to Excel, please check out our tutorial How to Convert PDF to Excel in Microsoft Office Word.
For more tips and tricks, visit Jotform’s Guide to Editing PDFs. We have another guide for other conversion methods for PDF files.


Send Comment:
2 Comments:
More than a year ago
Nice and informative article....
One can try this link
More than a year ago
I and my colleague use "Total PDF Converter". It works pretty cool for me. Here is the link for the website to download the software. They also offer free trial version. First try then buy.